Top 5 Causes of Lower Leg Pain While (or After) Running

hotspots while running

For many runners, lower leg pain is an all-too-common experience. It’s the bane of our existence, the thorn in our side, the nagging ache that just won’t quit. But fear not; I’m here to help.

In this post, I’ll be diving into the five most common causes of lower leg pain while (or after) running.

Whether you’re a seasoned pro or a newbie lacing up your shoes for the first time, we’ve got you covered. So let’s dive into the nitty-gritty of this pesky problem and get you back on the road pain-free.

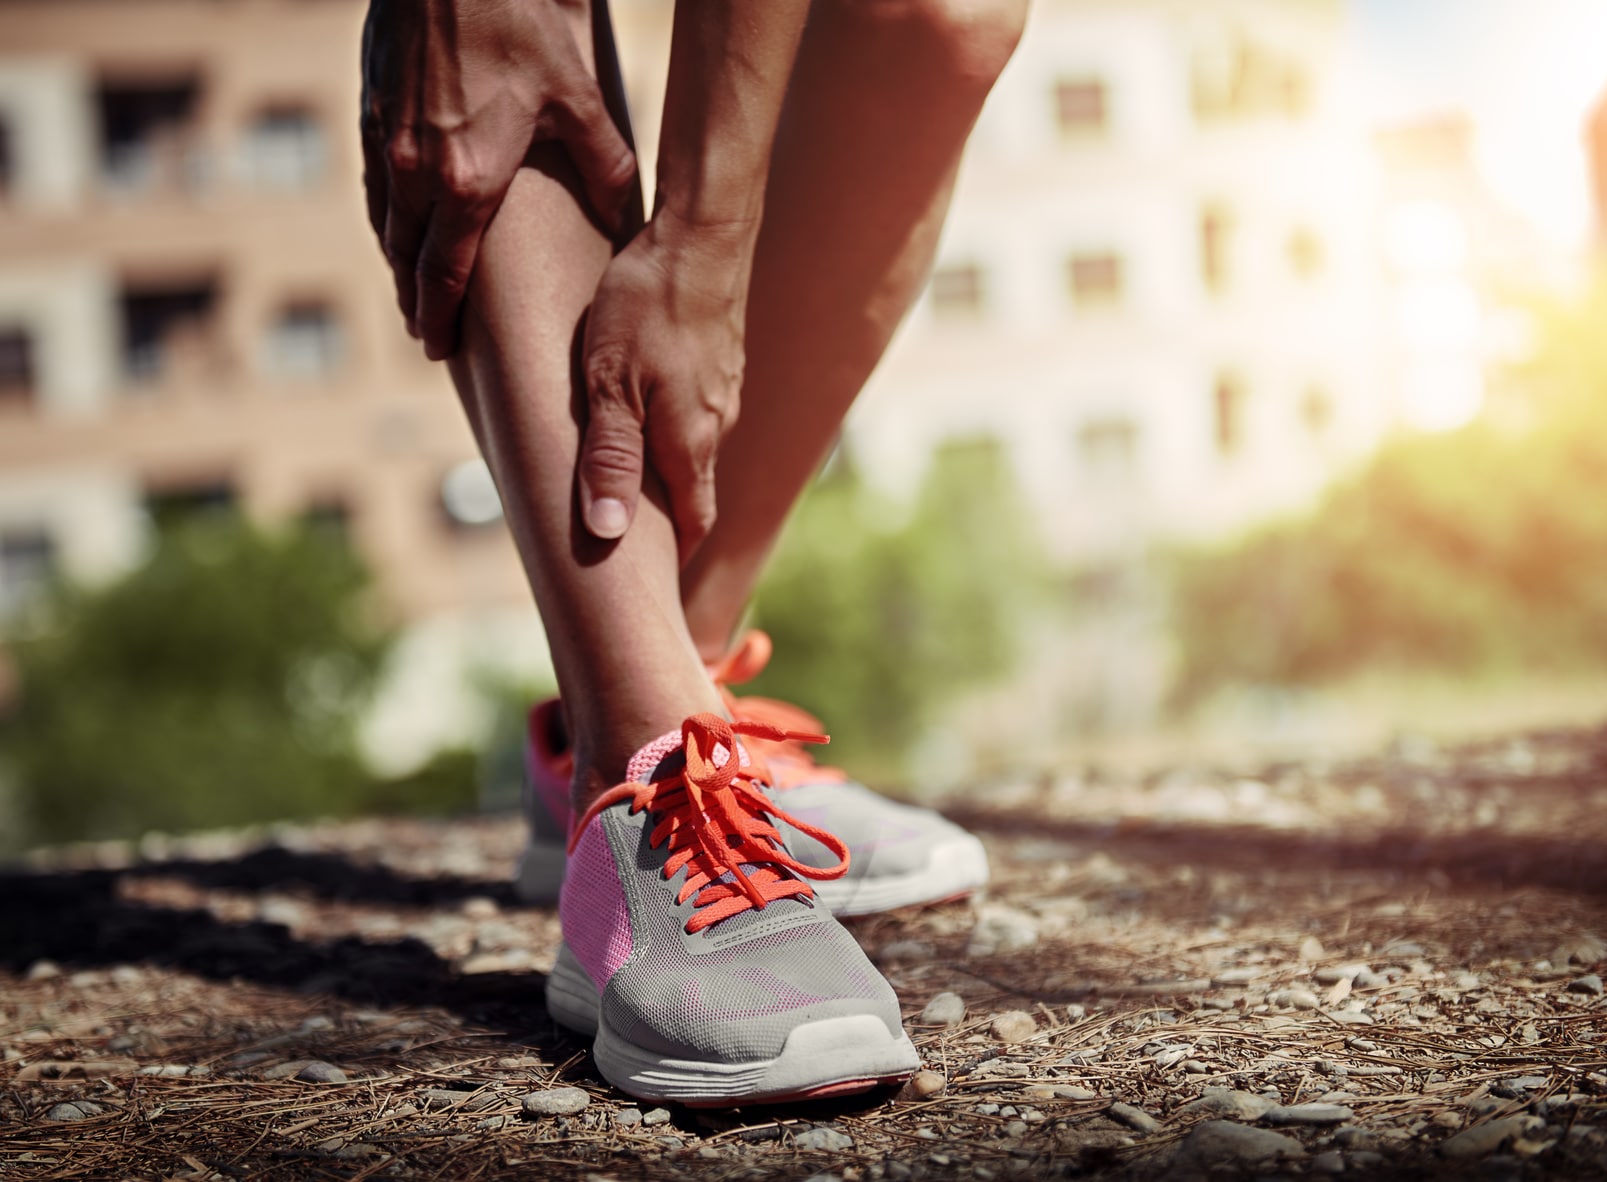
Lower Leg Pain Cause. 1 Shin Splints

First up, we have shin splints – a frustrating and painful condition that can plague even the most experienced runners.

Shin splints, also known as medial tibial stress syndrome or MTSS, is an inflammation of the muscles, bone tissue, and tendons around the tibia. This can cause pain along the inner (medial) side of the tibia, usually where the muscles attach to the bone.

If you think you might be dealing with shin splints, you’ll likely feel tenderness around the lower two-quarters of the inner tibia, and the affected spot will be tender to touch. You may also notice some mild swelling in the lower leg.

The causes of this injury are often attributed to repetitive stress on the shinbone and the connective tissue that attaches the muscles to the bone. This can happen when you suddenly increase your training volume, either with a new activity, or intensity or by changing something in your running routine. Even the skipping recovery section also takes part in this injury.

So, what can you do to treat and prevent shin splints?

First and foremost, rest is key. Take a break from high-impact exercises and opt for low-impact sports like swimming and cycling during the acute period.

Ice the affected area, wear proper shoes with arch support and change your running surfaces more regularly. Adding insoles or padding inside your shoes can also minimize the impact. For persistent cases, it’s important to consult a physiotherapist or chiropractor to help you improve the mobility and strength of your Achilles tendon, ankle, and calf.

Prevention

The best way to prevent shin pain is to take it slow and listen to your body. Assess your running routine and look for anything that could be making the injury worse, such as hills or hard surfaces. Instead, opt for softer surfaces like dirt paths or trails.

It’s also important to improve strength in the muscles along the front and side of your lower leg and improve the flexibility of your calf muscles. This can be done through exercises such as calf raises and stretches. And don’t forget to wear proper shoes with arch support and consider adding insoles or padding to minimize impact.

If you do experience lower leg pain, don’t push through it. Take a break from high-impact exercises and consider low-impact sports like swimming or cycling. And if the pain persists, don’t hesitate to seek the help of a physiotherapist or chiropractor to improve mobility and strength. Remember, prevention is key, so take care of your lower legs and keep them pain-free for all your running adventures.

Additional Resource – Here’s how to use KT Tape for runners knee.

Lower Leg Pain Cause. 2 Stress Fractures

Imagine you’re in the middle of your morning jog, heart pumping, sweat dripping down your face, and suddenly, you feel a sharp pain radiating down your leg. What could it be? It might be a stress fracture. This serious injury can knock you out of commission for weeks or even months, so it’s important to know the signs and how to prevent it.

Stress fractures occur when tiny cracks form in a bone due to repetitive trauma. They’re common in long-distance runners, particularly women who may be more prone to osteoporosis, hormonal imbalances, and low body weight. The metatarsals and the inside edge of the tibia are the most susceptible bones.

Unlike shin splints, which can also cause pain during or after running, stress fractures are characterized by sharp, persistent pain that worsens with each run. You might also experience tenderness, swelling, or bruising that doesn’t go away. Even putting weight on the affected leg or sleeping at night can be painful.

If you suspect a stress fracture, don’t try to power through it. That’s like driving a car with a broken engine and expecting it to work. You need to see your doctor as soon as possible for a thorough diagnosis. X-rays are necessary to detect the fracture, and you’ll likely need to stop weight-bearing exercises for 6 to 8 months, sometimes even longer in severe cases.

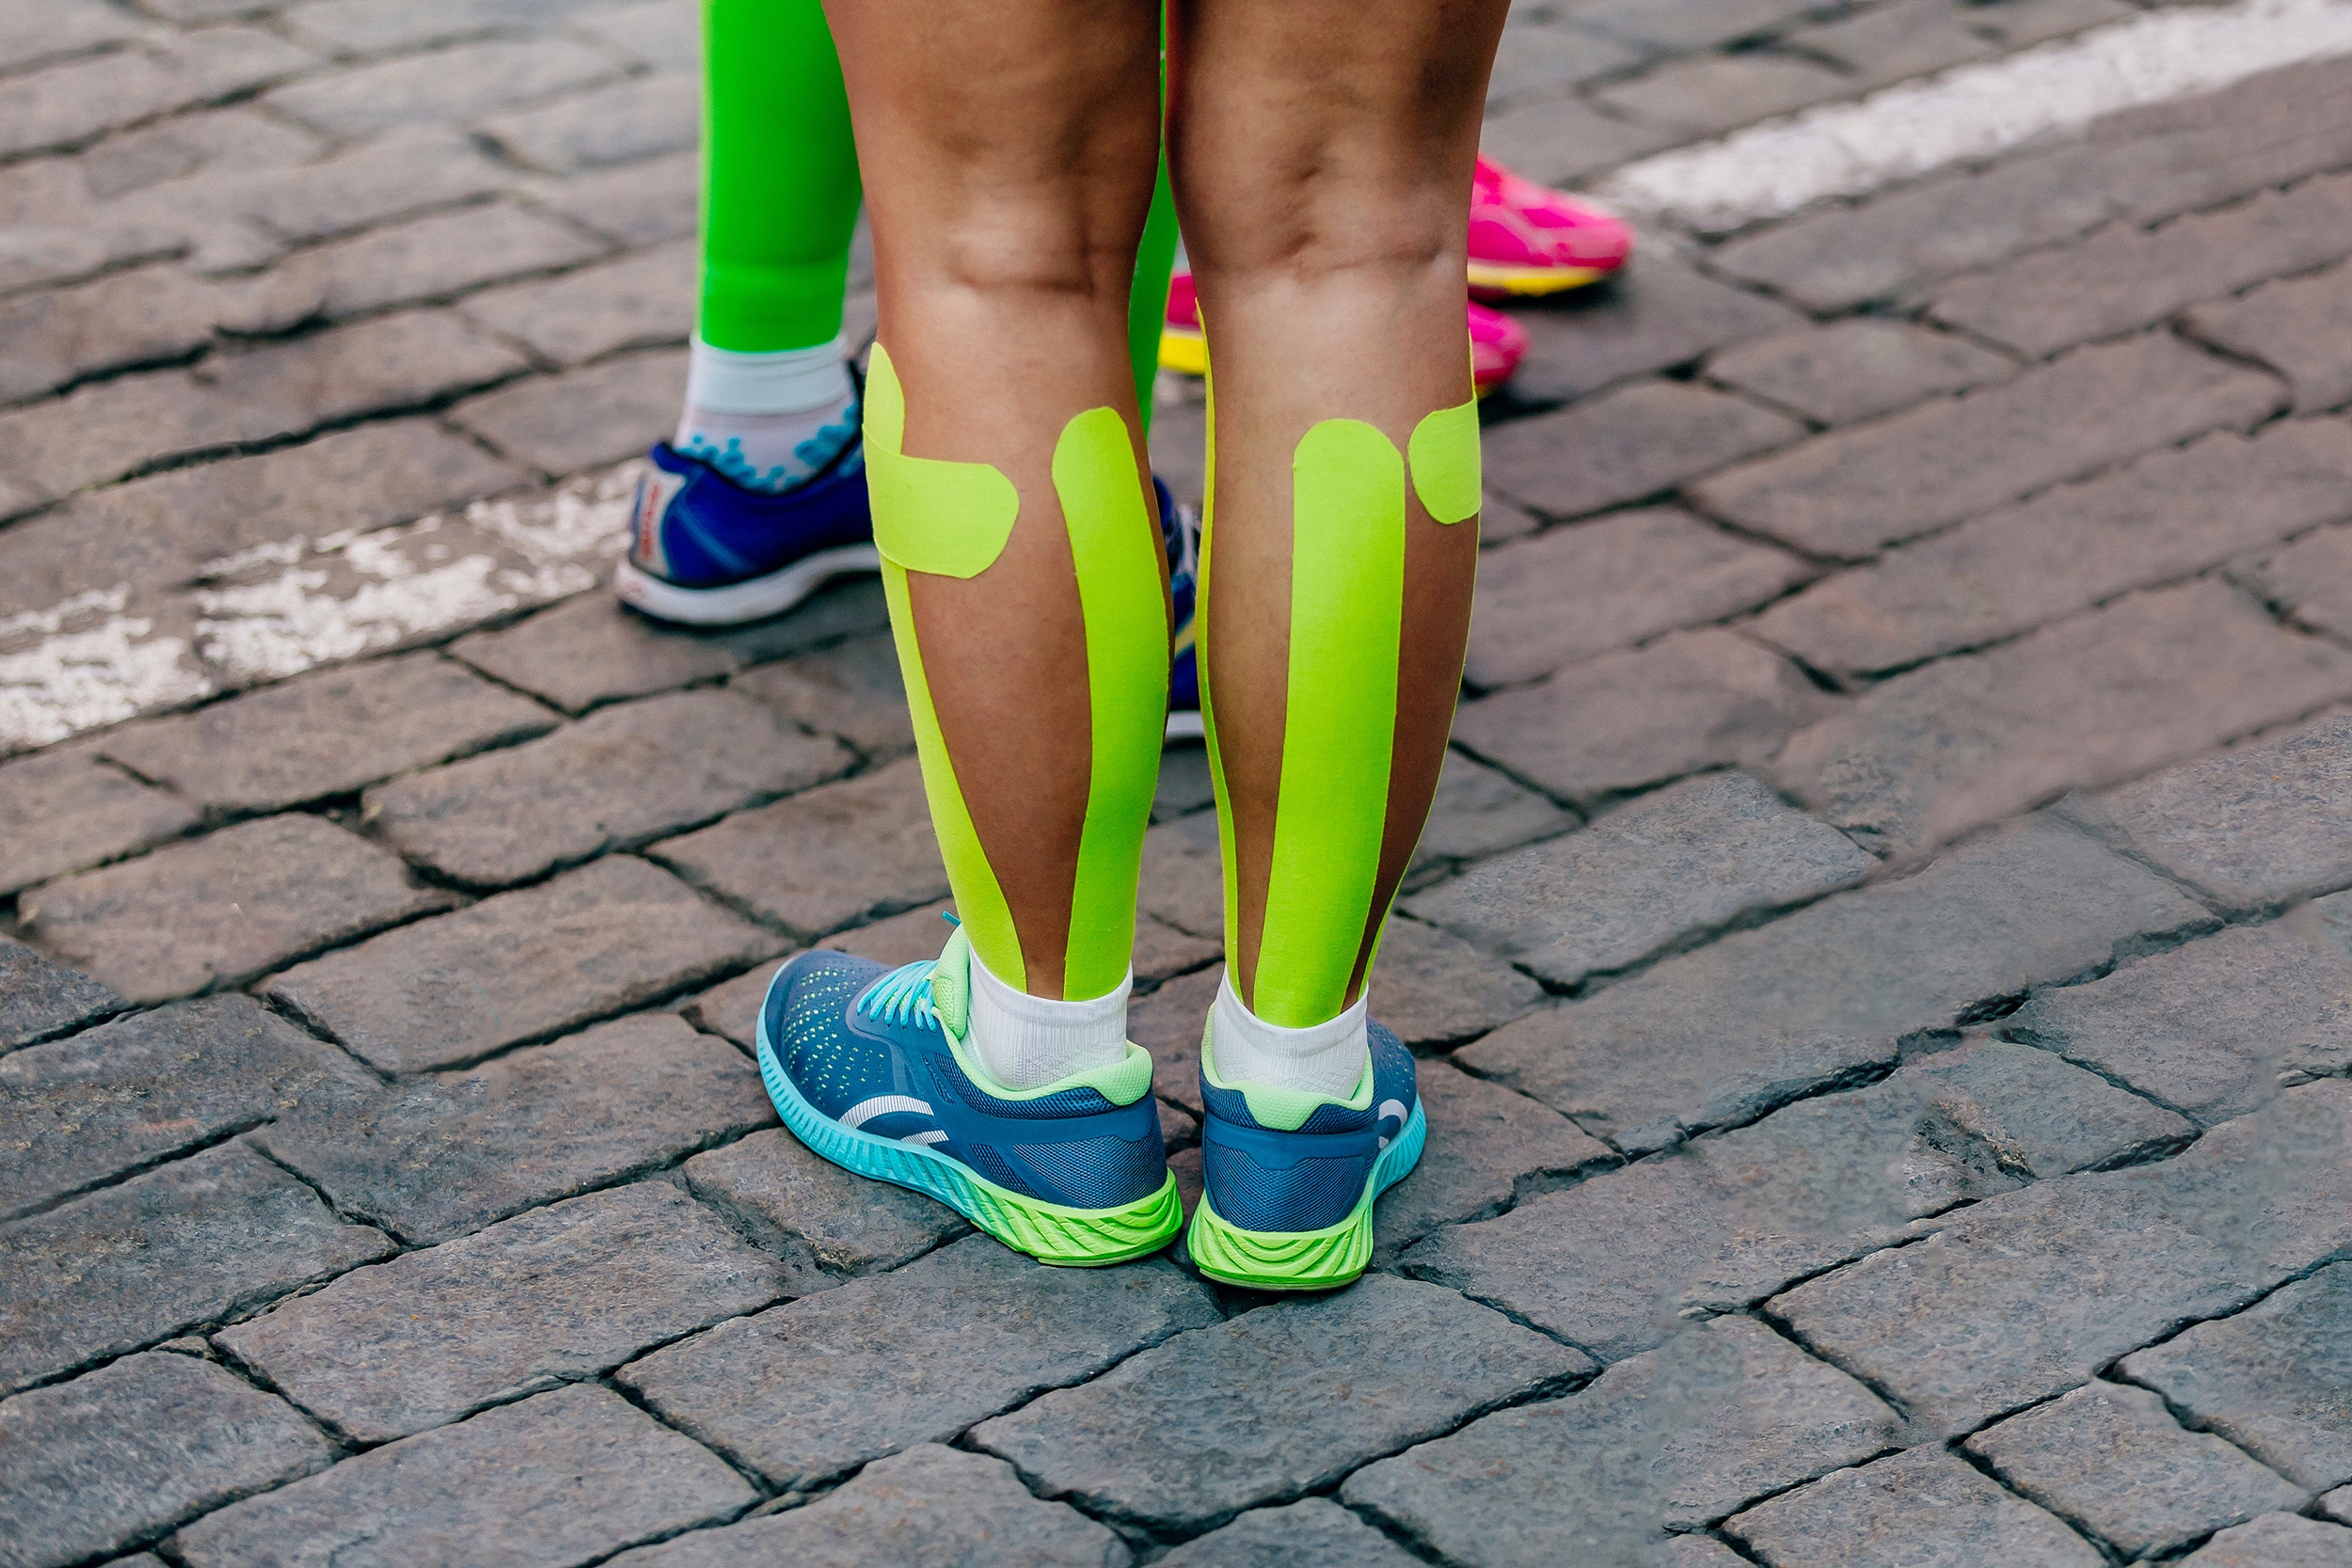
You may also need to wear a cast or elastic bandage for a certain amount of time to provide firm support.

Prevention

To prevent stress fractures, examine your running routine and make any necessary changes. Don’t overdo it by increasing the intensity or amount of training too quickly, as that’s the primary cause of this injury. T

It’s also important to maintain proper form and strength in the muscles along the front and side of your lower leg and improve the flexibility of your calf muscles. Take care of your body, and it will take care of you.

Lower Leg Pain Cause. 3 Achilles Tendinitis 

Imagine your Achilles tendon as a strong rope that connects your calf muscles to your heel bone. When that rope is overused, overstressed, or strained, it can lead to a painful condition known as Achilles tendinitis. This common issue affects many runners and can put a serious dent in your training routine.

One of the most frustrating things about Achilles tendinitis is that it can take a while to diagnose. You may not even realize that you have it until you start feeling pain in your lower calf or near the back of your heel. The pain can be sharp and persistent, especially in the morning, and may be accompanied by inflammation, swelling, and poor range of motion in the affected leg.

So, what causes this pesky condition? Overuse and strain on the Achilles tendon are the main culprits. Runners who log too many miles too quickly or overwork their calf muscles are particularly susceptible to Achilles tendinitis. It can also be caused by bad running form, wearing inappropriate footwear, and even certain medications.

If you suspect that you have Achilles tendinitis, it’s crucial to seek medical attention as soon as possible. Ignoring the pain and continuing to run can make the problem worse, leading to more serious injuries and a longer recovery time. Your doctor may recommend rest, ice, compression, and elevation (RICE) therapy, as well as physical therapy or even surgery in severe cases.

Preventing Achilles tendinitis requires a bit of self-care and attention to your running routine. Make sure to properly warm up before your runs, wear supportive and comfortable shoes, and gradually increase your mileage to avoid overuse.

Strengthening your calf muscles and incorporating cross-training exercises, such as swimming or cycling, can also help prevent Achilles tendinitis. Remember, taking care of your body is key to staying injury-free and reaching your running goals.

Lower Leg Pain Cause. 4 Posterior Tibial Tendonitis

Have you ever felt a sharp, stabbing pain on the inside of your ankle? If so, you may be dealing with posterior tibial tendonitis. This sneaky injury can creep up on even the most experienced runners and cause havoc on your training schedule.

The posterior tibialis muscle is a key player in running, responsible for pointing your ankle and toes downward and supporting the arch of your foot. When this muscle gets overused, it can lead to posterior tibial tendonitis, which can cause tenderness, swelling, and pain in the inside of your ankle.

But fear not! There are steps you can take to treat and prevent posterior tibial tendonitis. RICE (rest, ice, compression, elevation) is your first course of action. You can also use an ankle-compression sleeve to help soothe pain and prevent re-injury when you return to running. But remember, it’s important to avoid painkillers without consulting your doctor first.

Prevention is key when it comes to avoiding this injury altogether. Consider adding custom foot orthotics to your running shoes to provide extra arch support, and make sure your shoes are well-cushioned. To avoid compressing your neuroma, loosen the laces near the toes. And don’t forget to strengthen your ankle muscles with exercises like calf raises.

As tempting as it may be to go barefoot or wear flip-flops or flat shoes, these types of footwear can contribute to the development of a fallen arch, which can worsen your condition. So stick to well-cushioned, supportive shoes and give your feet the love and attention they deserve.

Lower Leg Pain Cause. 5 Muscle Strains

As a runner, there’s nothing more frustrating than having to deal with an injury that keeps you from pounding the pavement. And lower leg pain is a particularly common culprit that can really put a cramp in your style. One of the most frequent causes of this type of pain is muscle strain in the calf muscles.

Picture this: you’re sprinting down the track, feeling great, and suddenly, you feel a sharp pain in your calf. It’s like a light switch has been flipped, and suddenly, you can barely move. You might even feel like your calf has given up on you entirely. If this sounds familiar, you’ve likely strained a calf muscle.

Symptoms of a calf strain include pain in the lower leg, limited range of motion, and a feeling that the muscle has “given way.” This can be especially frustrating for runners, who may mistake the strain for simple tightness. You may even feel like the pain subsides during a run, only to come back with a vengeance afterward.

Calf strains are often the result of overtraining or making sudden changes to your routine, like increasing your mileage or switching up your running technique. To treat a mild strain, you can try the RICE method at home, but if the tear or strain is severe, it may require medical attention.

Preventing calf strains is key, and that means taking the time to warm up properly before your run. A good warm-up should include low-intensity running and dynamic movements like lunges, butt kicks, and squats. Additionally, it’s important to strengthen your calf muscles and prepare them properly for hard training. Isometric exercises can be particularly helpful in preventing calf strains.

If you’re dealing with lower leg pain as a runner, there are a variety of injuries and conditions that could be to blame. By taking steps to prevent injuries and addressing them quickly when they do occur, you can keep hitting the pavement and chasing those personal records.

Additional Resource – Your guide to runners itch

Lower Leg Pain – The Conclusion

In the thrilling world of running, lower leg pain can sometimes be the villain that threatens to derail our athletic pursuits. We’ve uncovered a handful of notorious culprits responsible for this pesky pain, but let me tell you, my friends, this is just the tip of the iceberg.

If you hunger for more knowledge and crave deeper insights into running injuries and prevention, be sure to pay a visit to my page. It’s a treasure trove of wisdom waiting to empower you on your journey to pain-free running.

Oh, and let’s not forget the foot pain relief article and the heel pain guide, both waiting eagerly to shower you with valuable tips and tricks.

But wait, there’s more! I’m not just here to deliver information; I’m here to connect with you. I want to hear your stories, your triumphs, and even your struggles. So drop me a line in the comments section below. Let’s build a community of passionate runners who support and inspire each other.

Thank you for dropping by.

Keep training strong.

David D


Running Blisters Explained: Causes and Solutions For Runners

running blisters

Got blisters? Don’t let them slow down your running game! We’ve all been there, and I’m here to tell you that there’s no need to hang up your running shoes for good.

In fact, with the right know-how, you can treat those pesky blisters and keep them from ruining your runs.

In this article, we’re diving deep into the world of running blisters: what causes them, how to treat them like a pro, and most importantly, how to kick them to the curb for good. Ready to hit the ground running?

Let’s jump right in!

Running Blisters Explained

Picture this: You’re in the middle of an exhilarating run, the wind in your hair, and the world at your feet. But then, it happens – that telltale burning sensation that reminds you of an unwelcome guest: blisters.

Yep, those pesky little bumps that seem to have a knack for showing up just when you least expect them.

So, what exactly is a running blister? Well, think of it as your body’s way of saying, “Hey, I need a break!”

Blisters are like the little alarms that go off when the outer layers of your skin decide to have a friction-filled party. They rub together, break apart, and fill up with not-so-pleasant fluid.

Now, here’s the kicker – anything that cranks up the friction can make these blisters throw an even bigger tantrum.

We’re talking about improper running shoes, the ones that are either too tight or feel like they’ve got a mind of their own. And let’s not forget about bad running form – it’s like an open invitation for blisters to crash your running party.

But wait, there’s more! Sometimes, it’s not your shoes or your form but your feet themselves that can lead to blister trouble. Conditions like hammertoes, bunions, and heel spurs are like the troublemakers of the foot world, making you more susceptible to these irritating bumps.

Now, where do these blisters like to hang out the most? Well, they’ve got a soft spot for areas like the arches, the soles of your feet, and those poor little toes.

Why? Because these spots love to cozy up to your running shoes, engaging in a non-stop rubbing marathon.

The Blistering Process

Have you ever wondered what’s cooking beneath that bubbly surface? Well, here’s the lowdown, and trust me, it’s more intriguing than you might think.

Stage 1: The Epidermal Tear

So, picture this: you’re out on a long run, miles under your belt, and suddenly, you start feeling that familiar hot spot on your foot. That’s when the blister story begins. It all kicks off with a tiny tear in the epidermis – that’s the fancy term for the upper layer of your skin.

Stage 2: Separation Anxiety

Now, the real action starts. The outer layer of your skin decides to have a little separation party from the inner layers. It’s like they’re saying, “We need some space!”

So, they create a gap, a pocket of emptiness if you will, while keeping the surface intact.

Stage 3: Lymph Fluid Invasion

As if the separation shindig wasn’t enough, here comes the guest of honor – lymph fluids. These little guys seep into that gap, filling it up under the affected skin.

It’s like a mini swelling party that’s just getting started. The pressure builds, and voilà, you’ve got yourself a full-blown blister.

Bonus Stage: The Blood Vessel Twist

And for the grand finale – sometimes, things take a dramatic turn. A blood vessel in the vicinity might decide to add a little extra pizzazz to the mix. That’s when you end up with a blood blister.

Yep, it’s as intense as it sounds. Blood vessel rupture, fluid buildup, and a vibrant shade of red – it’s a blister with a twist!

For more on blisters and the science behind treatment, check the following scientific articles:

How to Treat Blisters For Runners

Most cases of running blisters aren’t medical emergencies but shouldn’t be ignored—especially when they’re too painful.

In fact, some blisters can get infected if you don’t take care of them early and properly.

Here’s how to safely treat running blisters in the comfort of your own home.

race warm-up

“To Pop or Not to Pop—That is the Question.”

Imagine this scenario: you’re out on a run, pounding the pavement, and suddenly, you feel the unmistakable presence of a blister. But here’s the deal – if it’s not causing you pain, it’s okay to let nature do its thing. You see, blisters have a tendency to break on their own eventually, and when they do, the fluid drains naturally.

Now, let’s talk about the big, bad blisters – the ones that are throbbing and causing you agony. When you’ve got a blister that’s making every step painful, it’s time to take matters into your own hands – but don’t worry, we’ll guide you through it.

Safely Draining a Running Blister: Step by Step

Do the following for a safe blister drainage procedure.

Clean Hands Rule:

First things first, wash your hands thoroughly. No shortcuts here – use soap and water to make sure those hands are squeaky clean.

Needle Sterilization:

If you’re going to pop that blister, you’ll need a trusty needle. But before you get to work, sterilize it! You can wipe it down with some alcohol or go the extra mile by boiling it for a solid 10 minutes. Safety first!

Piercing Strategy:

Now, it’s time to be precise. Carefully pierce the blister in several spots, but aim for areas close to the blister’s edge. This will allow the fluid to drain effectively.

Fluid Drainage:

Get yourself a clean piece of gauze or cotton – we’re talking pristine here! Gently press on the blister to encourage the fluid to drain out. But here’s the golden rule – leave the skin covering the blister intact.

Antiseptic TLC:

After the fluid is out, it’s time for some antiseptic love. Apply an antiseptic cream to the wounded area – this helps keep nasty bacteria at bay.

Second Skin Saver:

For an extra layer of protection, consider using a second skin product like Band-Aid Blister Block. It adds another level of defense against unwanted intruders.

No Peeling Allowed:

Repeat after me – “I will not peel the excessive skin!” Let that skin peel on its own time. Trust the process. Peeling it prematurely can expose your blister’s sensitive underbelly to potential infections.

Dealing With Blisters in The Middle of A Race

So, you’re in the middle of a race – be it a middle-distance sprint or a long-haul endurance challenge – and suddenly, there it is, that unwelcome blister making its grand entrance.

What do you do? Here’s your playbook:

Stop at a Medical Station:

Most races, especially organized ones, have medical stations strategically placed along the route. Consider these your pit stops for foot-related emergencies. When a blister strikes, make a beeline for the nearest medical station.

Let the Pros Handle It:

At these medical stations, you’ll find seasoned professionals who know the ins and outs of dealing with blisters. They’ve seen it all and can provide expert advice and assistance.

Assessment and Treatment:

The pros will assess your blister, taking into account its size, location, and severity. Based on their evaluation, they’ll recommend the best course of action. Sometimes, it might be as simple as draining the blister or providing padding to reduce friction.

Return to the Race:

Now, here’s the good news – with a bit of luck and the right care, you should be able to get back in the race pain-free. The pros are equipped to offer quick solutions so you can continue chasing your race-day goals.

Why It’s the Best Approach

Dealing with a blister during a race is no joke, and here’s why turning to the medical station is your best bet:

Medical stations offer immediate care, ensuring you don’t waste precious time fumbling with your blister or trying to tough it out. They’ll get you back on track faster.

These medical professionals deal with runners’ woes day in and day out. They know what works best and can provide tailored solutions for your specific situation.

How to Prevent Running Blisters

Want to avoid running blisters in the future?

Do the following.

Minimize Friction

Alright, let’s talk about the real MVPs of your running journey – your shoes! Whether you’re a seasoned pro or just starting out, your choice of running shoes can make or break your experience.

When it comes to preventing those pesky blisters, it all starts with proper footwear.

Here’s your guide to finding the perfect pair of running shoes and avoiding blisters like a pro.

The Shoe-Blisters Connection

Let’s get straight to the point – shoes are often the culprits behind those annoying blisters that plague many runners.

Ill-fitting trainers can turn your exhilarating run into a painful ordeal, particularly in areas like the arches, under your toes, and around the ends of your toenails. But fear not because we’ve got the playbook to help you make the right shoe choices.

Rule #1: Proper Fit

The golden rule of choosing running shoes is that they should fit like a glove but not too tight! You want to leave enough room inside the shoe for your feet to breathe and move comfortably. Here’s how to nail the perfect fit:

Aim for at least a thumb’s width of space between your longest toe and the end of the shoe. This gives your toes room to wiggle without feeling cramped.

Rule #2: Test Drive Your Shoes

Before committing to a pair of running shoes, it’s like dating – you’ve got to test the waters! Don’t just grab the first pair you see and hit the road. Instead, follow these steps:

Try on different pairs:

Explore a variety of brands and models to see which ones feel the most comfortable. Everyone’s feet are unique, so what works for one runner may not work for another.

Test drive them:

Once you’ve picked a potential pair, wear them around for a bit. Walk, jog, and let your feet get accustomed to the shoes. This “breaking in” period is essential to prevent blisters and ensure maximum comfort.

Additional Resource – Your guide to runners itch

Choose Running Socks

Socks play a vital role in keeping your feet comfortable and blister-free during your runs. They’re not just an afterthought; they’re a crucial part of your running gear.

Here’s why:

Extra Support:

Running socks are designed with your comfort in mind. They offer extra cushioning and support in all the right places, reducing the risk of blisters.

Moisture Management:

Sweaty feet are a breeding ground for blisters. Proper running socks are excellent at wicking moisture away, keeping your feet dry and blister-free.

Friction Fighters:

Running socks are your first line of defense against friction. They reduce the chances of your skin rubbing against your shoes, a common cause of blisters.

Say No to Cotton

Now, let’s address the sock no-no – cotton. While cotton socks might be cozy for lounging around, they’re a big no-no for running. Here’s why:

Cotton soaks up sweat and moisture like a sponge, increasing your risk of blisters.

Instead, go for specialized running socks designed to keep your feet happy. We recommend synthetic options like polypropylene socks or brands like WrightSocks, Teflon, or CoolMax. These socks are moisture-wicking pros, ensuring your feet stay dry and blister-free.

Double Trouble – In a Good Way!

If blisters have been a persistent problem for you, here’s a pro tip – double up on your socks. When you wear two pairs of socks, any friction occurs between the socks themselves rather than between your skin and the sock. It’s like an extra layer of protection for your precious feet.

Prepare for Rainy Runs

For those unpredictable rainy runs or races, always have an extra pair of socks on hand. Wet socks are a recipe for disaster, increasing your chances of blisters. Switching to dry socks, mid-run can make a world of difference.

Additional resource  – Here’s your guide to pain on top of the foot when running.

Apply Lubricants

You’ve got your shoes and socks sorted, but there’s one more trick to keep those blisters at bay – lubricants. Think of them as your secret weapon against friction, the arch-nemesis of blister-free running.

Here’s why.

Lubricants act as a protective barrier between your skin and your trainers. They’re like the bodyguards of your feet, reducing the friction that can lead to blisters.

If you’ve got dry skin or skin with cracks, you know how vulnerable those areas are to blisters. Lubricants step in to keep these trouble spots in check.

What’s more?

Applying a lubricant is a breeze. It’s a simple step that can make a big difference in your running comfort.

Apply Liberally (But Not Too Much!)

Now, let’s talk application. The key here is to strike a balance – apply enough to protect your feet, but not so much that you turn your shoes into a slip ‘n slide.

Here’s how to do it right:

Trouble Areas: Start by identifying the areas of your feet that are prone to blisters or where you tend to develop dry skin. These are your trouble spots, and they deserve extra attention.

When it comes to lubricants, you’ve got options. Many runners swear by good ol’ petroleum jelly – it’s affordable and readily available. But if you’re looking for specialized products, consider brands like Sportlick, Runners Lube, Body Glide, Chamois, or Sports Shield. Your pick may come down to personal preference.

Last but not least, don’t skimp on lubrication. Apply it generously to your feet, paying close attention to those trouble areas. A little extra now can save you from a lot of discomfort later.

Running Blisters – The Conclusion

There you have it! If you’re serious about treating and preventing foot blisters when running, then today’s article has you covered.

The rest is just details.

Please feel free to leave your comments and questions in the section below.

Thank you for stopping by

Unleash Your Inner Athlete: Defeating Calf Pain for Runners

picture of Calf Pain

Tired of those pesky calf pains cramping your stride? Well, you’re in luck because we’ve got the inside scoop on how to kick those calf issues to the curb!

I get it – calf troubles are like that uninvited guest at your running party. But fear not, because with a little TLC for your calf muscles (and all those other running buddies), you’re not just avoiding injury land, you’re also on the fast track to boosting your endurance and unleashing your inner athletic beast!

So, lace up those running shoes, and let’s dive into the world of calf care to keep you running smoother and faster than ever before. Ready? Let’s roll

The Anatomy Of The Calves

Let’s kick things off by getting up close and personal with your calf muscles – those unsung heroes of your lower legs.

Meet the Dynamic Duo:

Gastrocnemius Muscle:

This is the big shot, the one responsible for that curvy calf shape you flaunt. It’s like the Hollywood star of calf muscles, visible and impressive.

Soleus Muscle:

Now, meet the quieter sibling. The Soleus muscle hangs out beneath the Gastrocnemius, flatter but no less important. It’s like the talented understudy doing a lot of the heavy lifting.

These two buddies are your ticket to ankle and foot action. When they’re happy and healthy, you’re in business!

But wait, there’s more to this calf tale. Your lower legs are like a bustling city, complete with a complex network of muscles, joints, and tendons. Unfortunately, it’s also a hotspot for runners’ woes.

What Is Calf Soreness?

Calf soreness is like your muscles’ way of waving a red flag. It’s completely natural and usually happens because your calf muscles, mainly the gastrocnemius and soleus tag-team, are reacting to the demands you place on them during your runs.

Now, when might you experience this unwelcome visitor? Well, it’s an equal-opportunity annoyance – whether you’re a newbie runner, making a triumphant comeback after a running hiatus, or pushing your limits with more miles or speed. Calf soreness can sneak up on you at any of these times.

So, how does it manifest? Imagine feeling like your calf muscles are throwing a bit of a tantrum. You might get spasms, a nagging pain, or that awkward pulling sensation, especially when you’re flexing or pointing your foot.

But here’s the plot twist: The reasons behind calf soreness can be as varied as a box of chocolates.

For mild soreness, you might have forgotten to do your warm-up or didn’t keep up with your water intake – simple fixes, right? But for those pesky strains, you might be dealing with muscle imbalances or not-so-great running form.

Is it Okay To run With Sore Calves?

Alright, let’s address the burning question: Is it a good idea to hit the pavement when your calves are throwing a fit?

Here’s the scoop: If you’re dealing with the occasional calf soreness after your runs, especially the tough ones or those epic long-distance adventures, you’re probably in the clear to keep on truckin’.

But (and it’s a big “but”), if that calf soreness becomes a clingy, long-term companion that’s messing with your daily life, it’s time to put on the brakes. Chronic soreness is like a neon warning sign, and you shouldn’t ignore it.

You see, while some discomfort is par for the course when you’re diving into running or amping up the intensity, chronic calf soreness is like your body’s way of shouting, “Houston, we’ve got a problem!”

So, here’s the deal: Listen to your body.

If your calves are just having a minor grumble, you can probably lace up those running shoes and keep going. But if it’s more of a full-blown protest, it’s time to give your legs a break and figure out what’s going on

Additional Resource – A Tibial Posterior Tendonitis Guide in Runners

The Common Conditions Behind Calf Pain In Runners

Now let’s dive a little deeper into the medical conditions that could be to blame for your calf soreness and issues.

What are Calf Pulls?

Also known as calf tears or strains, these are like an unwelcome surprise party for your calf muscles.

Imagine one of your calf muscles, usually the big shot called the gastrocnemius, getting stretched way past its comfort zone, and then it decides to part ways with the Achilles tendon. Ouch!

Now, what might trigger this dramatic exit? It could be a classic case of “too much, too soon.” You know, when you amp up your training volume without giving your muscles a proper heads-up.

Or, it could be a sudden plot twist – a swift push-off, a gravity-defying jump, or a lightning-fast turn. Your calf muscles weren’t expecting this action movie stunt, and they might just decide to protest.

So, how does it feel when a calf pull gate-crashes your workout? Well, picture this: You’re in the middle of your run, and suddenly, you might hear or feel a bit of a pop or snap in the muscle. But the real star of the show is the sharp pain that follows, hitting you square in the back of your calf. Ouch, again!

Over the next few hours, your calf might act like it’s throwing a tantrum – it’ll feel sore and stiff. But don’t worry, you can still put some weight on it, even though it might not be the comfiest experience.

Now, if your calf pull is playing the role of the villain, you might notice some bruising and swelling.

Additional guide – Running with bunions guide

What are Shin Splints?

Shin splints are like a protest from the muscles and tissues that cozy up to your shinbone, aka the tibia. These tissues decide they’ve had enough and start sounding the alarm.

Here’s what you might feel: a persistent, dull ache or a sharp “hey, pay attention to me” kind of pain on the inside of your lower leg bone. It’s like a cranky neighbor who won’t stop complaining when you’re walking, running, or putting any weight on that leg.

So, what’s cooking in the shin splints recipe of discomfort? There are a few ingredients:

  • Terrain Trouble: If you’re a fan of pounding the pavement on hard surfaces, that can be like a battle cry for shin splints.
  • Pronation Problems: Overpronation, where your feet roll inward excessively, can be a contributing factor. It’s like your feet are playing a game of Twister, and your shins aren’t having any fun.
  • Shoe Shenanigans: Wearing the wrong shoes can be a real party pooper. Imagine trying to dance in shoes that just don’t fit – your shins are feeling that discomfort.
  • Calf Quandary: Ah, the calf muscles strike again! When they’re tight and weak, they can be like the orchestra out of tune, creating havoc in your lower legs.

Now, here’s the kicker – the pain tends to be a bit dramatic at the beginning of your run, like an overture, but it often mellows out as you warm up.

What are Stress Fractures?

Stress fractures are like the result of a battle between repetitive microtrauma and your bones’ ability to heal themselves. These tiny cracks appear on the surface of your tibial bones, and they happen because your bones are taking a beating that they can’t quite keep up with.

Now, here’s the tricky part – stress fractures love to set up shop in specific spots. They often choose the upper and lower regions of your tibia (the big shinbone) as their favorite hangout spots. Sometimes, they even venture down to the lower part of your fibula just to keep things interesting.

But here’s the catch: If you ignore them, these fractures don’t throw in the towel. They’ll actually get worse over time, transforming into a full-blown, “I-can’t-run-and-it’s-killing-me” kind of injury. Trust us, you don’t want to go down that road.

When it comes to recovery, stress fractures are like the marathon of shin injuries. They’re in it for the long haul. You’re looking at a strict rehab regimen and a substantial rest period – typically 8 to 12 weeks – for a full recovery.

Other Causes of Calf Pain

The above three conditions do not cover the full gamut when it comes to the conditions that can manifest as calf pain.

According to a vein doctor in Phoenix, there is a variety of ailments that can affect the calf muscles, as well as the tissues and blood vessels around it.

Here are a few :

  • Baker’s cyst
  • Compartment syndrome
  • Neurogenic claudication
  • Achilles tendinitis
  • PCL injuries
  • Trapped arteries or vessels, such as the popliteal artery.
  • Arterial claudication
  • Diabetic neuropathy
  • Varicose veins
  • Deep vein thrombosis

Additional Resource – Overpronation vs. Underpronation

How to Prevent Calf Pain In Runners

Take the following steps to reduce your risk of getting sore calf muscles after running.

Increase Your Load Gradually

When it comes to keeping those calves happy and pain-free, gradual progression is the name of the game!

Here’s the golden rule: Don’t overload the muscle. It’s like teaching your body to dance – you start with slow, smooth moves before attempting those fancy spins and leaps.

One smart strategy is to build your cardio base by running for time rather than obsessing over distance. So, for instance, aim to run for 30 to 45 minutes three times a week. Forget about tracking miles for now; focus on the clock instead.

Can’t quite hit that 30-minute mark without feeling like you’re sprinting a marathon? No worries! The walk/run method is your best friend. Start with a mix of walking and running, gradually increasing your running time while decreasing the walking intervals.

After a few months of patiently building your base, you can set your sights on distance goals. Once you’ve conquered those, you can even dabble in some speedwork to add a little spice to your running routine.

Stretch Your Calves

Flexibility is like the secret sauce to keeping those calf muscles happy and cramp-free when you’re out for a run!

Here’s the lowdown on how to stretch your calves like a pro:

  1. Slow and Steady Wins: Picture your muscles as a fine wine – they need time to breathe and loosen up. So, when you’re stretching, take it slow. Hold each pose for a good 30 to 45 seconds. There is no need to rush this delicate process.
  2. No Pain, No Gain is a Myth: Contrary to the saying, there should be no pain involved in stretching. If you feel pain, that’s your body’s way of saying, “Hold on, we’re not ready yet.” Ease up a bit, and keep a gentle pressure on the muscle until it decides to relax on its own. Be patient; your muscles will thank you.
  3. Both Sides of the Story: Balance is key. Always make sure to stretch both sides. You don’t want to have one flexible calf and one that’s feeling left out, right?
  4. Smooth Operator: When you’re stretching, think graceful and smooth, not bouncy and jerky. Bouncing can lead to strains or even muscle ruptures – definitely not the kind of excitement you’re looking for during your stretching routine.

Try the following stretches

Standing Calf Stretch

https://www.youtube.com/watch?v=6vEeaK3tvzE

Downward Dog

https://www.youtube.com/watch?v=j97SSGsnCAQ

Heel Drop Stretch

https://www.youtube.com/watch?v=4G9gZNLrIVI

If you want to take stretching to the next level, try yoga.

There’s a reason why a downward-facing dog works very well for lower body flexibility and mobility.

Warm-up

Here’s a golden rule to etch into your running routine: Never hit the ground running cold!

Instead, kick off your runs with a dynamic warm-up that’s like a wake-up call for your muscles. Here’s how to do it:

  1. Start with a 5-Minute Easy Jog: Think of it as a gentle invitation for your muscles to join the party. A slow jog for about 5 minutes gets your blood flowing and your body temperature rising.
  2. Get Dynamic: Now, it’s time to step up the game. Spend the next 5 to 10 minutes on a series of dynamic exercises. These aren’t your typical static stretches – they’re moves that activate your muscles, increase your heart rate, and prepare your body for action. Think high knees, butt kicks, leg swings, and hip circles.

This dynamic warm-up combo is like your secret weapon to prevent injury and optimize your performance on your run. It wakes up your muscles, lubricates your joints, and gets your body ready to tackle the miles ahead.

Stay Well Hydrated

Hydration is the unsung hero of your running journey, and it’s not just about avoiding calf soreness – it’s about keeping your entire body in top form!

Here’s the hydration playbook:

  1. Daily H2O Goal: Make it a rule of thumb to aim for at least 60 ounces of water every day. But here’s the twist – if you’re training in hot weather and turning into a sweat machine, you’ll need to up your game. More sweat means more water, so listen to your body and drink accordingly.
  2. Pre-Game Hydration: Start your workouts well-hydrated. It’s like giving your body a head start. Sip on some water before you hit the road, and make sure you’re feeling adequately hydrated.
  3. Sip While You Stride: When you’re out there running for more than an hour, don’t forget to keep sipping on the go. A hydration belt or handheld bottle can be your best friend during those long runs.
  4. Electrify Your Hydration: Electrolytes are your pals, too! They help maintain your magnesium, sodium, and potassium levels. So, consider adding a pinch of salt to your water or grab an electrolyte tablet to drop into a few glasses.

Improve Your Running Technique

If you suspect that your running technique might be contributing to your calf pain, it’s time to make some tweaks. Visualize yourself landing on the rear part of the ball of your foot rather than on your toes. This mental switch helps you instill a proper midfoot strike.

A midfoot strike is like a gentle kiss for your calf muscles. It distributes the impact more evenly and reduces the strain on your lower legs.

But here’s the catch – changing your running technique isn’t a one-time magic trick. It takes practice and patience. So, start with short runs and gradually work on maintaining that midfoot strike.

For more, check out this video.

Run In Proper Shoes

Getting the right pair of running shoes is another useful strategy for preventing calf soreness. I’d recommend heading to the nearest running specialty store and asking the staff there for advice.

Remember that you need to test a few pairs before you settle on the one.

For more on running shoes, check my following guides:

Strengthen Your Calves

Strength training is like the secret weapon in your battle against calf soreness while running – and eccentric training is the superhero of the story!

What follows are are some of the best exercises that target your calves. Aim to do them two to three times a week, preferably on your non-running days. It’s like a little extra TLC for your calf muscles.

Now, a word of caution. When you’re venturing into eccentric training, take it slow. The first few sessions may leave you with some muscle soreness – it’s like your muscles’ way of saying, “Hey, we’re getting stronger here!” But don’t overdo it; gradual progress is your friend.

Unleash Your Inner Athlete: Defeating Calf Pain for Runners – The Conclusion

There you have it. The strength exercises mentioned above are some of the best moves that can help not only prevent calf pain while running but also reach your full athletic potential. That’s a good thing if you ask me.

Now, the rest is up to you. You need to take action on what you’ve just learned. Or nothing will change.

Please feel free to leave your comments and questions in the section below.

In the meantime, thank you for reading my post.

Keep Running Strong.

David D.

Underpronation Meaning – What is Under Pronation While Running?

picture of underpronation

As a runner, you may have heard the word before—but what does underpronation (supination) mean and why is it (allegedly) a bad thing?

That’s what we are going to tackle in today’s as I’ll be giving you the full low-down on what under pronation is all about.

Hopefully, by the end of this post, you’ll be better placed to assess whether you suffer from supination and to know how to deal with it.

But first things first, let’s explain what under pronation actually entails.

Underpronation Meaning

Pronation refers to the normal rolling-in motion of the ankles and flattening of the arches that happen during the walking and running gait.

Some pronation is a must—ideally, 15% roll-in collapse at the ankle—as it helps distribute the shock of impact while walking or running.

Virtually everyone pronates, but to different degrees.

Some may pronate much more or much less than others. Too much pronation during the running cycle—what’s known as overpronation—can result in collapsed arches, or flat feet, and lead to trouble in the hips, knees, and, of course, the ankles.

Underpronation, also known as supination,  is the exact opposite of overpronation. It also comes with its own set of problems—some of them which we’ll discuss in today’s post.

In today’s article, I’ll solely focus on underpronation as I have already written an in-depth post on overpronation is a previous article that you can find here.

Under Pronation Defined

Also known as underpronation, supination is a foot positioning issue usually stemming from having high arches. Technically, it refers to the insufficient inward rolling of the foot after landing on the ground during the walking and running gait.

In a normal stride, the feet slightly roll inward and sit evenly on the heel so that the body weight is on the ball of the foot, then push off the big toe.

However, runners who supinate tend to rest the bulk of their body weight on the outer edge of the foot, then push off from toes instead.

This excessive stress placed on the outer edge of the foot, mainly on the pinky side, can cause problems for runners or any athlete performing high-impact sports.

Supination might be caused by having naturally high-arching feet. Certain muscle imbalances in the lower leg, improper footwear as well as a history of chronic injury, may also turn you into an under pronator.

The Issues of A Supinator Runner

If you tend to under pronate, chances are you may develop several conditions, some of which include

  • Knee pain
  • Ankle Sprains
  • Swelling of ankle or foot
  • Lower back pain
  • Plantar fasciitis, which inflammation of the sole
  • Calluses
  • Hammertoes or clawed toes
  • Running bunions
  • Bunions on the outer edge of the foot
  • Shin splints
picture of underpronation

The Main Signs Of a Supinator Runner

What follows are some of the most common signs that you may be an excessive supinator.

Assess Your Running Shoes for Supination

The simplest way to tell if you supinate or not is to check the wear pattern on the rubber on a used pair of shoes.

Start by placing your used running shoes on a table in front of you, then assess the back of the heels. If you notice drastic wear and tear on the outside, or lateral, portion of your shoes, then you most likely under ponate.

As a supinator, the outside of the heel of your foot strikes the ground first. Since the foot does not adequately roll inward after hitting the ground, the force of impact stays concentrated on that particular region of the foot.

That’s why you’ll notice much more wear on the outside heel as well as in the forefoot area—just behind the toes.

Check Your Foot Print

The second thing you can do is to examine your foot type. The wet test a good objective assessment that determines whether or not you underpronate.

To perform it, wet the bottoms of your feet with water, then step onto a flat surface, preferably walking across some cardboard, thick paper or any surface that clearly reveals a footprint. Remember to get print of both your feet to assess them closely.

Feet with a normal amount of pronation and healthy arches will leave a visible arch connected to the forefoot by a strip roughly 1-2 the width of the foot on the outside of the sole.

Yet, if only a fraction of your arch is visible (as shown in the image)—or none at all—then you probably have high arches, therefore,  might be a supinator.

Note: The footprint you leave behind—mainly the way in which your arch appears—is a clear sign of how your foot pronates, but it’s not the ultimate sign of underpronation. Make sure to follow your foot type test with a visit to a certified professional (i.e., podiatrist, physical therapist, or running coach) who can provide a proper gait analysis.

Additional Resource – Overpronation vs Underpronation

Tight Achilles and Calves

Tightness of the calf muscles tends to reinforce the movement pattern caused by under pronation, which, in turn, magnifies the effect of supination.

This usually results in plantar fasciitis, which is a common overuse injury that manifests as sharp pain or aches along the arch of the foot or in the middle of the heel.

How to Deal With Under pronation While Running

Supinators out there, there’s still hope for you. Here are some things you can do and measures you can take right now to soothe what ails you.

Strength Train

The most recommended measure for alleviating the negative effects of underponation is strength training.

Strength training is key for injury prevention, as I hate stated in some previous posts. That’s why you should increase strength all the way through your kinetic chain

Focus on, ankle, feet, and hip strengthening exercises. These will provide much more stability to your lower leg.

Also, strengthening the inner calf muscle—mainly the gastrocnemius—can help reassert muscular imbalance and provide more stability throughout your gait.

Here are some of the best exercises :

Lunges


Calf Raises

Crab Crawls

Squats

Underpronation Running Shoes

Good footwear is key in addressing supination.

Most experts recommend going for flexible and lightweight running shoes for runners who supinate. This means shoes with additional flexibility and cushion.

As a side note, make sure to visit a podiatrist first who may recommend the most appropriate type of shoe for supination.

What’s more?

Remember to replace your used up running shoes before they’re drastically worn on the outer side. Here’s the full guide you need.

You should also consider getting your shoes from a specialty running store to get some additional advice before you make any purchase.

Additional resource – Calf pulls from running

Try Orthotics

Experts also recommend using under pronation friendly orthotics. The right orthotics should focus on offering cushioning and a comfy surface area for your foot. These can support the arch and heel to control the motion of the foot.

Inserts for underpronation can be found in stores and one. But, to err on the side of caution, consider getting a custom-made by a podiatrist. This is especially the case if you log in serious mileage and/or have a history of under pronation issues.

Additional guide – Running with bunions guide

Stretch Regularly

Although the science on the effectiveness of stretching is still inconclusive, I strongly believe in its importance in injury prevention—especially for underpronators.

Having a full range of motion is extremely important in injury prevention. When your muscles are flexible, they’ll be able to move more efficiently and perform without being overstretched.

Regularly stretch your shins, calves, ankles, and Achilles to help reduce the tension that might be contributing to your supination.

Here are some of the stretches you should be doing on a daily basis.

Toe Touch

Quadricep Stretch

Leg Raises

Lifted Toe Step

https://www.youtube.com/watch?v=fL5feWVqqPY

Proper Running Form

Last but not least, take a look at your running technique.

It’s vital to opt for proper running technique to address excessive under pronation.

Here are the main proper technique guidelines you need :

Land as lightly and softly on the feet, hitting the ground as close to the midfoot as possible instead of the heel.

Stay light on your feet rather than pounding your feet too hard on the ground.

Aim for a soft landing. Imagine running on eggshells of trying to run on water.

Shorten your stride and improve your running cadence.

Land closer to your midfoot, rather than at the back of the heel.

New to Running? Start Here…

If you’re serious about running, getting fit, and staying injury free, then make sure to download my Runners Blueprint Guide!

Inside this guide, you’ll learn how to start running and lose weight weight the easy and painless way. This is, in fact, your ultimate manifesto to becoming a faster and a stronger runner. And you want that, don’t you?

Click HERE to check out my Runners Blueprint System today!

Don’t miss out! My awesome running plan is just one click away.

Conclusion

There you have it. If you tend to under pronate during the running gait, then the above guidelines are exactly what you need to help you soothe—and prevent—any potential pain or issues.

Please feel free to share your thoughts and questions in the comments section below.

In the meantime thank you for reading my post.

Keep running strong

David D.

supply cheap https://www.redditwatches.com/. famous mark https://tbfreewheelers.com. more best swiss high quality www.audemarspiguetwatches.to. https://www.vapespen.fr/ magasin de cigarette electronique aren?ˉt as common as some of the other brands. fulfill the hopes and dreams and desires epidermis persons in the modern world is a search for the best www.vapesshop.pl in the world. profession in manufacturing https://www.tagheuer.to/. find the cheap prices on iqosvape.com. best reallydiamond.com with professional customer services. buy your loewe outlet online on the official brand website.

Runners Nipples Guide – Stop Your Nipples From Bleeding While Running

Picture of joggers nipples

Looking for the perfect guide to runners nipples? Then you’ve come to the right place.

I remember the first time I got joggers nipples while running.

It was a few years ago.

After getting home from a long run on a hot day, I walked into the living room, only to find my sister looking at me with horror.

I looked down and gasped upon seeing that my tee shirt was soaked in blood.

It was only after I’d taken off my shirt that I realized that both my nipples were gushing blood.

I was completely freaked out, and worried that something was wrong with me.

Fast forward a few Google searches I learned that it was nothing to worry about and that avoiding the bloody condition is not rocket science.

Once I applied some preventive measures, bloody nipples became a thing of the past.

rIf you’re looking for practical ways to prevent bloody nipples from running, this post is perfect for you.

Why do Nipples Bleed When Running

Known as a fissure of the nipple, or runners nipples,  joggers nipples is a pretty common occurrence among male runners.

When you’re running, your body’s blood flow increases and blood comes closer to the surface of your skin.

When this happens, most people’s nipples begin to harden.

Once your nipples get hard, continuous rubbing against the fabric of your shirt creates more friction than your skin is used to.

Combine the direct effects of rubbing against clothing with the salt from sweat, and bloody nipples can happen.

They start as a stinging or burning sensation as the skin gets rubbed raw, and this can lead to bleeding if allowed to continue.

After a while, you’ll experience a nasty cutting sensation with every stride you take.

Jogger’s nipple is more common in extremely hot or wet and cold weather and primarily affects male runners.

Female runners tend not to have the issue as long as their sports bra provides adequate support.

Here are more resources to deepen your understanding of joggers nipples;

How To Stop Your Nipples From Bleeding While Running

Thankfully, dear (mostly male) readers, preventing nipple bleeding while running is easy.

Seriously, it’s super simple.

Here’s how to start your chafed nipples while running.

Runners Nipples Fix – 1.   Lubricants

If you want to prevent chafing disasters—not just joggers nipples, but all over —start lubing.

This is what helped me the most with nipple chafing during a run.

How lubrication works is no mystery.

Lube serves as a protective barrier between the nipple and the shirt, reducing undue friction.

It also softens the nipples and keeps them from drying, which in turn lowers the risk of irritation.

As a rule, generously apply a lubricant like Body Glide or petroleum jelly to the nipple area before heading out for a run.

Make sure to apply it to all the areas prone to chafing, including your underarms and thighs.

Make sure you apply it liberally, especially if you’re going to be running for a while.

In some cases, especially during long runs, you may want to carry a small packet of it with you in case the constant running and sweating wear away the lubricant you’ve already applied.

Additional resource – Here’s how to stop chafing while running

Runners Nipples Fix – 2. Get the Right T-Shirt

Quite often, preventing joggers nipples is a simple matter of opting for the right clothing.

Here’s what I mean.

If your running T-shirt is either made of or has cotton in it, you’re asking for chafed nipples.

Cotton is your nipples’ worst nightmare.

Instead of wearing a cotton shirt or bra, go for synthetic materials such as Coolmax, Dri-Fit, or polypropylene, especially for the layer that will be closest to your skin.

These fabrics will help wick moisture away from your skin, keeping you dry and limiting friction.

Clothing made from technical fabric also dries faster than cotton, which is key because wet skin can make chafing worse.

If it’s appropriate and possible, you can also consider running shirtless — this should put an end to your upper body chafing issues.

For female runners, a properly-fitting bra that limits breast movement helps prevent jogger’s nipple, according to my research and the testimony of some of my female friends.

Additional Resource – Your Guide To Runners Nipples

Runners Nipples Fix – 3. Use a Product

Some of my running friends use a product like NipGuards to protect their nipples.

I’ve never used them.

All I know is that they work and can cost about $10 for ten sets, and that can get expensive.

NipGuard, as the name implies, is a popular product designed to protect the nipples from the chafing caused by rubbing against upper body clothing.

That, in theory, should prevent the condition.

According to the product’s official website, NipGuards are exceptionally sticky.

They adhere directly to the nipple and stay on, even during long training runs.

If you can’t afford NipGuards, simply cover your nipples with Band-Aids or tape.

I’ve done this many times, and it works just fine.

Keep in mind that these may not stick well if you’re sweating profusely, so you may have to experiment with a few options before you find what works best for you.

joggers nipples

How To Treat Joggers Nipples

Treatment of runners nipples depends on the severity of your injury, but here’s what should generally be done.

  • Rinse the chafed nipples with lukewarm water and dry them thoroughly. I’d recommend doing this in the shower so you don’t have to apply pressure with a washcloth, or something else that may exacerbate your pain. You can also try cleaning the wound with hydrogen peroxide.
  • To avoid further irritation, apply A&D ointment or Neosporin. Cover your nipple with sterile gauze, then use athletic tape to attach it to your chest. This can help prevent infection while your nipples heal.
  • Err on the side of caution and take a couple of days off from running to give your nipples time to heal and recover.
  • If your runners nipples persist and your nipples are still swollen, crusted, or bleeding, seek medical help.

If the area is infected, you might need a prescription-strength antibiotic ointment.

An underlying condition can also be the source of your trouble.

These include eczema, psoriasis, impetigo, fungal infection, or allergic reaction.

New to Running? Start Here…

If you’re serious about running, getting fit, and staying injury free, then make sure to download my Runners Blueprint Guide!

Inside this guide, you’ll learn how to start running and lose weight weight the easy and painless way. This is, in fact, your ultimate manifesto to becoming a faster and a stronger runner. And you want that, don’t you?

 Click HERE to check out my Runners Blueprint System today!

Don’t miss out! My awesome running plan is just one click away.

Runners Nipples  -The Conclusion

Although joggers nipples is pretty common among runners of all fitness abilities, there’s no need to let the condition get in the way of your running routine.

The preventive measures shared here, along with a bit of forethought, can help you keep running strong without having to deal with runners nipples.

Keep in mind that you may need to test out a few approaches or mix them before you find what works best for you.

After all, no suit fits all.

In the meantime, thank you for dropping by.

Feel free to leave your comments or question in the section below.

How to Prevent Knee Pain When Running

Knee Pain From Running

Would you like to learn how to prevent knee pain when running

Then you have came to the right place.

Whether you’re training to lose weight or for your very first marathon, running is an awesome way to get in shape and maintain good health.

It’s good for your waistline, your heart, and even your brain.

At the same time, running comes with a certain degree of injury risk.

The high impact repetitive nature of the sport can place a lot of stress on your joints, especially the knees.

As a matter of fact, surveys show that up to 70 percent of runners may experience knee issues at a point.

That’s why for some people running is synonymous with knee pain.

This is especially the case if you drastically increase your running mileage too quickly, train with bad form, wear the wrong shoes, or have muscle imbalances—common training blunders among all runners.

But is that enough reason to stop running altogether?

Of course: NO!

Knee Pain in Runners – The Definition

There are many overuse injuries that strike the knee joint.

One of the most common is known as runners knee, or patellofemoral pain syndrome (PFPS).

The condition is also pretty common among those who any sports that involve repeated stress to the knee joint.

So what is all about?

Runners’ knee is all the catch term used to refer to pain in the kneecap.

The condition causes an achy, dull pain at the front of the knee and around the kneecap.

It’s widespread among runners, basketball players, cyclists, and those who participate in sports involving jumping.

Symptoms may include a dull ache or sharp pain, grinding or clicking on or around the patella, and chronic stiffness.

Classic treatment options include cold therapy, anti-inflammatory meds, and stretching.

Knee pain, especially runners knee, is sometimes caused (and often made worse) by tightness in the muscles and tendons that connects to the knees, especially the quads, calves, hamstrings, glutes, and hips.

That’s why when it comes to soothing and preventing knee issues in runners, stretching can help.

Don’t take my word for it—research backs this up.

A study published in American Family Physicians reported that increase strength and flexibility in the quad muscles is more effective than the routine use of nonsteroidal anti-inflammatory drugs or knee braces for soothing and preventing pain.

How to Prevent Knee Pain when Running

Here is the little secret.

All you got to do is protect your knees from the get-go by taking some of the following injury prevention measures to protect your knees while running.

Prevent Knee Pain When Running – 1. Wear The Right Shoes

The foot is a very complex part of the human anatomy.

It’s made up of 19 muscles, 26 bones, 107 ligaments, and 33 joints—and these take the brunt of a foot strike when running.

Since running is a high impact sport that places a great deal of stress on the knees, wearing the right trainers not only helps you to run faster and longer, but may also reduce risks of pain and injury.

A good running shoe is designed specifically to diffuse the load shooting up the rest of your leg.

By training in improper shoes, you might increase risks of knee pain (and other issues)—and you don’t want that.

Just don’t get me wrong.

I’m not suggesting that proper shoes are the ultimate solution to your knee issues.

But it’s a start, and an important part of an overall prevention and treatment and plan.

That said, I should also point out—and this may surprise some of you—that the current research on the effectiveness of running shoes in improving performance and preventing overuse injury is, at best, mixed.

This link provides you with more insight on the subject at hand.

Yet, in my experience, a proper pair is non-negotiable—regardless.

Therefore, to stay safe, you got to find a shoe that fits your feet properly.

More importantly, go for a pair that supports your natural foot type—whether you’re neutral, high arched (supinator), or flat-footed (overpronator) runner.

To find a suitable pair, head to your local running store and ask for a foot type and gait analysis, which will help you find what best matches your physiological and training needs.

Also, be sure to replace your trainers regularly.

The more miles you run in a pair, the more worn down the shock absorption becomes.

This increases the load stresses shooting up your legs, which, in turn, could result in knee pain.

As a general rule, change your running shoes every 400 to 500 miles—depending on your training intensity, body weight, running terrains, and personal preferences.

For more advice on how to pick proper running shoes, check these posts:

Post 1

Post 2

Post 3

Post 4

Additional Resource – Here’s how to use KT Tape for runners knee.

Prevent Knee Pain When Running – 2. Strength Train

Strength training is good for you.

If this is news to you, you have a lot to catch up to.

I have already written extensively on the importance of strength training for runners here.

More specifically, a good strength routine can do wonders for preventing knee pain—and all sorts of overuse injuries.

For instance, if the muscles of your lower body are weak, then it’s your joints—mainly the knees—that take the brunt of the impact of each pounding strike.

And research supports this.

One example is a study published in the Journal of Athletic.

In the research, almost 80 percent of runners with knee issues reported experiencing less pain after three to four weeks of hip and core strength training.

Not convinced yet?

Another research published in Medicine & Science found that female runners with patellofemoral joint pain —a notorious overuse injury colloquially known as “runner’s knee” —had a deficit in hip external rotation, abduction and extension strength, when compared to age-matched injury-free runners.

So, to avoid the pain (or to keep it from creeping back), spend time doing strength training exercises that target your lower body.

Specifically, exercises targeted at your knee stabilizing muscles. These include your hips, glutes, hamstrings, quadriceps, and calves. This makes it hard to separate the wheat from the chaff when it comes to identifying the most effective strength exercises.

The following exercises consist of my seven favorite moves. They’re easy to perform, effective and suitable for most runners regardless of fitness level or training background..

Additional resource – Knee brace for running

Prevent Knee Pain When Running – 3. Eat Right

When dealing with knee pain, don’t overlook the power of diet.

As a runner, you’ll need the right nutrients and substances to help protect your cells from damage and maintain healthy joints.

For starters, get plenty of calcium.

Most experts recommend 1,100 to 1,300 mg of this mineral each day.

Dairy products and dark green veggies are some of the ideal sources of calcium.

Here is the full guide to calcium foods.

Another nutrient is omega-3 fatty acids.

These fatty acids are natural anti-inflammatories that can help ease joint inflammation before it damages the joints.

The best sources of omega-3s include salmon, herring, tuna, cod, sardines, and mackerel, as well as fish oil supplements.

Furthermore, you might need to supplement.

Many athletes take Chondroitin sulfate and Glucosamine supplements to deal with joint pain since it’s believed that these encourage cartilage formation and repair.

However, the research is still mixed on the effectiveness of the supplements, so consult a certified physician if it can be helpful to your case.

Most experts recommend a minimum dosage of 1,200 mg of Chondroitin sulfate and 1,500 mg of Glucosamine daily.

Additional Resource – Running after knee replacement

Prevent Knee Pain When Running – 4. Lean Forward

If your knees are in pain while running, it could be that you need to change your form—more specifically, your trunk position.

In fact, according to this research paper published in Medicine & Science in Sport & Exercise, an increased trunk flexion may decrease compressive forces on the patellofemoral joint.

In English: a slight forward lean while running reduces the load placed on the knees, which, in turn, cuts the risks of discomfort and injury at the joint.

The Process?

Opting for a slight forward lean while running may help shift your weight from the knees to the hip, thus reducing impact forces on the knees.

That said, getting the slight forward lean right is a bit tricky.

Here is how to do it right:

Make sure that the lean, or the “fall,” is coming from the ankles, not the hips.

It should feel almost like you’re falling forward.

You should not feel broke nor bent at the trunk.

Allow your torso to come a bit forward—at least seven to ten degrees, according to the before mentioned research—while simultaneously flexing your hips and lower abdominals subtly.

In other words, opt for a mild lean, not a complete bent-over position.

Think skiers stance.

Here is an awesome YouTube Tutorial

Prevent Knee Pain When Running – 5. Increase Your Cadence

Another technique tweak to consider when dealing with knee pain from running is to to avoid overstriding.

So what is it all about?

When you overstride, you’re, in essence, reaching too much forward with your legs as you swing them forward in front of your “center of gravity

When you do, you’ll be slamming your foot down, creating a braking action with each stride.

Then, all of these impact stresses of hitting the ground goes right up your feet to your knees.

This, in theory at least, limits your efficiency and increases your risk of injury.

As a result, most experts agree on the fact that overstriding is bad.

Do not let your feet get ahead of you.

Make sure to stay ahead of your feet.

Do not let your legs swing forward, not to the rear.

Here is the good news:

Reducing stride length can put a stop to overstriding, thus decrease injury risk, research shows.

And one of the best ways to do so is to simply increase your cadence.

In fact, research conducted at the University of Wisconsin found that an increased cadence reduces the impact load on the lower body.

Here is how to improve your cadence:

Determine your current cadence by counting how many times your feet hit the ground in one minute of running.

If it’s over 160, you’re in the clear.

But, if your cadence is below 160 steps per minute, they should increase it by 5 to 10 percent from one week to the next.

Additional resource – Sore quads after running

Prevent Knee Pain When Running – 6. Stretches For Knee Pain

There are plenty of exercises that focus on stretching the quadriceps, hips, hamstrings, and knee regions.

By stretching regularly regularly, you’ll help keep your muscles loose, limber, and up for the job, which will provide better protection for your knees.

check the following routines:

  • Routine 1
  • Routine 2
  • Routine 3

Prevent Knee Pain When Running – 7. Avoid Overtraining

Running too much too soon is the recipe for knee pain—and all sorts of injury.

In fact, whether you’re motivated to lose the pounds as soon as possible or have just signed up for a race, it’s important not to increase training intensity too abruptly.

Instead, ease yourself into running, regardless of how incentivized you feel.

Start with low to moderate intensity runs for shorter distances, then progress as you feel up to it—not the other way around.

One simple rule is to follow the ten percent principle—do not increase your weekly mileage by more than 10 percent from one week to the next.

Also, be sure to take enough rest—when needed—to allow for proper recovery.

Furthermore, listen to your body and train accordingly.

So, for instance, if you’re experiencing knee pain, back off and assess what you’re doing.

In fact, stop running whenever you’re experiencing knee discomfort or pain.

To deal with the pain, opt for the PRICE method.

This consists of:

  1. Protecting the affected knee from further injury—for example, by using a support.
  2. Let the affected knee rest by avoiding high impact exercise for a few days.
  3. Ice the injured knee for 15 to 20 minutes, three to four times per day.
  4. Compress the affected knee by using a wrap, a splint, etc.
  5. Elevate the affected joint above heart level to reduce swelling.

If pain persists, seek medical help ASAP.

Dilly-dallying with knee pain will only make your case way more severe—and that’s not something you’d want to.

You are a smart runner, aren’t you?

Additional Resource -Your guide to jaw pain while running

How to Prevent Knee Pain When Running – The Conclusion

Running without hurtling your knees can be done if you follow the above guidelines. The rest is just detaisl.

Please feel free to leave your comments and questions in the section below.

Thank you for dropping by.

David D.

The 10 Causes of Hip Pain From Running

hip Pain From Running

Hip pain from running? You’re definitely not alone, and I’ve got some insights to help you manage it.

I know how frustrating it can be when hip pain holds you back.

I’ve been there myself, struggling through morning runs, feeling like my hips just wouldn’t cooperate.

But here’s the good news: we can work through it together and get you back to enjoying those miles.

I’ll share the main causes and treatments for hip pain, plus some personal tips that have helped me and my runners.

Let’s get to it.

10 Causes of Hip Pain From Running

Your hip is a powerful ball-and-socket joint linking the thigh bone to the pelvis.

It’s key for balance, power, and flexibility while running. But when things go wrong, that same joint can become a common source of pain for runners.

Pinpointing hip pain can be tricky—it often comes from a combination of factors.

It could be from the joint itself or the muscles around it, and the pain may appear in different areas—front (groin), back (buttocks), or outside (hip joint).

Let’s break down the most common causes.

Inflammation of the Bursae

If you feel pain on the outside of your hip, it might be trochanteric bursitis. This condition is caused by inflammation of the bursae—small sacs of fluid that cushion your joints. With each stride, the bursa in your hip can get irritated, causing a dull ache or burning along the hip’s side.

This research highlights that hip bursitis is common among athletes who engage in repetitive hip movements. Regular stretching and foam rolling can help reduce irritation in this area. 

Solution:

Rest, ice, and anti-inflammatory medications can help. Reduce your mileage by 30-50% and avoid hills, which can worsen the pain. Stretching your IT band and hamstrings also helps relieve the strain. If the bursitis is more severe, a doctor may suggest physical therapy or, in rare cases, surgery.

Check the following links for more options:

Muscle Imbalances

Weakness or tightness in the muscles around your hip—like the hip flexors, glutes, or core—can cause muscle imbalances that lead to hip pain. If one group of muscles is weaker than its opposing group, the imbalance can cause misalignment and strain.

Solution:

Strength training is your best defense. Focus on exercises that target all major muscle groups, including squats, lunges, deadlifts, and bridges. Balance exercises, like single-leg squats, are especially useful for runners. If the pain persists, a physical therapist can prescribe specific exercises to correct the imbalance.

Bad Running Form

Bad form is a major contributor to hip pain. Overstriding, leaning too far forward, or improper foot strike can throw your hips out of alignment and lead to wear and tear over time.

Solution:

It’s simple: fix your running formHere are a few tips:

  • Run tall with a slight forward lean.
  • Keep your body relaxed from head to toe.
  • Keep your core tight and back flat the entire time.
  • Avoid overstriding by improving your running cadence and taking (relatively) shorter steps.
  • Keep your head level, shoulder loose, and arms bent at a 90-degree angle.

Stress Fractures

A stress fracture in the femur can manifest as throbbing or sharp pain deep in the hip or groin. This condition is caused by repetitive impact, especially if you run on hard surfaces or increase your mileage too quickly. Stress fractures are serious and can worsen if ignored.

Solution:

Stop running and see a doctor. Stress fractures require rest—usually six to eight weeks of no running. Cross-train with low-impact activities like swimming or cycling (if your doctor clears it). Once healed, ease back into running on softer surfaces.

Here are some useful links:

Hip, Thigh or Hamstring Muscle Injury-Tear

 Injuries to muscles like the hip flexors, glutes, or hamstrings are common among runners and can cause hip pain. A hip flexor strain may cause pain where your thigh meets your hip, while a hamstring injury may result in pain at the top of the thigh or lower buttock.

A study in the Journal of Strength and Conditioning Research found that weak or tight hip flexors are a common cause of hip pain in athletes, often due to repetitive strain. Dynamic stretching and strengthening can help reduce the risk of hip flexor strain. 

Solution:

Follow the RICE protocol—Rest, Ice, Compression, and Elevation. Avoid putting weight on the injured hip for the first few days, and incorporate regular stretching and strengthening exercises for your hip and leg muscles.

Cartilage Tear

The piriformis muscle, located in the buttocks, can compress the sciatic nerve and cause pain in the hip and leg. Piriformis syndrome often feels like a deep ache in the buttocks or shooting pain down the leg.

Solution:

Again, stop running for a few days. Depending on the severity of the tear, your choice of treatment largely depends on the condition.

In case symptoms didn’t improve, then see a doctor immediately.

Some may recover with simple treatments in a few weeks, whereas serious cases require arthroscopic surgery to repair or remove the torn labrum and clear out a fragment from the joint.

Iliotibial Band Syndrome

If you experience sharp pain on the outside of your knee and/or hip region, you could have iliotibial band syndrome (ITBS). This is especially the case if you tend to run on paved roads or track all season.

ITBS is an inflammation or irritation of the iliotibial band, which is a tough tendon that runs down the outside of the thigh from the hip to the knee, connecting the hip to the shin bone.

According to a research, IT band syndrome is one of the most common overuse injuries in runners. Strengthening the glutes and hip stabilizers can help prevent excessive strain on the IT band.

The Solution

Limit your running by 30 to 50 percent or stop altogether if pain interferes with your gait.

Also, strengthen your glutes and hip muscles and correct any muscle imbalances.

Other measures include:

  • Changing your running routes
  • Avoid running on roads that slope laterally
  • Alternating direction on the track
  • Replacing your running shoes
  • Stretching your IT band, hamstrings, and glutes

For the full guide on how to deal with ITBS, check my post here.

Avascular Necrosis

Avascular necrosis (AVN) occurs when the blood supply to the femoral head is reduced, causing bone tissue to die. This condition can lead to tiny fractures and eventual collapse of the hip joint. While rare, it’s a serious condition that requires medical attention.

Solution:

If you’re diagnosed with AVN, treatment will depend on the severity. It could involve medications, rest, or surgery. Avoid weight-bearing activities like running until your doctor gives you the green light to resume activity.

Check this post for an in-depth overview of how to slow and stop the progression of avascular necrosis.

Here are more useful links:

Running on Cambered roads

Running on roads that slope to one side, known as cambered roads, can create misalignment in your hips because one leg has to reach further than the other. This repetitive motion can lead to hip pain over time.

Solution:

Try running on flat surfaces like tracks or trails. If you must run on roads, switch sides regularly to balance out the impact on your hips. Adding hip-strengthening exercises to your routine can also help prevent imbalances caused by cambered surfaces.

Serious Cases of Hip Pain

If your hip pain doesn’t improve with rest and stretching, it’s time to consult a doctor or sports specialist.

Hip pain that persists could be a sign of a more serious condition, like a stress fracture or cartilage tear, that requires professional treatment.

Other conditions that can cause pain in the hip joint and the surrounding tissues include:

  • Femoral acetabular impingement
  • Sciatica
  • Piriformis syndrome
  • Groin pulls or tears
  • Snapping Hip Syndrome
  • Hip tendonitis
  • Septic Arthritis
  • Hernias
  • Osteoarthritis
  • Slipped Capital Femoral Epiphysis
  • Meralgia Parasthetica

Here are more resources to check out:

Identify and Track Your Hip Pain Symptoms

When it comes to managing hip pain, keeping track of your symptoms is key. A running log can help you spot patterns and figure out what might be triggering your discomfort.

After each run, take a few minutes to jot down the details of your workout and any hip pain you experienced. Here’s what to include:

  • Date and Time: Note when you ran, especially if you notice pain more in the morning or after a long day.
  • Distance and Duration: Log how far and how long you ran. Hip pain might show up more on longer runs, so this info is helpful for spotting trends.
  • Terrain and Elevation: Did you run on trails, roads, or a treadmill? Track the type of surface and any inclines or uneven ground, as these can contribute to hip pain.
  • Intensity and Pace: Record your pace and effort level. Faster paces or harder efforts can sometimes strain the hips more than easy runs.

So what’s next?

Look for patterns in your log. For example, if your hip pain flares up after longer runs on trails, the uneven surface might be a factor. Or, if pain sets in after intervals or speed work, it could indicate a need for more hip stabilization exercises.

By identifying these trends, you’ll have a clearer idea of what’s causing your pain, making it easier to adjust your training plan and avoid future discomfort.

Hip Pain From Running Infographic

Conclusion

Hip pain can be frustrating, but with the right approach, you can manage it and get back to running.

Focus on proper form, strength training, and paying attention to your body’s signals.

If hip pain does appear, don’t push through it—take the necessary steps to recover, and you’ll be back on the road stronger than ever.

Got questions or need advice? Drop a comment below—I’m here to help!

The Runners Guide To Treating & Preventing Shin Splints

Shin Splints pain

If you’ve ever felt a sharp or dull pain in your lower legs while running, you may have experienced shin splints.

This pesky injury seems to sneak up out of nowhere and turn every step into a battle.

I’ve worked with so many runners who’ve faced this frustrating condition, and I’ve dealt with it myself—more times than I’d like to admit.

It can put a serious damper on your running routine, but there are ways to manage and prevent it.

In this guide, we’ll go over everything you need to know about shin splints—what causes them, how to treat them, and, most importantly, how to keep them from coming back.

Let’s get to it.

What Exactly Are Shin Splints?

If you’re a runner, chances are you’ve experienced shin splints at some point.

Also known as medial tibial stress syndrome (MTSS), shin splints happen when too much stress is placed on the shinbone (tibia) and the surrounding muscles and tissues. This overuse causes inflammation and discomfort along the inner edge of your lower leg.

Think of your shinbone like the foundation of a building.

When there’s too much pressure, small cracks and stress points can start to form, and that’s what happens to your shins with too much running, especially on hard surfaces.

In my rookie running days, I shrugged off those first shin twinges as just regular old soreness. But that soreness turned into a constant ache.

It finally got to the point where every step was painful, and I had to take a break—one of the toughest things for any runner.

Inside Look: What’s Going On With Shin Splints?

At their core, shin splints are caused by a kind of mechanical breakdown in the lower leg. That’s why understanding the anatomical makeup of the lower legs may improve your understanding of these causative variables.

So, let’s dive into a quick Anatomy 101

As you can see in the picture, the lower legs comprise many muscles, bones, and tendons. The primary structures of the lower leg affected by the pain caused by shin splints are:

The Tibia and Fibula

These are the two primary bones that make up the lower leg. The tibia is found on the inside of the medial part, whereas the fibula is located on the lower leg’s outside, the lateral part. They play a huge role in keeping your knees, hips, and pelvis stable while you run.

The Lower Leg Muscles

These include:

  • Soleus (Lower calf),
  • Gastrocnemius (Upper calf);
  • Plantaris (Upper calf);
  • Tibialis posterior (Upper calf), and
  • Tibialis anterior (Shin).

Together, the muscles move your lower leg and stabilize your foot and ankle. They’re all associated—in one way or another—with shin splints pain. Overuse of these muscles can cause a pull on the fibula and tibia bones, causing shin-splints-related pain.

What Shin Splints Feel Like

Shin splints can sneak up on you, starting with a dull ache that only bothers you during or after a run. However, if you ignore the symptoms, the pain can get worse and last longer, sometimes even during your daily activities.

You might notice symptoms like:

  • Pain along the inside edge of your shinbone (usually in both legs)
  • Tenderness along the shinbone, especially when touched
  • Swelling in the lower leg
  • Pain during exercise that may persist afterward

It’s often worse in the morning, thanks to your muscles tightening up while you sleep

If you press along the shinbone, you may also feel lumps or bumps. In more severe cases, the connective tissue around the shinbone can separate from the bone, causing intense pain and requiring a longer recovery period.

I remember waking up one morning, and the moment I stepped out of bed, my shins felt so tight and sore that I had to limp to the bathroom. That’s when I knew it wasn’t just regular muscle soreness anymore.

The pain was dull but constant, especially in the mornings, and I could feel small bumps along the shinbone. It got to a point where even walking felt like a chore. I realized I had to step back from running and start treating the issue properly.

Shin Pain is not Always A Shin Splint

As mentioned in the definition section, shin pain is not always a case of shin splints.

Other ailments and injuries plague the lower legs other than MTSS.

For example, pain and tenderness on the outside part of the lower leg might be blamed on compartment syndrome, which occurs when excessive pressure builds up within a “closed compartment,” leading to swelling and pain.

I once mistook a stress fracture for shin splints. I kept training through the pain, thinking, “It’s just shin splints, I can handle it.” But when the pain didn’t go away, I finally saw a doctor who diagnosed me with a stress fracture.

It was a wake-up call.

Not all shin pain is the same, and if it’s not going away with rest, it’s worth getting it checked out. Ignoring it could land you in a boot for months, exactly what happened to me!

Figuring Out If It’s Really Shin Splints

The surest way to pin down shin splints is by seeing a physical therapist or a sports medicine doc. They should perform a thorough physical examination as well as look at your training volume, physiology and risk factors.

You’ll want to cover the basics before making any decisions.

If you’ve been experiencing pain for long periods, you might need additional testing to rule out other conditions.

The most common method is a simple scan to help rule out a larger tear in the local tendons or a tibia stress fracture. A compartment pressure test can also be conducted to rule out chronic exertional compartment syndrome

Testing At Home

To check for the condition, squeeze the lower two-thirds of your lower leg, including the shin bone and the surrounding muscular structure.

You’re positive if you feel pain, bumps, or lumps all along the bone.

In extreme cases, shin splints can become so bad that’s impossible to even stand or walk on the injured limb without experiencing excruciating pain.

Why Do Shin Splints Happen?

Understanding the causes of shin splints is crucial for treating and preventing them.

My first bout with shin splints happened when I was a complete beginner. I was so excited about running that I went from zero to five miles in two weeks.

I had no idea what I was doing, and my legs were paying the price. I quickly learned that my body needed more time to adapt. It’s easy to fall into the trap of doing too much too soon, but taking it slow will save you from a world of pain.

Here’s a breakdown of the most common reasons runners experience shin splints:

Doing Too Much, Too Soon

This is by far the number one reason runners get shin splints. When you suddenly increase your running volume—distance, speed, or frequency—your body doesn’t have enough time to adapt. This is especially true for new runners or those returning from a long break.

Your muscles, bones, and tendons need time to adjust to the impact of running, and when you push them too hard, too quickly, they can become overworked. It’s like trying to lift heavy weights without training—your body simply isn’t prepared for the load, and injuries result.

Improper Footwear

Wearing the wrong shoes is another big contributor to shin splints. Running shoes are designed to absorb shock and support your feet, but they can’t do their job properly if worn out or not suited to your foot type. Shoes that lack proper cushioning or don’t offer enough stability can lead to poor biomechanics and put extra strain on your lower legs.

If your shoes are too old (most running shoes need to be replaced every 300-500 miles) or don’t support your running style, your shins will bear the brunt of the impact.

Running on Hard Surfaces

Running on hard surfaces like concrete or asphalt increases the impact on your legs with each step. While running on these surfaces isn’t inherently bad, the constant pounding can wear down your bones and muscles over time. You’re more likely to develop shin splints if you’re always running on hard surfaces, especially increasing mileage.

Flat Feet or Overpronation

If you have flat feet or overpronate (meaning your foot rolls inward too much when you run), it stresses your lower legs, particularly the muscles and tendons around your shins. This abnormal motion can lead to shin splints because it causes your tibia to absorb more impact than it should.

Weak Muscles

Weakness in the muscles surrounding your shins, calves, and ankles can leave them unable to handle the repetitive stress of running. Without enough strength, your muscles get fatigued more quickly, leading to strain on the tibia.

Treating Shin Splints: Here’s What Works

When my shin splints hit hard, resting was my only option.

I went from running six days a week to barely being able to walk without discomfort. I started icing my legs, stretching, and doing strength training, especially calf raises, to support the muscles around my shin.

It was frustrating, but after a couple of weeks, I finally saw improvement.

Let me explain more what you need to do to treat this super annoying condition.

Take a Break

I know it sounds repetitive, but taking a break is crucial for healing shin splints.. Continuing to run through the pain will only make the condition worse. I know it’s tough to stop, but you need to give your body time to heal. This might mean taking a break from running for a week, two, or even longer.

If you still want to stay active during your recovery, consider low-impact activities like swimming, cycling, or using the elliptical. These exercises won’t put as much stress on your shins while still allowing you to maintain your fitness.

Ice

Applying ice to the affected area can help reduce inflammation and ease the pain. Ice your shins for 15 to 20 minutes at a time, several times a day, especially after any physical activity.

Compression

Wearing compression sleeves or socks can help reduce swelling and improve blood circulation, which may speed up the healing process. Compression socks specifically designed for runners are a great option.

Medication

In cases of severe pain, consider taking Nonsteroidal anti-inflammatory drugs ( NSAIDs), like aspirin or ibuprofen, to soothe the pain and speed up recovery.

But be careful not to overdo it.

Research shows that these over-the-counter pills have side effects, like ulcers. That’s why you should only take them for a short period, preferably under the guidance of a certified physician.

Stretching and Strengthening

Building strength and flexibility in your lower legs can make a big difference in recovering from shin splints and preventing them from coming back. Here are some effective exercises to target your calves, shins, and supporting muscles.

Calf Raises. Strengthening your calf muscles is essential for absorbing impact while running, which helps to reduce stress on your shins.

How to Do It: Stand on a flat surface with your feet hip-width apart. Slowly rise up onto your toes, then lower back down with control.

Sets & Reps: Aim for 3 sets of 15-20 reps.

Toe Taps. This simple exercise targets the muscles at the front of your lower leg, helping to balance and stabilize your shin area.

How to Do It: Sit in a chair with your feet flat on the ground. Lift your toes up, then tap them down for 1-2 minutes.

Calf and Hamstring Stretches. Maintaining flexibility in your calves and hamstrings can ease tension in the lower legs, helping to alleviate shin pain and prevent strain.

How to Do It:

Calf Stretch: Stand facing a wall, place one foot back, and press your heel into the ground while keeping your knee straight. Hold for 30 seconds on each leg.

Hamstring Stretch: Sit on the ground with one leg extended and the other bent in. Reach toward your toes on the extended leg, keeping your back straight. Hold for 30 seconds, then switch sides.

Ankle Circles. Strengthening and loosening up your ankle area also supports the muscles around your shin, reducing the risk of overuse injuries.

How to Do It: Sit or stand, and extend one leg. Slowly rotate your ankle in big circles, first clockwise, then counterclockwise, for about 1-2 minutes on each side.

How Long Does It Take to Recover?

In my experience, recovery time varies. The first time I had shin splints, I ignored the signs and kept running until the pain became unbearable. That turned into a two-month recovery process.

The second time around, I caught it early, rested immediately, and was back to running within three weeks. The lesson here? Listen to your body early on to speed up recovery.

In most cases, mild shin splints will improve after a week or two of rest and treatment. More severe cases might take up to six weeks or longer, especially if the pain persists or if you’re dealing with a stress fracture.

When I finally felt ready to run again after dealing with shin splints, I was nervous. The last thing I wanted was to reinjure myself. I started with short, slow runs, focusing on how my legs felt.

Instead of pushing for mileage, I paid attention to my form and made sure to run on softer surfaces to ease back into things. I was able to gradually increase my distance without a relapse, and those small steps made all the difference.

So whatever you do, don’t rush back into running! Start with short, easy runs once your pain has subsided, and gradually build up your mileage.

How to Prevent Shin Splints

After dealing with shin splints multiple times, I’ve adopted the motto: “Prevention is better than cure.”

Here are the best ways to avoid shin splints in the future:

Gradual Progression

Avoid the temptation to increase your mileage or speed too quickly. As I mentioned earlier, the 10% rule is a great guideline—don’t increase your mileage by more than 10% each week. This gradual progression allows your body to adapt to the increased stress without overloading your muscles and bones.

Proper Footwear

Wearing the right running shoes is critical for preventing shin splints. Make sure your shoes provide adequate support and cushioning for your foot type. If your shoes are old or worn out, replace them every 300 to 500 miles to ensure they’re still protecting your feet.

Strengthen Your Muscles


Strength training is key to preventing shin splints. Strong muscles can better absorb the impact of running, reducing the strain on your bones and tendons. Focus on exercises that target your calves, shins, and hips.

Try doing calf raises, toe taps, and lunges a few times a week to keep your muscles strong and resilient.

Improve Your Running Form

Running with proper form can also help prevent shin splints. Avoid overstriding (landing with your foot too far in front of your body), which increases the impact on your shins. Instead, aim to land with your foot directly under your body and focus on increasing your cadence to around 170-180 steps per minute.

Wrapping Up: 

Shin splints can be a frustrating injury, but with the right treatment and prevention strategies, you can get back to running without pain. Remember to listen to your body, take rest days when needed, and build up your training gradually.

Whether you’re a beginner or an experienced runner, these tips will help keep you on the road (or trail) and injury-free.

Thank you for reading!

Got questions or need some tips? Just drop a comment below—I’m here to help!

Happy running, and stay strong!

How To Choose The Best Running Shoes for Flat Feet

how to run with Flat Feet

Looking for the best running shoes for flat feet? Then you’ve come to the right place.

Being a flat-footed runner can be challenging.

But it does not inherently preclude you from running.

In fact, just because you’ve flat feet, it doesn’t inherently mean that you are bound for trouble.

As we are going to see in today’s article, having flat feet shouldn’t discourage you from running, even if you find it difficult to pound the pavement on a daily basis.

So what does it mean to be a flat-footed runner?

Are there any special precautions that should be taken?

what are the best running shoes for flat feet?

These are some of the questions I’ll answer in today’s post.

So, are you excited?

Then here we go.

What You Should Know About Running With Flat Feet

Before I get into how to choose the best running shoes for flat feet, let’s first explain what being flat footed is all about.

Also known as “fallen” or “low” arches, and medically referred to as “Pes Planus,” flat feet are viewed as a postural deformity condition in most fitness circles.

The condition occurs when the tendons, ligaments, and the tiny bones in the foot’s underside collapse, forcing the arch to sit low or completely flat against the ground.

According to conventional thinking, having flat feet is cause for alarm for most adults, and for some, it can cause serious issues.

These include foot pain, leg pain, muscle soreness, back pain, limited athletic ability, overuse injuries, etc.

For these reasons, as a runner, if you’ve trouble with your flat feet, then you must do something about it.

Otherwise, you may succumb to pain.

Surveys show that out of the general population, roughly 20 to 25 have flat feet, so it’s not really an “abnormality,” nor is it uncommon.

The Foot Arch Explained

For us runners, this condition affects one of the most critical components of our physiology: the foot arch.

Made up mostly of tendons, ligaments, and bones, and supported by muscles in the foot, the foot arch has three main arches:

Two longitudinal (medial and lateral) arches that run from front to back, with one on each side.

One anterior transverse arch that runs across the middle of the foot.

All of these three arches play a crucial role in promoting and maintaining all forms of movement, running included.

Most importantly, the foot arch act as a natural shock absorber, helping to reduce impact during the running gait cyle.

In fact, it can bear around 200,000 to 300,000 pounds of stress each mile we walk.

Without sufficient arch support, the impact stresses of a foot strike travel unhindered up the feet and legs, increasing the risk of injury.

Additional resource – How to measure foot size for running shoes

How To Choose The Best Running Shoes for Flat Feet

How to Determine Your Arch Height – The Wet Test

A podiatrist can determine your arch height, but you can also easily do it at home using the wet test.

Here is how

Start by dipping the sole of one of your feet in water, then step onto a piece of paper towel on a flat surface where your footprint will show.

Make sure to put sufficient weight on that foot to leave an imprint behind.

Last up, step away and assess the mark your feet leave.

If you can see nearly the entire bottom of your feet on the surface, then likely have flat feet.

See Image.

How Do Flat Feet Form?

Flat feet do not develop overnight to the overworked or overweight folks of the world.

Most people get it during the course of their lives as they get older without even realizing it.

Only a small percentage of the flat-footed populace is affected by hereditary flat foot.

Sure, flat feet can happen at birth (in cases of rheumatoid arthritis as one example), but any of the following reasons might contribute:

  • Wearing improper shoes,
  • Pregnancy,
  • Aging,
  • Injury,
  • Obesity,
  • Diabetes,
  • Improper training form,

Additional resource – Running shoes for plantar fasciitis

Brace For Pain

According to conventional wisdom, having flat feet can lead to severe injuries, especially when running in the wrong pair.

Examples include plantar fasciitis, Achilles tendinitis, Shin splints, tibialis posterior tendinopathy, etc.

But that’s not a universal rule.

Injuries are prevalent among all runners, regardless of their foot type and/or pronation style.

Even runners with regular arch heights get injured.

So, do you REALLY need special running footwear?

Well, the answer isn’t black and white.

First, let’s look at the theory.

Additional resource – How to recycle used running shoes

Flat Feet and Overpronation

Often than not, having flat feet causes overpronation.

Surveys show that roughly 90 percent of people with flat feet develop this abnormal inward turning of the feet upon foot impact.

Just don’t get me wrong.

Pronation is part of the regular movement of the foot that occurs upon foot strike when walking or running.

This allows the foot to mould to the surface and reduce shock impact.

That said, overpronation occurs when there is excessive pronation following the foot strike.

This places undue stress on the ankle, knee, hips, lower back, increasing injury risk.

Therefore, and according to most experts, flat-footed runners may need special footwear that help stabilize the feet when running.

These will be either stability or motion control shoes that have a steady medial post.

But is there any research backing up these claims?

I don’t think so.

Additional Resource – Overpronation vs Underpronation

The Research

As far as I know, when it comes to injury, flat-footed runners are subject to the same injuries as the rest of us.

There is no conclusive research with a significant sample size and consistent methodology that provides irrefutable evidence that flat-footed runners get injured more than runners with high or neutral arch heights.

Here a few studies to check out.

Research by Lees and Klenerman has found no conclusive correlation between foot type and running injuries, especially with a flat foot “deformity.”

Another research published in the Journal of Sports & Medicine found no direct association between increased running injury risk among beginner runners using a neutral shoe.

And that’s just not the case in the running world.

In fact, little scientific data suggest a link between pes planus and sports injuries to the lower extremities.

I can go on and on about this subject, but a simple Google search will satisfy your curiosity if you want to learn more.

Additional resource – Running Shoes Vs. Cross Trainers

The Bottom Line

As long as you’re not experiencing any pain or issues while running in neutral shoes, there is probably no need for a stability or motion control shoe, even if you’ve incredibly flat feet.

In fact, by simply taking the right training, injury and footwear precautions (like any other smart runner), you’d still manage to run relatively injury free.

Yes, this goes against conventional advice, but just keep mind that shoe producers have a vested interest in you buying their products.

So please don’t be a dumb costumer.

Before you decide on a given pair, take into consideration your personal preferences, running conditions, shoe history, budget, etc.

In the end, the best pair for you could or could not turn out to a shoe from the stability, or motion control category.

Additional Resource – Here’s how to dry running shoes.

Neutral Shoes Cause you Pain?

If you’ve chronic arch or heel pain (and are pretty sure that your neutral shoes are to blame), then consider changing your footwear.

Here is what you need to know about the so-called “flat feet” running shoes.

The Best Shoes For Runners With Flat Feet

If you have flat feet and overpronate, then get a pair that reduces over-pronation and provides more support throughout the running gait.

This is especially the case if you tend to exhibit moderate-to-severe overpronation and/or have had issues running in a neutral pair.

Major running footwear brands have developed specific shoe models over the last few decades catered toward runners with flat feet.

As previously stated, trainers that serve this purpose are commonly known as stability and motion control shoes.

These shoes are designed with a firmer midsole that limits excessive pronation.

Additional resource – Guide to insoles for running shoes

How To Choose The Best Running Shoes for Flat Feet

If you don’t know how to pick the right running shoes, then head to a specialty running store and consult the expert staff in there.

They can analyze your running mechanics, determine your foot type, then suggest the appropriate recommendations.

Just keep in mind that what works for someone else may not work for you and vice versa.

So do you research and be willing to experiment with different models to find the most suitable pair.

Stability Shoes Demystified

Stability shoes are made with layers of polyurethane materials in the arch to provide more stability and support for arches that may collapse upon foot strike.

The primary technology used in stability shoes is a medial post of dual density foam.

This is the gray and firmer piece of foam located on the inner side of the midsole, usually under the heel or midfoot regions—an area highly impacted by overpronation.

Further, these shoes have plenty of cushioning.

Every major shoe manufacturer has their own collection of stability running shoes.

It’s up to you to choose what brand appeals the best.

Just keep in mind that stability shoes are not a ‘one size that fits all.’

They may not work for everyone since not all stability shoes are the same.

The best stability shoes are Adidas Adistar Boost, etc.

Motion Control Demystified

If you’re a severe overpronator, motion control shoes might help.

These are usually the heaviest and most rigid shoes available in the running footwear market.

Motion control shoes are designed with more support in the arch of the foot, provide features such as stiffer heels, and a relatively straight shape/last to counter overpronation.

The best motion control shoes include the Mizuno Wave Inspire 9, Brooks Ravenna 4, etc.

Additional Tips

Keep on reading if you have issues with your flat feet.

Experiment with Barefoot Running

Barefoot running encourages a mid-foot or forefoot strike.

According to research, this may help strengthen your foot’s muscles and tendons, which can improve shock absorption.

So, if it’s all possible, add a few barefoot runs to your running program, preferably on a softer surface, such as grass or a beach.


Massage With a Tennis Ball

Having chronic arch pain?

Then try massaging with a tennis ball.

This exercise stretches the plantar fascia ligament and comes highly recommended by podiatrists and sports experts.

How?

Just place a tennis ball under your foot, then roll it back and forth under the arch for 90 to 120 seconds.

Check this YouTube Tutorial.

Lose Weight

Being overweight can put excessive stress on the ligaments of your feet, resulting in pain.

In fact, the more extra pounds you’re carrying around, the more pressure you exert on your arches.

This is especially the case if you engage in high impact exercise, such as running, on a regular basis.

Having trouble losing weight?

Then these resources can help.

Post 1

Post 2

Post 3

Hot Water Foot Baths

Heat therapy is effective at relieving arch pain and soreness—as long as your feet are not cut, bruised, or injured in any way.

You can either soak your feet for 15 to 20 minutes in a bath of warm water and Epsom salt or simply wet two towels with warm water then wrap them around your feet.

Additional resource – Running shoes for overpronators

Consider orthotics

Orthotics are custom-designed arch supports that may help you reduce pain by relieving pressure from the arch by limiting the rate of pronation, thus, reduce injury risk as related to excessive motion.

There are plenty of options to pick from, but as a rule of thumb, opt for insoles with substantial arch support, allow for enough wiggle room (so you don’t get blisters), and have a flexible sole.

Just keep in mind that not every runner with flat feet is an overpronator, and having a normal arch height does not make you injury proof.

New to Running? Start Here…

If you’re serious about running, getting fit, and staying injury free, then make sure to download my Runners Blueprint Guide!

Inside this guide, you’ll learn how to start running and lose weight weight the easy and painless way. This is, in fact, your ultimate manifesto to becoming a faster and a stronger runner. And you want that, don’t you?

 Click HERE to check out my Runners Blueprint System today!

Don’t miss out! My awesome running plan is just one click away.

Running Shoes for Flat Feet – The Conclusion

There you have it! If you’re looking for advice on how to choose the best running shoes for flat feet then today’s article should get you started on the right foot. The rest is just details.

Thank you for dropping by

Keep Training Strong

The Running Gait Cycle Explained

picture of Running Gait

Looking to learn more about the running gait cycle?

Well, you are in the right place.

In this (sort of technical) short blog post, I’ll teach you about the many components of running gait, gait cycle biomechanics, phases of running gait, and how to analyze your running gait cycle so you can improve your running form and performance.

Sounds great?

Let’s get started.

The Importance of The Running Gait Cycle?

Understanding gait cycle and its many components can help you pick the right running shoes and optimize your performance and training efficiency.

Not only that, learning more about your gait cycle can also help you better assess your running technique and biomechanics, which, in turn, is key for improving it.

Plus, some running experts suggest that assessing the way you run can also offer you many clues to the cause of a particular injury.

These are all valid reasons, if you ask me.

So, are you excited?

Then here we go.

running gait cycle

First things first, let’s define what gait actually means…

What is The Running Gait Cycle?

The gait cycle describes the continuous and repetitive pattern of walking or running —in other words, how we get from point A to point B.

More specifically, gait cycle biomechanics refers to a series of movements of the lower extremities—your legs— during locomotion which starts out when one foot strikes the ground and ends when the same foot strikes the ground again.

The gait cycle typically the same for all of us as it can be split into two main phases.

  • The Stance Phase—when the foot is in contact with the ground, and
  • The Swing Phase—when the foot is not in contact with the ground.

The phases of running gait includes both a stance and swing phase.

Note: During the walking cycle (not the topic of this post), there is a period known as double stance in which both feet are in contact with the ground.

The Stance Phase Of Running

The stance phase is the first phase of the gait cycle.

It begins when your heel makes contact with the ground, and it ends with the toe off.

When it comes to performance & injury prevention, the stance phase is usually under the spotlight as it’s the phase when your foot and leg bear your body weight.

The stance phase equates to roughly 60 percent of the walking gait cycle, and 40 percent of running gait cycle.

Just keep in mind that these proportions are not written in stone as they tend to change as the speed of walking or running increases (or decreases).

The stance phase can be further divided into three stages.

It starts with initial contact, followed by midstance, then propulsion.

Initial contact

Initial contact marks the beginning of the stance phase.

Also known as foot strike, this subphase starts when your foot makes contact with the ground after having been in the air—typically heel, midfoot, or forefoot strike, based on your running speed, running style,  biomechanics, etc.—and ends when the forefoot is in direct contact with the ground.

Think of initial contact as the cushioning phase of the gait cycle.

During this point in the gait, your foot is pronating at the subtalar joint, knee is slightly bent, and leg is internally rotating to help reduce the stress forces from the impact.

Mid Stance

Also known as single support phase, during the midstance, your foot flattens on the ground (moving from pronation into supination) to provide support as your body is moving forward over the leading foot while the other foot is in swing phase.

In essence, during this subphase, your body weight shifts from the back to the front of your foot, preparing for toe off and forward propulsion.

This means that all of your body weight is born by a single leg, which might make it prone to discomfort and overuse injury.

stance phase of running

The Toe Off/ Propulsion

The propulsion portion is the final stage of the stance phase.

It kicks off after the heel is off the ground and ends with the toes leaving the ground.

As you keep pushing forward, the heel starts lifting, while the muscles on the back of the leg—mainly the Gastrocs, Soleus, and Achilles Tendon—contract, resulting in plantar flexion of the ankle, allowing for toe off.

This subphase makes up the final 35 percent of the stance phase.

A common mistake beginners make is leaning too far forwards during the toe off.

This can hinder stride angle and might limit efficiency.

Instead, stay tall, aiming for a slight lean from the ankles.

The Swing Phase Of Running

The swing phase, or the “second phase of running”, refers to the time in which the foot is not in contact with the ground.

During this, your foot is swinging forward.

The swing phase starts with toe off and ends just before the foot hits the ground against, and a new gait cycle begins.

During this phase, your legs cycle through, ready for the next foot strike.

The swing phase is the longest phase of the running gait, making up the remaining 60 percent of the running gait, compared with 40 percent of the walking gait.

The swing phase of gait tends to be less relevant to running biomechanics for preventing injuries than the stance phase as there is no weight being born through the joints and muscles.

The main portion of this phase is known as the forward descent which occurs as the foot is being carried forward while it’s positioned for weight bearing.

Both the knee and the foot are flexed.

The swing phase ends at the heel contact, and a new gait cycle begins.

Additional resource – Guide to running lingo

What Is Running Gait Analysis

Gait analysis is no exercise in futility but a scientifically-based and reliable process.

Gait analysis is a scientific method for finding and understanding biomechanical abnormalities and challenges in your gait cycle.

A gait analysis can help a runner by identifying any underactive or overactive muscles in the feet, which could contribute to inefficiencies and overuse injuries in the future

In simple terms, running gait analysis is a way to assess your running style.

It draws a clear piece of the picture of your unique running technique.

What’s not to like!

The two crucial things that make normal gait possible are your posture and your foot interface with the ground.

Any abnormalities will force you to overcompensate.

This, over the long haul, causes damage and/or injury to the affected limbs.

There’s plenty of various types of gait analysis that you can perform, some more complex than others, and some easier to have done.

Usually, gait analysis requires taking a short video (from the front, rear, and side) of roughly 30 seconds of running on a treadmill in a neutral shoe with little to no cushioning.

This helps the professional to take an in-depth look at what your body looks like and how you move as you run on the treadmill, putting the focus on any abnormalities in your gait.

In general, runners are divided into three main categories: neutral, overpronators, and supinators.

Understanding your pronation type is key for choosing the right running shoes and hopefully helping avoid injury.

running gait analysis

How To Perform Gait Analysis

The cheapest way to analyze your gait involves a relatively quick (and usually free) treadmill test at a running specialty shop.

To get started, you’ll be put in a neutral shoe and start walking, or running, on a treadmill.

Then you run for a short period on the treadmill.

This allows the staff to assess how you’re landing, where you’re landing, and check for any biomechanical deficiencies within your ankles or knees.

The whole testing process may take 15 to 20 minutes.

Once the analysis is done, the staff will show you a frame by frame replay.

By analyzing the way you run and taking into consideration your fitness level, running goals, and injury history, the staff can make the right shoe recommendation that best suits your needs.

Gait Analysis Results

Some of the most common problems revealed and found out by gait analysis include;

  • Heel striking—when the foot lands in front of the hips.
  • Slow cadence—taking longer strides at a lower frequency.
  • Hip drop—caused by a lack of core strength
  • Lack of flexibility and strength, especially in the calves and glutes.

These issues, as well as others, can limit running performance and contributes to overuse injuries.

Running Gait Cycle – The Conclusion

There you have it! If you’re curious about the phases of running and gait cycle biomechanics, then today’s post should get started on the right foot. The rest is just details.

Please feel free to leave your comments and questions in the section below.