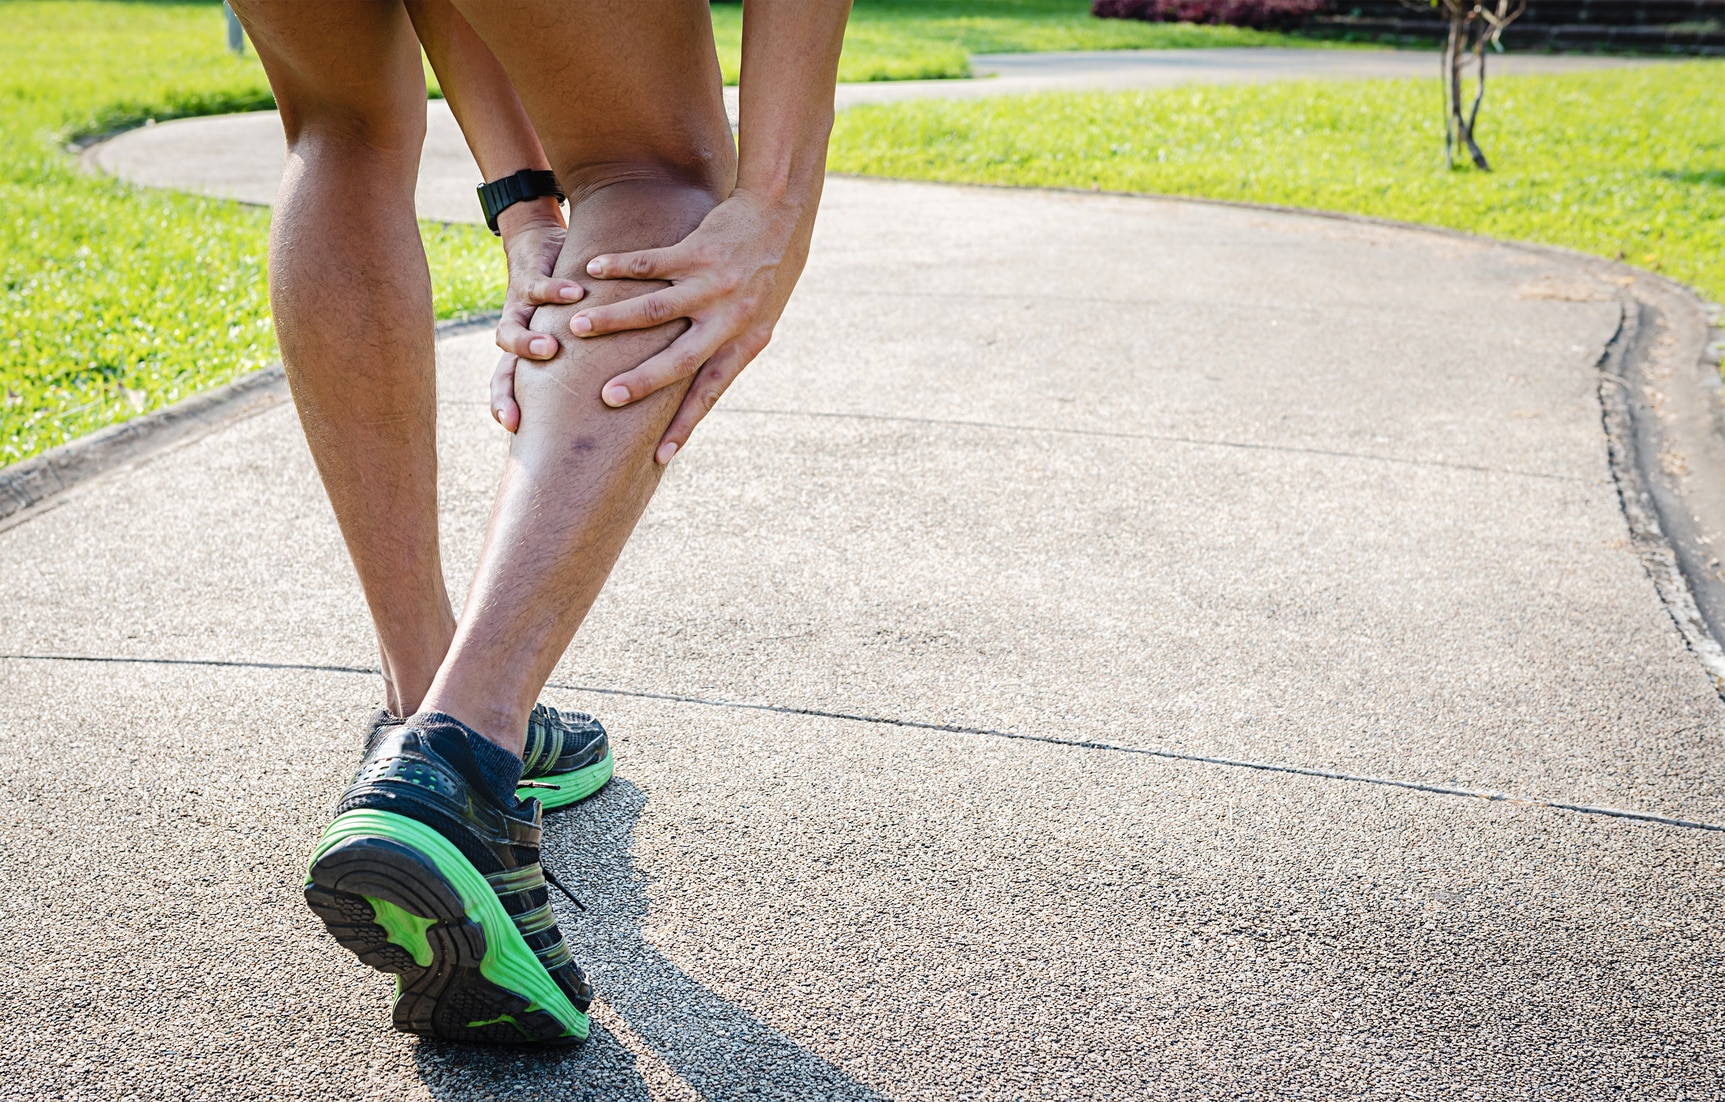
The 13 Best HIIT Running Workouts For Weight Loss

HIIT Workouts For Weight Loss

Looking for the best HIIT running workouts for weight loss?

Then you have come to the right place.

Why HIIT is famous? Simple. Because HIIT running workouts works like a charm for dropping pounds and achieving a healthy weight.

But to get the most out of high intensity training for weight loss, you need to set up your training the right way.

That’s where today’s post comes in handy.

In this article, I’m sharing with you the basics of high-intensity interval training so you can become your own coach and design your own plan.

Here’s a summary of what you’re going to learn by the end of this beginners guide to high-intensity interval training:

  • What is an HIIT running workout
  • Why HIIT is effective for Weight Loss
  • How long do HIIT workouts Should be?
  • How to add HIIT running Workouts For Weight Loss into your Exercise plan
  • When To Avoid High-intensity Interval Training For Weight Loss
  • The Treadmill Shed HIIT Workout
  • The Body Weight Incinerator HIIT Workout
  • The Plyometric Feast HIIT Workout
  • The Full Body HIIT Workout
  • The Hill Sprints HIIT Workout
  • The Weighted HIIT Sprints Workout
  • The Tabata HIIT Workout
  • The Stadium HIIT Workout
  • The Jump Rope HIIT Workout
  • The Staircase HIIT Workout
  • The Medicine Ball HIIT Workout
  • The HITT Sandbag Workout
  • The 30-Minute HIIT Hotel Workout Routine

Brace yourself, you’ll learn a lot and shed a lot!

*Disclosure: This post may contain affiliate links that at no additional cost to you. I only recommend products I’d use myself and all opinions expressed here are our own. 

What is An HIIT Workout?

High-intensity interval training, as the name suggests, consists of intervals of short periods of intense exercise, followed by recovery periods in a circuit or cycle.

During HIIT, you, basically, alternate intervals of all-out-effort performed at 90 to 99 percent of your maximum heart rate with a minimum resting period.

The interval portions may include fast-paced bodyweight exercise, sprinting, or any other challenging movement, whereas the recovery periods usually consist of either low-intensity exercise, such as jogging or walking at a slow pace, or complete rest.

The Effectiveness of HIIT for Weight Loss

Over the last few decades, plenty of published studies have proven, beyond the shadow of a doubt, the impact of interval training on fat loss.

In fact, most of the experiments revealed that HITT to be more effective at shedding the pounds, maintaining (even improving) muscle mass, and increasing fitness than long periods of low to moderate intensity cardio training.

Let’s check out a few:

Study I

Two weeks of high-intensity interval training improves aerobic capacity as much as six to eight weeks of endurance training, according to research presented at the American College of Sports Medicine Annual Meeting.

Study II

Not only do intervals burn mad calories during the workout, but also increase metabolism for more than 24 hours afterward, research shows.

This means that you keep burning calories at a higher rate long after you have finished exercising.

Study III

Overweight subjects doing HIIT style workouts for an 8-week period dropped more than two percent in body fat as compared to those who followed a moderate steady-state cardio routine on the treadmill, according to research out of the East Tennessee State University.

Study IV

Research out of Australia revealed that female subjects following a 20-minute interval routine, (consisting of 8-second sprints followed by 12-second rest periods), lost about six times more body fat than the group who opted for a 40-minute steady-state cardio training at 60 percent of maximum heart rate.

I hope by now you’re already getting the big picture.

Whether you’re looking to lose 10 pounds, 20 pounds, or even more, HIIT delivers.

How To Make HIIT Running Workouts Work For Weight Loss

The key to burning a lot of calories while doing high-intensity interval training lies in how hard you push yourself during the intense intervals.

As a rule, aim to train at roughly 90 percent of your max—this is what’s known as training in an anaerobic mode.

This is the equivalent of 8 to 9 on the rated perceived exertion scale.

How long does an HIIT running workout for weight loss Should Be?

Here’s more good news.

You don’t need a huge time commitment to get the most out of HIIT.

In fact, research has reported that even doing as little as 10 minutes of HIIT workouts can have a huge positive impact on health.

Individuals with insulin resistance risk, for example, can benefit from doing a HIIT workout. Running can help increase insulin sensitivity, specifically when you vary your speeds and intensity throughout a much shorter time. This will help your body use blood glucose more effectively, thus reducing blood sugar levels. 

Here’s how to add HIIT workouts to your exercise plan:

  • Two to three days of strength training per week
  • Two to three HIIT workouts at 20 to 30 minutes.
  • One long steady-state cardio day –45 minutes or longer.

Be Careful

If you’re a beginner and/or are out of shape, don’t go 100 percent all out at once.

Instead of performing intervals at near-maximum capacity, do fewer than you think at closer to 80 to 90 percent of maximum effort, then take plenty of rest between each round to let your body fully recover.

Don’t chew more than you can swallow—or else, you’re going to regret it.

What’s worst than regret?

Stopping training altogether because you got injured or burned out.

You don’t want that.

Additional source  – How to run to lose belly fat?

When To Avoid High-intensity Interval Training For Weight Loss

If you’re a complete beginner with no fitness experience or recovering from an acute injury, HIIT is not for you (not yet until you pass the acute phase).

As a beginner, aim first to build your endurance and strength doing plenty of walks, jogs, and total body strength training.

This should be the foundation of your training.

Once you feel that your body is up to the task, start HIIT training but do it in a slow and gradual manner.

In case you’re dealing with an injury, let’s say shin splints, then take up HIIT once you’re pain-free and/or already have the green light from your doctor.

Don’t get too excited—or else, if you try to push through pain, you may make your injury worse.

HIIT Workouts For Weight Loss

The Best HIIT Workouts For Weight Loss

To jumpstart your HIIT program, I’ve compiled a short, but very effective, list of my favorite interval workouts for weight loss.

Pick one or two—or all of them—to add to your weekly training routine.

Just whatever you do, stay within your fitness level the entire time—that’s how you get fit (and slim) without getting hurt.

Remember to include at least one day of recovery between workouts as these routines are super challenging.

The rest is just detail.

HIIT Running Workout 1 – The Treadmill Shed Routine

Start the routine with a 5-minute jog to get your mind and body ready for the intense work ahead.

Then choose a treadmill speed that you can sustain for no more than 30 seconds.

You can also add a 4 percent incline for more intensity.

Next, perform eight to ten intervals for 30 seconds, followed by 90 seconds of recovery.

Make sure you push yourself during the interval, shooting for at least 8 to 9 RPM on a scale of 1 to 10.

Then slow it down to bring your breathing and heart rate back to normal.

Last up, finish the session with a 5-minute slow jog cool-down.

Then stretch your muscles.

HIIT Running Workout 2 – The Body Weight Incinerator

start your routine with a 5-minute slow to jog to warm up.

Then perform another five minute of dynamic routine just like this one.

Continue by performing 12 to 16 reps of the following exercises in the order shown for 30 minutes.

Take 10 seconds of rest between each exercise.

  • Squats
  • Sit-ups
  • Push-ups
  • Jumping jacks
  • Long lunges

Rest for one to two minutes, then repeat the circuit for four to five times.

Once you’re done, perform this stretching routine as cool-down.

HIIT Non-Running Workout 3 – The Plyometric Feast

Following a 10-minute dynamic warm-up, complete the following seventy moves in order with no rest in between.

  • Squat jumps – 20 reps
  • Plyo push-ups (on your knees if you have to)—8 reps
  • Jumping lunges—10 reps on each side
  • Burpees – 15 reps
  • Lateral lunge jump – 15 reps

Take a one-minute break between each round.

Shoot for eight to ten rounds.

HIIT Running Workout 4 – Hill Sprints

Hill sprints, also known as hill repetitions, are the most powerful form of sprints that there is.

They help you sculpt a killer core and lower body strength, Also, ward off leg injury because of the position of your body and the shorter stride.

Here’s how to get started.

Look around your neighborhood and find a hill with a steep slope that is at least 50 yards long.

The longer, the better.

begin your session with a warm-up, then sprint up the hill at 70 percent of your max effort.

Walk down for recovery and do no more than five sprints at about 80 percent of your maximum effort.

Finish the session with a slow five-minute jog on a flat surface, followed by a 15-minute static stretch for all of your major muscle groups—especially the calves, hamstrings, and the gluts.

Additional Resource – Here’s how to much to run to lose weight

HIIT Running Workout 5 – The Weighted Sprint

Adding weighted vests to your sprint workouts makes them more challenging, thereby increasing energy expenditure.

You’ll feel much lighter on your feet once you remove the vest.

Strap on a weighted vest—weighing no more than 10 pounds for starters—and perform your interval sprints on a track.

Don’t go full throttle on your first sessions.

Get your body familiar with the new workload, the, aim for heavier vests and more sprints,

And Keep pushing your body as hard as you can.

Additional Resource – Your guide to weighted vests for running.

HIIT Running Workout 6 – The Tabata Routine

Tabata inspired workouts have been dubbed the “4-minute fat-burning miracle workout” because they help you increase aerobic and anaerobic capacity, along with overall fitness level like nothing else.

To do Tabata training right, make it your goal to push as hard as possible for 20 seconds, rests for 10 seconds, then repeats this on-off pattern for a total eight times, taking four minutes to complete one Tabata round.

After a thorough warm-up, perform the following four rounds, aiming to complete the whole workout in less than 20 minutes.

High Knees

Assume an athletic position with feet hip-width apart, back flat and core activated.

Next, perform high knees by jumping from one foot to the other at the same time, bringing the knees up to waist level.

You can also bring your palm in front of your waist, attempt to touch your palm with your knees as quickly as possible.

Make sure you’re pumping your arms and landing on the balls of the feet as they run in place as fast as possible.

Continue for 20 seconds, rests for 10, and then repeats the cycle eight times.

Squats

Stand tall, feet hip-width apart, with most of the weight on the balls of the feet.

Next, while keeping the back flat, core engaged, and knees tracking over the toes, squat down, sitting back until the knees are bent at a 90 degrees angle.

The goal is to strengthen your glutes, not showing it off.

So make sure you don’t over curve your lower back.

Last up, press back up to standing position and repeats.

Continue for the full 20-second interval, then rests for 10 seconds, and repeat the cycle eight times.

Additional resource – How to measure body fat percentage

Burpees

Begin stands with feet hip-width apart, back flat, and core activated.

Next, squat, place your palms on the floor, then kick the feet back to end up in a full plank position, quickly hop the feet back into the squat, and finally explode up in the air, reaching the arms overhead.

Perform as many burpees as possible for 20 seconds, rests for 10 seconds, then repeat the whole cycle eight times.

Jumping Lunges

Assume a lunge position with the left foot forward, both knees bent at a 90-degree angle, with the right knee almost touching the floor.

Next, while keeping the torso straight and core engaged, have your client jump up as high possible, swapping leg position mid-air. immediately jump up back again to starting position and repeat.

Continue jump lunging for 20 seconds, then rests for 10 seconds, repeating the whole cycle eight times.

HIIT running Workouts For Weight Loss

HIIT Non-Running Workout 7 – The Sleds Routine

Sled training is a grueling workout with a simple premise:  you push the sled from point A to point B as fast and as hard as possible with good technique.

Here’s how to proceed.

Load a sled with two 45-pound plates on each side.

Next, push the sled for the given distance without stopping, pause, then push back to starting position.

As you move forward, keep a straight line from head to ankle throughout the exercise, with the power coming from the hips and legs.

To do that, press and drive the feet diagonally into the ground with each step they take.

Rest for one minute and repeat for five to seven more times.

Push the sled with perfect form at all times.

HIIT Running Workout 8 -The Stadium Routine

Feeling trapped in the gym?

Hit the stadium.

In fact, you can get a lung-busting, muscle-burning session only by using the nearby stadium as a gym.

Here is an interval stadium workout routine to help you get into the best shape ever.

Perform the following exercises back to back, taking a 30-second rest between each exercise.

Aim to complete two to three total rounds.

Sprints

Start at one end of the straightway section of the track, then sprint full effort for 100 meters.

Rest for 30-seconds, then sprint back to the starting position.

Stair sprints

Run up the steps as fast as possible while driving your knees up and pumping your arms quickly and powerfully to keep momentum.

Then briskly walk down to starting position.

Double-step run

Sprint up the stairs as fast as you can while striding powerfully enough to skip every other step.

Double-leg hops

Begin by standing facing a series of steps with feet shoulder-width apart.

Assume a slight squat position, with your upper body, align or lower than your lower body then jump up and forward onto the first step, and land softly, knees slightly bent.

Pause, and then jump onto the second step and so on.

Continue making your way up to the top of the stairs until you reach the last step, then turn around and slowly walk back down.

HIIT Workout  9 – The Jump Rope Routine

Jump rope is a crucial training part of many sports, including tennis players, boxers, runners, and martial artists.

It’s also very convenient.

All you need is a properly-sized jump rope, and there you go.

Here’s one of my favorite jump rope routines:

Forward jump (basic jump)

Swing the rope over your head and jumps over it with both feet on every rotation.

Make sure you’re not jumping too high, just high enough to clear the rope.

Continue for one to two minutes, then recover for 30 seconds before moving to the next exercise.

Alternate-foot Jump

Instead of hopping over the rope, alternate the feet as if running in place.

Stay on the balls of the feet the entire time.

Continue for one to two minutes to finish one round.

Side-to-side Jumps

While opting for the basic jump, jump a few inches from side to side, using both feet.

Continue for one minute to finish one round.

Double Jump

Jump high enough in the air, or swing it fast enough, to pass the rope under the feet twice before landing.

Continue for 30 to 60 seconds to complete one set.

Single Foot Hops

Start hopping over the jump rope with the right foot for 30 seconds, then switch to the left foot and repeat.

Be sure to switch sides without stopping.

Aim for one-minute hops on each foot.

Additional link – Slow running vs fast running for fat loss

HIIT Running Workout 10- The Staircase Routine

Stair climbing exercises tone the calves, quads, glutes, and other lower body muscles without putting too much stress on the joints since it has less impact on the body.

Perform each exercise for 30 seconds to one minute, try as many reps as possible with good form.

Rest for one to two minutes between each circuit and aim to repeat it two to three times.

Sprints

Start facing the bottom of the stairs.

Next, while keeping the chest up and back flat, sprint up using each step as fast as possible.

Make sure you’re pumping your arms by the sides and making contact with each step.

Then, walk down for recovery and repeat.

Mountain Climbers

Assume a plank position with the hands on the second step, arms straight, legs extended, and core engaged.

Next, bring the right knee to the chest as close as they can, return to the starting position, then switch sides.

Continues alternating legs, bringing one knee at a time to the chest as fast as possible without losing form for one minute to complete one set.

Skip a Step

Sprint up the stairs, jumping high enough to skip two, or three, steps at a time.

Last up; walk down for recovery and repeats.

Additional resource – Here’s how long does it take to lose 100 pounds.

Stairs Decline Push-ups

Begin facing away from the bottom of the staircase and then assume a plank position with hands on the floor slightly wider than shoulder-width, and feet on the second or third step.

while keeping your body straight, perform a push-up by bending the elbows and lowering the upper body to the floor, then push back up until arms are fully extended to complete one rep.

Squat Jumps

Start facing the stairs, lowers into a squat, then while engaging the core and using both feet, jump up to the next step, landing in a squat.

As soon as you land in the squat, have them hop up to the next step, and continue until they reach the top of the stairs.

Just pay attention if you’re dealing with any ankle pain.

Walk down for recovery and repeats for one minute to complete one set.

Hop-ups

Stand tall, feet slightly more than shoulder-width apart and core engaged.

hop up and down from the first or second stair for one full minute without stopping to complete one set.

Rest for one to two minutes then repeats the whole circuit two to three times.

Additional resource  – Trx exercises for runners

HIIT Non-running Workout 11 – The Medicine Ball Routine

I love exercising with medicine balls.

They are fun, versatile, and challenge my body in ways that other workout routines can’t even come close.

Plus, med ball moves tend to be full-body exercises, instead of just an ab or a chest press, so they are really time efficient and enjoyable.

I typically prefer to use the Everlast medicine ball.

This brand comes in a variety of shapes, colors, and weights, and I love its textured surface, which ensures superior grip and handling ($50 – Get it Here).

If you are looking for durability, then get the Elite Power Medicine Ball.

This brand is perfectly balanced, bounces very well and it’s incredibly durable ($67 – Get it Here).

Another brand I love is the Nike Med Ball.

This one is mainly made with rubber and bounces very well, so it’s ideal for functional weight training ($25-100 – Get it Here).

Toe Touch

Begin by laying down on your back while holding a med ball in both hands, both legs raised and straight so they perpendicular to the ground.

Next, raise your torso and arms off the floor until the ball taps your toes, pause for a second, then slowly lower your torso down.

Make sure to keep your legs touching and in position the entire time.

Do 10 reps to complete one set.

Shoot for three sets.

Squat to Chest Pass

Start off by standing 3 to 5 feet from a wall with feet shoulder-width apart while holding the ball in hand at chest level

Next, to perform this exercise, drop down into a squat position, then explode up and toss the ball against the wall as hard as possible by pushing it outwards from your chest.

Then, seize the ball as it bounces back in one continuous action and moves into the next rep.

Then, repeat as fast as you can.

Do three sets of 16 reps each.

Suitcase Crunch

Lay on the floor on your back while holding a med ball, using both hands.

Make sure your arms are fully extended overhead.

Next, lift your torso, bend your right knee toward your chest then take the ball over your knee and toward your foot, pause for a moment, then gradually come back to the starting position.

Switch sides to complete one rep.

Do 8 reps to complete one set.

Aim for three sets.

Diagonal Chop

Assume an athletic position while holding a med ball at head height, hands on each side of the ball.

Next, while keeping your core activated and back straight, bring the ball down as hard as you can (imagine that you are chopping wood with the med ball), then bring it back up to the starting position.

Do 12 reps to complete one set.

Aim for three sets.

Overhead Slams

Stand tall feet shoulder-width apart, knees slightly bent, core engaged with a slam medicine ball held overhead.

Next, slam the ball down into the floor with as much power as possible.

Make sure to exhale during the slam and engage the core muscles.

Last up, pick up the med ball and lift it back to the starting position repeats.

Do 16 to 20 reps to complete one set.

Aim for five sets.

Medicine Ball Sit-up Throws

Start by laying down in a sit-up position on the floor with knees bent, facing a wall, or a partner.

Next, while holding the ball overhead with two hands crunch up and explosively throw the ball back to either against the wall or a receiver (a standing partner).

Last up, catch the med ball and repeats it.

Do 12 to 16 reps to complete one set.

Russian Twists

Begin by sitting on the ground with your knees slightly bent, back straight, and feet flat (easier) or raised up (more challenging).

That’s your starting position.

Next, while holding the med ball at chest level, lean back, engage your abs, then slowly rotate the ball around your mid-section to the right side, pause and tap the ball on the floor just outside of your right hip, then pull the ball back into your chest and repeat the motion on the other side to complete one rep.

Do 8 reps to complete one set.

Aim for three sets.

Bulgarian Split Squat with Medicine Ball

Hold a medicine ball in front of your chest with the top of the left foot on a bench behind you.

Your feet should be at least three feet apart.

Next, squat down as far as you can as you lower the ball toward the left thigh, pause for a moment, then push back up, lifting the ball above the right shoulder.

That’s one rep.

Do 10 reps on each side to complete one set.

Shoot for three sets.

Lunge to Rotation

Hold a medicine ball a few inches in front of your chest, then take a step forward into a lunge without letting the knee go over the toes.

Next, get deep into that lunge, then rotate your torso across your front leg, reaching the med ball to your right, pause for a moment, then reverse the movement back to starting position and repeats on the other side to complete one rep.

f you are looking for an explosive way to perform your medicine ball workouts, then you came to the right place.

Slam medicine balls exercises are an excellent way to increase explosive strength and power.

Here is a slam ball workout routine that will help you increase your range of motion and improve speed and explosiveness like nothing else.

Perpendicular Wall Ball Toss

Begin by standing about two to three away perpendicular to a wall, with the right hip closest to the wall and while holding a medicine ball in front of the waist.

Next, while engaging the core and extending the hips, throw the med ball toward the wall with as much force as possible for it to rebound back.

Catch the med ball and move immediately to the next rep.

Keep the back flat and chest up the entire time.

Shoot for 16 to 20 reps on each side to complete one set.

Medicine Ball Squat Throws Sprints

Stand tall, feet hip-width apart, while holding a med ball at chest level.

Squat down, then explode forward by extending both arms and legs and throwing the med ball forward with both hands.

As soon as the ball hits the floor, sprint forward until you catch up with the rolling ball, then repeat the squat-throw-chase eight to ten times to complete one set.

HIIT Non-Running Workout 12 – The Sandbag Routine

Sandbag training is another efficient way to do high-intensity interval training for weight loss.

To get started, you’ll need a bag.

You can either buy one, or make your own by following these steps:

  1. First of all: gather your materials. To make a sandbag you will need a duffle bag (make sure it’s resilient and can withstand abuse), a builder’s sandbag, sand (duh!), duct tape, and zip ties.
  2. Next, fill the builder’s bag with sand, wrap the top tightly then seal it tight with duct tape, and zip ties
  3. Finally, add the builder’s bag of sand directly in the duffel bag, then zip it shut. Make sure to leave enough wiggle room inside of the bag for the sand to splatter around.

Now put the bag to work, and do this powerful bag training routine to help you become the best runner (and athlete) you can be.

If you don’t want to make your own sandbag, then there are plenty of awesome commercial specialty sandbags designed with hardcore training in mind.

Perform the following workout as a circuit, and do the exercises in the order shown, performing as many reps as you can with good form.

Shoot for at least three complete sets of the circuit.

Sandbag Deadlift

Begin by standing with your feet right next to the bag, then grip the parallel handles or the material of the bag.

Next, tuck your toes under the bag, keep a neutral spine, with knees slightly bent, then take the slack out of the bag, and stand up straight, pulling the sandbag up as you lift your back.

Make sure to keep the sandbag close to your legs throughout the lifting motion.

Your back should be straight the entire time—never round your lower back when you pick up or lower the bag.

This is the recipe for lower back pain or herniation.

Last up, push your hips back and slowly return to starting position.

That’s one rep.

Sandbag Power Clean

Begin by standing behind the bag, feet parallel, and at hip-width.

Next, while keeping the sandbag closer to your shins, and knee slightly bent, bend over and pick up the bag by the side hands, lift it from the ground, and then explosively pull it upward by extending your knees and hips.

Next, and in one fluid movement, descend into a squat, then uncurl the sandbag and take it down to the floor returning to starting position.

That’s one rep.

Sandbag Rotational Lunge

Begin by grabbing the handles of the sandbag in each hand so that your palms are facing each other.

Next, while standing tall with feet together and sandbag to knee height, step your right leg forward, lunge, then bring the sandbag over your front leg’s knee and rotate through your waist.

Make sure to keep your back flat and core engaged the entire time – allow for no rounding forward, especially as you rotate with the sandbag.

Last up, while keeping your balance, push back to starting position, and switch sides to complete one rep.

Sandbag Front Squat

Start with feet shoulder-width apart, with toes slightly turned out, then clean the bag to the front position.

Next, push your hips back and squat down until your thighs are parallel to the ground, then drive the hips back upwards and press back to standing.

Squat in a slow and controlled manner and work your hamstrings and glutes as hard as you can.

Make sure to keep your knees tracking over your toes, knees in line with the feet, your elbows tight and body upright the entire time.

Thrusters

stand with your feet shoulder-width apart, back straight and knees slightly bent, then grab a hold of the bag, pick it up and hold it at shoulder height.

Next, while keeping the weight at chest heights the entire time, squat down, pause for a moment, then stand back up and push press the sandbag overhead until your arms are almost locked out.

Last up, return the weight to the chest and repeat the movement to complete one rep.

Around The World

Stand with your feet shoulder-width apart, and hold a sandbag in front of you.

Next, pivot to your right and use your whole body to swing the bag quickly over and in a circle over your head to the left side.

Make sure to generate enough momentum and to keep your elbows in tight to prevent shoulder injury.

Instead of slowing down use your arms, legs, and core to swing the sandbag back to its original position, and complete one rep.

Repeat for 8 reps to complete one set.

HIIT Non-Running Workout 13 -The Hotel Routine

Traveling a lot and are afraid to miss your own HIIT workouts for weight loss?

This routine will have you covered as it will help keep your body in check when on the road.

I came up with this workout while in Kuala Lumpur for a short vacation.

I stayed in one of these four start hotel rooms with some fantastic facilities (and it wasn’t that expensive).

The workout consists of eight exercises, and the total workout is 40 minutes routine (including the 5 minutes warm-up and cooldown).

This routine will raise your heart rate, burns mad calories, builds muscle, and most importantly—challenges you physically and mentally.

Rows with Luggage

Stand with your feet hip-width apart while holding a suitcase horizontally by the ends, knees bent.

Next, while keeping the back flat, lean forward, hinge at the hips, then pull the luggage to your chest, driving the elbows straight back next to your ribs and drawing the shoulder blades together.

Hold for a moment, then lower it back down.

Repeat for 12 to 15 times.

Pushups

Assume a plank position, core engaged, tailbone tucked in, and fingers spread wide.

Next, while engaging the core and keeping the back flat, bend your arms and lower down until your chest almost touches the ground, then press back up.

Do ten reps.

Luggage Overhead Presses

Begin standing with your feet hip-width apart with the luggage at chest or shoulder height—as in a front squat.

While engaging the core and keeping the back flat, press the luggage upwards and above your head.

Make sure your arms go to full extension.

Keep your head slightly in front of the arms at this point of the extension.

Chair Dips

Sit on a chair then grip the edge with both hands, knuckles pointing forward.

Next, slide your bottom off the chair just far enough that your butt clears the edge of the chair, then hold yourself with arms straight.

Slowly lower your body until your elbows are bent 45 and 90 degrees, then raise yourself up. Just make sure your elbows are pointing directly beneath you, not out to the side.

Planks/sphinx

Begin on the floor on your hands and knees.

Next, bend your elbows 90 degrees and lower your forearms to the floor with the elbows positioned under your shoulders and hand shoulders width apart.

Make sure your elbows are directly beneath your shoulders and that your body is forming a straight line from head to ankles.

Hold the position for as long as you can.

Shoot for one to two minutes hold

What Muscles Does Running Work? (2023 Update)

Looking to learn about what muscles does running work?

Then you’re in the right place.

Different muscles are used when you log the miles.

In fact, hundreds of muscles work together to propel your body into the forward motion.

But, some running muscles are more important than others.

Here are the muscle groups that targeted, worked, and used, during a running workout.:

  • Quadriceps
  • Hamstrings
  • Gluteals
  • Hip Flexors
  • Calves
  • Thoracic Diaphragm
  • Tensor Fascia Latae
  • Flexor Hallucis Brevis or Longus
  • Tibialis Anterior
  • Peroneals
  • Core Muscles
  • Upper Body Muscles (chest, back, shoulders, etc)

Let’s break down the main muscles used in running, explain their importance, what can go wrong with them, and most importantly, how to strengthen and condition your running muscles.

*Disclosure: This post may contain affiliate links that at no additional cost to you. I only recommend products I’d use myself and all opinions expressed here are our own. 

Muscle Anatomy – An Introduction

 The human body is an amazing piece of “machinery,” and muscles are a big part of what drives it.

Your muscle tissue consists of protein filaments of actin and myosin.

These  slide past one another, producing contractions that shift the shape and length of the cell muscle function to generate motion, force, and torque.

Some of the muscles primary functions include:

  • Moving your body
  • Keeping you upright,
  • Protect internal organs
  • Generating heat,
  • Supporting organ functions
  • And so much more

The Main Muscle Tissue

 There are three distinct types: cardiac, smooth, and skeletal.

Each type serves a specific role in the body, with a particular structure and a definite function.

Let’s break down each.

The Cardiac Muscles

 Cardiac muscles are found in the walls of the heart.

These are striated—meaning that the muscle fibers contain alternating light and dark bands.

This type of muscle fiber is under the control of the autonomic nervous system — meaning you can’t control the contraction.

Can you imagine if cardiac muscles can be controlled?

That’s gonna be like playing God.

Cardiac muscles are also highly resistant to fatigue thanks to the high concentration of mitochondria, myoglobin, and a decent blood supply allowing for constant aerobic metabolism.

Smooth Muscles

What’s known as the muscles of the organs, smooth muscles are found in the walls of hollow internal structures, such as the stomach, urinary tract, respiratory tract, and in the walls of blood vessels.

Smooth muscles are pretty flexible as they can change shape to regulate bodily functions, such as blood pressure, digestion, breathing, raising hairs, focusing eye, etc.

Skeletal muscles

 Last but not least, you also have skeletal muscles (the topic of today’s post).

Skeletal muscles are made of very elastic fibers connected by tissue and named for their location—attached to the bones.

The human body contains more than 650 named skeletal muscles, accounting for about one-third of the human body mass.

Skeletal muscles responsible mostly for movement when performing any form of physical activity, including running.

What Muscles Does
Running Work

Now that you understand a bit what muscles are all about, let’s look into the main muscles that running works the most.

The Quadriceps

As you move your leg forward, you’re primarily using the quadriceps muscles, the muscles located on the front of the thighs.

The quads run from the hips and upper femur down to the patella—the kneecap.

They consist of a group of four muscles that include:

  • The Vastus Medialis,
  • Vastus Intermedius,
  • Vastus Lateralis (vastus externus), and
  • Rectus Femoris. See picture.

 Functions Of The Quadriceps:

 Extending the knee, especially during the “drive” phase.

  • Hip flexor. Bending your hips. Your rectus femoris (see picture) is responsible for flexing the hips—the motion necessary to lift your feet off the ground.
  • Straightening and stabilizing your knees during running gait as the four heads of the quad are connected to the patella—the kneecap.
  • Absorbing the shock of impact upon landing, then dispersing it as it passes through the rest of the body.

 Downsides of Weakness

 A common dysfunction among many runners is having excessively stronger quadriceps than the hamstrings, the opposing muscle group.

This can have an adverse impact on leg posture and proper positioning, increasing the risks of overuse injury in the lower back, pelvis, hips, and knees.

Exercises For The Quadriceps

 Leg extensions

The Hamstrings

 As your body moves forward, the action switches from the quads to the hamstrings.

The hamstrings span two joints—the hips and knee and are made up of four muscle-parts.

As pictured, these consist of:

  • The biceps femoris, (two parts: long head and short head).
  • The Semitendinosus, and
  • The Semimembranosus

Functions Of The Hamstrings

  • Initiating knee bending as your body moves forward
  • Flexing your knees, causing your feet to move back toward your butt. This helps provide power to propel you forward.
  • Assisting the extension of thighs by moving the upper leg backward.

Downsides of Weakness

As I mentioned earlier, a lot of runners have weaker and/or tighter hamstrings in comparison to the quadriceps.

What’s more, chronic hamstring inflexibility is also widespread in runners who have a sedentary lifestyle.

This can affect the efficiency of the kinetic chain at the hip and knee, increasing the risks of pain and injury.

For these reasons, if you’ve hamstrings limitations, you’re more like to suffer from:

(1) Hamstring strain and tears, which is caused by the muscle’s inability to withstand the load generated by the contracting quad.

(2) Limited running performance due to limited ROM and the diminished power from the knee extensors and hip flexors.

Exercises 

  • Deadlifts
  • Lying leg curls
  • Hamstring pushups
  • Dynamic stretches (think yoga)

The Gluteal

 “Wanna have a perky ass?

Train your glutes!”

Consisting of three overlapping muscles: the Gluteus Maximus, medius, and minimus, the glutes are located in the buttocks and are the main source of power when logging the miles.

Functions of The Glutes

  • Stabilizing your hips and legs.
  • Extending the hip, then straightening it beneath you.
  • Lateral hip rotation as you swing your leg to the outer part of your body.
  • Keeping your posture straight, and the trunk stable and upright.
  • Maintaining proper knee alignment while running.

 Downsides of Weakness

 Sitting for prolonged periods of time can tighten and weaken the glutes, causing bad posture and limiting power output.

This leads to excess stress on the lower back, knee pain, contributing to all sorts of running injuries.

For example, research of Div.

III collegiate athlete revealed that subjects who reported suffering from “patellofemoral pain”—the technical name for knee pain—had drastically weaker hip abductor and external rotator muscle of the affected limb.

Exercises 

  • Squats
  • Sumo squats
  • Walking lunges
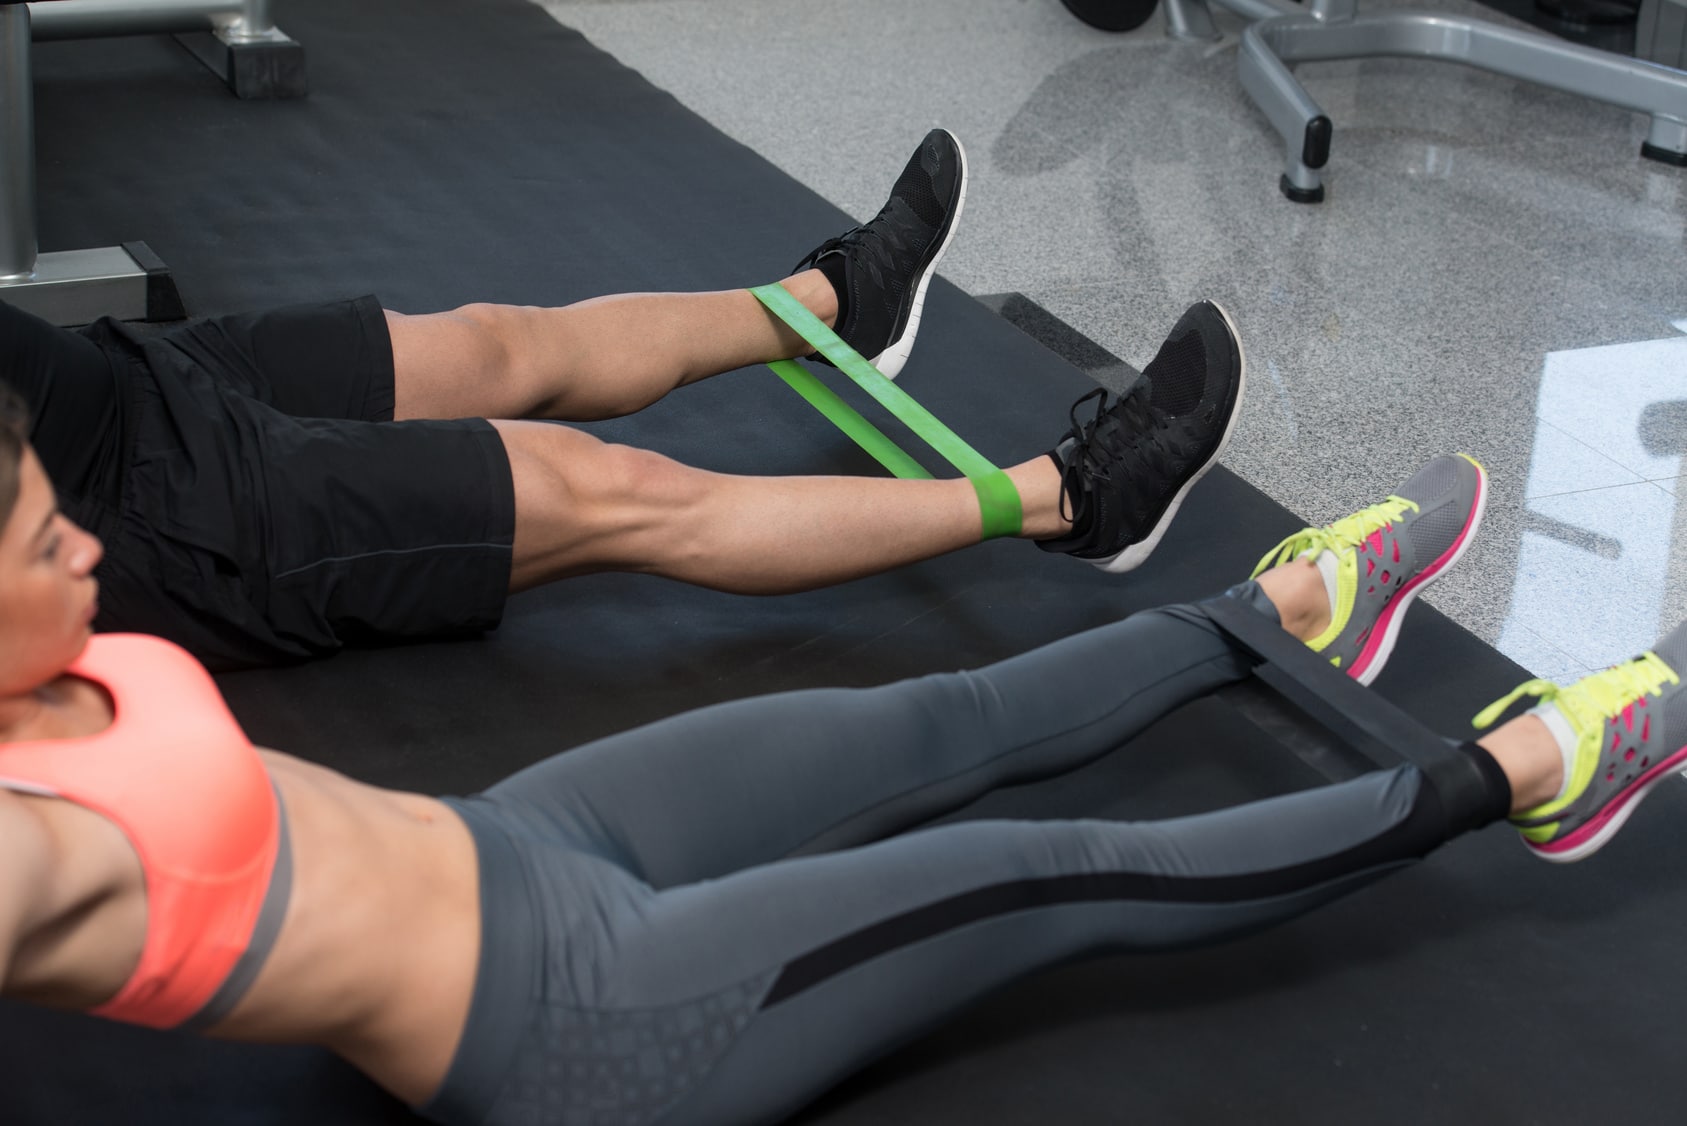
  • Clamshells (resistance bands version)
  • Glute bridges

Hip Flexors

 The hip flexors are the muscles located on the front of the hip, just above the thighs.

Also known as the iliopsoas, every time you lift your leg for any movement, whether when walking, running, or doing any sort of leg lifting motion, the hip flexors are called up into action.

The hip flexors are made of two muscles: the iliacus and the psoas major.

The psoas major is the largest of the muscles, stretching from the  T-12 spinal vertebrae to the L5 spinal vertebrae and there it attaches to the femur—your thigh bone.

Functions of The Hip Flexors

  • Moving your legs forward and back while working in conjunction with the hamstrings and quads.
  • Stabilizing the hip joint.
  • Developing good running posture and form.
  • Maintaining a standing position (in conjunction with the muscles of the lower leg, core, neck, and shoulders).
  • Stabilizing the pelvic region while keeping the hips level.

 Downsides of Weakness

 Research conducted at Stanford University found that knee-pain prone runners had a relatively weaker hip strength when compared to injury-free runners.

The good news is, most of the injured runners were able to return to training following a six-week hip strengthening training program.

What’s more?

Weak iliopsoas are often blamed for hip pain.

So, if you have a history of hip pain, consider strengthening or stretching these muscles more frequently.

You can also consult a certified physician or a chiropractic specialist for more.

Exercises

  • Weighted hip extensions
  • Bridges
  • Runners lunges
  • Skaters squats
  • Pigeon
  • Seated butterfly stretch

Additional resource – Guide To BCAAs for Runners

The Calves

The calves are the muscles located on the back of the lower leg, below your knees.

They consist of:

  • Gastrocnemius (outer calf), forging the clear bulge beneath the skin and
  • Soleus (inner calf), which is the flat muscle lying underneath the gastrocnemius muscle.

The two calf muscles attach from the end of your femur to the Achilles Tendon, which inserts into the calcaneus, the heel bone.

Functions of The Calves:

  • Providing spring in your step as they help in pushing off the ground to move forward.
  • Extending and flexing each foot as you land and push off.
  • Providing movement around the ankle joint and the phalanges.
  • Maintaining balance and ankle flexion.
  • Reducing the shock impact.

 Downsides of Weakness

 According to research, calves weakness/dysfunction may contribute to a host of injuries, including calf strains, shin splints, Achilles tendonitis, plantar fasciitis, and even hip or hamstring issues.

For instance, weak calves can place excessive strain on the Achilles and damage the fibers that make up the tendon.

Painful?

Sure.

Exercises

  • Calf raises
  • Farmer’s walk on toes
  • Toe lunges
  • Jump rope
  • Dumbbell jump squat

The Peroneals

The peroneal consists of a group of muscles located in the lower leg bone, or the fibular—the reason they’re often referred to as the fibularis or fibular muscles.

The peronerals are made up of three muscles: the peroneus longus, brevis and tertius.

The longest and most superficial of these is attached near the head of the fibula then courses down most of this bone.

The functions of The Peroneals

  •  Assisting ankle movement.
  • Helping stabilize your big toe and ankle joint against the ground.
  •  Providing support when standing, whether on both legs or one.

Downside of Weakness

 Since these muscles support the movement of your foot, they’re prone to overuse.

Problems in these muscles may cause swelling and pain in the lower leg, ankle, or foot.

These may include:

  • Peroneal tendonitis, which is swelling and pain in the peroneal tendons caused by overuse, which later leads to tendinopathy.
  • Peroneus longus muscle strain, which is the overstretching of the peroneal muscle caused by a sudden or forceful movement of the foot.
  • Peroneal tendon subluxation or dislocation, which is the overstretching of the peroneal tendons when the foot is forcefully moved into dorsiflexion and inversion of the ankle.
  • Ankle sprain, everyone must be familiar with this already. This hurts the lateral ligament of your ankles and may damage your peroneal tendons depends on the grade severity.

Exercises  

  • Standing calf raises
  • Resistance bands exercises
  • Heel walks
  • Lunges

 Tensor Fascia Latae

The tensor fascia latae (TFL) refers to a thigh muscle that connects your pelvis to the iliotibial band (ITB), which is a knee-stabilizing band that stretches down the outside of the leg.

That’s why when you have a strong TFL, your knees will be better aligned as you push forward while running.

Functions of The Tensor Fascia Latae

  • Helping create medial rotation of the hip, but also helps with hip flexion and hip abduction.
  • Stabilizing the hips and pelvis as you raise up each leg.
  • Helping provide lateral—or side-to-side—stability to the knee.
  •  In conjunction with the gluteal muscles, the TFL helps ensure lateral stability around the hip as well as lateral stability around the knee.

 Downside of Weakness

 Thanks to overuse, the tensor fascia latae can get tight.

When this occurs, it can lead to knee pain and injury such as patellofemoral pain syndrome (PFPS), iliotibial band syndrome (ITBS), and even meniscus injuries.

Exercises

  • Hip Hitches
  • Side-lying straight leg raises
  • Crab walks
  • Single-leg squat
  • Static Standing TFL Stretch
  • Pigeon

Flexor Hallucis Brevis

The flexor hallucis brevis (FHB) is a tiny intrinsic muscle of the foot that lies deep within the sole on the medial aspect.

The FHB is divided in front into two sections, which are interested into the lateral and medial sides of the base of the great toe.

Your big toe is responsible for foot stability and it’s key in push-off.

Anything you can do to improve its function can help improve your running performance and avoid injury.

Functions of The Flexor Hallucis Brevis

  • Helping flex the great toe at the metatarsophalangeal joint (MTP joints), especially at the toe-off phase of running gait.
  •  Helping keep the medial longitudinal arch of the foot

Downside of Weakness

When your hallux can’t bend enough, it forces the impact to go somewhere else, more likely, through tissues that aren’t designed to bear the load.

This can trigger a chain reaction of issues going up your leg—starting from tingling, sole discomfort, plantar fasciitis, Achilles injury to calf strains, and more.

Exercises

  • Toe Gripping
  • Resistance Band
  • Toe walks

Tibialis Anterior

The anterior tibialis is another less-common yet very important running muscle.

It consists of a muscle-tendon unit that stretches down the front of the shin, on the outside of the fibula—or the shin bone.

Functions of The Tibialis Anterior

  • Responsible for dorsiflexing your ankle—as in pulling your foot up towards your knee.
  • Helping position the foot to prepare for impact while your leg is still air-born.
  • Assisting in foot inversion

Downside of Weakness

A few problems can strike this muscle that may cause functional mobility issues. These may include

  • Shin splints
  • Anterior tibialis tendonitis
  • Sciatica (radiating) pain on the shin

Exercises

  •  Heel walks
  •  Toe raises
  • Single-leg hops

The Supporting Running Muscles

 If you have the slightest understanding of human anatomy and the biomechanics involved in moving from point A to point B, then you already realize that running isn’t just about your legs.

 As I mentioned earlier, running doesn’t just use your leg muscles.

It’s full bodywork.

The muscles of your upper body and the core are needed to keep good form, ensure movement efficiency, and help in forward motion.

Thoracic Diaphragm

 The diaphragm refers to the muscle that separates the abdomen from the chest cavity.

It consists of a fibromuscular structure that sits at the base of the chest and divides the abdominal organs from your lungs.

When you breathe, this muscle contracts and relaxes, pulling air into the lungs, then pushing it out.

That’s why this muscle is key for optimal lung capacity.

Since the diaphragm is the main breathing muscle, certain activities, such as running, can be painful if this muscle is not used to such intensity or already impaired in some capacity.

But whether logging the miles can actually cause diaphragmic injury is another question.

The Functions

  • On the inhale, the diaphragm contracts and depresses, pulling air into your lungs.
  • On the exhale, the diaphragm relaxes and pushes the carbon dioxide out, the build-up of which can trigger anxiety and breathlessness.
  • Increasing abdominal pressure to help your body get rid of urine, feces, and vomit.
  • Putting pressure on the esophagus to prevent acid reflux.

Downside of Weakness

Technically there’s no such thing as an overuse running injury of the diaphragm, but you can still hurt this muscle, especially in contact sports.

Contusions are caused by continuous and/or direct trauma to certain body parts, which damages the underlying muscle fibers without actually breaking tearing the skin.

That’s why to injure your diaphragm while running, you’d to run into a sharp object, fall hard on your side, experience some other type of traumatic accident.

Additional resource – Does running build muscles?

Exercises

 The best diaphragmic exercise, besides regular running, is to practice diaphragmatic breathing.

This helps you use the diaphragm the right way while breathing.

Check this YouTube Tutorial

In the gym, you can target this muscle by doing rotational lunges that help simulate running imbalances.

The Core Muscles

 Most of the core muscles, including the abs, paraspinal, pelvic floor, obliques, erector spinae, multifidus, diaphragm, and hip girdle muscle, are vital for a runner’s form.

You can have the strongest legs in the universe, but without a strong core, you won’t be able to put your legs’ strength into work.

 Furthermore, strength and stability in the core region can also protect your spine and lower back from the impact of running.

The Functions Of The Core

  • Maintaining balance and controlling joint movement.
  • Improving the energy transfer between your upper and lower body, helping your body work as one single unit.
  • Keeping you standing upright and avoiding an excessive forward lean that can put undue pressure on your lower back.

 Downside of Weakness

With a weak core, you’ll be unable to reap the above benefits, which can drastically hinder your running performance, and might even increase the risks of injury.

Exercises

  • Planks
  • Russian twists
  • Crunches
  • Kettlebell swings
  • Pilates

Upper Body Muscles

Though not targeted directly, several muscle groups in the upper body are used while running.

The most important ones include the muscles of the arms, chest, back, and shoulders.

Arms

Your arms help maintain a rhythmic motion that’s in tune with the lower body—key for efficient running—so strengthening them can improve form efficiency and balance.

To get more of the arm swing, bend your arms at the elbows and swing them back and forth during the running gait cycle.

Chest Muscles

What’s known as the pectorals, these consist of two large, and flat, muscles that course across the surface of your chest.

These help move your arms to cross your body and up and down as well other movements like adduction, flexion, and rotation.

This is why you should keep your chest up.

Biceps

Your biceps branchii, better known as the biceps, is key for maintaining a bent arm.

Strong biceps help you swing your arms back and forth with more power.

Shoulders

Tese are located above the elbows and allow you to flex your elbows and rotate your forearms, which help swing them back and forth to enhance balance and forward propulsion.

The Scalene Muscles

The scalene muscles consist of three pairs of neck muscles:: scalenus anterior, scalenus medius, and scalenus posterir.

These help tilt, flex, and rotate your neck, helping maintain good posture as you log the miles.

They also help with breathing by lifting up your ribs, especially when doing heavy exercise.

The Back

What’s known as the latissimus Dorsi, which is the triangular-shaped muscle stretching running across your back from your shoulders to the top of your glutes.

The main roles are to power arm movement, especially the backward swing and the downward pull, as well as keep your torso upright.

The other role is an extension and lateral flexion of the lumbar spine.

Exercises 

  • Pushups,
  • hammer curls,
  • bicep curls,
  • shoulder presses,
  • pull-ups,
  • kettlebell swings,

Note: Sure, a bulky, heavy, upper body will only slow you down. But to make the most of strength training, you won’t need to become a full-time strongman.

All you need is two to three 20 to 30 minutes of strength sessions per week.

Of course, feel free to do more, if that’s what you want.

Put it in your schedule as a part of your cross-training.

What muscles does running work – The Conclusion

There you have it.

Today’s short anatomy introduction into the main running muscles should help you start to better understand how your body moves as well as how to improve it.

Now that you know what muscles does running work, it’s up to you to take care of them.

The rest is just details, as the saying goes.

Please feel free to leave your comments and questions in the section below.

In the meantime, thank you for dropping by.

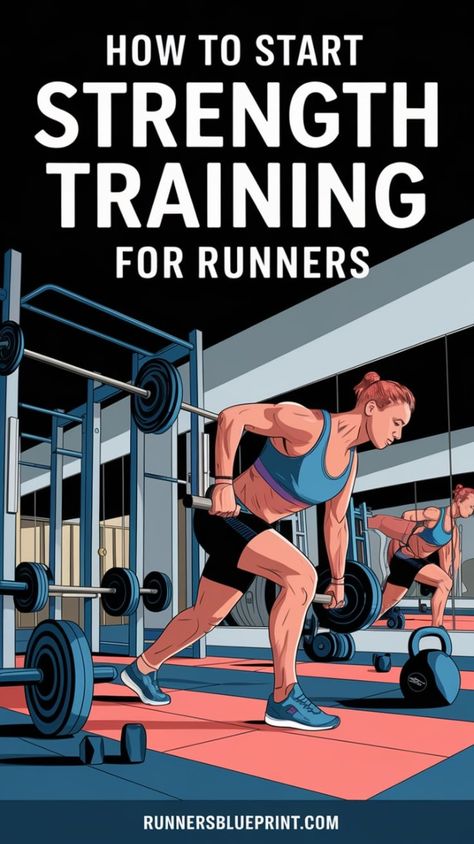
Strength Training Program for Runners

woman running in trail

If you’re really serious about improving your running performance, you’re in the perfect spot.

As runners, we often get caught up in piling on the miles—but hitting the pavement isn’t the full story.

Here’s the truth.

Adding strength training to your routine changes the game. It’s more than muscle—think fewer injuries, better running efficiency, and a faster path to your goals

What’s not to like, really!

Now, if you’re thinking, “Strength training? That sounds intense,” don’t worry!

No matter where you are in your strength training journey—total beginner or gym regular—I’m here to help

In this post, I’ll guide you through setting up a strength training regimen that complements your running, whether you’re a beginner or seasoned in the gym.

What Is Strength Training?

At its core, strength training is all about making your muscles work against resistance—weights, machines, or even your own body. And don’t worry, you don’t have to lift heavy weights to see results.

Did you know that simple bodyweight moves like push-ups and squats can build strength and stamina just as well—if not better—than traditional weight lifting?

And the benefits don’t stop there.

I’ll be honest: for the longest time, I was one of those runners who thought all you needed was running to get better at running.

If I wanted to improve, I figured I just needed to run more miles maybe throw in some speed work.

It seemed logical—run more, get better. But that approach left me nursing shin splints, knee pain, and tight hips all too often

After a few frustrating months, a friend—a much better, more seasoned runner—asked me a simple question: ‘Have you tried strength training?’

So I decided to give it a try.

I started small with bodyweight exercises like squats, lunges, and planks. To be honest, at first, it felt a little pointless. I was not holding any weights here, just doing these slow, controlled movements.

But, after a few weeks of consistency I started getting stronger. And that strength carried over to my miles.

Let me explain more why strength for runners matters and it matters a lot.

Why Should Runners Do Strength Training?

When I first integrated strength training into my routine, I was skeptical. I mean, I’m a runner, not a weightlifter, right?

But after just a few months of consistent bodyweight exercises, the difference was undeniable.

My runs felt easier, my body felt stronger, and those nagging injuries? They started disappearing.

Don’t take my word for it. Let me back this up with some science:

  • Improved Performance: A study published in the Scandinavian Journal of Medicine and Science in Sports found that runners who combined endurance and strength training improved their 10K times and running economy. Muscle strength also saw a big boost.
  • Better Running Economy: A study in the International Journal of Sports Physiology and Performance showed that strength training improved running economy by 2.9% after six weeks. That’s a huge deal when it comes to running more efficiently.
  • Fix Muscle Imbalances: Strength training helps correct muscle imbalances, a common cause of overuse injuries. It can safeguard your body and keep you running strong.
  • Increased VO2 Max: A study in the Journal of Strength and Conditioning Research found that a 12-week strength program improved VO2 max by 5.7%. VO2 max measures your body’s ability to use oxygen, improving it helps your overall endurance.
  • No Bulking Up: Worried about bulking up? Don’t be. The right strength training plan will strengthen you without adding unwanted muscle mass.

Finding Balance Between Running and Strength Training

If you’re wondering how to fit strength training into your already-packed running schedule, don’t worry—it’s easier than you think.

First, focus on your goals. Do you want to correct muscle imbalances, improve your form, or prevent injury? Whatever it is, you can tailor your strength program to fit your needs. Just 20-30 minutes of strength work two or three times a week can make a difference.

I recommend giving your muscles 48 hours of rest between strength workouts to recover and grow stronger.

Figuring out how to balance running with strength training was a game-changer for me. Initially, I tried doing both on the same day, but I quickly learned that separating them gave me better results.

Now, I strength train on non-running days, and it’s made a world of difference in my energy levels and performance

Still hesitant? Here’s how to run after a strength workout.

Warm Up Before You Lift

Before jumping into your strength workout, warm up your muscles. A 10-minute warm-up of brisk walking, jogging, and dynamic stretches (like lunges or high knees) will prepare your body to lift. Remember to cool down and stretch—it’s key for flexibility and recovery.

The Importance of Proper Form

Proper form is crucial when it comes to strength training. It’s better to do fewer reps with perfect form than to rush through and risk injury. Bad form can lead to muscle imbalances and inefficient movement, which are not helpful in the long run.

And don’t take my word for it.

A study published in the Journal of Strength and Conditioning Research found that proper form during squats increased muscle activation in the quadriceps, glutes, and hamstrings.

To build proper form, do the following:

  • Engage your core, stand tall, and head in a neutral position.
  • Focus on smooth, slow lifts and equally controlled descents.
  • Move slowly, ensuring you rely on muscles, not the moment, to do the lifting.
  • Protect your joints by gripping them properly.
  • Keep your body well-aligned and move smoothly through each exercise. Don’t use momentum to swing the weight around.
  • Keep your shoulders relaxed and down. Do not shrug. Avoid aligning your ears with your shoulders.
  • Exhale as you lift the weight and inhale as you lower it.

What’s more?

Consider hiring a personal trainer to teach you proper form from the get-go and learn how to properly complete each exercise. Investing in a few sessions with a personal trainer was one of the best decisions I made for my strength training journey. They corrected my posture, taught me how to engage my core properly, and showed me that quality trumps quantity every time.

Can’t afford one?

Study online videos and tutorials to learn proper lifting techniques—plenty of sources are around.

Running vs. Strength Training: Start Simple

Let’s talk about balancing your running and strength training.

As a beginner, focusing on two non-consecutive days of full-body strength training each week is best. Start with simple, equipment-free routines that target five key movement patterns: squatting, pushing, pulling, hinging, and core work.

Mastering these fundamental movements will help reduce your risk of injury and set the foundation for lifting heavier weights down the road.

Once comfortable, you can add resistance to deadlifts, glute bridges, reverse lunges, overhead presses, hammer curls, and chest presses. Don’t worry if you’re unfamiliar with the equipment—bodyweight exercises are the perfect stepping stone to strength training. Research shows they can be as effective as weights, especially for beginners or those without gym access.

As you get fitter, try introducing tools like TRX bands, resistance bands, kettlebells, barbells, and machines. And remember, it’s all about progression—start small and build up as you get stronger.

Running and Strength Training Schedule

If you’re new to strength training, you might wonder how to combine it with your running routine. Should you run first, then weight train, or lift the weight and hit the pavement?

My advice is simple: lift first, run later. During your first few months, prioritize your strength training routine to improve your technique and form and avoid getting distracted by fatigue from running. Once you’ve developed a solid foundation, you can switch up the order or perform both workouts on separate days.

Here’s a basic schedule that can help you make progress and avoid injury:

  • Monday: Interval run
  • Tuesday: Strength workout
  • Wednesday: Easy run
  • Thursday: Strength workout
  • Friday: Long run
  • Saturday: Strength workout
  • Sunday: Rest

Finding the Right Weight

When it’s time to add weights, start with a manageable weight and slowly build from there. If you swing the weights around or use momentum, the load is too heavy, and you need to scale back.

Ideally, your muscles should feel fatigued by the last couple of reps. If you’re breezing through, it’s time to increase the weight.

The right weight depends on the exercise. For example, with chest presses, ensure you can control the weight throughout the movement. If you rely on momentum to finish those last reps, go for a lighter weight.

The Range Reps

When it comes to the number of reps, keeping them low and the weight challenging enough is the way to go. Opt for a weight you cannot lift more than eight times and do at least three sets of five to eight repetitions per exercise.

Reps really do impact your results

Here is a quick overview of the number of reps and its impact on your strength results

  • The 2 to 5 range rep builds super dense muscle and strength.
  • The 6 to 12 rep range: This builds both muscular strength and muscular
  • The 12 rep range and above. Ideal for building endurance.

Beginner Strength Running Plan For Beginners

If you are just starting, take your training slowly and alternate between weight-lifting and running days.

According to a study published in the Journal of Strength and Conditioning Research, alternating between strength training and cardio on different days can result in better performance improvements than doing both on the same day.

Otherwise, you risk overtraining, which can lead to injury and slow your progress.

As a beginner, start with two strength workouts a week for three to four weeks, then add a third workout in month two.

Research shows that beginners can gain strength with just two weekly workouts.

Shoot for at least 20 to 30 minutes per session, then gradually add time and intensity until you’re lifting hard for 50 to 60 minutes a session.

A study published in the Journal of Applied Physiology found that a longer duration of resistance exercise led to greater muscle hypertrophy, or growth, in untrained individuals.

The Concept of Training Split

To schedule your workouts the right way, you need first to determine what weight training split and weekly schedule to opt for.

If you’re familiar with strength training, you already know how splits work If not, then below is a simple explanation and description.

The most common and widely tested is the 3-day full body split. This is what I’d recommend any beginner. I cannot emphasize it enough.

Additional Resources

For further reading on the benefits of strength training for runners, check out these resources:

Share Your Strength Training Journey!

We want to hear from you! Your experiences with strength training can inspire and motivate fellow runners. Take a moment to share your thoughts in the comments below. Here are a few questions to get you started:

  • What strength exercises have you found most beneficial for your running?
  • How has strength training impacted your performance?
  • Do you have any tips for incorporating strength training into a busy schedule?

Your insights not only contribute to our running community but also help others who are navigating their own strength training journeys. Let’s learn from each other and build a supportive environment!

Run and Walk to Success: Unleash Your Potential with the Run-Walk Method

Run Walk Method

Are you a beginner runner struggling to build endurance? Or an experienced athlete looking to take your performance to the next level?

Either way, the Run Walk method might just be the answer you’ve been searching for.

This method was pioneered by Jeff Galloway, a former Olympian and renowned coach who has helped countless people get into running.

But what exactly is the Run Walk method? It’s a simple yet effective training strategy that involves mixing low-intensity running intervals with walking breaks.

By finding the right balance between running and walking, you can improve your fitness, build stamina, and reduce the risk of injury and burnout.

It’s time to lace up your shoes and give this method a try!

The Benefits of The Run-Walk Method for Beginners

Jeff Galloway, a former Olympian and renowned coach, pioneered the Run-Walk Method, which has helped over 200,000 runners and walkers improve their running performance. The method is simple: mixing low-intensity running intervals with walking breaks can improve performance and reduce the risk of injury.

For beginners, this method is particularly useful as it allows them to slowly build up their endurance without risking discomfort, injury, or burnout. And for those returning to running after a long hiatus, the walk/run sessions can help fortify slow-twitch muscle fibers and improve recovery time.

But don’t be fooled into thinking this method is only for beginners. Intermediate and advanced runners can also benefit from the Run-Walk Method. In fact, it can help them stay safe while nursing an injury and even improve their race times.

Don’t take my word for it.

A study published in the Journal of Strength and Conditioning Research found that runners who used the run-walk method had similar improvements in running performance as those who completed a continuous run. The study also found that the run-walk method resulted in less muscle damage and inflammation, suggesting that it may be a useful tool for reducing the risk of injury.

Another study published in the Journal of Sports Science and Medicine found that novice runners who used the run-walk method with a 3:1 ratio of running to walking had significantly lower levels of perceived exertion and muscle soreness than those who completed a continuous run. The study also found that the run-walk method led to similar improvements in running performance as continuous running.

The Downsides of the Walk Run Method

While the run-walk method has become increasingly popular among runners, it’s important to consider both the potential benefits and downsides before trying it.

One potential downside of the run-walk method is the risk of losing mental focus during the walking intervals. That’s why you might find it hard to get into running after stopping for a walk break. It’s like hitting a speed bump on the road – it interrupts your flow and can be jarring to your system. However, some runners find that the structured intervals of the run-walk method actually help break up the monotony of continuous running and can help keep them engaged throughout the workout.

Another potential downside of the run-walk method is the risk of slowing down the overall pace. This can be frustrating for runners who are used to maintaining a consistent pace throughout their runs.

However, studies have shown that the run-walk method can actually be an effective way to improve overall pace over time.

A study published in the Journal of Science and Medicine in Sport found that runners who used the run-walk method in a half marathon were able to maintain a faster pace overall compared to those who ran continuously. This is likely because the walking intervals help reduce fatigue and allow runners to recover more quickly between running intervals.

It’s also important to note that the run-walk method may not be suitable for everyone. For example, if you have a specific time goal for a race, the run-walk method may not be the best approach. In this case, continuous running may be a more effective strategy for achieving your goal.

Run Walk Ratio For Beginners

To make the most out of this method, take the walk breaks before fatigue starts to set in.

Contrary to popular belief, the walk/run method does not mean that you should take breaks only when tired.

Au contraire, it’s about taking a brief walk break even if you are not tired.

If you wait until you are completely drained, you might go over the red line, thus burning your engine before you are done working out.

To determine the appropriate run-walk ratio for your individual needs, consider factors such as your current fitness level and personal preferences. A study published in the Journal of Sports Science and Medicine found that a run-walk ratio of 3 minutes running to 1-minute walking was more efficient and less taxing on the body than a continuous run for novice runners.

Here are three walk-to-running ratios to try out.

Choose whatever ratio of walking and running that works for you.

  • The Beginner: Run for 15 to 30 seconds. Then walk for one to two minutes
  • The Intermediate: Run for two to five minutes. Then walk for one to two minutes.
  • The Experienced: Run for eight to ten minutes. Then walk for 30 seconds to one full minute.

As you become more comfortable with the run-walk method, you can progress the ratio over time, like a gardener tending to a plant and allowing it to grow and blossom. A gradual increase in the amount of running and a decrease in the amount of walking can help build endurance and improve overall running performance.

Additional resource – How long does it take to walk a mile

Progressing the run-walk ratio over time:

As you become more comfortable with the run-walk method and your fitness level improves, you can gradually progress the run-walk ratio to challenge your body and continue improving. This may involve increasing the amount of time you spend running while decreasing the amount of time you spend walking or experimenting with different ratios to find the one that works best for you.

A general rule of thumb is to increase the running time by no more than 10% per week while also reducing the walking time by a corresponding amount. For example, if you start with a 1:1 ratio and run for one minute and walk for one minute, you might progress to a 2:1 ratio, running for two minutes and walking for one minute.

It’s important to listen to your body and make adjustments as needed, especially if you experience any pain or discomfort. Gradual progression is key to avoiding injury and getting the most out of the run-walk method over the long term.

Go For Time, Not Distance

So do you make the most out of the run walk method?

Simple. The key is to focus on time, not distance. Instead of feeling pressure to cover a specific distance at a certain pace, measure your walk and run segments in terms of minutes. This takes the pressure off and allows you to focus on improving your endurance and stamina.

The Ideal Session

For an ideal session, start with a 5-minute warm-up walk, then begin an easy run/walk routine, alternating between jogging slowly for 1 minute and walking for 2-3 minutes for recovery. Make sure to fully recover during the walk segments before beginning again. Repeat the cycle 5-7 times and end with a proper cool-down.

Additional resource – How long does it take to walk five miles

The Run Walk Run Method  for Beginners

If you’re a beginner, assess your fitness level and set realistic targets. For example, aim to run a 5K (3.1 miles) within 8-12 weeks of beginning your training. As you progress, increase your training volume, intensity, and frequency. And remember, consistency is key. By following this method consistently, you’ll be able to improve your endurance, reduce the risk of injury, and eventually run longer and faster than you ever thought possible.

Applying The Method

To incorporate the run-walk method into your training program, start with a few run-walk workouts per week and gradually increase the number of continuous runs over time like a sculptor gradually chiseling away at a block of marble to reveal a beautiful statue.

It’s also important to listen to your body and adjust your training program as needed, like a musician tuning their instrument to produce the best sound.

If you’re feeling fatigued or experiencing pain, it may be time to decrease the overall volume or intensity of your workouts, while if you’re feeling strong and making progress, you can gradually increase the volume and intensity of your workouts.

With patience and persistence, the run-walk method can be a valuable tool for improving your running performance and achieving your fitness goal.

Training Plans

The Internet is full of elaborate training programs, but I believe in keeping it simple.

Here are more tips for a great training plan:

  • Aim to exercise at least three times per week.
  • Walk, run/walk, or run for 20 to 30 minutes, three days a week.
  • Cross train or rest on your off days.
  • Keep your workouts at a conversational pace. AKA the Talk Test.

Stay In Your Lane

Remember, the key to injury-free training is staying within your fitness level. No more, no less. The Internet may be full of elaborate training programs, but keeping it simple is often the best approach. So, grab your running shoes, check the temperature, and get ready to hit the pavement with the run walk run method. Your running journey starts here!

The Run Walk Method – The Conclusion

And there you have it, my friends!

If you’re itching to dive into the world of running for the very first time, let me tell you, the run walk run method is your golden ticket. It’s the ultimate gateway to unleashing your inner runner, and the best part? The rest is just minor details. Trust me, you’ve got this!

Thank you so much for joining me on this exciting journey. Remember, when it comes to your training, keep pushing yourself and staying motivated. You’re capable of incredible things!

Wishing you endless miles of exhilarating runs and unforgettable adventures,

David D.

Unlock the Secret to Post-Run Recovery: Mastering the Art of Cool-Downs

trail running

If you’re a runner in search of the best way to wind down after your runs, you’ve landed in the right spot. The cool-down phase marks the conclusion of your run, and it’s a crucial element often underrated in a running routine.

During the cool down, your heart rate gradually decreases, and blood flow redistributes, particularly to essential organs, such as the brain. This is why emphasizing a proper cool-down is so critical immediately after a run.

To add to that, it should go hand in hand with a stretching routine.

In this post, we’ll explore the various benefits of cool-downs and provide practical guidelines to help you make the most of this essential aspect of your running routine. So, are you ready to learn more?

Let’s dive in.

Cool-Downs and Recovery Rate—Reality or Myth?

According to conventional wisdom, a proper cool-down can reduce muscle soreness, cut the risk of injury, and speed up recovery time.

But is there any evidence to support this? Should you invest any of your precious time in a cool down? Does the cool-down help reduce post-workout muscle soreness?

Well, here is the simple answer.

Recent research has shown that this is not the case.

In fact, study has found no concrete evidence that (traditional) cool-down methods can help prevent muscle soreness after exercise.

Don’t get me wrong.

This does not mean that the cool-down is a complete waste of your time.

As we are going to see, the cool-down has its own benefits.

And You should never toss it to the side.

Nonetheless, you MUST and SHOULD cool down after a run.

And here is why.

Cool Down Benefits

The main aim of a cool-down is to bring your body back to a resting state, or near the resting level for breathing rate, heart rate, blood pressure, and other factors.

In fact, in some individuals (especially those who are extremely out of shape or have cardiovascular issues), stopping on the spot can lead to extreme dizziness, even a loss of consciousness.

This brings me to the main benefit that cooldowns have to offer: preventing blood pooling.

So what is it?

And how does it affect you?

Additional resource – Calf pulls in runners

Increase Flexibility & Mobility

You’ve probably heard a zillion times that stretching is the magic potion that prevents injuries, right? Well, here’s the scoop – studies haven’t always been on the same page about that. Some say yes, some say no, and some just shrug their shoulders.

But hey, don’t chuck your stretching routine out the window just yet! Stretching still has its perks, and I’ll tell you why.

First off, stretching is like a mini spa day for your muscles. It’s that moment when your muscles breathe a sigh of relief after all that hard work. Tension? Gone. Flexibility? Increased. It’s like a little treat for your body.

Plus, it’s a bit like yoga for runners, helping you stay flexible and nimble. Think of it as your secret weapon against the dreaded stiffness that can creep in after a workout.

Now, even though the studies might not be on stretching’s side when it comes to injury prevention, think of it as insurance.

The Exact Cool Down Breakdown

Proper cool-down consists of the following two elements:

The Jogging to Walking Portion

Now, let’s dive into the art of the cool-down – your victory lap after a solid workout!

Here’s the deal: during your cool-down, you’re not coming to a screeching halt. Nope, think of it as a gentle transition, like easing off the expressway onto a quiet side street.

So, picture this: you’ve just crushed your workout, and now it’s time to downshift from turbo speed to a more leisurely pace.

The first leg of your cool-down journey? A smooth, low-intensity jog – you’re not sprinting anymore, just cruising. It’s like your car going from a Ferrari to a comfy sedan.

After a bit of that easy jogging, it’s time to slow things down even further. You transition to a leisurely walk, like a relaxed stroll through the park on a sunny day.

Why do this, you ask? Well, it helps your body cool down gradually, like letting your engine cool off after a long drive. Plus, it gives your heart and lungs a chance to catch their breath.

And here’s a bonus: this gentle cool-down helps move away those waste products your muscles have been working hard to produce.

The Stretching Portion

Now that you’ve gracefully cruised into your cool-down, it’s time to add the final touch to your workout masterpiece – stretching!

Here’s the lowdown: stretching isn’t just a fancy add-on; it’s the grand finale, the cherry on top, and it can do wonders for your body when done right.

You see, right after your run, your muscles are in prime-time warmth mode. They’re like a rubber band fresh out of the sun – super pliable and stretchy. This is when your muscles are most willing to embrace those lovely stretches.

Stretching at this stage helps improve your flexibility, making you as bendy as a yogi while also reducing the risk of muscle tears and injuries. It’s like giving your muscles a little spa treatment after their hard work.

So, how do you stretch like a pro? It’s easier than you might think!

  • Step 1: If you’re new to stretching, start with some basic static stretches. Think of it as your body’s way of saying, “Hey, thanks for the awesome run!”
  • Step 2: Incorporate stretching into your routine. It should feel as natural as warming up before your run. Stretching isn’t just a one-time thing; it’s a regular part of the workout show.
  • Step 3: Aim for a 10 to 15-minute stretching session, hitting all those key muscle groups. It’s like giving each muscle its own VIP experience.

Stretching Tips

Stretching is key, but let’s do it right, shall we?

Here are some tips for stretching like a pro and enjoying every moment of it!

  • Slow and Steady: Picture yourself as a graceful ballerina – stretch your muscles slowly, with purpose, and oh-so-gently. Hold each stretch for a serene 20 to 30 seconds, then switch sides like a pro dancer.
  • Reach for the Stars: Stretch each muscle to its glorious maximum range of motion. But remember, there’s a limit to everything – don’t overdo it. Pushing too hard is like trying to fit one more suitcase in an already full trunk – it won’t end well.
  • Comfort Is Key: When you stretch, aim for that sweet spot of mild discomfort, not pain. Pain is not your stretching buddy; it’s like inviting the Grinch to your holiday party. So, be kind to your muscles.
  • Breathe: Don’t forget to breathe! Inhale the good vibes, exhale the tension. Your breath is your stretching partner, helping you release any tightness. Breathing is the secret sauce to stretching success.
  • Warm It Up: Never, ever stretch a cold muscle. It’s like trying to bend a frozen popsicle stick – not a great idea. Warm-up with a light jog or some gentle movements before diving into your stretches. Your muscles will thank you.

What to Stretch During The Cool-Down?

Stretching is like giving your muscles a warm, loving hug after a run.

But, let’s make sure you’re hugging all the right muscles.

Here’s your guide on what to stretch:

  • Hamstrings – The Back of the Thighs: These are the muscles that run down the back of your thighs. Keeping them flexible is essential to avoid lower back pain, knee issues, and overuse injuries. So, show them some love!
  • Quadriceps – The Front of the Thighs: Your quadriceps are the muscles at the front of your thighs. They’ve been working hard, so make sure to stretch them out. It’s like thanking your thighs for their stellar performance.
  • Iliotibial Band (IT Band) – The Side of the Leg: The IT band is a tough customer. It runs from your hip to your knee along the outside of your leg. Stretching this area can help prevent IT band syndrome and keep your legs happy.
  • Hip Muscles – The Hips Don’t Lie: The muscles around your hips deserve some TLC too. This includes the glutes, lateral rotators, adductors, and iliopsoas. A happy hip region equals a happy runner!
  • Calves – Don’t Forget Those Calves: Your calf muscles have been working hard, propelling you forward with every stride. Stretching them can help maintain stride efficiency and keep cramps and injuries at bay.

Here are the 5 Stretches you Nee:

The Standing Hamstring Stretching

The Laying Hamstring Stretching

The Quad Stretch

The Hip Opener Stretch

https://www.youtube.com/watch?v=ZjvQInHSHBA

The Standing Calf Stretch

Foot Types for Shoes – How to Determine Your Foot Type?

foot types for runners

Looking to determine your foot type? Then this guide to types of runners feet is exactly what you need.

Here’s the truth.

When it comes to foot type biomechanics, foot type is divided into three broad categories: the neutral-footed, the flat-footed (the overpronator runner), and the high-arched (the supinator runner).

Therefore, if you are a serious runner looking to boost training volume but still hunting for the ideal running pair, then you need to learn more about your foot type.

According to conventional wisdom in the running world, your pronation type is also a contributing factor in selecting and choosing the right running shoe.

Not only that, some experts also claim that having an understanding of pronation and how it affects the rest of your body can help you determine the type of a shoe most appropriate for you.

Therefore, today, dear reader, I will share with you all you need to know about your foot type, what does that mean, and what type of shoe works the best for a particular foot type.

Foot Types for Shoes Explained

Substantial amounts of research and technology go into designing running shoes that best suit these three most common types of foot arches.

Determining your foot type can help you make the most suitable choices when looking for new running shoes.

This can help improve running efficiency, understand the way you run, reduce pain, and prevent injuries, such as heel pain or plantar fasciitis.

So are you excited?

Then here we go.

The Wet Test

If you have no idea what arch type you have or are not sure, you can perform the Wet Test.

Here is How To Do It

Simply wet the sole of your foot, then step onto a blank piece of paper or a shopping bag.

Last up, step off and examine the shape of the footprint and compare it with the following diagrams.

The result can help you determine if you’re a neutral runner, an overpronator, or a supinator/underpronator.

Please keep in mind that this test is not the most accurate in the world.

The Wet Test is simple, but the results might not be conclusive.

Lest you have a very low or high arch, it might be hard to interpret the results properly.

So it’s not the end of all your running shoe prayers.

Other factors must be accounted for.

Check this article for more.

Foot Types for Shoes

The Wear & Tear Patterns

The “Wear Test” is another straightforward assessment you can do to determine your arch type.

All you have to do is to check out the wear pattern on one of your used and abused pairs of running shoe.

How?

Just flip over the shoe and assess the rubber tread on the outsole.

In case you couldn’t see a clear and consistent wear & tear pattern by looking at the outsole of your running shoes, then simply place them on a flat surface, a table for instance, for instance.

Additional resource – Running shoes for plantar fasciitis

The Pro Option

For the most accurate assessment, go see a professional physician or a sports podiatrist.

While using high-tech tools, these experts can evaluate your feet in both a static and dynamic position.

This can help you determine whether you pronate or not and if you do, how much you pronate, etc.—all of which is essential for finding the most suitable shoe for you.

The Degrees of Pronation—Understanding Pronation

The feet rotate naturally while running.

But, the degree of rotation, what’s known as pronation, varies from one runner to the next, depending, mainly, on the foot unique anatomical structure.

Pronation, simply put, is the natural inward roll of the foot as the outside part of the heel comes in contact with the ground.

Pronation is 100 percent normal.

The proper amount of pronation is part and parcel of the natural movement of the human body.

In fact, it is the process by which your feet absorb the impact forces of running—about two to three times your body weight.

This inward rolling acts as a shock absorber for the legs and the rest of the body, ideally dispersing the forces of the impact of the heel striking the ground.

In other words, your foot NEEDS and MUST pronate to keep your lower limbs safe and injury free.

The Problem With Too Much (or too little) Pronation

During a typical gait cycle, the feet alternate between pronation, which is the inward roll motion, and supination, the outward motion.

Overpronation occurs when the feet roll inward too much.

Supination, or commonly known as underpronation, happens when the feet don’t roll inward enough.

If you overpronate, then your feet will roll inward too much.

Research shows that this might risk overuse injuries, mostly to the knees.

On the other hand, if your feet roll outward too much, what’s known as underpronator, then you might risk overuse injuries, mainly in the feet.

Figuring out your foot type and gait mechanics can help match you with the correct shoe type, with the main purpose of compensating over- or under-pronation.

This might help cut the risks of injury while improving your running economy and efficiency.

Additional resource  – Here’s your guide to pain on top of the foot while running.

The 3 Main Types Of Runners Feet

1. Normal (medium) Arch

This is the most common type of runners, and people in general.

The medium foot type is often called normal because of most people—roughly 60 percent—have a medium arch.

So, that does not mean there is something inherently wrong with having high or low arches.

These are also normal, but not just as widespread.

The Process

The Neutral type is identified by a slight pronation

While running, the foot lands on the outside of the heel then rolls inward to support body weight and reduce the shock impact of the foot strike.

The Wet Test

If, after assessing your footprint, it doesn’t look high arched or flat footed, then your chances you have a normal or neutral foot.

In general, the footprint will show a plain curve inward, but not by more than ¾ of an inch.

The Wear Patterns

Neutral pronation manifests as a wear pattern focused on the ball of the foot region and a small portion of the heel.

The Trouble

A runner with neutral feet has a normal arch with centralized balance.

The impact stresses generated by running are well distributed in the center of the foot, which cuts the risks of pain and/or injury in the tendons, bones, and the muscles of the lower body.

But having neutral feet does not mean that you’ve hit The Happy Feet Jackpot.

The fact is, as a runner, you are always prone to injury due to bad form, ill-fitting shoes, overuse, or repetitive stress injuries.

Best Shoes

Runners with “normal feet” can wear just about any type of shoe, but they are still prone to injuries, especially if they are overtraining, or not taking good care of their bodies.

Additional resource – How to choose Running shoes for overpronators

2. The Flat Foot

Overpronation is the second most common type, accounting for over 20 percent of all runners.

Flat-footed runners tend to overpronate, meaning that their feet roll inward too much during a foot strike.

This can be a source of problems and often requires proper support and weight redistribution.

Here’s the full guide to underpronation

The Process

The outer side of your heel strikes the ground first at an increased angle with little or no normal pronation, resulting in a massive transmission of stress and shock through the lower limbs.

The arch is designed to absorb a specific amount of shock, but when it collapses too much following impact, the resulting stress forces travel up and down the legs, leading to pain, even injury to the shins, hips, or knees.

The Wet Test

You have flat feet when there is no is no clear inward curve from the big toe to the heel while looking at your foot.

Typically, the imprint shows a filled-in arch.

The Wear Patterns

Soles mostly worn on the inside (typically along the inside edge of the shoe) mean that you’re most likely an overpronator.

Troubles

As previously stated, pronation is a good thing.

But too much of it can put a lot of undue stress and shock on your feet and knees, increasing the risks of pain and injury.

Flat footed runners are often biomechanically imbalanced, which can make them more prone to common foot issues such as arch pain, heel pain, and plantar fasciitis.

Other injuries include plantar fasciitis, shin splints, heel spurs, and bunions.

Follow proactive measures to reduce your risks of such ailments.

Additional guide – Running safely with bunions guide

Best Shoes

According to conventional wisdom, if you overpronate, then you might need shoes that help maintain your stability during a foot strike.

Look for terms like “stability” and “motion control” while selecting a new running pair.

Stability shoes can help stabilize your stride and provide better support for your feet.

This type of shoes might reduce the risks of common issues and injuries like heel pain, arch pain, plantar fasciitis, etc.

Just keep in mind that the current scientific research reveals no conclusive evidence that supports this theory.

In cases of severe overpronation, you might need to wear orthotics. These are custom made shoe inserts that may correct foot issues in some individuals.

Additional Resource – Here’s your guide to running shoes for flat feet.

3. The High-Arched Foot

The third type is the least common, accounting for less than 20 percent of the population.

In general, underpronators have high, rigid arches that do not sufficiently collapse.

Therefore, they do not absorb shock as efficiently as the other two foot types.

Supination is characterized by an outward rolling of the foot following a foot strike, which results in inadequate impact reduction and distribution.

The Wet Test

If the foot imprint shows little—or no—contact along the outside edge of the feet, mainly seeing only the heel and ball, then you have a high arch.

The Wear Patterns

Supination is marked by wear and tear on the outside of the heel area, especially along the outer edge of the shoe.

Troubles

Research shows that high arched people are more prone to foot conditions such as ball-of-foot pain, heel pain, plantar fasciitis, etc.

Why might you ask?

As already stated, the supination cycle can result in insufficient shock absorption upon impact.

Having high arches means less surface for absorbing impact.

This can place undue pressure on the rearfoot and forefoot areas.

Next, the impact forces can travel unhindered through the legs, knees, and hips to the back and the rest of the body, resulting in pain, musculoskeletal injuries, and even stress fracture in weight-bearing bones.

Additional Resource – Overpronation vs Underpronation

The Best Shoes

Experts recommend well-cushioned, flexible shoes with good arch support and a soft midsole to take some of the stress off the lower limbs and ward off injury, especially to the feet.

In some serious cases, you can use the right orthotics.

Thee can help can help fill in your arch cavity to help improve shock absorption, and provide alignment and cushioning needed to ward off pain and injury.

Additional guide – How to prevent Foot pain in runners

New to Running? Start Here…

If you’re serious about running, getting fit, and staying injury free, then make sure to download my Runners Blueprint Guide!

Inside this guide, you’ll learn how to start running and lose weight weight the easy and painless way. This is, in fact, your ultimate manifesto to becoming a faster and a stronger runner. And you want that, don’t you?

 Click HERE to check out my Runners Blueprint System today!

Don’t miss out! My awesome running plan is just one click away.

Run Strong: 8 Essential Foot Strengthening Exercises for Runners

foot exercises for runners

Well, you’ve stumbled upon the holy grail of foot-strengthening exercises, right here, right now.

Listen up, because this is important. As a runner, you know that strength training is like the secret sauce that adds power and resilience to your performance. You’ve probably been diligently working on strengthening your muscles, which is fantastic.

But here’s the million-dollar question: Have you ever considered giving some love and attention to your hardworking feet? If your answer is a hesitant “no,” then hold onto your running shoes, because we’re about to open your eyes to a game-changing aspect of training that you’ve been missing out on.

You see, your feet are the unsung heroes of your running journey. They endure countless strides, absorb impact, and propel you forward mile after mile. Yet, they often don’t get the attention they deserve. It’s time to change that, and unlock a whole new level of performance.

By incorporating specific foot strengthening exercises into your training routine, you’ll unleash a world of benefits. Picture this: enhanced stability, improved balance, reduced risk of injuries, and increased overall foot strength.

Now, don’t worry if you’re not sure where to start. We’ve got your back. In this comprehensive guide, we’ll walk you through the best foot strengthening exercises tailored specifically for runners like you.

Are you ready? Let’s get started.

The Benefits of Foot Exercises For Runners

Let’s dive into the incredible world of feet!

Did you know that each foot is a complex powerhouse with roughly 20 muscles working in harmony? These muscles, including the anterior tibial, peroneal tibial, posterior tibial, flexors, and extensors, play a vital role in supporting our every move.

Numerous studies and research papers have delved into the fascinating mechanics of these muscles, shedding light on their intricate functions and how they contribute to our overall performance.

But that’s not all—your feet are home to an impressive collection of 26 bones, accounting for a whopping 25 percent of all the bones in the human body.

Imagine that! Alongside these bones, you’ll find a network of 33 joints, more than 80 tendons, and ligaments that provide stability and flexibility to this remarkable structure.

Now, let’s talk about the significance of our feet in our daily lives. We rely on them to stand, walk, run, and perform a wide range of athletic movements, such as squatting, balancing, and jumping.

They truly are the unsung heroes of our physical endeavors. In fact, the metaphorical weight they carry is immense—they can make or break us as runners.

Given the incredible demands we place on our feet, it’s no wonder that they are the most used and abused part of our bodies. Every step we take, every leap we make, puts tremendous pressure on this intricate system.

And here’s where things get interesting: any dysfunction or imbalance in the musculature structure of our feet can have a ripple effect on our overall running gait and range of motion. This can ultimately lead to overuse injuries, like Achilles Tendinitis, chronic ankle sprains, knee pain/injury, and even lower back pains and aches.

Want more? Here’s a guide on running after strength training.

8 Foot Strength Exercises For Runners

Without further ado, here are the best foot strengthening exercises for runners. Strengthen your feet for running by performing these exercises at least two to three times a week.

Foot Exercise for Runners – 1. Shin Curls

While using a step or a box, stand while assuming an athletic position with the toes hanging off the edge as much as you feel comfortable.

Next, curl your toes and foot up toward your shin as high as possible without rocking backward, hold the dorsiflexed position for a moment, then slowly lower your toes to the starting position to complete one rep.

Foot Exercise for Runners – 2. Single Leg Balance

Stand with feet hip-width apart, with the core engaged, back flat, and both hands are resting gently on your sides.

Next, lift your left leg straight toward the 12 o’clock position and balance on your right leg.

If you have any balance issues, then feel free to use a wall or a stable chair for more assistance.

For more challenge, try swinging the lifted leg forward and back, from the 12 o’clock to 6 o’clock, so and so forth, or balance on a balance disc or a seat cushion. You can also try single-leg bridges to test your balance.

Foot Exercise for Runners – 3. Heel Walking

Lift up both your feet, then pace the whole length of the room by walking slowly on your heels.

Make sure that you are on your heels the entire time.

For more, keep your toes pointed forward.

Foot Exercise for Runners – 4. Toe Presses

Assume an athletic position with a slight bend in the knees.

Next, lift your toes off the ground then flex the foot (pull the ankle back towards your shin), hold the contraction for a count of three, then release it slowly to the ground.

You can do this exercise while standing tall or while sitting.

Your choice.

Additional resource – Running Vs. Strength training

Foot Exercise for Runners – 5. Toe Curls

Start by placing a towel on the floor, then spread your toes like a fan, then grip the object and pull it toward you.

Repeat 8 to 10 times, then work the other foot.

Foot Exercise for Runners – 6. Calf Raises

Begin by standing in a shoulder-width stance with the toes flat on the edge of a step or a box, near a doorway or a counter, then hold on light for balance.

Next, raise up by pushing your toes into the step, hold for a count of three, then lower your back to the starting position.

You’ll know that you are doing this one right once you start feeling a stretch in your calves.

Additional guide – How to prevent Foot pain in runners

Foot Exercise for Runners – 7. Ankle Circles

While using a wall or a chair for balance, stand on your right foot, then raise the left foot a few inches off the floor.

Next, and without moving your legs, rotate your right ankle in a large circle in one direction.

Then perform a circular motion with the big toe.

Clockwise then counter-clockwise.

When you are done with the right foot, release and repeat on the opposite side.

Foot Exercise for Runners – 8. Toe Walks

Stand tall with your back flat, core engaged.

Next, while keeping the legs straight and heels pulled up towards the calves, walk forward on the balls of your feet for one full minute.

Make sure to keep your stomach tight and maintain an upright posture throughout the exercise.

Whatever you do, do not fold at the waist.

Here are more strength exercises for runners.

8 Foot Strengthening Exercises For Runners – The Conclusion

If you’re looking for practical advice on how to strengthen feet for running then today’s post has you covered. The rest is just details.

Please feel free to leave your comments and questions in the section below.

Thank you for dropping by.

How to Boost Your Running Performance with Resistance Band Training

Resistance Bands Training exercises

Are you looking to give resistance band training a try? You’ve come to the right place.

Strength training is a crucial part of any running program, regardless of your current fitness level and training goals. In other words, if you run, you should incorporate strength training. There’s no way around it.

Why is it so important? Here are two key reasons:

  • Boost power and strength in essential running muscles like the glutes, quads, and calves. This leads to improved running economy and performance.
  • Correct muscle imbalances, which results in fewer injuries and less discomfort while running.

While I could talk endlessly about the benefits of strength training for runners, that’s not my main goal today. Instead, I want to share a set of resistance band exercises you can do at home to enhance your overall body strength.

So, why resistance bands? Well, keep reading for the answers.

Enter Resistance Bands

Resistance bands are fantastic fitness tools. They’re typically made from strong, thin, and durable rubber and feature handles at each end.

The best part? They come in various resistance levels, so you can choose the perfect fit for your current fitness level and training objectives.

These bands are incredibly versatile and customizable to suit your unique needs. Whether you’re a fitness newbie or a seasoned pro, there’s a resistance band for you.

From my experience, I can confidently say that resistance band exercises are among the best ways to maintain strength training routine, especially if you can’t make it to the gym or have your own personal reasons for avoiding it.

Let’s face it: having a stack of dumbbells in your living room might not be the most appealing option for everyone.

Resistance Bands Offer a lot of exercises

The beauty of resistance bands lies in their versatility. With these simple yet effective tools, you can unlock a world of diverse bodyweight exercises. In fact, there’s virtually no limit to the types of resistance exercises you can perform.

From squats to push-ups, chest presses to rows, triceps extensions to overhead presses, and bicep curls, the list goes on.

The best part? You can do all of these exercises without the need for dumbbells or a weight bar.

Many Muscle Groups

Resistance bands are incredibly versatile when it comes to targeting specific muscle groups. They can effectively engage the major muscle groups crucial for running, such as your core, glutes, and legs.

Moreover, you have the freedom to select exercises that align with your fitness goals and preferences. Whether you’re looking to work on your overall strength or isolate particular muscle groups, resistance bands have got you covered.

Connective Tissues

Resistance bands offer unique benefits for connective tissues like tendons and fascia. They can help improve the function of these crucial connective tissues, which is essential for overall mobility and injury prevention.

Additionally, resistance bands are incredibly cost-effective, making them one of the most budget-friendly options for strength training, second only to bodyweight exercises. You can find resistance bands for as little as $5, and even the more advanced options rarely exceed $25. This affordability makes them accessible to virtually anyone.

Moreover, their compact and portable nature adds to their convenience. You can easily roll up resistance bands and take them with you when you travel, ensuring that you can maintain your strength training regimen no matter where you go. This portability is a significant advantage for those who are constantly on the move or prefer to work out in different locations.

How to start Resistance Bands Exercises For Runners 

If you’re new to resistance bands training, here are some essential tips to get you started on the right foot:

  • Choose the Right Band: As a beginner, opt for a thinner band, typically in green or yellow. This level of resistance is ideal for newcomers and allows you to focus on proper form and technique. Remember, you can always increase the resistance as you become more experienced and stronger.
  • Master the Basics: Begin with fundamental exercises to build a solid foundation. Exercises like squats, rows, and chest presses are excellent starting points. These movements target major muscle groups and prepare your body for more advanced exercises.
  • Proper Form is Key: Pay close attention to your form. Ensure that you’re using the correct posture and technique for each exercise. This not only maximizes the effectiveness of the workout but also prevents injuries.
  • Gradually Increase Resistance: As you progress and feel more confident, challenge yourself by using a band with higher resistance. Bands in blue or green offer increased resistance and intensify your workouts.
  • Adjust Band Length: You can make exercises more challenging by shortening the bands or even doubling them up. Experiment with different band lengths to find the right level of resistance for your current fitness level.
  • Consistency is Key: Like any form of training, consistency is crucial. Incorporate resistance band exercises into your routine regularly, aiming for at least two to three sessions per week. This consistency will lead to steady progress over time.

1. Side Steps

This exercise is a fantastic way to stabilize and strengthen your hip abductors, which are crucial for runners. Research has shown that many overuse running injuries, such as Runner’s Knee and IT Band Syndrome, can be linked to weakness in the hip muscles.

Here’s how to do it correctly:

Proper Form:

Set Up: Begin by looping the resistance band either above your knees, below them, or for added resistance, around your ankles.

Athletic Position: Assume an athletic position with your feet hip-width apart and your knees slightly bent.

Step Out: Step out to the right side, planting your right heel and pulling your left foot over so you return to a hip-width stance. Maintain tension on the resistance band throughout the exercise.

Keep Feet Apart: Be sure not to let your feet come into contact during the movement.

Repetition: Repeat the sidestepping movement for at least 12 to 16 steps in one direction, and then reverse back to the starting point.

Progression: As you become stronger, challenge yourself by increasing the distance and resistance of the exercise.

2. Monster Steps

This exercise is another fantastic way to target the hip muscles and strengthen your entire lower body, with a special focus on the glutes. Here’s how to perform it correctly:

Proper Form:

Set Up: Loop a resistance band around both ankles and another one around your knees. Ensure that there is enough resistance so that the band is taut when your feet are hip-width apart. If it feels too easy, adjust the band to provide more resistance.

Starting Position: Begin with your knees slightly bent and engage your glutes. This is your starting position.

Movement: Sink into a semi-squat position, and then step forward and out to the side at a 45-degree angle.

Take Monster Steps: Step forward with your left foot, taking “monster” steps by keeping your feet as wide apart as possible. Continue walking in this manner for a distance of 16 to 20 feet.

Walk Backward: After reaching your desired distance, walk backward to return to your starting point.

3. Standing Hip Abduction

This exercise is a personal favorite of mine, and it’s incredibly effective for targeting the hip muscles and glutes. It also incorporates balance, making it an excellent choice for runners.

Proper Form:

Set-Up: To perform this exercise, you’ll need a resistance band and a sturdy object to anchor it. Create a loop by passing one handle of the band around the sturdy object and the other handle around your right ankle. Stand tall with your left foot on the tubing while holding the opposite handle.

Balance Assistance: If you have concerns about balance, you can hold onto a secure object for support.

Movement: Begin with your right knee straight and engage your core muscles. Kick your right leg outward, away from your body, while keeping your hips level and preventing any rotation. Hold this position for a moment.

Return: Slowly return your right leg to the starting position.

Focus on Hip Muscles: Throughout the exercise, concentrate on using your hip muscles rather than allowing your hips to rotate.

Repetitions: Aim to complete 12 to 16 repetitions on each side to finish one set.

4. Ankle Dorsiflexion

This exercise is particularly valuable if you’ve experienced lower leg pain or shin splints in the past. Dorsiflexion involves flexing your ankle by bringing your foot toward your shin, and it’s an effective way to strengthen your lower legs and reduce the risk of common overuse injuries.

Proper Form:

  • Set Up: Begin by sitting on a mat with your legs extended. Take the middle of the resistance band and wrap it around your right foot, then hold onto the band’s handle.
  • Movement: Pull your right foot up toward your shin as far as you can, maximizing dorsiflexion. This is the primary movement.
  • Return: Slowly lower your foot back to the starting position as soon as you’ve reached the maximum dorsiflexion. This completes one repetition.
  • Repetitions: Aim to perform at least 12 to 16 repetitions on each side to complete one set.

Clams:

Clam exercises target several muscle groups, including the outer thighs, glutes, groin, and hip flexors.

Proper Form:

Starting Position: Begin by lying on your right side, supporting your head with your hand or arm, or propping yourself up on your forearm. Your knees should be slightly bent, and your feet should be stacked, one on top of the other.

Band Placement: Loop the resistance band around your knees, ensuring it’s secure.

Movement: Lift your top knee upward about 8 to 10 inches while keeping your feet together throughout the movement.

Hold and Return: Hold the elevated position for a count of three, emphasizing the contraction in your hip and thigh muscles. Then, slowly lower your knee back to the starting position.

Repetitions: Perform the clam exercise for 12 to 16 repetitions on each side to complete one set.

5. Squat with Resistance Band

Squats are undoubtedly one of the best strength exercises, and when paired with resistance bands, they become even more effective for runners. Squats target various muscle groups, including the core, glutes, quadriceps, and calves. Additionally, they promote mobility and a full range of motion in the lower body, which is essential for runners.

Proper Form:

Starting Position: Stand on the resistance band with both feet, positioning them shoulder-width apart. Ensure the band is taut and centered under your feet.

Grip Handles: Squat down by pushing your hips back and reach down to grip a handle in each hand. Keep your chest up and your back flat.

Squat Movement: With the handles raised to shoulder height, maintain an upright posture while squatting down. Imagine you’re sitting in a chair positioned behind you.

Full Squat: Continue to lower your body until both of your knees are bent at approximately a 90-degree angle.

Return to Standing: Push through your heels to stand back up, returning to the starting position. This completes one repetition.

Knee Tracking: Pay attention to your knee alignment, ensuring they track over your toes throughout the exercise.

6. Standing Kickbacks

This exercise primarily targets the hamstrings (the muscles at the back of the thighs) and the gluteus maximus (the butt muscles). It’s an excellent addition to your resistance band routine to strengthen these crucial muscle groups.

Proper Form:

Ankle Loop: Begin by looping the resistance band just above your left ankle. Ensure it’s secure and won’t slide down during the exercise.

Sturdy Object: Stand facing a sturdy object that you can hold onto for balance. This could be a chair, a wall, or any stable support.

Knee Bend: Slightly bend your right knee while keeping your upper body upright.

Kickback Motion: Lift your left foot off the ground, driving your heel backward in a kickback motion. Focus on contracting your hamstrings and glutes.

Top Position: Hold the position for a moment when your left leg is fully extended backward, engaging your core for stability.

Lower and Repeat: Lower your left leg back down with control, and then repeat the kickback motion on the same side.

Core Engagement: Maintain engagement in your core muscles throughout the exercise to support your posture and balance.

Avoid Rocking: Ensure that your upper body doesn’t rock forward as you perform the kickbacks.

Hit the Ground Running: Smart Strategies for Beating Post-Run Muscle Soreness

stop Stop Muscle Soreness While Running

Have you ever found yourself hobbling around the day after a challenging run, wondering why your muscles feel like they’ve been through a boxing match? Well, you’re not alone!

Muscle soreness – it’s like the unwelcome guest that shows up after a party, reminding you of all the fun (or in this case, running) you had. But why does it happen? Is it just because our muscles are drama queens, or is there more to it? Spoiler alert: It’s not just your muscles being over-dramatic.

Whether you’re a seasoned runner or someone lacing up their sneakers for the first time, muscle soreness doesn’t discriminate.

However, beginner runners or those making a comeback after a break tend to experience it more frequently. But don’t worry, there’s hope, and we’re here to guide you through it.

In this article, we’ll explore the two primary types of exercise-related soreness: the immediate or acute soreness you feel during or right after a run, and the more familiar Delayed Onset Muscle Soreness (DOMS).

From the “Start Slow” principle, the importance of the golden window of post-run nutrition, the power of protein, and the wonders of compression gear, to the soothing effects of foam rolling, the perks of coffee (yes, coffee!), and even the chill therapy of ice baths – we’ve got it all covered.

Plus, we’ll dive into the benefits of topical ointments and why you shouldn’t stop moving, even when you’re sore.

Ready? Let’s go!

Muscle Soreness demystified

Let’s dive into this topic and unravel the mystery of muscle soreness.

The prevailing theory is that muscle soreness occurs due to muscle damage, often in the form of tiny tears in your muscles. Yes, you read that right—tiny tears. It might sound intimidating, but it’s a common part of the muscle-building process.

Muscle soreness is something many runners, regardless of their fitness levels and training backgrounds, have encountered. However, beginner runners or those returning to running after a hiatus tend to experience muscle soreness more frequently than those who maintain a consistent training regimen.

There are primarily two types of exercise-related soreness. The first type is immediate or acute soreness, which you feel during or shortly after a run. The second type is the more familiar one—Delayed Onset Muscle Soreness, affectionately known as DOMS in fitness circles.

In most cases, muscle soreness is mild and arises after a challenging run, such as long runs or intense sprint and hill repetitions. It usually doesn’t last more than a couple of days. However, there are times when this soreness doesn’t make its presence known until two or three days post-workout.

Dealing With Post-Run Muscle Soreness

Unfortunately, according to the current scientific theory, there are no fool-proof ways for speeding up the recovery of muscle soreness.

(Of course, there is one fool-proof way to avoid soreness altogether, which is to give up running altogether.

And I guess that you don’t want to do that.)

With that said, here are a few helpful training tips and recovery guidelines that are worth trying to get your body primed for the next run.

1. Start Slow

Taking a gradual approach to running is the golden rule, especially if you’re new to the sport or making a comeback after a long hiatus. Let’s break down this journey into manageable steps:

  • Embrace the Walk/Run Method: If you’re a complete novice in the running world, don’t fret! Start with the walk/run method. This means alternating between walking and running intervals. It’s an excellent way to build your endurance and avoid pushing your limits too soon
  • Gradually Increase Endurance: Once you’re comfortable and can maintain a continuous run for around 30 to 40 minutes without excessive strain, you’re on the right track. This milestone is your green light to start thinking about enhancing your running performance.
  • Introduction to Speed Work: At this stage, consider introducing speed work, but proceed with caution. Small increments of speed intervals can work wonders for your overall running performance.
  • Follow the 10 Percent Rule: To protect your body from overuse injuries, it’s crucial to follow the 10 percent rule. This rule advises against increasing your weekly running mileage by more than 10 percent compared to the previous week. This gradual approach minimizes the risk of pushing yourself too hard too soon.

Additional resource – Sore quads after running

2. Eat Right Away

Right after your run, there’s a golden window of opportunity that lasts for about one to two hours. During this time, your body is like a sponge, ready to absorb nutrients efficiently. Skip this crucial post-run nutrition, and you might find yourself running on empty in your next session, while also missing out on the muscle recovery benefits.

So, what should you do? Well, it’s simple—eat something right after your workout. The key is to aim for a ratio of 3 or 4 parts carbs to 1 part protein for optimal recovery. But don’t worry; it’s not a one-size-fits-all approach.

You might need to experiment with ratios and foods to discover what works best for your body.

Liquid Nutrition for Quick Recovery

If you’re pressed for time or not quite ready for solid food, liquid nutrition can be your go-to. My personal favorite is the classic chocolate milk or a banana-based smoothie. These options provide a quick dose of essential nutrients without overloading your stomach.

Here are some other fantastic post-run food choices:

  • Yogurt
  • Banana with peanut butter
  • Orange juice with two hard-boiled eggs and whole-grain toast

If you have a bit more time and a hearty appetite, consider options like brown rice with chicken, a bowl of quinoa, or an omelet paired with an avocado. The key is to find the post-run meal that satisfies your taste buds and your body’s recovery needs.

3. Consume Protein

I might sound like a broken record, but I can’t stress this enough: protein is your best buddy when it comes to preventing muscle soreness. Not only is it crucial for building muscles, but it has also been shown to work wonders in reducing post-workout muscle damage, as per scientific studies.

So, here’s the science behind it: protein intake stimulates a process called protein synthesis. This process is as fundamental as it gets in biology—it’s where amino acids line up to help your cells create specific proteins. Think of it as the construction crew getting to work.

But that’s not all. A sufficient intake of protein also elevates the level of amino acids in your blood. Why is this important? Because it sends a biomechanical signal to your muscles, telling them not to resort to protein as an alternative fuel source. Translation: when you consume enough protein, you provide your muscles with the essential building blocks they need to repair and rebuild damaged tissue.

Additional resource – Does running build muscle?

4. Compress it

Want to fast-track your recovery and kiss muscle soreness goodbye? Consider slipping into some compression gear. There’s solid scientific evidence backing this up.

A study published in the British Journal of Sports Medicine reveals that wearing compression garments during and after exercise can significantly reduce muscle soreness. But that’s not all—another piece of research in the Journal of Strength and Conditioning found that marathoners who sported compression socks in the 48 hours following a race reported a speedier recovery compared to those who skipped them.

So, how does this magic work?

Here’s the theory: technical compression fabric comes to the rescue by providing support to muscle groups, which in turn reduces those pesky micro-tears in your muscles. But that’s not all! Research also shows that compression can boost circulation.

5. Foam Roll

Foam rolling is like a soothing massage that you can give yourself, and it’s one of my all-time favorite methods for saying goodbye to post-run muscle soreness.

But what exactly is foam rolling, and how does it work its magic? Well, picture a long, cylinder-shaped tool that can work wonders for your body. Foam rolling is a type of self-myofascial release, and it targets those tight and sore spots in your muscles.

The idea behind it is pretty cool—foam rolling helps prevent scarring of the connective tissues, known as fascia, which are nestled between your muscles. By keeping these tissues supple and happy, you’re less likely to experience pain and injuries.

But that’s not all! Foam rolling also does a fantastic job of boosting blood flow to your hardworking muscles through applied pressure, which is essential for speeding up your recovery process.

So, how can you make the most of it? Consider incorporating foam rolling into your routine a couple of times a week, especially after a challenging run or even just before your workout, as part of your dynamic warm-up. If you’re feeling exceptionally sore, dedicate a good 15 to 20 minutes to roll out those areas of tension and soreness.

6. Drink Coffee

If you’re a coffee enthusiast, here’s some news that’ll perk you up even more! Not only does research highlight caffeine’s positive impact on training and endurance, but it turns out that your beloved brew can also help ease post-workout soreness.

A study conducted at the University of Georgia found that consuming caffeine, equivalent to about two cups of coffee, can be a soreness-soothing elixir after a tough training session. But how does it work its magic?

Let’s thank adenosine, which is a crucial biochemical involved in energy transfer and is released by your body, especially by the central nervous receptors responsible for pain processing.

Now, before you start guzzling down gallons of coffee, keep in mind that moderation is key. Too much coffee can lead to muscle spasms and some serious tummy troubles during your workouts. So, enjoy your coffee responsibly, and let it work its wonders on those sore muscles!

7. Use the Ice

Here’s a cool (pun intended) method to beat post-run soreness: take a refreshing dip in a cool bath after a demanding running session. Why does this work, you ask? Well, the theory behind it is that ice therapy can help minimize the body’s inflammation response.

Now, what’s the inflammation response, you wonder? In simple terms, it’s your body’s natural way of healing itself after an injury, battling infections, and repairing damaged tissue. However, it’s a bit like wearing a cast—often leading to swelling and stiffness in the affected area, immobilizing it as it heals.

So, after a tough workout, consider spending 15 to 20 minutes in a cold tub to cool those hot and troubled areas. If an ice bath isn’t convenient, you can still target strained or overworked areas with an ice pack. It’s a chill way to soothe those sore muscles!.

8. Use Topical Ointments

If all else fails and you’re still grappling with muscle soreness, it might be time to turn to topical ointments for relief. But how do they work? These ointments typically contain ingredients that provide a numbing and cooling effect on your muscles.

These products induce a sensation of cooling and pain relief, helping to boost blood flow and improve circulation in the process. So, don’t hesitate to massage these ointments into your usual sore spots after a tough run or for a few days until the soreness subsides.

You’ll find a variety of popular remedies available in stores or online, such as Ben-Gay, Arnica Rub, Tiger Balm, Traumeel, and magnesium oil. They’re here to help you soothe away that post-run discomfort!

9. Don’t Stop

I get it. The last thing you want to do when you’re sore is more exercise. But hold off on calling me crazy just yet because there’s a method to this madness.

According to science, the best thing you can do is to keep moving. Yes, I know, running might seem like a bad joke when your leg muscles are screaming in agony, but research has shown that light activity can work wonders. It increases blood flow and accelerates the body’s ability to clear out the chemicals and toxic waste associated with muscle soreness.

Now, before you think about repeating that gut-busting hill workout or long trail run from yesterday, hold on! That’s a big mistake and a surefire way to wreck your performance and health.

When I talk about active recovery, I mean engaging in light, easy exercise. This helps boost blood flow to those sore muscles without putting excessive pressure on them. Think of activities like a leisurely walk, a casual bike ride, a yoga session, or perhaps a refreshing swim. These are all excellent examples of active recovery that can help you get back on track without worsening your soreness.

Running Exercises at Home – Strength Training for Runners (No equipment Needed)

No-Equipment Home Workout for Runners

Looking for the best running exercises at home? Then you have came to the right place.

Runners need to strength train, period. I keep saying it over and over again.

And I know that it’s more easily said than done.

Keeping a regular running and strength training program is a lot to ask for, especially the case if you’re busy like the rest of us.

Take it from one who knows.

Between my job, my runs, my daily errands, and — you know — “life,” I’m more often than not tempted to skimp on gym time, just like you are (maybe?).

Still, even though it’s a challenge I’m sticking to my “weight training” guns because I think it’s that important.

But I will let you in on my little secret for making it more manageable, even with a busy schedule.

It’s bodyweight training.

runner doing No-Equipment Home Workout

Gyms are for People Who Have Time.

For the Rest of Us, Bodyweight Training is King

Bodyweight training has a lot to offer.

It’s convenient and burns calories, improves mobility, and builds strength and endurance.

It can help you get into the best shape of your life without leaving the comfort of your home.

What’s more? Bodyweight training stabilizes the joints, strengthens connective tissues, and improves balance.

What’s not to like!

Adding bodyweight training will help you improve your running endurance and prevents pain and injury: it sets the stage for a stellar performance.

Strength Training for Runners (No equipment) Workout

To get you started, here’s a list of the best running exercises at home for a challenging no-equipment bodyweight strength routine.  I came up with this specifically for runners to complement their outdoor efforts.

Running Exercise at Home – 1. Bodyweight Squat

Assume an athletic position with feet about shoulder width apart, while extending the arms out straight so they are parallel with the ground.

Next, while sticking your butt out, and leaning forward at the waist, squat down until both knees are bent at a 90-degree angle, and/or both thighs are parallel to the ground.

Make sure the back is straight, shoulders and chest upright throughout the movement.

Last up, return to starting position by driving through heels.

Perform 25 reps to complete one set.

Repeat for three times.

Running Exercise at Home 2. Planks

Begin by laying on your stomach, then prop up on your elbows with feet slightly apart.

The toes should be about hip distance apart with shoulders directly above the elbows.

Next, hold the plank position while keeping the entire body straight and core engaged the entire time.

Hold the pose for at least 90 seconds to complete one set.

Repeat for three or more sets.

Running Exercises at Home – 3. Walking Lunges

Assume an athletic position with your hands behind your head.

Next, while engaging the core and keeping your torso straight, step forward with your right leg until your front thigh is parallel to the floor, then push your right heel into the ground, and step forward to a standing position.

Repeat on the other side

Perform at least 12 reps on each side to complete one set.

Aim for three sets.

Additional Resource – 13 Exercises to improve running

Running Exercise at Home – 4. Lying Superman

Lay down with the body flat on the floor, arms extended in front of your face.

Next, while engaging the core, raise both of your legs, chest, and arms off the ground, then hold it for a count of three while squeezing the lower back in the process.

Last up, lower back to the starting position.

That’s one rep.

Perform 16 reps to complete one set.

Repeat for three times.

Additional resourceShould you be running after leg day?

Running Exercise at Home5. Dive Bomber Push-ups

Assume a downward dog position with the hands about shoulder width apart, and hips high in the air.

Be sure that body looks like an inverted “V.”

Next, lower your chest to the ground by bending your elbows as you push forward to an upward dog position.

Hold for the count of three, then reverse the movement, until you are back to the starting position.

Do at least 10 reps to complete one set.

Aim for three sets.

Additional resource – Maintaining muscle during marathon training

Running Exercise at Home  6. Russian Twists

Begin by laying on your back with the upper legs perpendicular to the floor and knees bent 90-degrees.

Next, while keeping the back straight and core engaged, twist your torso as far as you can to the right side, then twist back to the starting position, and repeat on the left side.

For more challenge, raise both of your legs off the floor and/or use weights for more resistance.

Do at least 16 reps on both sides to complete one set.

Aim for three sets with good form.

Running Exercise at Home 7. Single Leg Lateral Jumps

https://www.youtube.com/watch?v=Kz–psqBm9k

Begin by standing on the side of a hurdle or a cone, then balance on one leg with the knee slightly bent.

Next, while keeping your back flat, jump to hop sideways over the cone.

As soon as your foot touches the floor, rebound by jumping back to the starting position.

Be sure to continue hopping back and forth while engaging your core muscles and pushing explosively from your legs.

Aim for at least 12 to 16 reps on both legs.

Do three sets.

Running Exercise at Home 8. Fire Hydrants

Assume an all fours position.

Next, while engaging your core and keeping the lower back as flat as possible, raise your knee directly to the outside as high as you can, then lower down into the starting position.

Perform 16 reps on each side to complete one set.

Aim for three sets.

Running Exercise at Home 9. Burpees

Begin in a standing position with feet shoulder width apart

Next, lower down into a squatting position, placing both hands on the floor just outside of the feet.

Then, kick both of your feet, so you end up in a push-up position.

Lower your chest to the floor, then press back, kick your feet back to the squatting position, then explosively jump up into the air while clapping the arms overhead.

That’s one rep.

Aim for at least 25 burpees with good form to complete one set. Do three sets.

New to Running? Start Here…

If you’re serious about running, getting fit, and staying injury free, then make sure to download my Runners Blueprint Guide!

Inside this guide, you’ll learn how to start running and lose weight weight the easy and painless way. This is, in fact, your ultimate manifesto to becoming a faster and a stronger runner. And you want that, don’t you?

 Click HERE to check out my Runners Blueprint System today!

Don’t miss out! My awesome running plan is just one click away.