Plantar Fasciitis Unveiled: Causes, Treatment, and Prevention for Runners

How to Prevent Plantar Fasciitis When running

Ready to lace up those sneakers and hit the pavement? Well, hold on tight because today, we’re diving headfirst into the world of plantar fasciitis – that pesky, heel-aching injury that can strike fear into the hearts of runners everywhere.

In fact, it’s so notorious in the running community that it’s earned itself a nickname: ‘Runners Heel.’ Yes, that’s right! Plantar fasciitis is the heel’s arch-nemesis, and it’s responsible for a whopping 80% of all those dreaded cases of heel pain.

But here’s the kicker – it’s not just a pain in the heel; it’s also one of the top culprits behind about 1 in every ten running injuries out there.

Fret no more.

In today’s post, we’re diving deep into this condition. More specifically, I’ll be explaining:

  • What is plantar fascia
  • The causes of the injury
  • Why it’s common among runners
  • The fastest way to treat it
  • How stretching helps
  • The link between running surfaces and heel pain
  • Exercises you can do to prevent heel pain
  • And so much more

Sounds exciting? Let’s get started.

What’s the Plantar Fascia?

Plantar fasciitis is a common cause of heel pain that affects both runners and non-runners. The human body is equipped with this fibrous band of tissue called the plantar fascia. It’s like the support beam of your foot, stretching from your heel (the calcaneum) to the middle of your foot bones, bridging the gap between your heel bone and your toes.

Now, when that support beam gets all irritated and inflamed, that’s plantar fasciitis for you. It’s like your foot’s way of saying, “Hey, I hurt!”

It’s especially common in runners

Plantar Fasciitis is no stranger to runners.

In fact, it’s one of the most frequently reported causes of chronic heel pain. A study published in the Journal of Foot and Ankle Research vouches for this.

And in the realm of running, Plantar Fasciitis is quite the troublemaker. It’s responsible for approximately 8 percent of all running injuries, as revealed by a retrospective study analyzing 2000 running-related injuries.

The Process of The Injury

Plantar Fasciitis kicks off when the delicate fibers of the fascia, that fibrous band of tissue running from your heel to your toes, start to accumulate tiny tears.

It’s like your foot’s way of saying, “Hey, we’ve had enough tension here!”

Initially, it might seem like a minor annoyance, but as you keep pounding the pavement, those small irritations can snowball into a full-blown injury.

The key here is early detection and prompt treatment. Ignoring it could lead to some unpleasant consequences down the road.

Causes of Plantar Fasciitis

Overuse is the main culprit. However, several factors can increase your chances of developing this painful condition.

Here’s the lowdown on some of them:

  • Overdoing It Too Quickly: Pushing your limits too fast is a classic mistake. Rapidly increasing your running distance can put undue stress on your plantar fascia, paving the way for injury.
  • Carrying Extra Weight: If you’re on the heavier side, your plantar fascia might bear the brunt of the load. Those extra pounds can lead to irritation, pain, and, eventually, Plantar Fasciitis.
  • Gender: Surprisingly, women are about twice as likely to develop Plantar Fasciitis compared to men, as indicated by research.
  • Inadequate Footwear: Wearing the wrong running shoes can spell trouble. Shoes with insufficient arch support, heel cushioning, or sole flexibility can exacerbate the problem.
  • Poor Running Form: If you’re not running with the proper technique, you’re increasing the strain on your plantar fascia. Make sure to follow guidelines on proper running form to minimize the risk.
  • Mobility Issues: Research suggests that a tight Achilles tendon, that large tendon above your heel, can contribute to the development of Plantar Fasciitis. Stretching exercises can help alleviate this problem.

The Main Symptoms

Plantar Fasciitis typically presents with distinct symptoms that can help you identify the condition:

  • Gradual Heel Pain: The hallmark of Plantar Fasciitis is the gradual onset of sharp pain on the bottom of your heel, especially near the inside of the foot.
  • Morning Discomfort: You might notice intense heel pain during your first few steps in the morning. This phenomenon is often referred to as “first-step pain.”
  • Pain After Rest: After periods of rest, such as sitting for a while or getting up from a chair, you may experience heel pain.
  • Aggravation with Activity: Activities that put pressure on your feet, like climbing stairs or standing for extended periods, can trigger or exacerbate the pain.
  • Evening Recurrence: The heel pain may temporarily subside during the day, but make a return in the evening.

Treatment of Plantar Fasciitis

As I have already clearly stated, the condition can be a real nagging injury that only gets worse the longer it’s present.

Hence, the sooner you put in place an aggressive treatment plan, the better off you’ll be, both for the short and long term.

For that, here is the step-by-step treatment plan you need to follow:

Rest

Taking a break from activities that aggravate your condition, such as running and high-impact exercises, is essential. The duration of your rest period can vary depending on the severity of your condition. It might last a few days, several weeks, or even a few months. Pay attention to the intensity and frequency of your pain as a guideline for when to resume activity.

Keep in mind that Plantar Fasciitis typically develops over time due to accumulated injuries, so it’s important to give your foot the time it needs to heal properly. Resting is a crucial step in the recovery process.

Additional resource – How to Prevent ITBS in Runners

Massage for Reducing Pain

Self-massage and soft-tissue manipulation can provide relief from Plantar Fasciitis pain.

Here’s how you can do it:

  • Get a golf ball or a similar round, hard object.
  • Gently roll the affected foot back and forth over the ball.
  • Start with a few minutes a day and gradually increase to 5 minutes daily.

You can also use a frozen water bottle by rolling it under your injured foot.

Active Release Technique is a more advanced soft-tissue manipulation technique that may help alleviate Plantar Fasciitis pain. While scientific evidence supporting its effectiveness is limited, some individuals find it beneficial.

Try Orthotics

Consider using Over-The-Counter (OTC) orthotics to provide additional arch support, especially if you have a history of Plantar Fasciitis, faulty foot mechanics, or high arches. Research indicates that orthotics can help reduce pain and address faulty foot mechanics, a common cause of this condition.

OTC orthotics are readily available and cost-effective compared to custom orthotics, which can take weeks to receive. Ensure you use them in both shoes, even if only one foot is affected. If OTC orthotics don’t provide relief, consult a podiatrist for custom orthotics tailored to your needs.

Additional Resource – Overpronation vs. Underpronation

Kill the Pain

If you’re experiencing severe pain, consider using cold therapy on the affected area. Apply an ice pack (you can use a store-bought ice pack or a bag of frozen peas or corn wrapped in a towel) for 10 to 15 minutes daily.

Additionally, you can take over-the-counter pain relievers like ibuprofen, naproxen, or paracetamol to alleviate pain and inflammation.

Stretch it

Stretching is another effective strategy to expedite your recovery and reduce the risk of re-injury. Incorporate these stretches several times a day, making sure to stretch both feet.

Perform a few (check below) stretches pre-run, in the morning, and whenever you experience soreness or pain after running. A recommended stretching routine involves three to five sets of 30 seconds per stretch.

See a Doctor

If your pain persists despite trying the aforementioned measures, it’s crucial to consult a sports podiatrist.

In some cases, your doctor may recommend treatment options like cortisone injections, foot taping, night splints, or other tools to alleviate symptoms and expedite recovery. In severe cases, physical therapy may be necessary to fully restore plantar fasciitis function.

How to Treat Plantar Fasciitis When Running – The Conclusion

There you have it.

The above measures are some of the best you can implement right now as a part of your running routine to help reduce the risks of developing plantar fasciitis.

If you suspect you have plantar fasciitis—or any other overuse injury—visit your doctor or physical therapist for an evaluation.

The best way to determine the culprit behind your pain and provide a quick path toward full recovery is by doing a full examination of the biodynamics of your ankle, foot, and gait.

As a runner, your feet are your best ally.

They take you wherever you want to go.

But you have to take good care of them to lead a healthy, active life.

The rest is up to you.

Please feel free to leave your comments and questions in the section below.

In the meantime, thank you for reading my post.

Keep Running Strong.

David D.

Decoding Ankle Pain While Running: Causes and Solutions

achilles pain

Running, ah, it’s the sweet symphony of pounding the pavement, feeling the wind in your hair, and conquering mile after mile. But hold on a second. It’s not all rainbows and butterflies, right?

Sometimes, it’s more like a symphony of aching ankles and a chorus of “ouch” with every step. So, what’s the deal with our ankle buddies in this running journey?

You see, our ankles are truly unsung heroes.

They’re the MVPs of your lower extremities, bearing the brunt of your entire body weight during your daily strolls, exhilarating runs, epic jumps, and even those moments when you’re just standing there pondering life’s mysteries.

In fact, they work harder than your knees and hips, those other weight-bearing joints we tend to fret about.

Now, why are we delving into this ankle talk? Well, it’s simple. If you’re a runner or thinking about lacing up those running shoes, ankle soreness or pain might be a familiar companion. But fear not.

In this guide, we’ll dive into the world of ankle health for runners. We’ll unravel the mysteries behind those aches and pains, exploring the common culprits and their not-so-secret identities.

Together, we’ll learn how to decode your ankles’ messages and keep them happy so you can hit the running trails with confidence.

So, lace up your running shoes, and let’s embark on this journey to discover the secrets of happy ankles while running

Ankle Pain Running Explained

Alright, folks, it’s time to get down to the nitty-gritty of ankle pain while running. You see, our ankles are like a fascinating puzzle made up of bones, ligaments, and tendons.

They’re like the bridge connecting your body to the ground beneath you. But guess what? Just like any puzzle, sometimes they can get a little tricky.

So, what’s the deal?

Well, when something goes haywire with these ankle structures, it can lead to that pesky pain we’re talking about. Now, hold onto your running shoes because there are mainly two culprits here.

First up, we have those sudden, “ouch, I twisted my ankle” moments – yup, you guessed it, it’s the infamous ankle sprain. It’s like the ankle’s way of saying, “Whoa, slow down there, buddy!”

This usually happens when you’re zigzagging through an uneven trail, landing awkwardly, or having a little misstep.

Then, we have the more persistent troublemaker – Achilles tendinitis. It’s like that nagging pain that just won’t go away.

This one’s usually brought on by the wear and tear of running, overuse, or maybe some not-so-comfy running shoes.

Your Ankle Pain Running Guide

Let’s delve a bit deeper into the main causes of ankle pain during and/or after running.

Ankle Pain Running – 1. Ankle Sprain

Picture this: You’re out for your morning run, feeling fantastic, when suddenly, “Ouch!” You experience a sharp pain above your ankle bone. What’s going on? Well, you might just be dealing with the notorious ankle sprain.

An ankle sprain is essentially an injury to one or more of the ligaments that form your trusty ankle joint. Ligaments are like the body’s natural seatbelts, keeping your joints stable and secure. But sometimes, they need a little TLC, too.

Now, how does this drama unfold? Well, typically, it happens when you’re running on uneven terrain, make an unexpected step off a curb, or land in a rather awkward way. In some dramatic cases, you might even hear a little “pop” followed by a sharp, “Hey, that hurts!”

Yep, your ligaments are letting you know they’re not thrilled with your recent moves.

And here’s the kicker – ankle sprains are often accompanied by swelling. So, not only will you feel the pain, but your ankle joint might also decide to puff up like a balloon. Not exactly the fashion statement you were going for during your run, right?

Treatment Of Ankle Sprains

So, you’ve found yourself in the ankle sprain club—welcome, or maybe not-so-welcome, to the party!

But fret not, my running friend, because ankle sprains, while a bit of a nuisance, are actually one of the easier conditions to bounce back from.

Here’s the lowdown on how to kick that sprain to the curb and get back on your running game in no time:

Rest:

Yes, you heard it right, my fellow go-getter. Rest is your new best friend. Give that ankle some well-deserved downtime. Don’t rush things; healing takes time. But don’t worry; you’ll be up and running again in just a few weeks and sometimes even days!

Ice:

Grab that ice pack (or a bag of frozen peas if you’re feeling fancy) and apply it to your sprained ankle. Icy goodness will help reduce swelling and ease the discomfort. Ice for about 15-20 minutes every couple of hours—your ankle will thank you for it.

Compression:

Get yourself a comfy compression bandage. Wrap it gently but firmly around your ankle to help control swelling and provide support to those hard-working ligaments.

Elevate:

Elevate that sprained ankle whenever possible. Prop it up on a pillow or cushion when you’re sitting or lying down. It’s all about reducing the swelling and letting your ankle heal like a champ.

Anti-Inflammatories:

When the pain is really playing hard to get, over-the-counter anti-inflammatory meds can be your allies. Take them for 24 to 48 hours after the injury, but always follow the recommended dosage. They’re like your sidekicks in this recovery mission.

Baby Steps:

Now, here’s the exciting part. Once you can put your full body weight on that injured limb and perform ankle movements without wincing in pain, it’s time to ease back into running. But start slow and gradual, like a gentle jog, before sprinting towards your personal records.

Seek Help if Needed:

If the pain and swelling persist beyond a week, or if things just don’t seem to be getting better, don’t hesitate to reach out to a medical pro. They’ll give you the expert guidance you need to ensure a speedy recovery.

Ankle Pain Running -2. Achilles Tendonitis

So, you’ve got a pain in the back… of your ankle? Well, that could be your Achilles tendon trying to tell you something. If you experience pain that starts during the first few minutes of your run, eases up a bit, and then comes back to haunt you post-run, it might just be Achilles tendinitis paying you a visit.

Your Achilles tendon, or that strong, fibrous band located at the back of your ankle, plays a critical role in your running escapades. It’s the connection between two powerhouse muscles, the gastrocnemius and the soleus, and your heel.

So, how do you know if you’ve got Achilles tendinitis knocking on your ankle’s door? Look out for tenderness, stiffness, and a range of pain, from mild to “I can’t even right now” severe. It’s like a nagging reminder that something’s not quite right in the back of your leg.

Achilles tendinitis usually shows up when you’ve been putting in the miles a little too enthusiastically or maybe wearing shoes that just aren’t the perfect fit. Sometimes, even running in one direction on the track (seriously, who knew?) can stir the pot and lead to this irksome condition.

Treatment Of Achilles Tendonitis

So, you’ve been dealing with that nagging pain in the back of your ankle, and it turns out it’s Achilles tendonitis. Don’t worry, I’ve got your back, or should I say, your Achilles tendon!

Let’s talk treatment:

First Things First: Rest and Recovery

One of the best ways to show your Achilles tendon some love is by dialing down the intensity of your training or, in some cases, taking a temporary hiatus from your running routine. Think of it as a well-deserved rest for your tendon.

Chill Out with Cold Therapy

Cold therapy can be your new best friend. Applying ice to the affected area can help reduce inflammation and ease the pain. Just remember not to go overboard – a sensible approach to icing is usually around 15-20 minutes every couple of hours.

Self-Care for the Win

Elevating your leg and using compression can be surprisingly effective. Elevating helps with blood flow, while compression reduces swelling.

Anti-Inflammatories to the Rescue

Over-the-counter anti-inflammatory medications (with your doc’s approval, of course) can provide relief from pain and inflammation. They won’t fix the issue, but they’ll make you feel more comfortable during your recovery.

Stepping Up the Game: Invasive Treatments

In some cases, when Achilles tendonitis isn’t responding to the gentler treatments, more aggressive approaches might be needed. These include:

Steroid Injections: Sometimes, a shot of corticosteroid can help reduce inflammation. It’s like a superhero swooping in to save the day.

Platelet-Rich Plasma (PRP) Injections: This cutting-edge treatment involves using a concentrated form of your own blood to promote healing. It’s like giving your body a turbo boost to repair itself.

Surgery: While it’s typically a last resort, surgery may be necessary in severe cases where there’s significant tendon damage. Think of it as a surgical tune-up for your Achilles tendon.

Ankle Pain Running – 3. Stress Fractures

Stress fractures are like tiny battle scars on your anklebones. When you subject your bones to excessive force, like the pounding from running, your muscles can’t absorb all that shock. So, they pass the message along to your bones, and voilà – a tiny crack forms. Ouch!

Red Flags

Stress fractures come with their own set of warning signs.

If you notice your ankle is tender and bruised, and you can’t even think about running on it without wincing, it’s time to suspect a stress fracture. Sometimes, there might be redness, swelling, or even a weird sensation of numbness in your toes.

Treatment of Stress Fractures

If you suspect a stress fracture, it’s time to call in the professionals. Don’t worry; you’re not alone on this journey. Seeking medical treatment is crucial. Your doctor can confirm the diagnosis and provide guidance on the best course of action.

Here’s a little motivation to take stress fractures seriously: if you’ve had one, you might be at a higher risk of developing arthritis later in life. So, treating it properly isn’t just about getting back to running; it’s about preserving your long-term joint health.

running shoes for overpronators

Ankle Pain Running – 4. Tarsal Tunnel Syndrome

Let’s dive into another ankle woe, folks – Tarsal Tunnel Syndrome. Ever heard of it? It’s like the carpal tunnel syndrome of the ankle, and it’s a real pain, quite literally. Here’s the lowdown:

Tarsal Tunnel Syndrome is a sneaky condition where the tissues and ligaments in your foot decide to gang up and put pressure on the posterior tibial nerve, which hangs out near your ankle. This nerve is a branch of the sciatic nerve, making it a pretty big deal.

When Tarsal Tunnel Syndrome strikes, it likes to make a grand entrance. Expect sensations like burning, aching, numbness, and tingling in your ankle, heel, sole, and toes. It’s like a wild party, but not the fun kind.

So, who’s behind this chaos? Well, blame it on tendon swelling, foot pronation (when your foot rolls too far inward), and even arthritis. These troublemakers team up to create the perfect storm for Tarsal Tunnel Syndrome.

Additional Resource – Your guide to runners itch

Treatment of Tarsal Tunnel Syndrome

Alright, folks, we’ve covered what Tarsal Tunnel Syndrome is and why it’s a real party pooper for your ankles. Now, let’s talk about how to kick it to the curb and get back on your feet—literally!

First things first, the severity of Tarsal Tunnel Syndrome plays a starring role in determining your treatment.

Non-Surgical Arsenal: Rest, Ice, & NSAIDs

If you catch Tarsal Tunnel Syndrome early or it’s not too intense, you’re in luck. Non-surgical options can do the trick. Think of these as your trusty sidekicks:

  • Rest: Give those ankles a break. Let them chill.
  • Ice Therapy: The cool kid on the block. Apply ice to reduce inflammation.
  • NSAIDs: Nonsteroidal anti-inflammatory drugs, like ibuprofen, can be your allies. They help with pain and swelling.

When Pain Persists: Seek Help

If your ankle is still staging a revolt despite your best efforts, it’s time to call in the pros. Seeking medical assistance is a smart move. They’ve got more tricks up their sleeves.

The Surgical Saga: The Last Resort

In some cases, when Tarsal Tunnel Syndrome just won’t take the hint, surgery might be on the table. It’s the last resort, like calling in the superheroes when all else fails.

Conclusion

The best way to treat ankle pain—or any other sort of pain for that matter—is to avoid it in the first place.

Though it often comes with the territory in a high-impact sport like running, there’s a lot you can do in the way of prevention.

The above ankle pain guidelines should get you started on the right foot—no pun intended.

But if you want more advice and guidelines, check some of my following posts :

Please feel free to leave your comments and questions below.

In the meantime, thank you for reading my post

Keep running strong

David D.

Run Your Way to Health: How Regular Jogging Combats Disease and Enhances Longevity

picture of Diseases

You already know that running is important; otherwise, you’d have spent your money on chocolate bars and pretzels instead of your running shoes.

Why is running so worthwhile?

The reasons run the gamut: to lose weight, relieve stress, eat more without gaining weight, challenge oneself, stay young, get into better shape, etc.

And that’s not the whole story, as we’re going to see in today’s post.

Exercise, in general, prevents a host of health issues that can cause severe or chronic illness, disability, and even early death, including cardiovascular disease, high blood pressure, stroke, cancer, diabetes, osteoporosis, etc.

In today’s post, I’ll look into some of the ways running and exercise help protect against common diseases and illnesses.

Are you excited?

Here we go.

1. Run away from Cancer

Cancer, a formidable adversary in the modern era, has claimed the lives of millions across the globe. It haunts us in various forms, with colon, breast, lung, and rectal cancers among the most prevalent and devastating. The mere diagnosis of one of these malignancies often feels like a grim sentence.

But here’s the ray of hope: regular exercise emerges as a powerful shield against many types of cancer, including those notorious ones. A comprehensive review of 170 epidemiological studies featured in the Journal of Nutrition offers this beacon of optimism.

Still skeptical? Let’s delve into some more compelling research. A study conducted by the Public Health Sciences Division examined subjects engaged in over an hour of daily cardio exercise six days a week. The remarkable outcome was a substantial reduction in cellular propagation patterns associated with colon polyps—a precursor to cancer.

In another study, a meticulous meta-analysis of 67 articles published in the Canadian Medical Association Journal scrutinized lifestyle factors affecting breast cancer recurrence rates. It considered weight management, exercise, dietary choices, smoking, and more. The conclusion is? Exercise and weight management take center stage in reducing cancer recurrence rates.

But the benefits of regular exercise extend even further. It can alleviate some of the harsh side effects of cancer treatment, such as fatigue and nausea, providing relief for countless cancer patients.

Here’s a staggering statistic: approximately a third of all cancers can be prevented by embracing an active lifestyle, adopting healthy eating habits, and maintaining a proper weight, as per the Canadian Cancer Society. Moreover, research demonstrates that for individuals with colorectal cancer, regular exercise can slash the risks of cancer recurrence or death by up to 50 percent.

Curious about the mechanism behind some of the these benefits? Let’s dive a little deeper

On a cellular scale, exercise, including running, increases the production of antioxidants in the body. These antioxidants combat free radicals, which are unstable molecules that can damage cellular structures.

The accumulation of such damage over time can lead to mutations, potentially causing cancer. Furthermore, running helps maintain a balance in hormone levels, especially insulin. High insulin levels can promote the growth of cancer cells. By regularizing these levels, running indirectly reduces the risk of certain cancers.

2. Dodge Heart Disease

When it comes to safeguarding your heart’s health, cardiovascular exercise, especially running, emerges as a formidable ally. It does wonders for your heart muscles and has a positive impact on your blood pressure, as attested by the American Heart Association (AHA).

According to the AHA, a mere 150 minutes of brisk physical exercise per week is sufficient to maintain a healthy blood pressure. This guideline, found on their website, underscores the significant benefits of regular exercise.

But it’s not just the AHA that champions this cause. A plethora of research studies have arrived at similar conclusions. Regular exercise not only lowers blood pressure but also boosts good cholesterol (HDL), reduces bad cholesterol (LDL), enhances the working capacity of your heart and lungs, and improves blood flow—critical factors in preventing heart disease.

One noteworthy study published in Circulation delves into the realm of aerobic exercises like running, swimming, and cycling. It found that these activities have a positive impact on blood pressure and are beneficial for individuals dealing with hypertension.

Further reinforcing this evidence is research conducted at The Lawrence Berkeley National Laboratory, Life Science Division. Their findings highlight how running can lower the risks of high blood pressure, diabetes, and high cholesterol—key risk factors associated with cardiovascular problems.

So how come running can have such a positive impact on your heart?

Let me explain. Running’s influence on heart health isn’t just about calorie burn. It induces endothelial cells lining the arteries to produce nitric oxide, a molecule that relaxes blood vessels, increases blood flow, and decreases plaque growth and blood clotting.

Additionally, running helps in the production of more high-density lipoprotein (HDL, or “good cholesterol”) and reduces low-density lipoprotein (LDL, or “bad cholesterol”). This lipid adjustment minimizes the risk of fatty deposits in the arteries, which can lead to heart diseases.

3. Runners Suffer From Fewer Disabilities And Live Longer

Here’s an eye-opener: Running can slow down the aging process, according to research conducted at the Stanford University School of Medicine.

In this groundbreaking study, 538 runners and 423 healthy non-runners, all aged 50 and over, were tracked for a remarkable 21-year period. Each year, they underwent a thorough health and disability assessment, which gauged their ability to perform everyday tasks such as walking, opening a milk carton, getting out of a chair, and cutting meat, among others.

The results were nothing short of astonishing. Older runners reported experiencing fewer disabilities and were an astounding 50 percent less likely to pass away prematurely compared to their non-running counterparts. By the end of the 21-year study, a staggering 85 percent of the runners were still thriving, while the non-running group saw their numbers dwindle to just 66 percent.

Further substantiating these findings is another long-term prospective study. This one examined over 370 members of a running club, all aged 50 or older, alongside 249 control subjects. Once again, the results reinforced the idea that running can be a key factor in preventing disability and early mortality among the elderly.

4. Outdo Obesity

Is obesity a disease? Well, I’d argue that it is.

Now, here’s the kicker: One of the most effective ways to combat obesity and get into better shape is none other than running. That’s right, hitting the pavement can be your ticket to preventing excess weight gain and shedding those stubborn pounds for good.

I mean, think about it. When I ask my friends or readers why they run, a whopping 8 out of 10 tell me it’s all about achieving or maintaining a healthy weight.

The calorie-burning power of running is where the magic happens. Clocking in at around 100 calories burned per mile, running is a top-tier calorie torcher. Just picture this: A 200-pound person can incinerate over 900 calories in just one hour.

And there’s solid science to back it up. A study published in Medicine & Science in Sports & Exercise analyzed data from over 100,000 runners and found that those who logged 30 or more miles per week gained significantly fewer pounds than those who ran less than ten miles.

Obesity, as you may already know, is a major contributor to type II diabetes. According to research, shedding about 5 to 7 percent of your body weight can slash the risk of developing this condition by a whopping 58 percent. That’s a game-changing statistic.

What’s more, this same research discovered that consistent exercise dramatically improves insulin sensitivity and glucose metabolism. Translation? Your body’s cells can more effectively transport glucose into your liver, muscles, and fat tissue.

But here’s the catch: Weight loss is a numbers game. You’ll only shed pounds if you burn more calories than you consume. Pair your running regimen with a healthy and sensible diet to create the calorie deficit necessary for weight loss. Otherwise, reaching your ideal body weight might remain just out of reach.

That’s not the whole story.

Running elevates the metabolic rate, not just during the activity but also in the hours following the exercise, a phenomenon known as the afterburn effect or excess post-exercise oxygen consumption (EPOC). This heightened metabolic rate helps in efficient calorie utilization. Moreover, running increases insulin sensitivity, ensuring glucose is taken up by muscles more effectively for energy, reducing the risk of type II diabetes.

5. Fortify Your Bones

Now, let’s talk about something crucial: fortifying your bones. Osteoporosis is a significant public health concern, impacting a staggering 200 million people worldwide, with around 40 million of them residing in the United States, according to the National Institute of Health.

This condition leads to weakened, brittle bones, especially in areas like the hips, spine, wrists, and shoulders. Osteoporosis occurs when the body either loses too much bone density, produces too little of it, or sometimes both.

But here’s where running comes to the rescue once again. In a study published in the European Journal of Applied Physiology, researchers examined the bone density of 122 marathon runners, 81 half-marathon runners, and 10K race athletes. They put their bones to the test using ultrasonography assessments of the right and left calcaneus and compared the results to those of 75 sedentary individuals.

The findings were pretty clear: The runners boasted significantly healthier bone density compared to the sedentary group. But it doesn’t stop there. The scans also revealed that half-marathon and marathon runners had even better bone density than their shorter-distance counterparts.

And if that’s not enough evidence for you, research out of the University of Missouri showed that running might be even more effective at building strong bones than traditional resistance training.

So what’s the link between running and stronger bones?

Let’s delve a little deeper. When we run, the repeated weight-bearing action stresses the bones, which respond by stimulating bone-forming cells called osteoblasts. This process of bone remodeling helps increase bone density.

What’s more?

Running triggers the release of growth factors and promotes the absorption of essential minerals like calcium and phosphorus, which are crucial for bone health. This dynamic process ensures bones become stronger and less susceptible to conditions like osteoporosis.

How Running Prevent Chronic Diseases – The Conclusion

There you have it.

The above are some of the common diseases you can prevent with regular exercise.

Don’t get me wrong.

It’s not the full list by any means, nor does it mean that exercise can turn you into a disease-free immortal human.

But it’s still one of the best things you can do to keep living a healthier and more productive life.

The rest is just detail

Please feel free to leave your comments and questions below.

Thank you for dropping by.

Keep Running Strong

The 9 Golden Running Rules You Shouldn’t Break

Running is one of the most convenient sports out there.

All you need is a pair of trainers, and off you go.

But to reach your full running potential, there are a few training rules you need to abide by.

That’s where today’s post comes in handy.

The 9 Golden Running Rules You Shouldn’t Break

Whether you’ve started running last week or been doing it for years, here are the golden rules of running.

If you understand and apply the following seven rules, you’ll attain the running gains you seek.

*Disclosure: This post may contain affiliate links that at no additional cost to you. I only recommend products I’d use myself and all opinions expressed here are our own. 

Rule. 1 – The 10 Percent Rule

This is one of the most important and time-tested running rules.

In fact, ask any running expert about training principles, and the 10 percent rule will come up in the conversation.

It’s also quite simple.

The 10 percent rule states that you should never increase your weekly mileage by more than 10 percent from one week to the next.

This works very well because it helps you avoid doing too much too soon.

Why is that important?

Most running injuries are overuse injuries—they happen when you run too much or increase your weekly volume too drastically.

In short, this simple principle helps you avoid that pitfall.

The Exception

If you’re a complete beginner, toss the 10 percent rule aside.

Focus instead on running regularly to get your body used to the high impact nature of the sport.

I’d recommend that you aim for two to three 3-mile workouts a week, depending on your fitness level and personal preference.

Over the coming weeks, keep your training consistent and do no increase your mileage—even if you feel like you can do more.

Once you can run for 30 minutes without much huffing and puffing, then try to log in more miles.

Rule.2 – The Warm-up and Warm-Down Rule

Warming up and cooling down are the cornerstones of effective and comfortable training.

A proper warm-up dilates the blood vessels, raise body temperature and heart rate, which prepares your body for the work ahead.

This, in turn, helps prevent premature fatigue, injury, and burnout as well as improve performance.

Here’s my favorite routine.

Once you’re done running, it’s also imperative to let your bodily systems return to their norm.

That’s where a cooldown comes in handy.

A proper cool down is just as crucial to your performance as the warm-up.

This transitional phase helps bring down your heart and respiration rates down to normal, easing your body back into reality.

What’s more?

Low-intensity jogging or walking post workout helps prevent blood from pooling in your extremities as well as get rid of lactic buildup and other waste products from your muscles.

Static stretching—holding a stretch for a relatively long time—improves flexibility and mobility when performed while the muscles are warm and elastic after training.

Moreover, the post-run period is a fantastic time to do some stretching since your muscles are warmed up.

Note – Looking for the best Beginner’s Guide To Running?
Then Check my Runners Blueprint System Here.

The Exception

I can’t conceive of any running scenario in which you can nonchalantly skip the warm-up and the cool-down—even when doing an easy run.

That said, the length (and intensity) of both the warm-up and cool-down depends, mainly, on your fitness level and training goals.

As a guideline, the more intense the session, the longer you spend on warming it up for it and cooling down afterward.

Also, it takes less than 10 minutes to warm up on hot summer days.

Rule. 3 – The Conversational Rule

If you’re looking to keep an ideal pace while running as a beginner, then the conversational rule, aka the talk test, is the way to go.

The Talk Test is pretty simple.

If you can speak in complete sentences without panting for air, then you’re cruising at the right speed.

At the early stages of your training, most of your runs should be at comfortable or “conversational” pace.

Sticking with this pace sill helps you prevent running burnouts and overuse injuries.

If you’re running out of breath on every step, you’re pushing your body too much.

If you can no longer carry on a conversation, don’t hesitate to alternate running and walking, gradually increasing your run time while taking less and less for recovery.

The Exception

When doing any hard and intense training, forget about the conversational rule.

The fact is, if you can talk with ease while doing speedwork, you’re not pushing it hard enough.

Rule. 4 – The Three Hour Eating Rule

Before a run, eat something that will provide you with energy without causing any stomach issues on the road.

How long should you wait before you run after a meal is a matter of individual preference, just like most aspects of training.

As a general rule, wait for at least three hours before running following a large meal.

The bigger the meal, the more time you should wait.

For most people, two to three hours is ample time for food to move through the digestive system, especially if it’s high in easily digestible carbohydrates.

To avoid stomach issues while running, focus on digestible carbs and foods that are low in fat and fiber.

You can find lots of my favorite pre-run meals and snack ideas here.

The Exception

If you just had a light snack, like a banana or a smoothie, you should be okay to run for about 30 to 45 minutes after you eat.

But, it again depends on the size and type of the meal.

Also, keep in mind that everyone is different and responds differently to different foods.

So, what might work for someone else may not necessarily be the best thing for you.

Pre-run eating is quite tricky, and it will require you a bit of trial and effort to find out what exactly works the best for you.

Don’t hesitate to experiment.

Rule. 5 – The 400 to 500 Miles Rule

Shoes are made up of materials that don’t last forever.

Run in them too many miles and the fabrics and ingredients get compressed and deteriorate.

According to conventional wisdom, most running shoes lose their support and cushioning properties after reaching the 400 to 500 miles mark.

That’s why you need to replace your training once they reach that range.

Why should you care?

Once your shoes deteriorate, your risks of injury shoot up.

Don’t chance it.

To efficiently apply this rule, keep tabs on the number of miles you have run in each pair.

This is important because it helps you gauge and measure when you need to get a new pair.

Most apps allow you to “tag” a specific pair of shoes and keep track of the miles logged for you.

Here’s the full guide to running shoe replacement.

The Exception

The 400 to the 500-mile rule is not written in stone.

It varies depending on many factors, including your weight, training surfaces, foot strike patterns, and the type of the shoe.

I’ve written a full post on the subject.

You can find it here.

Rule. 6 – The Strength Training Rule

I see many runners avoid the weight room because they don’t want to bulk up.

That’s wrong.

So wrong.

Consistent resistance training helps build power in your running muscles, correct muscle imbalances, and deficiencies as well as get you into the best shape of your life.

This is particularly beneficial for beginners who took up running as adults and whose non-training hours involve a lot of sitting.

Here’s the full guide to strength training for runners.

Note – Looking for the best Beginner’s Guide To Running?
Then Check my Runners Blueprint System Here.

The Exception

The only hang-up I have about strength training as a runner is choosing the right time to do it.

If your body is already exhausted from running, chances are you’re not going to perform your best in the weight room.

You might be chancing lousy form, and you don’t want that.

That’s why I think you should experiment with training schedules that to figure out what works the best for you.

For instance, you could do an interval run workout in the morning, followed by 20 to 30 minutes of strength workout in the evening.

I usually tend to run and lift the weight on separate days.

That way I make sure that I’m giving it my best every time I work out—but that’s only possible because I work out six times per week.

What’s more?

You don’t need to hit the weight room several times a week to see gains.

A minimal time investment on your part might be all you need to stimulate tremendous strength gains.

To get the maximum from strength training, you only need a couple of sessions per week, committing to anywhere between 60 to 90 minutes of strength training per week .

Rule. 7 – The One Hour Post-Run Eating Rule

Proper post-run fueling helps you replenish exhausted glycogen stores, giving you energy, assisting in your body’s recovery.

Skipping post-workout nutrition could lead to hunger pangs or lethargy later in the day—or even injury or sickness down the road.

Don’t get me wrong.

You don’t need to take in calories immediately following a run, but try to have a healthy and well-balanced meal (or snack) within 60 minutes.

The rule is also pretty straightforward.

Eat something consisting of both carbohydrate and protein within 30 minutes of finishing your run. Remember to hydrate, too.

Some of my favorite options include yogurt topped with fruit, a glass of milk and a banana, a protein shake with mixed fruit, and an apple with a tablespoon of peanut butter.

The Exception

I hate to sound like a broken record, but it’s vital to realize that these are general guidelines.

They don’t work for everyone and are not universal rules by any means.

Post-training fueling needs vary depending on the length of your workout, your training intensity, and your fitness and training goals.

No suit fits all.

For instance, a marathon runner may need a sizeable post-run meal to replenish glycogen stores, where a beginner who only runs a few miles will require drastically less food.

This is why it’s critical, again, to experiment with different foods and diets to assess what works the best for you—and might be a reason you may want to consult a certified nutritionist for more advice and guidelines.

Rule. 8 – The Recovery Rule

Lots of beginners go hard every day trying to reach their goals as soon as possible.

In the meantime, they’re also ignoring their body’s feedback.

That’s a big mistake.

When training, it’s key not to overdo it.

Diving into the deep with inadequate recovery isn’t good for anyone.

Doing so can seriously boost your injury risks and potentially dire long-term consequences.

In fact, if you push yourself every day, you’ll be merely running your body into the ground, and improvement will be slow and problematic—which in turn can result in injury and burnout.

That’s where proper recovery comes into the picture.

It’s during the recovery days that your body adapts to the training you have been doing.

This in turn helps you become fitter and able to handle a more challenging pace and training workouts.

To make the most of this, take at least two days off from running each week.

Also, plan your workouts the right way.

Aim to complete two to three non-consecutive intense or long run session per week.

Include at least one easy run, cross training, or complete rest following a quality workout—think hard intervals and long runs.

The Exception

Sorry, there are no exceptions to this rule.

Rule. 9 – The Body Feedback Rule

As far as I can tell, this is the most important rule of them all.

If you experience sharp pain during a run, slow down your pace, or stop training altogether.

Do not ignore small nuisances—that’s how most serious running injuries start out.

If you do so 80 percent of the time, you’ll develop a more serious injury—and you don’t want that.

In general, take a couple of days off whenever something hurts for two straight days while running.

Usually, most cases of tightness, soreness, and stiffness typically subside following an easy warm-up.

However, severe pain that persists both during and after a run could indicate the onset of an injury—and that you need to do something about it.

Take as many rest days as possible while following the RICE method.

Once your symptoms subside, go back to your regular training program and listen to your body both during the warm-up and throughout the workout.

Stop training if you have any re-occurring symptoms.

I hate to sound like a broken record, but every runner is different and unique, and the training strategies that works for one runner may not be the best thing for you.

That’s why the best way to know if you’re on the right path and not doing too much for you is to listen to your body.

The Exception?

This rule, again, has no exception.

So be warry….extremely warry.

Bonus Tip: How Do I Become a Better Runner?

The answer to that question lies within my Runners Blueprint System.

Why?

My system was specially designed for beginners who either want to start running or take their training to the next level, but have little clue on how to do it.

And don’t worry, my ebook is written in a conversational, jargon-free, style. All you need to do is download it, follow the simple instructions, then start seeing results ASAP.

Here’s what it includes :

  • How to quickly and easily get started running (it’s indeed is easier than you’d think!)
  • How fast (or slow) should you go on your first sessions
  • The exact 13 questions you need to answer before you a buy a running shoe
  • The seven most common running injuries….how to deal with them before they progress into major ones!
  • The quick standing stretching routine that keeps you flexible even if you’re busy as hell
  • The 10-minute warm-up you must do before any session to get the most of your training
  • And much, much more.

Click HERE to get started with The Runners Blueprint System today!

Conclusion

There you have it.

The above 9 running training principles are some of the most important rules you need to apply in your training if you’re serious about making it as a runner.

The rest is just detail.

I’d love to hear from you in the comments section.

In the meantime thank you for reading my post.

Keep Running Strong

David D.

How to Stop Feeling Nauseous After Running

picture of nausea

Would like you like to learn how to stop feeling nauseous after running? Then you’ve come to the right place.

But first things first, let me tell you a little story.

Yesterday I had one of my best long runs in a long time.

I felt strong and in my element.

Everything was spot on.

Unfortunately, as soon as I got home, I felt super nauseous.

Instead of enjoying my post-run ritual, I spent it doubled over the toilet, spilling my guts.

Right on the spot, I knew something was amiss.

I did a quick Google search, and it turned out that a mix of sushi (a bad pre-run meal for me), humidity, and harder-than-usual long run were likely what made my stomach act out.

To save you from similar future trouble, I decided to write a full post on it.

Here are the guidelines you need to prevent throwing up during and after a run.

Nausea When Running Explained

Before I get into how to stop feeling nauseous after running, let’s first admit something.

Here’s the truth. Running-induced nausea is a real thing.

It can happen to anyone—and can get in the way of the post-run bliss you should be enjoying—just as happened to me.

Running-induced nausea is a feeling of sickness or vomiting that strikes during a run or shortly after a run.

The condition can be a symptom of fatigue, eating the wrong foods, underlying illness, and more.

*Disclosure: This post may contain affiliate links that at no additional cost to you. I only recommend products I’d use myself and all opinions expressed here are our own. 

Why Do I Feel Like Throwing up After Running

There are a multitude of things that can cause nausea (exercise-induced or not), but they all fall under one of two general categories: physiological or mechanical.

The physiological causes primarily involve blood flow.

When running, up to 80 percent of blood flow gets diverted from the GI tract to the working skeletal muscles and skin.

When this happens, digestion drastically slows down, and that, in turn, may induce discomfort, even triggering a vomiting or nausea response.

This is especially true if you had a meal or snack too close to exercise time.

The other major culprit is a mechanical response.

The simple up and down jostling of the body while running stirs the bowels and manhandles the intestines (and whatever’s in them), which, in turn, can provoke nausea.

Again, this is made worse by having a full meal close to workout time.

There are other things that can bring on nausea while exercising.

These include:

  • Low blood sugar
  • Running too intensely
  • Irritable bowel syndrome
  • Dehydration
  • Skipping the cool-down.
  • Having a history of GERD disease
  • Climate conditions

How to Stop Feeling Nauseous After Running

The blustery feeling in your stomach is preventable if you take the right precautions.

Take the following measures to help prevent throwing up after running.

Nausea When Running Fix – 1. Mind Your Pre-Run Meal

To avoid a sluggish, nauseating feeling during a run, I strongly recommend planning your session for two to three hours after a regular meal, or longer if you’re prone to the condition.

That’s your first step.

If you run in the morning, have a small pre-run snack, but if you’re nausea prone make it a rule not to eat within an hour of starting your session.  Check these healthy snacks here.

Opt for good sources of complex carbs and healthy proteins that are quick to digest.

Banana, oranges, eggs, and fish are all good choices.

Also, make sure to experiment with different types of food and the timing of your meals before running to find what works the best for you.

Additional resource – Probiotics For Runners 

Nausea When Running Fix – 2. Stay Within Your Fitness Level

When you’re overextending past your fitness level, your body reacts by boosting blood flow to your vital organs and skeletal muscles.

That’s how you’re able to keep working out for an extended period of time.

Unfortunately, when that happens blood is rushed away from your stomach and sent to your extremities.

This, in turn, makes you feel nauseated and sick.

The takeaway is that to ward off running-induced nausea, you need to exercise within your fitness level.

If your body is not used to a certain training intensity (like running eight miles at a 6:30-minute pace), don’t go at it full throttle.

You’re only going to run your body into the ground.

Instead, keep intensity within your tolerated range.

To err on the side of caution, increase your running distance and intensity incrementally.

Don’t know how?

Simply opt for the 10 percent rule.

Once you’re running for an hour at a conversational pace, add a speedwork session to your weekly routine.

prevent throwing up while running

Nausea When Running Fix – 3. Hydrate

As you run, you lose water through sweat.

The fluid that’s lost must be swiftly replaced.

Otherwise, you’re setting the stage for dehydration.

When you’re dehydrated your body lacks the key fluids, it needs to optimally perform its normal functions, and this results in a slew of problems, including manifesting as nausea.

Make sure to steadily drink plenty of water before, during and after a run.

Nausea When Running Fix – 4. Cool Down

When you stop running abruptly, your heart continues to pump blood to your extremities.

This leaves less blood for your brain, which in turn can trigger nausea in some individuals.

I strongly recommend that you invest time into a decent cooldown, even if you’re not prone to post-run nausea.

A solid sequence helps redirect blood flow more evenly throughout your body and bring things back to a normal level of function.

Here’s my favorite cool-down sequence.

Nausea When Running Fix – 5. Seek Medical help

If everything fails and your nausea symptoms are only getting worse, you MUST seek medical attention immediately.

Your doctor’s visit can help you rule out any underlying issues.

New to Running? Start Here…

If you’re serious about running, getting fit, and staying injury free, then make sure to download my Runners Blueprint Guide!

Inside this guide, you’ll learn how to start running and lose weight weight the easy and painless way. This is, in fact, your ultimate manifesto to becoming a faster and a stronger runner. And you want that, don’t you?

 Click HERE to check out my Runners Blueprint System today!

Don’t miss out! My awesome running plan is just one click away.

How to stop feeling nauseous after running – The Conclusion

Here you have it. The above guidelines are exactly what you need to prevent throwing up while running and exercising. Just make sure to take action on what you’ve just learned. The rest is just detail.

I’d love to hear from you in the comments section if you still have any questions or concerns.

In the meantime thank you for dropping by.

Keep Running Strong

David D.

Why Do I sweat So Much When I Run?

female runner wiping sweat after a running workout

“Why do I sweat so much when I run?”

If you’re looking for an answer, you have to the right place.

When I first took up running a few years ago, I relied on sweat as my main indicator of how hard I was pushing myself.

The more I sweat, the better and more accomplished I felt.

As I got fitter, however, I noticed that I’d started to sweat a lot more than before.

In fact, most of the time I ended up a sweaty mess by the end of my runs.

The profuse sweating scared me, as I thought there was something wrong.

Concerned,  I did what most people would do:

I Googled it.

To my relief, I found that I’d been worried over nothing.

In this post, you’ll learn the basics of what sweating is, why it happens, and how to deal with it if you’re concerned about it.

You’ll soon understand that when you’re a runner, sweating is your best ally and friend.

Sweating While Running Explained

Let’s break down the science of sweat.

Sweating is the natural process that regulates your core body temperature by keeping it as close to 98.6 degrees as possible.

When your body starts to overheat (for instance, while running), the nervous system activates the sweat glands to release perspiration, which is a water-and-electrolyte solution.

That in turn cools off the skin, resulting in a chain reaction of temperature reduction that eventually brings your core temperature down.

There are other forms of sweat that have nothing to do with heat regulation.

People sweat profusely when they’re nervous, or even as a response to spicy foods or hormonal changes.

Why Do I Sweat so Much When I Run – The Factors

Since every runner’s body is different, sweat rates vary from one person to the next.

The exact amount that you sweat is determined by a slew of factors including the number of sweat glands you have (between 3 and 5 million), outdoor temperature, resting body temperature, clothes worn, training intensity, fitness level, etc.

Generally speaking, the fitter you are, the more you’ll sweat.

The reason boils down to engine efficiency.

Fitter athletes tend to sweat more, and they start sweating a lot earlier in their workouts because their body’s thermoregulation system kicks into action faster.

That in turn helps them keep their core temperature down from the start of their session to the end.

Speaking for myself, I started noticing my increased sweat rate once I got serious about my running, doing lots of long runs and more intense interval workouts.

Nowadays I simply think of it as the price I pay for being fit.

What’s Normal Sweating?

Any amount of sweat is considered normal.

Everyone sweats a baseline amount at all times, even if you’re sweating more profusely than your training buddy.

The average person sweats between 0.8 to 1.4 liters, or 27.4 to 47.3 ounces per hour of exercise.

That’s equal to roughly one to three pounds of body weight.

Excessive Sweating While Running

If you still think you sweat too much, you probably do, especially if you sweat from a specific area of the body without engaging in any physical activity.

It may indicate hyperhidrosis, a common affliction marked by excessive sweating that affects roughly three percent of the U.S. population.

Hyperhidrosis is typically described as any sweating that obstructs normal daily activities.

People who have it may sweat up to four to five times the amount that other people do.

They also report sweating in cool environments for no obvious reason.

If this is your particular case, consult a doctor to discuss the treatment options available and to rule out any other underlying conditions.

Keep in mind that only a certified physician can officially diagnose such a condition.

Additional resource – What’s the best temperature for running

runner sweating while running on a trail

Why Do I Sweat So Much When I run – The Solutions You Need

Tired of dealing with sweat during your runs?

Try these simple solutions:

Measure Your Sweat Rate

Still don’t know whether you sweat more than normal?

Try measuring your sweat rate.

Doing so will help put your concerns to rest.

You do it by monitoring your pre and post-training bodyweight.

To begin, record your nude body weight before a run, then once you’re done, dry yourself immediately, strip down, and step on the same scale again.

The difference between your weight before and after your workout shows exactly how much fluid you lost.

For this to work, you need a digital scale, as it will show more detailed numbers (think 177.9 vs. 177).

Also, make sure your bladder and bowels are empty before stepping on the scale.

Record what and how much fluid you consumed during the run itself, as well as the weather conditions.

Your next step is to convert your sweat loss to ounces.

This tells you your fluid needs following a workout.

For each pound, you lost 16 ounces of fluid.

(or one liter of fluid for each kilogram).

For example, if you lose 2 pounds, your sweat rate for that particular session is 32 ounces.

This tells you that you need to drink that same amount to replace any fluid losses and stay well hydrated.

Additional resource – Running in the sun

Hydrate

Now that you know how much you’re sweating when running, the next step is to replace the fluid losses.

To keep your body well hydrated, make sure to drink plenty of water before, during and after your runs.

For longer sessions, hydrate on the run.

Drink eight to ten ounces of water for every 15 to 20 minutes of exercise, and make sure to drink an extra eight to ten ounces of fluid within 30 minutes of finishing your run.

During your runs, you’re also likely losing lots of vital electrolytes through your sweat.

If you sweat profusely or run for extended periods of time in hot weather, make sure to take in some salt to make up for your electrolyte losses.

Additional resource – Sodium for for runners

Turn On a Fan

When running on a treadmill, turn on a fan, open a window, or lower the air conditioning to reduce humidity in the air.

Consider Medicating

Use an over-the-counter antiperspirant containing about 10 to 15 percent aluminum chloride, and don’t restrict your use to your armpits.

Antiperspirants can also help curb sweating when applied to the palms and soles of the feet.

Just keep in mind that some antiperspirants are prescription only, so consult your doctor for the best option for you.

Cool Off

Immediately following a run, take a cold shower (if possible).

Anything that lowers your core body temperature will help you stop sweating faster.

Keep It Tidy

Shaving your armpits removes hair that keeps deodorant and antiperspirants from getting to your skin.

It also helps decrease odor because your hair holds more bacteria than your skin does.

Dress Properly

Invest in summer-friendly running apparel.

That means going for lightweight, synthetic fabrics with ample ventilation that will pull sweat away from your skin to the outer surface where it evaporates.

This type of clothing allows heat to move away from the body.

Merino and bamboo are excellent options.

Here’s the full guide to cold weather running gear.

Watch Your Diet

Your diet can influence your athletic performance, your health, and your sweat rate.

Consuming certain foods, including caffeine, garlic, onions, and curry, can stimulate your sweat glands, making you sweat more than normal.

Making these simple tweaks to your diet might solve your sweat problems.

New to Running? Start Here…

If you’re serious about running, getting fit, and staying injury free, then make sure to download my Runners Blueprint Guide!

Inside this guide, you’ll learn how to start running and lose weight weight the easy and painless way. This is, in fact, your ultimate manifesto to becoming a faster and a stronger runner. And you want that, don’t you?

 Click HERE to check out my Runners Blueprint System today!

Don’t miss out! My awesome running plan is just one click away.

Conclusion

There you have it! I hope today’s post offers a clear answer on the “Why do I sweat so much when I run” question.

If you have any concerns or questions, feel free to leave them in the comments section below.

In the meantime, thank you for reading my post.

David D.

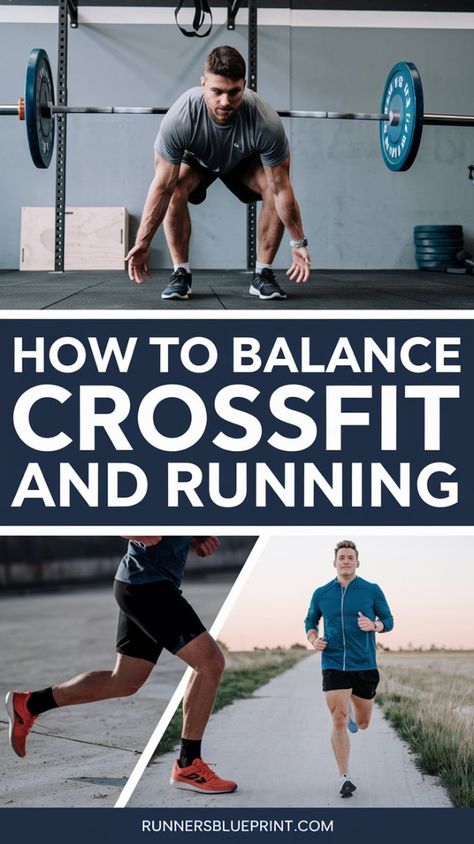
How to Balance CrossFit and Running

crossfit and running

Are you thinking about combining CrossFit and running but don’t know where to start? You’re in the right place!

I first tied Crossfit while I was looking for ways to improve my running speed and reduce injuries.

Initially, the variety of movements and the intensity were overwhelming.

But after my first few sessions, I noticed a significant improvement in my core strength and agility, which translated into better running form and fewer injuries on the road.

If this is something that picks your interest then keep on reading.

In this post, I’ll share useful training tips to help you blend CrossFit into your running routine without risking injury or burnout.

What is CrossFit?

According to the official CrossFit definition: “CrossFit is constantly varied functional movements performed at high intensity. All CrossFit workouts are based on functional movements, reflecting the best aspects of gymnastics, weightlifting, running, rowing, and more.”

It sounds like a lot, but don’t let that overwhelm you.

Let me explain in simple words.

CrossFit is a high-intensity training program that includes bodyweight exercises, cardio, Olympic weightlifting, gymnastics, and endurance training. The goal is to build overall fitness—improving strength, endurance, speed, flexibility, and more.

Why Bother With CrossFit?

Adding CrossFit into your running plan boosts power, speed, balance, and coordination, directly enhancing your running efficiency. The program’s explosive movements increase sprinting power, while its strength exercises help prevent injuries by correcting muscle imbalances.

However, finding the right balance between running and CrossFit can be tricky, especially when life gets busy. But after doing it myself for the past two years, I’ve learned to strike that balance without burning out or getting injured.

How to Balance CrossFit and Running

Balancing CrossFit and running was a challenge at first. I learned the hard way that you can’t go all out in both and expect to stay healthy. During my first month, I overdid it and ended up with a strained hamstring that sidelined me for weeks.

So, I had to make a choice. At that point, running was my priority. I wanted to run a marathon, so I scaled back on CrossFit to just two or three sessions a week.

My CrossFit workouts became more of a supplement to my running rather than the main focus. And once I made that shift, I stopped feeling constantly fatigued and started seeing progress again.

Determine Your Priority Sport

Identify your primary fitness goal before merging CrossFit with running. While it’s challenging to focus equally on both, understanding whether you aim to run a marathon or enhance overall strength helps in prioritizing your training efforts.

So what is your current fitness goal?

Do you want to:

  • Run a marathon?
  • Improve your overall strength?
  • Lose weight?
  • Compete in Olympic lifting?
  • Or something else?

You can’t give both CrossFit and running the same amount of attention at the same time—especially if you’re training for a serious race. For example, CrossFit should take a back seat to your running plan if you’re preparing for a marathon. If building strength is your goal, focus more on CrossFit and less on running.

While you don’t have to pick one forever, I cannot emphasize enough the importance of prioritizing one over the other while working towards a specific fitness goal.

Plan Your Weekly Workouts

Once you’ve chosen your main fitness priority, it’s time to schedule both your CrossFit and running workouts. Your weekly schedule will depend on which sport is your main focus.

Planning my weekly workouts became my Sunday ritual. I had to carefully craft sessions that allowed ample recovery and addressed different aspects of fitness—strength, endurance, and flexibility. Sharing my weekly schedule with my running group helped me stick to it and get real-time feedback on what worked and what didn’t.

This is what you should do:

If Running is Your Priority:

If you’re following a marathon or half-marathon training plan, here’s how you can fit CrossFit into your week:

  • Monday: CrossFit Workout
  • Tuesday: Easy-effort run
  • Wednesday: CrossFit Workout
  • Thursday: Speed or tempo run
  • Friday: CrossFit Workout or light cross-training
  • Saturday: Long, slow run
  • Sunday: Rest or light recovery (yoga, foam rolling, etc.)

In this setup, you’re using CrossFit to complement your running, doing it two or three times a week without compromising your run training.

If CrossFit is Your Priority:

If CrossFit is your main focus, your running should be limited to two or three easy runs per week. This is especially important if you’re already an experienced runner.

Here’s a sample schedule if CrossFit is the focus:

  • Monday: CrossFit Workout + easy recovery run
  • Tuesday: CrossFit Workout
  • Wednesday: Tempo or speed run
  • Thursday: CrossFit Workout + easy recovery run
  • Friday: CrossFit Workout
  • Saturday: Long, slow run
  • Sunday: Rest or light recovery (yoga, foam rolling, etc.)

Watch Out for Overtraining

Here’s where I learned the hard way—overtraining can sneak up on you fast when balancing CrossFit and running. I once suffered from Achilles tendinitis and shoulder issues because I pushed my body too far, trying to do it all. Don’t make the same mistake.

Be mindful of how your body feels. If you notice signs of overtraining, like excessive fatigue or persistent soreness, it’s time to scale back. Take an extra rest day, skip the next CrossFit session, or switch to a lighter workout. Your body needs time to recover, especially when adding intense CrossFit sessions to a workout plan.

Proper Form is King

CrossFit exercises like handstand push-ups, burpees, and Olympic lifts are intense and require good form to avoid injury. When you’re new to CrossFit, it’s essential to prioritize form over speed or reps.

Don’t let your ego get in the way. Focus on perfecting your technique with lighter weights before adding more. Proper form is key to staying injury-free and maximizing the benefits of CrossFit.

I’ll admit I was guilty of trying to lift more than I should have at the start, and my form suffered. Eventually, I learned that scaling exercises is not only okay, it’s smart. Taking the time to nail the basics before moving to heavier weights or more complex movements has saved me a lot of trouble.

Trust me, leave your ego at the door when you’re starting CrossFit, especially if you’re combining it with running. Focusing on proper technique is better than sacrificing form for a heavier rep count.

Embrace Running Friendly WODs

One of the coolest things about CrossFit is how you can tweak the workouts to suit your goals.

The first time I did a WOD that included running was six rounds of 400-meter sprints with burpees in between. It was brutal, but I loved it because it felt like I was doing something directly translating into running.

Over time, I’ve discovered a few other favorite WODs that help with my running.

One of them is a workout where I do ten power cleans, followed by a 400-meter run, and repeat that four times.

It’s exhausting, but the mix of lifting and running pushes me in ways a normal run can’t. It’s all about building that explosiveness and endurance at the same time..

Here are a few of my favorite running-focused CrossFit WODs:

  • WOD for time:
    • 12 power cleans
    • 400-meter run
    • Ten power cleans
    • 400-meter run
    • Eight power cleans
    • 400-meter run
    • Six power cleans
    • 400-meter run
  • 30-minute AMRAP (As Many Rounds As Possible):
    • Ten pull-ups
    • 15 Russian kettlebell swings
    • 400-meter run
  • Five rounds for time:
    • Ten burpees
    • 200-meter sprint
    • 20 squat jumps
    • 200-meter sprint
    • Ten deadlifts
    • 200-meter sprint

Sample CrossFit and Running Weekly Plan

Ready to mix CrossFit with running?

Here’s a sample weekly plan to guide you, balancing both disciplines so you get the most out of each workout while avoiding overtraining.

The schedule includes versions for beginner, intermediate, and advanced runners, so you can jump in at the level that suits you best.

Beginner Plan

For runners new to CrossFit or just getting into a routine. Focus on building strength and endurance gradually.

  • Monday: Easy 20–30 minute run + Core-focused CrossFit (e.g., planks, bird-dogs, mountain climbers)
  • Tuesday: Rest or gentle stretching
  • Wednesday: CrossFit session with a focus on form and low weight (e.g., bodyweight squats, lunges, light deadlifts)
  • Thursday: Short interval run (e.g., 4x200m with walking recovery in between)
  • Friday: Rest or easy mobility work
  • Saturday: CrossFit cardio session (e.g., rowing, jump rope, box step-ups) + short run (15–20 minutes)
  • Sunday: Rest day

Intermediate Plan

For runners with some CrossFit and running experience who want to build both strength and endurance.

  • Monday: Easy 30-minute run + Core and mobility-focused CrossFit (e.g., Russian twists, leg raises, hip bridges)
  • Tuesday: Strength-based CrossFit workout (e.g., deadlifts, lunges, and light squats)
  • Wednesday: Tempo run (e.g., 20 minutes at a challenging but sustainable pace) + upper body CrossFit (e.g., push-ups, rows)
  • Thursday: Rest or light stretching/yoga
  • Friday: CrossFit circuit with a focus on power moves (e.g., box jumps, kettlebell swings, wall balls)
  • Saturday: Long run (45–60 minutes at an easy pace)
  • Sunday: Rest day

Advanced Plan

For experienced runners with a solid base in both running and CrossFit. This plan includes high-intensity intervals and longer runs for more advanced conditioning.

  • Monday: Speed workout (e.g., 5x400m intervals with jogging recovery) + CrossFit focused on lower body strength (e.g., deadlifts, box jumps, Bulgarian split squats)
  • Tuesday: Rest or light yoga/mobility work
  • Wednesday: CrossFit session emphasizing upper body and core (e.g., pull-ups, push-ups, core circuits) + easy 30-minute recovery run
  • Thursday: Tempo run (e.g., 30 minutes at a moderately challenging pace)
  • Friday: CrossFit circuit for full-body strength and conditioning (e.g., kettlebell swings, sled pushes, battle ropes)
  • Saturday: Long run (60–75 minutes at a comfortable pace) + foam rolling or stretching
  • Sunday: Rest day

Frequently Asked Questions about CrossFit and Running

I know that you have more than one pressing about mixing CrossFit and running. Let me address some of the most common concerns.

Is CrossFit safe for runners?

Yes, when integrated thoughtfully, CrossFit can be a fantastic complement to your running routine. The key is balance—CrossFit builds strength, power, and stability, which can reduce your risk of common running injuries. However, it’s essential to avoid heavy lifting or high-intensity CrossFit workouts right before a long run or intense speed session.

How often should runners incorporate CrossFit?

Most runners find that 1–2 days of CrossFit per week strikes the right balance, offering strength gains without overloading the body. For example, you might schedule CrossFit on a cross-training day or a lighter running day to allow for full recovery.

If you’re new to CrossFit, start with one session per week and focus on functional movements that benefit your running, like core stability exercises and lower-body strength work.

Can CrossFit help me improve my running performance?

Absolutely! CrossFit emphasizes movements that strengthen the core, glutes, and legs—all critical for runners.

Studies from the Journal of Strength and Conditioning Research indicate that adding strength training to a running regimen can improve running economy, making it easier to maintain your pace over longer distances. Just remember, running-specific gains take time, so consistency is key.

What types of CrossFit workouts are best for runners?

Workouts that focus on functional strength, core stability, and plyometric exercises are particularly beneficial for runners. Think moves like deadlifts (with lighter weights to focus on form), box jumps, lunges, and planks. Avoid workouts that exhaust your legs right before a long run or race. And when in doubt, choose exercises that support balance, stability, and endurance.

Can I do CrossFit on my rest days?

For most runners, a true rest day—where you skip both CrossFit and running—is essential to allow your body to recover fully. If you’re an experienced athlete, you might opt for a light CrossFit session focusing on mobility and flexibility on an active recovery day. However, full rest days are invaluable, especially during high-mileage training weeks.

Join the Conversation

I’d love to hear about yours! Whether you’re just starting to explore CrossFit, a seasoned runner adding strength work, or somewhere in between, your story can inspire and help others.

Have you tried incorporating CrossFit into your running routine? What benefits have you noticed? Or maybe you’ve run into some challenges along the way? Share your tips, experiences, and questions in the comments below. We’re all here to support each other, swap advice, and get stronger together!

The 7 Main Signs & Symptoms Of Ketosis

keto diet

The ketogenic diet is straightforward—you drastically cut carbs, and before you know it, your body shifts into fat-burning mode, known as ketosis.

But figuring out when you’re actually in this metabolic state? That can be the tricky part.

When I first started experimenting with keto to optimize my health and running performance, I was intrigued by the concept of ketosis.

It took some trial and error, but the benefits were undeniable once I found my groove.

In this article, I’ll share what I’ve learned about recognizing ketosis and the symptoms that show you’re on track.

What’s the Ketogenic Diet?

The keto diet is high in fat, moderate in protein, and very low in carbohydrates. Typically, it comprises 70-80% fat, 15-25% protein, and 5-10% carbs.

The goal? To push your body into ketosis.

To achieve this, most people must limit carbs to 10-30 grams daily. I’ve already written a full guide to the ketogenic diet as well as how to train for a marathon on keto. Feel free to read these guides at your own pace.

Now let’s talk more about ketosis.

What Is Ketosis?

Key-tow-sis is a metabolic state in which the body metabolizes fat instead of carbs to produce ketones, employed by our cells to provide energy to perform their normal function.

Under normal conditions, your body uses carbs to sustain its energy needs. But when you drastically cut your carb intake, ketones are produced by the liver and released into the bloodstream as a reaction to inadequate glucose in the body.

Technically, ketosis is attained when blood ketone levels are around 0.5  mmol/ L. 

How to Get Into Ketosis

The best way to get into ketosis—and as fast as possible—is to eliminate all major carbohydrate sources in your diet, usually to less than 30 net grams of carbs per day.

The more restrictive your carb intake is during the early stage, the sooner your body enters ketosis. So it’s goodbye to bread, rice, pasta, peas, fruits, sugary drinks, chocolate, etc.

Instead, you’ll eat plenty of healthy fats, moderate amounts of lean proteins, and some vegetables. This first step seems brutal, but it’s worth every headache.

Here’s the full keto food diet list.

Note: Remember that 30 grams of carbs is the equivalent of 3 large carrots, one large banana, or two slices of white bread.

How Fast Can You Get Into Ketosis

If you’ve been on the low-carb, high-fat diet for at least a couple of weeks, then you should enter ketosis within three to four days—seven days max.

Most people can generally access light nutritional ketosis—about 0.6 to 1.0 mmol/L within two to three days.  It often takes more than two weeks to get into optimal and steady ketosis of 1.5 to 3.0 mmol/L.

Research on Ketosis Symptoms: What the Science Says

Research published in the Journal of Nutrition and Metabolism found that approximately 30-40% of people starting a ketogenic diet report symptoms consistent with keto flu. These symptoms often include headache, fatigue, nausea, dizziness, and irritability. On average, these symptoms peak within the first 2-7 days and gradually improve as the body adapts to burning fat instead of carbohydrates.

Interestingly, research also shows that after the adaptation period, many people experience improved mental clarity and stable energy levels. A study in Frontiers in Psychology suggests that ketosis may help provide a steady fuel source for the brain, potentially improving focus and reducing the energy crashes common with high-carb diets.

How to Tell If You’re in Ketosis: 7 Key Symptoms

Wondering how to tell when your body has made the switch? Here are seven key indications that signal you’ve entered the fat-burning state:

1. Reduced Insulin Levels

As carbs decrease, so do insulin levels, which regulates blood sugar levels. When I cut carbs, I noticed fewer energy crashes, more consistent energy throughout the day, and even better mental focus. For people with blood sugar issues, ketosis can significantly improve insulin sensitivity.

Science backs this up.

According to research published in the Annals of Internal Medicine, diabetic subjects on a low-carb diet for two weeks normalized their glucose levels. They reduced average blood sugar by 30 mg/dl.

Do the following to ensure low sugar levels don’t interfere with your life.

  • Have more meals. Plan to eat every four to five hours once you take your first few steps on the ketogenic path. This will help keep you satisfied and your blood sugar levels in check.
  • Reach for mineral-rich drinks. Instead of drinking plain water, opt for mineral-rich drinks between meals. These include high-quality electrolyte beverages or organic broths.
  • Have some Exogenous ketones. These are a great way to train your body to rely on ketos for energy before it’s efficient at producing ketones.

2. The Keto Flu

The dreaded keto flu—a term you’ve likely heard—hits hard in the early days of ketosis. Also known as “induction flu,” the keto flu mimics the signs of the flu. It consists of a bout of lethargy and flu-like symptoms experienced the first week or so as your body begins to make the transition from burning fat instead of glycogen.

Think of the keto flu as your body’s carbohydrate withdrawal syndrome.

When I started, I felt the keto flu within the first three days.

This is what I hated the most about the keto diet early on.

I remember it vividly. On day three or four, I got brain fog, and I was in a hazy state where I’d walk into a room and couldn’t remember why I’d gone in there in the first place.

It was really bad.

In most cases, the keto flu kicks at the 48-to-72-hour mark. Symptoms include:

Fortunately, the symptoms are not permanent, and it’s a good sign that your body is now burning fat. 

Once your body has adjusted, these usually resolve within a few days—often up to a week.

To ease the keto flu, drink plenty of water, increase your dietary fat intake, and consider opting for a sugar-free electrolyte drink.

3. Bad Breath

One of the first signs I noticed when I entered ketosis was a fruity or metallic breath odor—a common symptom caused by the ketone acetone being expelled through the breath.

Acetone is released in the liver and expelled via the breath. This is also a chemical used in producing nail polish removers and some paint thinners, and it is expelled through urine and breath.

Because of the same reason, some people may notice a slightly metallic, or even fruity, taste in their mouth.

While the bad breath may ruin your mood (or that of those you interact with), fortunately, it also indicates that your ketogenic diet is going well.

To mask this symptom, brush your teeth more regularly, add essential oils to water, mouthwash, or chew sugar-free mints.

Or, simply grin and bear it. It’s, after all, just a question of time as the stinks fades away.

4. Short-Term Fatigue

During the first few weeks—not days—you’ll feel less energy than usual when working out, especially when doing high-impact cardio sports, such as running.

Why?

The initial drop in performance is caused by the reduction in muscles’ glycogen stores, which is the primary and most efficient energy source for all forms of high-intensity training.

While the drop in energy output is a good sign of ketosis, it can be discouraging as it can negatively affect your workouts. It’s one of the main reasons beginners—especially the super active— quit the diet before fully keto-adapted.

On average, it may take 10 to 30 days before you’re in full ketosis. Complete keto-adaptation can take up to three months.

To help get over this initial hump, take electrolytes supplements to help replace those lost in droves. 

As a rough guideline, aim for 3000 to 4000 mg of sodium, 1000 mg of potassium, and no more than 300 mg of magnesium daily.

What’s more?

Take it easy during the adaptation period. Reduce your training load. Use less weight, fewer reps, take longer breaks between sets, and reduce the length and intensity of your cardio sessions.

Add an extra rest day if you need to.

5. Digestive Issues

I should also warn that it’s common to experience digestive issues like constipation or diarrhea on keto. These unwanted side effects are likely the results of eating more healthy fats than your digestive system is used to dealing with.

Limiting carb intake removes a lot of fiber, such as fruit, grains, legumes, and cereals, which may result in constipation.

On top of that, revving up fat intake may cause diarrhea.

That’s why digestive issues are like rites of passage for keto initiates.

As we have seen, most of these issues should subside after the transition period.

To ease your digestive issues, do the following:

  • Adding keto-friendly high-fiber foods.
  • Consuming plenty of fiber from non-starchy, low-carb vegetables.
  • Getting enough salt or magnesium.
  • Drinking plenty of water.
  • Cutting on dairy and nuts.

Keep in mind that some people have no trouble. So, just because you’re not suffering from any stomach issues doesn’t mean that the ketogenic diet isn’t delivering.

Everybody and every BODY is different. That’s why everyone’s digestive system may react differently to a drastic change in diet, such as cutting down on carbohydrates.

6. Reduced Appetite

One of the coolest perks of ketosis? You may find that your appetite decreases. Once I hit ketosis, I felt fuller for longer and didn’t need to snack as often. High-fat meals are incredibly satiating, and ketones can naturally suppress hunger.

So once you’re keto-adapted, expect long periods without feeling hungry. That’s why intermittent fasting is pretty common among established Keto’ers.

There are a few reasons why ketosis can tame your appetite. You’ll mainly consume healthy fats, lean proteins, and fibrous vegetables on the keto diet. These are the most satiating nutrients that affect appetite hormones, which tames your desire to eat.

Because of this, you’ll rarely feel hungry or need grazing or snacking throughout the day.

7. Increased Ketones

The main goal of the ketogenic diet, as previously stated, is to get your body to ramp up production of ketones.

Blood sugar levels fall, and the body releases fatty acids into the bloodstream.

Stay committed to the low-carb high-fat diet for a while, and ketones will be the main energy source.

Here’s the good news. You can easily measure ketone levels in the blood using a specialized meter. This meter measures your ketone levels by calculating the amount of beta-hydroxybutyrate (BHB), one of the three primary ketones released into the bloodstream once you reach full ketosis.

Technically, a blood ketone level of 0.5 mmol/L is the threshold for entering ketosis.

Various devices measure the presence of ketone bodies in the body, whether in the breath, urine, or blood. This provides an accurate biomarker of your level of ketosis.

According to most experts, measuring ketosis through blood is the most accurate, even though using a glucose meter is more expensive.

This is reliable because it measures endogenous (created by ketogenic eating, fasting, and exercise) and exogenous ketones, such as HVMN ketone.

Remember that this method can be expensive and invasive, requiring a small pinprick to draw blood from your finger. -That’s why most people will only perform one test per week or every other week.

If you’d like to put your ketosis doubts to rest by testing your ketones, Amazon has got what you need.

Managing Ketosis Symptoms

Here’s how I managed the initial symptoms of ketosis:

  • Stay Hydrated: Drinking water and replenishing electrolytes became a daily priority.
  • Gradual Transition: If you find the keto flu too intense, consider easing into it by reducing carbs more slowly.
  • Add Fiber: Increasing fiber from low-carb veggies helped manage digestive issues.
  • Take it Easy: During my first few weeks, I avoided pushing too hard in my workouts, giving my body time to adapt.

When to Seek Medical Help

While most keto symptoms are temporary, if you experience signs of severe dehydration or diabetic ketoacidosis (e.g., rapid breathing, nausea, confusion), it’s important to seek medical help. For most people, though, the keto flu passes after the first week.

Frequently Asked Questions

I know that you have more than one pressing question about ketosis. Let me address some of the most common concerns.

How long does ‘keto flu’ last?

Most people experience keto flu symptoms for 3-7 days as their body adapts to a low-carb, high-fat diet. Symptoms like headache, fatigue, and irritability typically improve within the first week.

To speed up recovery, focus on staying hydrated and increasing your intake of electrolytes—particularly sodium, potassium, and magnesium. Adding a pinch of salt to water or drinking electrolyte-rich broths can help reduce symptoms faster.

How can I prevent muscle cramps on keto?

Muscle cramps on keto are often due to low electrolyte levels, particularly magnesium. Consider taking a magnesium supplement or soaking in an Epsom salt bath, which allows magnesium to be absorbed through the skin. The Mayo Clinic suggests that moderate salt intake on a low-carb diet can be beneficial, especially during the initial keto adaptation phase.

Is it safe to exercise while adjusting to keto?

Yes, but take it easy during the first week of ketosis, as your body adjusts to burning fat for energy. Light exercise, like walking or gentle yoga, is generally fine and can even help reduce some keto flu symptoms. Once you feel more energized, you can gradually reintroduce higher-intensity workouts. Endurance athletes often benefit from a few weeks of adaptation before resuming intense training.

What foods should I eat to stay in ketosis?

Focus on high-fat, low-carb foods like avocados, eggs, leafy greens, fatty fish, and olive oil. Avoid starchy vegetables, grains, and sugary foods. Checking labels for carb content can help you stay within your daily carb limit.

The Conclusion

Ketosis symptoms vary from person to person. But all in all, chances are you’ll find that at least a few of the above signs of being in ketosis hold true for you.

Ultimately, if you’re applying the tenets of the ketogenic eating plan and stay consistent, you’ll, sooner or later, enter the state of ketosis.

The common thread in the above symptoms is that once your body makes the full transition, most—often all of—the symptoms should subside.

Once you make the full transition, your energy level will start to rise, and the keto flu is but a distance memory. Just be patient.

How long will that take depends on your particular case, genes, diet habits, activity levels, and age.

Just keep in mind that these symptoms do not affect everyone, so if you’re still hesitant about giving keto a shot, try it and see for yourself.

The 13 Best Exercises To Improve Running

Strength Exercises For Runners

Are you looking for the best exercises to improve running skills? You have come to the right place.

Once I started strength training regularly, I became a much more efficient and injury resistant runner.

And I believe the same could happen to you if you only just heed the advice I’m going to share with you in today’s post.

In fact, increasing total body muscular strength should be a part of every runner’s cross-training fitness plan.

Backing your road miles with off-road strengthening exercises will not only assist in injury prevention, but also turn you into a stronger, and more efficient runner.

And that’s a good thing if you ask me.

In other words, strength training is the backbone of great running training—no matter what your goals are.

Why do you need to strength train?

Well, for many reasons, including:

  • To increase strength and power in key running muscles such as the calves, quads, glutes, and hamstrings. This translates into better athletic performance both on and off the running track.
  • To fix muscle imbalances. Research has linked muscles imbalances (when a muscle group is stronger or weaker than the opposite group) to all sorts of overuse injuries, such as Runners Knees, IT band syndrome and the like.
  • To improve running form. Your muscles play a major role in helping you develop and keep proper form—especially when fatigue starts to set in. That’s why increasing strength in your core and upper body muscles is crucial. Doing so also provides you with more stability and support throughout a running gait.

Of course, as a runner myself, I’m assuming that you want the above things as well.

The 13 Best Exercises To Improve Running

Without further ado, here are the exercises most appropriate for runners.

Exercise To Improve Running No – 1. Forward Lunge

This asymmetrical standing exercise is among the most running friendly exercises out there—and for many reasons.

Lunges are convenient, versatile, and focus on the muscles runners use the most: glutes, hamstrings, and quadriceps.

Plus, they also increase the range of motion and improve balance and coordination—key running skills.

Proper Form

Begin by assuming a feet shoulder-width apart while holding a dumbbell in each hand.

Next, step forward with your right foot, shifting your weight to that foot’s heel.

Step far enough forward that both of your knees are bent at about 90-degree angle.

Lower your body until the front knee is positioned over the ankle and the back knee is a few inches off the ground. Make sure to remain as stable as possible with spine neutral throughout the movement.

Then step back to starting position, and repeat on the other side.

Perform 12 to 16 reps to complete one set. Aim for three sets.

Exercise To Improve Running No – 2. Planks

One of my favorite core exercises of all time!

Your core muscles, including the lower back, glutes, rectus abdominis (the six-pack), transverse abdominis (the “deep” abs), and obliques, work together to maintain pelvis neutrality and hold proper form when you run.

Plus, a strong core also reduces energy waste, preventing a litany of injuries and boosting your stride power. As you already know, runners are all about preventing injury and improving performance.

Proper Form

Begin by propping yourself on your elbows with the feet slightly apart.

Keep your abdominals engaged, back straight,

and shoulders directly above the elbows down and back, arms parallel to the body.

Instead of locking your knees, make sure to keep them slightly bent.

Hold this position for one full minute to complete one set.

Gradually add time (or weights!) as your gets stronger.

Additional Resource – Your guide to weighted vests for running.

Strength Exercises For Runners

Exercise To Improve Running No – 3. Push-ups

Just because you’re a runner does not mean that upper body strength is trivial.

The fact is, as already stated in this post, proper upper body strength is key for both efficient running and proper form. No doubts.

Not only that, but it also helps take the pressure off your hips, knees, and ankles as fatigue sets in.

And when it comes up building upper body strength and power, you cannot go wrong with pushups.

This symmetrical exercise helps develop upper body and core strength and endurance like nothing else.

More specifically, pushups target the pectoralis muscles of the chest, but they also train the triceps—the muscles at the back of the upper arms, and the shoulders.

Proper Form

Assume a plank position with your hands shoulder-width apart, back flat, and feet slightly apart.

Next, lower your body by bending your elbows to a 90-degree angle, keeping them relatively close to your torso, until your chest hover the ground.

Keep your glutes engaged and torso rigid throughout the exercise—hiked, or sagging hips is a sign that you lack enough strength to perform the exercise properly.

Then press back up to starting position and repeat.

Do as many push-ups as possible with good form to complete one set. Aim for three sets.

Exercise To Improve Running No – 4. The Twisting Lunge

This lunge variation is a great core exercise that also increases lower body strength, coordination, and balance.

Also, the twisting motion forces the glutes to contract more fully while it engages the core.

Proper Form

Assume an athletic position while holding a dumbbell or a medicine ball in front of you with elbows bent at approximately 90-degree angle.

Step forward with your right foot into a lunge position.

Then, while keeping your knee on the right foot, twist your upper body to the right.

Maintain a 90-degree angle bent in the front knee, then straighten and engage your rear leg.

Last up, slowly press back to starting position.

Exercise To Improve Running No – 5. Russian Twists

These are one of the best exercises for working the obliques—the muscles that help rotate the torso and stabilize the spine.

Plus, Russian twists can also target the hips, back, arms, and shoulders, depending on the weight apparatus used and/or loading of the movement.

Proper Form

Begin by sitting down on the floor while keeping your back at 45-degree angle, both feet either flat the floor (easy) or in the air (more advanced) so your body is forming a V shape.

Make sure to keep your back flat at this angle throughout the movement. Do not hunch your shoulders forward.

Next, twist your upper body to the right, hold for a count of three, then slowly rotate back to starting position.

Repeat on the other side.

For more challenge, hold a dumbbell in each hand as you twist.

Exercise To Improve Running No – 6. Squats

If I had to pick one exercise that fits perfectly with the demands of running, then it would be squats.

This fantastic exercise boosts leg power, improves knee stability, increase the range of motion—all of which can prevent a plethora of overuse running injury.

For the full guide to squat variations, check my post here.

Proper Form

Assume an athletic position with feet shoulder-width apart, toes pointing ahead, while holding dumbbells at shoulder-height.

You can also perform this without weight while holding your arms extended in front or overhead.

Next, lower down by sitting back as if there is a chair behind you.

Lower your hips down until your thighs are parallel to the floor, forming a 90-degree angle. Just do not let your knees go past your toes.

Then press back up to starting position.

Exercise To Improve Running No – 7. The Bridge

This is one of the best exercises for strengthening the core stabilizer muscles, specifically the transversus abdominis and multifidus muscles.

The bridge also helps prevent lower back pain.

Not to mention that it’s the go-to move for toning the gluteus medius muscle—one of the three muscles responsible for creating the ever coveted lift.

Proper Form

Begin by lying down on your back with arms to the side, palms facing down, knees bent, and heels on the floor.

Next, raise your hips until knees, hips, and shoulders are in straight line. Squeeze your abs and glutes as you reach the top of the movement. Do not overextend your back during the exercise.

Hold the bridge post for a couple of seconds before easing back down.

Last up, slowly lower your hips back to the floor and allow to briefly touch the floor before completing another rep.

Exercise To Improve Running No – 8. Wall Sits

This isometric exercise is one of my favorites!

It’s an impressive lower body move that builds strength and endurance in the calves, glutes, and more importantly, the quadriceps.

Walls sits are also easy on the knees and can be performed by almost anyone.

Proper Form

Stand roughly two feet away from a wall.

Next, press your back against the wall with your feet shoulder-width apart and slide down the wall until you end up in a sitting position. Imagine there is a chair under you.

Keep your thighs parallel to the ground and feet firmly planted on the ground throughout the hold.

Hold the position for as long as you can. And remember to engage your legs and core muscles, while keeping the back flat throughout the hold.

Last up, slide up the wall to starting position to complete one set.

Exercise To Improve Running No – 9. The Deadlift

The deadlift is the mother of all full body exercises.

In fact, it’s one of the most basic powerlifting exercises.

The classic deadlift hits almost every muscle in the body, including the quads, calves, lower back,  and the core muscles.

Furthermore, study shows that the deadlift can also increase strength and muscle mass by boosting the release of the growth hormone.

Proper Form

Start by placing a heavy barbell on the floor in front of you, positioning your feet about halfway under the bar—roughly 3 inches from touching it.

Next, while hinging at the hips and keeping your back straight with the core engaged,  bend over until your shins touch the barbell then grab the loaded barbell.

Next, to pull the barbell off the ground, extend your hips and knees until you’re standing up straight.

On the way down, slowly lower the weight to the floor until you’re back to the starting position.

Perform 8 to 10 reps to complete one set.

Aim for three sets.

Exercise To Improve Running No – 10. Overhead Lunge

This is a quite challenging variation of the classic bodyweight lunge that targets the shoulders, the core, the glutes, hamstrings, and quadriceps—making it a total body exercise per excellence.

Not only that, but overhead lunges will also help you build and increase flexibility in the hip flexors.

Also, they are ideal for challenging your balance, proprioception, and overall mobility.

Proper Form

Start by standing tall with feet shoulder-width apart while holding a plate, a pair of dumbbells or a barbell straight above your shoulders.

Please, make sure that your arms are straight with the elbows locked.

Next, while keeping the weight directly overhead (in line with the shoulder joint )take a large step forward with your right leg and lower your body until your right knee is bent at 90-degree angle.

Last up, return to the starting position and repeat with your left leg to complete one rep.

If this is too challenging for you, then feel free to hold the weight at shoulder level.

Exercise To Improve Running No – 11. The Chin-up

Another awesome upper body weight that’s guaranteed to help you achieve the kind of upper body strength you always wanted.

This ideal exercise targets the core, the back and biceps muscles like nothing else.

If performing straight chin-up is too much for you, then feel free to use a chair assist for more help.

(check the YouTube Tutorial for how).

Proper Form

While using a pull-up bar, grab it with your palms facing you and with hands a bit wider than shoulder width apart.

Next, while keeping your core engaged and letting your body hang, raise yourself up until your chin is parallel with or over the bar.

Then, slowly release and repeat.

Exercise To Improve Running No – 12.  Kettlebell Swing

You might not be familiar with this kettlebell exercise, but kettlebell swings are some of the best functional and total body exercises that there is.

This particular exercise is good for runners because it can help you boost endurance, core stability, strength, and balance—all of which can help you improve your overall running power for any distance and running terrain.

Proper Form

Start by standing tall feet hip-width apart while holding a dumbbell (or a kettlebell) with both hands at arm’s length.

Next, bend your knees slightly, rock back and lower the weight to between legs until it’s below your butt.

Then, with a hip snapping motion, thrusts the hips forward and swings the kettlebell forward to shoulder height.

Please do this while keeping the arms straight and core engaged through the movement.

Continue swinging back and forth, allowing momentum to swing the kettlebell upward instead of trying to actively lift it with the arms.

Do 12 to 16 swings to complete one set.

Aim for three sets.

Exercise To Improve Running No – 13 Front Squat to Push Press

Also known as thrusters in the CrossFit circles, and it’s a mix of the classic squat and the powerful push press exercise.

This exercise hits almost every major muscle group in the body with the added benefits of increasing total body endurance, flexibility, mobility and coordination like nothing else.

Just be careful.

This is an advanced exercise.

You can only start doing it after mastering basic squat variations as well as the stand push-press exercise.

Proper Form

Start by standing with your feet shoulder-width apart while holding hold a sandbag on the shoulder and upper chest (or a barbell across the front of the shoulders).

Next, while keeping the core engaged and back flat, lower Don by pushing your hips back and bending your knees until you are in a full squat position.

Hold for a moment, then from the bottom position, explode back and stand back up as hard as you can while pushing the weight overhead, with the legs straight, shoulder stacked over your hips and arms fully extended.

This is one rep.

Do 8 to 12 reps to complete one set.

Aim for three sets.

New to Running? Start Here…

If you’re serious about running, getting fit, and staying injury free, then make sure to download my Runners Blueprint Guide!

Inside this guide, you’ll learn how to start running and lose weight weight the easy and painless way. This is, in fact, your ultimate manifesto to becoming a faster and a stronger runner. And you want that, don’t you?

Don’t miss out! My awesome running plan is just one click away.

Click HERE to learn more about The Runners Blueprint System today!

5 Quick HIIT Workouts for Beginners

HIIT Workouts for Beginners

Are you ready to embark on a journey that will take your workouts to a whole new level? Well, get ready to dive into the invigorating world of high-intensity interval training (HIIT) with me.

Now, I know what you might be thinking. HIIT has gained quite a reputation for its intensity, and that can be intimidating, especially if you’re new to the fitness game. But here’s the truth: you don’t have to fear it. In fact, you’d be making a big mistake by shying away from this powerhouse training method.

Why? Because HIIT is a game-changer when it comes to boosting your fitness levels and torching that stubborn fat. It’s like a secret weapon that unlocks your body’s full potential. And let me tell you, the results are worth every drop of sweat.

Today, I’m your guide to conquering HIIT workouts with confidence and without risking injury. I’ll show you how to customize your workouts, ramping up or dialing down the intensity to suit your needs. Because hey, we’re all on our own fitness journey, and it’s important to honor our bodies along the way.

But wait, there’s more! I won’t just leave you hanging with theory and advice. I’ve got a treat for you. I’ll be sharing a collection of workout routines specifically designed for the complete beginners among us. These routines will ease you into the world of HIIT, helping you build a strong foundation and gradually increase your stamina and strength.

So, are you ready to unleash the power of HIIT while keeping your well-being in check?

Let’s go!

What’s HIIT?

Alright, listen up, fitness enthusiasts! We’re about to unravel the secrets of one of the most powerful training methods out there: High Intensity Interval Training, HIIT for short. Now, forget everything you thought you knew about exercise because HIIT is about to blow your mind.

Picture this: instead of spending endless hours on the treadmill, mindlessly jogging at a steady pace, HIIT shakes things up with its explosive bursts of all-out effort followed by moments of well-deserved recovery.

Here’s the deal: you don’t have to be a superhuman athlete to tap into the magic of HIIT. That’s right, even if you’re a complete beginner, HIIT can work wonders for you. But hold on tight because things are about to get intense. I’m talking heart-pounding, sweat-drenching, muscle-burning intensity. And with great power comes great responsibility.

You see, HIIT pushes your body to the limits, and if you don’t approach it with caution and follow some essential guidelines, you might find yourself dealing with unnecessary wear and tear. But fear not, my friends, for I’m here to equip you with the knowledge and tools to navigate the world of HIIT safely and injury-free.

Let’s get to it.

The Beginner Tips You Need

Here is how to take on high-intensity interval training workouts most effectively as you work your way toward achieving your fitness goals.

And just because the routines shared below are for beginners, that does not mean, by no means, they’re easy.

Stay Within Your Fitness Level

Now, when it comes to HIIT, one cardinal rule reigns supreme: stay within your fitness level. Trust me, this is the golden ticket to success, regardless of where you currently stand on the fitness spectrum or what your training goals may be. It’s like walking a tightrope—finding that perfect balance between pushing yourself and avoiding overexertion.

Sure, HIIT workouts are all about intensity, but going all-out too soon can be a recipe for disaster. I’m about talking injuries, painful burnouts, and a whole lot of regret. And let’s be honest, nobody wants to deal with that. So, here’s a simple strategy for you: listen to your body and adjust your training approach accordingly. If something feels off or too challenging, take a step back and reevaluate. It’s all about finding that sweet spot where you’re pushing your limits without pushing too far.

Now, my friends, as a beginner, it’s important to keep an eye on that heart rate of yours. It’s like a compass guiding you through the HIIT wilderness. If it starts to skyrocket and you feel like you’re about to keel over, take a breather. There’s no shame in taking breaks or modifying exercises to match your current fitness level.

Remember, progress is a journey, not a race, and you want to build a strong foundation before conquering the mountaintop.

Don’t Do HIIT Every Day

Speaking of taking breaks, let’s address the burning question: should you do HIIT every single day?

The answer is a resounding no! I know, I know, those short and intense workouts can be addictively tempting, but overdoing it is a recipe for disaster. Your body needs time to recover and rebuild. It’s like a car that needs regular maintenance to keep running smoothly.

So, my dear beginners, start with two HIIT sessions a week and gradually work your way up to three or four. This allows your muscles, joints, and mind to recharge, preventing overuse injuries and the dreaded state of overtraining.

The Warm-up

Before you jump into those heart-pounding intervals, take a few moments to elevate your training experience with a proper warm-up.

Trust me, it’s like laying the groundwork for a masterpiece. The warm-up is your chance to elevate your body temperature, get your heart pumping, and activate those muscles that are about to go full-throttle. I’m talking injury prevention and optimal performance here.

So, how do you craft the ultimate warm-up sequence? It’s all about finding that perfect balance. Start off with a 5 to 10-minute session of slow jogging or spinning, getting that heart rate up and those lungs in gear. You can even get creative and jog or march in place if you’re limited on space. The goal is to get those engines revving and ready to take on the challenge ahead.

Once you’re feeling warmed up and in the zone, it’s time to dive into some dynamic stretches that will have your muscles firing on all cylinders. We’re talking about exercises that target major muscle groups and leave no stone unturned.

Perform moves like standing crisscross crunches, inchworms, side lunges, high kicks, leg swings (front to back), and squats. These power-packed moves engage your upper body, lower body, and core, ensuring that every inch of your being is primed and ready for action.

Form is Key

Form is everything. That’s right, whether you’re hitting the pavement for your first 5K or stepping into the world of resistance training as a beginner, nailing your technique is the key to success. It’s more important than the number of reps you do or the speed at which you perform them. Trust me, it’s worth repeating: technique reigns supreme.

So, as you embark on your HIIT journey, I implore you to prioritize form above all else. Remember the mantra “form first, speed second” and etch it into your mind. Don’t even think about attempting an exercise if your technique isn’t on point. It’s better to skip a rep than risk injury or compromise your progress.

Think of it this way: just like a finely-tuned machine, your body operates at its best when each component is functioning flawlessly. By mastering your form, you’re ensuring that every movement is executed with precision and efficiency. This not only minimizes the risk of injury but also maximizes the benefits you’ll reap from each and every workout.

5 Quick HIIT Workouts For Beginners

To kick off your HIIT journey without a hitch, here are five fat-burning, muscle-building interval workouts to try.

These routines can take any beginners into elite HIIT beast in just a few months.

Each routine involves performing easy-to-master and convenient exercises, made just for you.

All you need is basic equipment, a mat, water, and some willpower. The rest is just details, as the saying goes.

HIIT Workouts For Beginners – 1: The 15-Minute Full Body Routine

Alright, my friends, get ready to embark on an electrifying workout journey that will leave you feeling like a true fitness rockstar. This workout is designed with the complete beginner in mind, making it accessible for anyone, anytime, anywhere. So no excuses, folks!

Here’s the game plan: Complete the circuit a total of five times, but make sure to give yourself a well-deserved one-minute breather between each round. This will allow you to catch your breath, recover, and prepare to crush the next round with even more determination. And remember, we’re aiming for a 7 to 8 on the RPE scale, so push yourself to find that sweet spot where you’re challenging your limits while still maintaining good form.

First up, pushups that will sculpt those glorious upper body muscles. Don’t worry if you’re new to pushups, I’ve got your back. Check out the link for a handy tutorial that will guide you through the perfect pushup form. Trust me, you’ll be a pushup pro in no time!

Next, we’re cranking up the cardio with 20 jumping jacks. It’s a classic move that gets your heart pumping and your body buzzing with energy. Follow this link for a visual demonstration that will have you jumping for joy in no time.

Now, let’s dial it up a notch with 10 modified burpees. This full-body exercise is a true powerhouse, engaging multiple muscle groups and skyrocketing your heart rate. Not sure how to tackle the modified burpee? Fear not! Check out this link for a step-by-step tutorial that will have you nailing those burpees like a seasoned pro.

HIIT Workouts For Beginners – 2: The 15-Minute Kettlebell Routine

You’re short on time, but you still want to get a heart-pumping, sweat-inducing workout that will leave you feeling like a true fitness dynamo. Well, look no further than the mighty kettlebell—the ultimate weapon in your HIIT arsenal.

Let me tell you, kettlebell training is like a symphony of strength and cardio, perfectly orchestrated to push your heart rate to the max. It’s a powerhouse workout that combines explosive movements with functional strength training, giving you the ultimate bang for your buck.

Now, let’s dive into a heart-pounding routine that will test your mettle and ignite your fitness journey. I’m talking three minutes of intense work followed by two minutes of blissful rest. Trust me, these rounds will challenge you, but they will also unleash your inner beast and take your fitness to new heights.

Are you ready to rock this kettlebell extravaganza? Let’s do it!

In round one, we kick things off with kettlebell sit-ups. It’s an exercise that targets your core, giving those abs a serious wake-up call. Not sure how to perform a kettlebell sit-up with proper form? Fear not!

Check out this link for a visual guide that will have you mastering the sit-up in no time.

Next up, we’ve got American kettlebell swings. These bad boys are a true game-changer, targeting your posterior chain and firing up your entire body. Get ready to unleash the power within you as you swing that kettlebell like a champion.

Don’t know how to swing? No worries! Check out this link for a demonstration that will have you swinging with finesse and grace.

Now, let’s shift gears to the kettlebell clean and press. This compound movement works multiple muscle groups simultaneously, taking your strength and endurance to new heights. Trust me, it’s a total-body burner that will leave you feeling like a superhero. Need some guidance on the clean and press technique?

Look no further than this link for a step-by-step tutorial that will have you conquering the clean and press like a true warrior.

Last but not least, we’ve got the kettlebell goblet lunge. This exercise targets your legs, glutes, and core, sculpting those lower body muscles with each and every lunge. It’s a true test of strength and stability, and boy, does it deliver results.

Not sure how to execute a perfect kettlebell goblet lunge? Check out this link for a demonstration that will have you lunging with confidence and precision.

Additional resource  – TRX exercises for runners

HIIT Workouts For Beginners – 3: The 20-Minute Lung Busting Routine

Get ready to unleash your inner cardio warrior with a heart-pounding routine that will skyrocket your heart rate like nothing else. This circuit is a cardio extravaganza that will leave you feeling invigorated, energized, and dripping with sweat. Are you ready to take on the challenge? Let’s dive in!

Let’s kick things off with squat jumps. These explosive movements will have your legs burning and your heart pumping in no time. Get ready to leap into action, channeling your inner superhero as you explode off the ground and land with grace.

Need some guidance on perfecting your squat jumps? Check out this link for a demonstration that will have you jumping with power and finesse.

Next up, we’ve got the almighty kettlebell swings. This exercise is a cardio powerhouse that will engage your entire body and leave you feeling like a force to be reckoned with. Swing that kettlebell with gusto, letting the momentum propel you forward as you conquer each rep. Don’t know how to swing like a pro? This link will provide you with a visual guide to perfecting your kettlebell swings.

Now, let’s shift gears to high knees jog. This exercise is like a burst of energy, revving up your heart rate and engaging your legs in a high-octane cardio blast. Get those knees pumping, embracing the rhythm and intensity of this movement. Want to see how it’s done? Look no further than this link a demonstration that will have you jogging in place like a cardio champion.

Last but certainly not least, we’ve got the dreaded burpees. Yes, my friends, the burpee—a true test of strength, endurance, and mental fortitude. Embrace the challenge, dive down into that push-up position, explode back up, and jump towards the sky with determination. Burpees are the ultimate full-body exercise that will leave you gasping for air and feeling a sense of accomplishment like no other. Need a refresher on proper burpee form? Check out this link for a step-by-step guide that will have you burpee-ing with confidence and precision.

HIIT Workouts For Beginners – 4: The Lower Body Sculptor Routine

Prepare to unleash the power of your lower body while torching calories and building endurance with a workout routine that will leave you feeling stronger and more accomplished. This routine is a perfect blend of strength training and cardiovascular exercise, designed to sculpt your muscles and ignite your metabolism.

Are you ready to take your fitness to new heights? Let’s dive in!

We’re kicking things off with air squats, a fundamental exercise that targets your glutes, quads, and hamstrings. It’s time to squat like you mean it, engaging your lower body muscles and working on your form.

Need some guidance on perfecting your air squats? Check out this helpful video that will walk you through the proper technique, ensuring you get the most out of each squat.

Next up, we have alternating lunges, a dynamic exercise that engages your legs, glutes, and core. Step forward with confidence, sinking into each lunge and powering through to the next. Alternating lunges not only strengthen your lower body but also improve balance and stability. Want to see how it’s done?

Take a look at this instructional video that will guide you through the correct form and execution of alternating lunges.

Now, it’s time to put your back against the wall and challenge yourself with wall squats. This isometric exercise targets your quadriceps and glutes while also engaging your core for stability. Embrace the burn as you hold the squat position against the wall, feeling the muscles in your lower body working hard. Check out this informative video to learn the proper technique and get the most out of your wall squats.

Finally, we have the explosive squat jumps, a plyometric exercise that takes your lower body workout to the next level. Explode into the air, pushing off with power and landing softly. Squat jumps not only build strength and endurance but also improve explosive power and coordination. Want to master the art of squat jumps? Look no further than this dynamic video that will guide you through the proper form and execution.

HIIT Workouts For Beginners – 5: The 30-Minute Total Body Feast

Let’s begin with the mighty kettlebell swings, a dynamic exercise that targets your hips, glutes, and core while also providing a cardiovascular challenge. Grab that kettlebell and swing it like a pendulum, feeling the power and momentum as you propel yourself forward. Need some guidance on perfecting your kettlebell swings? Check out this informative video that will help you master the technique and unleash the full potential of this explosive exercise.

Next up, we have the Spiderman pushups, a move that will engage your chest, shoulders, triceps, and core while also testing your agility and coordination. Channel your inner superhero as you bring your knee to your elbow with each pushup, feeling the burn in your upper body and enjoying the challenge. Want to see how it’s done? Watch this captivating video that will guide you through the proper form and execution of Spiderman pushups.

Prepare to elevate your heart rate and ignite your leg muscles with jump lunges, a plyometric exercise that takes your lower body workout to new heights. Jump, switch legs mid-air, and land with grace, feeling the power and explosiveness in every rep. Jump lunges not only build strength and endurance but also improve your balance and coordination. Need some inspiration? Check out this electrifying video that will demonstrate the correct technique and motivate you to conquer this challenging exercise.

Now, it’s time to engage your entire body with plank jacks, a dynamic variation of the traditional plank exercise. Get into a plank position, then jump your feet wide and back together, feeling the burn in your core, shoulders, and legs. Plank jacks are a fantastic way to boost your cardiovascular endurance while also strengthening your core stability. Watch this captivating video to learn the proper form and technique for plank jacks.

Lastly, we have weighted Russian twists, a core exercise that targets your obliques and improves rotational strength. Grab a weight, whether it’s a dumbbell, kettlebell, or medicine ball, and twist from side to side, engaging your entire core as you go. Weighted Russian twists not only sculpt your midsection but also enhance your balance and stability. Get ready to feel the burn with this engaging video that will guide you through the proper execution of weighted Russian twists.

HIIT Workouts for Beginners – The Conclusion

Here you have it!

These beginner HIIT workouts are all you need to get you started on the high-intensity training path. So, what are you waiting for?

Take action now. The rest is just detail.