Cross training workouts and exercises for runners. This is what you need to do off-road to improve your running performance and protect yourself against injry
If you’ve ever found yourself hesitant to hit the pavement solo, fret not – you’ve come to the right place! I’m about to unleash a whole bunch of tips and tricks to transform your solo running experience from daunting to delightful!
Picture this – no more feeling like a lone wolf on those winding trails or empty streets. I’ve got your back, and I’m here to prove that running alone can be an absolute blast!
In today’s post, we’re serving up a buffet of fantastic ideas that will make you fall head over heels for solo runs. No more dreading the solitude – we’ll show you how to embrace it and make every mile an adventure to remember.
Awesome, let’s dive right in!
Focus on the Scenery
Let’s talk about the magic of immersing ourselves in nature while logging those miles. We all know running is fantastic for our physical and mental health, but hold on to your running hats because I’ve got some research-backed good news for you!
Studies have shown that running in natural settings takes our endorphin game to a whole new level! Yes, you heard it right – it’s like a double shot of happiness for our souls! The lush greenery, the scent of the earth beneath our feet, and the soft rustle of leaves – all of it contributes to lifting our moods and kicking stress to the curb.
It’s like running through a dreamy paradise, and you’re the star of the show! Trust me, when you’re out there, surrounded by nature’s beauty, you’ll feel like the luckiest runner on the planet. It’s a one-of-a-kind experience that truly makes you appreciate the wonders of being alive.
So, my friends, I dare you to explore the uncharted territories of running! Take that road less traveled, venture into new routes, and embrace the unexpected. Run through the parks, forests, or along scenic trails – it’s like embarking on a soul-nourishing adventure every time you lace up your running shoes.
Do Intervals
When you’re running solo, you’re doing your own thing. You are not worried about speeding up When you’re out there conquering the trails all on your own, you’re the boss of your pace – no more worrying about keeping up with your buddies or slowing down for the team. It’s just you, your determination, and the open road!
Now, hold on tight because I’m about to let you in on a little secret that’ll take your solo running to the next level – intervals! It’s like adding a dash of adrenaline and a sprinkle of excitement to your runs. Imagine interval training as your very own superhero cape – it’s tailored to your pace and running goals, making you feel like a running superstar!
Ready for some real fun? Allow me to introduce you to the thrilling world of “fartlek” – a Swedish term for “speed play.” Fancy, huh? It’s the ultimate game of catch-me-if-you-can with yourself! Here’s how it goes:
First, give yourself a 10-minute slow jog warm-up – just a little prelude to the adventure that awaits. Now, keep your eyes peeled for a landmark in the distance – it could be a stop sign, a parked car, or even a majestic tree. Ready? Now sprint towards it with all your might, like a cheetah chasing its prey!
Feel the wind on your face, the rush of endorphins, and the thrill of pushing your limits. You’re unstoppable! Once you reach your landmark, take a breather for one to two minutes – catch your breath and let the excitement build again.
Then, it’s time for round two – pick another landmark and speed up like a rocket! You’re like a superhero soaring through the city, faster than a speeding bullet! The best part? You get to repeat this epic cycle as many times as you like – the world is your playground, and you’re the superhero calling the shots!
Listen To Music
let’s crank up the rhythm and talk about the magic of running to the beat of our favorite tunes! Music has this incredible power, don’t you think? Whenever I feel stuck in my own little world, a killer playlist can be the ultimate push I need to get out that door and conquer those miles like a pro!
I mean, come on, we all know that pesky inner voice that tries to slow us down or tell us we can’t do it. But with the right beats blasting in our ears, that voice doesn’t stand a chance! It’s like having a personal cheerleader that keeps us going, no matter what obstacles lie ahead.
Now, hold up, my friends, before you start cranking up the volume to a concert level – let’s talk safety. As much as you love rocking out to our favorite jams, you need to be mindful of your surroundings too.
So, keep that volume in check or better yet, use just one earbud. It’s like having the best of both worlds – the motivation from the music and the awareness of everything happening around us.
Stick to your Schedule
Now, let’s get down to business – schedules! Trust me, having a well-thought-out running routine is like having a superpower to conquer the chaos of life. So, take a deep breath and decide how many times a week you’d like to embrace those runs and how long each workout will last. Plan it out in advance like a boss!
You know what happens when you have a strict schedule in place? It’s like making a promise to yourself, and you know what? You’ll be surprised at how seriously you take that promise! Each run becomes a “must-do” activity, no more optional miles for us! Even when work or family obligations pop up out of nowhere, you’ll find it easier to prioritize your running routine over impromptu plans..
Ready to lace up those sneakers and hit the pavement for some thrilling 5K races? You’ve come to the perfect spot to fuel your running passion and discover exciting races right in your neighborhood!
Setting a 5K race goal is like adding a burst of energy to your training routine. Not only will you boost your fitness level, but you’ll also keep that motivation skyrocketing through the roof. And guess what? It’s never been easier to jump into the racing scene, with thousands of events happening all around the world each year.
But we get it; life can be hectic, and traveling might not be on your agenda. No worries, though! We’ve got your back with ingenious ways to find a 5K race happening right in your own backyard, or at least within a short drive.
So, are you ready to kickstart your race journey? Stick around because, in today’s post, we’re sharing some of my favorite tried-and-tested methods for effortlessly discovering those hidden gem local running races. Let’s dive in!
Use Online Resources
Alright, my fellow running adventurers, get ready to unlock the secret to finding a plethora of thrilling 5K races right in your backyard! Online resources are like a treasure map leading you to a bounty of local events, and trust me, it’s a breeze to navigate.
Picture this: you’re sitting at your computer, and with just a few clicks, the world of running events unfolds before you. It’s like having a personal race concierge at your service! These online hubs are bustling with energy, packed with local event listings, and geared up to match your preferences like a perfect running shoe.
But wait, there’s more! Some of these virtual wonderlands even let you narrow down your options based on your location, event type, or even the season. It’s like having a running genie granting your race wishes! Whether you’re seeking scenic 5Ks amidst nature’s wonders or urban adventures with bustling crowds, these sites have got you covered.
First stop, the mighty “Race-find.Com” – the go-to hub for all things events! Think of it as your running oracle, bringing you a feast of races with just a few taps of your keyboard. And hey, if you’ve got marathon dreams too, “Marathon Guide.com” is here to make those dreams come true!
But wait, there’s more magic to explore! Check out “runsignup.com,” “runningintheusacom,” and “marathonsports.com” – these gems are chock-full of local events, ready to spice up your running journey with excitement and camaraderie.
Google The Smart Way
I hate to sound like a broken record but Google knows it all! Type in the magic words “5K races near me,” and voila! A treasure trove of running events in your region will materialize before your very eyes. It’s like Google’s waving a virtual race flag, guiding you towards adrenaline-pumping fun!
But wait, there’s more to this Google magic! Time for trick number two – get ready to unleash your inner cartographer and conquer Google Maps. Pinpoint towns within a 60 to 90-minute drive from you – these are your hidden race gems just waiting to be discovered!
Now, with your secret list of towns in hand, launch another Google search and type in the town’s name, followed by “5K race” (or any other race distance you’re craving). It’s like summoning a virtual running genie, and guess what? This genie will grant your wish for more races that might not be on those regular online directories. It’s like discovering a secret passage to a whole new world of running adventures!
Imagine this – as you dive into your search, you’ll find races tucked away in towns you didn’t even know were so close to you! It’s like finding hidden gems in the vast wilderness of the running world.
Picture this – you stroll into your favorite running store, and there they are, the gurus of all things running! The staff at these shops are like running wizards, filled with valuable race insights and ready to sprinkle some magical advice your way. They’re not just selling shoes; they’re guiding you towards epic 5K races too!
So, you’re on a mission to find new 5K races, right? Well, these running store wizards have got your back! They’ve got their ears to the ground, always on the lookout for the latest and greatest races in town. It’s like having a secret race hotline with all the juicy race details!
But wait, there’s more! As you browse for your shiny new pair of running shoes, keep an eagle eye out for those sneaky little race posters and signs. These are like hidden treasure maps, leading you straight to upcoming events that you might have missed otherwise. It’s like stumbling upon a pirate’s map to a chest full of racing adventures!
Oh, and hold onto your race bibs, because some running stores go above and beyond! They organize group training runs, where you can bond with fellow runners and prepare for your races together. It’s like joining a running family that’s cheering you on every step of the way!
And here’s a sweet cherry on top – some of these running sanctuaries offer exclusive race discounts! Yep, you heard it right. They’re like magical gatekeepers granting you special entry to the world of discounted race registrations. Score!
Wait, there’s one more secret we’ve got to share! Sign up for the store’s newsletter, and you’ll be like the insider of all insiders! You’ll get the scoop on upcoming events, group runs, and exclusive deals delivered right to your inbox.
Check your Local Running Club
You walk into your first running club meeting, and boom! You’re instantly surrounded by a pack of like-minded, running-crazy individuals just like you.
But hold on tight, because the perks of joining a running club go way beyond just making new buddies. Brace yourself for a rollercoaster ride of epic race opportunities!
Here’s the juicy scoop – many of these running clubs play host to their very own races! Yep, you heard it right. They’re like race wizards conjuring up events that cater to all skill levels. It’s like having front-row tickets to the hottest racing show in town!
Oh, and let’s not forget the sweet cherry on top – affiliate discounts! When you become a member of a running club, you unlock a treasure trove of race discounts. It’s like being handed a magical golden ticket that grants you entry to discounted race heaven. Score!
Now, picture this – you’re out on a morning run with your running club buddies, chatting away and sharing stories. Suddenly, someone mentions an exciting upcoming race. You perk up, eager to join in on the action! It’s like discovering a hidden treasure chest of race recommendations straight from your running comrades.
Wait, there’s more! Being part of a running club means you’re in the know about their exclusive training runs and upcoming events. It’s like getting a backstage pass to a secret running concert with VIP access! You’ll never miss out on exciting races and fun group runs.
Feeling like you’re in the dark about finding the nearest running club? Fear not! The Road Runners Club of America is like a guiding star, leading you to the nearest running club in your area. They’ve got the inside scoop on all the running club goodness!
While scrolling through your Instagram feed, and boom! A local running club’s post pops up, announcing their latest race event. It’s like having a running fairy godmother right in your pocket, granting you access to all the running excitement!
But wait, there’s more to this social media frenzy! Follow local running clubs and organizations on Instagram, Facebook, and Twitter, and you’ll be in for a wild ride of race updates and running inspiration. It’s like creating your own front-row seat to the hottest running events in town!
But hold on tight, because there’s a secret weapon in your social media arsenal. Ready for it? It’s time to unleash the power of your own posts! Share your running passion with the world, and don’t be shy to ask your followers for their favorite races. It’s like throwing a running party and inviting everyone to join in on the fun!
Now, here’s where the magic happens – your running friends on Twitter and Instagram are like a treasure trove of race recommendations! Imagine their responses flooding in like a waterfall of exciting race opportunities. It’s like tapping into a vast network of running expertise!
And guess what? The fun doesn’t stop there! Engaging with your running community on social media is like joining a never-ending virtual race expo. You’ll be flooded with race highlights, motivational stories, and heartwarming running tales that keep your passion burning bright.
Find Local 5K Races – The Conclusion
There you have it!
If you find it hard to locate 5K races nearby, then the above guidelines are more than enough to set you on the right path.
Just get on it, choose a race, and start training.
The rest is just details.
Please feel free to leave your comments and questions in the section below.
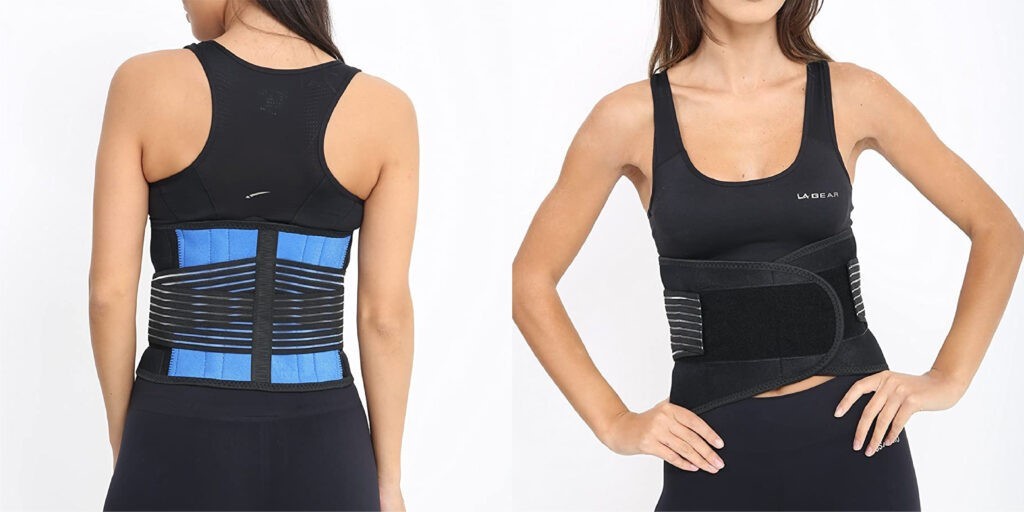
Running is a great way to keep fit, but without the right equipment, it can lead to discomfort and potentially, injury. One essential and often overlooked component of running gear is the back support belt. In this blog post, we highlight its importance, demonstrating why it is a must-have accessory in every runner’s wardrobe, novice or veteran.
Benefits of Using Lower Back Support Belt for Runners
It is a protective gear that you fasten around your waist – spanning over your lower back – providing stability and support in this region. The belts are typically made of sturdy, breathy materials like neoprene and come in various sizes to snugly fit all body types. This accessory works by reducing the stress on the user’s lower back. It facilitates proper weight distribution and absorbs some of the impacts when a runner’s foot strikes the ground, ensuring that the pressure does not overwhelmingly concentrate on the lower back.
The usage of these braces is not just limited to professional runners; even hobbyists and those who partake in occasional or moderate running sessions can make great use of the back belts. When running, the repetitive jarring motion can give rise to an incidence of strain and potential injury, especially in the lower back area. Regular usage of a lumbar back belt adds an extra layer of defense against these injuries, effectively reducing the risk of muscular strains or ligament sprains in the lower back region.
Moreover, they are incredibly beneficial for those recovering from an injury. As the belt restricts undue movements and provides optimum support, it aids in quick and safe recovery by preventing further damage to the strained muscles. Thus, incorporating it into your running regimen will invariably improve posture, decrease discomfort, prevent severe injuries, and aid in recovery, urging you to push your limits.
Ensure You Choose the Right One
Picking the perfect back belt for running depends on key factors:
Adjustability: The brace should have flexible fitting options to provide custom compression levels according to your needs;
Material: The material used should ensure durability and effective performance. A prevalent material choice is neoprene due to its robust nature, flexibility, and ability to retain heat, thereby soothing the muscles;
Comfort and support: They should also be key considerations, as a belt should not feel restrictive or uncomfortable. It should give your lower back secure but comfortable support.
Among the myriad options available, Nygex stands out as the top brand. Its distinguishing feature is the stretchy interlaced bands offer steady compression, while the adjustable hook and loop straps let you select the fit that feels most comfortable. Further, its premium quality neoprene ensures maximum breathability while providing a high level of support without hindering mobility, making it a preferred choice. By visiting https://nygex.nz/p/lumbar-back-support-brace/, you can see other benefits of this back support and choose the right size.
To utilize it effectively, ensure that you wear it snugly around your waist in a way that covers your lower back adequately. However, remember not to fasten it too tightly as it may hinder blood circulation. Ensure it fits you comfortably even during movements. Wearing such belts over a thin layer of clothing is ideal to evade skin irritation.
The Role of Back Belt in Maintaining the Proper Running Posture
The right posture can make a world of difference in improving the run and conserving energy by maximizing efficiency and speed and minimizing force. Back support braces play an integral part in achieving and maintaining correct running posture. The belt supports the natural arch of the lower back, aligning the body correctly from shoulders to legs. With a snug fit around the waist, they keep the lower back firm yet flexible. This helps prevent unneeded stress on the back, facilitating a correct and consistent posture throughout a run.
To achieve the correct running posture, here are specific tips:
Ensure your head is up, maintaining a comfortable and neutral position while looking ahead;
Keep your shoulders relaxed, loose, and lowered, and avoid shrugging;
Your arms should be bent at a 90-degree angle, swinging loosely from the shoulders;
Engage your core muscles while keeping your back straight;
Remember to land softly on your heels, rolling forward to push off the balls of your feet;
A lower back support belt can highly facilitate this, allowing you to focus and maintain this ideal stride, supporting a flawless running form.
The Impact of Regular Exercise and Proper Gear on Spine Health
Exercise strengthens muscles around the spine, improving balance and posture, thereby reducing the risks of back pain and injury. Proper gear like lower support belts, good running shoes, and suitable clothing further enhance this protection by providing additional support and safety.
Apart from offering support, back braces encourage proper alignment of the spine while running. They maintain and stabilize the normal curvature of the spine, reducing the chances of undue strain or uncomfortable postures. This functionality is beneficial to protect from potential injuries and also to heal from existing ones.
The combination of regular exercise, engaging in proper alignment, and the use of a back support belt helps in keeping the core and back muscles sturdy, resulting in better spine health. Moreover, these measures help prevent painful conditions like herniated discs or sciatica that runners can sometimes face.
If you’re a beginner runner and you’re in need of some inspiration in order to help smash any future goals, then Russell Cook might just provide you with it. Born in Worthing, the YouTuber is attempting to run the entire length of Africa as we speak, a quite remarkable achievement should he manage to pull it off.
The 26-year-old, who is also known as the “Hardest Geezer”, is currently making excellent progress after already covering the entire length of South Africa and Namibia. Along the journey so far, Cook has even had messages of support from legendary athletes who have won numerous gold medals, inspired others, been backed by millions in the betting stakes, and put on numerous masterclasses in a competitive scenario.
Mo Farah has shown his support for Cook
One world-famous runner who has backed Russell Cook on his journey is Mo Farah. The four-time Olympic champion said: “I’m so proud of you and what you’re doing. Nobody can tell you that you can’t, because you can. Believe in yourself. You’re doing an amazing thing for charity. It’s incredible to see you on this journey. Let’s go Russ!”
With any money raised going towards The Running Charity and Water Aid, Cook is certainly doing an amazing thing for charity, as Sir Mo himself said. This isn’t just a YouTuber aiming to generate views and turnover huge sums of money for himself, this is a man on a genuine life-changing mission that he has clearly trained for intensely as he aims to inspire others to do the same, be more active, and get stomping out on the tarmac.
Cook wants us all to get running
Along the journey on YouTube so far, viewers have been exposed to Cook’s strong mentality, while also witnessing the evident struggles he is already having in these relatively early stages. Already, Cook has suffered with illness on numerous occasions, but he keeps pushing through and continues to run around 31 miles (50km) most days. While having no rest days was the aim from the offset, it has been vitally important on a few occasions already in order to replenish his body and essentially improve his chances of success further down the line. If Cook can dig deep and smash this amazing goal, then why can’t the rest of us?
He has a team behind him
As you might expect, despite his nickname, Cook can’t do this alone. After all, he is essentially aiming to run 9,320 miles (14,500km) in total during the challenge, crossing 16 borders in the process and experiencing a number of different settings, from bustling city environments to dead deserts. His small team of close friends follow his every move, making sure he is safe from any wild animals, while also focusing on his health and important aspects of any run, such as water intake. There have been numerous incidents already along the journey, too. From urinating blood to being held-up at gunpoint, the group have experienced plenty in a short space of time, but if Cook was alone it’d certainly be far more of a risk to take.
A Christmas finish is looking unlikely
With the extreme challenge officially beginning on 22 April, the initial aim was to finish it in time for Christmas given that it is expected to take more than eight months to complete. Given the numerous issues that Cook and his team have encountered already, though, we could see a later finish date. Regardless, Cook can enjoy his turkey when he returns, with the inspirational athlete capable of inspiring the world should be manage to complete one of the toughest challenges any runner has faced.
If you’d like to follow his every step, then tuning in to the action on YouTube is highly recommended. Although he has a massive amount of ground still to cover, Russell Cook is looking like he’s more than capable of smashing this phenomenal goal and motivating the planet’s population in the process. Here’s hoping he can pull it off.
Hey there, fitness enthusiasts! Hold on to your kettlebells because I’ve got a mind-boggling question for you: Ever wondered just how much the fitness and health industry is worth? A cool billion? Maybe 10 billion? Think bigger, my friend!
Believe it or not, the industry’s value is a jaw-dropping 100 billion dollars! Yup, you heard that right – $100,000,000,000! And no, we’re not talking Hong Kong dollars here; we’re dealing with good old American greenbacks.
Now, imagine this – that’s a whole lot of zeros! But hold on, that’s not even the juiciest part. The market is sprinting forward like a marathon runner on rocket fuel. Yoga studios and CrossFit gyms are popping up faster than daisies in spring!
What’s the big picture, you ask? Well, it’s not just a bunch of fitness fanatics out there; it’s a thriving industry ripe with opportunities for anyone with a fitness- or health-related blog. Cha-ching! Money-making potential, ahoy!
So, here’s the scoop – in today’s post, I’m dishing out some secrets from my treasure chest of blogging knowledge. I’ll share the steps I took to turn my passion for fitness into a money-making machine.
But wait, there’s more! As an added bonus, I’ll sprinkle some traffic generation tactics to supercharge your blog’s voyage to success!
Ready to set sail on this thrilling adventure? Ahoy, let’s go!
Part 1 – Drive Traffic
Picture this – your fitness blog is like a shiny gem, filled with valuable content and knowledge. But what good is a gem if nobody gets to see it? You need to send waves of eager visitors to your posts, like a stampede of fitness enthusiasts hungry for wisdom.
Because let’s face it, my friends, traffic is the lifeblood of your blog. It’s what fuels your journey to more engagement, more sales, and more moolah! Without it, even the greatest content can get lost in the vast digital wilderness.
The traffic sources you need:
Now, don’t fret! I’ve got the secret map that leads you to the ultimate traffic sources. Let’s check a few.
First stop – the mighty Google! With over 3.5 billion searches every day, it’s like a bustling marketplace where people seek answers to their fitness dreams. You want to be right there, waving your blog like a banner, saying, “Hey, I’ve got the solutions you need!”
Next, let’s board the Pinterest express! This platform is a gold mine for fitness bloggers like us. With its 320 million active users and billions in ad revenue, it’s like a bustling bazaar of inspiration and ideas. So, pin your way to success, my friends!
And of course, we can’t leave Facebook behind! With billions of members, it’s like a massive party where you can showcase your fitness expertise to the world.
Now, don’t get me wrong – we’ve got other traffic routes too! I’m talking about Twitter, StumbleUpon, and Reddit – the hidden trails of opportunity. But, if you want to reach your destination fast, focus on Facebook and Pinterest first.
But hey, don’t just stop there! Once you’ve built your audience, it’s time to expand your empire! Explore new territories, try new strategies, and conquer the digital landscape.
Optimize Your Posts For SEO
With over 3.5 billion searches every single day, Google is big—like really really big, and guess what? They’re hungry for fitness advice too! It’s like a never-ending parade of potential readers, just waiting to discover your fitness blog!
Think about how we use the internet – it’s our ultimate guide to life! Whether we’re searching for the best protein shakes or directions to the nearest gym, we turn to those trusty search engines. And as a blogger, one of the best ways to make your content stand out above everyone else’s is to have a solid SEO strategy (check this post if you have no idea what SEO is).
Now, let me share the secrets of SEO success with you. It’s like a carefully crafted recipe, combining various ingredients to create the perfect blog post.
First off, we’ve got the “keyword research” spice. With tools like SEMrush and Ahrefs, you can uncover the hottest keywords in the fitness universe. These are the secret codes that unlock the doors to higher rankings. So, sprinkle them strategically throughout your content, and watch your blog soar!
Next up, we’ve got the “epic content” seasoning. Imagine crafting blog posts that are so valuable, so helpful, and so inspiring that readers can’t help but fall in love with your blog! That’s the magic of epic content.
And let’s not forget about the “click-worthy post titles” sauce! These are like little appetizers, tempting readers to click and dive into your blog. But remember, no clickbait here! We want titles that promise real value and deliver on that promise.
Now, to add that extra oomph to your blog, we’ve got the “descriptive meta-descriptions” garnish. These little snippets of goodness show up in search results, enticing folks to click on your link. So, make ’em snappy and include those juicy keywords!
Last but not least, we’ve got the “Yoast plugin” magic dust! This nifty tool helps you sprinkle SEO goodness all over your blog posts. It’s like having a fairy godmother for your SEO efforts!
Pinterest
Pinterest is like a treasure trove of readers, just waiting to discover your amazing content!
You see, Pinterest has a special place in my heart, and here’s why – it drives more traffic to The Runners Blueprint Blog than any other social media platform.
Why is Pinterest so magical, you ask? Well, it’s because I pour my heart and soul into it! I’m like a pinning wizard, constantly creating new pins, showcasing my stuff, and spreading the love by pinning other people’s awesome content. It’s like a dance of pins and clicks, and I can’t get enough of it!
And the best part? Pinterest is like a never-ending garden, always blooming and growing. At the end of 2019, it had over 320 million active users, and boy, has it been growing like wildfire! It’s like a rising star in the social media galaxy, shining bright as the fourth largest platform in the US, right after YouTube, Instagram, and Facebook.
But wait, there’s more! Pinterest’s ad revenue is projected to hit a billion dollars – that’s billion with a B! It’s like a gold mine of opportunities for fitness bloggers like you and me.
Facebook
Facebook has been my trusty ally in the quest for traffic! With over 15,000 followers on my personal page, this powerhouse sends me a whopping 15 percent of my blog’s traffic. It’s like having an army of fitness enthusiasts marching towards my content!
But here’s the secret sauce – I don’t just stop at my personal page. Oh no, I take the plunge into the vast world of Facebook groups! I’m like a social butterfly, fluttering from one group to another, spreading my fitness wisdom and sharing my blog posts like precious gems.
And guess what? It works like magic! Joining relevant Facebook groups within your fitness niche is like stepping into a wonderland of like-minded individuals. It’s a place where you can interact, engage, and share your expertise with people who actually care!
Here’s the golden rule of Facebook group success – be active like a whirling dervish! Post regularly, answer questions, share valuable insights, and above all, be a force of good out there.
Be that shining light of positivity, and watch how you attract the right kind of attention – the attention that brings more readers to your fitness blog!
Guest posting is the practice of producing captivating articles for other blogs or websites, sharing your wisdom with their audience. And guess what? It’s a win-win situation! You get to showcase your yoga prowess while the host blog receives valuable content to delight their readers. It’s like a fitness feast for everyone involved!
And let me tell you a secret – guest posting is not just about winning hearts; it’s about winning the favor of Google too! Oh yes, when you publish those amazing guest posts, Google nods its virtual head in approval. Why? Because every link back to your website acts like a glowing endorsement in the eyes of the search engine gods!
As a result, take a leaf out of my book. In the past year, I’ve been on a guest posting spree, like a fitness globetrotter, exploring different websites and leaving my fitness wisdom wherever I go. It’s like planting seeds of knowledge in various corners of the virtual world!
And guess what? I’ve seen the magic unfold! My fitness blog’s page authority has soared like an eagle, flying high in the realm of Google’s search results.
Here are a few examples.
Making Money with Your Blog
Now, let’s talk business, fellow bloggers, because there are countless ways to rake in the moolah in the vast realm of the internet. But don’t fret; I’ve boiled it down to the top five ways to line your pockets with green using your precious fitness blog!
Ad Networks
First up, we have the trusty Ad Networks – the gold mine of passive income!
Picture this: you set up adverts on your blog, and voilà, the money starts flowing in without you lifting a finger! As a beginner, I’d suggest diving into the AdSense pool. It’s like dipping your toes into the waters of earning without breaking a sweat.
But hold on to your yoga mats, because there’s more! Once your fitness blog starts attracting a decent crowd of monthly visitors, it’s time to level up.
Enter AdThrive, my faithful partner-in-profit! When I switched from AdSense to AdThrive, it was like transforming from a mere mortal to a fitness blog tycoon overnight!
But here’s the catch, my aspiring money makers – you need a hefty crowd cheering for you to dance in the ad revenue spotlight. To waltz into the world of real money (yes, more than a mere $500 a month), you’ll need a sizable audience, with thousands of visitors every single day! Trust me; crossing that threshold can be like climbing Mount Everest!
Fear not. Start by setting your sights on the 25k visitors a month mark – it’s like setting a new personal record in the blogging world! Once you conquer that milestone, it’s time to review your options and select the private ad manager network that suits you like a perfectly tailored workout outfit.
Affiliates
With affiliate marketing, you get to play matchmaker between your audience and awesome products or services. It’s like setting up the perfect blind date, and if your audience falls head over heels for the product and makes a purchase using your special links, cha-ching!
You earn a sweet commission – it’s like winning a gold medal in the fitness blog Olympics!
Now, just like finding the right fitness gear for your workouts, choosing the right products to promote requires a little research and finesse. You need to find products that align with your fitness blog’s niche and resonate with your audience.
Here’s the good news. The internet is brimming with fantastic affiliate programs that are eager to partner with fitness blogs like yours. You can sign up for affiliate accounts on Amazon Associate, Awin, CJ, or ShareASale, to name just a few – it’s like having a buffet of affiliate options right at your fingertips!
Once you’ve found your perfect match, it’s time to get creative! Promote those products through your blog posts, social media shares, or even some jaw-dropping fitness videos.
Sponsored Content
Picture this: you, the fitness influencer, shining like a superstar in your niche, talking about awesome brands and products while getting paid for it! It’s like becoming the face of a top-notch supplement brand, only without breaking a sweat!
But hold your kettlebells, my fitness stars, because sponsored content is a path reserved for those with a loyal and established following. It’s like being the captain of a championship-winning sports team – sponsors want to work with influencers who can score big with their audience!
Selling Your Own Product/Service
Next up, we have the self-made entrepreneurs of the fitness blog universe – the ones who dare to create and sell their own products or services. Writing an eBook, for example, is like crafting your own personalized fitness plan for your audience – it’s a way to share your passion and knowledge while earning some well-deserved bucks!
Freelancing
Now, let’s talk about freelancing – the flexibly rewarding option that lets you showcase your fitness writing or any other skill. With the fitness industry booming, there’s a hot demand for talented fitness writers, and your expertise is like a rare gem in the treasure chest!
Remember, my fitness freelancers, always know your worth. Like a top-notch personal trainer, your skills are valuable, and you should never settle for anything less. It’s like commanding the price you deserve and building a reputation that shines like a golden trophy!
Conclusion
See, there are so many opportunities to make a good buck on the internet.
You just need to try out different things and see what works best for you and your blog. Just don’t overdo it.
And please do not be a SPAMMER.
We don’t need more of those here.
We already have enough for a lifetime.
Have a sense of ethics and strive to, first, help people, then, second, make money.
Don’t let money be your ultimate goal.
Trust me, building a successful fitness blog takes a lot of time, work, and patience, but if you can provide true values and are genuine in your endeavors, you’ll get there, sooner or later.
Are you ready to unlock the secrets to shedding those stubborn 10 pounds? Well, you’ve come to the right place! Losing weight doesn’t have to be a mysterious puzzle; it’s all about finding the right pieces and putting them together to create your masterpiece.
First things first, let’s talk about numbers. Weight loss is indeed a numbers game, but it’s not about deprivation. It’s about finding the right balance between exercise and eating. A little more movement, a little less food, and you’ll be on your way to success!
But wait, I know the weight loss landscape can be a maze of confusion, with contradictory advice lurking around every corner. Fear not! I’ve got your back, and I’ve sifted through countless studies and research papers to bring you the cream of the crop.
So, are you ready to embark on this exciting journey with me? Let’s conquer those 10 pounds with a blend of science, determination, and a dash of adventure! Together, we’ll unravel the mysteries of weight loss and create a masterpiece that’s uniquely yours.
Let’s do this
Drink Water Before Your Meals
This may surprise you but water can work wonders for our weight loss journey. According to some fascinating research presented at the annual meeting of the American Chemical Society, the simple act of drinking two glasses of water before a main meal can make all the difference. And hey, cutting back on portions is an added bonus!
You won’t believe the numbers—they found that dieters who followed this water-sipping strategy lost a whopping 44 percent more weight than their counterparts who didn’t adopt this habit. Now, that’s some serious progress! But the best part is, they were able to keep those pesky pounds off for at least a whole year. Talk about a lasting impact!
But wait, there’s more evidence to back this up! Across the pond, the University of Birmingham in the UK conducted a study with 84 obese adult volunteers under the watchful eyes of their doctors. The results were eye-opening. Those who pre-loaded with two glasses of plain tap water lost an average of 10 pounds over a 12-week period. Impressive, right?
And it’s not just a one-off finding either. The Journal of Obesity decided to put water to the test, and guess what? They came to the same delightful conclusion. Drinking water before meals is like a secret weapon in the weight loss arsenal.
So, why does water work its magic? Well, when you gulp down those two glasses before a meal, it helps fill up your stomach, making you feel more satisfied with smaller portions. Plus, it’s calorie-free, so you’re not adding any extra baggage to your plate—literally!
Isn’t it amazing how something as simple as water can have such a profound impact on our weight loss journey? No fancy pills, no complicated diets—just good old H2O doing its thing. It’s like nature’s weight loss elixir!
Drink Black Coffee
Coffee lovers, rejoice! Here’s some good news that’ll put an extra pep in your step. That delightful cup of joe you savor every morning might just be your secret weapon in the battle against those stubborn pounds.
You see, research has shown that caffeine, the beloved buzz-inducing compound in coffee, is not only a great pick-me-up but also a powerful metabolism booster. It can rev up your metabolic rate by a cool 3 to 10 percent, and if that wasn’t impressive enough, it can even kickstart fat burning by 10 to 25 percent. Now that’s what I call a double shot of goodness!
But here’s the kicker—those magical polyphenols, a group of plant-based antioxidants, are the real heroes behind this fat-blasting phenomenon. And to get the full dose of these wonderful compounds, you’ll want to indulge in the best coffee money can buy—Kenyan or Ethiopian coffee. Trust me; your taste buds will thank you for it!
Now, I know what you’re thinking—how much coffee is enough to get that metabolism-boosting magic going? Well, here’s the scoop. According to the experts, you need not down more than one cup a day to reap the benefits of black coffee. So, go ahead and savor that cup like it’s a precious elixir from the coffee gods!
But, and this is a big but, there’s a catch. If you’re looking to shed those extra pounds, you need to steer clear of the sugar, creamer, and flavorings in your coffee. I hate to break it to you, but that Venti Mocha Frappuccino Blended Coffee with whipped cream might taste heavenly, but it packs a hefty 500 calories. Yikes! That’s definitely not what you signed up for in your weight loss journey.
So, here’s the golden rule—keep your coffee calorie-free and let it work its magic on your metabolism. That way, you can enjoy the full benefits without any guilt or extra baggage.
Drink Green Tea
Move over, coffee; there’s another invigorating elixir that’s making waves in the world of weight loss—green tea! Don’t be fooled by its mild appearance; this humble drink packs a powerful punch when it comes to shedding those extra pounds.
Green tea, with its caffeine and flavonoids, has been turning heads in the scientific community for its potential to turbocharge your metabolism, boost insulin activity, and ramp up fat oxidation. It’s like having a secret weapon in your weight loss arsenal!
You might be wondering, “Is there any proof to back up these claims?” You bet! One study revealed that participants who took green tea extract lost an average of seven pounds and burned an extra 180 calories over three months—without even changing their eating habits. Talk about a helping hand from nature!
Here’s what sets green tea apart from its counterparts—its catechin-rich goodness. Catechins are powerful antioxidants that take center stage in green tea, making it a nutritional powerhouse. Oolong and black tea might be popular, but when it comes to catechins, green tea steals the show.
So, how much green tea should you be sipping to reap these fantastic benefits? According to the experts at the University of Maryland Medical Center, two to three cups a day is the sweet spot. And let me tell you, each cup is brimming with about 100 to 300 milligrams of those potent catechins and up to 10 to 50 milligrams of caffeine, depending on how you brew it.
Eat More Fiber
Fiber is the unsung hero of the weight loss world! While it’s true that fiber is a type of carbohydrate found in plant-based foods, don’t be quick to dismiss it as just another carb. This little gem is the key to filling you up and helping you shed those pesky pounds.
Let’s talk science, shall we? A study published in the Annals of Internal Medicine had 240 adults with the metabolic syndrome consume 30 grams of fiber daily, while keeping the rest of their diet unchanged. Guess what happened? They lost more weight than the control group! It’s like fiber waved its magic wand and made those pounds disappear.
But wait, there’s more! Fiber doesn’t stop at just weight loss. It’s a multitasker, working wonders on your metabolic markers like blood sugar, blood pressure, and cholesterol levels. Talk about a superhero in disguise!
So, how much fiber is enough to set you on your weight loss journey? The dietary guidelines suggest 20 to 30 grams per day. Not bad, but if you’re looking to kick things up a notch, listen to this pro tip: aim for around 40 to 50 grams per 1,000 calories you consume. That means more minimally processed plant foods in your diet, and trust me, your body will thank you for it.
Now, let me spill the beans on some precious sources of fiber that you can fill your plate with:
Beans and legumes: These little powerhouses are packed with fiber, making them an excellent addition to your meals.
Flax seeds: Don’t underestimate these tiny wonders—they’re fiber-rich and can easily be sprinkled on top of your dishes for that extra boost.
Asparagus: Not only does it taste delicious, but asparagus also delivers a healthy dose of fiber to keep you feeling full and satisfied.
Oats: Starting your day with a bowl of hearty oats not only fuels you up but also keeps your fiber intake in check.
Brussel sprouts: These little green marvels may not be everyone’s favorite, but they sure are a fantastic source of fiber.
Eat More Protein
Protein is another powerful ally for your quest to losing 10 pounds. You won’t believe what this research from McMaster University in Canada uncovered! They found that a low-calorie, high-protein diet, coupled with exercise, is a match made in weight loss heaven. Not only will you shed those pounds faster, but you’ll also gain some fabulous muscle mass. Talk about a win-win situation!
But that’s not all. The Rowlett Research Institute in Aberdeen chimed in with its findings, revealing that a high-protein, low-carb diet is a true champion at taming those hunger pangs and aiding in weight loss, at least in the short term. It’s like protein is your trusty sidekick on this weight loss adventure, keeping you on track and satisfied.
Now, let’s talk numbers. How much protein should you be loading up on? Aim for a delightful 20 to 30 grams of protein with every meal. It’s like a magic formula, helping you lose those 10 pounds and gain some lean muscle along the way. Who knew eating could be this powerful?
So, what’s on the menu for your protein-packed feast? Oh, just the most delicious choices like grass-fed meat, eggs, chicken breast, fish, beans, tofu, and nuts. Your taste buds will be dancing with joy!
And don’t you worry, my vegetarian friends—there’s a whole world of plant-based protein sources waiting for you to explore. Whether it’s quinoa, lentils, chickpeas, or tempeh, the options are endless, and they deliver on the protein punch.
Feeling like you’re not getting enough protein in your life? No problem! You can consider supplementing with whey protein. Research has shown that substituting some of your calorie intake with whey protein can help you shed about 8 pounds while gaining that coveted lean muscle mass.
Don’t Drink Your Calories
Liquid calories are the ultimate diet saboteurs.
You won’t believe the numbers—hold on to your seat! The average American chugs down a whopping 250 calories a day from soft drinks alone. Can you imagine? That’s like carrying around an extra 25 pounds of sugary baggage every year!
And guess what? The so-called “diet” drinks aren’t the weight loss wonders we hoped they’d be. Research from the Imperial College in London pulled the curtains back on this illusion and revealed that these seemingly innocent diet beverages are just as harmful and weight gain-friendly as their sugary counterparts. Oh, the disappointment!
But fret not—we’ve got a plan to curb those sugary cravings and make a healthy switch. Step one, wean yourself off any sugary drink that’s not plain water, black coffee, or the mighty green tea. These three will become your trusty sidekicks in your battle against sugar!
Next up, always have an alternative. You know, stock up on plenty of non-soda drinks, so when the sugary temptation comes knocking, you have a whole army of better choices to reach for. Convenience is key here!
And here’s a nifty trick—take a closer look at the sugar content of your favorite drinks. Knowledge is power, my friend! Once you’re aware of the hidden sugar traps, you’ll be able to make smarter choices and keep those pesky pounds at bay.
Isn’t it fascinating how something as simple as the color of our plate can trick our minds and lead us to consume more calories? It’s like a sneaky optical illusion that our brain falls for without even realizing it! Let me tell you about this intriguing study published in the International Journal Of Obesity.
Picture this: you’re serving yourself a delicious meal, and unknowingly, you reach for a plate that perfectly matches the color of your food. Well, guess what? According to this research, when your meal blends in with the plate, you’re likely to serve yourself a whopping 20 percent more food compared to when you serve it on a plate of contrasting color. Who would have thought that the color of our plate could have such an impact on our portion sizes?
But hey, it’s not our fault—we’re naturally drawn to things that look visually appealing. And the food industry knows this little secret too. Just take a look at fast-food chains! They use bold and eye-catching colors in their packaging and décor to entice us into indulging a bit more. Clever, right?
Now, how do we outsmart this sneaky illusion and keep our portion sizes in check? Well, here’s a nifty trick for you. Get yourself a variety of low-cost plates in different colors? This way, you can ensure that your dishes always contrast with the meal you’re serving, and you won’t be tricked into piling on those extra calories unknowingly.
And here’s a fun twist! Research suggests that eating your food on the bluest plate you have in your cupboard might just do the trick. Why, you ask? Well, blue foods are quite rare in nature, making them the least appealing blend with the food you’re eating
Try Intermittent Fasting
Intermittent fasting, or IF as it’s commonly known, has been making waves in the world of weight loss, and it’s backed by some serious scientific evidence! Multiple reviews and randomized clinical trials have shown that IF can be a powerful tool for shedding those extra pounds, especially for overweight and obese individuals.
Now, let’s be clear right from the start—intermittent fasting is NOT your typical diet. It’s more like an eating schedule that works wonders in speeding up fat loss and muscle growth. Instead of focusing on what you eat, IF focuses on when you eat.
Here’s the deal: during the fasting period, you simply skip meals, which naturally reduces your calorie intake. But don’t worry, you won’t be starving yourself! The magic lies in limiting your “feeding” to a specific window of time. So, while you may not eat during certain hours, you get to enjoy your delicious meals within a designated period.
And let me tell you, the results can be impressive! Studies have shown that IF can lead to a weight reduction of three to eight percent over a period of three to 20 weeks. Not bad for simply adjusting your eating schedule, right?
The key to making IF work for you is to stay hydrated during the fasting period. Drink plenty of water and zero-calorie beverages to keep your body nourished and happy. Just steer clear of anything with caloric content to maintain the fasting benefits.
Now, here are the main IF protocols to consider:
The 16/8 Method: This one is quite popular. You simply skip breakfast every day and enjoy your meals during an 8-hour feeding window. Imagine having your scrumptious dishes from 2 pm to 10 pm—it’s like having a food festival in the afternoon!
Eat-Stop-Eat: Here’s a daring option for the adventurous folks. You go on one to two 24-hour fasts each week. It’s like challenging yourself to see how well you can handle the fasting game!
The 5:2 Diet: This one adds a bit of variety to your week. You get to consume no more than 500 calories two days per week while enjoying your regular meals the rest of the week. It’s like having a mini challenge to tackle!
Go Low Carb
If you’ve been remotely connected to the world of health and fitness, you’ve probably heard that carb-restricted diets are the way to go for achieving lasting weight loss. So, let’s dive right into the delicious details of this nutritional regime.
Low carb diets are all about cutting down on carbohydrate consumption while indulging in plenty of high-quality proteins and healthy dietary fats. And guess what? Science is backing it up with a treasure trove of studies and research papers that reveal the true power of these diets.
Picture this—eating fewer sugars and starches is a critical factor in your weight loss journey. On the flip side, consuming more carbs is linked to weight gain, obesity, and a whole host of health troubles. Ouch! But don’t worry, I’ve got your back with some solid evidence to prove it.
In one eye-opening study published in the prestigious New England Journal Of Medicine, they randomly assigned 63 subjects to either a low-carb group or a low-fat, calorie-restricted group for a full year. And what happened? Drumroll, please! The low-carb group triumphed, shedding around 7 percent of their total body weight, while the low-fat group could only manage about 4 percent. Way to go, low-carb superheroes!
But wait, there’s more! The brilliant minds at Brigham and Women’s Hospital and the Harvard T.H. Chan School of Public Health conducted further research, comparing low-carb diets to other approaches. And guess what? Low carb emerged as the heavyweight champion of weight loss for the long haul. Knockout!
For the full list of modern scientific studies that show the importance of low carb eating for weight loss, check this link.
And here’s a little bonus—low carb diets aren’t just about weight loss. They’re like superheroes, protecting you from life-threatening conditions like cancer! Talk about having your cake and eating it too—except it’s a low-carb cake!
Now, here’s the plan of action—limit your daily carb intake to a tantalizing range of 20 to 50 grams per day. That’s the equivalent of 80 to 200 calories provided by carbohydrates. And remember, balance is the key! Severely cutting it down to 20 grams or less can leave you feeling drained and not-so-super. So, let’s avoid any fatigue, dizziness, weakness, or headaches, shall we?
Alright, foodies, listen up! You may think eating on the go is a smart time-saving strategy, but guess what? Research from the University of Surrey spills the beans—dieters who munch on the move end up packing on the pounds later in the day. Yikes!
But don’t worry, we’ve got more tasty nuggets of research to share. Another study in the Journal Appetite reveals that those who gobble up lunch while glued to their screens or lost in games tend to snack more later. The struggle is real, folks!
And here’s a head-scratcher—multitasking while munching can be a recipe for overeating, as proven by a study in the American Journal of Clinical Nutrition. Eating while texting, talking on the phone, watching TV, or strolling around triggers our inner overeater. Oh no!
Believe it or not, even walking while wolfing down your meal is a sneaky culprit. Those who eat while walking consume more calories than those who sit down to savor their food. The researchers suggest that when we eat on the go, we don’t treat it as a “real meal,” so we subconsciously snack more later. Oops!
But fear not, my mindful eaters! We have a solution for you to savor each bite and stay on track. Ready? Here are some deliciously simple tips to become a “mindful eater”:
First off, treat your mealtime as a sacred moment. Sit down and savor your food with intention. No more munching while multitasking!
Next, let’s slow things down. Chew slowly, focusing on the flavors and textures of your food. Say goodbye to distractions and hello to chopsticks if you want to add a little fun to your dining experience.
And remember, good things take time! Aim to take 15 to 20 minutes to enjoy an average-sized meal. Trust us, the longer you linger, the more satisfied you’ll feel.
Eat a Big Breakfast
Breakfast, the most delicious and important meal of the day! And guess what? It’s not just about satisfying your morning hunger pangs, it can actually help you shed those stubborn pounds. So, rise and shine, because we’ve got some breakfast wisdom to share!
Now, picture this: you start your day with a scrumptious breakfast, and what happens? You feel satisfied and energized, right? Well, that’s because by fueling up in the morning, you’re less likely to go overboard during your next meal. Smart move, huh?
But don’t just take our word for it! Let’s dive into some juicy research, shall we? In a study published in the Journal Obesity, two groups of obese women with metabolic syndrome were put to the test. Group I had a hearty 700-calorie breakfast, while Group II settled for a paltry 200 calories. And guess what happened? Group I lost a whopping 18 pounds and three inches from their waist, while Group II only managed to shed 8 pounds and 1.4 inches. Talk about a breakfast victory!
But wait, there’s more! Researchers at the Imperial College of London took things a step further. They scanned the brains of breakfast skippers using MRI, and guess what they found? When shown pictures of tempting treats like cake, chocolate, and pizza, the “orbitofrontal cortex” in their brains lit up like fireworks! And it gets even juicier—when offered lunch, these breakfast skippers chowed down 20 percent more calories than the breakfast eaters. Not a great way to kickstart your day, right?
So, here’s the bottom line: skipping breakfast might prime your brain to go on a calorie-hunting spree later in the day. Not cool at all! But fear not, breakfast believers! We’ve got your back.
And just when you thought we were done, here’s some more food for thought! Researchers from the Loma Linda University School of Public Health in California found that one of the keys to a drop in body mass index was having a substantial breakfast. So, if you want to make those pounds say “bye-bye,” make sure to enjoy a satisfying morning meal.
Have Eggs for Breakfast
I’d like to recommend one tasty food for anyone looking to lose 10 pounds or more; I won’t be recommending eggs enough.
Let me fill you in on the details.
A mind-blowing study published in the International Journal of Obesity spilled the beans on the egg-cellent benefits of starting your day with two eggs. Brace yourself for this—those who had the egg-tastic breakfast experienced a 65 percent greater weight loss, a 61 percent reduction in body mass index, and a 34 percent smaller waist circumference compared to the bagel munchers! Talk about egg-ceptional results!
Why do eggs pack such a powerful punch? Well, it’s simple. They’re incredibly nutrient-dense and low in calories, making them a weight loss warrior. Packed with top-notch proteins, essential vitamins, and healthy fats, eggs have everything you need to power through your day with gusto.
And guess what? If you’re not a fan of eggs, fear not! There are plenty of other high-quality protein options that can do the trick. Take a page out of the Pennington Biochemical Research Center’s book, where they found that a protein-rich breakfast left subjects feeling less hungry and munching on less food come lunchtime.
So, what are some egg-cellent choices besides eggs? How about some smoked salmon, mackerel, plain yogurt, or a tantalizing omelet? Oh, and let’s not forget about the raw muesli with nuts—yum!
Cooking at home isn’t just a delightful hobby; it’s actually a secret weapon for a healthier and more balanced diet. Don’t believe me? Well, let me dish out some juicy research findings that’ll make your taste buds tingle!
Researchers from the University of Washington School of Public Health unveiled the magic of home-cooked meals. Those who don their chef hats at home are more likely to whip up a well-balanced, nutritious feast without blowing up their food budget. It’s a win-win situation!
But wait, there’s more! A study published in the esteemed journal Public Health Nutrition served up some eye-opening numbers. Dieters who savored their meals at home were gobbling down a whopping 200 fewer calories per day compared to their restaurant-hopping counterparts. Can you believe that? It adds up to over 60,000 calories in a year—a staggering 16 pounds of fat! Now that’s a pretty compelling reason to grab that apron and get cooking!
Cooking at home empowers you with unrivaled control over every little ingredient that goes into your masterpiece. You’re the mastermind behind your meals, deciding just how much fat, sugar, and salt make it onto your plate. It’s like having the superpower of wholesome eating!
And here’s the secret to making it even better—focus on healthier and more wholesome ingredients while giving those refined and processed ingredients the boot. Your taste buds will thank you, and your waistline will too!
Here is the beginner’s guide to cooking
Next, start small by making one of these healthy meals recipes in just 15 minutes or less.
Consume Coconut Oil
Research shows that consuming medium chain triglycerides can increase metabolism by 120 calories per day, and lessen appetite so that you consume about 250 fewer calories per day.
Here is how to add coconut oil the healthy way into your daily menu
Use Smaller Plates
Picture this: You switch from using larger plates to smaller ones at home, and suddenly, you find yourself naturally eating less. It’s like your brain plays a little trick on you, but it’s all in your favor!
You see, a study published in the Journal of The Association for Consumer Research unraveled the secret. When you serve your meals on smaller plates, your brain associates any white space on the plate with less food. So, even though you’re eating a smaller portion, your brain tricks you into believing it’s the same amount of food. How clever is that?
And it gets even better! This nifty strategy works like a charm when it’s time to control your portions. By using an eight to 10-inch plate instead of a larger, 12-inch one, you’ll be serving yourself just the right amount, and you won’t even notice the difference.
Exercise Portion Control
Portion control, my friend, is the secret sauce to conquering those pesky pounds! Research has unmasked the culprit behind the obesity epidemic in the U.S.—increased portion sizes. But fear not, for science also unveils the magical solution: portion-controlled meals!
Imagine this: You opt for those pre-packaged, portion-controlled delights, and like a charm, you witness higher weight loss than with a self-selected diet. The evidence is undeniable, with studies like the one in the Journal Obesity showcasing how these meals work wonders for shedding weight.
Even a humble smaller plate can wield its power! Researchers from Cambridge University discovered that using a smaller plate reduced calorie intake by a whopping 160 calories. Talk about portion size becoming your secret weapon in the battle against those extra pounds!
Now, let’s get practical with portion control:
Embrace those single-serving packaged meals, loaded with nutritious goodness in just the right proportions. They’re like little weight-loss superheroes!
Your hands can be your trusty guide—two handfuls of veggies, one fistful of good carbs, a palm of lean protein, and a thumb of healthy fats at every meal. Voilà! The perfect portion awaits.
When dining out, think small, my friend. Instead of going for the colossal seven-inch sandwich, go for the charm of a small salad, a petite hamburger, or any other delightful mini portion.
Eat Spicy Foods
Capsaicin, the active ingredient in chili peppers, has been linked to an increased ability to burn energy, according to a study from US Arizona University and reported by China’s Xinhua news agency.
Additionally, research published in the Journal Obesity Open Access found that supplementing with capsicum extracts can boost resting energy expenditure in healthy adults. Another study from Purdue University suggests that consuming spicy food can help reduce appetite and calorie intake.
The secret lies in capsaicin’s potential to stimulate brown fat, which can increase metabolism by up to five percent and enhance fat burning by up to 15 percent.
To incorporate this spicy goodness into your diet, consider adding small amounts of crushed ground cayenne or red pepper to your meals three to four times a week.
Sprinkle cayenne pepper on sandwiches or eggs, use fresh pepper slices to accompany your dishes, or mix it into salads, soups, or dips.
However, remember not to go overboard, as not everyone may be accustomed to the spiciness.
Fork size matters. A study published in the Journal of Consumer Research suggests that using a bigger fork could actually help you consume fewer calories.
In a unique experiment, researchers took over an Italian restaurant and randomly assigned tables to receive either unusually large forks (20 percent larger than average) or unusually small forks (20 percent smaller).
The results were surprising. Customers who received the bigger forks ended up eating less food. When they finished their meals, they left roughly 7.9 ounces of food on their plates, compared to 4.4 ounces for the other group. The researchers theorized that people with the bigger forks may have felt fuller with less food because they were eating larger mouthfuls, which created the impression of consuming more food.
Walk After Your Meals
Walking is a fantastic low-impact exercise with numerous health benefits, but did you know that taking a brisk walk right after a meal can actually enhance its effectiveness for weight loss? According to Japanese research, participants who went for a 30-minute walk immediately after eating lost more weight compared to those who skipped the walk.
And it’s not just about weight loss. Another study published in the International Journal of General Medicine found that walking after any meal, including dinner, can lead to significant health improvements. These benefits include reducing blood sugar levels, speeding up digestion, curbing triglyceride levels, and increasing calorie burn—all contributing to weight loss.
Moreover, research conducted at the Lawrence Berkeley National Laboratory in California discovered that brisk walking can lower the risk of diabetes, high cholesterol, and high blood pressure just as effectively as running.
Take up Running
When it comes to losing weight and maintaining a healthy lifestyle, running takes the crown as one of the most effective exercises out there. Despite being a high-impact sport, running has the incredible ability to torch calories at an impressive rate—around 100 calories per mile, although the exact number may vary based on factors like training intensity and fitness level.
The scientific community stands in agreement with the weight loss potential of running, and numerous studies have highlighted its benefits. For instance, there’s a compelling body of research supporting its effectiveness in shedding pounds and improving overall health.
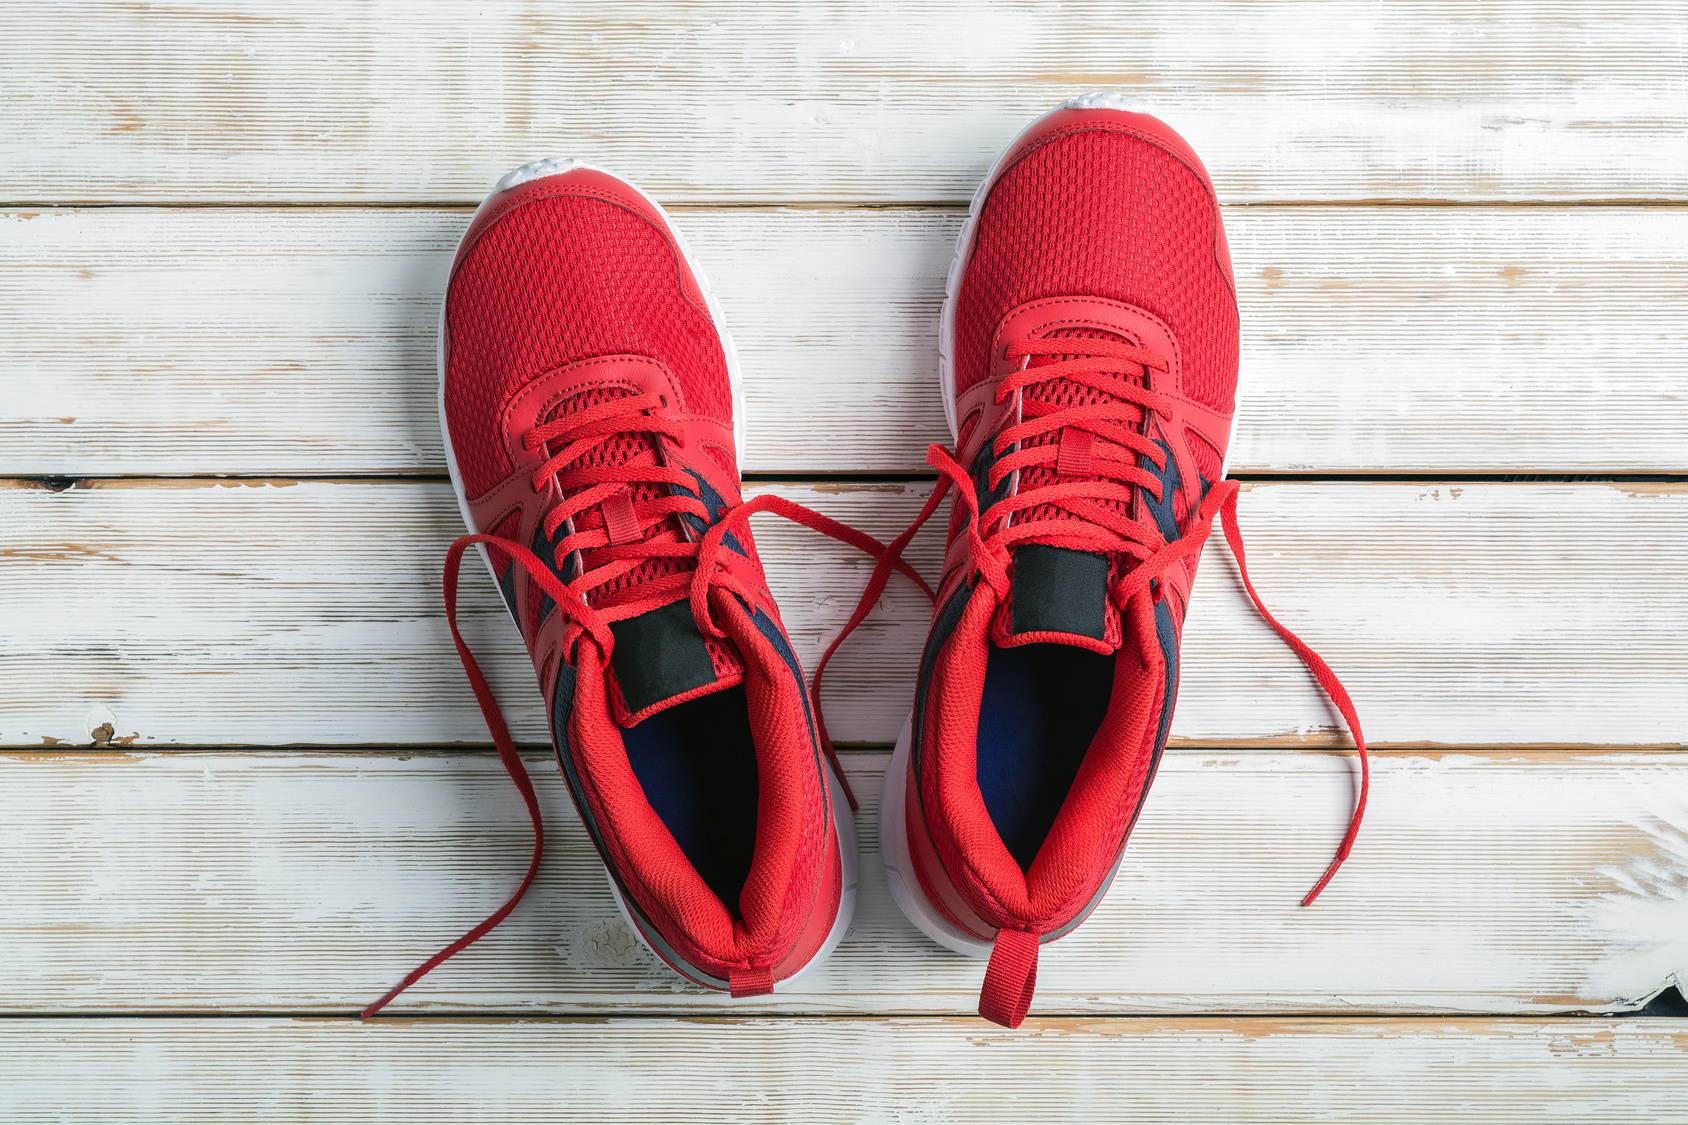
The best part is, you don’t need fancy equipment or a gym membership to get started. All you require is a good pair of running shoes, and you’re ready to hit the ground running, quite literally!
Here are the resources you need to get started running.
Regular yoga practice has been linked to mindful eating, which, in turn, may help curb binge eating, as per research conducted at the Fred Hutchinson Cancer Research Center.
Another study published in the Journal of Alternative and Complementary Medicine found that regular short yoga training led to weight loss and reduced cardiovascular disease risk in overweight men.
Additionally, a study in Menopause, the journal of The North American Menopause Society (NAMS), reported that six months of yoga significantly reduced body weight, lean body mass, and waist circumference in obese post-menopausal women.
One reason why yoga is effective for weight loss might be its ability to lower cortisol levels—a hormone that tends to rise during periods of high stress and is known to increase abdominal fat. Beyond its potential impact on weight, yoga offers a wide array of physical, emotional, and psychological benefits, making it a holistic approach to improving overall well-being.
Here is a YouTube Tutorial to help you get started on the yoga path.
Lift Weights
If you’re a regular reader of Runners Blueprint, you already know that I’m a huge advocate of strength training, and for a good reason—it works wonders! Not only can regular resistance training enhance your running performance, but it also has numerous other benefits.
By incorporating strength training into your routine, you can build muscle mass, increase your resting metabolic rate, and safeguard your precious muscle from wasting away.
But here’s the real kicker—some studies even suggest that weightlifting might be more effective for weight loss than traditional cardio-based exercises.
Yes, you heard that right!
According to research published in the International Journal of Cardiology, high-intensity strength training could be the secret weapon to help you shed that stubborn belly fat, outperforming cardio exercises alone.
So, if you’re ready to get started with strength training, don’t worry—it’s simpler than you think. Begin with the basics and progress gradually, making sure to hit the weight room at least three times a week. Focus on compound movements like squats, deadlifts, pushups, pull-ups, burpees, lunges, and other full-body exercises that engage multiple muscle groups simultaneously.
This way, you’ll get the most bang for your buck and set yourself on the path to a stronger, leaner, and more resilient body.
High-Intensity Interval Training
While extended steady-state cardio can certainly burn calories, if you want to maximize the effectiveness of your workouts and boost your metabolism, high-intensity interval training (HIIT) is the way to go.
HIIT involves alternating intervals of high-intensity effort with periods of low-to-moderate effort for recovery. This type of training has been shown to be highly effective for burning calories and increasing metabolism for a prolonged period after the workout—much more so than steady-state training of even longer duration.
Research has consistently shown that HIIT can help you achieve better results in a shorter amount of time compared to traditional steady-state cardio. Not only does HIIT burn more calories during the workout, but it also triggers an “afterburn” effect known as excess post-exercise oxygen consumption (EPOC). This means that your body continues to burn calories at an elevated rate even after you’ve finished your workout.
Exercising first thing in the morning can be a game-changer when it comes to burning calories and achieving weight loss.
Research from Northumbria University indicates that working out on an empty stomach in the morning can lead to a whopping 20 percent more fat loss compared to exercising after breakfast.
If you want to become a morning exerciser, here are some tips to help you get started:
Plan your workout the night before: Decide on the type of exercise you’ll do, whether it’s a morning jog, yoga session, or a home workout routine.
Lay out your workout gear: Set your exercise clothes and shoes in plain view the night before. This will make it easier for you to get dressed and get moving in the morning.
Set two alarm clocks: Put your alarm clocks away from arm’s reach, so you have to physically get out of bed to turn them off. This can help you avoid hitting the snooze button repeatedly.
Stick to a consistent routine: Try to wake up at the same time every morning, even on weekends. This will help regulate your body’s internal clock and make it easier to get up and start your workout.
Prioritize sleep: Aim for seven to nine hours of sleep each night. Having enough rest makes it more manageable to wake up earlier and tackle your morning exercise
Find a workout buddy: Partner up with a friend who shares your fitness goals. Holding each other accountable can provide motivation and make morning workouts more enjoyable.
Keep a Food Diary
Keeping a food diary can be a powerful tool for weight loss and maintaining a healthy diet. Research published in the American Journal of Preventive Medicine suggests that the more detailed records you keep of the food you consume, the more weight you’re likely to lose.
In a six-month experiment involving 1,700 overweight subjects, participants were encouraged to exercise and follow a sensible diet while diligently keeping a food diary. The results were striking, with the individuals who religiously recorded their meals shedding about twice as much weight as those who didn’t keep such records.
To make the most of your food diary, here are some key things to keep track of:
Time spent eating: Note the time of day you eat your meals or snacks. This can help you identify patterns in your eating habits and plan better for healthy meals throughout the day.
Place of meal: Jot down where you have your meals, whether it’s at home, work, a restaurant, or on-the-go. This information can provide insights into your environment’s impact on your food choices.
Your mood at the time of the meal: Record your emotions before and after eating. This can help you recognize emotional eating triggers and find healthier ways to cope with stress or other emotions.
Hunger levels at the time: Rate your hunger levels on a scale before and after eating. This will help you distinguish between true hunger and eating out of boredom or habit.
Food choices and portion sizes: Be specific about what you eat and the quantities. Including details about portion sizes can give you a better understanding of your calorie intake.
Sleep Well
Ensuring you get enough sleep is a crucial factor in making sure your efforts to lose 10 pounds are successful. Various studies have highlighted the impact of sleep on our eating habits and overall weight.
According to a study published in the Journal of Clinical Nutrition, sleep deprivation can lead to an increase in late-night high-carb snacking. Further research conducted at the University of Chicago revealed that sleep-deprived individuals tend to consume snacks with twice as much fat as those who get enough sleep.
A long-term study published in the American Journal of Epidemiology found that women who don’t get enough sleep are 30 percent more likely to gain about 33 pounds over the next 16 years compared to those who sleep for eight to nine hours each night.
The link between sleep and weight gain lies in the impact of sleep deprivation on the frontal lobe of the brain, which controls impulse control and decision making. When we lack sleep, it becomes harder to resist temptations and make healthy choices.
Moreover, sleep deprivation disrupts the balance of hunger hormones, leading to increased appetite and potential weight gain. It can also lead to other health issues like high blood pressure, diabetes, cardiovascular diseases, and cognitive problems.
Surround yourself with The Right People
The influence of friends and social circles on our weight loss journey is significant, as research from the University of California shows. If you have a friend who gained weight in a given interval, you are 57 percent more likely to do the same.
However, the flip side is that having an exercise buddy who successfully lost weight increases your chances of achieving sustained weight loss, according to a study published in the Journal of Consulting and Clinical Psychology.
Further research has also demonstrated that embarking on a weight loss journey with friends can be highly beneficial. Those who have supportive friends on their weight loss journey are more likely to lose weight and maintain a healthy weight compared to those who go about it on their own.
To leverage the power of peer pressure to your advantage, start by communicating your weight loss and fitness goals within your social environment. Share your aspirations and seek support from friends and family.
Additionally, consider joining online communities on platforms like Facebook, Twitter, or other forums that offer support, advice, and monthly challenges. These communities can provide a sense of camaraderie, motivation, and accountability, making your weight loss journey more enjoyable and successful..
Emotional eating can significantly impact healthy body weight and hinder your weight loss goals. However, there’s good news: daily mindful practice can help you become more aware of hunger cues, emotional triggers, and feelings associated with binge eating.
In a study conducted at North Carolina State University, 80 subjects were divided into two groups. One group engaged in daily meditation, while the other group designed their own mindful practice. The results showed that the meditation group lost an average of 4.2 pounds, which was seven times more than the other group’s average of 0.6 pounds.
Furthermore, research from The French NutriNet Santé reported that regular meditation could decrease the risk of obesity by 50 percent.
To build the habit of daily meditation, you can try various forms of mindfulness practices, such as breathing exercises, Vipassana, transcendental meditation, muscle relaxation, self-hypnosis, Yin yoga, and more. Find the technique that resonates with you and make it a part of your daily routine to improve your relationship with food and enhance your weight loss efforts.
Check this beginner YouTube tutorial for getting started down the mindfulness path:
Reduce Your Stress
Cortisol, a stress hormone produced by the adrenal glands, has been linked to increased food cravings and stubborn belly fat in numerous research studies. This hormone plays a role in regulating appetite, metabolism, and body composition.
A study published in the Journal Obesity analyzed cortisol levels in hair samples from participants and found that those with higher cortisol levels had larger body weight, waist circumference, and BMI.
Stress may also affect the secretion of peptide YY (PYY), a hormone that signals fullness and regulates appetite, released by cells in the intestines and colon.
To reduce stress, consider incorporating the following practices into your daily life:
Engage in regular meditation or mindfulness exercises.
Surround yourself with positive and supportive people.
Spend more time in nature and limit screen time.
Laugh more often to release tension and boost mood.
Treat yourself with kindness and self-compassion.
Learn to say no to unnecessary commitments and prioritize self-care.
By managing stress levels, you may experience improved overall well-being and better weight management.
Pay cash for Groceries
Research conducted at Cornell University found that the payment method used for groceries can influence food choices. The study showed that individuals were less likely to buy unhealthy junk food when they used cash instead of credit cards.
In a separate analysis of supermarket purchases from 1,000 households over six months, it was observed that shoppers who used credit cards tended to buy more junk food compared to those who paid in cash. This suggests that using credit cards may lead to the purchase of calorie-dense and unhealthy foods, despite the potential additional cost to both health and finances.
Therefore, if you want to make healthier food choices and avoid unnecessary junk food purchases, consider using cash when shopping for groceries. It may help you stay more mindful of your purchases and make better decisions for your overall health.
Visualize the Food You Crave
Research published in the journal Science suggests that imagining oneself repeatedly indulging in junk food can actually help in consuming less of the actual food when presented with the opportunity. This finding challenges the traditional thought-suppression strategy often used in weight loss efforts.
Rather than trying to suppress thoughts about tempting foods, the study recommends embracing those thoughts and visualizing oneself indulging in the desired treats. By doing so, individuals may reduce the intensity of their cravings and feel less compelled to overindulge in unhealthy snacks.
However, it’s essential to strike a balance and maintain a healthy and balanced diet overall. While this visualization technique may help manage cravings, it should not replace the importance of making mindful and nutritious food choices for long-term health and weight management.
Don’t Diet. Build A Healthy Lifestyle
Building a healthy lifestyle is key to achieving lasting weight loss and overall well-being. Crash diets and quick fixes may yield temporary results, but they often lead to rebound weight gain and can be detrimental to overall health.
Instead of chasing after short-term solutions, focus on creating sustainable habits that promote a balanced and healthy lifestyle. Regular exercise, a well-balanced and nutritious diet, adequate sleep, and stress management are essential components of a healthy lifestyle.
Rather than depriving yourself of the foods you love, practice moderation and portion control. Allow yourself occasional treats and enjoy them guilt-free. This approach fosters a positive relationship with food and helps prevent feelings of deprivation that can lead to overeating.
Remember, a healthy lifestyle is not just about physical health but also about mental and emotional well-being. Engage in activities that bring you joy and help reduce stress. Prioritize self-care and self-compassion, as they are vital for maintaining a healthy and sustainable weight loss journey.
By focusing on creating a positive and balanced lifestyle, you’ll not only achieve your weight loss goals but also experience numerous benefits for your overall health and happiness.
The Conclusion
I’d like for the record to state that what works for some people may not work for others when it comes to losing weight.
All the strategies below are backed by real science, but that does not mean that they guaranteed to work for everyone. Your friend might lose 10 pounds by trying them. You may lose more. or less. Depends.
Everyone is different and responds differently to various methods and strategies. So experiment widely to find out what works the best for you.
I hope this article can help in some way, small or big, and keep in mind, if any of the above strategies are put into action it’s a step in the right direction—no matter how far you still have to go.
It might not be your fault that you’re in the situation you’re in right now, but it’s up to you to drive your own bus and take it where you want to go.
For more, check the links to the studies and research papers.
We all know deep down that we were born to run – that exhilarating feeling of freedom and the wind rushing through our hair. But hey, even the most natural-born runners can benefit from refining their technique and taking their performance to new heights!
Here’s the truth. If you’ve been around the running block for a while, then you must have heard about various running techniques out there, each claiming to be the holy grail for better, more efficient running. But today, we’re diving into one of the most buzzed-about methods – the Chi Running technique!
Imagine a mindful dance between the ancient Chinese martial art, Tai Chi, and the art of running. That’s what Chi Running is all about! Created by ultramarathoner Danny Dreyer, it combines the physical, mental, and even spiritual aspects of Tai Chi with solid running principles to elevate your running game.
Now, you might be wondering – what makes Chi Running so special? Advocates say it could be the key to unlocking a more natural and harmonious running form that works with, not against, the laws of physics. We’re talking reduced stress on your body, improved speed, fewer injuries, and dare we say, even more joy while training!
Curious how it all works? Don’t worry; we’ve got you covered! Today, we’re diving into the nitty-gritty of Chi Running – how it can enhance your running efficiency and elevate your entire running experience.
Ready? Let’s get started.
Chi Running Explained
Imagine a harmonious blend of ancient wisdom and modern science, where the art of Tai Chi meets the exhilarating world of running. Enter Danny Dreyer, the mastermind behind Chi Running, an ultramarathoner with a passion for fusing the physiological, mental, and spiritual elements of Tai Chi with the art of running.
But what exactly is Chi Running? It’s a mindfulness-based running technique that places your focus squarely on your form and technique. By doing so, you’ll unlock a magical world where stress melts away, speed soars, and injury risk diminishes. It’s like finding your running flow, effortlessly moving with the laws of physics rather than pushing against them.
Advocates of Chi Running sing its praises – claiming it’s the key to unlocking your true running potential. Imagine running with ease, feeling like you’re gliding through the air, as if the ground beneath you is merely a gentle suggestion. And as the miles fly by, you’ll be filled with an indescribable sense of joy and fulfillment, making training sessions a delightful adventure.
But hey, don’t take our word for it! Science has stepped into the spotlight to validate the Chi Running phenomenon. A study from the Journal of Orthopaedical & Sports Physical Therapy revealed that Chi Running reduces loading on the hips and knees, offering a glimmer of hope for those with a history of joint issues.
Yet, as with any adventure, there might be a few twists and turns. Chi Running might not be the perfect fit for everyone, especially if you’re nursing pesky ankle pains. Remember, every journey is unique, and what works like magic for some may not quite click for others. (More on this later)
The Science
Alright, let’s dig into the juicy stuff – the science behind Chi Running! You know, we all love a good story, and here’s one that reveals the truth behind those acclaimed benefits.
But, here’s the twist in the tale. As with any adventure, there’s a trade-off. It’s like walking a tightrope – Chi Running may lighten the load on your hips and knees, but it might, just might, shift some of that load to the ankles. The complexity of the human body!
But fear not, for every tale has its silver lining. For runners who’ve battled hip and knee woes, this could be a blessing in disguise. A sigh of relief and a glimmer of hope, like finding an oasis in the desert.
But what if you’re dealing with ankle issues? Then the journey might not be as smooth. Ankle problems are like pesky little gremlins, demanding caution and care. So, before you embark on the Chi Running adventure, listen to your body, and consult with a wise coach or healthcare wizard.
But wait, there’s more! Another study from the University of North Carolina at Chapel Hill has added more credibly to the power of the Chi Running Method. Though not as rock-solid as the first, it whispers tales of improved efficiency and reduced impact when comparing Chi Running to other common running styles. It’s like finding a secret shortcut on the running map!
How About Running Economy?
Think of running economy as the secret currency of runners, where every step counts! Now, let me share a tale of a fascinating research paper that explored this very enigma.
The research wizards discovered that, while Chi Running did work its magic to lessen impact, the coveted running economy remained elusive. It’s like a hidden treasure, just beyond reach!
But this is not the end of the story. Remember, the path to running glory is not a one-size-fits-all affair. Each runner’s journey is a unique tapestry of strengths, weaknesses, and preferences.
The Risks of The Chi Running Method
As you can tell, I’m a huge fan of the Chi running method, but let’s be real here, it’s not a one-size-fits-all solution. As with any major change in how you run, there are some potential risks and drawbacks to consider when diving into the world of Chi Running.
One thing that pops up is the concern about overloading those ankle joints. Sure, Chi Running might lessen the load on your hips and knees, which is great, but some runners have reported increased stress on their ankles. If you’ve had ankle issues in the past or deal with instability, it’s essential to approach Chi Running with caution. Before making the leap, it might be a smart move to consult with a qualified coach or healthcare professional who can guide you through the process.
And let me tell you, tinkering with your running technique isn’t a walk in the park. It requires some serious adjustments in your muscle activation and biomechanics. If you rush into it without a gradual approach and proper guidance, you might find yourself facing temporary discomfort or even injuries.
Moreover, it’s important to understand that what works for one runner might not work for another. We’re all unique, with different body structures, gait patterns, and running styles. So while Chi Running can be a game-changer for some, others might not find it as compatible with their biomechanics or training goals.
Oh, and here’s a little food for thought: Chi Running is fantastic, but it’s not a magical cure-all. It won’t address everything related to running performance.
Don’t get me wrong, it can improve things, but it’s not the whole package. Strengthening your muscles, working on flexibility, and maintaining overall conditioning are still crucial aspects of becoming a better runner and staying injury-free. Focusing solely on running form and neglecting the other elements might hinder your progress and overall effectiveness.
Chi Running Vs. Other Running Schools
Alright, let’s dive into the world of running techniques and see how Chi Running stacks up against other popular schools!
First up, we’ve got the Pose Method. Picture this: a group of runners gracefully gliding forward, focusing on falling slightly forward and landing on the ball of their feet, just like in Chi Running. Advocates of the Pose Method claim that this approach reduces impact and lowers the risk of injuries while boosting running economy. Sounds intriguing, right? But here’s the kicker – we need more research to truly understand how it compares to Chi Running. Wouldn’t it be exciting to see some comparative studies between these two methods to shed some light on their respective benefits and limitations?
Now, let’s talk about the traditional rearfoot-striking techniques that many runners swear by. You know the ones – those heel-to-toe landings that have been the go-to for ages. They have their advantages and disadvantages, no doubt. They distribute impact differently, and the way they load your joints might differ from midfoot-striking methods like Chi Running. It’s like comparing classic moves to a modern dance routine – both have their unique styles, and we need some solid research to understand how they impact injury risk and overall performance.
But wait, there’s more! Some running schools swear by forefoot striking, while others focus on nailing the perfect cadence and stride length. It’s like a whole world of running philosophies out there! And you know what? We need to acknowledge and embrace these diverse approaches. After all, each runner is like an artist, crafting their masterpiece on the track or trail.
Now, wouldn’t it be amazing if we could get our hands on research papers and studies comparing all these techniques? I mean, we’re all eager to know how Chi Running measures up in terms of injury prevention, running economy, and overall performance when pitted against these different styles. It’s like a thrilling race to uncover the best method for our running adventures!
How To Practice Chi Running
To practice Chi Running, try implementing the following form cues.
Run Tall
The ground rule of Chi running comes down to alignment. The method requires proper posture, with the head, shoulders, hips, and feet aligned. When aligned, you’ll help reduce the work that your body has to exert to keep standing and propelling forward.
Proper posture reduces the amount of work your muscles exert and move more efficiently. This is, after all, the foundation of an efficient running economy.
Lean Forward
Lean forward and let gravity become your best friend on this running journey! As you lean slightly, you’ll feel the pull of the earth beneath your feet, propelling you forward with grace and ease.
But wait, there’s more to this lean! Imagine your feet landing like delicate butterflies on the ground, gracefully touching down on the ball of your foot, not the heavy thud of a heel strike.
Yet, as with any tale, there’s a twist. Avoid leaning from the waist! It’s like trying to sing an opera without a conductor – chaos ensues. So, stand tall, tilt your body forward from your ankles, and let gravity be the maestro, guiding your every move.
And here’s a little secret – subtlety is the key. Think of it as a delicate dance with gravity, a whisper of a lean that keeps you in control. Avoid leaning too far, for the road to enchantment lies in finding that sweet spot where you run like a river flowing effortlessly.
Engage Your Core
Chi running requires a level pelvis. To maintain that, you need to embrace your core muscles like a long-lost friend.
Imagine leaning against a sturdy wall, feeling the support against your back. Now, channel your inner ninja and press your lower back against that wall, mastering the art of a level pelvis.
And here’s the bonus – this magical core strength will work its wonders on your stride. It’s like a sorcerer’s spell, shortening your strides to prevent overreaching and the dreaded heel striking. Your running form will flow like a mesmerizing dance, as if the very ground bows to your every step.
But that’s not all.
Core strength is like a suit of armor, protecting you from the pitfalls of injury. Like a fortress, it guards against the onslaught of wear and tear, ensuring your body stays resilient and ready for your next adventure.
Land on The Midfoot
Picture this: You’re a seasoned runner, feeling the rhythm of the road beneath your feet. But uh-oh, you notice that pesky heel strike creeping into your stride! It’s like putting on the brakes every time you take a step, halting your running flow like a red light in a sea of green.
Now, let me let you in on a little secret – the magic of the mid-foot strike! It’s like unlocking the secret passage to a smoother, more efficient running experience. Instead of landing with a thud in front of your hips, you gracefully touch down on the mid-foot.
With every mid-foot stride, it’s like a symphony of motion, where you unleash the brakes and let your running spirit soar. The impact on your muscles and joints is softened. And oh, the joy of a reduced risk of injury – it’s like a safety net that allows you to run with confidence and freedom.
Relax Your Body
Here’s another enchanting lesson from the world of Chi Running – the art of relaxation. As fatigue sets in, it’s like the weight of the world on your shoulders. But beware, for tension is like a sneaky thief, stealing your energy and robbing you of your running efficiency.
Now, let’s flip the script – imagine yourself as a graceful river, flowing effortlessly through the landscape. As you relax your body, you’re saving up that precious energy for the journey ahead.
And that is the secret to Chi Running – to run with ease, to flow with the rhythm of your body, and to find the magic in every step.
How To Implement Chi Running into your Running routine
Let me share a timeless truth with you – behavior change is like taming a wild stallion. It takes time, dedication, and a whole lot of persistence to break away from old movement patterns.
As you lace up your running shoes for the first few runs, remember this – slow and steady wins the race. Focus on the Chi Running principles with every stride, and let the magic of practice work its charm.
It might take your muscles 4 to 12 weeks to get used to this new movement pattern. Like a butterfly emerging from its cocoon, give yourself time to spread your wings and embrace the beauty of change.
Now, here’s the secret ingredient to success – devote one sacred session per week to technique. Think of it as a date with Chi Running, where you leave pace, distractions, and to-do lists behind. Instead, let your attention be like a laser beam, focused solely on your posture and movement efficiency.
Energy follows attention. So, let your attention be your guiding light, leading you towards running excellence. In this dance of mindfulness, pay homage to your posture and make the necessary tweaks as you run. It’s like molding clay, shaping your running form with every step.
And here’s a little tip – don’t try to bite more than you chew! In this waltz of change, focus on mastering one principle at a time. It’s like building a castle brick by brick, creating a strong foundation for your Chi Running journey.
Now, here’s the magical part – once you’ve built these movement habits, they’ll become second nature. It’s like riding a bike – you won’t have to think about it anymore. Your body and mind will become one with Chi Running, and every stride will feel like a graceful dance.
Are you ready to unravel the mysteries of the perfect running shoe fit? Well, you’re in luck because you’ve stumbled upon the ultimate guide that’s about to change your running game for the better.
We all know that wearing the wrong pair of running shoes can turn your training sessions into a painful nightmare. But fear not, my friend, because I’m here to equip you with all the knowledge you need to find that sweet spot of comfort and support.
In this article, I’ll dive deep into the art of finding the perfect fit for your running shoes. Say goodbye to blisters, discomfort, and all those pesky foot issues. It’s time to unlock the secret to running comfortably and pain-free.
So, get ready to lace up your curiosity and let’s embark on this journey together. By the end of this guide, you’ll be a pro at determining how your running shoes should fit. Sounds exciting, right? Well, it’s about to get even better.
The Benefits of Proper Fit
Let’s talk about the real deal when it comes to choosing the perfect pair of running shoes. Forget about the fancy looks, the trendy designs, and even the brand names that make your heart skip a beat. The ultimate deciding factor? Drumroll, please… It’s all about the fit!
Proper fit should be your holy grail when hunting for those dream running shoes. Why, you ask? Well, buckle up because I’m about to drop some serious knowledge bombs.
When your running shoes fit like a glove, they become your trusty sidekicks, providing the support and stability your feet need. It’s like having your own personal cheerleaders, propelling you to reach new running heights and keeping those pesky injuries at bay.
But let’s get real here. Ill-fitting shoes are the arch-nemesis of every runner. Tight shoes? Say hello to blisters and toe injuries. Oversized or too wide? Prepare for some serious toe-damage drama. And that’s just the tip of the iceberg, my friend.
If you think that’s scary, hold onto your running hat because improper-fitting shoes can unleash Pandora’s box of troubles. I’m talking tendonitis, impingement, heel pain, ankle sprains, stress fractures—you name it. Trust me, you don’t want to go down that painful road.
I could keep going on and on, but I think you’ve grasped the importance of finding the right fit. It’s the superhero cape that will save you from a multitude of running woes.
Red Flags For Improper Fit
Now that you’ve found your potential running shoe soulmates, it’s time to put them to the ultimate test.
I’m talking about a little trial period to see if they’re truly the perfect fit. So, grab your shoes, put them through their paces, and keep an eye out for these red flags that scream “improper fit.”
First up, let’s talk about the heel slippage. If you feel your heel sliding around when you hit the road or tackle those uphill battles, it’s a clear sign that your shoes are either too big or not giving you the snug embrace you need. We want your feet feeling secure, not like they’re about to do a moonwalk!
Next, pay attention to any numbness on the top of your feet. This could be a sign that the shoes are either too loose or too tight. You want that upper fabric to be snug, like a gentle hug for your feet, but not so tight that it cuts off the blood flow.
Now, let’s talk about those troublesome blisters. If you find them setting up camp on your toes, it’s a clear indication that your shoes are too tight in the box or simply too small. Ouch! We want your toes to have plenty of room to wiggle and breathe, not feel like they’re trapped in a toe-squeezing dungeon.
Speaking of toes, if you notice any bruising, it’s time to reassess the size situation. Bruised toes are a big red flag that your shoes are playing a size game that’s one size too small for your real foot size. We don’t want your toes feeling like they’ve been through a boxing match!
Keep an eye out for any numbness or tingling in your feet, especially in those precious little piggies. This could indicate that your shoes lack the necessary volume to accommodate your feet comfortably. It’s like trying to fit a square peg into a round hole—we need the right shape and size to keep those feet happy!
Moving down to the ball of your feet, if you find yourself battling blisters in that area, it’s likely a sign that your shoes are a tad too wide. We want a secure fit, not a slip-and-slide party for your feet!
Last but not least, let’s talk about those pesky heel blisters. If they make an unwelcome appearance, it could mean that the heel cup of the shoe is just too wide for you.
Measure Your Feet
Before we dive into the world of shoe fitting, let’s start with the basics—measuring your feet. After all, we need to know the dimensions of these magnificent foot soldiers of yours.
Now, here’s the deal. When it comes to finding the perfect fit, we’re not just talking about the length of your feet. We also need to consider the width. It’s all about finding that sweet spot where your feet have enough space to breathe and move comfortably while also receiving the support they need. We don’t want any sliding or wiggling around inside the shoe!
Oh, and don’t forget about the socks! When you measure your foot length and width, make sure you’re wearing the type of socks you’ll be using for your runs. We want to get the most accurate measurement possible, and socks can make a difference in how your shoes fit.
Now, here’s a little nugget of wisdom: foot size can change over time. As the years go by and life happens, your feet might decide to gain or shed a little weight, or maybe they just want to mix things up. That’s why it’s a good idea to check both the length and width of your feet every couple of years. We want to make sure we’re keeping up with your foot’s latest adventures!
The Measuring Process
Let’s get down to business.
Here’s what you’ll need: a ruler or tape measure, a trusty piece of paper or cardboard, and a pen. Are you ready? Let’s do this!
First things first, find a nice, flat surface to work on. Lay that piece of paper on the floor like a blank canvas, ready to capture the essence of your foot. Make sure you’re wearing the same socks you usually rock during your training sessions—it’s all about keeping it real.
Now, it’s showtime for your right foot. Take a stand on that paper, and let your foot make its mark. With the pen in hand, gently trace a thin line around the outer edges of your foot, following its every curve and contour. Keep that pen perpendicular to the floor, or if you want some assistance, ask a friend to lend a hand (or, should I say, a pen?).
Once you’ve worked your artistic magic on one foot, it’s time to repeat the process on the other side. Let that left foot leave its trace on the paper, capturing its unique shape and size.
Now, grab your ruler and prepare to measure the grandeur of your feet. For the length, measure vertically from the tip of your longest toe down to the base of your heel. Capture that vertical distance with precision.
As for the width, it’s all about capturing the widest part of your foot. Use that ruler to measure horizontally across the chunkiest section, embracing the fullness of your foot.
Find Your Size
Once you’ve got your trusty foot measurements, it’s time to find your size using a handy sizing conversion chart. It’s like decoding the secret language of shoes, and I’m here to guide you through it.
Matching your measurements with the recommended running shoe size is as easy as pie. Just find that perfect length measurement and let it lead you to your shoe soulmate. It’s like finding the missing piece to complete the puzzle of your perfect fit.
The Finger Test
The finger test is a true game-changer when it comes to determining the optimal length fit. Imagine your longest toe gracefully stretching within the shoe, leaving just enough space to wiggle and breathe. You want to aim for about half to one inch of glorious freedom between your toe and the shoe’s end.
That’s roughly the width of your thumb, my friend. So, here’s the trick: slip your finger between your heel and the back of the shoe, feeling for that Goldilocks zone. If it slides in easily but feels snug, you’ve hit the sweet spot.
But if you’re struggling to fit your finger in or need to summon some superhero strength, those shoes are too small for your fabulous feet. On the other hand (or should I say foot), if you can fit two or three fingers comfortably behind your heel, it’s a clear sign that those shoes are too roomy.
But wait, there’s more! Width matters too. You want a little pinchable space at the top or sides of the shoe. It’s like giving your feet a cozy hug, ensuring they have room to expand and breathe during your runs. That’s why running shoe sizes often run a half size bigger—or even more—than your usual footwear. It’s all about finding that sweet balance between comfort and support.
Now, let’s talk about red flags. If you’re experiencing blisters, black toenails, or any toe-related drama, it’s a clear sign that your feet need some extra wiggle room within those shoes. We don’t want hammertoes, corns, or calluses crashing the party, either. So, remember to listen to your feet and give them the space they need to thrive.
By finding the right shoe size—length and width—the world of running will become your oyster. Say goodbye to discomfort and hello to a blissful journey where your feet can conquer miles with joy and ease.
Try On Different Shoes
Once you’ve got your measurements sorted, it’s time to hit the stores and find your perfect match. If you’re new to the world of running shoe shopping, make a beeline for a running specialty store—they’re like the holy grail of shoe-finding wisdom.
The staff at these stores are the real MVPs. They’ll be your trusty guides, helping you navigate through the vast selection of shoes based on your foot type, running style, training goals, preferred running surfaces, and other factors that can impact your shoe choice. They’re seasoned runners themselves, so they know a thing or two about the art of finding the perfect pair of shoes.
It’s important to spill the beans and let the fit specialist know about any foot issues you might be dealing with. Whether you have hammertoes or bunions or are recovering from Achilles tendonitis or plantar fasciitis, they’re there to lend a helping hand and steer you toward shoes that provide the right support and comfort for your unique needs.
Now, let’s talk about the importance of a well-stocked running shoe store. You want a place that’s bursting with options, a veritable treasure trove of running shoe goodness. The more choices, the better your chances of finding that perfect fit. And with the knowledgeable staff by your side, you’re in for a winning combination.
Oh, and don’t forget about the trusty sizing charts! After you’ve measured the length and width of your feet, these handy charts come to the rescue. They’re like the secret decoder rings of shoe sizing, helping you pinpoint your ideal fit and guiding you toward running shoe nirvana.
Charts
After measuring the length and width of your feet, use the following size charge to find your ideal fit.
Ready to take your running game to the next level? Well, you’re in luck because you’ve landed in the perfect spot.
Listen up because I can’t stress enough how crucial it is to nail down your running technique. Trust me; it’s a game-changer.
Let’s go back to the basics. Our bodies were built for running; it’s in our DNA.
Running is as natural as breathing, and some running gurus like Chris MacDougal and the fascinating world of evolutionary thinking will tell you that it’s one of the most innate actions we can perform.
In fact, there’s even a mind-boggling theory that suggests running is what made us human in the first place. Curious? Go check out the Endurance Running Hypothesis Wikipedia Page for an absolute goldmine of information and mind-expanding research references.
Now, before you go sprinting off into the sunset, let me be real with you. Mastering proper running techniques is a journey. It’s a process of trial and error, a learning curve that every runner must traverse.
But fear not! In this article, I’m about to spill the beans on some universal rules of proper running techniques that will turbocharge your performance. We’re talking faster speeds, longer distances, and bidding farewell to that pesky fatigue that always seems to creep up.
Exciting, right? I thought so too.
So, grab your favorite pair of running shoes, lace ’em up nice and tight, and get ready to dive headfirst into the world of proper running technique.
What is Proper Running Technique
Imagine your body as a finely tuned machine, where all the parts are perfectly aligned and working in harmony. From the moment your head takes the lead, guiding your gaze forward, down to your trunk, thighs, and lower legs, everything should fall into place. It’s a symphony of movement efficiency, where no energy is wasted, and every motion propels you forward with grace and power.
But why is this alignment so important, you may wonder? Well, my friend, it’s all about maximizing your running potential. When your body systems are in sync and stacked in a straight line, you become a force to be reckoned with. Every step you take becomes a testament to your efficiency and mastery of the sport.
In fact, scientific studies have shown that proper alignment is not just about looking good; it can have a profound impact on your running performance. A study published in the Journal of Sports Sciences found that runners with better body alignment experienced increased running economy and decreased energy expenditure.
In simpler terms, proper alignment helps you run farther, faster, and with less effort. Who wouldn’t want that?
And yes, we’re born to run.
Numerous scientific studies have explored the naturalness of running and its impact on human evolution. For instance, Lieberman et al. (2004) conducted research that suggests humans have evolved as endurance runners. Their study highlighted the unique anatomical adaptations in the human body, such as long legs, short toes, and efficient cooling mechanisms, which are believed to have provided an evolutionary advantage for persistence hunting.
Another study by Bramble and Lieberman (2004) focused on the biomechanical aspects of running, showcasing how the human body is well-suited for this activity. They argued that features like the Achilles tendon, arches of the foot, and spring-like energy storage and release in tendons contribute to the efficient running mechanics observed in humans.
Moreover, a research article by Raichlen et al. (2012) examined the metabolic benefits of running. Their study found that humans have unique adaptations that allow for efficient energy consumption during running, making it a highly efficient mode of locomotion compared to other animals.
What’s more?
Christopher McDougall, a prominent author, and journalist, has extensively written about the benefits of running and its ties to human history in his book ‘Born to Run’ (2009). While his work is not a scientific study per se, it provides insightful anecdotes and interviews with experts in the field, offering valuable perspectives on the naturalness of running.
Without further ado, let’s dive into how to improve your running technique so you can improve performance and limit injury risk.
Running Technique Rule No. 1 – Stand Tall
Let’s talk about the first rule of running technique: standing tall. Picture this: you’re about to embark on your run, and as you take your first step, imagine a plumb line running down from above your head, straight through your trunk, creating a perfect vertical alignment. It’s like a guiding beacon, keeping you on the right path toward optimal posture and performance.
Now, you might be wondering why standing tall is so crucial. Well, my friend, it’s not just about looking confident and poised. Maintaining proper posture while running can work wonders for your body, both during and after your run. It’s like building a solid foundation for a skyscraper. When your posture is aligned, the strain on your upper body is reduced, giving your muscles a break and warding off the dreaded muscle fatigue, back pain, and unnecessary soreness. It’s like giving your body a protective shield against the wear and tear of the road.
But here’s the secret sauce—proper posture doesn’t end when you start running. It’s a continuous process, a habit you should cultivate both on and off the running field. Just like taking a quick pit stop to refuel during a race, take a moment every 10 to 15 minutes to check your posture. Make sure everything is on track, aligned, and in harmony. Running shouldn’t make your head and neck feel tense or burdened. If you notice any tension, it’s a sign that your posture might be off-kilter, and it’s time to make some adjustments.
Running Technique Rule No. 2 – Lean A Bit
Now, there’s a delicate balance between gravity-assisted leaning and bending forward at the waist. Picture this: you’re on a run, trying to master the art of the forward lean. You might be tempted to slouch or lean too far forward from the waist, but hold your horses, my friend. That’s a common form of error that can wreak havoc on your lower back muscles, and we definitely want to avoid that.
So, how can you achieve the forward lean without falling into this costly mistake? Here’s the secret sauce: instead of bending from the waist, focus on a slight lean forward from the ankles. It’s all about finding that sweet spot where your body aligns like a well-oiled machine, from head to toe. Think of it as a symphony conductor guiding each section of the orchestra to play in perfect harmony.
Now, let me paint a vivid picture for you. Imagine you’re in the midst of your run, and as you lean forward from the ankles, it’s as if you’re gracefully falling forward. You’re on the edge of tipping over, but fear not, you maintain your balance with finesse. It’s like a tightrope walker, defying gravity as they confidently make their way across the thin wire. This relatively unstable position is a secret weapon for forward propulsion, allowing you to unleash your inner speed demon and cover more ground.
But here’s the golden rule: don’t lean too far forward or too far back. We want to avoid extremes and find that sweet spot in the middle. Find that balance where you feel the gentle pull of gravity working in your favor without putting excessive strain on your hips or lower back. It’s a delicate dance between stability and propulsion.
Running Technique Rule No. 3 – Keep A neutral Head
Believe it or not, the position of your head plays a significant role in your overall posture and can greatly impact your running efficiency. It’s time to give your noggin some attention!
Imagine this: you’re running along, and your head is held high, aligned with your shoulders, and your chin parallel to the ground. It’s like a crown atop your majestic running kingdom. No wobbling from side to side or unnecessary bobbing up and down. Your head is a steady beacon, guiding the way forward.
Now, here’s the secret sauce to maintaining that neutral head position: let your gaze lead the way. Focus your eyes on the ground about 15 to 20 feet ahead of you, scanning the horizon like an eagle searching for prey. This forward focus keeps you engaged and aware of your surroundings while also helping you maintain proper alignment.
But here’s a word of caution: resist the temptation to constantly look down at your feet. I know it’s tempting to keep a close eye on those trusty running shoes but trust me, it’s a slippery slope. When you stare down, tension creeps into your neck and shoulders, especially during those later stages of your run when fatigue sets in. We don’t want that, do we?
Running Technique Rule No. 4 – Pump Your Arms
While running may seem like a lower-body extravaganza, don’t underestimate the power of your upper body, specifically your arms, in propelling you forward. Get ready to unleash those swinging limbs!
Picture this: you’re in the midst of your run, and your arms are in action. Your elbows are comfortably bent at around a 90-degree angle, almost pointing away from your torso. Your arms swing from your shoulders, gracefully and relaxed, like the pendulum of a grandfather clock.
But here’s the secret sauce: synchronize your arm movements with your legs. As your right leg strides forward, your left arm swings forward, and vice versa. It’s a beautifully orchestrated symphony of motion where every beat counts.
Why is arm pumping so important, you might ask? Well, studies have shown that proper arm movement can enhance your running efficiency and help you maintain a balanced stride. Think of your arms as the driving force behind your forward propulsion, working in tandem with your legs to propel you like a mighty locomotive.
But remember, it’s not about flailing your arms wildly or tensing up like a statue. Keep those arm movements relaxed, fluid, and in sync with your running rhythm. Allow your arms to be an extension of your natural stride, helping you maintain stability and balance as you conquer the miles.
Running Technique Rule No. 5 – Keep it Relaxed
When you’re out there pushing your limits and logging those miles, it’s crucial to maintain a state of relaxation throughout your entire body. Trust me; tension is the last thing you want tagging along on your run, sapping away precious energy reserves.
Imagine this: you’re in the midst of your run, feeling the burn, but your body remains as calm and collected as a Zen master. It’s like gliding on a cloud effortlessly and with grace. By keeping your body relaxed, you optimize your energy usage, ensuring that every ounce of fuel is utilized efficiently.
To achieve this state of relaxation, let’s break it down step by step:
First, identify your tension spots. These troublemakers include the face, jaw, shoulders, and hands. Take a deep breath, let the air flow through slightly parted lips, and give yourself permission to shake out those arms. Release the tension in your shoulders, unclench those fists, and let your cheeks wiggle with a sense of freedom. Feel the release, and let the tension melt away.
Speaking of shoulders, it’s crucial to keep them relaxed and squared, facing forward. No hunching over like a turtle retreating into its shell. Remember to raise your shoulders every few minutes during your run, giving them a gentle reset before dropping them back down to a proper and relaxed position.
Now let’s focus on that noggin of yours. Jutting your head forward can put unnecessary stress on your neck and shoulder muscles, leading to more tension. Keep your head in a neutral position, as if it’s balancing effortlessly atop your shoulders. Picture your ears aligned roughly over the middle of your shoulders, finding that sweet spot of relaxation.
What’s more?
Pay attention to your hands. When you clench them into tight fists, tension travels up your arms and spreads throughout your body. Instead, imagine cradling delicate eggs in each hand—gently enough to keep them secure but not so tight that they crack under pressure. Feel the ease and lightness in your grip.
Running Technique Rule No. 6 – Strike It Right
Your foot strike is like your personal signature as a runner, leaving a unique imprint with every step you take. It’s not just about how your foot meets the ground; it’s about the impact it has on your alignment, posture, and energy transfer throughout your body’s kinetic chain.
Now, here’s an interesting tidbit: studies suggest that your foot strike can play a significant role in preventing running injuries, especially those pesky ones that target our knees.
So, let’s explore the three basic types of foot strikes: neutral, overpronated, and supinated. Each has its own quirks and potential risks. Some research suggests that heel strikers may be more prone to knee and hip injuries, while forefoot strikers could be at a higher risk of Plantar Fascia and Achilles Tendon issues. However, the scientific community is still debating the matter, so let’s take it with a grain of salt.
Now, pay close attention, especially if you’re a beginner. My completely subjective and non-scientific observations indicate that the forefoot strike may be the way to go for those starting out on their running journey.
Here’s how to nail the forefoot strike technique:
Picture this: you’re aiming to land just below and slightly in front of your center of gravity on the mid-foot. It’s like finding that sweet spot of balance and control. Your foot should touch down slightly ahead of your center of gravity, with your leading foot facing directly forward, like an arrow pointing towards your destination.
Now, here’s the key: think light and fast steps. As your foot makes contact with the ground, strive to land as lightly as possible, minimizing the time spent in contact with the surface. We want to avoid any thunderous stomping or disruptive noises that might disturb the tranquility of your run.
Imagine rolling swiftly through the middle of your foot, smoothly transitioning to the front of your toes. Keep those toes pointed in the direction you want to go, guiding you toward your running goals. It’s all about maintaining a sense of fluidity and purpose in each step.
Running Technique Rule No. 7 – Improve Your Cadence
Now, let’s talk cadence—the magical metric that measures the number of times your feet gracefully touch the ground within a single minute of running. Studies and experienced runners alike advocate for an optimal cadence of around 180 steps per minute. Consider it the gold standard that every runner should strive to achieve.
To discover your own cadence, here’s a simple trick: count the number of steps your foot takes in one minute, and then double it to calculate your total step rate. Aim for a balanced stride rate of approximately 180, or 90 per foot. It’s like finding the perfect tempo for your running symphony.
Now, I know what you’re thinking—how on earth do I increase my cadence?
Take it slow and steady, gradually increasing your cadence by a few steps at a time. Let’s say you typically run with a cadence of 167 steps per minute. Your goal should be to inch your way up to 170 or even 174, keeping your stride aligned and landing with a swifter rhythm.
To assist you in your quest for the ideal cadence, consider enlisting the help of a trusty metronome or a handy-dandy app. Imagine it as your personal conductor, keeping your leg turnover in perfect sync without requiring an excessive amount of effort. It’s like having a musical partner guiding you toward cadence perfection.
Running Technique Rule No. 8 –Practice Drills
Ah, the secret sauce to elevating your running technique: drills. It’s time to shake up your workout routine and embrace the power of targeted training.
Drills are like those hidden gems tucked away in the realm of running. They have the remarkable ability to enhance your range of motion, strengthen your essential running muscles, and fine-tune various aspects of your running gait. Think of them as the secret recipe for unlocking your full running potential.
But wait, there’s more! Drills also possess the incredible superpower of preparing you for the dreaded villain called fatigue. Yes, you heard it right. By incorporating drills into your training regimen, you build endurance and fortify your ability to maintain optimal technique even when the going gets tough.
Now, let’s explore a few drill options that will make your running routine feel like a playground of athleticism. Get ready to unleash your inner track star with these exercises:
Strides: Picture yourself gracefully soaring across the pavement, taking longer, faster strides that stretch your limits and awaken your inner speed demon.
Skips: Channel your inner child and embrace the joy of skipping. This playful drill helps you develop explosive power and coordination while putting a smile on your face.
Hurdle mobility exercises: Jumping over hurdles isn’t just for Olympic athletes. These exercises improve your agility, flexibility, and overall lower body strength, giving you the power to conquer any running challenge that comes your way.
Leg swings: Swing those legs like a pendulum, my friend. This drill enhances your hip mobility, improves your stride length, and unlocks the full potential of your running prowess.
Now, you have a choice. You can either dedicate an entire workout to these drills, making them the star of the show, or you can incorporate them as a delightful warm-up before your run or workout. Whichever path you choose, make sure to execute each drill with gusto, maintaining impeccable form and pushing yourself to the limits.
But remember, if you notice your form going south, it’s okay to slow down or even hit the pause button. Quality over quantity, my friend.
Running Technique Rule No. 9 – Find What Works the Best
Here’s the thing: running should feel like an extension of yourself, a fluid motion that harmonizes with your physiology and biomechanics. So, resist the urge to meddle, my friend. Don’t try to fix something that ain’t broken. Instead, let your body be the ultimate judge. Trust in its wisdom and strive to find what works best for you.
Remember, there is no one-size-fits-all approach to running technique. Just like a fingerprint, your running style is beautifully unique. So, embrace it, celebrate it, and allow it to evolve naturally. If you’ve already found your sweet spot, then congratulations! You’re already on the right track, my running virtuoso. Keep up the good work, and let your feet carry you to new heights.
Now, as we draw towards the conclusion of our running technique adventure, it’s time to reflect on the impact of these principles. When you incorporate the elements of proper running technique into your training, magic happens. You unlock a world of efficiency and comfort, where each stride feels like a graceful dance toward your goals. You might even discover that running faster and farther becomes second nature when your technique is finely tuned.
But here’s a gentle reminder, my eager road warrior: Rome wasn’t built in a day, and neither is the perfect running technique. It takes time, patience, and dedication. Luckily, even a small investment of time in practicing the guidelines we’ve explored can make a world of difference in your running performance down the road. So, embrace the journey, my friend, and trust that each step you take is propelling you forward on the path to greatness.
Try adding these elements of proper running technique to your next runs and see how efficient and comfortable your training becomes. You might also realize that you can run faster and further when your technique improves.
Keep in mind that Rome wasn’t built in a day, so it is the optimal running technique. Fortunately, a lite time invested in prating the above guidelines can make a drastic difference in your running performance down the road.
When it comes to keeping your precious phone safe and sound while pounding the pavement, you’ve got a plethora of options at your fingertips.
Picture this: your trusty handheld companion nestled in the palm of your hand, snugly tucked into your waistband, playfully peeking out from your pocket, or perhaps stealthily concealed within the depths of your bra. In fact, if you ask ten different runners, you’re bound to get ten different answers.
But here’s the thing: there’s no definitive right or wrong way to stash your phone while on the run. Each method has its own set of pros and cons, and it’s all about finding what works best for you. In this captivating article, we’re going to delve into the fascinating world of phone-stashing techniques used by runners everywhere.
We’ll explore the perks and pitfalls of each method, and rest assured, we’ll even provide you with some nifty practical advice on how to maximize the potential of each approach.
Ready, set? Let’s roll!
Why Should You Care?
In the vast tapestry of our modern lives, one device has emerged as an extension of our very being—the smartphone.
We cling to it like a lifeline, relying on its multitude of functions to enhance our running experience. From distance tracking to mapping our routes, from serenading us with energizing beats to capturing our triumphant moments, our phones have become indispensable companions on the open road.
But here’s a revelation that might startle you: that little gadget in your hand may hold a value greater than your trusted running shoes.
Yes, you heard it right. The culmination of advanced technology, countless hours of development, and a plethora of features can make your phone a prized possession—a treasure worth more than your entire running ensemble combined.
Now, imagine this. Your feet pound the pavement, your heart races with exhilaration, and your phone bounces around, exposed to the perils of the running world. Is this the fate you desire for your prized companion?
The thought of a cracked screen or a waterlogged circuit sends shivers down your spine. It’s time to prioritize the security of your device with unwavering determination.
You see, my fellow runner, the truth is that protecting your phone while you conquer the miles is not just a frivolous fancy. It’s a necessity, a sacred duty that guards your valuable investment against the harsh elements of the running realm. Preventing it from being tossed about like a leaf in the wind or drenched in the rains becomes paramount in your pursuit of a seamless running experience.
In Your Hand
In the realm of convenience, the hand method reigns supreme. Your phone rests snugly within your grasp, instantly accessible for a quick check or a change of tune—provided your fingers are relatively dry, of course.
And here’s the best part: it won’t cost you a dime. Yes, my friend, the simplicity of carrying your phone in hand is a free indulgence, a testament to the beauty of minimalism.
But let’s not ignore the elephant in the room, shall we? While the hand method may have its merits, it comes with its fair share of challenges. As your run progresses, the weight of your phone becomes a nagging distraction, threatening to disrupt the rhythm of your stride. Your hand, once nimble and relaxed, may succumb to the cramps and discomfort that accompany prolonged gripping. And let’s not forget the perils that lurk in the shadows—take an unfortunate stumble or fall, and the risk of dropping and damaging your precious device skyrockets.
Ah, fear not, my fellow runner, for I present to you a solution—a ray of hope in the face of adversity. To keep your phone safe and secure in the palm of your hand, consider employing a clever strap that allows you to hold it without the strain of a tight grip. Alternatively, adorn the back of your device with a trusty ring grip, adding an extra layer of protection and stability. These small but mighty accessories can transform your hand-carrying experience into a seamless fusion of comfort and convenience.
However, let us tread cautiously on this path, my friend. As the minutes turn into hours, and your running adventures extend beyond the half-hour mark, the hand method reveals its limitations. Anything longer than 30 minutes and the strain on your hand becomes an undeniable hindrance, threatening to steal your focus and joy. It is during these longer expeditions that we must seek alternative means of securing our phones, freeing our hands to embrace the fullness of our running experience.
In your Short Pockets
Imagine slipping into your favorite pair of running shorts, ready to conquer the roads ahead. As you admire the sleek design and comfortable fabric, you discover a hidden treasure—the pockets. Yes, my fellow runner, the pockets of your shorts hold the promise of a solution, a sanctuary for your phone as you embark on your running escapades.
Ah, but here’s the plot. Not all running shorts pockets are created equal, my friend. Some fall victim to the curse of minimalism, barely capable of accommodating a key, let alone the girth of a modern smartphone. It’s as if they mock our need for practicality, leaving us in a state of frustration and longing.
Here’s what to do. Go for running shorts adorned with spacious, preferably zipped pockets. These pockets are the key to harmonious coexistence between you and your phone. As you peruse the aisles of sporting goods stores or browse online, be sure to put these shorts to the test, ensuring their ability to securely cradle your precious device.
But heed my advice and tread with caution. Do not be swayed by the allure of shorts boasting a mere stash side pocket, for they offer little more than false hope. Choose wisely, and let the depth of your pockets match the depth of your passion for running.
In Your Arm
Imagine yourself on a run, your legs propelling you forward with every stride. Your hands swing freely by your side, unencumbered by the weight of a phone. How is this possible, you ask? Behold the power of the arm strap holder—the runner’s secret weapon.
Well, it’s a practical choice, providing easy access to your device without the burden of hand-carrying or the discomfort of a bouncing pocket. As a seasoned runner, I can vouch for the reliability of this method, for it has been my trusted companion on countless running adventures.
But wait, there’s more! The arm strap holder not only sets your hands free but also safeguards your phone from the perils of the running journey. Opt for a water-resistant armband, and you’ll have peace of mind even in the face of unexpected rain or intense sweat. These ingenious accessories come in various sizes, tailored to fit your phone perfectly, while some even boast sweat-resistant features, ensuring a comfortable and dry experience.
Of course, like any solution, the arm strap holder is not without its quirks. Beware the bouncy band, the chafing strap, or the slippery slide, especially if you have smaller arms or a less-than-ideal fit. It can be a challenge to navigate your phone within the sleeve, depending on the model you choose. And let’s not forget the hurdle of donning an armband over clothing during the chilly months—unless it comes equipped with the trusty Velcro.
Here’s the solution. If the arm strap holder aligns with your running aspirations, select a model that boasts easy adjustability, allowing you to find the perfect fit. Seek out an armband that facilitates smooth phone usage, eliminating any hindrances to your digital interactions. And above all, prioritize the comfort of your arm, opting for a chafe-free design that hugs your limb without causing irritation. With these considerations in mind, you’ll find an armband that harmonizes seamlessly with your running routine.
In Your Sports Bra
In the realm of phone-carrying solutions, there exists a curious option—one that defies convention and challenges the status quo.
Behold, the sports bra. Yes, you read that right. As a man, I must admit, the idea of stashing a phone in a sports bra seems oddly intriguing. But hear me out, for there is wisdom to be found in this unconventional choice.
Think about it—a sports bra provides a snug and secure pocket for your phone, nestled close to your body. It’s a place of easy access, ensuring your device remains within reach at all times. No more worries about your phone taking a perilous tumble and shattering upon impact as you pound the pavement. With the trusty sports bra, you can run with confidence, knowing that your phone is safely tucked away.
However, like every solution, there are trade-offs to consider. The chest area can quickly become a hotbed of sweat, and we all know what moisture does to our beloved gadgets. It’s the obvious truth—excessive sweat can spell doom for your phone, leading to its untimely demise. Surely, we don’t want that. Additionally, maneuvering your phone in and out of the bra pocket may feel a tad awkward or uncomfortable, depending on your personal preference.
The solution lies in finding a high-impact sports bra that fits your body like a glove. Ladies, I implore you to prioritize comfort and support when selecting a sports bra that suits your shape.
Seek out a running bra designed with a back pocket specifically crafted to securely hold your phone. Placing your device at the back of the bra reduces the likelihood of excessive sweat infiltration, providing a safer environment for your phone to endure the rigors of your running escapades.
Belts (and The Like)
Enter the realm of running belts, where comfort and convenience intertwine to provide you with the ultimate solution for stashing your phone while conquering the miles.
These versatile belts go beyond phone storage—they can also accommodate other running essentials. Need hydration? No problem. Tuck a water bottle in your belt. Craving a quick energy boost? Slide in some gels for easy access. Even sunglasses and other treasures find a snug home in the realm of running belts.
Now, let’s address the elephant in the room—the cost. Alas, this method does require a financial investment. To find the perfect vest, pack, or belt that aligns with your training goals, personal preferences, and budget, you may need to embark on a quest of trial and error. But fear not, for the rewards far outweigh the price tag.
However, it’s important to note that running belts may not be the most practical choice for shorter runs. After all, do you really need to carry water and snacks for a brief sprint? The answer lies in the duration and intensity of your run.
So, how do you navigate the vast landscape of running belts to find your perfect match? Look no further. Explore the myriad of options available, each offering its own blend of design, color, and fabric. Seek out a model equipped with a zippered pocket for that extra layer of security. Pay attention to the stretchiness of the material—opt for a sturdy fabric that can withstand the test of time and movement.
When it comes to positioning your running belt, remember the golden rule—place the pouch in front at the widest part of your hips. This strategic placement ensures maximum comfort and accessibility throughout your run. And don’t forget to measure your hips beforehand to select the perfect size belt. Adjustable straps are a blessing, allowing you to fine-tune the fit to perfection.
But wait, there’s more to discover within the realm of running belts. Look for additional features that cater to your specific needs. Are gel packs your fuel of choice? Seek out loops to keep them within easy reach. Do your eyes crave protection from the sun’s rays? Find a belt with a dedicated sunglasses pouch. Enhance your visibility with reflective details, or embrace the vibrant allure of luminous color options. And for those seeking a truly versatile companion, explore belts with interior pockets for storing ID, cash, and credit cards.
In conclusion, dear runners, you now possess the knowledge to choose the best companion for your phone during your running adventures. The decision rests in your hands. Embrace the tools that resonate with your needs and provide the utmost comfort. And remember, the realm of running belts is ever-evolving, so feel free to share your own ideas and experiences in the comments below.
Thank you for embarking on this journey with us. Keep your stride strong, your spirit lifted, and may the roads ahead be filled with exhilarating runs and newfound discoveries.