Top 7 Hip Stretches For Runners

hip stretches for runners

Looking for some of the best hip stretches for runners?

You’re in the right place.

In today’s article I’ll show you how to stretch your hips in a safe and comfortable way. But first things first, let’s talk about why you need to add a few hip opening stretches to your training routine.

Let’s delve deeper…

*Disclosure: This post may contain affiliate links that at no additional cost to you. I only recommend products I’d use myself and all opinions expressed here are my own. 

What Are The Hip Flexors?

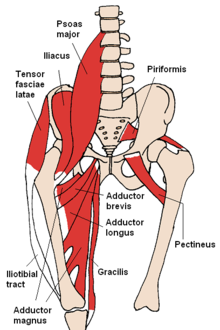
Located near the top of your thighs, the hip flexors consist of a group of muscles and tendons on the front—anterior—of your hip joint, connecting your legs to your pelvis.

When contracted, your hip flexors let you raise your knees or bend at the hip.

The primary hip flexor muscles are the psoas major and the iliacus— collectively known as the iliopsoas, (usually the weakest of all of the muscles).

Other hip flexor muscles include the sartorius, tensor fascia latae, and rectus femoris.

See image.

And here’s how they look like :

The main hip flexors muscles

Source – Wikipedia

The Functions Of the Hip Flexors

The hip flexor muscles are used in every stride when walking, running, and sprinting.

These allow you to walk, run, bend kick, and swivel your hips.

Your hip flexors are contracted on every step forward.

The more miles you log in, the more you put them to work.

Some of the main functions:

  • Bringing the thighs up toward the chest.
  • Driving the knees up and down.
  • Maintaining proper running form.
  • Moving the legs from side to side and front to back.
  • Stabilizing the pelvis.

Causes of Hip Issues

The hips is just one region of the body that’s prone to tightness if you’re a runner.

Running’s repetitive nature means that you’re constantly working the hip flexors and extensors through a very small range of motion.

So it’s not surprising that hip pain from running is such a common issue.

Add to this the fact that, thanks to our sedentary lifestyle, we spend the bulk of our time sitting—roughly a third of the day.

When you spend a lot of time in a seated position, your hip flexors are kept in a shortened position more than they should be, which, in turn, makes them super tight.

This has huge negative effects on your posture, spinal stability, and gait.

Ramifications of Tightness

Tightness in the hip flexors results in an exaggerated anterior pelvic tilt.

This occurs when the arch of the lower back increases while the backside stick out more.

The tighter your hip flexors get, the more your pelvis tilts back and the more likely you’re to lean forward—as in stick out your butt and arch your back—while running.

Not only this is bad form, but can also set you up for back pain and serious injury. And you want none of that.

For more on the research conducted on hip muscle tightness and overuse injury, check the following studies:

Study 1

Study 2

Study 3

Study 4

How To Test Your Hip Flexor Flexibility

Wondering if your hips are too tight—or loose enough? Take the Thomas test.

Also known as Iliacus test or Iliopsoas Test, this test is used to measure the flexibility of the hip flexors—more specifically, that of the iliopsoas muscle group, the pectineus, Rectus Femoris, gracillus as well as the Sartorius and Tensor Fascia.

Proper form

Start by laying or sitting at the very edge of a table or bent, with the tailbone resting at the edge.

Then, roll back onto the table while pulling both knees to your chest.

This helps ensure that your lumbar spine is flat on the table and your pelvis is posteriorly rotated.

Next, hold the opposite hip in maximum flexor with the arms, while the assessed limb hang down toward the floor.

Last up, perform on both sides and compare.

Results

If your left leg lower backs, and sacrum remain flat on the table with the knee bending to 70 to 90 degrees, kudos…you don’t have tight hip flexors.

However, if one of your thighs or legs stay up drastically higher than the other, then you do have tight hips, and regular hip openning stretches are required.

Now that you know a thing or two about the importance of hip stretches for runners, let’s get to the exercises themselves.

Top 7 Hip Stretches For Runners

Fortunately, there’s is an abundance of good hip openining stretches that you can perform at home to decrease tightness, relieve pain, and increase mobility in your hips.

You won’t need to join a gym, buy a lot of expensive equipment or even leave the comfort of your home to perform the following hip flexors exercises.

Enjoy!

Hip Stretch for Runner – 1. Pigeon

Also known as Eka pada rajakapotasana, this is a famous yoga pose, and one of the most effective hip flexors stretches, especially the hip abductors.

Proper Form

Begin by sitting with your right knee bent and left leg stretched behind you.

Next, while making sure that your left hip is always pointing toward the mat, drag your right heel toward your left hip.

Then rest your hands on your right thigh or your hips, then walk your hands out in front of you, and lower your hips down toward the floor over your right knee.

Hold the pose for 30 seconds to one minute.

Be sure to breathe into any area of discomfort or tension.

Repeat on the other side.

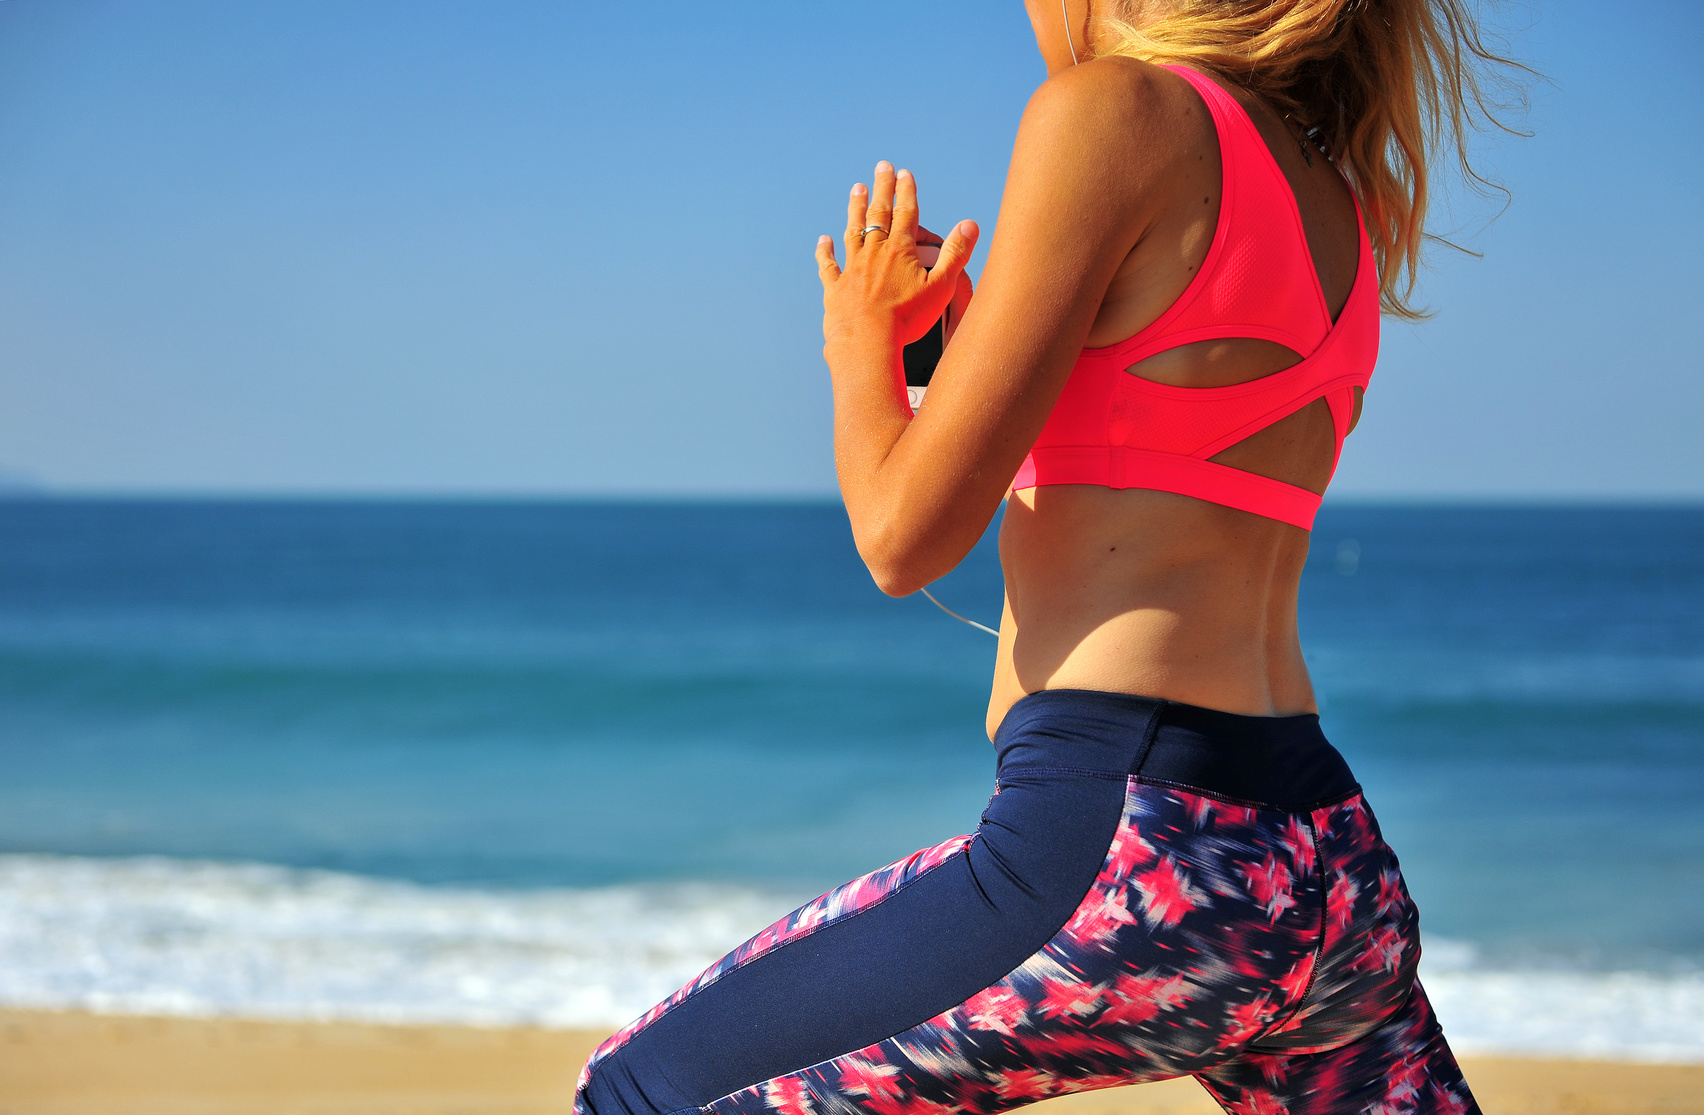
Hip Stretch for Runner – 2. Lunge Hip Flexor Stretch

One of the best best hip stretches for runners that  not only targets most of the muscles in the hips, but it’s also ideal for stretching the glutes, hamstrings, and quadriceps.

Proper Form

Assume a lunge position with your right knee forward.

Next, drop your left knee to the ground, and place your hands on your right knee or the floor under your shoulders, according to your flexibility level.

Be sure to keep your upper body tall, and core engaged the entire time.

Then, while keeping your front knee directly above your ankle, hold the position for 30 seconds to one minute, and feel the stretch in your left hip flexor.

Change sides and repeat.

Hip Stretch for Runner – 3. Happy Baby

Also known as Ananda Balasana in the yogic circles, this relaxing hip stretch also targets the lower back and the hamstrings.

Proper Form

Lay flat on your back with both knees bent while gently holding the outside edges of your feet with your hands.

Next, while keeping your arms on the outside of your legs, press both knees to the ground below your armpits.

Feel free to rock lightly from side to side if that feels good.

Hold the pose for at least one minute, then move to the next stretch.

Hip Stretch for Runner – 4. Butterfly

A powerful hip opener that also stretches the glutes and the inner thighs.

Proper Form

Assume a cross-legged seated position with the soles of the feet pressed together.

Next, while grabbing your ankles, lengthen your spine upward,  draw your belly button inward then slowly fold forward from your hips with a deep exhale.

Focus on your inner thighs and be sure to breathe into that area to release any tension or discomfort.

For more stretch, feel free to crawl your hands forward away from your body.

Hold the pose for one minute then slowly release and move to the next stretch.

Hip Stretch for Runner – 5. Extended Wide Squat

Not only this hip opening stretch is ideal for the hip abductors, but also increase mobility in the lower back, hamstrings, and glutes.

Proper Form

Assume a standing position, with the feet slightly wider than your hips, toes pointing out so that hips are open.

Next, while keeping your back flat and core engaged, slowly bend your knees and lower your hips toward the floor.

For more stretch, place your elbows inside of your thighs, gently pressing them out against the inside of your knees.

Hold the pose for 30 seconds to one minute then slowly release back to standing position.

Hip Stretch for Runner – 6. Frog Hip Stretch

This simple pose stretches and opens up the the hip abductors, the insides of the thighs, and the groin.

If you have any recent leg, hip or knee injury, be careful with this one.

Proper Form

This is one of my favorite hip flexor stretches.

Assume an all fours position with hands and knee in a tabletop position, then bring your forearms onto the mat or a yoga block.

Next, slowly slide both knees away from your body and widen them out as far as possible as you lower your chest and hips toward the floor.

Hold the position for one to two minutes then slowly release it and move to the next stretch.

Hip Stretch for Runner – 7. Standing Wide-Legged Split

This stretch will not only target your hips but also opens up your inner thighs and hamstrings.

Proper Form

Begin by sitting up tall with the feet three to four feet apart, heels a bit wider than the toes.

Next, while keeping the soles of your feet flat on the floor and torso long,  fold forward from the hips and place your hands on a yoga block or mat right below your shoulders.

Hold the pose for 30 seconds to one minute.

If your flexibility allows it, feel free to lower onto forearms for a deeper hips stretch.

hip flexor stretches for runners

New to Running? Start Here…

If you’re serious about running, getting fit, and staying injury free, then make sure to download my Runners Blueprint Guide!

Inside this guide, you’ll learn how to start running and lose weight weight the easy and painless way. This is, in fact, your ultimate manifesto to becoming a faster and a stronger runner. And you want that, don’t you?

 Click HERE to check out my Runners Blueprint System today!

Don’t miss out! My awesome running plan is just one click away.

Top 7 Hip Stretches For Runners – The Conclusion

There you have it!

The above hip flexor stretches for runners are all you need for to open your hip flexors and keep flexible for the long haul.

Just make sure to do them on a regular basis. The rest is just detail.

How to Protect Yourself From Dogs While Running

Looking on advice on how to protect yourself from dogs while running? Then you’re in the right place.

Imagine yourself enjoying a run on the trails or around the neighborhood when, and out of nowhere, a hostile dog runs up to you at light speed with fangs barred and bad intentions.

Do you know what you should do?

If your answer is no, then keep on reading…

As much as I love dogs—and all animals for that matters—I don’t really like being chased, or attacked, by them while  running.

In fact, dogs can be a runner’s worst nightmare when they go on the offense.

In fact, every outdoor junkie—whether it’s a runner, a biker, walker, etc. —has a story about an up-close-and-personal-encounter with a hostile dog.

And this is no news.

There are plenty of stories about runners who were injured by dogs while hitting the pavement.

Take, for instance, this tragic story of the 63-year old woman who was mauled to death by four dogs during her morning jog in Palmdale, or Littlerock, California.

Of course, these attacks are not everyday occurrences, but it’s well worth the effort to know how to proceed in the off chance of a dangerous encounter.

Try a Dog Repellent Spray For Runners

The Statistics

About 4.7 million people get bitten by dogs each year in the United States, and out of those incidents, 1 out of 5 ends up in the emergency room and requires medical attention, and 17 result in death according to the American Human Association, with roughly 55 percent of all fatal dog attacks in the US committed by pit bulls

Therefore, learning how to handle the situation is of utmost importance—especially if you do a lot of outdoor running in not-so-safe and/or unfamiliar areas.

how to Protect Yourself From Dogs While Running

As you already know, prevention is better than cure, so before showing you how to fend yourself off a vicious dog, it’s crucial to look at ways you can avoid such encounter completely. And of course, these measures aren’t just about using a dog repellent spray for runners.

Here are a few ways to help you avoid a violent clash with an angry four-legged tail-wager.

Know your Route

This shall come as no surprise, but the best advice I can ever give you when it comes to avoiding dog attacks, is to be aware of your environment, period.

Here is how to increase your awareness while hitting the pavement:

  • Keep your eyes on the route ahead of you. If you spot one in the distance, be sure to keep a safe distance between your and a dog—even on lead— change direction or simply cross the street.
  • Avoid running in areas where there are dogs on the loose or where neglectful owners don’t provide their dogs with enough care and attention, allowing them to roam freely.
  • Run distraction free. Leave your headphones at home as doing so can help stay aware and be conscious and aware of your surroundings, especially in not-so-safe and/or unfamiliar areas

Read their Body Language

In most cases, reading the dog’s body language will tell you everything you need to know about how to proceed.

So learn to recognize the warning signs of an impending attack so you can get safe while you can—with your limbs intact.

Here are some of the telltale signs you need to keep an eye on:

  • Tense body with the hackles—the area between the tail and shoulders—up and ears erect.
  • Loud growling
  • Furrowed brows
  • Drooling from the mouth
  • Flicking tongue
  • Backing away while growling
  • Stiff tail, or held high and wagging faster than normal.
  • Intense stare with eyes wide with rage

If any (or a combination) of the above is on the scene, be sure to put a safe amount of space between you and the dog.

In Case You are Chased…

If and only if things escalate and you couldn’t avoid the attack, do the following:

Stop in Your Tracks

The first thing you need to do is to calm down, stop running, and stand still with your arms folded across your chest to not activate the dog’s prey drive —according to most dogs’ experts, this is the best approach.

Even if every cell in your body wants to run in the other direction, you need to fight that and stand your ground.

Bolting in the other direction will only make things worse.

The only scenario in which you should keep on moving and running is if you know that you can get behind a barrier, such as a car, bench, or tree to separate you from the dog.

Otherwise, stand still and control your nerves.

No Eye Contact

Looking straight into the dog’s eyes can feel threatening to most dogs out there, which will only make them more aggressive and territorial.

Therefore, be sure to avert your eyes but keep the dog in your peripheral vision the entire time.

But as a rule of thumb, never turn your back to the dog as it can be interpreted as a sign of weakness.

Use the Right Commands

If the dog persists, face him and while using a deep and firm voice, command him to “back away” using a strong and confident voice.

If the owner is close by, call them.

Hopefully, he’ll intervene and call off the dog.

Check this youtube clip for more tips on using commands:

If You Got Attacked – How To Handle it The Right Way

If all else fails, it’s time to on defensive mode and protect yourself.

Here is what you need to do here;

Try a Dog Repellent Spray For Runners

Spraying an attacking dog with mace is one of the things you can do to stop the attack in its track. This might be  the best weapon to defend against dog attack

Of course, this might sound terrible, but this option actually doesn’t hurt the dog, and will really save you a lot of trouble.

However, this is not a fool-proof solution.

Factors like wind speed, your aim and your mental and emotional state have a say, and in some cases, you could end up making the dog more aggressive if you don’t know how to the use pepper spray right.

Hence, I don’t think it’s the all end of all your prayers when it comes to dealing with dogs attacks—but it is still an option to consider.

Even so, if you are serious about this option, then be sure to look for dog repellent when you are scouting the market for a pepper spray.

These are designed to fend off attacking dogs.

Give it Something to Chew On

If it’s possible, give the dog something to chew on.

It’s better than tearing up your own flesh.

Therefore, put something between the dog’s teeth and your body.

This could be a loose fitting piece of fabric, your jacket sleeves, a stick, or anything that could separate the two of you.

If the worse happen, and the dog is inches away from biting you, let it bite your shins or forearms—that is better than getting bitten in your face, throat, or any other sensible area.

And do your best not to panic.

Do Not Pull Away – Fight Back

Whatever you do, do not pull away as that will only tear the skin and make things worse.

Instead, defend yourself by kicking or hitting the dog in the back of the head, nose or throat, busting its head, choking it, breaking its knee, etc.

If you have a heavy object or a weapon, like a stick, rock, brick, you should use it to hit the dog and keep using it until the dog retreats or loses consciousness.

Also, as you are fighting the dog, be sure to yell for help.

Yell something that you know will have others attention, such as “TERRORIST!” “FIRE!”

Roll into a ball

This is the worst case scenario, so pay special attention to this, probably life-saving, advice:

If the dog takes you down, curl into a ball by tucking your knees and placing your hands behind your neck to cover your head, making sure to protect the soft tissue areas such as your face, throat, and belly.

Also, make sure to keep your hands in a fist to guard your fingers.

Post Bites Measures

If you got bitten, then the first thing you need to do when you get home is to wash the wound carefully with warm water and soap to gently cleanse it and examine it.

If it’s nothing serious, treat it yourself and dress the bite using a topical antibacterial such as bacitracin and a sterile band-aid or sterile bandage.

Next, keep cleaning the wound every 24 hours while looking thoroughly for any signs of infection, including increasing swelling, redness, warmth, oozing pus or drainage—these are the warning signs of infection, and you should see a doctor and get checked out if any of these symptoms arise.

Nonetheless, to err on the right side, a visit to the doctor is the right course of action if you ask me.

Better be safe than sorry.

The doctor will be able to assess the injury better.

In most cases, he might suggest you take antibiotics to prevent infection and receive a tetanus shot, or a series of preventative shots called rabies post-exposure prophylaxis.

vicious dog attacked me while running

Report It

Yes, snitch on the dog.

Report the incident to your local police department, animal control as well to the owners, if you can find them, immediately after the attack.

Also, be sure to talk with the owner.

Start with a genuine attitude.

Perhaps the whole accident was a once-in-a-lifetime thing and won’t happen again.

Nonetheless, if the owner is a complete a$$hole, then you MUST take things to the next level.

And in case you got hurt badly, consider taking legal action against the owners—that will teach them something.

Dogs can be a danger to the community should they be neglected.

Here’s the full guide to preventing animal attacks while running.

New to Running? Start Here…

If you’re serious about running, getting fit, and staying injury free, then make sure to download my Runners Blueprint Guide!

Inside this guide, you’ll learn how to start running and lose weight the easy and painless way. This is, in fact, your ultimate manifesto to becoming a faster and a stronger runner. And you want that, don’t you?

 Click HERE to check out my Runners Blueprint System today!

Don’t miss out! My awesome running plan is just one click away.

Top 15 HIIT Running Workout Routines

HIIT Workouts for runners

Looking for the ultimate HIIT running workout routines? Well, strap on your running shoes and get ready for a wild ride because you’ve stumbled upon the holy grail of high-intensity training.

And let me tell you, my friend, I am obsessed with running. Like, seriously obsessed. It’s been my passion for the past decade, and let me tell you, it hasn’t always been smooth sailing.

I’ll be real with you. I’ve made my fair share of mistakes along the way. I mean, who hasn’t? I’m not perfect, and neither are you. But here’s the thing: we learn from those mistakes and we grow stronger because of them. One mistake that stands out vividly in my memory is when I neglected the power of high-intensity interval training (HIIT).

For the first three years of my running journey, I was pounding the pavement tirelessly, thinking that sheer mileage would magically improve my performance. Boy, was I wrong. Not only did my progress come to a screeching halt, but I also found myself nursing a slew of frustrating injuries. And let’s not forget the unwanted weight gain from my repetitive running routine. It was a vicious cycle, my friend.

But then, everything changed when I incorporated HIIT into my training regimen. Let me tell you, it was a game-changer. Within just a few weeks, I started noticing incredible improvements, not only in my running abilities but also in my overall strength and athleticism. It was like unlocking a secret door to a whole new level of fitness.

And guess what? I don’t want you to go through the same struggles I did. That’s why today, I’m here to introduce you to the magic of HIIT training. Now, don’t worry, I won’t drown you in a sea of boring theories and scientific jargon. Nope, we’re going to keep it fun, practical, and actionable.

In this post, I’ll not only share some of the most effective running-specific HIIT routines but also throw in a few non-running workouts that will leave you breathless and begging for more. Trust me, it’s going to be epic.

Ready? Let’s do this!-

HIIT For Runners Defined

So, what the heck is HIIT, you ask? Well, let me break it down for you.

High-intensity interval training is like a thrilling roller coaster ride for your body. It’s all about pushing yourself to the limit through a strategic blend of intense anaerobic intervals and low-intensity aerobic activity.

Picture this: you go all out for 20 to 60 seconds, giving it everything you’ve got, and then you catch your breath during a brief period of rest or lighter activity. And guess what? You repeat this cycle for a total of 15 to 30 minutes of pure fitness bliss.

But what sets HIIT apart from the monotonous, never-ending treadmill sessions or steady-state cardio that most people dread?

Well, it’s all about the intensity. HIIT takes your workout to a whole new level by challenging your body to reach its maximum output capacity, boosting your VO2 max in the process. It’s like revving the engine of a high-performance sports car. You go full throttle, reach your peak heart rate, and then strategically recover before diving back into the action.

Now, let me share the secret sauce to maximizing your HIIT experience. Enter intensity. When those high-burst intervals come knocking, give it your all. Push yourself to the absolute limit and feel your heart racing, your muscles burning, and the sweat pouring down. Embrace the discomfort because that’s where the magic happens.

But remember that it’s crucial to allow yourself proper rest and recovery during the designated periods. It’s like catching your breath at the top of the roller coaster before plunging into the next exhilarating loop.

A Formula for Success

Still confused?

Here’s how to proceed:

  1. Start with a warm-up. Check this routine.
  2. First interval: exercise at maximum power for 30 to 60 seconds.
  3. Recover for 20 to 60 seconds (or longer, depending on the workout).
  4. Repeat step (2) and (3) seven to ten times.
  5. Cooldown. Check my routine here.

The Benefits of HIIT For Runners

High intensity interval training has a lot to offer, including:

Reduces Body Fat

Let me blow your mind with some fascinating research. There’s an Australian study that’ll make you think twice about your fat-burning strategy.

In this study, they pitted the high-intensity interval training (HIIT) group against the steady-state cardio group. And guess what? The results were mind-boggling. The HIIT group, following a mere 20-minute routine, managed to shed a whopping six times more body fat than their steady-state counterparts. Yes, you heard that right—six times more fat melted away in those who embraced the intensity of HIIT.

Now, what’s the takeaway from this remarkable study? It’s simple, my friend. When it comes to burning fat, it’s all about going hard and going short. Forget those long, tedious hours spent on the treadmill or elliptical machine. HIIT is here to save the day and kick fat to the curb.

And you know what I love most about it? It demolishes the age-old excuse of “I don’t have time for exercise.” Say goodbye to those time-consuming workouts because HIIT gets the job done in a fraction of the time.

I remember when I first ventured into the world of HIIT. I must admit, I was skeptical. How could a shorter workout make such a significant impact on the scale? But let me tell you, my friend, it was a game-changer.

Boost Metabolism

Thanks to a phenomenon called excess post-exercise oxygen consumption (EPOC), your body continues to torch calories even while you kick back and relax. It’s like getting a bonus boost to your metabolism!

And guess what? A study conducted by the brilliant minds at East Tennessee State University discovered that HIIT workouts can keep your metabolism revved up for hours, burning as much as an extra 100 calories post-training.

Now, you might be thinking, “100 calories? That doesn’t sound like much.” But my friend, those calories can add up over time, giving you an extra edge in your weight loss journey.

Build Muscle

But wait, there’s more! HIIT doesn’t just help you shed fat; it also helps you build muscle. You might be wondering, “But isn’t muscle building reserved for those heavy lifting sessions?” Well, think again.

A groundbreaking study published in the Journal of The International Society of Sports Nutrition revealed something fascinating. Even in the absence of traditional strength training, HIIT has the power to sculpt those muscles you’ve always dreamed of. It’s like a magical two-in-one combo—shedding fat while gaining lean muscle mass. How does it work?

HIIT creates an anabolic effect in your body, promoting muscle growth. And here’s the cherry on top: it skyrockets the production of human growth post-training, making your muscles say, “Hello gains, nice!”

Cutting the Junk Is the Big Promise

Researchers at McMaster University in Hamilton, Ontario cracked the code and discovered that HIIT is like a superhero for your fitness, capable of achieving in 2.5 hours what would take a whopping 10.5 hours of traditional endurance training.

You lace up your running shoes and hit the pavement for an interval run. You push your limits for short bursts of intense effort, followed by brief periods of active recovery. The result?

A fitness miracle that’s four times more effective than your standard cardio routine. It’s like discovering a hidden shortcut to your fitness goals, leaving those monotonous long runs in the dust.

I’ve personally experienced this transformation, and let me tell you, it’s nothing short of amazing.

By incorporating plenty of interval workouts while reducing my weekly mileage, I’ve not only become a faster runner but also managed to keep those pesky injuries at bay.

You Can Do It Anywhere

Now here’s the best part: high-intensity interval workouts can be done anywhere, anytime. They’re the chameleons of fitness, adapting to any environment and equipment you have available.q

Whether you prefer interval runs that make your heart pound like a tribal drum or fartlek runs that keep you on your toes, there’s a world of options at your disposal. And let’s not forget about the power of bodyweight exercises, dumbbells, kettlebells, jump ropes, weights, or even a trusty sandbag.

The possibilities are endless, and you can turn any space into your personal fitness playground.

The Dangers of HIIT For Runners

Listen up, my fellow fitness enthusiasts, because we’re about to dive into the nitty-gritty of HIIT and uncover the potential pitfalls that lie beneath its shiny surface.

Yes, it’s time to shed some light on the not-so-sunny side of this revolutionary training method. While HIIT has the power to transform your fitness journey, you must tread carefully and consider a few important factors before jumping headfirst into the high-intensity abyss.

Now, let’s get real for a moment. HIIT is a force to be reckoned with, pushing your body to its limits and demanding the utmost from your cardiovascular system. But that also means it’s not suitable for everyone, especially those who find themselves in a delicate state of injury recovery, dealing with cardiovascular or circulatory issues, or simply starting from square one on their fitness journey. In these cases, it’s crucial to prioritize your health and well-being above all else.

Here’s the deal: I’m not a doctor, but I strongly urge you to consult with a healthcare professional who can assess your current condition and guide you towards the best workout options for your specific needs. They have the knowledge and expertise to give you personalized advice that takes into account your unique circumstances.

Remember, your health is priceless. Taking a step back and ensuring you’re in the right physical condition to tackle the challenges of HIIT is a wise move. Think of it as protecting your investment. Just like a car needs regular maintenance to perform at its peak, your body deserves the same care and attention. So, don’t be shy about seeking professional advice. It’s better to be safe than sorry.

How to Start HIIT Workouts For runners 

Alright, my eager friend, now that you’ve received the green light from your doctor and you’re ready to take on the exhilarating world of HIIT, it’s time to lay down the foundation for success. I want you to dive into this training method with confidence, avoiding any unnecessary risks or setbacks.

Think of these benchmarks as stepping stones that will guide you towards a smooth and injury-free HIIT experience. They serve as a testament to your commitment and readiness to take on the challenges that lie ahead.

Without further ado, let’s dive into the three key benchmarks that will set you up for HIIT success.

First up, we have the habit of running regularly for the past three to four months. Consistency is key here. It’s all about building a strong foundation of cardiovascular endurance and getting those legs accustomed to the rhythm of the run. Lace up those shoes, hit the pavement, and make running a part of your lifestyle.

But we don’t stop there. It’s time to level up your running game. The second benchmark calls for consistently challenging yourself during your runs, pushing your effort level to a solid 70 to 80 percent. I’m talking about stepping outside your comfort zone, embracing that burn in your muscles, and breaking through any self-imposed limitations. This is where the magic happens.

Now, onto the third benchmark—the weekly long run. Picture this: you’re out there, pounding the pavement, one foot in front of the other, for a solid hour or more. It’s a test of mental and physical endurance, a chance to tap into your inner grit and discover what you’re truly capable of. This long run builds resilience and prepares your body for the challenges that await during HIIT workouts.

If you’ve checked off these three benchmarks and you’re feeling like a running rockstar, then congratulations! You’ve laid a solid foundation for the introduction of HIIT into your training routine. You’ve shown dedication, discipline, and a burning desire to take your fitness to the next level. But hold on, if you’re just starting out on your running journey or haven’t quite met these benchmarks yet, don’t worry.

If you find yourself in this position, my advice to you is simple: invest a few months into building up your stamina. Follow a well-rounded running program that gradually increases your mileage and endurance.

Top 15 HIIT Running Workout Routines

Here are 15 HIIT variations to help you get into the best shape of your life.

Pick one or two workouts to add to your weekly program.

Make sure you incorporate at least one day of rest between each workout.

HIIT Running Workout # 1 – Sprints

Before you dive into the heart-pounding action, let’s not forget the importance of a proper warm-up. Think of it as preparing your body for the exhilarating race ahead. Engage in dynamic stretches, loosen those muscles, and get that blood pumping. A warm-up primes your body for the intensity that awaits, helping you perform at your best and reducing the risk of injury.

Now, let’s talk about sprint distances. Choose a distance that suits your fitness level and pushes you just beyond your comfort zone. It’s like selecting the perfect gear for a thrilling race. Whether it’s a 100-meter dash or a longer sprint, find the sweet spot that challenges you without overwhelming you.

As you gear up for your first sprint interval, give it everything you’ve got.  Go all out at 80 percent of your maximum effort. Feel your muscles engage, your heart pounding, and the wind rushing past you.

After each sprint, take a well-deserved breather. Recovery is crucial to catch your breath and prepare for the next explosive burst of energy. Take between 30 seconds and one minute to recover, allowing your heart rate to settle and your body to replenish its energy stores.

Repeat this exhilarating process of sprinting and recovery six to eight times. Feel the rush of adrenaline with each interval, pushing yourself beyond your limits and unlocking new levels of strength and endurance. Embrace the challenge, and remember, it’s in these intense moments that growth happens.

As you approach the finish line of your workout, it’s time to cool down. Just like a victorious athlete savors their triumph, take five minutes to gradually decrease your pace and let your body ease into a state of relaxation.

HIIT Running Workout # 2 – Hill Sprints

Get ready to take your sprinting game to new heights with an electrifying twist – hill sprints! If you’ve mastered sprinting on flat ground, it’s time to conquer the majestic slopes and unleash your lower body speed and strength.

Now, it’s time to seek out the perfect hill for your sprinting adventure. Find a steep slope that stretches between 100 to 300 feet in length. It’s like scouting for the ultimate conquerable peak, where your efforts will be rewarded with incredible speed and strength gains.

As you embark on your hill sprint session, visualize yourself as an unstoppable force, conquering the incline with every powerful stride. Feel the burn in your quads, the surge of energy in your calves, and the wind whipping through your hair. Embrace the challenge, knowing that with each step, you’re building a stronger and faster version of yourself.

Once you reach the top of the hill, take a moment to catch your breath and enjoy the victorious view. It’s a triumphant pause in your ascent, a well-deserved reward for conquering the uphill battle. But don’t rest for too long, my friend, as you’ll need to make your way back down the hill for your recovery phase. Let gravity be your guide as you jog back down, allowing your body to recover and prepare for the next thrilling ascent.

Repeat this invigorating cycle of sprinting uphill and jogging back down five to eight times. Each repetition is like conquering a mini mountain, pushing your limits and elevating your performance to new heights. Embrace the burn in your muscles and the rapid beat of your heart, for it is in these challenging moments that true strength is forged.

HIIT Running Workout # 3 – The Bodyweight Routine

Picture yourself harnessing the might of your muscles, sculpting your body, and pushing yourself to new limits. Get ready for a bodyweight routine that will ignite your progress and lay the foundation for future challenges.

As a fan of bodyweight exercises, I can’t stress enough their benefits. They’re like the Swiss Army knives of the fitness world—convenient, versatile, and accessible to all. Whether you’re a beginner or a seasoned fitness enthusiast, bodyweight exercises offer a pathway to success, as long as you prioritize proper form and stay within your fitness level. It’s all about building a solid foundation to support your fitness journey.

Now, let’s dive into a beginner-friendly routine that will set you on the path to total body strength and endurance. By incorporating these exercises regularly, you’ll lay the groundwork for even more demanding workouts in the future. So, grab your enthusiasm, put on your workout gear, and let’s conquer this bodyweight routine together!

For each exercise, aim to complete five sets of ten-to-fifteen reps. Remember, it’s not just about the quantity, but also the quality of each repetition. Focus on maintaining proper form, engaging the target muscles, and challenging yourself without compromising safety.

First up, pull-ups, the ultimate test of upper body strength. Picture yourself hanging from a sturdy bar, channeling your inner warrior as you lift your bodyweight with sheer determination. This exercise targets your back, shoulders, and arms, building strength and definition in those upper body muscles.

Next, let’s embrace the power of air squats. Stand tall, feet shoulder-width apart, and sink into a squat position as if you’re preparing to sit on an imaginary chair. Feel the burn in your quadriceps and glutes as you rise back up, like a phoenix rising from the ashes. Air squats are fantastic for strengthening your lower body and enhancing your overall stability.

Prepare to take a dip into the world of dips! Find parallel bars or sturdy surfaces to support your body as you lower yourself down and push back up. This exercise targets your triceps, chest, and shoulders, sculpting those upper body muscles and improving your pushing strength. Embrace the challenge, and watch your body transform.

Now, let’s shift our focus to the classic pushup. Get into a high plank position, hands shoulder-width apart, and lower your chest towards the ground before pushing back up with controlled power. Feel your chest, shoulders, and triceps engage as you conquer each repetition. Pushups are like the bread and butter of bodyweight exercises, delivering a well-rounded upper body workout.

Last but not least, forward lunges, a move that activates your lower body and challenges your balance. Step forward with one leg, lower your body until both knees are bent at a 90-degree angle, and push through your heel to return to the starting position.

Alternate legs with each repetition, and feel the burn in your quadriceps and glutes as you stride towards greater strength.

HIIT Running Workout # 4 – Tabata Protocol

Get ready to experience a heart-pumping, calorie-blasting, and exhilarating workout that will push your limits and leave you feeling invigorated. Introducing one of my all-time favorite HIIT workouts—the Tabata protocol.

This workout is like a burst of lightning, delivering intense intervals of effort followed by moments of recovery. It’s a high-intensity dance between pushing your limits and allowing your body to recharge.

Studies have shown that Tabata workouts, like the one we just conquered, have numerous benefits. Research papers have revealed that this form of high-intensity interval training can enhance cardiovascular fitness, improve anaerobic capacity, and even boost metabolism long after the workout is over.

For the Tabata intervals, you’ll be running at your fastest pace for 20 seconds—a sprint that will make your heart race, your lungs gasp for air, and your legs feel like they’re on fire. Channel your inner Usain Bolt as you explode forward, pushing your limits with every stride.

But don’t worry, after each 20-second burst of speed, you’ll have a moment to catch your breath and recover. It’s like a brief respite amidst the storm—a chance to regroup, refocus, and prepare for the next exhilarating round. Use those 10 seconds of recovery to jog slowly, allowing your heart rate to settle and your muscles to relax before the next sprint.

Now, let’s repeat this electrifying pattern eight times. Eight cycles of pushing your limits, followed by moments of respite. It’s a beautiful balance between exertion and recovery. With each repetition, you’ll feel your body growing stronger, your endurance soaring, and your spirit igniting with a sense of accomplishment.

HIIT Running Workout # 5 – Tabata Protocol – The Strength Version

Are you ready to take your fitness journey to the next level? Brace yourself for the ultimate challenge—Tabata bodyweight training. It’s time to put your strength, endurance, and mental fortitude to the test. But before we dive into this exhilarating workout, let’s talk about what makes it so unique and why you need to approach it with caution.

Tabata bodyweight training combines the best of both worlds: aerobic and anaerobic exercises.

It’s like a fusion of fire and air, blending the intensity of high-intensity intervals with the power of bodyweight movements. This workout will make you sweat, burn calories, and leave you feeling like a warrior who has conquered the battlefield of fitness.

However, a word of caution—Tabata bodyweight training is not for the faint of heart. It demands discipline, proper form, and a keen understanding of your fitness level. It’s important to listen to your body and know when to push yourself and when to take a step back. Remember, your safety and well-being should always be a top priority.

Here’s the workout routine:

  • Do as many high knee sprints as you can in 20 seconds
  • Rest for 10 seconds
  • Do as many squats as you can in 20 seconds
  • Rest for 10 seconds
  • Do as many pushups as you can in 20 seconds
  • Rest for 10 seconds
  • Do as many burpees as you can in 20 seconds
  • Rest for 10 seconds
  • Do as many sit-ups as you can in 20 seconds
  • Rest for 10 seconds
  • Do as many squat jumps as you can in 20 seconds

Rest for one to two minutes.

Repeat the circuit two to three times.

Finish the session with a 10-minute cool-down.

You can also try this agility ladder workout.

HIIT For Runners Workout # 6 – HIIT Time Challenge

Looking for an extra edge with your training? Try the HIIT time challenge.

Start your session with a 10-minute warm-up of light jogging.

After that, spend 20 minutes doing as many rounds as possible (AMRAP) of:

  • Ten military style pushups
  • Ten hanging leg raises
  • Ten jumping squats
  • Ten burpees
  • Ten pull-ups.

Record your result, then during your next session aim to beat your record.

HIIT For Runners Workout # 7 – Jump Rope Routine

I’m a big fan of jump rope workouts.

These burn mad calories, improve your foot speed, increase coordination, and boost agility.

What’s not to like?

Here’s how to proceed:

Start with a 5 minute forward jumping rope exercise at a comfortable pace as a warm-up.

Afterward, put the rope down and do a set of full-body dynamic stretches.

Next, perform the following exercises:

  • One minute of forward jumps
  • One minute of alternate foot jumps
  • One minute of side-to-side jumps
  • One minute of double unders
  • One minute of high knee jumps
  • One minute of one-foot hops

Rest for two to three minutes, then repeat the circuit two to three times.

HIIT For Runners Workout # 8 – Plyometric HIIT Workout

Also known as explosive training, plyometric training requires your muscles to make use of maximum force in minimum time.

When doing this workout, go explosive for 30 seconds, then recover for another 30 seconds, move to the next exercise, and repeat.

Rest for one to two minutes after completing the whole circuit, then repeat it two to three times.

For a greater challenge, consider holding dumbbells at your sides while doing the workout, or wear a weighted vest.

  • Box Jumps
  • Plyo push-up
  • Jumping lunges
  • 180-degree squat jump
  • Burpees

HIIT For Runners Workout # 9  – The Ab Worker

I don’t believe in “spot reduction” exercises, but I’m pretty sure that HIIT training can tone your midsection.

It’s also a fun way to exercise your abs: HIIT style is much more enjoyable than doing crunches.

Here’s the workout.

Complete three sets of:

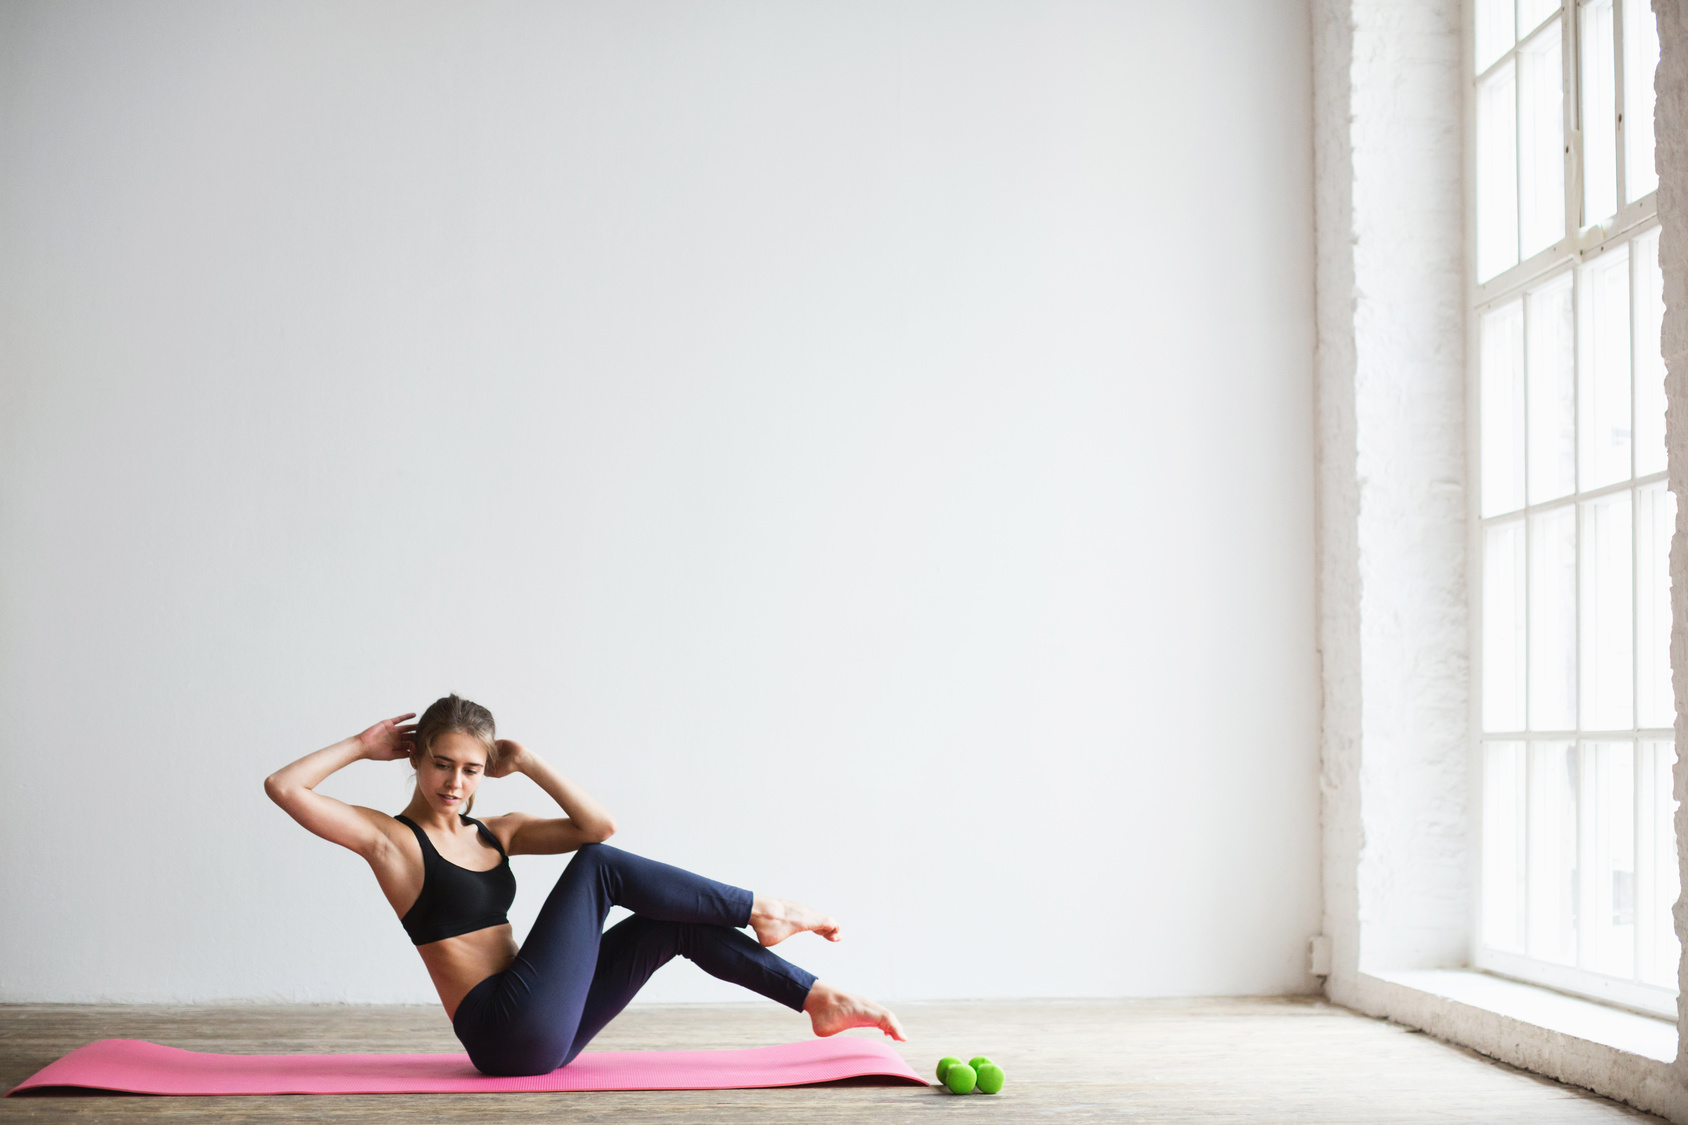
  • 25 Russian twists (on each side)
  • 20 Woodchoppers
  • 25 Mountain climbers
  • 20 Bicycle crunches
  • 20 Hanging leg

HIIT For Runners Workout # 10 – Medicine-Ball HIIT Workout

Medicine balls are usually lightweight.

They’re designed for simple grip and maneuverability, and they’re also a powerful tool for HIIT styled workouts.

Med ball exercises target multiple muscle groups, boost coordination, increase endurance, and improve grip strength.

Complete three sets of eight to 15 reps of:

  • Rock and roll up
  • Medicine ball push-up
  • V-up
  • Woodchopper
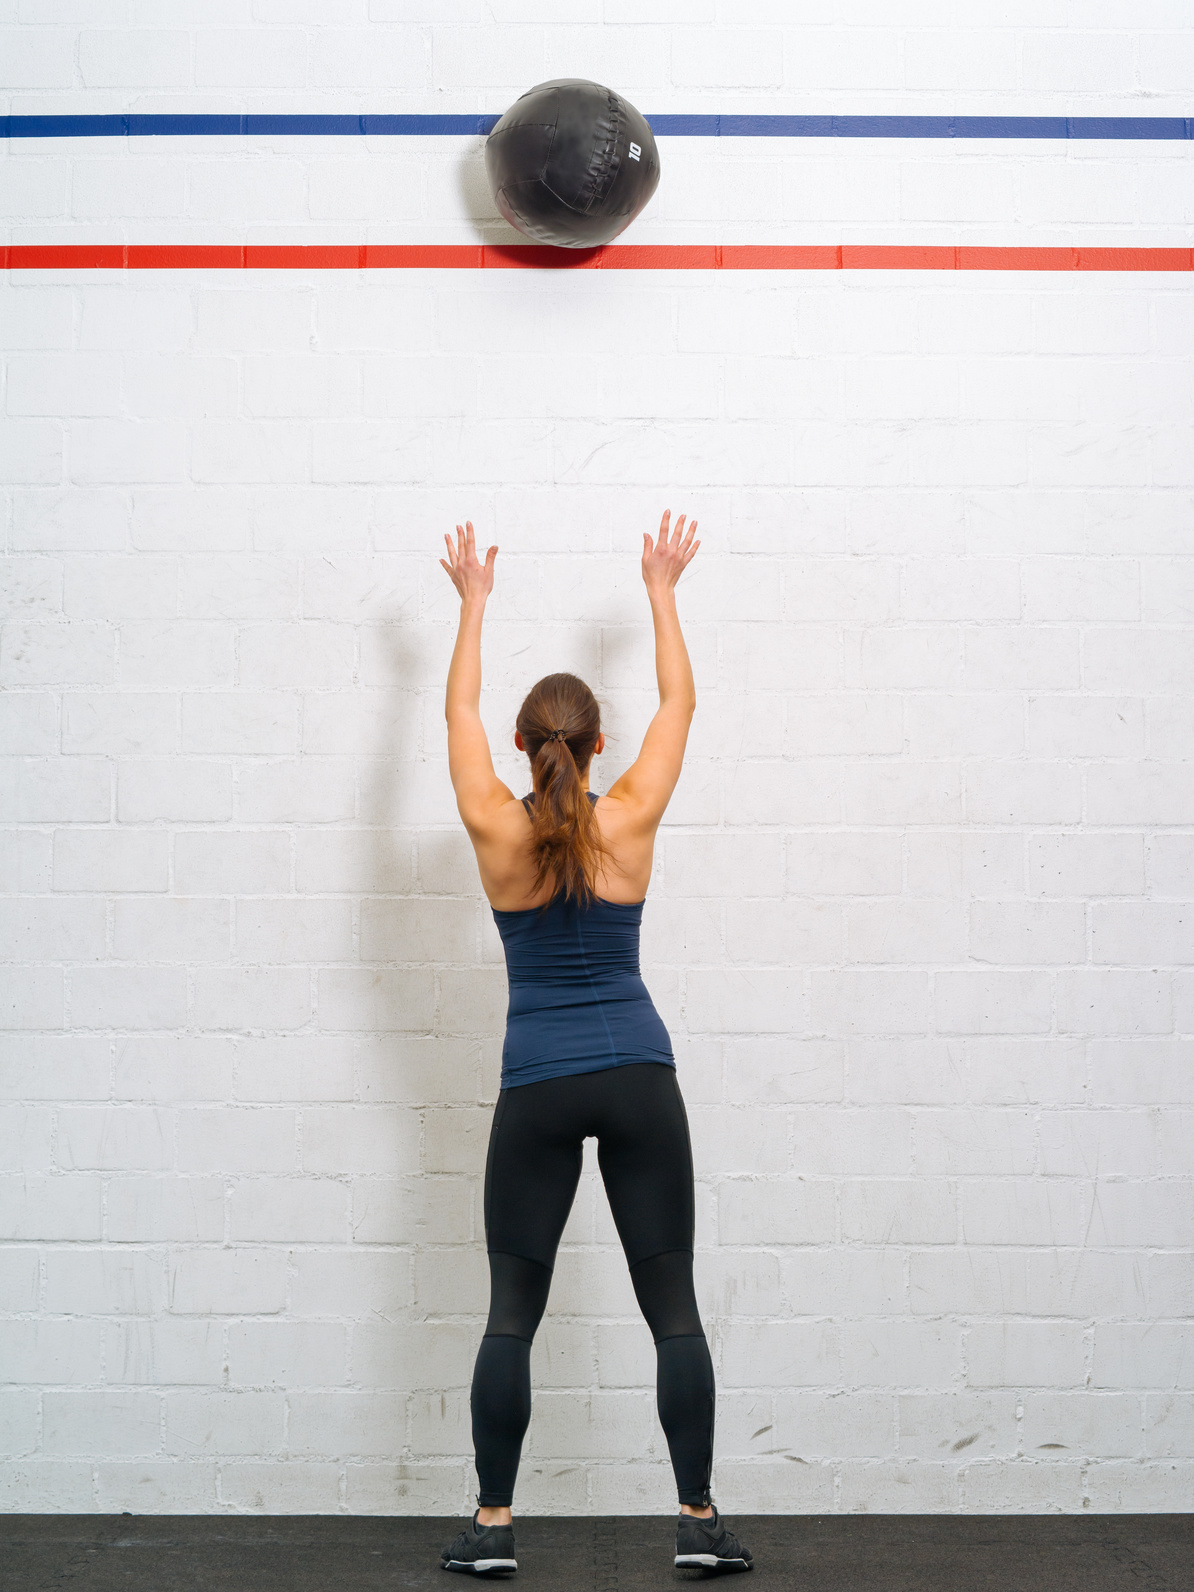
  • Wall toss.

HIIT For Runners Workout # 11 – Sleds Routine

Sled training is one of the most grueling workouts I’ve ever done.

The first time I ever tried it I truly thought I was going to die, but thanks to a training buddy that kept motivated, I was able to pull it through.

The premise is simple: push the sled from point A to point B as hard and fast as possible without sacrificing form.

That’s it!

If it’s your first time trying this workout, go light and slow.

Start out with a 35-pound slate or lighter.

Only after you’ve nailed proper form should you gradually add more weights and reps.

This I learned the hard way after my first go at sled workouts when I thought I was Superman, I couldn’t sit comfortably nor move my arms for two days!

Here’s how to proceed:

Load a sled on each side and push it for the desired distance.

Then rest for 30 seconds and repeat five to seven more times.

What’s good form? Keep a straight line from your head to your ankle and drive your feet diagonally into the ground with each step you take.

The power needed for the forward momentum must come from your hips and legs, not your arms.

HIIT For Runners Workout # 12 – “Fight Gone Bad” WOD

You cannot do HIIT workouts without throwing some CrossFit WODs (Workout of The Day) into the mix.

After all, CrossFit philosophy revolves around the principles of HIIT training.

I like the “Fight Gone Bad” WOD because it’s intense and will have you doing all sorts of plyo, resistance, and cardio exercises.

To do the “Fight Gone Bad” WOD, complete five rounds of:

  • Wall-ball, 20-pound ball, 10 ft targets (Reps)
  • Sumo deadlift high-pull, 75 pounds (Reps)
  • Box Jump, 20″ box (Reps)
  • Push-press, 75 pounds (Reps)
  • Row (Calories)

HIIT For Runners Workout # 14 – Filthy Fifty CrossFit Workout

The filthy 50 is another brutal CrossFit workout loaded with rigorous exercises guaranteed to push you to your breaking point.

The circuit involves performing 50 reps of 10 different exercises, all done as quickly as possible.

The exercises are:

  • 50 box jumps with a 24-inch box
  • 50 jumping pull-ups
  • 50 Kettlebell swings
  • 50 walking lunge steps
  • 50 knees to elbows
  • 50 reps of push presses with 45 pounds
  • 50 back extensions
  • 50 wall balls using a 20-pound ball
  • 50 burpees
  • 50 double-unders.

Amazing, right? If you can pull this off in under 30 minutes, then you’re in remarkable condition!

HIIT For Runners Workout # 15 – Heavy Rope HIIT Workout

Rope training is the most recent addition to my training regimen, and goodness, it’s freaking tough!

Heavy rope exercises target every major muscle in the body and will push you to the breaking point if you’re not careful.

Here’s a workout routine to try:

Start with a 10 to 15 minutes dynamic warm-up, then perform the following battling rope exercises:

  • One minute of rope waves
  • One minute of shoulder press
  • One minute of rope spirals
  • One minute of side slams
  • One minute of alternating wave lunge jump
  • One minute of start jumps.

HIIT Running Workout Routines – The Conclusion

There you have it. The above HIIT running workout routines are some of the most efficient and powerful workouts you can ever do to improve your fitness and health.

Feel free to leave your comments and questions below, and as always, thanks for stopping by. Keep running strong!

David D.

How To Improve Running Form for Beginners

couple running and have good running form

Whether you’re a beginner or you’ve been running for a while, you’ve probably wondered how to improve your running technique. Well, you’re in the right place.

Here’s the truth: running is one of the most natural things we do as humans.

According to evolutionary thinking (and running gurus like Chris McDougall), our bodies were built for running, especially over long distances. That’s how our ancestors survived back in the day—running was a matter of life or death.

But here’s the catch: good running form doesn’t come naturally to everyone.

Training with poor form is a common pitfall I’ve seen it in many runners, from beginners to the experienced. It’s a tough topic, often filled with conflicting advice, but addressing your form can lead to breakthroughs in how you feel and perform

So, today, I’m here to break it down for you. By the end of this post, you’ll understand what good running form looks like, why it’s important, and how to improve yours.

What is Running Form?

Running form, also known as running mechanics or technique, refers to how your body moves while running. It includes everything from posture and foot strike to arm position and cadence. Each of these elements impacts how comfortable and efficient your run is—and, ultimately, how well you perform.

I’ll be honest—I didn’t pay much attention to my form when I started running. I just figured that running was natural, and I’d been doing it since I was a kid, right? But after a few months of consistent running, I started feeling little aches and pains, especially in my knees and lower back.

I couldn’t figure out what I was doing wrong. It wasn’t until a friend pointed out that my posture looked off while running that I realized the problem might be my form.

I started paying attention to how I was moving, and after making a few adjustments, those nagging pains started to disappear.

It was a game-changer for me.

How to Improve Running Form

While it might seem like just another thing to worry about, I assure you that understanding and improving your running form is well worth your time. It’s about more than just avoiding injury; it’s about enhancing every run and feeling great while doing it

Let me share with you some my favorite tips.

Posture: Stand Tall, Lean Slightly Forward

Good posture is everything in running. I used to slouch when I ran, and it caused all sorts of issues—back pain, sore shoulders, you name it.

One simple adjustment that made a huge difference was improving my posture. I started imagining a string pulling me up from the top of my head during runs, which helped me keep my spine straight and avoid slouching.

I felt better physically, and my runs became more enjoyable. I wasn’t wasting energy on poor form and could focus on hitting my stride.

Here’s how to improve your posture:

  • Keep your spine straight and shoulders relaxed.
  • Lean slightly forward from your ankles, not your waist.
  • Engage your core—it’s the foundation of good running form.
  • Imagine a string pulling you upward from the top of your head. This keeps you tall and aligned.

Arm Position: Swing with Purpose

Your arms play a bigger role in running than you might think. They help balance your body and add rhythm to your stride. I used to run with my arms crossing over my chest, which I didn’t realize was throwing off my balance. A coach pointed it out during a workshop, and correcting it has helped me conserve energy and avoid side stitches.

Here’s how to improve arm position while running:

  • Keep your arms at your sides. Make sure your arms and legs are swinging in rhythm with each other.
  • Keep your elbows bent at approximately 90 degrees and somewhat pointed away from the torso.
  • Move your arms in conjunction with your legs.
  • Swing your arms forward and back, not across your body. This also allows your shoulders and neck to relax.
  • Relax your hands—imagine holding a delicate egg in each hand you don’t want to crush.

Your Head While Running

To ensure proper head position so you can run properly, do the following:

  • Keep your head high and centered between the shoulders.
  • Gaze directly roughly 10 to 15 feet ahead of you.
  • Never look at your feet, as doing so leads to slouching, which is bad form at its worst.
  • Don’t tilt your chin up or down—that usually occurs when you get tired.

This should help put your neck in proper alignment with your spine, which may improve your overall running economy.

Your Hands While Running

Your hands regulate tension in your upper body.

Tightness can create tension in the back and shoulders.

Here’s what to do with your hands when pounding the pavement:

  • Keep your hands in an unclenched fist, with the fingers and thumbs lightly touching, hand cupped as though you are holding a delicate butterfly or an egg that you don’t want to crush or break.
  • Do not let your hands cross the centerline of your body. The forearms should swing slightly across the body. But the hands should never cross this centerline.
  • Swing your arms to the rear, not the front. Imagine trying to elbow someone behind you instead of punching someone in front of you.

Practice a Forward Lean

One technique that helped me improve my form is leaning into gravity. A slight lean from your ankles helps engage gravity, making it easier to propel yourself forward without overexerting your muscles. Think of it like downhill skiing—you want to lean forward just enough to let gravity do some of the work.

First time I heard about this concept was from the Chi Running method and thinking it sounded strange.

But I was curious, so I tried it during one of my tempo runs.

I started with a slight forward tilt, focusing on leaning from my ankles instead of my waist. At first, it felt awkward, but after a few minutes, I noticed I was moving faster without feeling like I was working harder.

I know this is nothing but anecdotal evidence, but I’d urge you to try it for yourself and see.

Relax and Stay Loose

Tension wastes energy. When you’re running, the more relaxed you are, the more efficient your run will be. Here are a few ways to stay loose:

  • Know your tension spots, and do your best to consciously release tension whenever and wherever it’s creeping up. The hands, shoulders, and jaw are the most common tension spots.
  • Keep your shoulders back and loose. If you feel tightness in this area, just drop your arms, open your hands, and shake them out for a moment.
  • Unclench your jaw. Let it slacken, and your eyes droop and soften. Your facial muscles greatly impact the degree of tension in your entire body. This also helps prevent jaw pain while running.
  • Unclasp your fists. Imagine holding a delicate egg in each hand you don’t want to crush. Tension here can set the stage for tension and improper form.
  • Breathe deep. Instead of relying on your chest, engage your diaphragm—your belly—to draw in deeper and more powerful inhales and exhales.

Cadence: Find Your Rhythm

Cadence, or how many steps you take per minute, is crucial to running efficiently. A higher cadence means less stress on your joints and a smoother stride. Ideally, aim for around 170-180 steps per minute.

To determine your cadence, count how many times one foot hits the ground in 30 seconds, then multiply by two. If your cadence is low, increase it gradually—about 5% every few weeks—until you reach your goal.

Keep in mind that your cadence varies according to your running intensity.

For instance, your speedwork or racing cadence will be much faster than your typical training cadence. Therefore, you should aim to settle on your number for both types of runs.

I felt awkward the first time time I tried to speed up my cadence. But after a few weeks, it started to feel natural, and my legs felt less tired after long runs.

Foot Strike: Midfoot is Your Friend

There’s a lot of debate about the ideal foot strike—should you land on your heel, midfoot, or forefoot?

As far as I can tell, it all depends on what feels natural to you, but most experts agree that a midfoot strike might be the most efficient.

And I cannot agree more.

When I shifted to a midfoot strike, I felt like I was gliding rather than stomping the pavement. Plus, it helped reduce the stress on my knees and ankles.

I believe that landing this way puts the least stress on the knees and ankle while helping you generate a stronger push-off.

Here is how: while running, do your best to land on your midfoot (or on the area between your heel and midfoot), then quickly roll forward onto the toes, popping off the ground and engaging your glutes on each step.

Just land as softly as possible—just like a ninja.

AQ Section: Common Questions About Running Form

I know that you have more than one pressing question about running form. Let me address some of the most common concerns.

How can I tell if my running form is correct?

One of the best ways to assess your running form is to have someone experienced observe you while you run. You can also record yourself running and review the footage to check for common indicators of good form, such as maintaining an upright posture, having a midfoot strike, and a relaxed arm movement. Additionally, consider using a running coach or joining a running group for feedback.

What are the most common mistakes runners make?

Some common mistakes include overstriding (landing with your foot too far in front of your body), poor posture (slouching or leaning too far forward), and not using your arms effectively (keeping them stiff or crossing them over your body). Many runners also fail to engage their core, which is crucial for stability. Awareness of these issues is the first step in correcting them!

Can I improve my form without professional help?

Absolutely! While professional coaching can provide personalized feedback, many resources are available to help you improve your running form independently. You can find instructional videos, articles, and books focused on running technique. Additionally, practicing specific drills, such as form running or cadence exercises, can enhance your technique over time. Just remember to be patient with yourself and stay consistent!

Does my running form change when I get tired?

Yes, fatigue can lead to changes in your running form, such as slumping your shoulders, lengthening your stride, or losing core engagement. It’s important to practice maintaining good form even as you fatigue. Incorporating form drills into your training can help reinforce proper technique under tired conditions.

Are there specific exercises I can do to improve my running form?

Absolutely! Some effective exercises include strength training for your core and leg muscles, mobility exercises to enhance flexibility, and drills like high knees, butt kicks, and strides to improve your form. Incorporating these into your routine can help reinforce good mechanics.

How Often Should You Work on Your Form?

Improving your form is something you can do gradually. You don’t need to overhaul everything all at once. Trying to change too much too quickly can lead to injury. Instead, focus on one aspect of your form at a time. For example, work on your posture one week and your cadence the next.

A good rule of thumb is to check in on your form during every run. It doesn’t have to take long—just a quick mental checklist every few miles will do the trick.

When I coach new runners, I always stress the importance of patience with form adjustments. I share how I tackled one element at a time—starting with posture, then gradually moving to arm swing and foot strike. It’s about small changes leading to big improvements

Can You Practice Running Form on a Treadmill?

Absolutely! The treadmill is a great place to focus on your form because you can control your pace and environment. I used the treadmill while working on my posture and cadence, which helped me stay consistent without worrying about uneven terrain or traffic.

What equipment do I need to check my form?

You don’t need fancy equipment! A smartphone or a simple video camera is sufficient for recording your runs. You can also use a mirror while performing running drills at home to visually check your form. Some fitness trackers also offer running form metrics, which can be helpful for feedback.

Conclusion: Build Your Form Over Time

Building proper running form takes time, but it’s worth the effort. Start with the basics—stand tall, lean slightly forward, relax your arms, and increase your cadence. Once you’ve got those down, you’ll notice that running feels easier and will likely experience fewer injuries.

And remember, don’t rush it. In my experience, trying to change everything at once is a recipe for disaster. Take it one step at a time, and listen to your body. Before you know it, you’ll be running in perfect form.

Thanks for reading! Now, go out there and run strong!

How to Treat and Prevent Runner’s Knee

female runner suffering from knee pain

Runners knee can affect anyone, from beginner runners who are just starting out to elite athletes trying to achieve their next personal best.

If you’re looking for practical solutions for relieving and avoiding this common overuse running injury, then you’re in the right place.

Today I’m going to share with you a simple step-by-step runners knee injury treatment and prevention program that can help put a stop to the condition for good.

By the end of this post you will know all you need about:

  • The exact definition of runners knee and its symptoms, and causes,
  • The best treatment options for runner’s knee,
  • How to get back safely to running after runners knee, and
  • The right preventative measures you can take so you no longer have to endure another (or your first) runner’s knee nightmare.

So are you excited? Then let’s get the ball rolling

Runner’s Knee Explained

Standing for a number of conditions affecting the knee, such as Patellar Tendinitis, Chondromalacia Patella, and Patellofemoral Pain Syndrome, or PFPS for short, Runner’s knee is a general term that’s been used to describe pain and tenderness around and/or below the kneecap.

PFPS is the most Common

Patellofemoral pain syndrome (what a mouthful!), is the most common form of runner’s knee, accounting for about 20 percent of all running injuries, according to study.

Note: This whole post is mainly focused on patellofemoral pain syndrome.

In future posts, I’ll be dealing other conditions affecting the knee.

That’s why in this post, I’ll be using the terms PFPS and runner’s knee interchangeably, but please keep in mind that they are not the same thing.

Runners Knee Symptoms

The primary symptom is mild pain around, and below the top of the kneecap, typically toward the center of the back of the knee where the kneecap and thighbone meet.

The pain is, in most cases, mild at the first stages and may be only felt during running (or while doing other high impact exercises), but the pain becomes increasingly more intense not only during running but also after a workout.

Since the knee is a joint—Read: it moves around a lot—pinpointing the exact painful spot can prove difficult.

Nevertheless, by and large, Runner’s Knee is described as an aching pain behind and/or around the kneecap.

To make sure you actually have PFPS, you may need to visit a doctor to give you a thorough physical exam.

In some cases, X-rays and MRIs—Magnetic Resonance Imaging)—and other tests are needed for a complete assessment.

But in most cases, if you are a runner, and you started experiencing the above symptoms, rest assured that you have runner’s knee, and it’s time to step back from running and treat the condition before you do more damage to the cartilage.

You may also experience swelling and/or popping or cracking sensations in the knee.

Additional Resource – Can you run again after knee replacement

Runners Knee – The Injury Process

At the root level, runners knee develops when the patella (the kneecap) tracks incorrectly over the femoral groove, which a groove in the thighbone—as you use your knee.

Under normal conditions, the patella rests in the femoral groove and glides effortlessly up and down as you bend and straighten your knee.

But when the patella is misaligned—or tracking out of its normal range— it can irritate the nerves around the kneecap and damage the cartilage beneath the patella, leading to knee pain and eventually, runners knee.

Not Just Runners

As I have already stated, Runners’ Knee is the most common overuse injury among runners, but it can also strike any athlete in a variety of fields—especially sports that require plenty of cutting and sharp lateral movements, such as skiing, basketball, and tennis, or any type of sport that’s arduous activity on the legs.

Runners Knee Causes

Pinpointing a single cause of runner’s knee may prove elusive.

There are so many factors that can lead to the condition.

Here are some of the causes:

Overuse. This is the most common cause.

The repetitive high impact nature of running—and other high impact activities that are strenuous on the knees—can irritate the nerves around kneecap and damage the tendons.

Misalignment. When the patella—kneecap—is slightly out of its correct position—in other words it’s out of alignment—running and other high impact activities that require a lot knee bending and twisting can wear down the cartilage of the kneecap, leading to pain and damage to the joints.

Muscle weakness. Muscle imbalances in the legs can also lead to the condition.

Weak glutes, hip abductors, and quadriceps muscles can reduce support and stability around the knees, which forces the kneecap to track out of alignment.

Muscle tightness. Tight hamstrings and calf muscles can put pressure on the knee, resulting in misalignment of the kneecap, thus increasing kneecap friction and pain.

Add to this the repetitive high impact nature of running and you have a recipe for runners knee.

Foot problems. If you have flat feet—also known as fallen arches or overpronation—this anatomical condition can overstretch the muscles and tendons of your legs, resulting in knee pain and irritation.

An unusual foot position forces the foot to roll inwards which significantly changes the way the forces go through the knee

Direct trauma. This is when you receive a direct trauma to the knee, such like a blow or a fall.

The shock impact can dislocate the kneecap, or even move it out of place, forcing it to mal-track over the femoral groove.

How to Treat Runner’s Knee

If you have runners knee, then there is no perfect answer to when your knee will be healed.

Nevertheless, to speed up the healing process, do the following.

Stop Running

This is obvious.

Stop doing anything, including running and other high impact exercises, that leads to knee pain, but feel free to do as much exercise as you can do pain-free.

Take as many recovery days (or weeks) as you need.

If you don’t want to stop exercising, then opt for cross training activities with minimum impact on the knee.

Join a yoga class, strength train or join a aqua jogging class.

Just because you have runners knee don’t mean that you should fall off the training wagon, and turn into a couch potato.

Ice your Knee

Ice therapy can help you assuage pain and reduce the swelling.

Do it for 10 to 15 minutes three to four times per day until the pain is gone.

Use cold packs or ice wrapped in a towel.

Compress The Knee

Support the injured knee by using sleeves, straps or an elastic bandage to accelerate the healing process and reduce pain.

Elevate your Knee

Another measure you can take is to keep the knee raised up higher then you chest level by elevating it on a pillow when you are sitting or lying down.

Take Anti-inflammatory Pills

I will only recommend that you take pills if the pain was too much to bear.

Non-steroidal anti-inflammatory medication, like Aleve, Advil, or most commonly Ibuprofen, will help with the swelling and the pain—especially if you needed more pain relief.

Just be careful. These drugs—like any other drug—have a dark side.

They can boost the risk of bleeding and ulcers—only used when your doctor says so or in cases of severe pain.

See a Doctor

In case your knee did not get well with the above steps, and the pain persists, then you may need to see a physician and have a professional examine your knee for a thorough medical evaluation.

In most cases, runners knee can be easily treated provided that you spot it early on and take the necessary action steps on the spot.

Severe Runners Knee Cases

In some severe cases of runner’s knee, the above steps may not help as much.

So what to do then?

Well, severe cases of the runner may need immediate surgery to fix the damage.

A surgeon could take out the injured cartilage or mend the position of the patella.

Hopefully, you will never have to endure severe cases of runner’s knee.

This condition—and most other running injuries—can be easily treated—when spotted at the right time and before they get any worse—and with the implementation of the right preventative strategies.

Additional resource – Your guide to ITBS

How to Get Back Running after Runner’s Knee

Here are the three keys to return safely to running after runner’s knee

Take your Time

Returning back to running, of course, will depend on how severe you damaged your knee.

Thus, it’s hard to guess how much recovery time you will need, especially when you put into consideration the biomechanical causes of the condition.

You cannot fix your muscles imbalances or running mechanics overnight.

So this cannot be rushed up. No one can

For instance, you may only need a few days off if you spot runners’ knee early, but if you have been running through pain for a while, you may need a lot longer.

But as a general guideline, full recovery from runner’s knee can take from four to eight weeks (or even more in severe cases) of no irritating activities—including running and other activities that require a lot of knee bending and twisting.

To stay on the safe side, opt for cross-training activities that don’t aggravate the pain and require minimum knee twisting and effort.

Take up aqua jogging, swimming, and the like.

And if a cross-training activity leads to knee pain, you shouldn’t be doing it.

The same approach applies for other knee injuries such as ITBS and patellar tendonitis.

Restart Slowly

Depending on how long you were out of the running field, it will take you to get back to running the way you used to.

A loss of cardio base and stamina is expected after a moderate layoff—even for just a couple of weeks.

Restart your running engine carefully and slowly.

Don’t force it.

Adopt a beginner’s runner mindset.

Fix the Root-Cause

Whether the root cause of your injury was biomechanical or any other cause, you will need to continue on working on it until it poses no future threats.

So please keep in mind that if you don’t strive to gradually fix the root-cause, it won’t just repair itself.

That was my mistake.

And please don’t repeat my mistake.

Additional Resource – Overpronation vs Underpronation


How to Increase Running Speed

runner trying to Increase Running Speed

Looking for the best advice on how to increase running speed? You’ve come to the right place!

Whether you’re training for your first 5K or aiming to improve your marathon time, getting faster is a goal most runners have.

When I first started running, I was obsessed with getting faster. I thought the secret was just running more and more miles and I found myself frustrated and wondering what I was missing.

That’s when I started to explore other techniques—ones that didn’t just focus on piling up the miles.

And once I tried out the strategies below, my speed picked up in weeks.

So, if you’re looking to break through that speed barrier without burning out, this guide is for you.

Strength Training

Strength training really speeds you up. When you build stronger muscles, you can generate more power each each stride.

Getting strong also helps prevent injuries. This is because stronger muscles are better equipped to handle the repeated impact that comes with running.

I didn’t pay much attention to strength training for a long time. After injuries and getting outrun, I learned gym time is essential

I started with basic bodyweight exercises like squats and planks, and eventually added in weights. I was surprised at how quickly I saw improvements in my endurance and speed. It turns out that stronger legs and a solid core really do make a difference.

Here are the exercises I swear by:

  • Squats: A fantastic exercise to build strength in your quads, hamstrings, and glutes. These muscles generate a lot of power when running, especially when you’re trying to pick up the pace.
  • Planks: A strong core is essential for maintaining good running posture, which helps you run efficiently.
  • Lunges and single-leg exercises: These strengthen each leg independently, improving balance and stability.
  • Plyometric exercises: Explosive moves like squat jumps and box jumps help develop fast-twitch muscle fibers, which are responsible for bursts of speed.

Try to include two strength training sessions per week into your routine. Focus on full-body exercises, but don’t forget to give special attention to your legs and core.

Don’t know where to start?

Check these five posts:

Interval Training

Interval training will definitely speed you up. This type of training alternates between high-intensity running (sprinting) and low-intensity recovery periods (jogging or walking). Interval training pushes your cardiovascular system to its limits, helping you build endurance and speed simultaneously.

My first interval session was brutal. My lungs felt like they were on fire, and I questioned whether it was worth it. But after just a few weeks, the results were undeniable. My legs felt springier, and I was able to maintain a faster pace on my regular runs.

One of my go-to workouts now is a simple interval session where I sprint for 30 seconds, then jog for 60. I try to do at least eight repeats, and even though it’s brutal, there’s something satisfying about pushing myself to the limit.

Intervals train you to run faster, without extra miles. It’s also a great way to burn a ton of calories in a short period of time.

How to get started:

  • After warming up, sprint for 30 seconds to one minute at near-maximum effort.
  • Follow this with one to two minutes of easy jogging or walking to recover.
  • Repeat this cycle 6 to 8 times.

As you get stronger, you can increase the number of intervals or the length of your sprints. Remember, the key is to give it your all during the sprint so that by the end of your interval, you’re feeling it.

Note – You’ll need need a stop watch to keep track of time when performing intervals.

Drill Training

I ignored speed drills for too long. Then, a running buddy convinced me to join him in some acceleration strides and high-knee drills after one of our easy runs. I felt ridiculous at first, lifting my knees so high and sprinting in short bursts, but the drills helped me improve my form and increase my cadence.

I’ve kept them in my training routine ever since, and I can say without a doubt that they’ve helped me shave off some seconds from my race times.

Here’s the truth.

Speed drills will fast-track your pace and polish your form. Speed drills help improve your coordination, strengthen your muscles, and increase your running cadence—all crucial components for running faster.

Some speed drills to try:

  • High Knees: This drill helps improve your knee lift and running cadence. Focus on quick, powerful steps while engaging your core.
  • Butt Kicks: Another great drill to help you focus on increasing your cadence and getting your feet off the ground quickly.
  • Strides: Run at a controlled fast pace for 20–30 seconds, focusing on good form. Strides help you work on maintaining speed without the pressure of a full sprint.

These drills are excellent to incorporate into your warm-up before a run or as a standalone workout once or twice a week.

You can also try this agility ladder routine.

Hill Training

For speed and stamina, run hills.

Running uphill forces you to engage more muscle fibers than running on flat terrain. It’s a tough workout, but the payoff is huge. Hills help build strength in your quads, hamstrings, and calves, which in turn gives you more power when you return to flat running.

Here’s how to start: Find a hill that’s about 50 to 100 meters long and not too steep. After a warm-up, run uphill at a hard but manageable pace. Once you reach the top, jog or walk back down to recover, repeat this 6 to 8 times. Over time, aim to increase the number of repeats or the distance you’re running uphill.

Plyometric Training

Plyometric exercises, or “jump training,” help develop explosive strength. Since running is essentially a series of single-leg jumps, plyometrics train your muscles to generate more power with each stride.

Plyometrics sounded intimidating to me at first. I imagined myself face-planting while attempting box jumps or landing awkwardly during squat jumps.

But I decided to give them a shot, starting with basic moves like jump squats and single-leg hops.

At first, my legs were jelly after just a few reps, but as I kept at it, I noticed that my running stride felt more powerful and efficient.

Here some exercises to try:

  • Box Jumps: Jump onto a sturdy box or platform and step down. This builds explosive leg strength.
  • Lateral Jumps: Jump side-to-side over a line or cone. This helps improve coordination and leg power.
  • Burpees: A full-body movement that combines a squat, jump, and push-up.

Adding plyometric exercises into your strength training routine once or twice a week will help you develop the power needed for faster running.

Improve Your Running Cadence

Running cadence refers to how many steps you take per minute. Research shows that the most efficient runners have a cadence of around 180 steps per minute. If your cadence is lower, it means you’re likely overstriding, which can waste energy and slow you down.

Here how to improve your cadence:

  • Start by counting how many times your right foot hits the ground in one minute, then multiply by two to get your total steps per minute.
  • If your number is below 170, focus on taking shorter, quicker steps. It should feel like you’re “dancing” lightly on your feet.

Jump Rope

Jumping rope is an underrated but highly effective exercise for runners. It improves foot speed, coordination, and endurance—all while giving your calves, quads, and glutes a great workout. Jump rope also strengthens the muscles around your ankles, helping to prevent injuries.

Start by incorporating 5 to 10 minutes of jumping rope into your warm-up or cross-training routine. As you get more comfortable, increase the duration or try different variations like alternating feet or high knees while jumping.

To take this classic workout to the next level, increase the duration and intensity of your jump rope exercise, building it up to 20 to 30 minutes.

You can also play with your feet for more challenge. Try alternating feet, jumping on one foot, or jumping on your heels.

Focus on Proper Running Form

I only focused on form after a coach noticed my overstriding. It took some practice (and a lot of mental reminders) to correct my posture, but once I did, I started running more efficiently.

Here’s what you need to keep on mind when it comes to running form:

  • Keep your torso tall and chest open. Imagine a string pulling you up from the top of your head.
  • Focus on landing your foot directly underneath your body, not in front of you. This helps reduce the impact on your joints and keeps your momentum moving forward.
  • Keep your arms at a 90-degree angle, swinging them forward and back (not across your body) to help drive your legs.
  • Relax your hands and shoulders. Tension in these areas wastes energy.

Lose Weight (If Necessary)

After struggling with a plateau in my speed, I decided to make some changes to my diet and shed a few extra pounds. I didn’t expect it to make a huge difference, but it was like flipping a switch. Running felt easier, and I started hitting paces that seemed impossible before.

Don’t take my word for it.

Research revealed that losing weight (fat, not muscle) can help runners improve running times—cutting roughly two seconds off a mile for each pound lost.

For example, a 15-pound weight loss should cut about 80 to 90 seconds of 5K race time.

The reasoning?

The more weight you carry, the more effort you expend to run from point A to point B, thus, the less power you have overall.

Don’t believe me?

Try running while strapping on a 25-pound backpack then tell me how you feel.

You’ll, sooner than later, realize how hard it is to achieve, let alone maintain, speed.

Now picture how much easier it would be if you were many pounds lighter.

Be Consistent

Finally, one of the most important aspects of improving your running speed is consistency.

Speed doesn’t come overnight—it takes time and dedication. Make sure you’re running at least three to four times a week, with a mix of interval training, long runs, and strength workouts.

Being consistent with your training allows your body to adapt, helping you gradually become stronger and faster.

Here’s a simple plan you can follow to work on your speed:

  • Monday: Interval run – 8 x 400m at 80–90% effort
  • Tuesday: Strength training (focus on legs and core)
  • Wednesday: Hill workout – 6–8 hill repeats
  • Thursday: Easy run or rest day
  • Friday: Tempo run – 4 miles at a comfortably hard pace
  • Saturday: Long run at an easy pace
  • Sunday: Rest day or light cross-training

Running Speed FAQ

I know that you have more than one pressing questions about boosting your running speed. Let me address some of the most common ones.

How long does it take to increase running speed?

The timeline for speed improvements varies, but with a consistent speed-focused training plan, most runners see progress within 4-6 weeks. This timeframe allows your body to adapt to new training stimuli, such as interval training, tempo runs, and hill sprints. Remember, consistency is key. Stick to a routine, and you’ll likely notice gradual improvements in your pace and endurance.

What is the best exercise to improve running speed?

There’s no single “best” exercise for speed, but interval training is highly effective. Short bursts of fast-paced running followed by rest or easy jogging help increase your anaerobic capacity and teach your body to handle higher speeds. Workouts like 400-meter repeats on the track or timed sprints (30 seconds on, 30 seconds off) are great options. Try incorporating intervals into your training once or twice a week for maximum benefit.

Does running on hills help with speed?

Absolutely! Hill training is like strength work in disguise—it builds power, endurance, and speed all at once. Uphill sprints strengthen key muscles used in running and improve your form by promoting a forward lean and higher knee drive. Try hill repeats once a week, running hard uphill for 20-30 seconds, then walking back down to recover.

What should I do if I don’t see improvements in my speed?

If you’re not seeing progress, consider tweaking your routine. Common issues include overtraining without enough recovery, or not varying your workouts enough. Make sure you’re balancing hard effort days with easier ones, and try different types of speed work like intervals, tempo runs, and hill sprints. Give yourself time, stay consistent, and keep track of your progress. Sometimes, small adjustments can make a big difference!

Conclusion

By doing interval workouts, increasing cadence, working on technique, losing weight, running hills, and incorporating consistency, you’ll be able to take your running speed to an entirely new level.

Now the ball is in your court. Do you have any other tips to share? If so, then feel free to do so in the comments section below.

I hope my guidelines for increasing running speed will help you become faster than you ever thought possible.

In the meantime, thank you for dropping by.

Keep running strong.

David D.

6 Yoga Poses to Ease Post-Run Muscle Soreness

Yoga Poses to Ease Post-Run Muscle Soreness

Post-workout soreness after running or any other exercise, often referred to as delayed onset muscle soreness, better known as DOMS, is common among runners—whether you are a beginner just starting out, or an intermediate runner after dramatically increasing the duration or intensity of your runs.

Good or Bad?

Don’ get me wrong.

Post-workout muscle soreness is a good sign.

It says that you are pushing yourself beyond your comfort zone, and that’s where real change happens.

And the good news is that the more you run, the less your muscles will be sore in the weeks and months to come.

In other words, if you feel sore after a run, then good job buddy!

But this soreness can also be a bad thing, especially if it’s interfering with your everyday activities.

Post-run soreness can also be an unpleasant experience—even painful at times, and may interfere with your daily activity and how ready you can be—physically and mentally—for your next workout.

Therefore, today I’m sharing with you one of my favorite cross-training activities you can do to speed up recovery: yoga.

women performing Yoga Poses to Ease Post-Run Muscle Soreness

The Power Of Yoga

Yoga can help you alleviate a lot of post-workout pains and it’s more efficient than, say, the traditional stretching technique you learned in high school.

Truth be told, a regular yoga practice can help you rehab tired muscles, prevent injuries and get your body ready for your next run.

Therefore, here are some of my favorite yoga poses that will work to alleviate post-run pains and aches while increasing your flexibility and mobility in key running muscles such the glutes, hamstrings, quads, and calves.

I recommend that you use this routine as means for speeding up recovery after a hard run—mainly a long run or an interval session.

Hold each for 30 to 45 seconds, and breathe deeply to release any tension or tightness you might experience.

Keep in mind that this simple 20-minute sequence is an easy and gentle sequence.

So no need to push yourself here.

Just do it gently and slowly and remember to breathe deeply.

So don’t try to win the world’s most flexible human contest in one session.

Here’s the full guide to yoga for runners.

1. Standing Forward Bend

Benefits

This is a must pose for calming the mind while also stretching and relieving the muscles of the spine and the hamstrings.

Proper Form

Begin by standing with your feet together, toes parallel, core engaged, with hands on your hips.

This is your starting position, or what’s known as the Mountain Pose, Tadasana.

Next, while allowing for a slight bend in the knees, fold over at your hips, and roll your spine down as you reach towards the floor, lengthening the front of your torso in the process.

Make sure to let your neck relax once you reach the bottom part of the pose, once you reach your max flexibility point.

Then, let the crown of your head hang loose and place your fingertips on your knees, shins or the floor beside your feet if your flexibility allows it.

Make sure to fold forward with a straight back, releasing slowly and gradually into the full pose.

Then, straighten your legs as much as possible while shifting your weight forward into your toes.

Hold the pose for one to two minutes, being mindful of your spine and legs the entire time.

2. Wide Legged Forward Bend Twist

Benefits

Also known as Prasarita Padottanasana , this asana stretches and strengthens the inner back legs and spine while penning the hips and improving the trunks rotation ability.

Proper Form

From mountain pose, widen your feet and place them three to four feet apart, with toes slightly turned slightly out, then hinge your torso forward at the hips.

Next, roll your spine downward and place your hands on your ground or on a yoga block, letting your neck and head relax.

Then, while breathing deep and being mindful of your spine, lift your right arm and reach it toward the ceiling, feeling your spine twist and open.

Hold the pose for 30 to 45 seconds, then slowly bring your hand down and switch sides.

3. Lunge with Side Stretch

Benefits

An awesome pose for releasing and opening the adductors, the abductors, and the glutes.

Proper Form

Assume Tadasana pose, then widen your stance with toes pointing 45 degrees outward.

Next, lunge to the right side, bending your right knee to a 90-degree angle and straightening the left leg to point upward with heel on the floor.

You can place your hands on the right thigh, or on the floor, depending on how flexible you are.

Hold the stretch for 30 45 seconds, then change sides.

Please, keep your back straight and core engaged during the stretch.

4. Star Pose

Benefits

This pose can help you open up and release tension in the hips, lower back, shoulders, and neck.

Proper Form

https://www.youtube.com/watch?v=GlB8OfrTkWM

Sit down on the floor with the sole of the feet together, knees bent in a kite shape, creating a diamond shape with your legs.

Next, lengthen your spine, grasp your shins or feet, then slowly let your back round and roll your body forward drawing your forehead towards your heels, then breathe deep and look within.

Relax into this pose for at least one to two minutes.

5. Legs Up the Wall

Benefits

This is in my experience one of the best relaxing and restorative inversions in the yoga world.

This post speeds up recovery by draining tension from the legs while stretching the lower back, legs, and hamstrings.

Proper Form

Sit on the floor with a wall next to right side.

For more support, you can use a long firm pillow by bolstering against the wall.

Then, raise your legs up into the air then rest them on the wall.

Make sure your lower is resting against the support pillow, if you are using one.

Next, relax your body and put your hands on your belly, rest head and shoulders on the ground, and start taking deep breaths to release any tension or stress in your body, starting from your toes and down through your ankles, knees, thighs, glutes, lower back and the rest of your body.

Stay in this pose as long as you can—nothing short from 5 minutes.

6. Lying-down Body Twist

Benefits

Also known as Natrajasana, this asana can help you release tension in the lower body—especially the lower back and glutes.

Proper Form

Start by lying down on your back with both feet on the floor at hip width and knees bent, then extend your arms out at your sides.

Next, bend your knees, and bring them toward your chest as close as possible, then slowly lower your bent knees to the left side while turning your head and looking over to your right side.

Next, reach your arms out to the left side then lower both legs to the left side while keeping your right shoulder in contact with the floor.

Hold the pose for 30 to 45 seconds and feel the stretch in your back, stomach, neck, shoulders, groin and thighs, then slowly return to the center and switch sides.

New to Running? Start Here…

If you’re serious about running, getting fit, and staying injury free, then make sure to download my Runners Blueprint Guide!

Inside this guide, you’ll learn how to start running and lose weight the easy and painless way. This is, in fact, your ultimate manifesto to becoming a faster and a stronger runner. And you want that, don’t you?

 Click HERE to check out my Runners Blueprint System today!

Don’t miss out! My awesome running plan is just one click away.

Circuit Training For Runners – The 30-Minute Indoor Workout

female doing ndoor Circuit Workout

If it’s not possible for you to go for an outdoor run, and you don’t want to jump on the treadmill for the hundredth time this month, then here is an indoor workout you can do at home for free.

No need for special equipment.

No need for hefty gym fees.

Oh! I forgot, it will also get you sweating like crazy and push your conditionning level to the max.

So are you excited? Then here we go…

Circuit Training For Runners – The 30-Minute Indoor Workout

If you are currently stuck inside, due to the weather, a baby, safety concerns, monetary reasons, you name it, the circuit I’m sharing with you today is the perfect solution.

In fact, this indoor workout routine is ideal for the cold winter month and perfect if time crunched fitness nuts.

Most of the exercises below require minimum equipment and can be done almost anywhere, as long as you have enough space.

These exercises will boost your heart rate, sculpt your body and get you out of running rut and help you smash through a training plateau.

For more challenge, use heavier dumbbells, medicine balls and push as hard as you can, or shoot for more rounds.

runner doing ndoor Circuit Workout

The Warm-Up

Warm up right by jogging in place at a comfortable pace for five minutes.

Make sure to land on the balls of your feet.

Exercise one: Jog in Place

Once you are warmed up, pick up the pace and jog in place as fast as you can by driving your arms back and forth and lifting your knees to waist level.

Make sure to run in place as fast as you can while pumping your arms back and forth, engaging the upper body as well.

Alternate between jogging at high intensity for 30 seconds, then slow it down and recovery for another 30 seconds, bringing your heart rate up in the process.

Exercise Two: High Knee Sprints

While jogging, pick up the start performing high knee sprints by bringing your knees up high toward your chest as fast as you can while engaging the glutes and keeping your torso upright.

Make sure to focus on high speed and knee lift while swinging your arms back and forth to generate momentum.

Sprint in place for one full minute to complete one set.

Exercise Three: High Lunges

Stand tall with back straight and core engaged, then step your left foot forward as far as possible so you are in a wide lunge position.

Next, while keeping your torso upright and gazing straight ahead, push through your left heel and drive your right knee forward and up toward your chest, then return it to starting position and repeat as fast as you can.

Do 10 to reps on each side to complete one set.

Exercise Four: Burpees

From a standing position, lower down and place your hands on the floor on either side of the feet.

Next, kick your feet back so you are now in a plank position, then immediately bring the feet back to between your hands and explosively jump up into the air, clapping your hands mid-air.

Make sure to land softly on the floor, then repeat as fast as possible while keeping good form throughout the exercise.

Exercise Five: Squat Jumps

Stand with feet hip-width apart with arms crossed over your chest.

Next, while keeping your head up and core engaged, squat down until your upper thighs are parallel to the ground, then, while pressing mainly with the balls of your feet, and using the thighs like springs, jump straight up in the air as high as you can.

Last up, land softly on the floor, bend your knees and sink back into the squat position and immediately jump again.

Please make sure to land with control and be extra caution if you have any knee or back injuries.

Repeat for 12 to 16 to complete one set.

Exercise Six: Butt Kicks

Begin by standing with your legs shoulder width apart, with the arms bent at your sides.

Next, while keeping your back straight and core engaged, run in place by kicking your heels up toward your butt, pumping your arms back and forth with elbows bent at a 90-degree angle as quickly as you can.

Make sure that your thighs do not move much as you lift and kick one heel at a time to your butt.

Lift your heels as close as you can to your butt, using a quick leg movement on the balls of your feet.

To do this circuit right, make sure to take minimum recovery between each exercise.

Your heart rate should remain high throughout the entire circuit.

Exercise Seven: Ski Abs

Assume a straight arm plank position, with back flat, head in neutral position and feet together.

Next, while engaging your core, hop both of your feet up to the left side, aiming to bring your knees to the outside of your left elbow, then quickly hop back into starting position, and change sides to complete one rep.

Repeat the exercise for one full minute to complete one set.

Circuit Training For Runners – The Conclusion

There you have it! If you’re looking for a cross training workout for runners, then this post is perfect for you. The rest is just details.

Please feel free to leave your comments and questions in the section below.

In the meantime thank for dropping by.

David D.

The 101 Best Weight Loss Tips of All Time

Weight Loss woman

If you’re looking to lose weight—whether it’s 5 pounds, 10 pounds, 20 pounds or more —then you’ve come to the right place.

This article will take you through just about every aspect of weight loss possible, from exercise to diet, motivation to lifestyle, and everything in between.

Without further ado, here are 101 ways to lose the extra pounds for good. I hope you find my tips and strategies helpful.

Note:  This is a super-long article (14000+ words). Don’t sit down to read it until you have enough time to dig into it. To make sure you don’t forget, bookmark this post and read it later, when you have time.In addition to the content I’ve written, I’ve also provided links to over 70 scientific studies related to weight loss and exercise.  They’re worthwhile reading as well, so click through on the links for even more helpful information and detail.

  1. Find Your Big Why

 In my experience, the first step toward achieving anything in life—let alone losing weight—is having the right motivation.

Without a “Big Why,” you’ll have no (or too little) motivation — especially when you come across roadblocks. When you’re motivated enough, you’re in a good place. I can guarantee that you ’ll lose weight and keep it off for good once you know your Big Why.

So, What’s YOUR WHY?

Why do you want to lose weight?

Why do you want to start exercising?

Why do you want to live a healthy lifestyle?

Why?

Is it because you’re ashamed of your body?

Is it because losing weight is a matter of life or death?

Whatever your real reason is, after you’ve figured out your big WHY (or WHYs), write it down and keep it somewhere that you’ll see it on a daily basis. This will serve as a constant reminder when the going gets tough.

Diet Tips

  1. Eat More Vegetables

There is no such thing as healthy eating without vegetables.

Why? Well for starters, vegetables score high in fiber and are low in calories— both key nutritional elements for successful weight loss. They’re also chock-full of minerals, vitamins, antioxidants and plenty of other valuable nutrients.

Do your best to eat as much as green stuff as possible. Some of the best options include broccoli, watercress, kale, cabbage, lettuce, cucumber, cauliflower, Swiss chard, and Brussels sprouts.

3. Eat Protein At Every Meal

Protein is your friend, whether you’re trying to increase muscle mass or lose weight.

Good protein can help keep you feeling full longer and controls your blood sugar levels, both of which can cut cravings for sugary, high-calorie, high-fat foods. Protein is also critical for muscle recovery and fat burning.

There is plenty of research to back these claims up.  According to a study published in the American Journal of Clinical Nutrition, people who eat protein at each meal lost more weight than those who didn’t have the nutrient at certain meals.

Another study conducted at the University of Missouri found that people who had protein with each meal reported the most weight loss benefits.

Some of the best animal-based sources of lean protein include lean meat, seafood, and egg whites, and the best plant-based are nuts and beans.

Limit processed meats like ham, sausage, and bacon, or better yet avoid them entirely. These foods contain a lot of saturated fats and a plethora of chemicals and harmful ingredients.

Additional Resource: What is in a dairy-free Protein Powder?

  1. Plan Your Foods

“If you fail to plan, then you’re planning to fail.” This maxim holds true whether you are the CEO of a 500-Fortune company or just a regular Joe (or Jane) trying to build healthy eating habits.

Planning your meals can help you take the guesswork out of the equation, and this, in turn, increases your chances of success.

The best way to plan your food intake is to spend at least an hour every Saturday or Sunday evening thoroughly planning your meals for the upcoming week. Then all you have to do the rest of the week is stick to the plan.

Try to prepare at least 10 to 12 meals and put them in Tupperware bowls, so you have them ready for the week ahead.

  1. Eat More Fiber

Fiber is a type of carbohydrate found in plant foods like vegetables, fruits, and whole grains. According to a study published in the Journal of Nutrition, increasing fiber intake by 8 grams for every 1,000 calories you take in can promote weight loss and prevent weight gain.

Why?

Fiber, unlike other carbs, does not get easily absorbed by your body. This means that it helps you feel full for longer. Increasing your intake of fiber can also lower your cholesterol, and may even prevent colon cancer and other health ailments.

Shoot for at least 30 to 40 grams of fiber a day. Some of the best sources of fiber include beans, broccoli, asparagus, oats, Brussels sprouts, apples, and flax seeds, to name just a few.

woman trying to lose weight

  1. Cut the Bad Carbs

Not all carbs are created equal. If you want to lose weight, eat the good carbs and avoid bad ones.

Good carbs are also known as complex carbs. They take longer to digest and can help you feel full longer. Some of the best sources of good carbs include vegetables, fruits, sweet potatoes, beans, brown rice, and other whole grain products.

Bad carbs are also known as simple carbs. They are digested quickly by the body, and this can lead to blood sugar spikes, cravings, and a host of health troubles.

Classic examples of simple carbs include bread, pasta, bagels, candy, muffins, donuts, French fries, sugary cereals, white rice, and any sugary or highly processed food.

Additional resource – A 7-day keto meal plan

  1. Eat Low GI Foods

Established about 30 years ago, the glycemic index is a scale that ranks foods from 0 to 100 based on the impact they have on blood sugar levels. According to studies, subjects who followed a low-GI diet have reported losing double their fat as compared to a high GI group.

Check the following list.

glycemic food index

Many thanks to LeanGainGuide.com for this awesome list.

  1. Don’t Fear Fats

Fats get a bad rap in the health community, but if you avoid them entirely, you’re doing yourself a great disservice.

Here’s the truth. Fats — the healthy kind — are an integral part of a healthy diet. Research shows that eating the right kinds of fats can help you lose weight and increase your overall health and well-being level.

So, which fats are good ones?

Good fats are monounsaturated fats, AKA MUFAs. They increase good HDL cholesterol while reducing bad LDL cholesterol.

Research shows that good fats can protect against the buildup of artery plaque, preventing heart disease and other health troubles. They can also suppress your appetite, reducing the number of calories you eat in a day while boosting your metabolism.

Some of the best sources of MUFAs include olive oil, coconut oil, canola oil, avocados, almonds, peanuts, and sesame seeds.

You don’t need too much good fat to get its benefits. Research suggests that two to three tablespoons of olive oil per day are enough to do the trick.

  1. Consume Water-Rich Foods

According to a study conducted at the Pennsylvania State University, eating water-rich foods cuts overall calorie consumption, as many of these foods are low in calories but high in fiber.

Here is a list of some of the best water-rich foods:

  • Tomatoes
  • Cucumbers
  • Iceberg lettuce
  • Zucchini
  • Green peppers
  • Celery
  • Cantaloupe
  • Spinach
  • Strawberries
  • Radishes
  • Grapefruits
  • Watermelon
  • Cauliflower
  1. Keep a Food Journal

According to a six-month study published in the American Journal of Preventative Medicine, people who kept tabs on their daily eating habits for six days a week reported losing about twice as many pounds as those who didn’t keep written records.

By monitoring your daily eating habits, you give yourself a better idea of what’s going into your mouth, This can help you better assess your daily eating choices and habits.

Here’s what you need to do. Get yourself a diet journal and start tracking the amount of food you consume throughout the day, including snacks and treats.

  1. Take Pictures of Your Food

Photographing your meals and snacks is another helpful way to keep tabs on your daily eating habits.

Doing so can also help you examine the quantity and quality of the meals you’re eating, as well as holding you accountable for every bite you eat.

Research backs this up.

According to a study conducted at the University of Wisconsin-Madison, taking pictures of every meal and snack you eat can encourage you to change your diet.

  1. Eat Five Times a Day

Although there are no conclusive studies that prove that eating 4 to 5 mini meals a day can help you shed weight, many people say that eating small healthy meals multiple times a day has helped them lose weight.

As long as you’re eating the right foods, eating small meals throughout the day can help you win the battle of the bulge.

Try eating four to five 350 to 500-calorie meals every three to four hours. These small meals should include breakfast, a mid-morning snack, a small early lunch, a mid-afternoon snack, a finally a small, light dinner.

Here is a sample schedule:

  • 7:30 am—Breakfast
  • 10:00 am—Mid-morning snack
  • 1:00 pm—Lunch
  • 4:00 pm—Evening snack
  • 7:00 pm—Dinner
  1. Try Intermittent Fasting

Intermittent fasting is the artful form of skipping meals without hurting your weight loss efforts.

Intermittent fasting, or IF, involves regular, short-term fasts. According to research, fasting during short, specific windows during the day can help you consume fewer calories. It also optimizes some hormones linked to weight control.

There are several methods of intermittent fasting. One of the most popular is the 16/8 method in which you skip breakfast and eat during a limited 8-hour feeding period.

During the 16/8, you fast for 16 hours (including sleep time). For example, fasting from 9 p.m. to 1 p.m. adds up to 16 hours of fasting.

This method only requires that you trade your regular breakfast for a cup of coffee or some other non-caloric fluid. Then you can have lunch at 1:00 as your first meal of the day. This method only requires that you trade your regular breakfast for a cup of coffee, MUD\WTR, or some other non-caloric fluid

The 16/8 Method is convenient and simple, and does not require counting calories. You can do the 16/8 fast twice a week, on weekends, or every single day.

Additional resource – Here’s how long does it take to lose 100 pounds.

  1. Fill Your Plate with Veggies First

As you may already know, eating more vegetables has been proven one of the most significant predictors of weight loss and ideal health.

But how do you ensure you’re getting enough veggies?

It’s simple. Fill up half of your plate with vegetables, then divide the other half into two equal-sized areas. Fill one with good carbs like sweet potatoes, brown rice or a slice of whole-grain bread. Fill the other with lean protein such as skinless poultry, fish, lean beef or beans.

With this simple trick you won’t even need to count your calories or worry about portion size.

  1. Spice it Up

Spicy items like hot sauce, chopped jalapeno, and Cajun seasonings add a lot of flavor to meals with few calories. But that’s not the whole story.

According to research, most spicy foods contain a compound called capsaicin, which is the source from which chilies get their heat. According to research, this compound can tame your appetite and increase your metabolism.

Not only that, but capsaicin also may have a thermogenic effect, boosting body temperature after consumption. This may lead to a higher calorie burn for 20 to 30 minutes after you’re finished eating.

Additional resource – The best running songs

  1. Cook with Coconut Oil

Two tablespoons per day of coconut oil can help you reduce your waist circumference by an average of 1.1 inches over the course of a month, according to a study.

Coconut oil scores high on the healthy medium chain saturated fatty acids fats (known as Medium Chain Triglycerides, or MCTs) that increase metabolism for immediate energy and decrease appetite.

To get the most benefit from this, use virgin coconut oil. It’s usually made with no chemicals, while refined or RBD oil is usually chemically treated.

  1. Have Breakfast

A study conducted at Harvard revealed that obesity rates are roughly 40 to 50 percent lower in people who have breakfast on a consistent basis, compared with those who skip breakfast.

A healthy breakfast will make you less likely to be hungry later, which often leads to overeating over the remainder of the day.

Unless you’re doing intermittent fasting, you should never skip breakfast. As a rule, have up to 500 calories each day at breakfast, depending of course on your weight loss goals, age, fitness level, and exercise goals.

A healthy breakfast should consist of a serving of protein, a serving of whole grain carbs, and a serving of fruit—especially after a morning workout.

  1. Eat Eggs for Breakfast

Eggs should be a staple of your daily eating plan, and research shows that the best way to get the most out of eggs is to start your day off with them.

A study found that obese subjects lost more weight and had a higher reduction in waist circumference when they ate a breakfast of two eggs instead of bagels, even though each group’s breakfast contained the same amount of calories.

Why? Eggs are rich in protein (one egg contains about six grams of protein) and other valuable nutrients, helping you feel full longer.

  1. Have Barley for Breakfast

If you don’t like eggs for breakfast, then another healthy choice is barley.

Barley is one of the best foods you can eat.

According to Swedish researchers, having barley for breakfast can help you keep your blood sugar levels under control. Barley scores low on the GI index, meaning it raises your blood sugar level more slowly than high carbs foods like bagels and donuts.

As a rule, buy minimally processed hull barley, and avoid processed forms such as pearl barley.

  1. Watch the Salad Dressing

Salads should be a big part of your eating plan. They’re one of the best ways to ensure you’re eating enough veggies.

But, if you don’t keep an eye on the goodies you put into your salad, they can end up more calorie-laden than pizza or bagel.

Many salad dressings are chock-full of preservatives, trans fats and artificial flavor, which can spell disaster for an otherwise healthy and green dish.

For more flavor, opt for low-calorie, healthier alternatives.  Try avocado oil, refined olive oil, homemade Paleo mayonnaise, a squeeze of lemon juice, tomato juice, macadamia, balsamic vinegar or even some homemade salsa.

  1. Eat Light at Night

By eating lightly during the late evening, you’ll not only prevent weight gain, you’ll also sleep much better and have a better appetite for a healthy breakfast in the morning.

Here’s how to make it happen:

Aim to consume at least three-quarters of your calories before dinner, then make sure to leave at least a gap of two to three hours between your last meal of the day and bedtime. This will help give your body enough time to digest your food before you sleep.

If you feel super famished just before going to bed, then opt for a small serving of protein such as a piece of cheese or a hard-boiled egg.

  1. Eat More Slowly

It takes roughly 20 minutes for leptin, the body’s satiety hormone, to kick in. Once it does, your brain gets the signal of “fullness” from your stomach. In other words, your brain doesn’t register when your stomach is full right away.

As a result, give yourself at least 20 minutes to eat, and then wait after you’re done. If 20 minutes go by and you’re still hungry, go back and have a healthy snack. To help you eat slowly try using a set of chopsticks, or eat your meal with your less dominant hand.

  1. Chew Your Food

Eating your meals more slowly and mindfully can drastically help you decrease the amount of calories you consume during a meal, according to a study published in the American Journal of Clinical Nutrition.

Chewing and eating your food slowly helps you feel full faster, and it’s when you feel full that you should stop eating.

Next time you sit down to a meal, make sure to take your time to chew your food rather than gulping it down as fast as you can.

  1. Sit Down to Eat

If you’re in the habit of eating on the go, you may be heading in the wrong direction.

Research published in the Journal of Academy of Nutrition and Dietetics found that taking a seat at the table while eating can help you eat at a slower pace, and the slower you eat, the better.

As a rule, eat your food while sitting down, preferably from a plate.

  1. Mind your Portion Sizes

According to a study, subjects who practiced portion control for two years lost 5 percent more weight than those who didn’t.

Here’s more good news. Portion control is not rocket science. To master it, you simply need to learn how to measure portion size correctly. Doing so will help you know for sure the amount of calories you’re taking in and how they’re affecting your weight loss efforts.

Here’s a simple infographic to help you understand portion sizes.

  1. Use Smaller Plates

A simple change from a 12-inch plate to a 10-inch plate can cut your food consumption by up to 20 percent, according to the Cornell and Brand Lab’s Small Plate Movement.

Make sure to serve yourself on a smaller plate that’s roughly the size of your grandmother’s china instead of one of the larger, more modern ones.

Photo courtesy of SkinnyRules.com

serving size

  1. Change Your Plate Color

According to a study conducted at Cornell University, you can cut your serving size by 20 percent when opting for a contrasting plate color instead of for a plate whose colors blend in with your meal’s color.

Next time you sit down to a meal, make sure that your food color and plate color are different from one another. Many experts recommend using blue plates, but at the very least make sure your plate doesn’t match the color of your meal.

  1. Turn Off the TV

According to a study from the University of Massachusetts, eating in front of the TV leads to consuming more than 300 extra calories. That’s because if you’re busy watching TV, you’re more likely to be so distracted that you devour an entire plate quickly without thinking about whether you’re satiated or not.

Create a distraction-free eating environment. Turn off the TV, put away your phone, shut down Facebook and enjoy your meal.

  1. Find a Healthy Meal You Love and Eat it Over and Over Again

Come up with a list of low-calorie foods that you love and which satisfy your daily energy needs, then mix and match them, so you’re eating the same meals over and over again.

By planning your healthy meals this way, you’ll be less likely to make unhealthy last-minute food choices. This method will also help you spend less time fretting about the foods you need to eat.

  1. Never Shop Hungry

According to a study conducted at Cornell University, eating something healthy before going to the grocery store makes shoppers less prone to buy junk food.

How come this trick works is no mystery. Shopping while feeling full strengthens your willpower and makes you immune to junk food temptations.

As a rule, never go shopping when you’re hungry. Instead, eat a filling meal, some produce or a healthy snack before you hit the grocery aisle.

  1. Read the Labels

Not only will learning this skill give you a better idea of the number of calories you’re consuming, but it will also help you be more aware of food’s nutritional value. Take the time to read the labels, making sure you know how to interpret what you read.

Here is an infographic to provide you with a quick and easy guide.

Photo courtesy of UC Davis and Gkplace.com

  1. Make a Weekly Grocery List

To make sure you’re putting the right kind of foods in your shopping cart, write a detailed and thorough grocery list. Doing so not only help you get in and out of the store as quickly as possible, but it can also help you decrease impulse purchases and stick to your healthy eating plan.

Use this simple list to stock your kitchen up with healthy food all week (or month) long.

Here’s an infographic to help.

Infographic courtesy of Greatist.

food list for weight loss

  1. Banish Emotional Eating

If you’re more likely to eat when you’re feeling depressed, anxious or lonely, you might be prone to emotional eating. According to research, emotional eating is one of the leading causes of bad food choices.

Emotional eating can compromise your weight loss efforts, especially since the food we crave at those times tend to be sweet, high-calorie, and fatty.

Reevaluate your relationship with the food you eat and learn how to differentiate between real hunger (physical hunger) and fake hunger (head hunger).

  1. Say No to the Bread Basket

Research has found a direct link between regular consumption of white bread and being prone to weight gain.

White bread is bad for you for a slew of reasons. It adds a lot of empty calories to your meals, and it doesn’t keep you feeling full.

Bread is also high in carbs. Eating it in bulk will prevent stored body fat from being used as fuel, hindering your fat-burning process.

The real bad news is that white bread is a staple in most pantries.

So what should you do here?

It’s simple: Replace your white bread with whole grain or whole wheat bread whenever you can.

  1. Banish Junk Food

To set yourself up for total weight loss success, declare your house a junk-food-free zone.

If you have no unhealthy food laying around, you’ll be more likely to stick to your healthy eating plan. In other words, practice the mantra “out of sight, out of mind.”

Purge your kitchen of as cookies, cakes, pies, candy, sugary drinks, biscuits, crisp pretzels pastries, and other sugar-filled, highly processed junk foods.

  1. Stock Up on Healthy Foods

Instead of letting junk food into your home, fill your kitchen cupboards with healthier foods and snacks so when hunger pangs strike, you’ll reach for something that’s good for you.

Here are a few food items you should stock up on:

  • Fruits
  • Unsweetened or unsalted popcorn
  • Baby carrots
  • Nuts and seeds
  • Hard-boiled eggs
  1. Stop Drinking Soda

Research has linked soda to a host of health troubles, including obesity, diabetes, and a plethora of other troubles. And if you believe diet soda is a good alternative, you’re WRONG.

Diet soda is just as bad as regular soda. A study conducted by the University of Texas Health Science Center showed that subjects who drank two cans of diet soda are more likely to gain weight compared to those who didn’t drink the stuff. That’s right – they gained weight instead of losing it.

Don’t drink your calories. Doing so is even worse than eating junk food. Have water instead of soda, and you’ll be thinner and far healthier for it. Here’s  How to measure body fat percentage

  1. Reduce Your Alcohol Intake

A study published in Current Obesity Reports found that alcohol intake increases the risk of weight gain, especially for heavy drinkers.

And according to a UK survey, drinking alcohol weakens willpower and inhibits healthy eating decisions, making you more likely to indulge in high-fat high-calorie foods such as pizza, burgers, and chips.

If alcohol is your diet downfall, then you need to cut it out, or at least, have control over your drinking.

woman trying to lose weight

  1. Drink More Water

Your body uses water to metabolize fat stores, and relies on it for every other process as well.

Water has no calories at all and can help you feel full, making it less likely that you’ll fill yourself up with more food.

Instead of drinking juices and soft drinks, I urge you to start drinking more water.

Shoot for at least 10 to 12 cups of water per day. Drink plenty of water before your workouts, during your workouts, and immediately afterward too.

Make sure your body is well hydrated throughout the day. You’ll feel fitter and healthier when you do so, and dampen any penchant for gorging at the same time.

  1. Drink Water Before a Meal

Chugging a glass of water before a meal will help regulate your appetite, as the water will take up room in your stomach.

Research shows you can lose up to 30 percent more weight simply by having two cups of water before each meal.

Another study from the University of Birmingham in the U.K. found that drinking roughly 16 ounces of H2O 30 minutes before a meal promotes weight loss, without making any other dietary changes.

  1. Drink Green Tea

I believe that green tea is the healthiest drink on the planet, right after water.

Why?

This remarkable beverage is rich in antioxidants, fights cancer and contains brain-healthy compounds and a host of other health-promoting and vital nutrients.

Not only that, according to a study published in the Journal of Nurse Practitioners, green tea can help you reduce your appetite and increase your metabolism, both of which are essential for weight loss.

Add green tea to your diet plan. Stick to two to three cups a day and opt for brewing your own instead of choosing bottled versions to avoid added calories and artificial chemicals and sweeteners.

Remember, adding sugar and cream to your tea will wipe out any weight loss benefits, so get used to drinking your tea with no sweeteners or adornment.

  1. Snack Smart

Dumb snacking— and especially snacking on high-sugar, highly processed foods with little or no nutritional value — can compromise your weight loss goals.

Smart snacking between meals can tame hunger and control appetite, helping you prevent overeating and keep you from making bad food choices when meal time rolls around.

If you snack often, do it the smart way. Healthy ideas include hard-boiled eggs, apples, or a handful of nuts, seeds or dried fruits.

  1. Don’t be a Perfectionist

Practice the 90/10 rule. What’s that?

As a rule of thumb, 90 percent of your diet should focus on healthy food (vegetables, lean protein, and healthy fats) while the remaining 10 percent can be devoted to “cheat meals.”

By adhering to this simple rule, you’ll indulge your sweet tooth and satisfy your cravings without throwing your whole intake out of balance.

Cheat meals are vital for a healthy diet, as long as you are doing them right.

Feel free to cheat every now and then. That’s how you’ll stay sane for the long haul.  Just keep it to one meal, not every meal throughout the entire day.

Exercise Tips

  1. Start Slowly

Whether you’re thinking about starting a running program, hitting the weight room, hiring a personal trainer, or joining a CrossFit class, starting slow is the way to go.

Once you decide on a workout program, start slow and stay within your fitness level at all times.

If you’re a beginner with little exercise experience, start with two to three workouts per week that last at least 30 minutes per session. As you get fitter, you can slowly and gradually ramp it up until you reach your challenge point.

  1. Start Running

Running is one of the best exercises you can do to lose weight and get fit for good. This sport is convenient and sheds mad calories. All you need is a pair of good running shoes, and you’re ready to go.

This whole blog is about running and the many ways you can incorporate it into your life, so why wait?

Here are the resources you need to get started without risking injury or burnout.

  1. Lift Weights

Weightlifting is an INTEGRAL part of any weight loss program. If you’re skipping the strength room, you’re missing out.

Strength training builds muscles, and the more muscles you have, the higher your resting metabolic rate will be. This means you’ll burn more calories, even when you’re not working out. Isn’t that a good thing?

Add at least two strength workouts to your training program.

For the highest calorie burn, train your entire body in each workout. Focus on total-body exercises that challenge the large muscle groups, like pushups, squats, deadlifts, planks, lunges, and pull-ups.

Additional link – Slow running vs fast running for weight loss

  1. Go Swimming

Swimming is a great low-impact option that burns mad calories without putting a lot of pressure on your body.

A 160-pound person can burn up to 520 calories by swimming laps for an hour. The exact number of calories burned depends on a wide range of factors, including weight, age, fitness level, and training intensity.

Swimming uses all of the body’s muscles, so with each kick, push, and stroke you’re performing a mini strength workout for your entire body, especially your glutes, core, hips, arms, and shoulders.

  1. Do Yoga Two Times Per Week

Yoga is another low-impact exercise that can help you melt fat without breaking a sweat. According to research, overweight subjects who rolled out their yoga mat at least once a week for four years lost more weight than those who didn’t take the time to practice.

Yoga can also help you become more flexible, reduces stress and promotes a general sense of health and well-being. I could go and on about its benefits.

Add at least a couple of yoga sessions into your training program, either by following a yoga DVD program or enrolling in a class — make sure to do it with good form. You’re always better off doing yoga with the guidance of a certified professional. Once you nail the form, you can practice it in the comfort of your home.

Additional resource – Guide to running terms

  1. Shoot for 10,000+ Steps Every Day

According to research conducted at Arizona State University, people leading an active lifestyle typically take over 10,000 steps per day.

This is very helpful if you can’t afford going to a gym, or if you’re looking for more ways to be active that don’t involve intense exercise.

10,000 steps a day might seem like too much walking, but it’s not. There are always opportunities to squeeze in more walks during everyday situations.

You’ve got plenty of options.  Meet up with a friend and walk around the neighborhood or park. Go to a museum. Take a walk during your lunch break. If it’s possible, walk to work instead of taking a car or public transportation.

To make sure you’re on the right path, use a pedometer or fitness tracker to keep tabs on your daily steps.

Additional resource – How to reduce sugar intake

  1. Challenge Yourself

Real growth happens when you step outside of your comfort zone. If you stick to the same exercise routine—whether it’s weightlifting, running, swimming, or anything else —you’ll invite boredom and training plateaus.

On the other hand, constant challenges lead to improvement.

I encourage you to challenge yourself to lift more weight, to run farther in the same amount of time, to make even the tiniest and smallest improvement. It all counts.

  1. HIIT it Hard

High-intensity interval training is, by far, the ideal training method to help you burn calories and improve your fitness level. Countless studies have shown HIIT to be effective for weight loss as well as for improving fitness level. It’s like nothing else.

HIIT is all about mixing high-intensity exercise with low-to-moderate intensity exercises.

I have used it. I have done it. And I love it. I bet you will love it too once you get used to it and learn how to do it right.

Here’s your complete guide to the HIIT method.

  1. Sprint It Out

Sprints are the ultimate form of high-intensity interval training. They’re simple, intense, and scalable, so you can always readjust them to fit your needs and training goals.

During sprint intervals, you alternate between running as fast as possible for a set distance and brief periods of slow jogging for recovery.

Here’s how to proceed with a sprint session.

After a thorough warm-up of 10 minutes, perform eight to ten 30-second, full effort sprints at your maximum speed.

Take one minute of recovery between each sprint, then finish your session with a 5-minute cooldown.

  1. Run Some Hills

Hill reps are the next level of track sprints. They’re one of the best resistance exercises for the lower body, helping build strength and speed in your glutes, hamstrings, quads, and calves.

Hill sprints are also safer on your legs and take less time to perform than sprints.

Here’s how to proceed:

Find a steep hill that takes you 20 to 30 seconds to run to the top. Sprint up it as fast as you can, then slowly jog back down to recover.

Perform enough reps of this exercise for the session to last between 20 and 25 minutes, then end your workout with a 5-minute cooldown jog.

Here are five more hill workouts to try.

  1. Rope Training

Rope training is one of the most under-utilized yet most effective training tools for increasing cardiovascular fitness. It speeds up weight loss and improves muscle endurance.

This training system is a fat burning machine. According to a study published in the Journal of Strength and Conditioning Research, battling the ropes for one minute can burn up to 10.3 calories per minute. That translates to 400 to 500 calories in a 30-minute workout.

Battling ropes exercises target almost every muscle in the body, especially the core, the glutes, lower obliques, and abs.

Here’s a battle rope workout routine to try out.

  1. Use Kettlebells

Kettlebells are cannonball-like weights with a handle. They are one of the best training tools you can add to your workouts if you want to get a leaner, stronger body without spending endless hours in the gym.

According to research conducted at the University of Wisconsin, kettlebell training burns as many calories per minute as running a 6-minute mile, amounting to 400 to 500 calories for a 30-minute workout.

Other research has found that kettlebell training can lessen shoulder, neck and back pain by strengthening upper body and core muscles.

Here’s a simple workout routine to try:

After a thorough 10-minute warm-up, do 12 reps of kettlebell squat thrusts immediately followed by 16 reps of kettlebell swings. Then do 12 kettlebell snatches, rest for one to two minutes, then repeat the whole circuit three to four times.

Here’s another kettlebell workout to try.

  1. Stop Doing Crunches

Crunches, sit-ups, and other traditional ab exercises are a waste of time and energy.

Sit-Ups and crunches can lead to lower back pain and may even cause herniated discs. They’re boring and not that effective, especially when performed using bad form.

Instead, do planks (with all of its variations) or total-body exercises such as deadlifts, squats, or floor wipes.

Additional resource – How to rotate running shoes

  1. Do Tempo Runs on the Treadmill

Also known as lactate threshold (LT) or threshold runs, this is a faster-paced workout that’s vital for improving metabolic fitness and maximizing the number of calories burned on the treadmill.

Here’s how to proceed:

First step: Warm up with five minutes of easy jogging,

Second step: Run a mile at 20 to 30 seconds slower than your half-marathon pace. It’s a pace that feels comfortably easy.

Third step: Pick up the pace every mile by 5 to 10 seconds until you’re running the final mile 20 seconds faster than your half marathon pace.

Fourth step: Finish the workout with a slow five-minute jog and some light stretching.

  1. Hill Treadmill Intervals

The second treadmill workout is a hill interval routine.

Performing indoor hill intervals can help you get more out of your treadmill workout by simulating outside hill running. This is vital for increasing endurance and building killer lower-body strength.

Here’s a hill treadmill workout to try out:

First step: Warm-up.

Second step: Raise the incline to three or five percent, and run for 90-seconds at a pace that’s 15 seconds slower than your 10K pace. The pace should feel mildly challenging.

Third step: Recover by jogging slowly for one full minute with no incline.

Fourth step: Raise the incline to five or seven percent and run for another 90-seconds at 15 seconds slower than your 10K pace. Recover for one minute.

Fifth step: Repeat the fourth step three to six times, depending on your fitness level and goals. You could also opt for a steeper incline.

Sixth step: Cooldown.

  1. Embrace Free Weights

According to a study published in the Journal of Strength and Conditioning Research, exercising with free weights instead of machines leads to greater muscle activation.

With free weights, you can target every muscle group in your body without wasting precious time moving from machine to machine or going back and forth between different pieces of equipment.

Also, free weights can help you achieve better symmetry between both sides of your body by forcing the weak side to work unaided by the dominant side. They’re also convenient, scalable and easy to learn.

I could go on and on about the effectiveness of free weights, but you get the big picture.

  1. Start CrossFit

I love CrossFit, and I believe it’s one of the best workout programs out there for helping you to push yourself and keep improving.

There are nine basic exercises in most CF training routines. These include the deadlift; sumo deadlift high pull; shoulder press; push press; air squat (without the weights); front squat; overhead squat; and medicine ball clean.

As you get stronger, you’ll be doing other exercises such as sprints, pull-ups, burpees, sit-ups, box jumps, rowing, gymnastics ring work, and other exercises.

  1. The Tabata Protocol

Dubbed “the fat burning miracle training routine,” the Tabata protocol is a form of high-intensity training scientifically proven to improve aerobic and anaerobic threshold as well as calorie burn.

Studies show that the typical Tabata workout routine can burn 12 to 15 calories per minute.

Here’s a sample workout:

Perform the following exercises for as many reps as possible in 20 seconds, then rest for 10 seconds before moving to the next exercise and doing it as fast as possible for 20 seconds. Shoot for six to eight total rounds, resting one minute between each round.

  • 20 seconds of squat jumps, 10 seconds of rest
  • 20 seconds of burpees, 10 seconds of rest
  • 20 seconds of jumping lunges, 10 seconds of rest
  • 20 seconds of push-ups, 10 seconds of rest
  • 20 seconds of kettlebell swings, 10 seconds of rest

Here’s another Tabata workout routine to try.

  1. Medicine Ball Training

Medicine balls are powerful and can be a great addition to your training arsenal.

What I love about medicine ball exercises is that they’re some of the best and most challenging core exercises you can ever do, building both muscular power and endurance while pushing your cardiovascular system to its breaking point.

Here’s a medicine ball workout to try.

  • Squat to chest pass
  • Suitcase crunch
  • Diagonal chop
  • Russian twist
  • Lunge to rotation

Here’s another medicine ball workout to try.

  1. Add Short Cardio After Each Weight Workout

Engaging in intense exercise after 45 minutes-to-an-hour of weight training guarantees that the activity right after will immediately use up fat as the primary source of energy.

In other words, the window right after your weight workout session is prime fat-burning time. Make the most of it!

Here are three workout finishers to try:

Workout Finisher One

Do three rounds of:

  • Plate push for 30 seconds
  • Kettlebell swings, 15 reps
  • Med-ball thrusters, 15 reps

Workout Finisher Two

Do three sets of:

  • Lunge jumps, 20 reps
  • Burpee, 15 reps
  • Jump rope for one full minute

Workout Finisher Three

300-yard shuttle sprints.

Place two cones or water bottles roughly 25 yards apart, then run as fast as you can back and forth between the cones eight to ten times. Aim to touch the cones each time.

women on treadmill trying to lose weight

  1. Try a Group Fitness Class

If you’re more of an extrovert and enjoy the company of others, consider joining a group fitness class.

These classes are a great way to stay on track, up the ante with your workouts, and meet active and like-minded people. As an added benefit, peer pressure can do wonders for your weight loss journey.

The good news is that there are a wide range of classes available, and you’re sure to find something that fits your budget, fitness level, and training goals.

Different classes offer different exercises and workout routines geared around building strength, endurance, and flexibility.

Try CrossFit, join an MMA class, try a spinning class, or enroll in a boot camp class.  Just find a class you like and attend it consistently.

  1. Try an Outdoor Activity

Working out outdoors not only helps you lose weight, it also provides a lot of health benefits.

Studies show that exercising outdoors boosts vitality, self-esteem, and enthusiasm and lowers levels of the stress hormone cortisol. Braving the outdoors can help you reduce tension, fatigue, and depression.

Here’s a list of outdoor activities and sports that will put your gym workouts to shame:

  • Biking
  • Kayaking
  • Stand-up paddleboarding
  • Skating
  • Frisbee
  • Surfing
  • Rowing
  • Bouldering
  • Hiking
  • Trekking
  • Beach volleyball
  • Rock climbing
  • Badminton
  1. Follow a Workout Plan

If you have a good plan, or even a mediocre plan, you’re more likely to lose weight and achieve your fitness goals than those who don’t have a plan at all.

The best workout plans involve working out three to four times per week, depending on your current fitness level and training goals.

Start your workouts with a proper warm-up, do the workout, then finish with a cool-down and a few stretches.

Never been to a gym? Ask a trainer for some advice, or hire them if you have a budget. It’s important that you start off on the right foot and build up the right way. If you’re unsure where to start or want to find a qualified personal trainer in your area, you can compare personal trainers near you using a comprehensive directory. A directory allows you to compare trainers based on their qualifications, experience, and client reviews, helping you make an informed decision about hiring a trainer that’s right for you.

  1. Start a Workout Journal

In addition to regular fitness tests, one of the best ways I know of measuring your fitness progress (or lack thereof) is keeping track of your training routines and cycles in a workout journal.

I’d go so far as to say that keeping a workout journal is as important as training itself, especially if you’re serious about reaching your full potential.

Get yourself a workout diary and keep tabs of all your activities: training sessions, workout routines, daily miles, weights used, reps performed, number of sets, energy levels, performance numbers, and everything else.

  1. Schedule Your Workout

To ensure training consistency, schedule your workouts the same way you schedule your important work meetings or family events.

By giving your training routine the same level of importance that you give your school deadlines, work meetings, and unpaid taxes, you’ll increase your odds of following through and staying consistent with it—especially if you lead a hectic life.

Spend at least 10 minutes every Sunday night planning your workouts for the week, the same way you would with other obligations.

Choose at least two workouts and schedule them the way you would an appointment that you don’t want to miss. These will be the most important workouts of the week, and should preferably include a total-body strength workout and an intense cardio session.

Jot down the exact time you are going to exercise on your daily calendar, then treat your workouts like an unbreakable commitment.

  1. Exercise First Thing in the Morning

Research shows that people who work out first thing in the morning are more likely to stay consistent with their training programs than those who skip morning workouts.

When you exercise first thing in the morning, you’re done – you don’t have to worry about doing it later in the day. You also get the mental boost of knowing that you’ve accomplished what you need to do for the day while the rest of the world is still asleep.

Exercising in the morning is a great way to help you wake up, boost your energy levels and increase your brainpower and productivity for the rest of the day.

Go to bed 60 to 90 minutes earlier than usual so that you have enough time and have rested enough for a workout first thing in the morning.

  1. Pair Up with a Training Buddy

According to research conducted at the University Of Pennsylvania School Of Medicine, working out with a partner speeds up weight loss results.

The more you rub shoulders with people who support your goals and your vision, the more likely you are to succeed.

Chances are you be more consistent with your workouts when you have a training buddy to motivate you who will hold you accountable for your action.

Whether you’re trying to get into better shape or just want to shed a few extra pounds, be sure to schedule your workouts (or at least some of them) with a workout partner.

  1. Hire a Personal Trainer

If you’re looking to get the most out of every hour you spend working out, hire a personal trainer. They can help you learn proper form, hold you accountable to your goals, devise a smart workout strategy, overcome physical and emotional obstacles, and teach you how to safely adjust your workouts so you can keep on getting real results without hurting yourself.

Once you find a trainer you like, ask them to take you through a fitness assessment to identify your weaknesses and muscular imbalances.  Doing this will help them come up with a well-rounded workout routine that fits your current fitness needs and future goals.

  1. Do What You Love

In my opinion, the best exercise program in the world is the activity you already love doing.

When you choose to do an exercise you love, you’ll have more fun doing it and be more likely to keep doing it over the long haul, so if you like running, then run.

If you like swimming, then swim.

If you like skating, then skate.

If you like boxing, then box.

If you prefer lifting weights, then pump it hard.

If you like them all, then alternate between them as often as you like, for at least 30 to 40 minutes a day.

Do whatever you want. You’re the boss. You’re in charge.

The list of possible workout options available to you is long and varied; you have to find something you love doing.

  1. Practice Proper Recovery

Spending endless hours working out eventually leads to diminishing returns. If your current workout routine doesn’t allow for proper rest, you’re flirting with disaster.

Inadequate recovery hinders your ability to train, and might set the stage for injury, burnout, and serious trouble. Becoming a workout addict will only get you in trouble, so you need to make sure to build good recovery habits.

For starters, space out your hard workouts, especially interval and intense strength sessions, with at least two days of rest. Take as many recovery days as you need, especially when experiencing symptoms of overtraining such as elevated heart rate or chronic soreness and fatigue.

Sleep is also essential for proper recovery.  Aim for at least eight hours of high quality and uninterrupted sleep per night. You can also plan for a recovery week by decreasing your training volume 50 to 60 percent for every four to five weeks of training.

Motivation Tips

  1. Manufacture Motivation

Motivation is of paramount importance, and maybe the most important thing on this list. On your weight loss journey, you’ll need lots of inspiration to help keep your inner fires burning.

What are some ways to keep motivation going strong?

You’ve got plenty of options. Read real-life success stories. Read fitness blogs and magazines and books. Use the reward system and the buddy system. Take before and after pictures. Set weight loss goals and make them public, Use mantras and motivational quotes.

Just be open and try them all.

Here’s a lit of my favorite fitness quotes.

  1. Set S.M.A.R.T Goals

This is a good checklist to consider when you’re about to set goals for yourself.

S.M.A.R.T. stands for Specific, Measurable, Achievable, Results-focused and Time-bound. SMART goals are the right way to go about setting weight loss goals.

Setting smart goals can be the difference between success and failure. They will help keep you focused and motivated.

Here’s what you need to do. Come up with one weight loss goal and one performance goal, and keep these two goals somewhere visible, so you’re reminded of them every day.

For example, your goals might be “Lose 15 pounds in three months” and “Run three times per week for the next three months.”

Over the long term, the best weight loss goal is to lose one to two pounds a week. That may not seem like much, but if you keep doing it consistently, it adds up.

Do it for a month, and you’d shed 4 to 8 pounds.

Do it for three months, and you’d shed 12 to 20 pounds.

You get the picture. It might not be as fast as you’d like it to be, but slow and steady is what will help you win the flab race.

If you’re looking for more tips on how to set fitness goals, check this post.

  1. Go Public With Your Goals

Research shows that if you make your goals public, you’ll be more likely to stick with your healthy lifestyle plan. It keeps you accountable for your behavior and your habits.

Your social circle can encourage you and push you to do your best and never give up.

I encourage you to make your weight loss goals public and commit to giving regular updates to your family members, friends or social circle every week or month.

Also share them on Facebook, Twitter, and other social media platforms.

  1. Enlist Your Friends and Family For Support

The weight loss journey is not a smooth ride, so you’re going to need all the support you can get.

A strong support system can be the difference between success and failure. A study revealed that people who had the support of their social circle lost more weight than those who didn’t.

Let your family and friends keep you motivated and hold you accountable for your actions, making sure you never deviate from your weight loss journey.

At the same time, you need to banish negative people from your life.  They’ll only bring you down and hamper your progress. You’re better off restricting yourself to spending time with people who believe in you and support your goals.

  1. Get Your Partner on Board

When you go on a weight loss journey, your entire life has to change to make the changes you need. If you’re married or live with a partner, your decision will affect them too, so they need to be on board and provide their support.

Your partner’s heartfelt support can make the difference between reverting back to old, damaging ways and accomplishing the fitness goals you’ve set for yourself.

Where appropriate, consider starting a weight loss journey together: it’s a great way to keep each other on track.

One way or another, start preparing healthier dishes together. Eat at home more. Keep each other accountable. Go running together. Join a gym class. Build a home gym.

  1. Use Online Support Networks

A study conducted by Britain’s Medical Research Council (MRC) found that people who joined a weight loss support group lost more weight than those who hadn’t.

A support group can help you talk through your troubles, provide you with practical solutions to your problems, and most importantly remind you that you’re not alone. Look for these online message boards, join one, then open up and talk about your struggles and victories.

Here’s a list of websites to check out:

Spark People

Diet.com

FitLink

Peer Trainer

Weight Loss Buddy

Weight Loss Wars

  1. Weigh Yourself Once a Week

Keeping track of your weight is a good strategy, but obsessing over it is counterproductive. Your weight isn’t everything, and it doesn’t tell your whole story.

Stepping on the scale every day can have a negative impact on you. Your weight will fluctuate from day to day, and if you weight yourself daily, you’ll find yourself in a constant battle of ups and downs.

Most experts recommend that you weigh yourself once a week under the same conditions—preferably at the same time and on the same weekday. The best time is in the morning, shortly after finishing your morning ritual and just before you’ve eaten.

man losing weight

  1. Take Progress Pictures

As I’ve already said, the scale only tells one side of the story. To get a full picture of your progress, you need to start taking pictures of your fitness and weight loss journey on a weekly basis.

Taking before and after pictures is not only perfect for keeping track of your progress, the “before” pictures can also be a huge wake-up call and provide the exact motivation kick you need to make your weight loss vision a concrete reality.

Here’s a short video to show you how to take your progress pictures the right way:

  1. Track Other Body Stats

Weekly weigh-ins and photo shoots are often enough, but if you want a clearer picture of your weight loss journey, start tracking some other important body stats.

Here are the main ones to take and write down:

  • Weekly measurements of your hips, chest, waist, upper arms, thighs
  • Body fat percentage should be checked on a monthly basis using a body fat caliper

Additionally, use fewer objective measures of your progress. Ask another person — preferably a trusted friend or family member —for honest feedback, and check how your clothes fit. Are they looser than before?

  1. Reward Yourself

Rewarding yourself for progress can help reinforce your new habits and provide you with the motivation you need to continue with your journey, so after reaching a performance or weight loss goal, treat yourself to something nice.

Some of the best things you can do to reward yourself include shopping for smaller sized clothes, going to the movies, taking a surfing lesson, taking a vacation to your dream destination, spending a weekend at the spa, reading a book, binge-watching your favorite show, or just sleeping in. It doesn’t matter whether it’s expensive or free, far-flung or in your home, as long as it is something that gives you pleasure and is not about food.

  1. Sign Up for a Race

To keep yourself exercising regularly, consider signing up for a 5K race. This is a perfect distance for beginner runners who are looking to build cardio power and fitness the right way.

You can find plenty of 5K races in your city or cities near you by checking websites like Runners World or Running in the USA for local races and dates.

After signing up for a 5K race, find a training program to help get you ready and fit enough to cross the finish line.

As a general guideline, most 5K training plans last 8 to 12 weeks, so you signing up for one will give you a plan within a reasonable amount of time to get you in shape.

Lifestyle and Mindset Tips

  1. Take Responsibility for Unhealthy Habits

You’re the one in charge.

You choose the script by which you live your life, and you’re the king or queen of your actions. No one is responsible for them but you.

Bad habits or not, they’re yours. You’re the one responsible for changing it. No one else.

You’ve built your habits through repetition, and through repetition, you can break them too.

Take conscious responsibility for your everyday actions—the good, the bad, and the ugly.

Doing so is empowering because it lets you realize that you’re the master of your destiny.

  1. Get Enough Sleep

Lack of sleep will not only make your life miserable, it’ll also make your waistline bigger.

Research study after research study has revealed that sleep-deprived individuals are more likely to be overweight and to suffer from a plethora of health troubles.

Sleep deprivation can boost hunger, muscle loss, and unwanted weight gain, so log at least 8 hours of high quality, uninterrupted slumber each night.

  1. Relax

According to research, stress is a primary cause of weight gain, while relaxation and calm can facilitate healthy weight loss.

When we’re stressed, we seek comfort and emotional release in food, usually by reaching for high-calorie, unhealthy foods.

Stress also increases the release of the hormone cortisol, known as a key culprit behind stubborn belly fat.

To tame stress, try meditating, taking long walks in nature, talking out your problems with a friend, getting enough sleep, getting rid of friction in your life, doing yoga, look into anti-stress supplements or therapy.

The bottom line is don’t ignore your stress. As long as you’re dealing with your it in a positive and constructive manner, you’re in the right place.

  1. Try Meditation

Sitting blissfully on a cushion for endless hours does not burn a lot of calories, but research shows that mindfulness—one of the many benefits brought about by meditation—is key for weight loss and overall health and well-being levels.

Studies show that people who practice meditation on a regular basis are less likely to give in to emotional eating or unhealthy bingeing.

Meditation practice can also help lower high blood pressure levels and helps to manage stress, one of the primary causes of overeating and making bad food choices.

So what you are waiting for? The science backing up meditation is IRREFUTABLE.

Start with short meditation sessions lasting no more than 10 minutes. Sit comfortably, close your eyes, and focus on your breathing. Whenever your mind wanders—and it will have the tendency to do so— bring it back and keep focusing on each exhalation and inhalation.

  1. Brush Your Teeth More Often

If you brush and floss your teeth right after dinner, you’ll find yourself less likely to crave snacks or sweet desserts late at night. This sets you up right for avoiding late night snacking.

It also helps keep your gums healthy and your teeth clean.

Additionally, if you follow this train of thought and brush your teeth after every meal, it will make you less likely to snack between meals.

  1. Check Your Hormones With a Blood Panel

By learning more about your hormonal situation, you give yourself a better idea of the nutritional and lifestyle changes you need to speed up your weight loss and increase your energy and health.

A blood panel can help you assess your levels of the stress hormone cortisol, whether your adrenals are insufficient, whether you’re low in vitamin D3, or whether your cholesterol and blood sugar levels are within the normal healthy range.

  1. Embrace the Cold

Spending time in relatively chilly temperatures can help you burn more calories, even if you’re just sitting around doing nothing. This may sound crazy, but research backs it up.

According to a study published in the journal Trends in Endocrinology and Metabolism, cooler temperatures can increase calorie burn by up to 30 percent, while another study published in the Journal of Clinical Investigations found that people who spend a couple of hours a day in mild cold—approximately 63 degrees F—for a period of six weeks burned more energy than those who spent the same amount of time in warmer temperatures.

Next time you’re thinking about skipping an outdoor workout because it’s too cold, remember that the cold is your weight loss friend.

  1. Handle Social Festivities the Right Way

Studies show that most people gain two to ten pounds during the winter months, and one of the main reasons for this weight gain is the eating festivities during the holidays.

The best thing you can do to counter this effect is to eat before you go to a party. It will help curb your hunger and take the edge off your appetite.

If you want to go all out, you can also bring your healthy foods to make sure you have an alternative to the high calorie, fat-laden dishes your host or hostess is serving.

  1. Watch Your Weekends

It’s totally doable to stick with a healthy diet and exercise plan during the week, but once the freedom of the weekend arrives, a lot of people take a break from their weight-loss resolution. This is a mistake.  Doing so will only set you back and undo all your efforts from the week before.

You need to be conscientious when you’re attending that happy hour after work on Friday, the restaurant dinner on Saturday, and the home-cooked meal on Sunday. Otherwise, your weekends will turn into diet landmines that undo each week’s worth of healthy dieting and exercise.

Eating poorly and skipping workouts from Friday to Sunday add up to a whopping 12 days off a month. Not a good idea.

  1. Be Patient

Patience is a virtue. It helps you reduce stress, control cravings, set the right goals, and most importantly it will keep you consistent, especially when all the odds are stacked against you.

Patience allows you to see beyond the current (unpleasant) moment to a future in which you’ve already achieved what you’re after.

Said in a different way, the more patient you are, the more likely you are to succeed.

Take the time you need to learn about what type of exercise works best for you, as well as about the various foods that offer the best nutrition.

  1. Take Action

“Nothing happens until something moves.”—Albert Einstein.

Every minute you’re sitting around thinking about losing weight, surfing the net for magical diets, or checking Facebook, you’re not doing what’s needed to achieve your weight loss goals.

Regardless of how much you want to do to change your life or lead a healthier lifestyle, nothing will happen until you actually DO something. You can talk about starting a workout program and developing healthier eating habits as much as you want, but nothing will change until you start taking action.

This means you need to get moving NOW.

Here’s what you need to do: make a list of the lifestyle changes you want to see happen, then give yourself time to make each one a part of your life.

  1. Practice Kaizen

The philosophy of Kaizen is all about going after small, continuous improvement. It builds up over time — over weeks, months and years of regular practice.

This approach is the best way to banish short-term and silver bullet thinking.

Achieving a healthy lifestyle is a marathon rather than a sprint. Slow, and steady will win the race.

Embrace the philosophy of small, continuous improvement and aim to get 1 percent better each day. Begin every morning by asking yourself what the one thing is that you can do today to improve your fitness and health? Start super small and go about achieving it.

There are hundreds of these little things, and if you keep adding one a day, they will quickly build up.

  1. After you Lose the Weight, Stick to Your New Lifestyle

Research shows that most people gain back most of the weight they lose less than two years after losing it. This is atrocious.

Losing weight is hard enough. Gaining it back sucks.

Once you reach your target weight, keep in mind that you’ve only won half of the battle. You need to do your best not to revert to your old ways.

I hate to sound like a broken record, but the real secret to reaching your ideal weight and staying at that weight for life is to make a lifelong commitment to the all the diet, lifestyle and exercise habits listed above.

The moment you go back to your old ways is the moment when the pounds start creeping back.

If you’re serious about losing weight and never gaining it back again, you need to understand that your weight and health consciousness doesn’t ever stop.

All of it. The healthy eating. The sleeping. The running. It doesn’t stop.

You need to keep things going, prevent slip-ups and come up with creative ways to spice up your workouts and cope with whatever life throws at you.

  1. Remember: It’s all About Creating a Calorie Deficit

Weight loss is all about creating a calorie deficit.

At this point you surely know that weight loss is a numbers game. Nothing more and nothing less.

If you eat more calories than you burn, you’ll gain weight.

If you burn more calories than you eat, you’ll lose weight.

A healthy weight loss goal is to aim for a 500 calorie deficit per day, and the best way to accomplish that goal is to do a mix of healthy eating and smart exercise.

That’s it. Weight loss, in its basic form, is a numbers game

  1. Find What Works Best For You

Please keep in mind that the subject of weight loss—whether it’s diet, exercise or lifestyle-related—is one of the most controversial topics out there. Most of the tips and strategies I’m sharing with you are based on my own experience and research.

There are some contradictory tips—for instance, intermittent fasting versus eating breakfast—but there are some great ones here too.

What’s important to remember is that nothing is written in stone. Take all the tips with a grain of salt and remember that everyone is different and responds differently to different diet and exercise methods. Just because a weight loss tactic works for someone else, doesn’t necessarily mean that it will work for you.

Feel free to experiment to find what works the best for you.

Bonus Tip: Never Give up

This is where the rubber meets the road when it comes to losing weight and keeping if off for good.

Weight loss resolutions fail because people give up way too often and way too early in their journey.

Whatever you do, please don’t give up.

Don’t give up.

Don’t ever give up.

You’re going to have bad days, weeks, maybe even bac months. But don’t give up.

Shit happens. It’s part of life.

If you fail one day, the next day is a new start. Get up and go after it again.  Change your approach, find a way to do things differently to make it work for you.

Please, please, please don’t let your past mistakes or past failures define who you are. You are much more than your past.

Welcome failure and let it shape your approach and course of action.

Conclusion

Boy, that was a long post! If you’ve made it this far, I applaud you for your commitment. You’re the best.

You rock for taking the time to invest in yourself.

Now go take action on what you’ve just learned, and thank you for reading my post.

Feel free to leave your questions and comments below.

David D.

Please share this post on Pinterest, Facebook, Twitter, Reddit, StumbleUpon, and other social media websites. Help me spread the word.

Featured Image Credit – Byong Wook via Flickr

6 Dynamic Warm-up Exercises For Runners

dynamic warm up exercises

Wondering how to start your run right with a solid warm-up? Let me share what works for me

As a running coach, I can’t tell you how many times I’ve seen runners skip warming up, only to end up tight, sore, or even sidelined with injuries.

I used to be one of those runners—lacing up, heading straight out the door, and hoping for the best.

It took me a few scares and even a minor hamstring strain to finally realize how crucial it is to warm up right before I hit the road

Let me walk you through how to warm up properly for your runs and workouts.

What is A Dynamic Warm-up?

Dynamic warm-ups mean you’re stretching with movement, getting your muscles ready to roll.

Unlike static stretching (which involves holding a stretch for 20-30 seconds), a dynamic warm-up is about movement. You’re essentially “warming up” your muscles and joints by taking them through the full range of motion you’ll use while running.

A good warm-up has two simple phases that cover all you need to feel ready:

  1. General Warm-Up. This phase is all about waking up your muscles and getting the blood moving. The idea is to wake up your muscles, get your heart rate up, and increase circulation to your legs, core, and upper body. You can start with light activity, such as brisk walking, jogging, or running in place. Think of this as the prep work that primes your body for the more intense exercises.
  2. Specific Warm-Up. This phase focuses on movements that mimic the biomechanics of running. You’ll target the specific muscles you’ll be using during your run, like your quads, hamstrings, glutes, and calves. This is where dynamic stretches come in. These exercises wake up your nervous system, fire up your muscles, and ensure everything moves smoothly when you start running.

A running buddy introduced me to dynamic warm-ups, and it was a total game-changer. At first, I thought it was a bit of overkill—I mean, who has time for all these exercises before every run?

But after doing them consistently for a few weeks, I noticed a huge difference. I felt looser and more energized at the start of my runs, but I also found that my body felt more prepared for those tough hill workouts or speed intervals.

One of the moves that made a difference for me was butt kicks. It sounds simple, but kicking your heels up towards your glutes gets your legs ready for the motion of running.

I remember feeling silly doing them in the park the first few times, but now they’re a regular part of my pre-run routine.

Benefits Of Dynamic Running Warm-ups

First, let’s get this straight: warming up isn’t just something “extra” you do before a workout. It’s an essential part of the workout itself.

Here’s why:

  1. Prevents Injury. Keeping injuries at bay is the best part of warming up right; cold muscles are just begging for trouble. Warming up increases blood flow to your muscles, making them more flexible and reducing the risk of injury. Once I started doing regular warm-ups, I noticed fewer aches and less tightness, especially in my hamstrings and calves.
  2. Improves Performance. Warming up prepares your body for action, which means you’ll run more efficiently and with better form. When properly warmed up, your muscles contract and relax more easily, which helps you run faster and longer. It’s not just about avoiding injury—warming up can make your run easier and more enjoyable.
  3. Gets Your Heart Rate Up. A proper warm-up increases your heart rate gradually, preparing your cardiovascular system for the work ahead. If you’ve ever started a run feeling sluggish or like your legs won’t move, it might be because you didn’t warm up properly. When you ease into your workout, you’re allowing your body to adjust and perform at its best.

How To Warm Up Before Running

Here’s a warm-up routine I recommend to my running friends. These exercises target the major muscle groups used in running, increase your heart rate, and improve flexibility and mobility.

Let’s break it down.

A good dynamic warm-up usually takes about 10 to 15 minutes. This includes 5 minutes of light aerobic activity (walking or jogging) followed by 5 to 10 minutes of dynamic exercises. If you’re doing a more intense workout, like sprints or hill repeats, you might need a longer warm-up of up to 15 minutes to activate everything properly.

For easier runs, like a recovery day, you can shorten your warm-up slightly, but I still recommend spending at least 5 minutes doing dynamic movements. Even on easy days, I always warm up to ensure I’m not starting with tight muscles.

I also recommend the Myrtle Routine for warm-up.

Toy Soldier Kicks

Toy Soldiers are great for warming up your hamstrings, glutes, and core. They also improve flexibility in the backs of your legs, which is crucial for runners, especially if you tend to get tight hamstrings (like I do!).

It also helps improve coordination, which is key for maintaining good form during your run.

How to do it:

  • Stand tall with your arms extended out in front of you.
  • Step forward with your right leg, keep your knee straight, and kick your leg towards your hand.
  • Try to kick as high as possible while keeping your core tight and back straight.
  • Alternate legs and repeat for 10 to 12 kicks on each side.

Side Step/Shuffle

This move is a lateral movement, which we don’t do often in running but is important for overall balance and injury prevention.

Side shuffles are great for activating your glutes and improving lateral stability. This is important for runners because it strengthens the muscles around your hips, which helps with balance and can prevent injuries like IT band syndrome.

How to do it:

  • Stand with your feet hip-width apart.
  • Step to the side, performing quick side shuffles for 10 to 15 meters.
  • Land on your right foot and pause, then shuffle back to the left.
  • Repeat for 2 to 3 sets.

Side-to-side Leg Swings

Leg swings are one of my favorite dynamic stretches because they loosen up the hips, essential for a smooth running stride. Tight hips are a common problem for runners, especially if you sit for long periods during the day.

How to do it:

  • Stand next to a wall or sturdy surface for support.
  • Swing your right leg from side to side across your body keeps your core engaged and the movement controlled.
  • Do 10 to 12 swings on each leg.

Lateral Lunge

Lateral lunges strengthen the glutes, quads, and adductors while improving mobility in the hips and knees. This is crucial for runners who must maintain balance and control throughout their stride. I find lateral lunges help me feel more stable during my runs, especially on uneven terrain.

How to do it:

  • Start in a standing position with feet hip-width apart.
  • Step to the side with your right foot, bending your right knee and pushing your hips back to lower into a lunge.
  • Keep your left leg straight and your back flat.
  • Push off with your right foot to return to the starting position, then switch sides.
  • Make 12 lunges on each leg.

Walking Lunges

Walking lunges are one of the best dynamic exercises for runners because they engage your entire lower body and core. This move targets your quads, hamstrings, glutes, and hip flexors. It also helps improve your range of motion, which is important for runners who need fluid movement through their entire stride.

How to do it:

  • Step forward with your right foot into a deep lunge, lowering your left knee toward the ground.
  • Push off with your left foot and step forward into the next lunge with your left leg.
  • Repeat for 10 to 12 lunges on each leg.

Butt Kicks

Butt kicks may look funny, but they do wonders for firing up those hamstrings and refining your running form.

How to do it:

  • Jog in place while bringing your heels up to kick your butt.
  • Keep your knees low and focus on quick, light steps.
  • Do this for 30 seconds to 1 minute.

Conclusion

If you’re new to warming up, I’d recommend starting with simple moves like walking lunges or side leg swings. It doesn’t take long—just 10 minutes before your run can make a huge difference.

Over time, you can add more dynamic exercises and tailor your routine based on how your body feels that day. For example, if I feel tight in my hips, I’ll spend more time on hip mobility exercises.

What Are Your Go-To Warm-Up Moves?

Do you have a favorite stretch, dynamic exercise, or sequence that gets you ready to run? Maybe there’s a routine that’s helped you avoid injuries or feel more energized.

Share your favorite moves, tips, and any advice you have for warming up effectively.