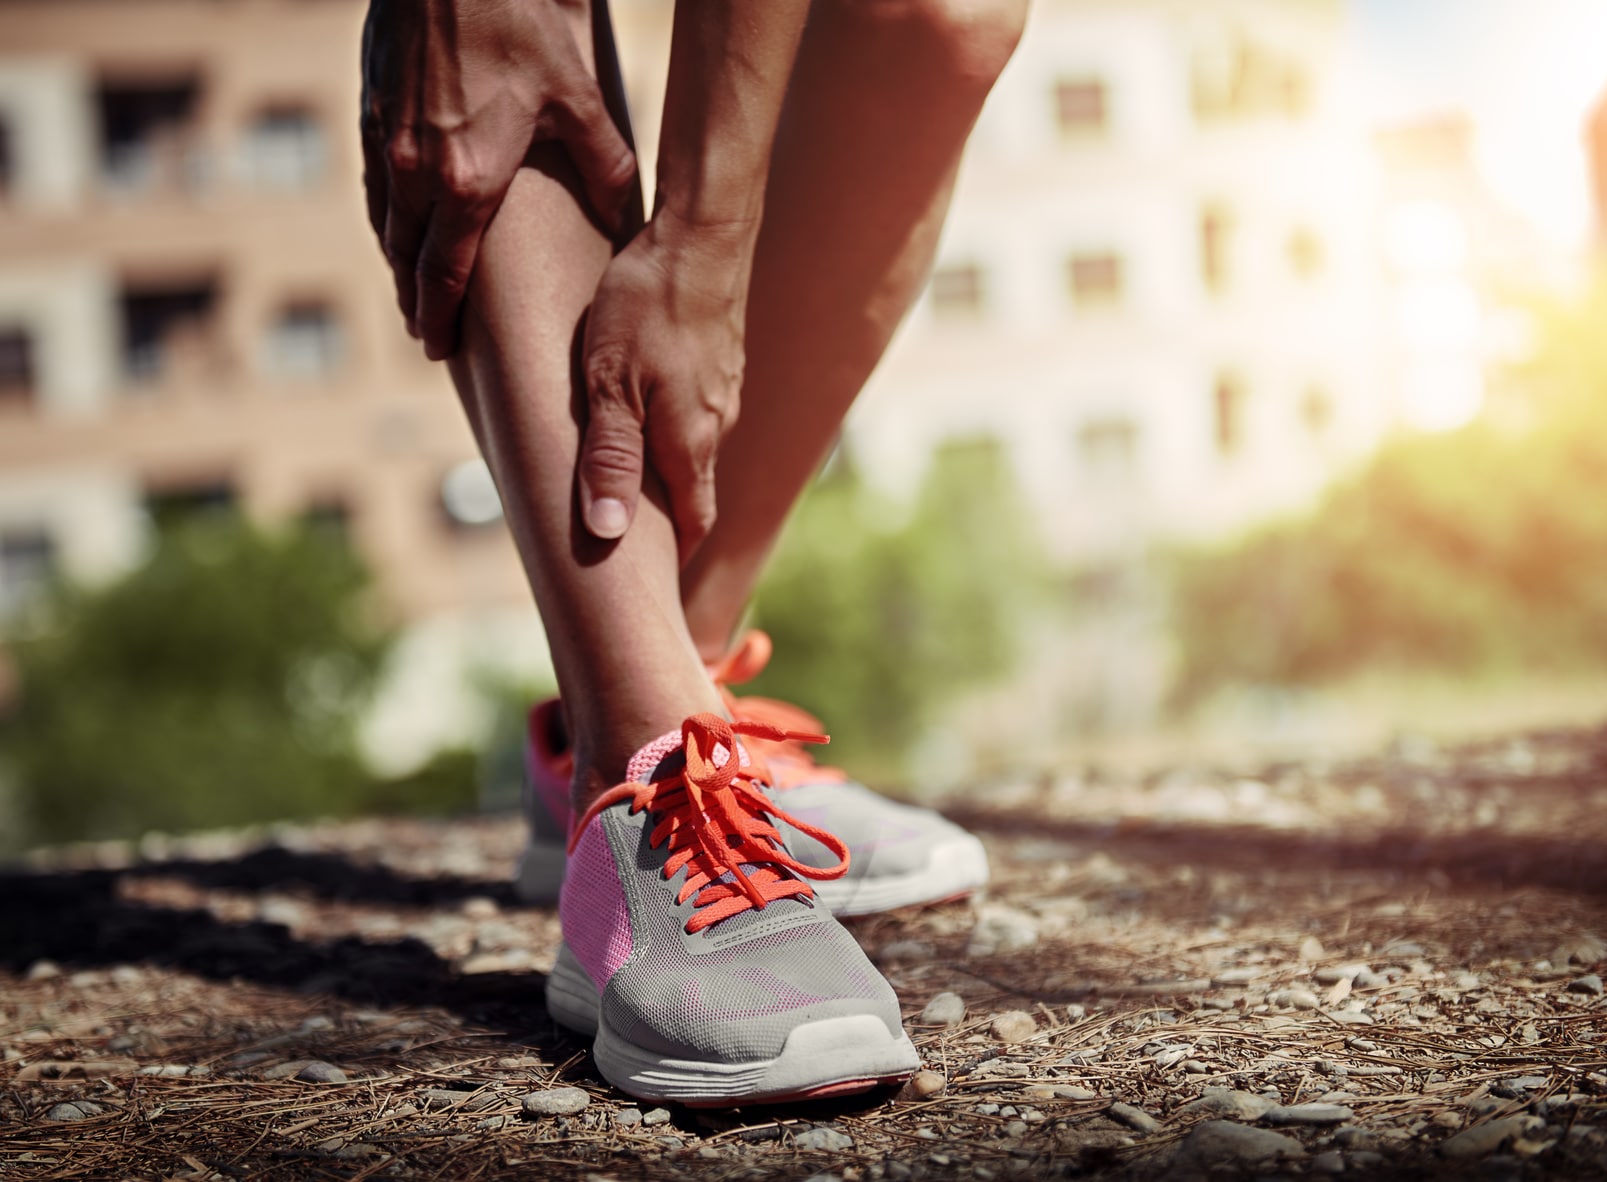
Shin splints suck. No sugarcoating it.
If you’ve ever felt that sharp, nagging pain lighting up the front of your lower leg mid-run—or worse, when you’re just sitting at your desk afterward—you know how fast it can wreck your training plans.
But here’s the deal: shin splints aren’t some rite of passage. They’re a giant flashing warning sign from your body saying, “Back off and fix something.”
The good news? You can absolutely avoid them. And I’m going to show you how, step by step—no fluff, just what works.
What Are Shin Splints (Really)?
Medically, it’s called medial tibial stress syndrome, but let’s keep it simple: shin splints happen when the tissue and bone along your shinbone take more pounding than they can handle. Think of it as an overuse injury caused by poor loading and too much too soon.
It starts small—maybe a bit of soreness during a run. Then the next day, your shins feel stiff getting out of bed. Then suddenly, you’re hobbling, skipping workouts, Googling “stress fracture symptoms,” and cursing your shoes.
Know the Warning Signs
Let me break it down like I would to a client on day one:
- Pain along the inner shinbone – Especially halfway down, on the inside edge. If it hurts to press, that’s a red flag.
- Soreness that lingers – It might start during a run and stick around after. Or hit you the next morning like a hangover in your legs.
- Tenderness to touch – Press your finger along your lower shin. If it feels like pressing a bruise? That’s your body yelling at you.
- Swelling or bumpy feel – Sometimes the inflammation causes slight swelling or little ridges you can feel along the bone.
- It creeps into daily life – If it hurts while you’re sitting at your desk or walking around the kitchen? It’s gone from “watch it” to “fix it.”
One runner told me her shin started nagging mid-run, but she kept pushing, thinking it was just part of getting stronger. That soreness turned into full-on pain during walks, and eventually, she couldn’t even jog across the street without limping. She ended up missing her goal race and taking over 3 months off. The biggest regret? Not backing off sooner.
Bottom line: Shin splints are not a badge of honor. They’re your body’s version of a “check engine” light. Ignore it, and you might end up parked for months.
Step One: Start Slow – Like, Slower Than You Think
You want to avoid shin splints? Don’t be a hero in week one. One of the fastest ways to land yourself in shin pain city is ramping up your mileage like a rocket.
The 10% Rule (Yes, It’s Still a Thing)
It’s not perfect science, but it’s a solid rule of thumb:
Don’t increase your weekly mileage by more than 10% per week.
Ran 10 miles this week? Keep next week to around 11. That’s it. No double-digit spikes because you “felt great.” That’s where people go wrong.
Now, I know some folks online will tell you the 10% rule is outdated—and sure, it’s not a hard law. But what it is… is smart. It forces you to build gradually. Whether you’re increasing by 5%, 8%, or 12%, the keyword here is gradual.
Your bones and tendons adapt way slower than your lungs or cardio. Just because you can breathe through a 5-mile run doesn’t mean your lower legs are ready for it.
Coach’s Confession:
Back when I first got serious about running, I made this mistake. Got cocky, doubled my weekly mileage, and felt great… until I didn’t. A week later, it felt like someone was jabbing a pencil into my shin every time I stepped. No joke—I limped through life for weeks.
Now I tell every runner I coach: respect the build. Your future self will thank you.
Don’t Be Afraid to Walk – It’s Still Training
Let’s be real: runners can be stubborn. We treat walking like failure. But here’s the truth—walk breaks are smart, especially when you’re just getting started or coming back from an injury.
Using the walk-run method isn’t backing down—it’s leveling up without breaking yourself.
Walk-Run Works (And Here’s Why)
Mixing walking into your runs lets you spend more time on your feet without hammering your legs. Think of it as a safe way to build endurance while keeping shin pain at bay.
Try this: alternate 1 minute jogging / 1 minute brisk walking for 20–30 minutes. That’s a solid session—and a lot easier on your body than grinding through nonstop miles.
Legendary coach Jeff Galloway is a big fan of this method. His advice?
“Stay below the threshold of irritation.”
In other words—if running three miles straight leaves your shins screaming, drop to two and mix in some walking. You’ll still build fitness without wrecking your legs.
Most new runners I coach who start this way feel stronger within weeks—and often avoid shin splints altogether.
Don’t Crank Everything Up At Once
Here’s where a lot of runners go sideways—especially the eager ones. They increase distance, speed, and frequency… all at the same time. That’s a triple-decker injury sandwich.
Instead, follow the golden rule:
Only increase one thing at a time.
Adding an extra day of running this week? Keep it slow and easy.
Starting to throw in some speed workouts? Cool—but don’t bump up your weekly mileage at the same time.
Adding hill repeats? Then everything else stays mellow.
Your shins (and knees and hips) need time to catch up to your goals. Spread the hard stuff out, and always follow a tough run with either a rest day or an easy jog. Back-to-back beatdowns are a fast track to injury.
Pay Attention When Pain Starts Whispering
Almost every injury starts as a whisper—a little twinge, some dull soreness. If you ignore it? That whisper turns into a scream.
Notice shin pain creeping in? Hit pause. Don’t try to “run through it.” That’s how a little issue turns into a 3-week forced rest.
Maybe you ramped up mileage too fast or hit the track before your legs were ready. Whatever it is, take 3–5 days off, do some cross-training (swim, bike, elliptical), and let the fire die down. Then restart with a slower build.
One runner I worked with admitted she went hard on a trail run the first week of her half-marathon plan. Her shins flared up during the cooldown. Smart move: she switched to pool running and cycling for a few weeks, backed off the hills, and restarted with a gentle walk-run plan. No shame in that—it’s called being smart.
Lesson? Back off early, bounce back faster.
Strengthen Those Shins or Pay the Price
If you want bulletproof lower legs, you’ve got to lift. Not just for quads or glutes—you need to train your calves, ankles, and shin muscles too.
Think of it this way: every step you take sends impact up your legs. If your muscles are strong, they soak up the shock. If they’re weak? That load lands straight on your bones.
Why Shin Strength Matters
Most runners have overpowered calves and weak tibialis anterior muscles (the thin ones along the front of your shins). That’s an imbalance that pulls on your shinbone every time you run, setting you up for pain.
Fix it by doing:
- Toe raises (heel on the ground, lift your toes)
- Heel walks (walk on your heels for 30–60 seconds)
- Resistance band foot pulls (to strengthen the shin)
- Calf raises too, but balance them out with shin work
And don’t forget the little guys—your foot and ankle muscles. Strong feet = better stability = less overload on your shins.
Strengthen the Whole Chain — Not Just the Shins
If you’re only focused on your shins, you’re missing the bigger picture.
Shin splints don’t show up because just one muscle failed — they show up because the whole lower leg team isn’t pulling its weight. Think of your calves, shins, feet, hips… they’re all part of the same squad. If one member slacks off, the others take the hit — and your shins usually pay the price.
Key Muscle Groups You Gotta Train
Let’s break it down runner-style. These are the muscle groups that keep your legs strong and your shins out of trouble:
- Calves (gastrocnemius + soleus): These power each step and absorb impact. Strong calves take pressure off your shinbone. Weak calves? The shins take the heat.
- Tibialis Anterior (that muscle on the front of your shin): It controls foot drop and helps with shock absorption. If it’s weak and your calves dominate the game, you’re setting up a nasty imbalance.
- Feet & Ankles: Tons of little muscles here that handle balance and stabilize each step. Weak ankles or sloppy foot mechanics? That stress moves up the chain.
- Hips & Glutes (especially the glute med): You might not think “hips” when you hear “shin splints,” but trust me — weak hips throw your stride out of whack. You get internal knee collapse or extra rotation, and all that mess sends the stress downhill to your shins.
You don’t need a gym full of machines. A band, your body weight, and some focus will do just fine.
Shin-Saving Strength Moves
Do these 2–3 times a week. Doesn’t need to be fancy — 10–15 minutes is plenty. I tell my athletes: this is your shin armor. Build it.
1. Calf Raises
Stand tall, feet hip-width apart. Rise up on your toes, hold for a second, then slowly lower down. Do it slow — no bouncing. For a challenge? Try one-leg at a time.
Why it matters: Strong calves handle more load during toe-off, which means less strain yanking on your shinbones.
“I never took calf work seriously until I got sidelined with shin splints. Now? I hit ‘em twice a week. Haven’t had a flare-up since.”
2. Tibialis Anterior Raises (Toe Taps)
Sit or stand. Keep your heels planted and lift your toes up toward your shins — like you’re tapping them. Hold. Lower. Repeat.
Want more fire? Wrap a resistance band around your foot and pull against it. Don’t skip this one — most runners have calves that overpower the shins.
One guy I coached said, “Strengthening my tibs finally fixed my shin splints. Didn’t matter what shoes I wore after that — the problem was muscle imbalance.”
3. Toe Curls + Foot Doming
Throw a towel on the floor. Use your toes to scrunch it up. Then try “doming” — press your toes into the ground while lifting your arch (don’t curl your toes).
Why it matters: Your feet are your foundation. Weak feet = sloppy landings = overloaded shins. Strengthen them.
4. Heel Walks & Toe Walks
Simple but sneaky. Walk on your heels for 20–30 seconds — this torches the tibialis anterior. Then switch to toe walks, staying high on your forefoot. Repeat.
Do this barefoot if possible. Builds foot strength too.
5. Monster Walks (With Resistance Band)
Loop a resistance band around your ankles or thighs. Drop into a half-squat and take slow, side-stepping “monster” steps. Keep tension on the band.
Why it matters: Hits the glutes, hips, and even ankle stabilizers. Keeps your legs tracking straight so your shins don’t get twisted up.
6. Ankle Alphabet
Kick your leg out and “draw” the alphabet with your big toe. All caps. A to Z. Slow and steady.
“I do this every night while watching TV,” one runner told me. “My ankles used to be stiff as bricks — now they’re smooth and loose.”
Strength Is Your Best Defense
Stretching is good. Rolling is great. But strength is what keeps shin splints from coming back. It’s your long-term fix.
Tight muscles tug at your bones. Weak ones dump stress onto the wrong areas. But strong, mobile lower legs? They absorb, adapt, and keep you moving without pain.
Start small. Hit these exercises a few times per week. Ten minutes is all it takes.
Think of it like brushing your teeth — not glamorous, but if you skip it too long, you’ll regret it later.
Stretching Out the Shin Splints
Let’s talk shin splints — every runner’s rite of passage, right? That burning pain on the front of your lower legs that creeps in just when your training’s starting to click. Yeah, I’ve been there too. Good news? One of the simplest tools you’ve got to fight it is… stretching.
Now, I’ll be straight with you — sports scientists still bicker about how much stretching actually prevents injury. But in the real world, runners and coaches alike know that staying loose in the lower legs helps. Tight calves and tight Achilles? That’s a recipe for shin splints. Those stiff tissues yank on your tibia and throw off your form. Stretching can’t magically bulletproof you, but it does give your muscles the space they need to work without pulling things out of whack.
Think of it like this: stretching is TLC for your legs. You’re not just trying to “feel good,” you’re making room for better movement.
What to Stretch to Fight Off Shin Splints
1. Shin Stretch (a.k.a. Standing Tibialis Anterior Stretch)
This one hits the muscle that runs right along your shin — the tibialis anterior. Stand tall, then slide one leg slightly behind you and point that toe down. Bend the knee a little and try to press your shoelaces toward the ground. Feel that pull on the front of your ankle and shin? That’s the sweet spot.
You can also do this kneeling — sit on your heels with your toes pointed back. Instant relief for tight shins.
Runner tip: I do this one after speedwork — when my shins are buzzing. A few deep breaths in this position, and it’s like hitting the reset button.
2. Classic Calf Stretch (Gastrocnemius + Soleus Tag Team)
Tight calves are shin splints’ wingmen. They pull on everything below the knee — including the shin area — especially if your Achilles is tight too.
Lean against a wall, back leg straight, heel down — boom, you’re stretching your upper calf (gastrocnemius). Now bend the knee a little, and the stretch moves lower to hit the soleus.
Do both. Hold each for 30 seconds. Switch sides. Repeat. Feel the difference.
One orthopedic doc told me straight up: “Flexible calves = happier shins.” I took that to heart. My legs thanked me.
3. Toe Alphabet Drill
This one’s sneaky good. Sit down, extend a leg, and start “writing” the alphabet in the air with your big toe. A to Z. Or just A to M on one leg and N to Z on the other if you’re feeling lazy (no judgment).
You’re hitting every little muscle around the ankle and shin — it’s like dynamic stretching and rehab in one.
Bonus: You’ll probably hear a few pops and crackles. That’s tightness leaving the chat.
4. Seated Anterior Tib Stretch
This is another one that zeroes in on that overworked shin muscle. Sit with your legs out. Point your toes forward like a ballerina (yep), then use your hand or a strap to gently pull them even farther down.
You’ll feel the stretch on the front of your shin and ankle. Don’t yank it — just guide it. You can also bend your knees, feet flat, and lean back so your toes point behind you.
Do this when your shins feel “charged” after a hard run. It calms ‘em down.
5. Don’t Forget the Hips and Hammies
Shin splints don’t always start at the shin. Tight hips and hamstrings jack up your stride. That causes compensations — like heel striking or overstriding — and those land hard on your shins.
Simple fixes:
Hamstring Stretch: Lie on your back, use a towel or strap to pull one leg up straight.
Hip Flexor Stretch: Kneeling lunge, sink into the front leg, reach up if you want to intensify it.
Loose hips and hammies = smoother stride = less abuse on the shins.
Fix Your Form (Because Your Shins Are Tired of Getting Beat Up)
Let’s get something straight: if your shins feel like they’ve been through a meat grinder, your running form is probably part of the problem. I’m not saying you’ve gotta look like an Olympic miler, but if you’re overstriding and heel-slamming with every step, you’re basically asking for shin splints.
Good news? You can fix this. And your legs will thank you. Here’s how.
Ditch the Hardcore Heel Slam
First off, heel striking isn’t evil — some runners are just built that way. But if you’re landing way out in front of your body, crashing down on your heel like you’re trying to break the pavement, that’s a problem.
That kind of landing creates a braking force — you’re literally slamming on the brakes with every step. All that shock runs straight up your leg and punches your shins in the face (so to speak). Over time? Boom — shin splints, or worse, stress fractures.
Instead, aim for a midfoot strike — landing closer to the center of your foot, with your foot directly under your hips. This takes advantage of your foot’s natural shock system — your arches and calves absorb more of the hit, and your shins get a breather.
Quick tip: Imagine running on eggshells. If you smash them, you’re doing it wrong. Keep it light and centered.
Not sure what your footstrike looks like? Have a buddy film you from the side or hop on a treadmill with a mirror. If your foot’s way out front and you’re landing on a stiff leg, it’s time for a change.
Shorten That Stride by About 10%
One of the best ways to stop overstriding is simple: take slightly shorter steps. Yeah, I know it sounds weird — like won’t that slow me down? But the truth is, shortening your stride reduces impact on your legs big time.
A study in Medicine & Science in Sports & Exercise found that reducing stride length by just 10% cuts down on tibial stress by 3–6%. That’s huge when you’re logging miles.
Picture this: instead of covering 100 yards in 100 long steps, take 110 slightly quicker ones. Each step hits softer, and your foot lands closer to your body — where it should be. Less reach = less shock.
Want a mental cue? Focus on landing with your foot under your knee, not out in front. That automatically cuts down your stride and keeps you more upright and balanced.
Boost Your Cadence (Your Legs Will Love It)
Cadence = steps per minute. More steps, less force per step. Simple math, big benefit.
If your cadence is super low (like 150s), chances are you’re overstriding and probably heel striking too. Most solid runners hit somewhere around 170–180 steps per minute (total, both feet). That’s about 85–90 per foot.
Why does it matter? Because a higher cadence usually leads to quicker, lighter steps and better landing mechanics. There’s legit science behind this — a 10% increase in cadence moves you toward a midfoot strike and less impact on your bones and joints.
How to check yours:
Count how many times one foot hits the ground in 60 seconds of running.
Double it. That’s your cadence.
If you’re at 156, try nudging it up to 165 over a few weeks. Use a metronome app or a playlist with songs at 175–180 BPM. Match your steps to the beat. It takes practice, but it’s worth it.
Visualize this: hot pavement. You wanna get your feet off the ground fast. Tap-tap-tap, not thud-thud-thud.
Don’t Overcorrect Like a Maniac
Here’s the trap: you get excited and go full midfoot-ninja overnight. Then your calves and Achilles get wrecked.
Take it slow. Make small changes. Start with short midfoot intervals during your run — maybe 20 seconds at a time, then walk, then repeat. Let your muscles and tendons catch up. No need to go from couch to gazelle in one week.
More Form Fixes from the Frontlines
- Run Tall
Posture matters. Keep your head above your shoulders, shoulders over hips. Lean forward slightly from the ankles, not from hunching your back. - Watch the Downhills
Downhill running is brutal on shins if you overstride. Keep those steps quick and short going downhill — resist the urge to let gravity stretch your stride. - Mind Your Foot Placement
Try to land on the outer edge of your foot, then roll in naturally. Overpronation (rolling too hard inward) can torch your medial shins. Good shoes or insoles can help — more on that in the gear section. - Run Quiet
If you sound like a herd of elephants, that’s a problem. Try to run quiet — it forces better form and reduces pounding. Your shins (and your neighbors) will appreciate it.
Run Softer, Hurt Less: Surfaces & Shoes That Save Your Shins
Let me say it straight: where you run matters. A lot.
If you’re pounding your shins into concrete every day, don’t be surprised when they start barking back. Your body’s durable—but it’s not bulletproof. Not without a little help.
Over the years, I’ve learned the hard way (and seen plenty of runners do the same) that your running surface can make or break your training streak—literally. Especially if you’re prone to shin splints or other impact junk.
Hard Ground, Hard Consequences
Think about it: would you rather jump barefoot on concrete or a gym mat?
Exactly. Concrete hits back. Grass forgives.
A study in the Journal of Science and Medicine in Sport found that running on softer ground lowers impact force on your legs. Which means less shock slamming up your tibias every time your foot hits the ground.
Your shins will thank you.
Best Surfaces for Shin Splint Prevention
Let’s talk terrain. Here’s the real-world rundown on where to run when you want your legs to stay happy:
Grass
Parks, athletic fields—anywhere with soft, manicured grass? Gold.
It absorbs impact naturally, which is why a lot of elite runners do recovery runs on grass. It’s not about being fancy—it’s about saving the legs.
Heads-up though: watch for holes or uneven spots. Twist an ankle, and your shins will be the least of your worries.
Dirt Trails
My personal favorite. Packed dirt has that sweet balance—soft enough to cushion, firm enough to stay stable.
Trail running also wakes up your stabilizer muscles—your ankles, hips, glutes. It’s like functional strength work built right into your run.
One runner told me he was fine on asphalt, but one week running on concrete sidewalks during vacation trashed his shins. Switched back to dirt, and boom—pain faded fast.
Track (Synthetic)
That rubberized red stuff? Designed for runners.
It’s got bounce, give, and a smooth surface. Do your intervals or tempo work here when you need to cut the impact but keep the intensity.
Just don’t run 40 laps in the same direction every week. Switch sides or stick to the straights if your track allows.
Treadmill
Surprise, surprise: treadmills are actually shin-friendly.
The belt’s got some shock absorption, and you can tweak incline to reduce overstriding. If it’s icy or brutal outside, don’t feel guilty—logging a few miles on the ‘mill is way better than wrecking your legs on frozen pavement.
Sand (with a caveat)
Loose sand is soft but also brutal. Running in it will toast your calves and Achilles real quick. If you’re gonna go beach running, stick to the firm wet sand near the waterline.
It’s soft but not a death trap for your lower legs.
Surfaces to Be Wary Of
Let’s get real: not all roads are created equal.
- Concrete sidewalks? Brutal. Harder than asphalt. Avoid them if you can.
- Asphalt? A bit better than concrete, but still firm. Use with caution.
- Parking garage concrete or warehouse floors? Just don’t.
If you have to choose between asphalt and sidewalk—go with the road. Safely, of course. Facing traffic, visible clothes, the whole deal.
Don’t Ditch Roads Entirely
If you race on roads, you gotta train on them sometimes. Your legs adapt to the surface. That’s “surface-specificity.”
So mix it up. Say you run 5 days a week? Maybe 2–3 runs on dirt, grass, or treadmill, and the others on road.
It’s like cross-training for your legs. Keeps ‘em strong but not shattered.
A sports med doc said it best:
“Try to stay away from pavement and move towards grass when dealing with shin pain.”
That advice has saved many a runner’s season—including mine.
Shoes Matter—A Lot More Than You Think
Now let’s talk gear. If your shoes are garbage, no surface can save you.
Worn out soles, wrong support, cheap cushioning—all of it adds up to shin pain and frustration. Good shoes don’t need to be flashy. They need to fit your foot and fix your flaws.
Here’s how to get it right:
Know Your Feet
You flat-footed and rolling in hard? That’s overpronation, and it’s a shin splint magnet.
You need a shoe labeled “stability” or “motion control.” These help slow that roll and keep pressure off your inner shins.
High arches and rolling outward? That’s underpronation (supination). Your feet are too stiff to absorb shock well.
You need extra cushioning—neutral shoes that absorb that impact for you.
Get Checked (Seriously)
Go to a legit running store.
Ask for a gait analysis. They’ll watch you run—maybe even on a treadmill—and tell you if you’re neutral, overpronating, or whatever.
Then they’ll hand you a shoe that actually fits your mechanics.
Bonus tip: comfort beats tech. Don’t get wooed by buzzwords. The best shoe is the one that feels right the second you jog around the store.
Orthotics if You Really Need ‘Em
Still struggling even in the right shoes? Time to see a podiatrist.
They might recommend custom orthotics or supportive insoles. Especially if your shin splints keep coming back no matter what surface you run on.
Terrain-Specific = Shin-Saving Smart
You train where you train — your shoes should match the surface.
Road runners? Go with smooth-soled, cushioned shoes built for pavement.
Trail runners? Look for aggressive outsoles, rock plates, and models built to handle twists and slopes. Stability on uneven ground = less strain on your legs.
And let me say this: if you’re prone to shin pain, don’t go minimalist on the roads. That’s like signing your shins up for punishment.
Fun story: I had a runner who swore by the Nike Pegasus — until her knees started flaring up. Gait test showed nothing weird. Switched to Brooks Ghost, same neutral category, and boom — pain gone. Goes to show: even small differences in shoe geometry can shift how your body moves.
So don’t be afraid to experiment with brands. One neutral shoe isn’t the same as another.
Foam Rolling: Hurts So Good (But Actually Helps)
Let’s get one thing straight — foam rolling isn’t supposed to feel like a spa day. It’s going to hurt, especially if you’ve been skipping it or if your calves are tight as piano wire. But trust me: it’s the kind of pain that pays off.
I’ve had runners tell me, “Foam rolling saved my shins,” even while grimacing through the session. That ache you feel? It usually means you’ve found a knotted muscle. Stick with it — over time, the pain eases up as the muscles finally start to let go.
Plenty of runners roll after a run, or even while watching Netflix at night. It doesn’t have to be fancy — just consistent.
Need Something Less Brutal?
If rolling your shins feels like medieval torture, don’t worry — there are easier ways to get the job done:
Tiger Tail or Massage Stick:
These let you control the pressure using your arms. One guy in a shin splints forum swore by his Tiger Tail because a foam roller on his shins was “waaay too painful.” With the stick, he could target those calf knots without seeing stars.
Massage Ball (Tennis or Lacrosse):
Great for pinpoint pressure. Roll out calves or hit trigger points near the shin by leaning into a wall or floor. Just avoid jabbing right into the shin bone.
Pro Massage Therapy:
If you’ve got the budget, a deep tissue massage therapist or sports physio can work magic. They’ll find tight spots you didn’t even know existed — in your calves, hamstrings, even your hips (yep, those can mess with your shins too). Hurts during, feels amazing after.
Why It Works (Even If It’s Uncomfortable)
Loosening tight muscles improves blood flow, helps with recovery, and can even bump up ankle mobility — all of which reduce stress on your shins. Some experts say the biggest benefit is neurological — it teaches your nervous system to let those tight muscles chill out.
Bottom line? It might not fix everything, but regular rolling is often the thing that gets you running pain-free again — or at least lets you keep cross-training while you heal.
Real Runner Proof: It Works If You Work It
One runner on r/running said she was ready to quit running altogether — nothing was helping her shin splints. Then she started rolling pre- and post-run. Boom. Pain started easing up, and over a few weeks, she was back in the game. Another guy chimed in saying his year-long shin splints finally calmed down after adding a massage stick to his daily routine.
Rolling isn’t magic, but it is maintenance. And for many runners, it’s a game-changer.
⚠️ Important: Don’t roll directly on your shin bone. You’re trying to release tight muscle, not beat up your tibia. And if you suspect a stress fracture? Skip the massage and go see a doctor. Don’t mess around with that.
Acupuncture: Weird… But Worth a Shot?
Okay, I get it — sticking needles into your leg sounds wild. But hear me out.
Acupuncture has been around forever, and a growing number of runners are finding it actually helps with stubborn shin splints — especially early on. We’re talking pain relief, reduced inflammation, and better blood flow, all from a few tiny needles.
What the Research Says
One study in the Journal of Chinese Medicine (2002) looked at 40 athletes with shin splints. They split them into three groups:
One got standard treatment (rest, ice, anti-inflammatories)
One got acupuncture
One got a combo of both
Guess which group had the best results? Acupuncture alone — with a 72.5% effectiveness rate. That beat standard care (46.5%) and even the combo group (54.5%).
Athletes who got the needles had less pain, moved better, and used fewer meds. And the benefits kicked in fast — especially when acupuncture was started early.
The method? Tiny needles threaded along the tender edge of the tibia, where muscle meets bone. Basically, the area where shin splints live. It boosts blood flow, triggers the body’s natural painkillers, and wakes up the healing response.
Another source — Pacific College of Oriental Medicine — backed it up, saying acupuncture also boosts microcirculation and sends oxygen and nutrients to damaged areas. In plain English: it helps your body fix itself.
Real Stories from the Trenches
A former gymnast wrote online that she tried everything for her chronic shin splints — rest, orthotics, PT — nothing worked. Then she tried acupuncture. After 12 sessions, pain gone. No issues since.
Another runner said his shin splints calmed down faster with acupuncture than with months of physical therapy. The needles helped calm inflammation and cut the pain — period.
Not everyone’s a believer, and that’s fair. But if you’ve been fighting shin splints and nothing’s worked? It might be worth a shot (or a dozen little ones).
When to Give Acupuncture a Shot
So your shin splints just won’t quit. You’ve rested, iced, foam rolled yourself half to death, and it’s still barking at you every run? You’ve got a race coming up and need that thing to settle down—fast? This might be the time to throw acupuncture into the mix.
No, it’s not voodoo. And it’s not just for yogis and crystal lovers. Plenty of runners—myself included—have been surprised at how effective it can be when done right.
What It Feels Like (And What It Actually Does)
If the idea of needles freaks you out, breathe easy. These aren’t the harpoons from your COVID booster—they’re super thin, and most folks feel just a mild ache or warmth where they go in. Not pain. It’s more like a little hum under the skin.
Key tip: Make sure you go to someone who knows sports injuries. There are acupuncturists who specialize in running-related stuff. They may even hook you up to a gentle electrical current (yeah, sounds weird, but it feels like a pulsing massage) or combine needling with cupping or acupressure.
Usually, you’ll go 1 to 3 times a week for a few weeks. In one study, athletes got needled twice a week for three weeks and reported solid progress—some even felt better after the first couple sessions.
Western vs Eastern Mindset
From the Western angle? Acupuncture might help by cranking up endorphins, taming inflammation, and relaxing tight muscles. From the Traditional Chinese Medicine side? They’d say it moves blocked Qi and blood, helping your body heal.
Either way, same goal: less pain, better healing.
But let me be clear—acupuncture is not magic, and it won’t fix everything on its own. If your shoes are shot, your stride’s jacked, or your glutes are sleeping on the job, you still have to fix those. Think of acupuncture as a boost—a turbo button—to help you get over the hump.
Real Runner, Real Results: The Skeptic Who Got Sold
One distance runner I worked with had been battling posterior shin splints for months. Rest, shoes, stretching—you name it. Nothing was working. He was ready to DNS his goal race. Out of desperation, he gave acupuncture a shot.
His words: “I was willing to try anything.”
Three sessions in, he was running 30 minutes with minimal pain, when before even 5 minutes was rough. After two more weeks of treatment? He was fully back on track.
“It felt like a deep ache going in, then a weird warmth. But afterward, my leg felt looser, like someone had turned the pain dial way down.”
He still did all the right stuff—stretching, swapped shoes—but he credits acupuncture with speeding up the healing process big-time.
The Takeaway?
If you’ve got stubborn shin splints that won’t quit—or you’re short on time before a race—acupuncture’s worth considering. It might not work for everyone, but the combo of science and real-world stories says it helps more than it hurts.
Just make sure to:
- Talk to your doctor or sports therapist first
- Find a licensed pro who knows runners
- Use it alongside solid recovery habits, not instead of them
Sometimes, it’s the thing that finally moves the needle (pun fully intended).
Know When to Bring in the Big Guns
You’ve tried everything, yet your shins still feel like someone’s smacking them with a hammer every run? Time to call in the pros.
This isn’t about being weak or giving up—it’s about getting smarter. A sports doc, PT, or podiatrist can often spot stuff we miss when we’re knee-deep in Dr. Google and YouTube stretches.
Biomechanics: Get Evaluated
A sports-minded physical therapist or podiatrist can break down your whole system—stride, flexibility, strength, posture. You might learn that:
You’re overpronating like crazy and need support (orthotics, stability shoes).
One leg’s a tad longer, or your pelvis is off-center—causing uneven load.
Your hips are weak or imbalanced (super common) and you’re overloading one side.
Your stride looks clean… until mile five when fatigue reveals a hitch on one side.
That’s the stuff only trained eyes catch.
Imaging: If It’s Still Not Adding Up
If things just aren’t improving, a doc might order X-rays or an MRI. Reason? To rule out a stress fracture. Shin splints live on the same spectrum as stress reactions—and if you’ve crossed into “bone crack” territory, running on it can go from bad to dangerous.
Sharp, pinpoint pain that doesn’t fade with rest? That’s your cue to stop and get scanned.
Advanced Recovery Tools Pros Use
Once you’re in good hands, they’ve got some tools you probably don’t have at home:
- Ultrasound therapy: Boosts blood flow, helps tissue heal faster.
- Electrical stimulation (like TENS): Reduces pain, encourages muscle engagement.
- Laser therapy: Sounds fancy, but some PTs swear by it to reduce inflammation.
These treatments take just minutes but can make a real difference when paired with proper rehab.
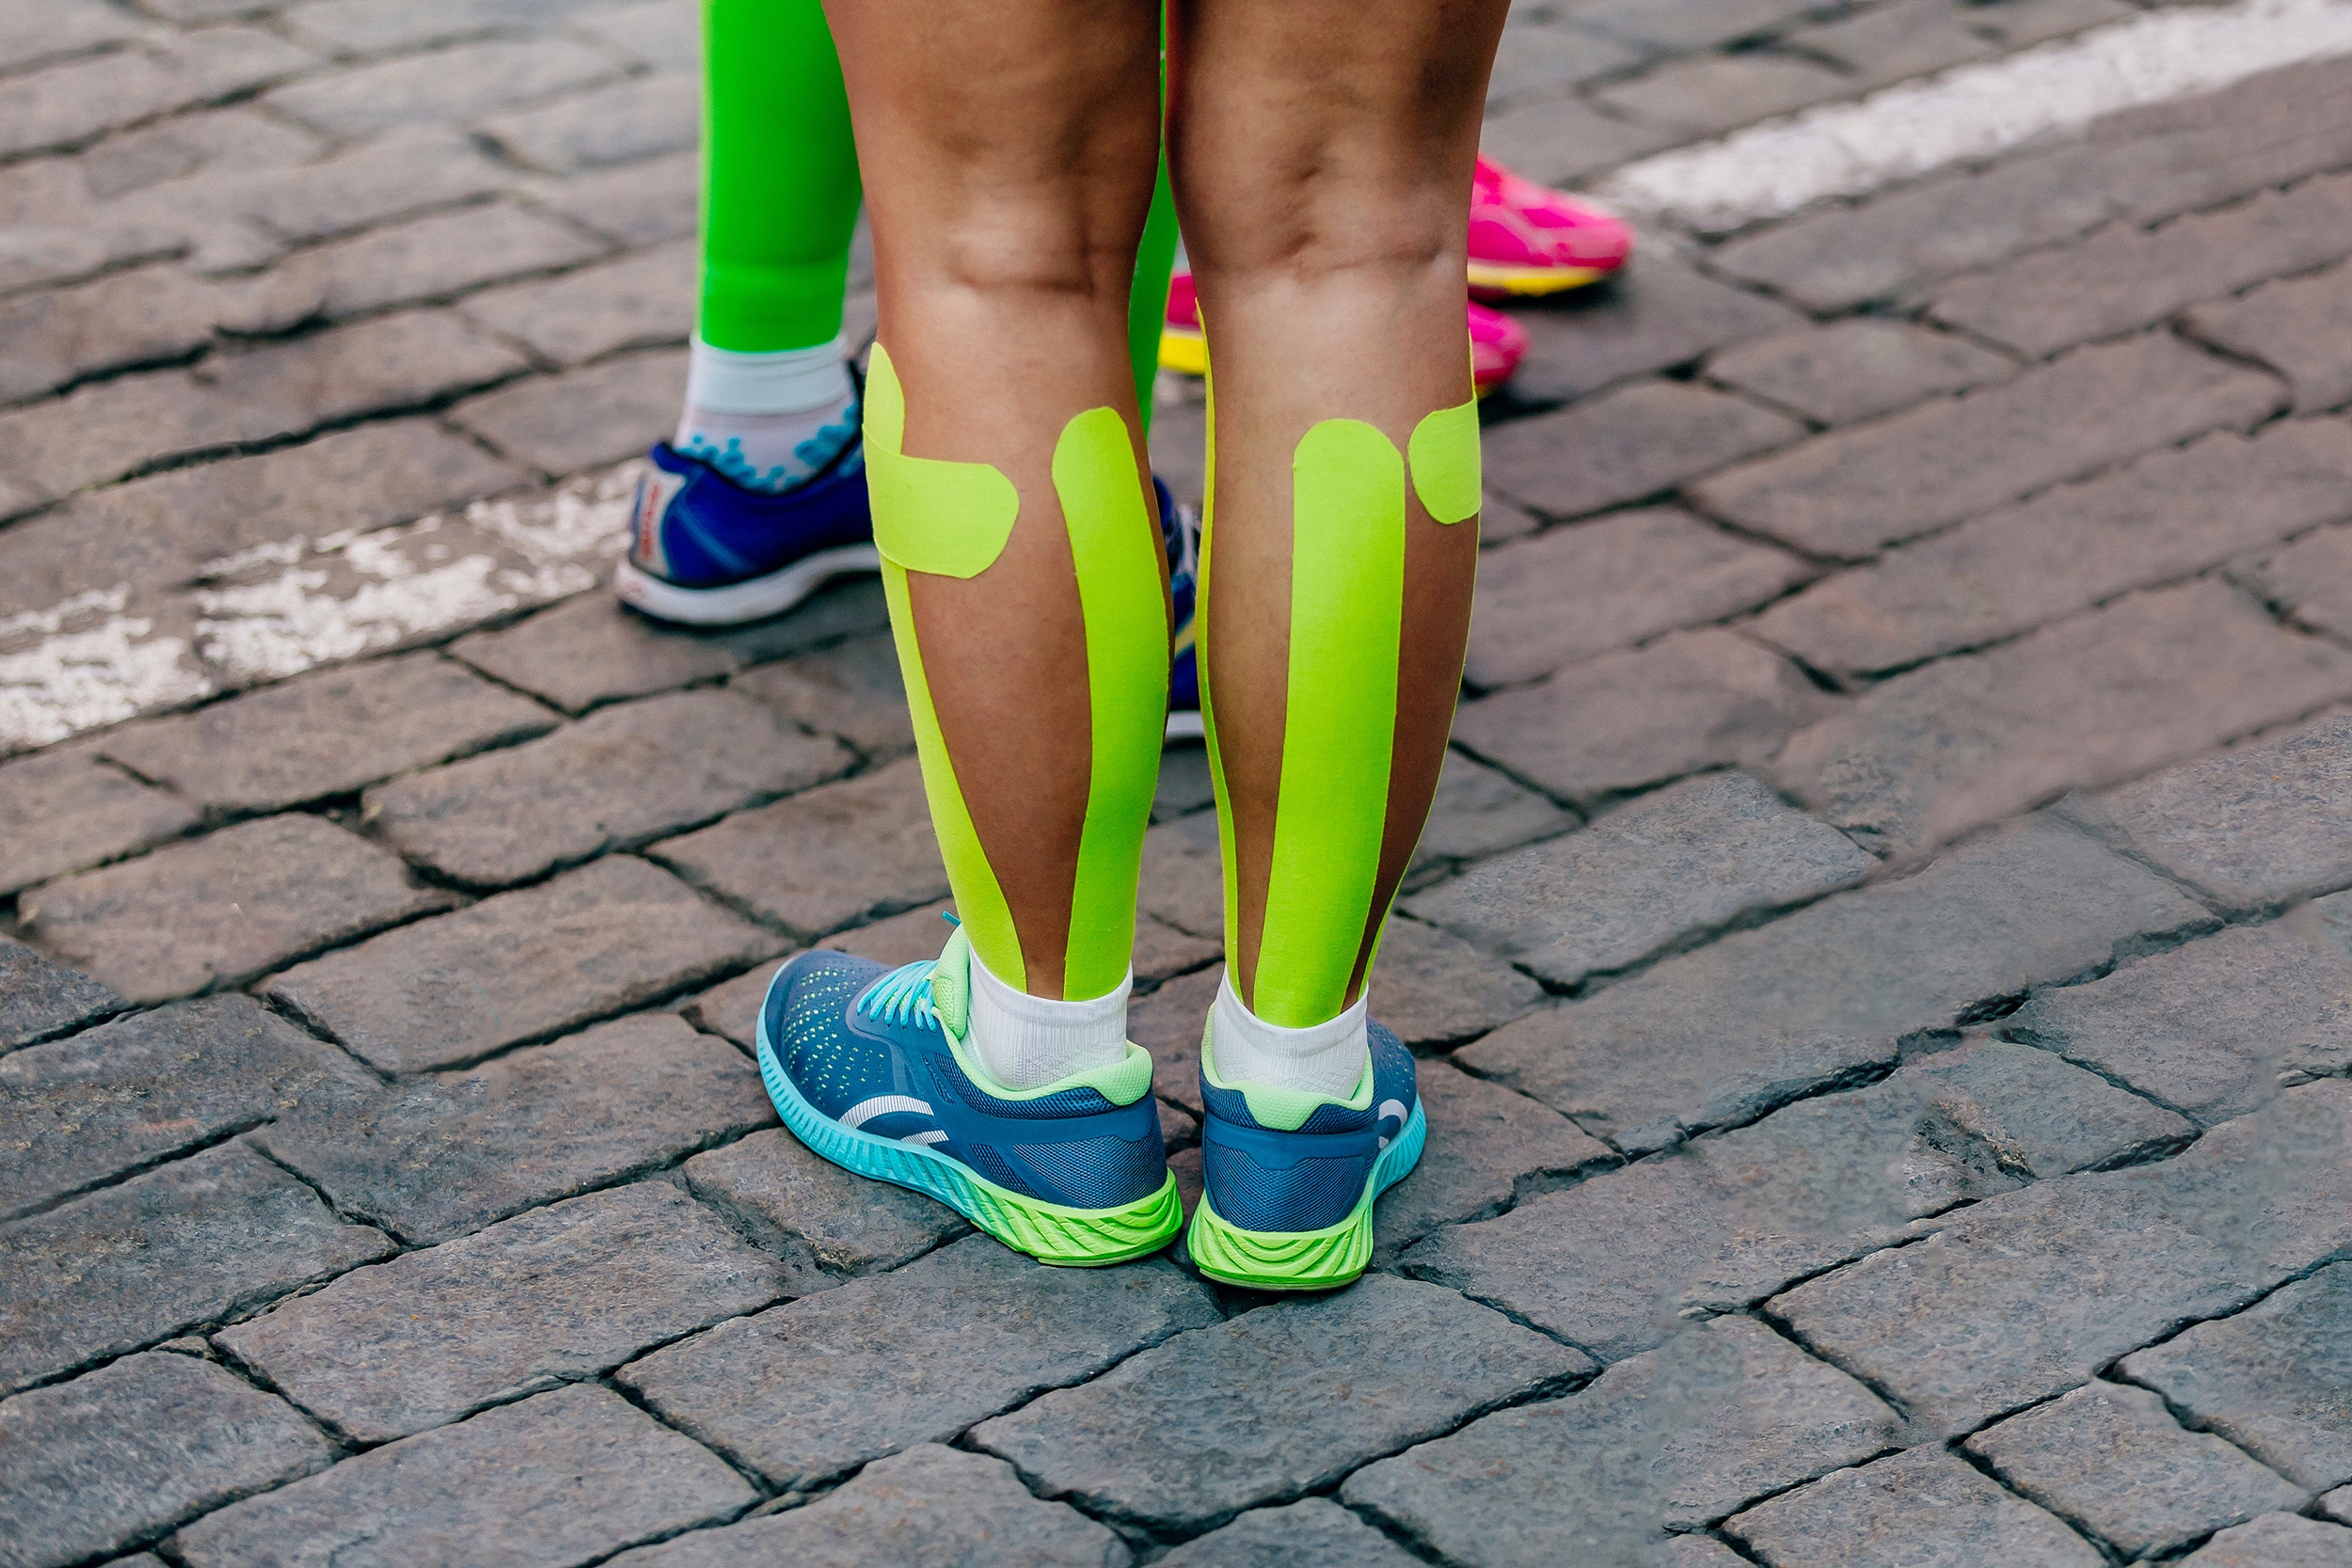
KT Tape & Custom Orthotics
KT Tape: Not a cure, but can reduce pain and make running more manageable. Worn right, it lifts the skin, improves circulation, and gives a light support feel. I’ve seen runners tape up and knock out solid runs pain-free.
Custom Orthotics: If your arches are collapsing or you’re an overpronation mess, an off-the-shelf insole might not cut it. A podiatrist can make you inserts that correct your mechanics like a custom shock absorber. These can be a game-changer if you’re dealing with structural issues.
Gait Retraining & Personalized Strength Work
Gait Retraining: Think of this as “running form rehab.” They’ll tweak your stride, maybe raise your cadence, or fix an overstride—often using video or feedback tools.
Strength/Mobility Plans: Cookie-cutter YouTube workouts won’t always fix your issue. A PT will pinpoint your weakness (maybe one hip’s asleep, or your ankles move like bricks) and build a plan around that.
That’s how you go from bandaid solutions to bulletproof mechanics.
When to Stop Guessing and Go See a Pro
Let’s be honest—runners are stubborn. We push through things we probably shouldn’t, slap some ice on it, and hope it magically fixes itself.
But when it comes to shin pain? Stop winging it.
If it’s getting worse, hasn’t improved after a couple weeks, or it hurts even when you’re just walking or lying in bed—that’s not just regular soreness anymore. That might be a stress fracture, and you don’t want to “tough it out” into a boot or crutches.
If you’ve been playing injury whack-a-mole with shin splints every training cycle? Time to let a pro get eyes on you. There might be something going on with your form, your feet, your mechanics—stuff you just can’t spot on your own.
One runner I know said this after training through shin pain for too long:
“I should’ve seen a podiatrist and PT instead of gutting it out. I made it worse.”
That story ends with him missing an entire race season.
Real Runner, Real Fix
Take this one:
A marathoner had recurring shin pain for months. Finally, she checked into a sports med clinic. The doc (a physiatrist) spotted it right away: flat feet. Her arches were basically MIA, and they were torching her shins.
They got her into custom orthotics, and referred her to PT. That’s when the real work started.
Her calves were crazy tight. Her glutes? Weak. Her hips? Not doing their job.
The PT set her up with eccentric calf stretches, glute activation work, and even some ASTYM (tool-assisted massage) to break up scar tissue in the shins and calves.
Four weeks later? She was running almost pain-free—for the first time in a YEAR.
“I honestly kicked myself for not going sooner,” she said. “The pros figured me out in one visit.”
That’s the kind of “overnight success” that only happens when you finally stop guessing and get help.
It Might Not Even Be Shin Splints
Another runner kept having what she thought were shin splints. Turned out it was something else entirely:
Chronic Exertional Compartment Syndrome. It mimics shin splints, but it’s deeper—and nastier. Only a sports doctor could confirm it with pressure testing, and she eventually needed surgery.
Extreme case, yeah. But a good reminder: if something doesn’t add up, don’t self-diagnose. Go to someone who knows what to look for.
Little Tools That Help (But Aren’t the Whole Fix)
A few runners have found temporary relief with stuff like:
TENS units (those little machines that zap your muscles with pulses)
Taping techniques (which help reduce soreness and boost proprioception)
There’s some research backing that up—taping especially can help reduce pain and improve function for shin splints. If you work with a PT, they might show you how to do it right.
Just remember: these are tools, not solutions. Helpful additions, but not the whole game plan.
Key Takeaway: Strong Runners Ask for Help
There’s zero shame in going to a PT, podiatrist, or sports doc. That’s what they’re there for.
And if you think asking for help makes you weak? You’re dead wrong.
Pushing through until you’re broken—that’s what makes you weak.
As a wise coach once said:
“Most injuries start as whispers—don’t wait until they start screaming.”
If your shins are whispering, listen.
A pro might spot the issue in five minutes—something you never would’ve figured out by yourself, no matter how many YouTube rehab videos you watch.
Final Word: Stay Ahead of the Pain
Shin splints suck—but they’re not inevitable. If you’ve made it this far, you already know what to do:
- Train smart
- Listen to your body
- Strengthen what’s weak
- Stretch what’s tight
- Choose your surfaces wisely
- Wear the right shoes
And if it lingers—get help
Do that, and your shins won’t just survive. They’ll support you for every mile you run.