Custom Orthotics vs Stability Shoes: A Running Coach’s Personal Take

As a coach now, I see this question pop up all the time: orthotics or stability shoes? And yeah, the advice out there is all over the place.

So let’s cut through the noise. In this guide, I’ll walk you through what I’ve learned—both from my own experience and from working with hundreds of runners. I’ll break down what each option actually does, what the science says, and how to know what might work best for your feet.

We’ll also squash some myths along the way (because more support isn’t always better).

By the end, you’ll walk away with a clear, no-fluff answer: are stability shoes enough for you—or is it time to invest in custom orthotics?

Custom Orthotics vs Stability Shoes?

Here’s the quick answer.

Both stability shoes and custom orthotics are designed to fix the same thing—too much inward foot roll (overpronation).

Stability shoes come with built-in features like firmer foam on the inner side to control that roll. They’re great for runners with mild to moderate flat feet.

Custom orthotics, on the other hand, are made specifically for your foot and better suited for more serious or specific issues.

Most runners can start with a well-built stability shoe—it’s easier and cheaper. But if your pain lingers or your pronation is extreme, getting custom orthotics from a pro might be worth it.

Best bet? Get a gait analysis, try both, and see what feels best on your run.

Now let’s dive a little deeper…

Flat Feet, Overpronation & Injury: The Basics

Let’s talk feet.

Flat feet usually mean your arches have dropped—and with that comes overpronation, where your foot rolls too far inward when it lands.

A little roll is normal—it helps absorb shock. But too much? That throws off your alignment. Ankles, knees, hips, lower back… they all get dragged into the mess.

The American Podiatric Medical Association warns that overpronation can lead to everything from arch pain to knee and back issues.

I’ve seen it firsthand with runners dealing with shin splints, runner’s knee, and even stress fractures. A lot of them had flat feet. It’s a common combo.

So if someone told you, “Hey, you need support,” they’re not wrong. You might. Because when your arch collapses over and over, your risk of injury climbs.

Here’s an easy test: check your old running shoes. If the inside edges are worn down way more than the outside, you’re probably overpronating.

Better yet, get a free gait analysis at a running store—they’ll record your stride and slow it down frame by frame. That alone can be a game-changer.

Once you confirm it? You’ve got two ways to fight the roll: buy shoes built to handle it or use inserts inside your current shoes.

Let’s break down the first one.

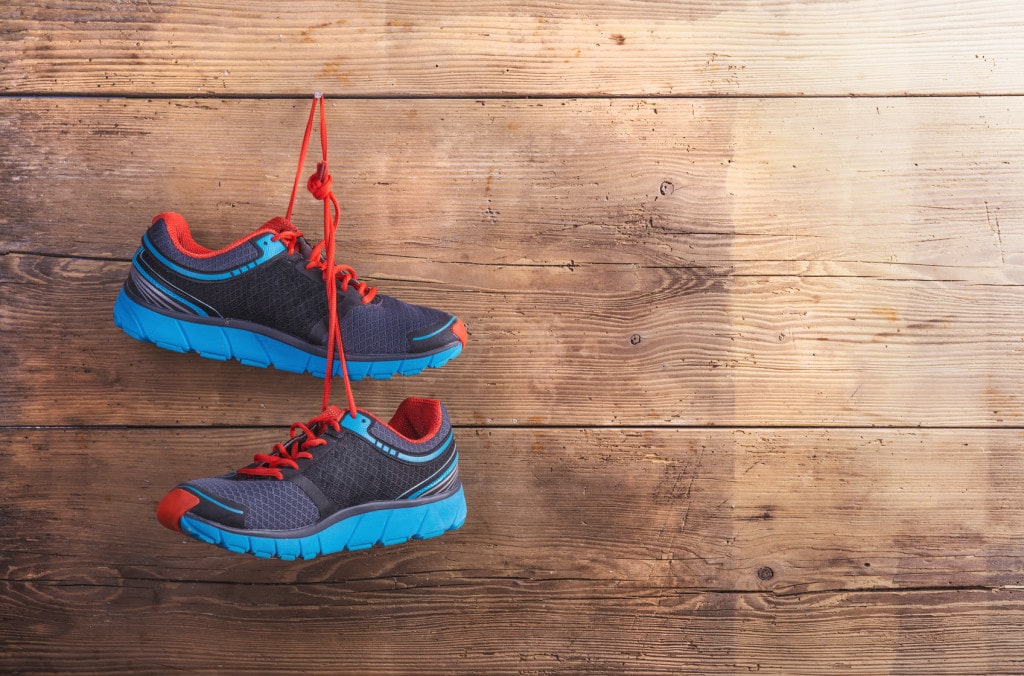
What Are Stability Shoes—and How Do They Help?

Stability shoes are made to slow down overpronation.

Think of them like neutral running shoes—but with backup. They’ve got features that help keep your feet from collapsing inward.

Here’s what makes them different:

  • Firmer Foam on the Inner Edge: Most stability shoes use denser foam under the arch (called a dual-density midsole). It resists compression and slows down that inward roll. Take the ASICS GT-2000, for example—its inner foam wedge (now called “Litetruss”) helps reduce excess movement.
  • Guide Rails: Brands like Brooks use guide rails in models like the Adrenaline GTS. These act like bumper lanes, gently nudging your foot back in line when it veers too far.
  • Support Frames & Heel Counters: Some shoes (like the Saucony Tempus) have an EVA frame built into softer foam to cradle the foot. Others use firm heel counters or shanks under the arch to keep your foot stable.

Basically, these shoes are like training wheels. They let your foot move naturally—but they stop it from going too far.

This helps spread pressure evenly and keeps your knees aligned. According to the American College of Sports Medicine, stability and motion-control shoes are ideal for overpronators, and Mayo Clinic agrees—they recommend shoes with good arch structure to cut down on pain.

From what I’ve seen, a good pair of stability shoes can make an immediate difference.

And the science backs this up: studies have shown that motion-control shoes (the most supportive kind) can lower injury risk for runners who overpronate.

Another review found that arch-supportive shoes or insoles helped reduce injury for flat-footed runners.

Stability Shoes Aren’t One-Size-Fits-All

Let’s get one thing straight: not all stability shoes are the same. There’s a full spectrum out there, depending on how much support your feet need.

Mild stability shoes are kind of like “supportive neutral” shoes. They’ve got just a hint of guidance—perfect if you slightly overpronate but don’t need anything extreme.

Moderate stability is where most runners with flat feet end up. These shoes have visible support features but still feel smooth enough for daily miles.

Motion control is the big guns—heavy, max support shoes for folks with severe overpronation or who are on the heavier side. Think Brooks Beast or ASICS Gel-Forte—solid, wide, firm builds that aren’t messing around.

Back in the day, stability shoes were tanks. Heavy, clunky, and about as subtle as a brick. But now? Brands have stepped it up. They’ve made these shoes lighter, sleeker, and more runner-friendly.

A physical therapist at Doctors of Running put it best: “Stability shoes are better than they ever have been…plenty of options where arch support is designed into the shoe.”

Here’s the Deal:

If you already wear stability shoes—or you’re thinking about trying them—make sure they feel right when you run.

Support shouldn’t mean “stiff.” It should feel like your arch is being hugged, not smothered. If a shoe jabs into your foot or feels like a brick, try something else.

Some runners love a softer stability ride—like the Nike Structure or Saucony Guide—while others prefer the firmer posts in something like the New Balance 860.

One more thing: shoes aren’t magic wands. They can reduce pronation, but they won’t fix deep-rooted biomechanical issues.

Got one leg longer than the other? Weak glutes? That’s where orthotics or strength work might need to tag in.

Take a look at the midsole of a Brooks Adrenaline—you’ll see a darker foam along the arch side. That’s the medial post, built to gently fight off overpronation and keep your stride cleaner.

What Are Custom Orthotics?

Now let’s talk about the other piece of the puzzle: custom orthotics.

Think of them as inserts made just for your feet—like a tailored insole built to fix whatever quirks your feet throw at the pavement. They’re usually prescribed by a podiatrist and built using molds or 3D scans of your foot.

They’re not soft, cushy gel pads either—most are semi-rigid, designed to guide your foot’s shape while you walk or run.

Here’s how they actually work:

  • Stability shoes tweak the midsole.
  • Orthotics change the entire surface your foot lands on.

They support your arch, adjust your foot angles, and shift your alignment. Some can even post your heel or forefoot to address imbalance.

A well-made orthotic feels like a mini coach under your foot—nudging it back into a more neutral position with every step.

They can help reduce pronation, fix heel strike patterns, and absorb stress where your body needs it most.

According to a 2023 randomized trial, runners using orthotic inserts reported greater comfort—and even fewer injuries (though not a major statistical win there).

But the big standout? Comfort. Orthotics significantly boosted comfort scores across the board.

And let’s be honest—when the run feels better, you’re more likely to stick with it.

But It’s Not All Sunshine

Here’s where things get real. Orthotics might work wonders for some—but they’re not a perfect fit for everyone.

Let’s break it down:

Cost

Custom orthotics are pricey. In the U.S., they usually run $300–$600. Unless insurance has your back, it’s a big hit to the wallet.

Coach Michael at RunnersConnect says they can be up to $500 out-of-pocket.

Compare that to off-the-shelf insoles like Superfeet or PowerStep—those run around $50–$60.

And yep, some runners feel burned. One athlete I know spent big on customs and ended up tossing them for a cheap cork insole that felt way better.

Comfort Isn’t Guaranteed

Here’s the kicker—some runners hate the feel of orthotics. They can be stiff, archy, or just plain weird.

One guy in my running group said they made his shoes feel cramped and awkward. Another runner described sharp pain under his toes when he wore orthotics in a stability shoe—like his foot couldn’t bend right.

The problem? Overcorrection. Orthotics need to match your shoes and your feet. Often, they work best in neutral shoes with enough space.

Break-In Time & “Crutch” Concerns

Don’t slap orthotics into your shoes and run 10 miles right away. You’ve got to ease into them—some folks need weeks to adjust.

And here’s something worth thinking about: some coaches argue that relying on orthotics too much could weaken your feet.

Coach Jason Fitzgerald said it best: “An insert under the arch can act as a crutch—restricting movement and allowing the arch to weaken over time.” 

He’s not wrong. Orthotics help with alignment, but they don’t build strength in your feet.

So if you’re relying on inserts without doing footwork or strength drills? You’re just putting a Band-Aid on the issue.

So, When Are Orthotics Actually Worth It?

Here’s my honest take: orthotics should be the last resort, not your first move. That’s how I treat them in my coaching.

And I’m not alone—most podiatrists and physical therapists will try everything else first: better shoes, strength work, form tweaks. Only after that comes the “custom” card.

Most runners do just fine with a solid stability shoe. Orthotics? Only if you’ve already tried the usual stuff and still feel broken.

Most people don’t need custom or even off-the-shelf insoles unless there’s a real diagnosis on the table.

That’s key: custom doesn’t mean better—only necessary when it’s truly needed.

When Custom Orthotics Might Actually Make Sense

If you check one of these boxes, orthotics might be worth a shot:

  • Your arch is basically falling apart. I’m talking severe. If a stability shoe still isn’t enough, and one foot pronates more than the other—orthotics can provide that precise, side-specific fix.
  • You’re injured… again. Tried the right shoes and still battling the same plantar fasciitis or tibial tendonitis? A custom insert might shift your load just enough to finally give that sore spot a break.
  • Your feet are… unique. Crazy high arches? Mismatched foot lengths? Arthritic joints? This is where custom orthotics shine—they can be tailored to your exact foot shape, pressure points, and even conditions like arthritis.

And bonus: one pair can work across shoes. Use them in your running shoes, walking shoes, work shoes—whatever.

That means 24/7 support, which can be a game changer if you’re dealing with foot pain all day long.

“Orthotics” Doesn’t Always Mean Custom

Let’s clear something up.

When runners talk about orthotics, they’re not always talking about those $400 custom-molded ones.

There’s a middle ground: quality off-the-shelf insoles like Superfeet, Currex, or PowerStep. These aren’t made just for you, but they come in different arch heights and provide decent support.

And for some folks? That’s all they need.

I remember reading a runner’s post who paired PowerStep insoles with a light stability shoe—totally kept his ankle pain in check.

Another guy swore by Fulton cork insoles that molded to his feet over time. He actually preferred them over the expensive customs he tried before.

So yeah, orthotics come in tiers. You don’t have to go full-custom on day one.

Quick tip: Try a $50 over-the-counter insole in a neutral shoe. If it helps, maybe later you upgrade to custom. Test before you invest.

Custom Orthotics vs Stability Shoes: Pros & Cons Showdown

Let’s break it down like a coach would.

Stability shoes and orthotics both aim to fix the same issue—overpronation or flat feet—but they go about it differently.

Stability Shoes – The First Line of Defense

Pros:

  • Built-in Support: No fiddling. Just lace up and run.
  • Made for Movement: They flex naturally where your foot does. Good ones aren’t clunky bricks—they’re comfy and responsive.
  • Great for Mild to Moderate Overpronation: For many runners, that’s all you need. Stability shoes can knock out shin splints or knee pain by correcting how your foot lands.
  • Plenty of Choices: You’ve got options like the Asics Kayano, Brooks Adrenaline, Saucony Guide, New Balance 860, and Nike Structure. One will probably fit your vibe.
  • Cost-effective: You’re buying shoes anyway. A stability version doesn’t add extra cost like orthotics do.

Cons:

  • One-Size-Fits-Most: These shoes aren’t built for your exact foot. If one foot pronates more, or your arches are odd, it might not cut it.
  • Feel & Weight: Some people find them stiff or heavier than neutral shoes. If you like soft or super minimalist shoes, they might feel clunky.
  • Not for Extreme Cases: If your feet collapse like a pancake, even a stability shoe may not hold you up enough. That’s when we start talking orthotics.

Custom Orthotics – The Precision Fix

Pros:

  • Tailored to You: This is the big one. Built for your feet—left and right can even be different if needed.
  • Specific Pain Relief: They can target ball-of-foot pain, heel spurs, bunions—whatever’s bothering you.
  • Serious Support: If your arch totally collapses and your ankles roll, orthotics can prevent that when a shoe can’t.
  • All-Day Help: Use them in all your shoes, not just your runners. Great for people with issues that aren’t just limited to training.

Cons:

  • Expensive & Time-Consuming: You need to see a specialist, do fittings, wait weeks… and they cost more than a pair of shoes. Not always covered by insurance.
  • Can Be Too Much: If your orthotic is too rigid or paired with a super controlling shoe, it can overcorrect your stride. That might fix one issue and cause another—like forefoot pain or tight calves. One runner online said the combo gave him sharp forefoot pain.
  • Not a Cure-All: Orthotics don’t fix poor form or weak glutes. They’re a tool—not a magic solution. You still need to do the strength work, the drills, and run smart.

Do I Need Custom Orthotics If I Wear Stability Shoes?

Let’s cut straight to it: if you already run in solid stability shoes, do you really need custom orthotics too?

Most of the time—nope.

Here’s the deal. Tossing orthotics into a stability shoe can sometimes be like adding salt to an already salty dish. It doesn’t make things better—it makes it too much.

You get overcorrected.

That’s a fancy way of saying your foot’s natural movement gets jammed up because there’s too much support fighting against itself.

Why You Shouldn’t Stack Support on Support

Stability shoes are already designed to guide your gait. They assume how your foot moves and try to fix things—like overpronation—along the way.

Now imagine dropping an orthotic in there that also wants to correct your stride. It’s like two backseat drivers yelling conflicting directions.

Here’s what happens: the shoe’s medial post pushes up on your arch, the orthotic does the same, and boom—you’ve got a foot that’s locked up and can’t move naturally.

You might even feel like you’re running with a brick in your shoe.

What the Pros Say

Most podiatrists agree: if you get custom orthotics, don’t shove them in a motion-control or heavy stability shoe.

The folks at Doctors of Running are very clear—pair orthotics with neutral shoes that have enough room to work. Otherwise, you’re just asking for trouble.

I’ve heard the same advice again and again: if you’re in a stability shoe and it’s doing the job—no pain, no weirdness—you likely don’t need orthotics. Don’t fix what isn’t broken.

That said, there are exceptions. If you’ve got a legit issue—like a leg length discrepancy, bunion, or post-surgical change—an orthotic might be necessary even with a supportive shoe.

But that’s a medical call, not something to guess on.

Flip It: Got Orthotics? 

Here’s where things get flipped.

If you already have custom orthotics (and they’re helping), you probably don’t need a bulky stability shoe on top of that.

A lot of folks think, “Oh, I have foot issues—I’ll get both.” Nope. That double-dip often backfires.

Instead, go with a neutral shoe that plays nice with your insert. Think removable insole, wide enough toe box, enough volume for the orthotic to sit right.

Some favorites among orthotic-wearers:

  • Brooks Dyad
  • Saucony Echelon
  • Certain New Balance trainers
  • ASICS Cumulus
  • Nike Pegasus

A sports podiatrist I know often recommends “stable neutral” shoes.

Basically, these aren’t full-on stability shoes, but they’ve got a wide, flat base and a little structure—just not aggressive posting.

The orthotic does the heavy lifting. The shoe just supports the stage.

So… Which One Wins?

Let’s keep it simple:

Are stability shoes better than orthotics for overpronation?
In a lot of cases—yeah.

A well-designed stability shoe can take care of mild to moderate overpronation without needing a custom insert
(Runners Connect, Doctors of Running).

Orthotics are usually the second line of defense—used when shoes alone aren’t cutting it.

If your current shoe isn’t solving the problem (or you’ve got a very specific issue), then orthotics might help. But they’re not the default.

And if you do need orthotics, you can probably say goodbye to motion-control tanks like the Beast.

A lighter, neutral shoe with a flat base usually works better with orthotics doing the correcting from the inside.

I’ve even seen runners on Reddit say their podiatrist advised them to skip the stability shoe and just pair a good orthotic with a neutral base.

That’s becoming more common.

Final Word: Don’t Go Overboard

Here’s the real coaching moment: don’t just pile on more “support” thinking it’ll fix everything.

Support isn’t a contest. More isn’t always better.

Dr. Matt Klein said it best: “More is not better. The right amount is best”

Your feet are meant to move.

Even in a stability shoe—or with orthotics—you still want some natural pronation. Zero movement means overcorrection, and that leads to its own set of problems.

Takeaway

  • If your stability shoes feel great? Don’t add orthotics. Let the shoe do its thing.
  • If you’re in a stability shoe and still hurting? Get assessed. You might need an orthotic—or a totally different shoe.
  • If you already wear orthotics? Use them with a neutral shoe that gives them space to work.
  • If something feels off? Listen to your body. New pain = a red flag.

The sweet spot? Enough support to run pain-free—but not so much that your feet can’t do what they’re built to do.

How to Break in New Running Shoes (Without Wrecking Your Feet)

woman running

So, you just got yourself a fresh pair of running shoes—box still smells like the store, laces crisp, soles untouched.

I get it.

You’re itching to lace them up and hit the road.

I know exactly how you feel.

A few months ago, I tore open a new pair and headed out for a long run without thinking twice.

Three miles in, I had blisters on both feet, my arches were throbbing, and I was cursing myself the whole way back.

Rookie mistake—but one I had to make to learn a simple truth:

Even the best shoes need time to settle in.

But here’s the thing—it doesn’t have to be a painful process.

If you ease into it the right way, breaking in your new running shoes can be smooth, maybe even enjoyable.

In this guide, I’ll walk you through exactly how long it takes (spoiler: it depends), how I approach it with my runners, and what to watch for so you’re not sidelined by avoidable aches.

How Long Does It Take to Break In Running Shoes?

This is probably one of the most common questions I get as a coach: “How long until my new shoes feel good?”

I wish I could give you a magic number.

But the truth?

It depends—on the shoe, your feet, and how you run.

For me, most shoes feel fully broken in after two to three weeks of regular use.

I had one pair of beefy stability shoes that took almost a month before they stopped fighting my feet.

At first, I thought something was wrong with my form. Turns out, I just needed to give them time.

For most runners, I recommend planning for 15 to 25 miles of steady running before shoes feel dialed in.

That usually falls within the 2–3 week range if you’re running regularly. This isn’t just my experience—it lines up with what experts say too.

According to podiatrist Dr. Bruce Pinker, some shoes start to feel right after just 5 to 10 miles. For others, especially structured models, the break-in curve is steeper.

Here’s how it usually plays out:

  • Light, flexible shoes (like most daily trainers)?
    They often feel good right out of the box—or by run number two.
  • Heavy-duty shoes (think: high-stack stability or trail shoes)?
    They take longer to break in. I had a friend swear his firm-foam Adidas didn’t feel right until after 30 miles.

Contrast that with a pair of ZoomX Nike trainers I tested last year—those babies felt great on my second run. That soft foam just needed a couple of miles to settle in.

It’s Not Just the Shoe—It’s You

Your feet matter. A lot.

If you’ve got high arches, wide feet, bunions, or anything like plantar fasciitis, your break-in window might be longer.

Shoes aren’t made in custom shapes (unless you’re splurging on that), so your foot might need a little time to get used to the way a new shoe moves, supports, and lands.

Also, switching shoe types can throw your body off.

Going from a plush stability shoe to a sleek minimalist trainer?

You’re going to feel that transition—and you’ll need more patience while your body adapts.

On the flip side, if the new pair is just a newer version of what you’ve been running in, the adjustment might only take a few runs.

When to Say “Nope”—This Shoe Ain’t It

Let’s keep it real—not every shoe is “break-in-able.”

If you’re 50 miles in and still feeling hot spots, weird pressure points, or pain you can’t explain, don’t keep pushing.

That’s not a shoe that needs more time.

That’s a shoe that doesn’t fit your foot or running style. And no amount of toughing it out will fix that.

Return it. Exchange it. Move on.

You’re not weak for doing that—you’re smart.

Running in shoes that don’t work for your body is how injuries happen.

I’ve coached too many runners through plantar fasciitis, shin splints, and knee pain that could’ve been avoided if they had just swapped their shoes sooner.

Why Breaking In Running Shoes Actually Matters

I get this question a lot: “Do I really have to break in my running shoes? Can’t I just lace ‘em up and go?”

Honestly, I used to think the same thing.

Some veteran runners will tell you that if a shoe fits well, it should feel great from day one—and they’re not totally wrong.

A solid pair should feel comfortable right out of the box, especially if you’ve nailed the sizing and the fit (shoutout to verywellfit.com for backing that up).

But here’s what most people won’t say loud enough: just because it feels okay on day one doesn’t mean your body is ready for 10 miles in them.

Here’s why that matters:

1. Your Shoes Need Time to Loosen Up

Right out of the box, everything—the upper, the midsole, even the insole—is stiff.

It hasn’t molded to your foot yet.

That rigidity can create pressure points, friction, and rubbing. The first few runs help soften the shoe so it starts shaping around your unique stride.

Think of it like a baseball glove or a leather jacket. It feels tight at first, but after a few wears, it fits you like it was made for you.

2. New Shoes Limit Your Foot’s Natural Movement

Running coach Sean Fortune backs this up—brand-new shoes tend to be stiffer and restrict your natural range of motion.

If you head out for a long run right away, you’re asking your body to adapt to something that hasn’t softened yet.

That’s extra stress on your feet, calves, and lower legs.

I’ve seen that stress turn into foot cramps, blisters, even cases of plantar fasciitis or a flared-up Achilles. All because the shoe wasn’t given time to chill out.

3. Switching Shoe Types? Break-In Is Non-Negotiable

If you’re changing brands, dropping from a high-cushioned shoe to a minimalist one, or moving from a stability to a neutral shoe, listen up: you need a transition period.

Nike expert Ashley Campbell points out that a new shoe can mess with your mechanics—your stride, your foot strike, the way your muscles fire.

I saw this firsthand when I tried switching to zero-drop minimalist shoes after years of running in traditional trainers.

I thought I could jump right in.

Nope.

Ended up with a strained calf after one overly confident run. Took me a full month of easing in before my calves and Achilles stopped hating me.

4. You’re Avoiding Injuries

The obvious stuff like blisters or black toenails? Those show up quickly.

But more serious stuff—shin splints, sore knees, hip pain, even IT band flare-ups—sneak in when a shoe subtly messes with your gait.

Breaking in gives you a “test drive” window.

If something doesn’t feel right—a rub here, a weird pressure there—you’ll catch it on a short run, not during mile 12 of your long Sunday outing.

How to Break In Running Shoes (Without Destroying Your Feet)

Let’s be real—nothing kills motivation like getting blisters or sore feet from a brand-new pair of running shoes.

Here’s my go-to system. It’s been battle-tested over the years—both on my own feet and with runners I coach.

Step 1: Don’t Start with the Wrong Shoes

Before we even talk about “breaking them in,” let’s make sure you picked the right damn pair in the first place.

Sounds obvious, right? But trust me, I’ve made that mistake more than once.

I grabbed a pair that looked fast—sleek design, flashy color, and every guy at my track club seemed to be wearing them.

Bad call.

They were way too narrow and had zero support for my overpronating feet. No amount of breaking-in magic was gonna fix that.

So, here’s what I tell every runner now: the best shoes to break in are the ones that fit right from the start.

Here’s how to stack the odds in your favor:

  • Pick the right type for your gait. Know whether you need neutral, stability, or motion-control shoes. If you’re not sure, try a gait analysis at a running store, or do the old-school “wet foot test” at home to check your arch type. I’ve got fairly average arches and roll in a bit (overpronation), so support shoes usually work best for me.
  • Size matters—really. Your feet swell when you run. You want about a thumb’s width—roughly a centimeter—between your big toe and the front of the shoe. Snug at the midfoot and heel is good. But if your toes feel cramped, or your pinky is already rubbing the side? Don’t hope it gets better. It won’t.
  • Comfort counts on day one. The shoes should feel pretty good right out of the box. Not perfect—but not painful. If they’re already rubbing weird or feel like bricks, that’s a red flag. Ask yourself: Do these feel like they hug my foot in a good way? Or is something off?

I always say: If you’re forcing your foot into the shoe, the shoe’s not the problem—you just need a different shoe. A better fit from the start means less pain later. And a lot fewer blisters.

Step 2: Wear Them Around the House Like a Weirdo

Once you’ve found your Cinderella shoe, don’t just rip the tag off and go hammer 10 miles.

Slow your roll.

Step one of breaking them in? Wear them like slippers first.

No joke—I wear my new running shoes around the house for a few days. Doing dishes, answering emails, even watching Netflix. My girlfriend thinks I’m nuts. But it works.

Here’s why: just walking around helps the shoe start to mold to your foot without the pounding from running.

The midsole softens up.

Your foot gets used to the shape. You avoid hotspots and heel blisters before they start.

A few pro tips:

  • Keep it short at first. Wear them for an hour or two around the house, then swap back to your old shoes. Gradually increase it each day. On day one, I might just clean the kitchen in them. By day four, I’ll wear them to the grocery store or around the neighborhood.
  • Keep them clean (for now). Most running stores only accept returns if the shoes still look new. So wear them on clean floors or treadmills while you’re testing them. If they start causing issues—slipping heels, hot spots, weird pressure—you’ll still be able to return them.
  • Loosen them up with your hands. I’ll gently flex the toe box a few times—just a light bend forward and back to get some movement in the sole. Some experts even recommend manually flexing the forefoot 4-5 times before the first run. You’re not trying to break the shoe, just wake it up a little.
  • Do a few squats or lunges. Sounds silly, but it helps. You’re flexing the midsole, letting your foot settle into the shoe’s shape. I’ve done air squats in my living room plenty of times just to get that break-in started.

I usually give it about 5–7 days of casual wear.

When the shoe starts feeling like a natural extension of your foot—even while you’re pacing around the house—you’re ready to take it outside.

3. Take Your New Shoes for a Gentle Test Run

Once you’ve logged some solid walking time in your new shoes, it’s time for the real test: running.

But don’t go full beast mode just yet.

This isn’t the day for crushing a tempo run or chasing a PR.

Whenever I lace up a new pair, I treat that first run like a slow first date.

No pressure. No pushing.

Just a short, easy jog—20 to 30 minutes max, around 2 to 4 miles depending on your pace. If your usual is five miles a day, scale it back to two or three. The goal here isn’t mileage—it’s feedback.

I always tell my coaching clients: think of it as a “test drive.”

You’re not trying to hit top gear. You’re just seeing how the shoes move, feel, and respond under a light load.

Here’s how I usually go about it:

  • Keep It Easy. No speedwork. No hills. No chasing Strava segments. Treat this like a recovery run—conversational pace only. When I take a new pair out, I’m tuned into every step. Do they rub near the toes? Feel tight on the midfoot? Any heel slippage? Running slow gives you the space to notice these things—before they turn into blisters or bigger problems.
  • Keep It Short. That first run? Think 2 miles around the block. If all feels good, maybe bump it to 3 or 4 on the next one. I usually give it a full week of short runs—never more than 3–4 miles—before I even think about taking them out for a long haul. Let your body adjust. Let the shoe adjust. You’re building a relationship here.
  • Skip the Hard Stuff (For Now). I’ve made the mistake of doing intervals in brand-new shoes. Bad idea. The cushioning’s still stiff, the fit might not be perfect, and your feet haven’t adapted yet. Give them 1–2 weeks of easy running before you throw them into a fast workout or long run. You don’t want to find out at mile 5 of your 12-miler that they rub your pinky toe raw.

4. Rotate Your New Shoes with Your Old Pair

Here’s a move that’s saved me more than once: don’t go all-in on the new shoes right away. If you’ve got an older pair that’s still hanging in there, use it.

Rotate.

Let’s say you run four times a week.

Start by using the new pair once or twice.

Run the other days in your old, reliable shoes. This gives your feet a break and helps you ease into the new kicks without getting banged up.

Here’s why this helps:

  • Eases the Transition. Your feet and legs need time to adjust—especially if the new shoes have a different feel, drop, or support level. When I switched to lower-drop shoes a few years ago, alternating saved my calves from being wrecked. Think of it like weaning off caffeine—slow and steady works best.
  • Shoes Need Recovery Too. The foam in your shoes needs time to bounce back. After a run, that midsole gets squashed. Give it a day off, and it rebounds better. This extends the life of your shoes and helps keep the cushioning feeling fresh. Research from the Scandinavian Journal of Medicine & Science in Sports backs this up. They found that rotating between different running shoes can cut your injury risk by up to 39%. That’s huge.
  • Test Without Risk. If you’ve got a race or a big long run coming up, you don’t want to risk going all-in with brand-new shoes. Rotate them in during your easy runs first. Once you’ve logged 40–50 miles in them and they feel good, you can start trusting them on longer efforts or race day.

When I break in a new pair, it usually looks like this:

  • Tuesday: Easy run in new shoes
  • Thursday: Workout in old shoes
  • Saturday: Long run in old shoes
  • Sunday: Recovery jog in new shoes

After a couple of weeks, if everything feels dialed in, I start mixing them into workouts and long runs. Injury rates dropped big-time once I adopted this pattern.

5. Mind Your Socks and Blister Prevention

Let’s be real: few things kill a good run faster than a nasty blister.

New shoes might feel exciting, but they’ve also got that little risk — a pinch here, a rub there — that can turn into a full-blown hotspot if you’re not careful.

I’ve been through it all.

Raw heels. Popped blisters on long runs. I even once ran a half marathon with tape wrapped around both pinky toes.

Not fun.

But with a bit of planning, you can avoid most of that pain.

Here’s what’s worked for me — and for the runners I coach:

Moisturize Your Feet (Seriously)

This might sound like a skincare tip, but it’s legit.

Dry feet are like sandpaper inside your socks. And friction is the enemy.

I make it a habit to slap on some plain, fragrance-free lotion after my shower or before bed — especially during dry months. It helps keep the skin soft and less prone to cracking or rubbing.

Just don’t do it right before a run — nobody wants greasy feet sliding around in their shoes. Do it the night before or give it plenty of time to soak in.

Once I started this habit, my post-run blister rate dropped like crazy. Try it. Your feet will thank you.

Sock Choice Is Make-or-Break

Forget those 10-for-$5 cotton socks from the department store. They soak up sweat like a sponge, bunch up, and turn your foot into a blister magnet.

Go for moisture-wicking socks made of technical fabric — think polyester, nylon, or merino wool. These keep your feet drier and cooler and reduce the chance of hotspots.

Pay attention to thickness too.

If your new shoes feel tight, wear your thinnest pair. If they feel a little loose or your heel’s moving around, go for a cushioned sock. I’ve got a drawer full of sock options just for this reason.

Think of your sock like part of your shoe fit system — it’s not just something you throw on.

One expert at Nike even suggested experimenting with sock thickness when breaking in shoes. That advice helped me solve a rubbing issue in the heel once — just by switching socks. No shoe change needed.

Anti-Blister Balm = Cheap Insurance

If you know your feet — and you know where you usually get rubbed raw — get ahead of it.

I always apply BodyGlide or a little Vaseline on trouble spots before a long run, especially in new shoes.

For me, it’s the back of the Achilles or the arch.

If you’ve got tape or blister pads, use ’em.

One time I got a small blister on the inside of my toe during a tempo run. The next few days, I taped that toe, and boom — no more pain. It’s a tiny fix that can keep your training on track.

Tweak Laces, Insoles, and Tongue Position

Sometimes all you need is a quick adjustment.

Try different lacing patterns — like skipping an eyelet if you’re feeling pressure on the top of your foot, or using heel-lock lacing if your heel is slipping.

Make sure the tongue is laying flat (I’ve had wrinkled tongues cause weird irritation before).

And don’t be afraid to swap insoles.

If the stock one is causing arch pain or rubbing, drop in one from another pair or an aftermarket option. That tweak alone has saved me from tossing out shoes that just needed a little tuning.

If you feel a blister starting mid-run, don’t be a hero. Stop. Adjust your sock. Apply tape if you carry it. It’s better to pause for 30 seconds than to be sidelined for a week.

The combo of solid socks, moisturized skin, and some preemptive care can save your feet.

After 10–20 miles, most shoes mold to your foot, and if you’ve done things right, they’ll feel like part of your body — not something you’re fighting against.

6. Take Your Time and Listen to Your Body

Now let’s talk about the mindset.

Breaking in a new pair of shoes isn’t a race.

I get it — you’re pumped to hit the road and rack up miles. I’m the same way. But I’ve also rushed the process and paid for it in sore arches and ruined workouts.

Give your shoes — and your body — time to adjust. It’s not just smart. It’s necessary.

Build Up Slowly

Start with short, easy runs — think 2 to 4 miles max.

In week two, maybe add some distance or a short tempo segment. By week three, you can go longer if things feel good.

But don’t force it.

If something feels off — heel soreness, tight calves, hotspots — back off.

Rotate your old pair in and give it time. Research even shows that gradual transitions help your body adapt and prevent injury.

Know the Difference Between “New Shoe Weird” and Real Pain

Some odd feelings are normal with new shoes — your foot isn’t used to them yet.

But sharp arch pain?

Burning blisters?

Pain that lingers after the run?

That’s your body screaming at you to stop.

As a coach, I always say: discomfort is okay, pain is not. Don’t tough it out if your gut tells you something’s wrong.

How to Know When Your Running Shoes Are Fully Broken In (And Ready for Real Work)

So, you’ve been putting in the miles, easing into those new shoes, trying not to rush the process.

But now you’re wondering—are they finally broken in?

How do you really know?

Here’s the deal: when your shoes are dialed in, they should feel like an extension of your feet.

No distractions. No pinching. No “new shoe” weirdness.

Just you, the ground, and the rhythm of your run.

I always say—when you forget you’re even wearing them, that’s when you’ve nailed it.

Let’s break it down with a few signs that your shoes are fully broken in and ready for whatever you throw at them:

They Move With You, Not Against You

At first, new shoes can feel stiff—like your feet are arguing with them every step. Maybe the sole feels a bit like a plank, or the upper digs into your pinky toe just enough to be annoying.

But after 30, maybe 40 miles?

The shoe should start flexing where your foot naturally bends. The upper softens up. The midsole molds to your stride. It’s like they’ve learned your foot’s language.

For me, that’s the sweet spot. When my trainers start feeling like they were made just for me, I know they’re game-ready.

No More Rubbing, Blisters, or Hot Spots

This one’s huge.

If your heel is still getting chewed up after a few weeks, something’s off. You shouldn’t be finishing runs with sore toes or mystery pain.

Once broken in:

  • The heel should feel snug but soft—no digging into your Achilles.
  • The toe box should let your toes wiggle without jamming the front.
  • No more new blisters. No more tape. No more band-aids.

If you’re finishing your runs without noticing your shoes at all, that’s a massive green light.

That Brand-New Stiffness is Gone

You know that tight, overly springy feeling some shoes have out of the box?

Especially with modern foam tech—sometimes it feels like you’re running on the shoes, not with them.

But give it a week or two of real running and that bounce levels out. The sole gets more predictable, more stable.

If you bend the shoe in your hands and it flexes more than it did on day one, that’s a physical sign the break-in is happening.

Your Stride Feels Normal Again

When I lace up a new pair, my first few runs always feel a little off.

Maybe my cadence is weird.

Maybe I subconsciously adjust my form.

It’s normal.

But once the shoes are broken in, it all clicks. I’m back to my usual flow. I’m hitting my splits, my stride feels clean, and I trust the shoes on any surface or pace.

That’s when I know: these are ready for speed workouts, long runs, race day—whatever I’ve got planned.

Final Word: Trust the Feel

There’s nothing like that moment when your shoes finally feel broken in.

No more doubts. No more adjusting. Just smooth miles ahead.

They’ve gone from strangers to training partners. From fresh-out-the-box to road warriors.

So enjoy it.

You earned that comfort.

Now tell me—what’s your favorite running shoe to break in? Ever had a pair that felt like magic once you hit that sweet spot?

Drop your stories in the comments—I’m always up for some good shoe talk.

The Runner’s Guide to the Heel-To-Toe Drop

Heel To Toe Drop for runners

Ever put on two pairs of running shoes that look almost identical—but one just feels off?

Chances are, it’s the heel-to-toe drop messing with you.

That’s the little height difference between the heel and the forefoot, and it can seriously change how your body handles impact.

I like to think of it like adjusting a bike seat.

A few millimeters might not sound like much, but it changes everything—your posture, your power, your comfort. Same goes for shoes.

So, What the Heck Is Heel-To-Toe Drop?

In plain English, heel-to-toe drop (a.k.a. heel drop or offset) is how much higher your heel sits compared to your toes.

It’s measured in millimeters.

If your shoe has a 0 mm drop, your heel and forefoot are the same height—basically barefoot style. A 10 mm drop means your heel is sitting 10 mm higher.

Here’s the quick breakdown:

  • 0 mm drop: Flat like pancakes—common in minimalist or barefoot shoes.
  • 1–4 mm: Low drop—almost flat and often nudges you toward landing on your mid or forefoot.
  • 5–8 mm: Middle ground—neutral territory.
  • 10 mm+: High drop—your classic old-school cushioned trainers.

Lower drops tend to push you forward on your foot. Higher drops lean you back on your heel.

I’ve seen it time and time again with clients—switching drop can either ease pain or stir up new issues.

One guy I worked with got brutal hip flexor pain in Brooks Adrenalines (12 mm drop). It disappeared like magic when he swapped to a 4 mm shoe.

But it cuts both ways—runners with tight calves or cranky Achilles tend to feel better with a higher heel.

When Drop Matters… and When It Doesn’t

Drop isn’t the end-all, be-all. It’s one piece of a messy puzzle that includes cushioning, shoe shape, your own gait, and how much you’re pounding the pavement.

But it still matters—if you respect it.

Let’s dig into the facts:

  • Injury Risk Isn’t Black & White: A 2016 AJSM study tracked 553 runners in low (0 mm), medium (6 mm), and high (10 mm) drop shoes. About a quarter of runners in each group got hurt. Translation? Changing drop alone doesn’t save your knees. Your training load and running history matter just as much.
  • Too Much Lift = Trouble: A 2024 study from the University of Florida found runners in very high-drop shoes were more injury-prone. Some even had trouble sensing how their feet were hitting the ground. In contrast, flatter shoes helped runners stay tuned in and adjust better. The key? Don’t make a sudden switch. It’s like going from couch to marathon overnight. Bad idea.
  • The Biomechanics Breakdown: A review dug into dozens of studies and found that switching drop didn’t wildly change stride or form—except for zero-drop shoes, which did encourage more toe or midfoot strikes. But here’s the kicker: landing flatter often meant higher impact forces at first. So yeah, it can feel jarring.

My Rookie Mistake: Zero Drop, Full Pain

I’ll admit it—I screwed this up early on.

I got sucked into the barefoot craze and bought a pair of zero-drop Altras.

First week? Amazing.

Second week? Foot pain.

Third week? Metatarsal ache so bad I could barely jog.

I read a Reddit post that could’ve been my own words: “Went zero-drop too fast… now I’m out with bone marrow edema.”

Brutal. Don’t be that guy. Your body needs time to catch up with your ambition.

Here’s what I’d recommend:

  • Ease into it: Whether you’re going lower or higher, take your time. Give your body weeks—not days—to adjust. I now use barefoot-style shoes for short walks and drills before I ever try them on a run.
  • Muscles Need Time: A coaching buddy once told me, “Changing drop is like swapping your office chair for a barstool.” Totally true. Your calves, hips, and Achilles need time to figure it out. Even Dr. Heather Vincent, who co-authored that 2024 study, said it took her six months to get used to a more minimal shoe. Don’t rush it.
  • Use Drop to Recover Smarter: I’ve found that a low-drop shoe helps me bounce back faster after races. When my knees are trashed, I’ll throw on a 4 mm trainer. It lets my quads rest and shifts some of the work to the back chain. After my last half marathon, that small switch felt like a game-changer during recovery week.

Using Drop as a Recovery Tool (From the Coach’s Toolbox)

Most runners talk about heel-to-toe drop like it’s some mysterious number printed on the box.

But here’s the deal—it’s not just about performance.

Drop can actually be a sneaky-smart rehab tool. I’ve used it with runners nursing injuries, and it works—if you use it right.

Lemme explain more:

Achilles/Calf Problems?

When your Achilles is barking or your calves are stiff as bricks, bumping up the drop can make runs feel less like punishment.

I’ve seen runners fresh off an Achilles rupture thrive in 10–14 mm drop shoes with plush cushioning. I think a 10 mm drop may shift your ankle angle by about 4°, making walking and running feel more natural during recovery. Over time, they gradually drop back to 5–8 mm as the strength returns. Smart and simple.

Chronic Knee Pain?

On the flip side, if your knees are taking too much heat, dropping down a few millimeters might help. That slight shift can move your footstrike forward a bit, easing stress on the knees. I’ve seen it help a few folks—but only when paired with form work and strength training. Don’t expect miracles from the shoe alone. Use it as one piece of the puzzle.

Forefoot Issues or Plantar Fasciitis?

Pain under the front of your foot or in the arch? Try nudging your drop higher. That’ll help take some pressure off the forefoot and let you run without gritting your teeth through every step. It won’t fix everything—but it can make things more bearable on moderate runs.

Rotating Drop Based on the Workout

This is one of my favorite coaching tricks. Think of your shoe rotation the same way you think of your workouts—each has a purpose.

Here’s how one coach buddy of mine sets it up:

  • Tuesday Easy Run: 4 mm drop – light, fast cadence
  • Wednesday Speed Intervals: 6–8 mm – cushion for impact
  • Thursday Recovery Jog: 10 mm – legs get a break
  • Saturday Long Run: If it’s chill pace, go 10 mm. If it’s a harder race-pace effort, 6–8 mm for better response.

He’s not rigid with it. Some days he even uses a shoe randomizer app just for fun.

The real goal is variety—keep the muscles guessing. Rotate smart, and your body adapts instead of breaking down.

How to Find Your Ideal Running Shoe Drop

Here’s my rule: if you can feel the drop with every step, something’s off. The right drop should disappear under you. You shouldn’t have to think about it.

Try this:

  • Get 2–3 pairs of shoes with different drops (say 4 mm, 6 mm, and 10 mm).
  • Rotate them on easy runs.
  • Pay attention:
    • Did one make your knees happier?
    • Did another blow up your calves?
    • Did one just feel right from the first stride?

Track that feedback. Your body’s telling you what it likes—listen to it over the next few weeks, not just one day.

A contrarian take?

Some coaches argue drop doesn’t matter much if your form is dialed. And I get that—form and strength are king.

But I’ve seen drop tip the scales enough times to say: keep it on your radar. Not the only factor, but one worth testing.

And please, also make sure to choose proper running shoes.

Bottom Line

Drop is personal. It’s not about trends or shoe reviews—it’s about what helps you run smoother, recover faster, and stay injury-free.

Trust your body more than the internet.

The perfect drop? It’s the one you forget about because your run just flows.

The wrong drop? That’s the one that turns every step into a battle.

Let your form, goals, and injury history guide your choice. Use research. Ask fellow runners. But in the end, your feet are the real experts.

Quick Q&A: Heel-to-Toe Drop FAQs

What is drop in a running shoe?

It’s the difference in height between the heel and forefoot inside the shoe. Basically, how slanted the shoe feels under your foot.

Does drop matter for injury?

Kind of. Drop changes how force hits your legs.

Higher drop usually takes pressure off your calves and Achilles. Lower drop might shift more load to your knees. But no one study proves drop alone causes injuries—it’s just one piece of the puzzle.

Is zero-drop better?

Depends. Zero-drop (like Altra or minimalist shoes) builds foot strength and encourages a forefoot strike.

But it’s brutal if you’re not ready. You need to ease into them and build calf/foot strength first. Jump in too fast and you’re asking for trouble.

Can high drop shoes help shin pain?

Yep. A bigger heel can take some load off your Achilles and calves, which often eases shin splints too.

That’s why high-drop shoes are often used in rehab. Just be careful—it can shift the strain up to your knees if you overdo it.

Research Side Note

A running biomechanics review showed that changing drop doesn’t really mess with knee or hip motion much. But it does affect ground impact. Lower drop shoes tend to create more vertical impact force. So yeah—ease into them, and expect your legs to feel a bit stiffer until they adapt.


Ready to Find Your Drop? (Next Steps)

Running is a personal journey, and so is finding the right drop. Use this guide as your roadmap. Start by listening to your body on your next run: does any shoe feel surprisingly good or awkward after just a mile?

Try mixing in a different drop on easy days and note the difference. Maybe join a local running group or forum and ask others what’s worked for them.

Remember, I’ve been there too – the excitement of minimalist shoes and the crash of calf strain. But I also know the thrill when the perfect pair of shoes finally clicks.

The moment you lace up a pair and your legs say “this is the one,” you’ll understand why we care about drop in the first place.

So lace up with confidence!

Pay attention to how your feet and legs feel, adjust gradually, and enjoy the process. Every runner is unique – find your fit, run happy, and let us know how it goes.

Keep moving forward, one drop at a time!