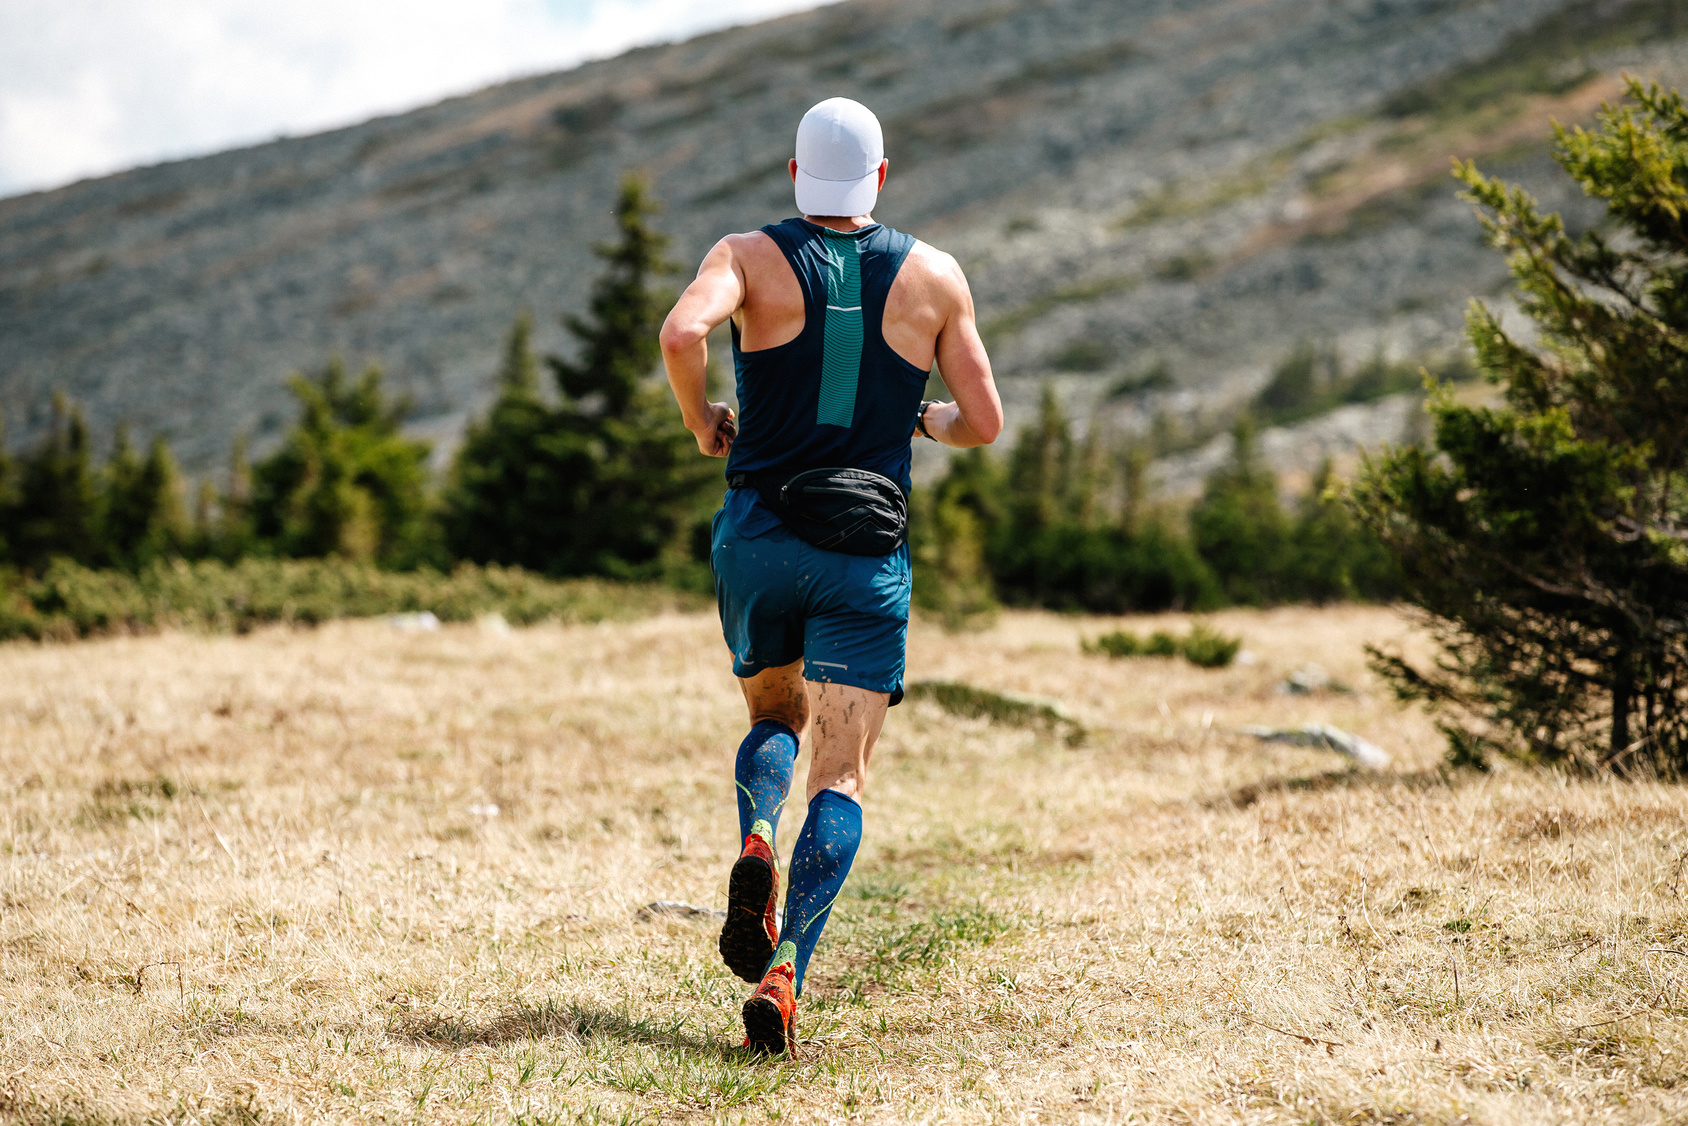
Let’s talk about a piece of gear that’s become just as common as running shoes on the start line: arm sleeves.
I’m not talking about fashion statements here — though yeah, some folks rock them like they’re heading to the Olympics. I’m talking real-world sleeves that do real work. The kind that help your arms stay fresh, fight off the elements, and even give you a bit of a mental edge when the miles stack up.
From weekend 5Ks to 100-mile ultras, runners at every level are sliding on these stretchy tubes for good reason.
In this guide, I’ll break down why arm sleeves aren’t just hype, how they actually help (and when they don’t), and how to choose the right pair for your runs. I’ll also throw in a few stories from runners who’ve worn them everywhere — from trail ultras to marathon finish lines.
Let’s dive in.
What Are Running Arm Sleeves, Really?
Picture compression socks — but for your arms. That’s basically what these things are. You slide them on from your wrist to your bicep, and they fit tight enough to hug your muscles without cutting off your circulation.
At their core, running arm sleeves are designed to give your arm muscles some backup: they reduce bounce, improve blood flow, and protect your skin from sun, cold, and brush on the trails.
But here’s the thing: not all arm sleeves are built the same. You’ve got options:
Types of Sleeves You’ll See Runners Use
- Compression Sleeves: The classic. Snug fit, made to boost circulation and support your muscles. If someone says “arm sleeves” at a race, this is usually what they mean.
- Arm Warmers: Thicker, thermal sleeves that are perfect for cold mornings. Way easier to strip off mid-run than wearing a long-sleeve shirt.
- Sun Sleeves (a.k.a. Arm Coolers): Lightweight, breathable sleeves that keep you cool and protect your skin from UV rays. Some come with UPF 50+ built right in.
And nowadays, a lot of sleeves mix it up — offering compression and sun protection in one.
Bottom line: whether it’s for warmth, cooling, or support, arm sleeves are more versatile than they look.
Why the Heck Are So Many Runners Wearing Arm Sleeves?
Let’s get into what actually makes them useful. Sure, they look cool, but they’re not just for style.
Here’s what they’re doing for you:
Compression = Better Circulation + Less Fatigue
This is the big one. Compression helps your blood flow better — which means more oxygen and nutrients hitting your muscles while you run. More oxygen = less fatigue.
Every time your foot hits the ground, a mini shockwave runs through your whole body — including your arms. That jiggling might not seem like much, but over time, it adds up. Compression sleeves help keep those arm muscles stable, cutting down on unnecessary vibrations and soreness.
Some runners say it even helps them feel stronger late in races — especially when form starts to fall apart. You’re not wasting energy flailing your arms around, and you stay a little more locked in.
Now, to be real with you: science is mixed when it comes to performance gains. But you know what isn’t mixed? The mental boost. As one coach once told me, “Confidence is performance too.” If sleeves make you feel like a beast, you’ll run like one.
Post-Run Recovery Is Where They Shine
Here’s where sleeves can really earn their keep — after your run.
A bunch of athletes (myself included) throw on sleeves post-workout to help with recovery. And there’s real logic behind it.
Here’s what compression sleeves can do for recovery:
- Flush out lactic acid faster: When circulation improves, waste products clear out quicker. Less “dead arm” feeling the next day.
- Fight swelling: Ever notice your hands puff up after a long, hot run? Sleeves help keep that in check by applying gentle pressure to stop fluid buildup.
- Ease soreness: Less muscle vibration during your run = less damage = less post-run pain. Simple as that.
Some runners only wear sleeves after they run. One marathoner I know throws them on right after races or long days on her feet — not during — and swears they help her bounce back quicker. She even got fitted for medical-grade sleeves to dial in the support.
So even if you’re not wearing them while running, they can still be a recovery weapon.
Bonus: They’re Like Armor for Your Skin
On top of the muscle support and recovery perks, arm sleeves double as lightweight protection:
- Sun protection: Sun sleeves are made from moisture-wicking fabric and offer UPF ratings to keep your skin safe on hot days. Better than slathering sunscreen on your arms every few miles.
- Cold mornings: Arm warmers help you start warm and shed layers as your body heats up. More flexible than dressing like it’s January when you’re running in April.
- Trail rash: Running through brush? Sleeves save your skin from scrapes and scratches.
Real Talk: Are Sleeves a Magic Fix?
Nope. If you’re expecting them to shave minutes off your PR, don’t hold your breath. Compression sleeves aren’t some miracle tool.
But if you want:
- A bit more muscle support
- Less swelling post-run
- Extra sun or cold protection
- Or just something that helps your arms feel better during long efforts…
…then yeah, they’re worth trying out.
Sometimes the best gear doesn’t make you faster — it just helps you stay consistent, recover quicker, and feel a little fresher.
How to Choose the Right Pair
If you’re thinking about grabbing a pair, here’s what to look for:
- Fit: They should feel snug but not like they’re cutting off circulation. If they leave deep marks or cause tingling — too tight.
- Fabric: Look for moisture-wicking, breathable stuff. Avoid thick cotton blends — they’ll just soak up sweat and weigh you down.
- Purpose: Decide what you’re using them for. Cold weather? Go for thermal arm warmers. Hot, sunny runs? Pick sleeves with UPF protection. Recovery only? Compression matters most.
- Easy on/off: If you’re planning to shed them mid-run, make sure they’re not a struggle to pull down while you’re moving.
Pro tip: Don’t just buy whatever’s trending. Try a few out — even borrow a friend’s — and see what feels good during your kind of running.
Sleeves for Safety: A Thin Layer That Packs a Punch
Let’s get real — running isn’t always sunshine and smooth sidewalks.
Sometimes it’s trail branches slapping your arms, or face-planting on busted pavement because your toe caught that one crack you didn’t see. That’s where arm sleeves come in. They’re like lightweight armor — and I don’t say that lightly.
Scrapes? Sleeves Take the Hit, Not You
If you fall, sleeves take the brunt, not your skin. Think of it this way: better to rip a $20 sleeve than rip open your elbow and spend the next week scrubbing gravel out of it.
Trail runners especially love this — bushes, branches, thorns… it’s a jungle out there. One guy I met at a trail race said he used to come home from every run with little bloody lines all over his arms. Now? He throws on sleeves and doesn’t think twice.
“It’s like having an extra layer of skin.” That’s what he said — and yeah, I stole that line.
Be Seen or Be Sorry: Visibility Matters
Ever run during early morning hours or right at dusk when the light’s weird and drivers aren’t paying attention? Sleeves help you stand out. Bright colors, reflective stripes — they grab eyes.
You don’t need to be lit up like a Christmas tree, but throwing on neon sleeves is an easy safety upgrade.
I’ve seen runners just toss on blaze-orange sleeves instead of wearing a full reflective vest — and honestly, it works. Some sleeves even come with built-in reflective strips, which bounce back car headlights so you’re visible from a distance.
Especially helpful if you’re like me and always squeeze runs into weird times. Night runners: get sleeves with reflectivity. Pair ‘em with a headlamp and you’ve got a basic safety system.
Bonus Hack: Storage You Didn’t Think Of
I know one marathoner who stashes energy gels under his sleeves during races. Yep, the compression holds ‘em tight to the bicep. No belt, no bounce.
I’ve even seen folks tuck tissues or a car key in there. Not the “intended” use? Sure. But damn handy when you need your hands free and don’t want to carry extra gear.
Sleeves = pockets in disguise. Just don’t overstuff or you’ll end up with saggy arms mid-run.
Sun Protection That Doesn’t Sweat Off
If you run outside, the sun is always a factor — especially for the fair-skinned crew. Even if you’re a sunscreen junkie (like me), sweat eventually washes it off. That’s where UV-blocking sleeves step in.
Think of Them Like Wearable Sunscreen
Most decent sleeves come with a UPF rating — 30, 40, even 50+. That means they block most of those nasty UV rays. And unlike sunscreen, they don’t rub off halfway through your long run.
One redheaded runner (who called himself a “ginger on fire”) said UV sleeves saved his arms on long sunny outings. Another person mentioned how it keeps their tattoos from fading. I mean, if you spent good money on that ink, might as well protect it, right?
Cooler With Sleeves? Believe It.
Sounds nuts, I know — wearing more in the heat. But lightweight sleeves (especially white ones) actually help cool you off. They wick sweat and let airflow create an evaporative cooling effect. It’s like having your own mini air-con system.
A couple who ran a charity event in freakin’ Death Valley (100°F+) said they stayed cooler with sleeves. They’d squirt water on them mid-run, and it was like instant air conditioning.
One of them had previously had melanoma removed from his arm — so yeah, this wasn’t just about comfort. It was about staying safe under serious sun.
Bottom line: If your run’s longer than 30 minutes and the sun’s out, sleeves are a smart move. They won’t replace sunscreen, but they sure as hell back it up.
Temperature Control: Sleeves That Flex With the Weather
Arm sleeves aren’t just for sun and scratches — they’re a secret weapon for managing temperature. Hot or cold, they help your body do what it does best: run strong.
In the Cold: Stay Loose, Stay Fast
Cool mornings? Early races? You don’t always need a full long-sleeve top. Arm warmers trap heat, keep your muscles loose, and prevent that stiff, tight feeling when it’s under 50°F (10°C).
One of my favorite tricks: start your run in a singlet + sleeves. Once you’re warm (usually by mile 4–5), you just roll ‘em down or tuck them away. Try doing that with a long-sleeve shirt.
Some runners even cut the toes off old socks and use them as throwaway warmers. Cheap, effective, and easy to ditch once you’re cooking.
Sleeves give you flexibility. They’re the gear version of “layer up, layer down” without needing a wardrobe change at mile 6.
Keeping Cool (Literally) – How Arm Sleeves Help in the Heat
Here’s something a lot of runners don’t realize: sleeves aren’t just for cold weather. In fact, they can be your best friend when it’s hot as hell out.
Think about it — those thin, sweat-wicking sleeves? They’re like a personal cooling system. When they get wet (from sweat or pouring water over them at aid stations), they help you shed heat through evaporation. That’s science doing its job — heat escapes, you cool off.
They also block the sun, which matters more than you think. Running bare-armed under a blazing sun is like slow-roasting your skin. But cover up with some light UPF sleeves? You’re staying shaded, and that keeps core temps in check.
A gear tester at Runner’s World pointed out some sleeves are specifically built for summer — ultra-thin, mesh-paneled, sweat-sucking machines that protect without smothering you.
In humid weather, yeah, the cooling effect may not feel as strong. But there’s still value — like shielding your skin from rash, chafing, and sunburn. I’ve seen runners toast their arms on humid long runs. Sleeves help prevent that nasty combo of sweat + friction + UV that turns your arm into a war zone.
Bottom line: Arm sleeves are like a thermostat for your limbs. Need warmth? They trap heat. Need to cool down? Get ’em wet and let them breathe.
One trail runner I know in Oregon nailed it — she wore sleeves for a cold, foggy trail race and said it was “the best wardrobe choice of the day.” Kept her warm while standing around in the woods pre-race, then once the sun came out? She peeled ’em off and stashed them. Boom – problem solved. No jacket needed, no overheating.
Do Arm Sleeves Really Work? Here’s What the Science Says
Okay, now let’s cut through the hype. You’ve heard the claims – better circulation, less soreness, more performance. Sounds great. But does the research back it up?
Let’s break it down:
1. Performance While Running
Hate to burst your bubble, but sleeves won’t make you faster. The big 2022 review of 183 studies found no strong evidence that compression gear boosts pace, VO₂ max, heart rate, or running economy.
So if you’re banking on sleeves to PR your marathon? Don’t.
One study even tested compression socks during a marathon and found no difference in muscle damage or pace compared to runners who didn’t wear them. The gear alone isn’t magic.
That said — they don’t hurt either. So there’s no downside.
2. What’s Actually Happening Physically
Compression does change a few things under the hood. Studies show sleeves reduce muscle jiggle (aka oscillation), slightly boost blood flow in the compressed areas, and even warm up your skin a bit.
They can also dial up your body awareness — aka proprioception. So if you’ve ever felt more “in control” with sleeves on, that’s not your imagination.
But don’t expect superpowers. Your lactate, oxygen levels, and overall performance won’t suddenly skyrocket. Think of it more like subtle support, not a rocket boost.
3. Recovery is Where Sleeves Shine
Now we’re talking. If you’re gonna get one benefit from sleeves, it’s recovery.
That same 2022 study found that while performance didn’t budge much, runners felt less sore and bounced back faster when they wore compression gear. That’s huge.
Another review from 2016 backed it up: compression helped with things like clearing blood lactate, reducing inflammation, and improving muscle strength recovery in the days after hard efforts.
In real terms: you finish a long run, slip on sleeves, and maybe — just maybe — you’re a little less wrecked the next day. That’s a win in my book.
Even legs have more research behind them, but it makes sense the benefit transfers to arms too — especially if you’re doing trail races, ultras, or strength work where your upper body gets in on the action.
4. The Placebo is Real — and That’s Okay
Here’s a fun twist: some of the benefit might be in your head — and that’s not a bad thing.
Studies show runners feel better wearing compression gear, even when the actual metrics don’t change. They report lower effort, less fatigue, and more control. That’s the mental edge.
I’ve had runners tell me, “I just feel stronger in sleeves.” And you know what? If believing it gives you the extra push, who cares what the lab says? Sports are mental too.
One athlete put it best:
“I’ve read the data. Still feels better with them on. That’s enough for me.”
When to Skip the Sleeves: Know When to Leave ’Em Behind
Look, I like compression gear as much as the next mileage junkie. But arm sleeves aren’t magic. They’re a tool — not a uniform — and they’re definitely not something you need every single run.
There are times when they just flat-out don’t make sense.
1. It’s Hotter Than Hell Out There
If it’s pushing 95°F and the air feels like soup, sleeves might roast you alive. Even the lightest compression fabric can feel suffocating when the humidity hits.
Your body’s #1 priority in those conditions is dumping heat — and sleeves can get in the way of that.
Bare skin may actually cool better in humid heat if you’re out of the sun. If you’re baking under direct rays, a breathable long-sleeve with UV protection might be better than snug sleeves.
But in thick humidity when sweat just pools? Ditch the sleeves or roll them down mid-run if you start cooking. Heatstroke isn’t worth looking cool.
Rule of thumb: If you feel like a walking radiator, lose the extra layer.
2. Tight Gear Makes You Nuts
Compression ain’t for everyone. Some runners just can’t stand tight gear — and that’s totally fair.
If sleeves make you feel like your arms are trapped in sausage casing, don’t force it. I’ve seen folks pull at their sleeves the entire run because the tightness was driving them up a wall.
That’s not focus — that’s distraction.
There are looser-fitting “warmers” out there that don’t squeeze. Try those if you like the idea but not the compression. But if you still hate the feeling? Skip it. Better to run free than annoyed.
3. You’re Just Out for a Chill Run
If it’s a 20-minute jog or a short recovery run, sleeves probably aren’t doing much for you — unless you’re using them for sun or chill protection.
Compression really shines when you’re logging long miles, racing, or recovering. On an easy day? They’re mostly just for show.
Not a crime to wear ’em if you like the feel, but don’t think you have to.
No sleeves doesn’t mean no hustle. It just means you’re running smart.
4. Race Rules Are Weird
Rare case, but worth mentioning: some track teams or competitions have gear rules. It’s usually traditional team stuff — think strict uniforms.
Most road races and trail events don’t care. Even in the Olympics, you’ll see sleeves all over the place.
But if you’re lining up at a race with old-school coaches or tight uniform policies, double-check before race day. No one wants to be the guy who gets flagged for dressing like a superhero on the starting line.
Sleeves = Tools, Not Must-Haves
I’ve seen elite runners who bring sleeves to every race but don’t always wear them. One guy I know starts cold marathons with them on, then tosses them halfway when he warms up.
Other times, he keeps ’em in a pocket and throws them on if cold rain hits mid-run.
That’s the smart play: use sleeves dynamically. Don’t just wear them out of habit. If the weather, the effort, or your own comfort says “nope,” leave them off.
And get yourself a lightweight pair you can scrunch up or stash. Like the Scouts say: be ready.
How to Choose the Right Arm Sleeves
Alright, if you’re ready to give sleeves a try — or upgrade your current pair — fit matters most. A bad fit turns gear from “helpful” to “hellish” real fast.
Here’s what to look for when picking your sleeves:
1. Fit & Size: Not Too Loose, Not Too Tight
Compression sleeves should feel snug — but not like a blood pressure cuff.
How to size it right:
- Measure around the thickest part of your bicep (relaxed).
- Some brands also ask for forearm circumference.
- Use the brand’s size chart (they vary — seriously, they do).
- Between sizes? Want more compression? Size down. Want comfort? Go up.
Try ’em on if you can. You should be able to bend your arm easily without the sleeve biting into your skin.
Quick test: Wear for 10 minutes. Fingers tingling? Not good. If you can slide one finger under the top band and feel light, even pressure, you’re golden.
2. Length That Works for You
Some sleeves ride all the way up to the armpit. Others stop lower. Pick what feels natural.
- Too short? You’ll get a gap near your shoulder (cold and weird).
- Too long? It’ll bunch at the wrist or dig into your pits.
Ideally, it covers from wrist bone to just below the armpit — without chafing or flapping.
Some have grippy silicone bands to help them stay put. Just make sure they don’t roll or bite.
3. Unisex vs Gender-Specific
Most sleeves are unisex, but some brands make men’s and women’s versions. Honestly? Go with whatever fits best.
I’ve seen women with strong arms size up to men’s. I’ve seen lean guys grab women’s for a better fit. Forget the label — fit is king.
Pro Tip: Start Light
If you’re new to compression gear, don’t go for the tightest, medical-grade pair on day one. That’s how sleeves end up in your drawer forever.
Start with a brand that offers gentle compression and work your way up if needed. I’ve heard runners swear by Zensah for comfort and CEP for more squeeze. Me? I’ve tried both. It depends on the day.
Let’s Talk Arm Sleeves: What Actually Matters in the Material
If you’re looking to grab a pair of running sleeves, don’t just grab the first flashy pattern you see. The fabric — not the look — is what’ll make or break your run.
Here’s what to look out for when it comes to material:
Moisture-Wicking or Bust
If your sleeves don’t wick sweat, skip ‘em.
You want technical fabrics — blends like polyester, nylon, and spandex — that actually pull sweat off your skin. Whether it’s hot, cold, or raining sideways, you’ll stay drier and more comfortable.
Avoid cotton like you’d avoid blisters. Cotton sleeves soak up sweat and hang onto it like a wet rag. You’ll feel clammy and gross 10 minutes in.
Look for terms like:
- Dry-fit
- Moisture-wicking
- Breathable
If it doesn’t say that? Move on.
Stretch & Compression: Find Your Fit
The best sleeves use a blend of spandex (aka elastane or Lycra) for that bounce-back stretch and firm fit.
- Want sleeves that slip on easily and stretch with your stride? Look for 15–20% spandex — super elastic, good for larger arms or quick on/off.
- Chasing compression? Then go for a tighter-knit fabric with lower stretch but firmer feel.
Look for terms like:
- “Graduated compression”
- “15–20 mmHg” (or similar pressure ratings)
More compression = better support, especially for long runs or recovery.
Thickness = Climate Control
Here’s the deal: no one sleeve is perfect for all weather. Period.
- Running in winter? Look for thermal sleeves — thicker, maybe fleece-lined, or even wool blends. They’ll trap heat and still breathe.
- Running in heat? You need thin, breathable, almost-mesh sleeves. Some cooling sleeves feel like silk — super light and airy. Great for sun protection without overheating.
Real talk: You might end up owning two pairs — one for cold days, one for hot. Totally normal.
Seam Construction: Chafe-Free or Bust
Seams matter more than you think.
- Flatlock or seamless sleeves are what you want — they reduce rubbing and chafing, especially over long miles. One tester noted her flatlock-seam sleeves didn’t chafe at all, even on multi-hour runs. That’s the gold standard.
- Avoid sleeves with big seams running down the inside of your arm — you’ll feel it every time your elbow bends.
Durability vs. Featherweight
Here’s the trade-off: the thinner the sleeve, the more delicate it usually is.
- That paper-thin mesh you love in July? It might snag or tear faster than thicker models.
- Higher nylon content = more durable.
Check reviews — if folks say it frays after three washes, it’s probably not built for long haul.
But even the thin ones should last you dozens of runs if you treat ‘em right.
Extra Features: Small Details, Big Payoff
Let’s talk about the bonus stuff — the features that might not seem huge at first but make a big difference once you’re out on the road or trail.
UV Protection
If you’re logging serious miles in the sun, this is a no-brainer.
Look for UPF-rated sleeves (UPF 30, 40, or 50). A UPF 50 rating blocks 98% of UV rays — that’s a big win for your skin long-term.
Heads up: Not all compression sleeves are rated. If it doesn’t say “UV protection,” assume it’s not officially tested — even if it does block some sun just by covering skin.
Reflective Elements
Running at dawn, dusk, or night? Then you want sleeves with reflective logos or strips.
Even a small reflective design can help cars spot you sooner. Some brands include reflective dots or trim — it’s not huge, but it’s a nice safety bonus.
Pockets or Stash Spots
Rare, but worth mentioning. A few sleeves come with tiny pockets for gels, keys, or a credit card.
Most runners just tuck fuel under the sleeve itself, but if you don’t wear a belt or pack, this could be handy.
Grippers vs. No Grippers
How do sleeves stay up? Usually one of two ways:
- Silicone grippers: Thin bands at the top that grip your skin and keep the sleeve from sliding.
- Elastic tension: A good stretch-fit that hugs your arm without slipping.
Silicone works well — just watch for skin sensitivity. Some runners get mild irritation. If that’s you, look for sleeves that are just snug and long enough to stay put naturally.
Odor Control
Some sleeves are treated with anti-odor tech (like Polygiene).
If you tend to re-wear gear before washing (guilty), this feature helps. Not a must-have, but nice if you’re prone to stank sleeves.
Style
Let’s not pretend looks don’t matter. Luckily, sleeves now come in everything from plain black to wild neon to country flag prints.
Just make sure the design doesn’t compromise performance — most prints are just cosmetic overlays on the same technical fabric.
Coach’s Checklist: What Do You Need?
Before you buy, make your own list. Something like:
- Must be moisture-wicking
- Needs UPF 50 for sunny long runs
- Prefer no silicone gripper
- Don’t care about stash pockets
Knowing your non-negotiables saves time (and bad purchases).
Top Arm Sleeve Brands Runners Actually Use (and Why)
Let’s get this out of the way — not all arm sleeves are created equal. Some are legit performance gear. Others are glorified sweatbands. I’ve tested enough to know the difference.
So if you’re shopping around and wondering where to start, here’s a quick guide to the top names and what each brand does best:
CEP – For Hardcore Compression & Recovery
If you want serious compression — like, medical-grade squeeze — CEP is where it’s at. This German brand doesn’t mess around. Their sleeves are tight, targeted, and built for real recovery. Great for marathoners or anyone putting in heavy mileage.
Just know: they’re not “comfy.” They’re effective. If you’re the kind of runner who ices, stretches, and logs everything — you’ll love these.
Best for: Recovery junkies, high-mileage runners, and anyone who wants max compression.
Zensah – For Everyday Comfort
Zensah sleeves are the ones I toss in my gym bag and forget about — in a good way. Soft, seamless, and solid compression without turning your arms purple.
They don’t slide down or chafe, even on long runs. If you’re newer to sleeves or just want something that feels good mile after mile, start here.
Best for: Daily runs, long runs, and runners who care more about feel than full-blown compression.
Compressport – For Trail Beasts & Ultra Grinders
Compressport’s sleeves show up at mountain ultras for a reason. Built to last. Built to support. I’ve worn them on rough trails, and they stay put.
Their targeted compression zones keep your arms from feeling like jello late in a race. These are sleeves for people who run where the roads end.
Best for: Trail runners, ultrarunners, and folks who treat hills like playgrounds.
Nike / Under Armour – For Style, Budget, & Basics
Let’s be honest — not everyone needs elite-level compression. Sometimes you just want sleeves that look good, offer a little warmth or sun protection, and don’t break the bank.
Nike’s Pro sleeves and UA’s HeatGear/ColdGear lines fit that bill. Are they medical-grade? Nope. Do they work for most everyday runners? Absolutely.
Best for: Casual runners, cool weather runs, and anyone who prefers familiar brands.
Rockay – For Eco-Minded Runners Who Still Want Performance
Rockay’s a newer name, but they’re making waves — especially with runners who care about sustainability.
They use recycled materials and still offer solid compression and breathability. I dig their mission and their gear.
Best for: Runners who want solid gear and a smaller footprint.
Other Brands Worth Checking Out
- 2XU – Another heavy-hitter in compression gear
- CW-X – Known for support-focused designs
- Salomon / Asics – Especially useful for sun sleeves and trail gear
- InkNBurn – Wild designs if you want to stand out on race day
- Generic Amazon Brands – Don’t laugh; some are actually solid and crazy affordable
Bonus Tip: Try Cycling Arm Warmers
Runners forget this all the time: the cycling world has killer sleeves.
Brands like Pearl Izumi and Castelli make thermal and sun sleeves that work great for running too. Pearl Izumi’s thermal warmers? Gold on cold mornings.
Final Thoughts — Should You Even Wear Arm Sleeves?
Alright, let’s wrap this up.
Arm sleeves aren’t magic. They won’t turn a 9-minute pace into a 6:30. But they can make your run better. More comfortable. Less chafing. Quicker recovery. A mental edge. That’s worth something.
Here’s what sleeves can actually do:
- Cut down soreness, so your arms aren’t dead the next day
- Keep you warm (or cool), depending on fabric
- Protect against sun, scrapes, or wind
- Hold a gel or two (some even stash small items)
- Make you feel like a badass — hey, mindset matters
They’re cheap compared to shoes or watches. And once you find a pair that fits right, you might end up wearing them on every long run.
I’ve had runners swear they’d never wear sleeves — until they tried a pair on a windy 12-miler and suddenly wouldn’t take them off.
If You’re On the Fence, Try This:
- Hot climate? Start with a lightweight UV sleeve.
- Cold climate? Go with a thermal compression sleeve.
- Unsure? Toss one in your bag. You can always take them off mid-run if it’s not working.
Some folks don’t notice much difference. That’s cool. Use what works. If a long sleeve shirt or sunscreen gets the job done, that’s fine too. Running is personal. Gear is personal.
As I always tell my athletes:
“Not every piece of gear has to change your time. Some gear just changes how you feel — and that’s just as important.”
Sleeves might be all mental. Or they might be your new secret weapon.
Only one way to find out.