Should You Buy a New or Used Treadmill?

I’ll never forget my first treadmill.

It was sitting in the corner of a dusty garage, half-buried under old gym bags. The owner barely used it, but for me, it became the start of hundreds of miles of winter training.

It wasn’t perfect, but it got the job done — and taught me a lesson I’ve shared with dozens of runners since:

A treadmill is only as good as the miles you put on it.

Whether you’re buying brand new or scoring a secondhand deal, the goal stays the same: find a machine that fits your needs without draining your wallet or your patience.

In this guide, I’ll break down what really matters when choosing between used and new treadmills — based on what I’ve seen work (and not work) for real runners over the past decade.

Let’s get to it.


Why a Used Treadmill Can help

Over the years, I’ve coached plenty of runners who started out with secondhand treadmills.

Some ran their first marathon using machines older than their race bibs!

Here’s why used can actually be a smart move if you play your cards right.

1. Your Wallet Will Thank You

I’ve seen runners snag $2,000 treadmills for $500. Same sturdy frame. Same powerful motor. Just a little dust—and a lot more cash left for new shoes, race entries, or even a racecation.

2. High-End Without the High Price

Buying used can get you into top-tier brands — the kinds built for daily pounding, not occasional strolls. Instead of settling for a flimsy new machine, you could be logging miles on a serious runner’s treadmill.

3. Less Pressure to Commit

If you’re just dipping your toes into treadmill training, a used machine doesn’t feel like such a big commitment. No guilt if you decide to switch back to outdoor runs when the weather warms up.

4. Someone Else Eats the Depreciation

Treadmills lose value fast—usually 30–50% within the first year or two. If you buy smart, you’re letting someone else take that hit while you get nearly the same performance.


Buying Used Has Its Pitfalls

I’ve also seen the dark side of secondhand deals—machines that break down mid-run, mysterious squeaks that grow into full-blown malfunctions, and runners who wish they’d spent a little more upfront.

Here’s what you need to watch out for:

1. The Mystery Machine Problem

Unless the seller kept meticulous records (spoiler: most don’t), you’ll have no idea how hard that treadmill’s been pushed.

2. Wear and Tear You Can’t See

Motors lose their punch. Belts wear unevenly. Electronics glitch. You might not notice during a quick test jog, but two weeks into training? Different story. So please make sure to always crank up the speed and incline during a test. Listen for rattles, squeaks, or hesitation. Trust your gut.

3. No Warranty = All Risk

If something breaks — and it might — the repair bill’s on you. And sometimes, finding parts for older models is harder than finding a race with free donuts at the finish line.

4. Tech From the Stone Age

Some older treadmills feel downright ancient: clunky screens, zero connectivity, no workout variety. If tech keeps you motivated, an outdated machine could kill your momentum fast.


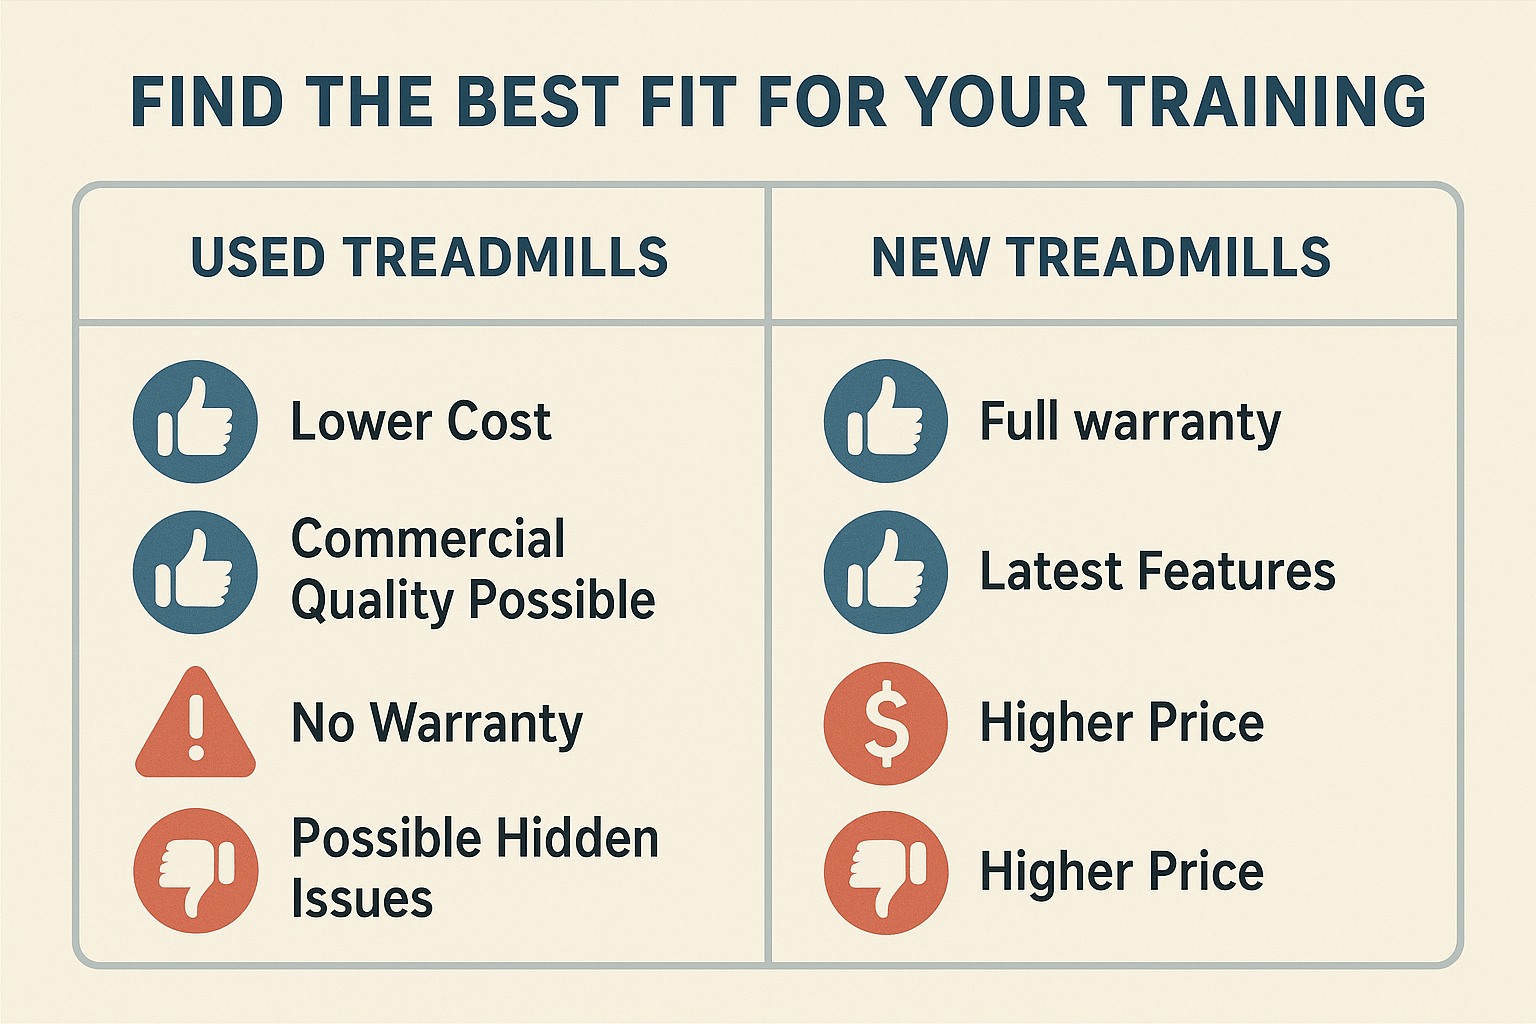
New vs Used: The Straight-Shooter’s Comparison

Here’s how I break it down with my athletes:

Neither is “better.” It’s about what fits your situation, goals, and risk tolerance.


Buying a Used Treadmill? Here’s How to Get It Right

Going the used route can be a smart move — but only if you treat it like you would picking a training partner for a marathon. You want reliable, not just convenient. I’ve seen runners rush a treadmill purchase and regret it within weeks. Let’s make sure that’s not you.

Here’s the step-by-step game plan I recommend to my friends and clients:


Step 1: Research Like a Detective

Before you even set foot in someone’s garage or scroll through online ads, know your target.

  • Price Check: Find out what the model cost new. A treadmill that sold for $2,500 three years ago is a very different machine from one that retailed for $699.

  • Review Hunt: Read real-world runner reviews, not just manufacturer descriptions. Look for common complaints: belt slipping, noisy motor, bad electronics — these are red flags.

  • Troubleshooting Patterns: Every treadmill line has its quirks. Some brands have belts that fray faster; others have motors that overheat. Knowing what to look out for will save you from a bad surprise.

My best advice? Stick to brands that are known for durability. Over the years, I’ve seen NordicTrack, Sole, and LifeFitness treadmills hold up best under real-world mileage.

Step 2: Inspect It Like You Mean It

You wouldn’t buy a car without a test drive, right? Same principle here. Your future training depends on this thing working smoothly.

When you go check it out:

  • Frame: Grab the side rails and rock them gently. A good treadmill feels sturdy, not wobbly like a cheap patio chair.

  • Motor: Start it up, crank the speed, then slow it down, and run a few minutes at 5–6 mph. A healthy motor sounds low and steady — not screechy, not hesitant.

  • Belt: Look closely. A belt should be centered, smooth, and show even wear. If it’s frayed, slipping, or feels jerky underfoot, that’s a major repair waiting to happen.

  • Console: Push every button. Test incline changes. Test speed jumps. A flickering screen or dead button could mean expensive electronic issues down the line.

Step 3: Ask the Tough Questions (Don’t Be Shy)

Good treadmills age gracefully if they’re cared for. Your job is to find out how this machine was treated.

Questions to ask the seller:

  • How often was it used? Daily marathon training is different from occasional walking while binge-watching Netflix.

  • What types of workouts? Sprints and heavy interval training wear treadmills harder than easy walking.

  • Was it maintained? Specifically: Was the belt lubricated regularly? (Neglect here shortens the machine’s life.)

  • Why are you selling it? Listen closely to their answer. Vague excuses (“We just don’t need it anymore”) are okay. Dodging the question is not.

Be Careful – If the seller gets defensive, rushes you, or refuses to let you really test it — trust your gut and walk away. A good seller will want you to feel confident.

Step 4: Know What a Fair Price Looks Like

Here’s a rough cheat sheet I’ve built over years of helping runners buy used treadmills:

  • Basic Home Models (light use, walking-focused) $200–$500

  • Mid-Range Running Machines (inclines, better motors) $500–$1000

  • High-End Commercial Models (built for serious training) $1000–$1800

Quick Recap: Your 5-Minute Pre-Purchase Checklist

Before you hand over a single dollar, make sure you can say YES to these:

  • ✅ Solid frame with no wobbles

  • ✅ Smooth motor sound at all speeds

  • ✅ Belt centered and in good condition

  • ✅ Console buttons and screen fully functional

  • ✅ Clear, honest answers from the seller


Real Runner FAQ

Q: How long will a good treadmill last me?
👉 If you treat it right? 7–12 years easy. Beat it up? Maybe 3–5.

Q: Should I buy a treadmill from a gym sell-off?
👉 Sometimes! Commercial treadmills are tanks — just check age, service history, and mileage.

Q: Can I trust online-only treadmill purchases?
👉 Not really. Try to test in person. If not, buy from somewhere with a real return policy.

Q: What’s the #1 feature to care about?
👉 Motor power (at least 2.5–3.5 HP for runners). Forget the shiny touchscreen if the engine’s a lawnmower.


Final Verdict: New or Used, It’s the Miles That Matter

Look — I’ve seen runners PR off Craigslist treadmills. I’ve seen others burn out on fancy machines that became expensive coat racks.

At the end of the day, the machine is just the stage. You’re the main act.

If you buy smart, inspect carefully, and commit to showing up day after day, either option can lead to incredible results.

Remember:

🏃‍♂️ A used treadmill won’t limit you — excuses will.
🏃‍♀️ A new treadmill won’t guarantee success — consistency will.

Pick the machine that fits your budget, your goals, and your life — then lace up and get to work. Your best run starts with one step.

How Long Is a 5K? Distance and Average Finishing Times

When I first started running, the thought of completing a 5K race felt like a mountain I’d never climb.

I didn’t even understand the distance at first.

I was more worried about whether my knees would give out or if I’d even make it to the finish line.

My first 5K? Sure, the 3.1 miles sounded doable, but my legs were shaking by the time I crossed that line. And crossing that line? It was one of the most rewarding moments of my life.

Looking back now, finishing that race, no matter how slow my time was, made me realize something: the real victory isn’t in your time. It’s in the fact that you pushed yourself to show up and finish.

We’ll talk about the numbers and benchmarks in a bit, but for now, just remember this: when you run your first 5K, it’s not about being fast. It’s about finishing strong.

How Far is a 5K? (Spoiler: Just 3.1 Miles)

Let’s clear this up first: a 5K is 5 kilometers, which equals 3.1 miles.

That’s barely more than three miles! To help you picture it:

  • It’s about 50 city blocks. (Yep, 50! But don’t let that freak you out – it’s totally doable.)
  • It’s 12 and a half laps around a 400-meter track. Each lap is about a quarter-mile, so you’ll be done after just over 12 laps.
  • Or imagine walking at a 15-minute per mile pace. You’d finish the whole 5K in about 47 minutes. Even if you walk, you’re still finishing under an hour.

For runners, how long it takes to run 3.1 miles depends on your pace.

For example, at around 10-minute per mile pace, you’ll finish a 5K in about 30 minutes. If you’re running at 9 minutes per mile, you’re looking at roughly 28 minutes. And that’s a solid pace for most runners!

The important thing is to remember: it’s just 3.1 miles – not a marathon, not something that’s going to take forever.

Even if you walk or do a run/walk mix, you can totally crush it. One of my coach friends always says, “It’s like running your regular loop, but with just one extra lap.” And trust me, that extra lap is totally within reach, even for beginners with a little training.

How long is a 5K

Why Finishing Beats Fast Time (Especially for Beginners)

For all you first-timers, let me be straight with you: your goal is to finish, not race against the clock.

Let me tell you about my first 5K. I thought I was going to sprint the whole thing (I mean, I’d “sprinted” up my street a few times, right?).

Spoiler alert: I didn’t sprint.

By the time I hit mile 2, I was gasping for air and walking.

But when I crossed that finish line – completely wiped out, slower than I imagined – I felt like a champion. That finish line was more than just a line; it was a huge win for me.

If you’re out of breath at the end of your first 5K, then guess what? You’ve already won.

Don’t stress about how fast other people are going. !Remember, it’s just a 5K so don’t beat yourself up over your time; you can always try again if it doesn’t go well.

Average 5K Finish Times by Age & Gender

Alright, if you’re still wondering where you stand, let’s break down some real-world data. This comes from a 2018 race dataset, so it’s legit. Here’s a look at typical 5K finish times by age and gender:

average 5K time by age

Key Takeaways:

  • Women’s times tend to go up a bit as they age. For instance, younger women are around 39 minutes, while older women (60+) might hit 49 minutes.
  • Men’s times are faster across the board: younger guys finish around 31 minutes, and older men (60+) land around 41 minutes.
  • The gender gap is pretty consistent. Men are about 6-8 minutes faster on average. That’s because men tend to run about 10% faster than women on average.

How Age and Gender Affect Your 5K Times

Here’s something that comes up a lot: “Am I too old to get faster?” or “Why do my male friends crush my time?” Let’s break this down with some stats.

Gender:

Generally, men tend to run faster than women, with an average difference of around 10–11% in long-distance races (PMC.ncbi.nlm.nih.gov). For example, in the 20-29 age group, men typically finish a 5K in 33:19, while women average 38:44, which is about 14% slower.

Why?

Men typically have higher hemoglobin levels (helps transport oxygen), more muscle mass, and different hormones—all things that help with speed. But here’s the truth: women can and do narrow the gap with the right training. You’re not “less of a runner” because you’re not as fast as the guy next to you. Trust me on that.

Age:

We all know it’s true—your body will slow down as you age. But it’s not a major drop-off until you hit around 35. For most runners, speed declines about 1% per year after that.

So, if you’re 30 and running a 25-minute 5K, by age 50, you might be running around 27:30 if you keep up your training. After around age 65-70, the slowdown can speed up a little, around 1.5-2% per year.

A fun example:

If you ran a 25-minute 5K at 35, a 50-year-old in the same shape might hit around 28 minutes. By age 80, that 5K might be 33 minutes or more, depending on their shape. Of course, genetics, training, and overall health play a huge role, but you get the point.

Personally, I’m in my late 30s now, and I’ve noticed hill climbs and recovery take a little more effort than when I was 25. But with smart training, I’m still hitting some of my fastest times ever. Strength work has made a huge difference.

Realistic 5K Times for Beginners: It’s All About the Mindset

Alright, if you’re just starting out with running, it’s crucial to keep things real.

You can’t expect to run a 5K at some lightning-fast pace right away. Most beginners, honestly, will clock in anywhere between 30 and 60 minutes for that first 5K. And that’s totally fine.

Don’t sweat it. You’ll definitely see those times come down as you build strength and stamina.

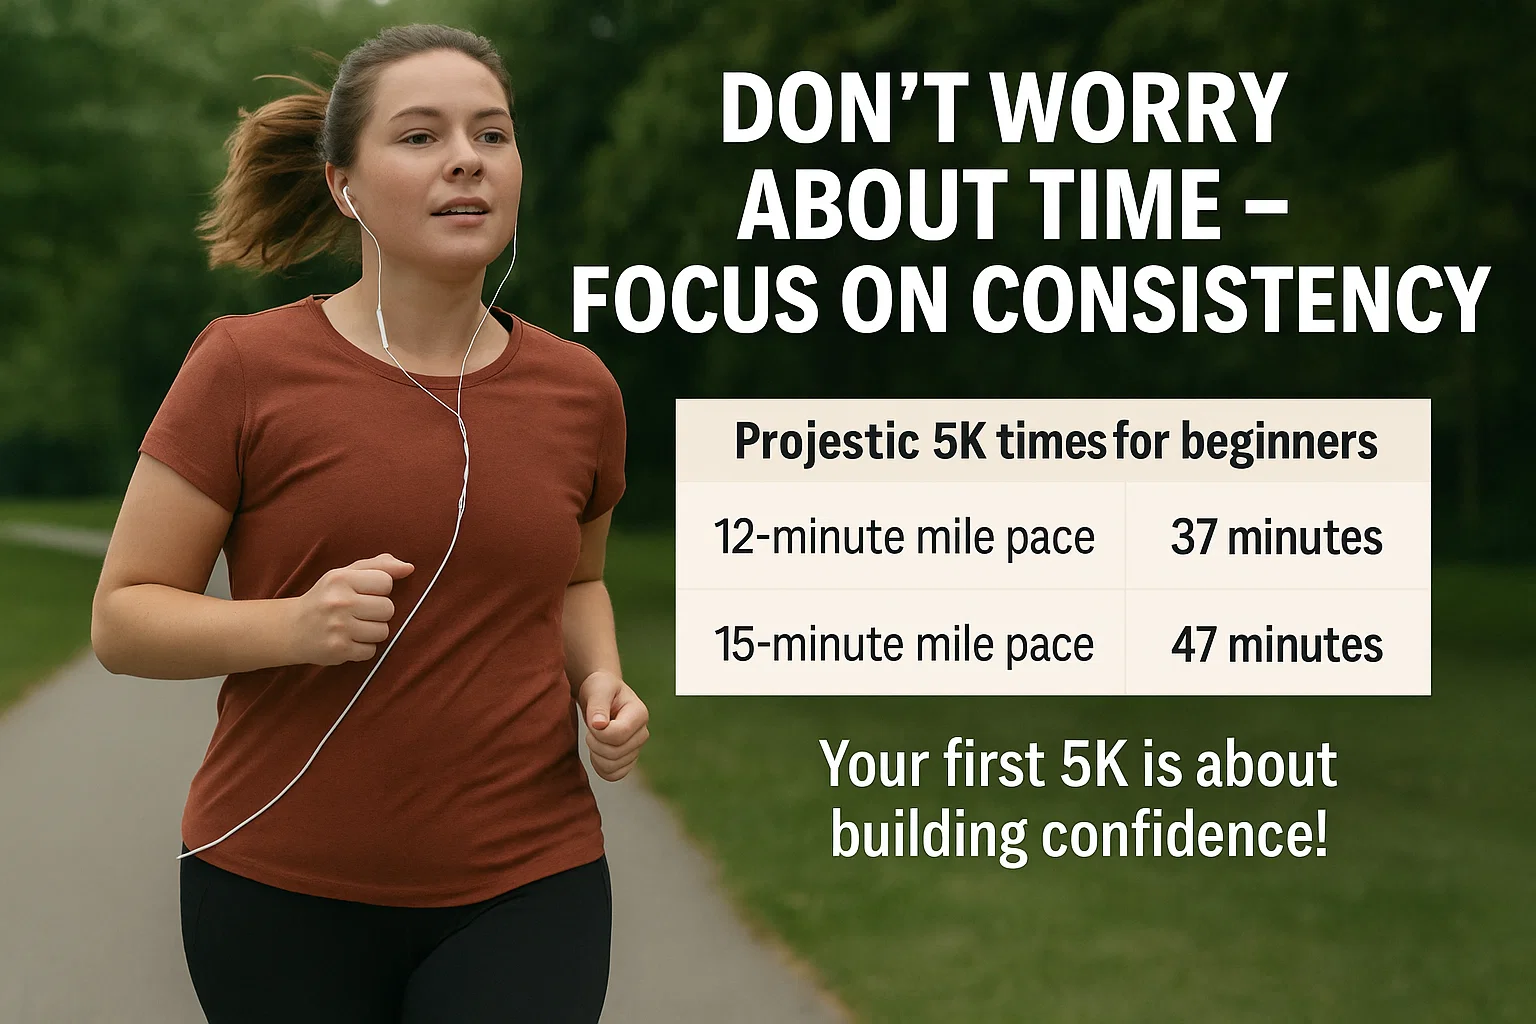
Here’s an easy way to break it down: if you can jog or walk a mile in 12 minutes, your 5K time (around 3.1 miles) will likely land around 37 minutes.

If your mile is more like 15 minutes, you’re looking at about a 47-minute 5K. Many Couch-to-5K programs aim to get you to a point where you can run/walk for about 30 minutes straight. This roughly equals a sub-30-minute 5K if you keep it up.

Curious about competitive 5K finish times? Check out this chart:

Average 5K winning time by age

Source

Keep it Comfortable:

Ease into it. Don’t try to sprint the first mile and burn yourself out. You want to be able to chat while running, so don’t push it too hard in the beginning.

I’ve had my moments where I went out too fast, gasping for air with two miles left. No fun. Don’t go out too fast… nothing’s worse than gasping for air and realizing you still have 2 miles left.

Walk When You Need To:

Walking doesn’t mean you’re failing. It’s part of the game. Many beginners use a run-walk plan (like run 4 minutes, walk 1 minute). You’re still moving forward, and that’s what matters. There’s no shame in walking if you need to. Coaches even suggest walking breaks to help maintain form and avoid burnout.

Focus on the Effort, Not the Clock:

Forget about obsessing over times. If you finished in 50 minutes but didn’t stop, that’s a huge win. It’s not about the time, it’s about turning pain into purpose. Every step forward is progress.

Instead of worrying about what “average” runners are doing, focus on hitting small milestones. They’re what push you to the next level. If you’ve been walking, a 45-minute 5K is a solid result. If you’re more experienced and already run at 30 minutes, maybe try hitting 28 minutes as your next goal. But always remember—the goal is to finish strong and be ready to crush the next one faster!

Training Tips: How to Improve Your 5K Time

Ready to crush that 5K and see a faster time? Here’s the deal—it’s not about luck or magic. Improving your 5K boils down to one thing: consistent, structured training. Let’s dive into the coach-style tips I’ve picked up over the years. I’ll mix in my own experiences with some real runner wisdom.

Mix Up Your Workouts

If you’re running easy every single day, you’re not going to get faster. Change things up and add some variety:

  1. Speed Intervals: Once a week, try doing short, fast repeats. For example, 6×400 meters (that’s one lap around the track) with a 200-meter easy jog in between. Or, 3×1 km at your goal 5K pace with 2-3 minutes rest. These workouts teach your legs to pick up the pace and help your heart handle lactic buildup. I remember when I did my first 5×400 workout—it was tough, but by the end of the month, I had shaved a full minute off my 5K time.
  2. Tempo Runs: These are key for building endurance. Aim for 15–20 minutes at a “comfortably hard” pace, which is about 75-85% of your max effort. It’s challenging but sustainable. Try running at a pace you could hold for a solid 30-minute run. This trains your body to clear out fatigue faster, and you’ll notice it on race day.
  3. Easy Long Runs: Once a week, go longer than your race distance. If your 5K is 3 miles, shoot for 4–5 miles at a relaxed pace. It helps build that aerobic base that’ll let you keep going without running out of steam. Even if you need to walk a little, that’s okay. The key is to build that endurance gradually.
  4. Hill Work: Don’t skip the hills. Throw in a hill sprint workout or pick a hilly route to run. Running uphill strengthens your legs and boosts your speed on the flat. I learned this lesson after trying a race with zero hills, then running a course with a ton of elevation. I could feel the difference in my performance, especially towards the end of the race.

Pacing: Don’t Go Out Too Fast

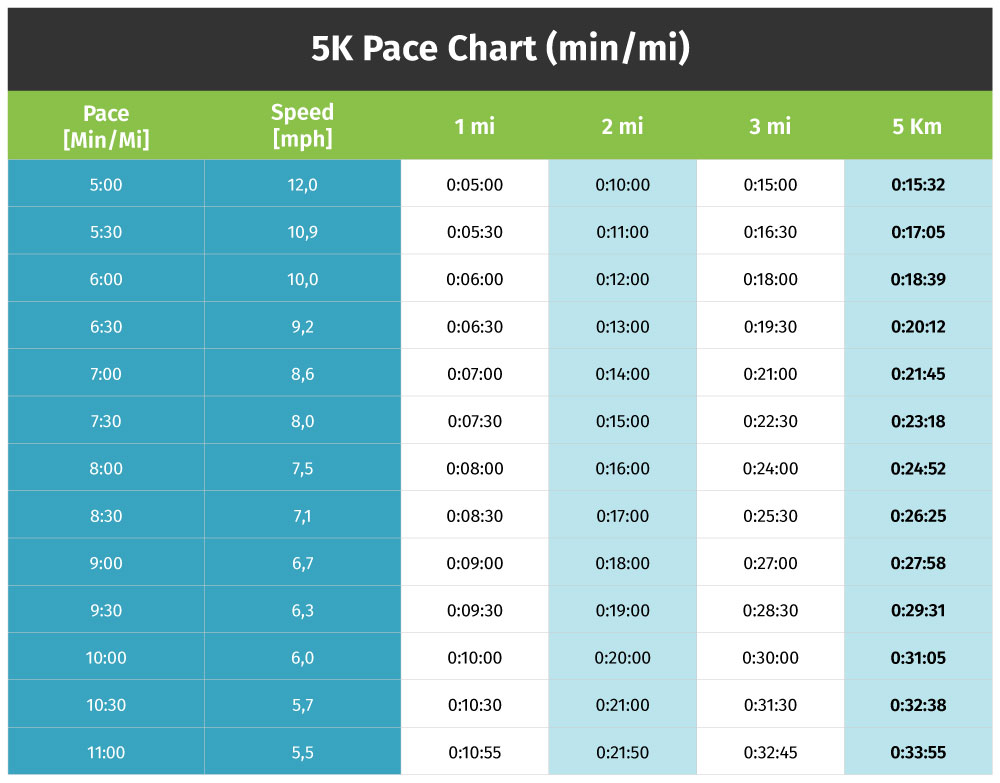
Let me say it again: pacing is everything. If you’re shooting for a 30-minute 5K (that’s a 9:40/mile pace), it’s critical to practice running at that pace. I made the mistake early on of going too fast at the start, only to burn out halfway through. You don’t need fancy gadgets for pacing—just use a watch or pace chart. The trick is to resist the urge to sprint from the start.

To give you an idea on how pace impacts your 5K time, check out this chart:

Average 5K pace in miles

Consistency is Key

Look, you’re not going to get faster if you only run once in a while. Consistency is what really makes the difference. It’s better to run short distances 4 times a week than do one huge run and then rest for the next five days. Stick to 3–4 days of running, and you’ll see the payoff. I know that when I started running back-to-back days without skipping, I saw a noticeable improvement in strength and stamina. But don’t overdo it—listen to your body.

Here’s a schedule that worked for me: start the week easy, build up the intensity in the middle, then ease off before a long run or speed workout.

Recovery: Don’t Skip It

You can’t keep pushing yourself if you’re not recovering properly. I learned that the hard way. Your body gets faster and stronger when it has time to recover. Trust me, sleep is a game-changer. I’ve noticed firsthand that when I don’t sleep well, my workouts feel 30% harder. So get your rest.

Also, don’t forget to stretch and foam roll after runs. It only takes five minutes, but it makes a huge difference in preventing injuries. I learned this lesson after dealing with shin splints during college. Since then, I make sure to foam-roll and do some leg swings post-run. It’s saved me countless injuries over the years.

Nutrition & Hydration: Fuel Up

Eat to run. It’s that simple. You need a solid, balanced diet to fuel your runs. Hydration is just as important—running while even a little dehydrated can slow you down. On race day, don’t try anything new.

Stick with what you know works, like a small carb snack an hour before you race (banana or oatmeal, for example). Keep it simple.

One runner on a forum mentioned how eating more protein and veggies and actually getting 8 hours of sleep made a huge difference in their performance. No need for fancy supplements—just good food and rest.

Mental Training: Train Your Mind

Running a fast 5K isn’t just about the legs—it’s mental, too. When the going gets tough, it’s your mind that will push you through. I often picture myself crossing the finish line strong when I feel the urge to quit.

Mantras like “one step at a time” or counting breaths really help during tough moments. By mile 2.5 of a 5K, it’s all mental. Plan ahead—find a mantra that works for you or set little targets like “run to the next mailbox.”

And don’t forget to smile or wave to the crowd. It helps keep the energy up, and honestly, it makes the race more fun.

Weekly Training Plan Example

If you’re running 4 days a week, here’s a solid plan to follow:

  • Monday: Rest
  • Tuesday: Speed work (intervals)
  • Wednesday: Easy run (20 min)
  • Thursday: Tempo run (20 min)
  • Friday: Rest or cross-train
  • Saturday: Long run (4-5 miles easy)
  • Sunday: Easy jog or rest

Each week, add a minute to your intervals or a block to your long run. Small, steady progress is the key.

AQ: All About the 5K

Q1: How far is a 5K in miles?

A 5K is approximately 3.1 miles.

Q2: What is the average time to run a 5K?

For recreational runners, the average time to complete a 5K is between 25 and 35 minutes.

Q3: How long does it take to walk a 5K?

Walking a 5K usually takes between 45 and 60 minutes, depending on your pace.

Q4: How can I improve my 5K time?

Incorporate interval training, tempo runs, and consistent mileage into your routine to build speed and endurance.

Q5: What’s a good goal time for a beginner 5K?

Many beginners aim to finish a 5K in under 30 minutes, though any pace that’s challenging but achievable is great.

Q6: How often should I train for a 5K?

Most runners train 3 to 4 times per week, including a mix of easy runs, speed work, and rest days.

Q7: Do I need special shoes for a 5K?

Yes—running-specific shoes with proper support and cushioning help prevent injuries.

Q8: Can I walk part of a 5K?

Absolutely! Many beginners use run-walk intervals to build endurance safely.

Q9: What should I eat before a 5K?

Eat a light snack with carbohydrates, like a banana or toast with peanut butter, 30–60 minutes before running.

The Bottom Line

The secret to improving your 5K time isn’t about running harder—it’s about running smarter. Sure, improving by 10% doesn’t happen in one week, but if you keep at it—building your volume and adding faster efforts—you’ll see the time drop. It’s all about consistency, patience, and letting your body adapt to the training.

Before your next training week, ask yourself: What’s one thing I can improve?

Whether it’s shaving a few seconds off your pace or adding one more interval, focus on that and see how you progress.

You’re more advanced? Then Try the following 5k training plans

How to Overcome Nerves on Your First Run: The Ultimate Guide for Beginners

Feeling nervous before your first run? Don’t worry, it’s normal!

I remember putting on my shoes for the first time and feeling really nervous.

I worried I wouldn’t last 10 minutes without stopping.

But it’s okay—everyone feels nervous before their first few runs. For some the feeling may even linger.

The key isn’t to ignore your nerves, but to manage them.

You just need to control them so they don’t hold you back.

Let me show you how to manage those nerves and feel more confident.


Nerves Are Normal

Nervous? That’s good! It means you care.

If you’re not a little nervous, you’re not challenging yourself enough. Nerves show that you care and are trying something new. Whether it’s your first run or your first race, nerves are there to help you, not hold you back.

Embrace those nerves—they can work in your favor!


Shift Your Focus

Nerves get stronger when you start thinking too much: “What if I can’t finish?” or “What if I’m the slowest?”

Forget about those worries. Instead, focus on each step, not the whole run.

Don’t worry about the end—just take it one step at a time. Break it into smaller parts, and you’ll finish before you know it.


Use Positive Self-Talk

The “I can’t do this” voice will pop up, I promise. That thought will come, but it’s completely wrong. When you hear that voice, fight back with: “I’m here. I’m doing this. I can do it.” Have a bunch of mantras you can rely on in times of need. 

I used to be scared to run in front of others, thinking they were watching me. Then I realized: people are too focused on their own run to notice mine. And honestly? You might even inspire someone else along the way.


Breathe

You’re running, your heart is racing, and you’re out of breath.

That’s normal.

But here’s a trick: slow your breathing down. Take slow breaths—in through your nose, hold, then out through your mouth. Do this for a minute, and you’ll feel much calmer.

Remember: you’re not just running, you’re breathing your way through it. Keep your breathing steady and strong!


Start Slow—You’ve Got Time

I get it, you want to crush it right from the start.

But trust me, that fast pace can wait.

You’re not in a race right now. Your goal is to get comfortable with running. Start slow and pick a pace where you can talk without getting too out of breath.

And hey, if you need to slow down to a brisk walk, go for it. There’s no shame in walking, especially when you’re starting out.


Visualize Yourself Finishing Strong

Alright, this might sound a bit strange, but trust me.

Take a minute and picture yourself running.

Visualize the path ahead, the sound of your shoes hitting the pavement, and how your body feels as you keep moving.

Then, see yourself finishing strong—crossing that imaginary finish line with a huge grin on your face. It works. Seriously. Mental prep is just as important as physical prep.


Don’t Overthink The Start

Listen, the hardest part is always the start.

You can talk yourself into a panic, but nothing’s going to happen until you actually put one foot in front of the other.

Stop overthinking it. Just put on your shoes, step outside, and start running.

That’s it. Simple. Don’t overthink it. Once you start, your nerves will go away.


Get Into A Routine

Nervousness will still pop up now and then, but trust me, the more you run, the easier it gets. Having a routine makes it so much easier to push through those nerves. The more you run, the easier it will be to handle those nerves before each run.

Here’s how to make running a habit.


Celebrate Every Run

So, you didn’t run a marathon on your first day?

No one expects you to. But guess what? You ran.

Whether it’s five minutes or five miles, you showed up—and that’s worth celebrating.

The first time I ran 30 minutes without stopping I Felt like I was on top of the world! So, celebrate every win, no matter how small.


FAQ: 

How do I overcome pre-run anxiety?

Pre-run anxiety is normal—even experienced runners feel it. The best way to handle it is by focusing on the steps, not the finish line. Take deep breaths, tell yourself something positive like “I’m strong, I’ve got this,” and remember, it’s just a run, not a race.

What if I can’t run the full distance on my first try?

Don’t sweat it! Everyone starts somewhere. If you can’t run the full distance, that’s okay. You showed up—that’s the win! Take breaks, walk if you need to, and focus on consistency, not perfection.

How can I calm my nerves before a run?

Breathing exercises are a game-changer. Breathe in deeply through your nose, hold for a second, and then slowly exhale through your mouth. This helps calm you down. Also, keep in mind: those nerves? They’re your body’s way of saying, “I’m ready!” Embrace it and use it as fuel to get you going.

How should I pace myself on my first run?

Start slow—like, really slow. You’ll thank yourself later. Focus on a pace where you can hold a conversation without gasping for air. It’s not about speed right now; it’s about building that endurance. Check out this post.

How do I avoid injury as a beginner runner?

It’s simple—warm up before, cool down after. Stretch before your run (think leg swings and lunges), and stretch afterward (hold those stretches). Also, listen to your body. If something hurts, don’t push through it. Start with shorter runs and build up gradually. This isn’t a race; it’s about pacing yourself for the long term.

How to Never Get Lost on the Trails

I’ve gotten lost on trails more times than I care to admit.

One time, I chased a random runner and ended up miles off-course.

Another time, I thought I could navigate a backwoods trail based on nothing but gut instinct.

Yeah, it didn’t end well.

I could keep going, but I think you get the idea—getting lost on the trail happens to the best of us.

The key? Knowing how to minimize the chances, staying calm when it does happen, and avoiding making the situation worse.

In this guide, I’m going to break down the best ways to avoid getting lost while trail running and how to stay calm if it happens.

The more you prep, the more you can focus on enjoying the run—and maybe even take that wrong turn with a little more confidence.


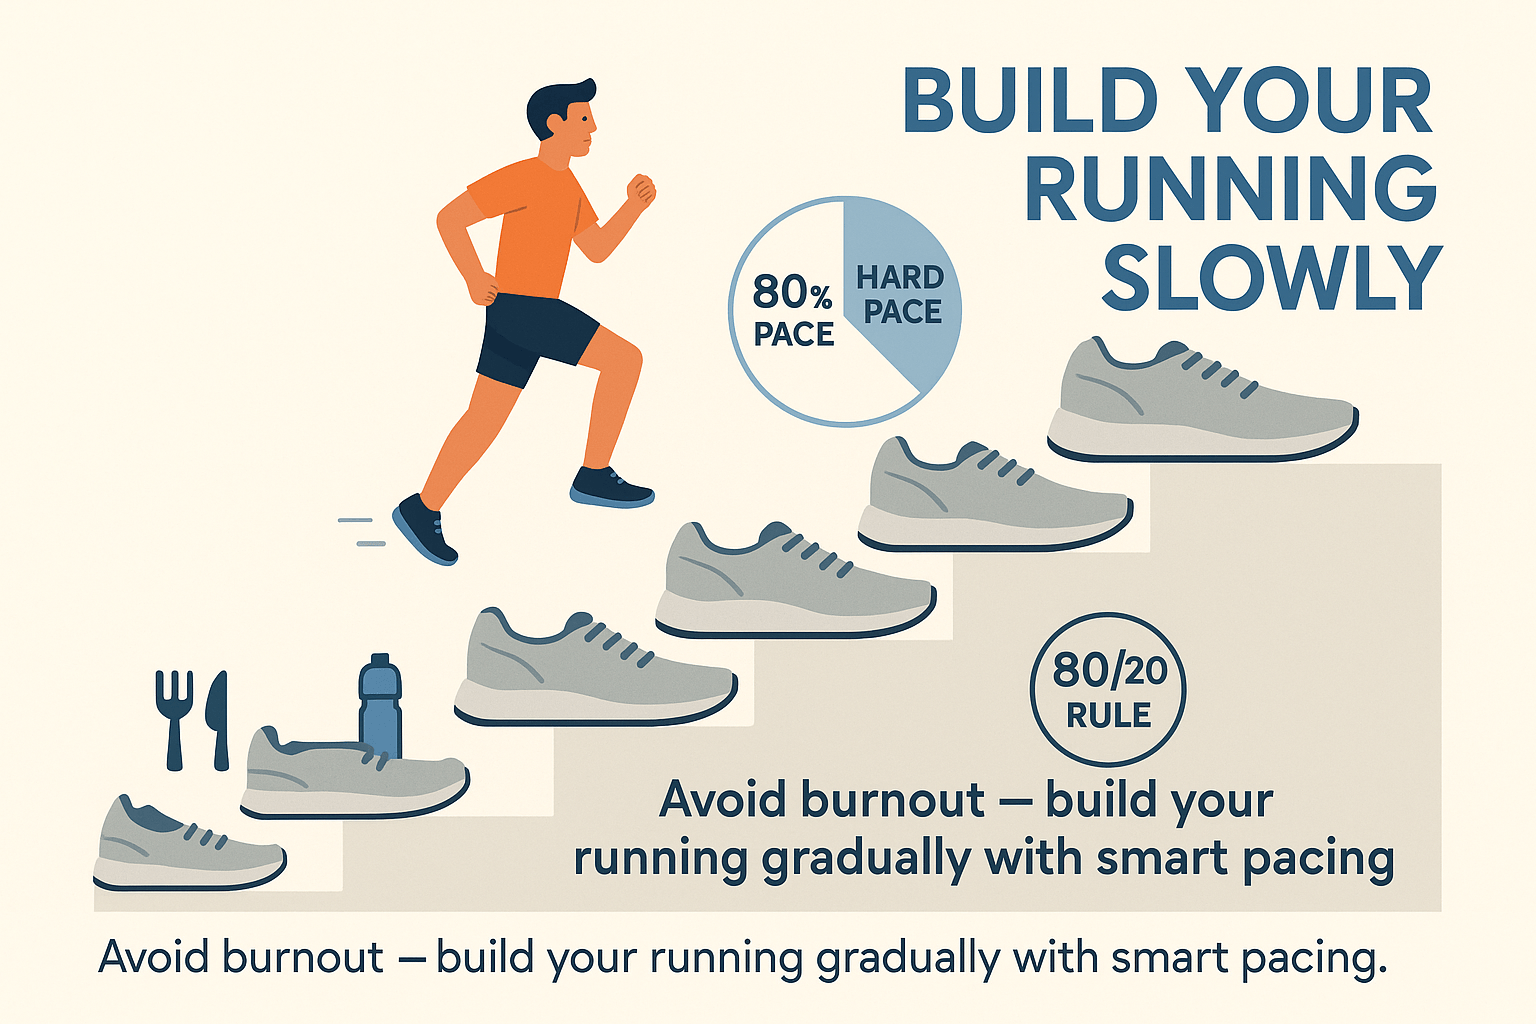
Start Slow and Pick Easy Trails

When you first start running on trails, don’t go for the toughest one right away.

I know it’s tempting to pick a cool, wild trail, but trust me—if it’s not marked well, you’ll get lost pretty quickly.

And I’m speaking from personal experience of course.

On one of my first trail runs, I turned the wrong way and ended up hiking up a mountain on a trail that looked like nobody had been there for years.

It was a rookie mistake.

Luckily, I found my way back, but it could’ve been much worse.

Here’s my advice: Stick to well-marked, easy-to-follow trails when you’re starting out.

You don’t want to waste your time worrying about getting lost, especially when you’re still learning how to find your way.


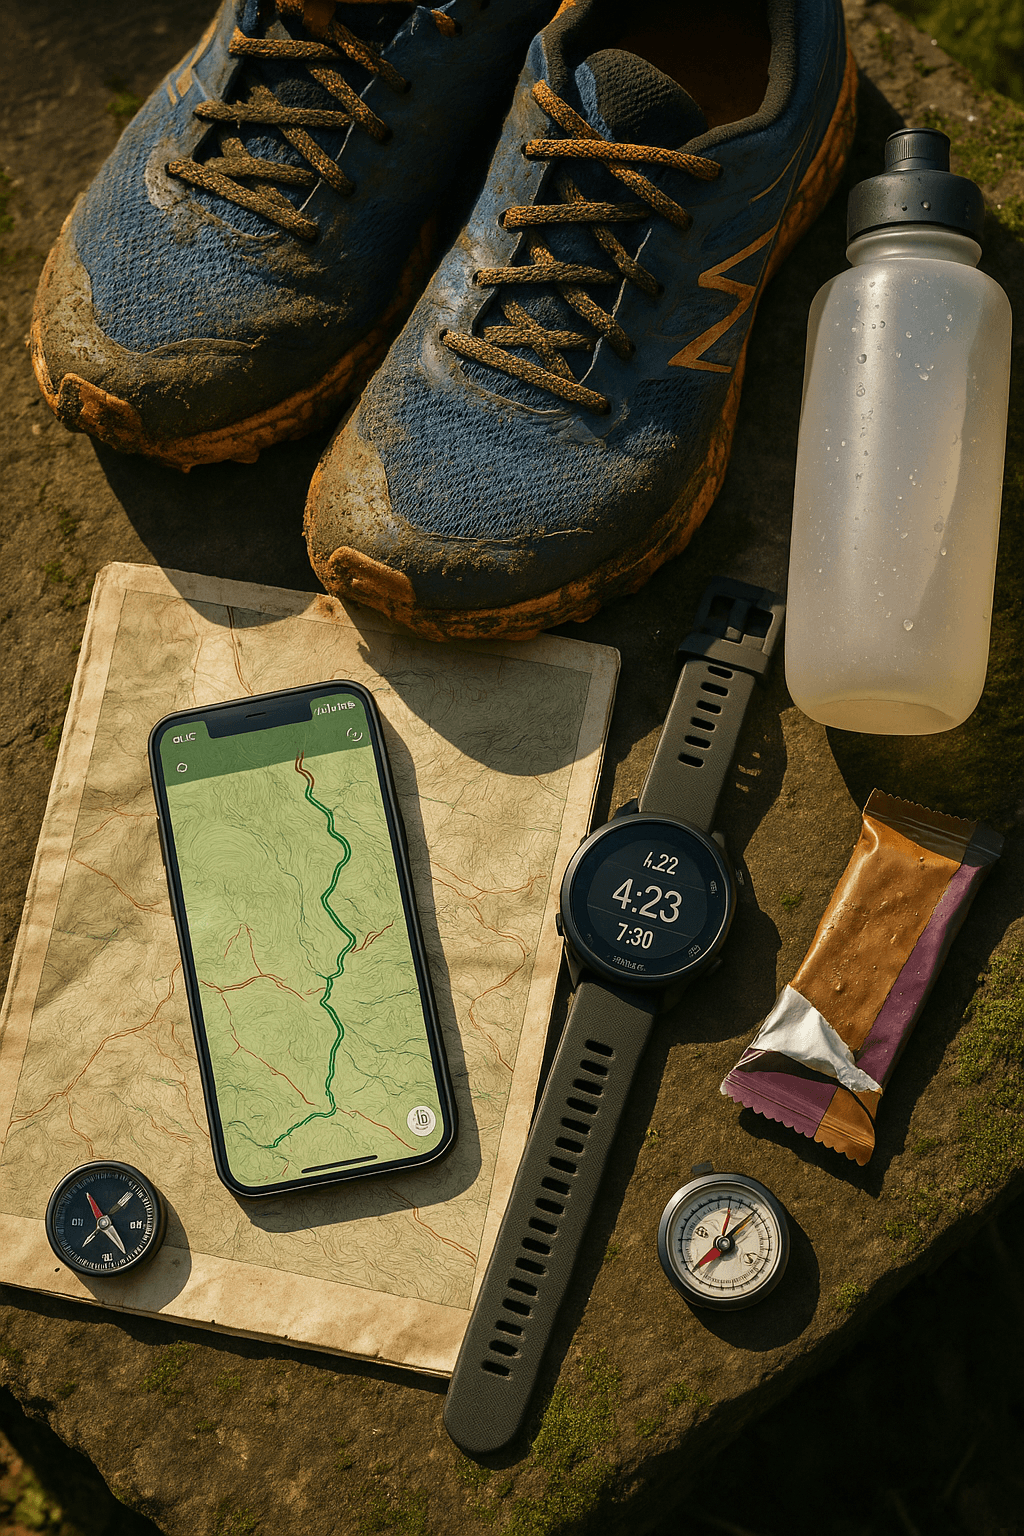
Use Your Phone 

It’s easy to trust your phone’s GPS or a fancy watch when you’re running, but out on remote trails, the signal can disappear pretty fast.

Here’s what I do: I use both a paper map and my phone.

Why? Because phones run out of battery. It’s always smart to be ready for anything.

Before you go, download your trail maps so you can still use them if the signal drops. Apps like Gaia GPS or AllTrails are great for this.

And if you have a watch, set up your route on it before you head out so you’re ready—even if you go off the grid.

One more tip: put a pin on your phone where you parked. That way, if you get lost, you can always find your way back to the car. It’s way easier than hoping your watch will magically save you. Safety matters!


Know the Landmarks 

I love trail running because it’s a chance to zone out and enjoy nature. But when you’re really into the run, it’s easy to lose track of where you are.

Here’s my rule: Pay attention to the first few minutes of your run.

Look for landmarks like big rocks, stream crossings, or big trees. These are the things that will help you find your way back.

If you remember these markers, even if you get a little lost, you can retrace your steps. It really makes a difference!


Stick to Marked Trails 

I get it—some people like a little adventure, but if you don’t know the area well, stick to the marked trails. If you’re unsure, stay away from animal trails or those tempting “shortcuts.” They might seem fun, but they can easily lead you into the unknown.

The more people there are on a trail, the more likely you’ll find someone if you need help. Stick to the popular trails, and you’ll be safe!


Plan Your Route Ahead of Time

Planning is key to not getting lost.

Before you head out, take 10 minutes to check your route on a map or app. It’s worth it!

When I first started trail running, I never planned, and I regretted it every time I got lost in unfamiliar places. A little planning can help you feel more confident and make your run a lot more enjoyable.


Tell Someone Where You’re Going

I know it sounds basic, but this is super important:

Always tell someone where you’re going and when you plan to be back.

Even if it’s just a short run, things can go wrong.

If you’re running alone, this is a must.

The last thing you want is for someone to get worried because they can’t reach you. A quick check-in can make all the difference if something goes wrong.


Stay Calm and Backtrack If You Need To

If you get lost, don’t freak out. Just stop, take a deep breath, and look around. 

Start by retracing your steps. I’ve been there—thinking I was totally lost, only to realize I missed a turn just five minutes ago.

Going back to where you last felt good can save you a lot of trouble and help you get back on track quickly.


Know When to Turn Back

Here’s the deal: Trail running isn’t about pushing yourself too hard. It’s about being smart.

If you feel like the trail’s getting rougher, the weather’s turning, or you’re just too tired—turn around. It’s not a failure, it’s being safe. You might think running just one more mile will be fine, but it could turn into a bad situation.

Knowing when to stop is part of staying safe and being ready for your next run. And hey, you can always try again when the conditions are better!


Stay Calm and Breathe

Trail running can be scary sometimes, especially when things start looking unfamiliar. Feeling nervous is normal, but panicking won’t help.

If you get lost, try to stay calm. It helps you think clearly and get back on track.

A trick I use is called box breathing: breathe in for four seconds, hold for four seconds, and breathe out for four.

It slows everything down and helps you think better.

Look around for landmarks like a big rock or a stream. They’ll help you figure out where you are. And if you’re in doubt, just stop, breathe, and think. It works!


Solo Running vs. Running with Friends

Running alone can be amazing. You get to clear your mind and enjoy the run. But solo running on unfamiliar trails can be risky.

If you’re not familiar with the area, it’s smart to bring a friend or run with a group. Having someone with you can help you stay on track, and if things go wrong, they’ll be there to help.

But running solo doesn’t have to be dangerous.

If you know the route, carry a map, and always tell someone where you’re going, you’ll be fine.

Solo runs are great if you’re on familiar trails, but if you’re on unfamiliar ones, it’s smart to bring someone with you.


Hydration and Extra Supplies

I might sound like a broken record but proper hydration is really important—especially on the trail.

Sometimes the trail will surprise you. You don’t want to get stuck without enough water or snacks, especially if your run takes longer than expected.

Always carry extra water, even if you think you won’t need it. Being thirsty in the middle of nowhere is no fun.

Pack snacks too, like energy bars or gels. They’ll keep you going. And if you’re deep in the woods, bring a water filter or purification tablets.

If you run out of water, you can grab some from a creek without worrying about getting sick. It’s always better to be safe than sorry.


Talking to Locals and Trail Communities

This one’s huge: Talk to locals who know the trails. I’m serious, don’t skip this step.

There are tons of online forums, local groups, and Facebook communities where experienced trail runners share their tips. They know the best routes and can warn you about tricky spots.

I’ve learned so much from talking to locals, and sometimes they’ll even offer to run with you. Running with someone who knows the trail makes everything less stressful and more fun.

Plus, you get all the insider info.


Conclusion:

Getting lost on a trail is just part of the adventure, but it doesn’t have to be scary. With a little planning and the right gear, you can stay safe and enjoy every step.

Whether it’s your first trail run or your hundredth, remember—it’s not just about finishing the run; it’s about getting there safely. So lace up, get out there, and enjoy exploring the trails!

How to Beat Muscle Tightness After Running

You’ve just finished that hard run, and now your muscles are tight as hell as if they’re made of concrete.

If you’ve been running for any length of time, you know exactly what I’m talking about.

It feels like your legs aren’t even yours anymore, right?

Like they belong to someone who hasn’t run a step in their life.

And it’s not the best feeling.

Worry no more.

In this article, I’ll break down some of my favorite strategies to help you prevent muscle tightness after running.

Why Do Muscles Get Tight Anyway?

Alright, let’s get to the bottom of why your muscles feel super tight post-run.

Here’s the deal: muscle tightness is your body’s natural response to the physical stress of running.

When you run, your muscles contract and stretch repeatedly, which leads to tiny tears in the muscle fibers.

This might sound a bit scary, but it’s completely normal.

After a run, your body begins to repair those tiny tears, making your muscles stronger and more resilient in the process.

The tightness you feel is a sign that your muscles are getting stronger, but it also means they need a little extra care to recover properly.


How to Prevent Muscle Tightness in the First Place

It’s much easier to prevent muscle tightness than to fix it once it’s already set in. Let me share with you my best best strategies to help you minimize tightness and muscle stiffness before it even happens.

1. Warm-Up Properly Before Your Run

Warming up is essential. It’s not just about preparing your body for the workout ahead; it’s also about getting your muscles and joints ready for the stress of running. Dynamic stretches like leg swings, walking lunges, and high knees will help loosen up your muscles and get blood flowing to your legs.

2. Don’t Skip Your Cool-Down

After you finish your run, make sure you cool down. I know, you’re probably tired and just want to sit down, but taking a few minutes to stretch and cool down can help prevent muscle tightness.

Walk for a few minutes to gradually bring your heart rate down and stretch out your quads, hamstrings, and calves.
Trust me, your muscles will thank you later.


Post-Run Recovery: Fixing Tight Muscles

Even with the best warm-ups and cool-downs, you might still experience some muscle tightness.

Don’t worry—that’s normal!

Here are a few recovery techniques to help loosen those tight muscles and speed up your recovery.

1. Foam Rolling

Foam rolling is one of the best ways to release muscle tightness and improve blood flow to your muscles. By rolling out your quads, hamstrings, and calves, you can target specific areas that may have tightened up after your run.

It might hurt a little at first, but trust me, it’s worth it. Try rolling for 1-2 minutes on each muscle group to release tightness and improve flexibility.

2. Stretching

Stretching is a great way to lengthen your muscles post-run. Focus on holding each stretch for 30 seconds to a minute. Some of my favorite post-run stretches are:

  • Hamstring Stretch: Sit on the floor and reach for your toes.
  • Quad Stretch: Stand on one leg and pull your other foot toward your glutes.
  • Calf Stretch: Place your hands on a wall and step one leg back, pressing your heel into the ground.

When to Seek Professional Help

While muscle tightness is usually manageable on your own, sometimes you might need professional help.

If you notice that tightness persists for several days or feels like something more than just typical soreness, it might be time to see a physical therapist or a sports chiropractor. Don’t try to run through pain.

They can assess your form, give you targeted exercises, and help you get back to running without pain or tightness.


Quick Tips to Keep in Mind

  • Hydration is Key: Drink plenty of water to help flush out toxins and keep your muscles hydrated.
  • Rest and Recovery: Don’t skip your rest days. Give your muscles time to recover and rebuild.
  • Massage Therapy: Consider a post-run massage to help release tension and improve circulation.

Conclusion: Don’t Let Tight Muscles Hold You Back

Muscle tightness can be a real pain, but with the right recovery strategies, you can keep it in check and stay on track with your running goals.

Remember to take care of your body with proper warm-ups, cool-downs, and recovery.

If you experience muscle tightness, don’t freak out—it’s a normal part of the running journey.

Follow the tips I’ve shared, and soon enough, you’ll be running pain-free and feeling stronger with each step.

Keep pushing and stay consistent.

How to Survive Your First Month of Running: Real Tips for New Runners (No BS)

I Hate to Discourage Anyone, But Running Sucks at First

I’m not gonna sugarcoat it.

When I started, every step felt like my legs were on fire and my lungs were about to collapse.

My body was like, “What the hell are you doing, dude?”

But here’s the thing: every time you get out there, even when it feels miserable, you’re becoming a runner.

Every mile you’re logging is building the runner you’re becoming.

Let me share with you my best tips on how to survive your first month as a runner – speaking both as a runner and running coach.

Sounds like a good idea?

Let’s get to it.


Why Soreness is Normal 

Alright, let’s talk about why running as a beginner can really suck.

If you’re sore after your first few runs, good news—you’re doing it right. 

Here’s the truth: soreness isn’t a sign that you’re doing something wrong. Far from it. It’s your muscles saying, “Hey, we’re not used to this!”

Seriously. If you’re not sore, you’re either a hidden marathoner or just one of those annoying people who are basically born with runner’s legs.

For the rest of us, soreness is part of the deal. 


Why Do You Get Sore?

Running uses different muscles, movements, and forces than most other activities, so when you’re just starting out, your body’s catching up.

Expect tight calves, sore hamstrings, maybe even a stiff back.

It’s normal, and it’s all part of the process. But don’t freak out though, it’s all part of the process. You’ll be laughing at this in a few weeks.

It’s uncomfortable, no doubt.

But that discomfort is where the magic happens.

Now let’s get into how to survive it.


How to Combat Fatigue Without Burning Out

You’re gonna feel wiped out. Like, “I just ran two miles and now I need a nap” wiped out. I get it. You’re putting in the work, but your body’s still like, “Uh, nope.” 

Here’s the deal—your body is still figuring out how to use energy efficiently.

Eventually, you won’t feel like you’ve been hit by a bus after a 20-minute jog.


Take It Easy on Rest Days

As your coach, I’d urge you to take it easy on rest days.

No, you’re not being lazy. Your body needs that time to recover.

And trust me, those rest days are gold. Skip them and your legs will let you know. It’s recovery, not procrastination.


Manage Your Expectations

There’s an old saying that disappointment comes from not planning right. So if you manage your expectations, you’re setting yourself up for success.

Here’s the deal: after your first month, you might not be running like an Olympian.

And that’s totally normal.

I know you want to be fast, but remember—this isn’t a sprint to the finish line. It’s about building a solid foundation. Stick to the basics: be consistent, and trust me, the speed will come in time.


Mental Struggles Are Part of the Game

This might surprise you, but the hardest part of running isn’t your legs—it’s your mind.

And trust me, I’ve been there myself and worked with countless beginners who feel the same way.

There will be days when you just want to quit. Your legs will feel like lead, and your brain will be screaming, “Why the hell did I sign up for this?”

But here’s the truth: it’s normal.

Every runner goes through it.

Don’t let those mind games mess with you. Push through, and keep going. You’ve got this.


Goals Matter

Set goals. But not the “I wanna be faster” kind—those are too vague.

I’m talking about SMART goals: Specific, Measurable, Achievable, Relevant, and Time-bound.

These kinds of goals will keep you focused and grounded, and they make the process feel less like a never-ending grind.

My best advice? Start small. Like, “By week four, I want to run 10 minutes without stopping.”

And when you hit that? Celebrate it. Then, set a new goal. Keep pushing forward.

Progress is progress, even if it’s a small win.


You’ll Experience New Body Oddities

I hate to sound all sorts of alarms but running has its ugly side.

Chafing.

Blisters.

Black toenails.

If you haven’t had any of these yet, just wait.

I’m not trying to scare you, but it’s part of the journey.

You’re putting your body through a lot, and sometimes, it decides to throw some weird stuff your way.

Here’s how to avoid some of these issues:

(1) get fitted for a good pair of shoes, and

(2) make sure you’re wearing moisture-wicking socks.

If you’re dealing with chafing, invest in some anti-chafe cream—it works wonders.


Your Body Will Start Changing—But Slowly

Don’t expect to wake up with “runner’s legs” overnight. This takes time.

After a month or so, though, you’ll start noticing your posture improving, your muscles toning up, and your energy levels going up. It’s not an instant upgrade, but it’s happening.

If you want to speed up the muscle-building process, add some strength training to your routine.

Squats, lunges, and core exercises will complement your running and give you those toned legs you’re after.


Quick Takeaways:

  • Start slow, focus on consistency, not speed.
  • Don’t skip rest days – recovery is just as important as the run.
  • Celebrate every small win, it adds up.
  • Embrace soreness – it’s part of the journey.
  • Set small, achievable goals, and watch your progress skyrocket!

Conclusion: 

Listen, I know it’s not easy right now.

But you’re doing it.

Every time you lace up, you’re getting closer to that goal. Keep going, stay consistent, and remember this: every step you take is a step closer to becoming the runner you’re meant to be.

Keep pushing, and soon enough, 3 miles will be a breeze. Just keep showing up.

Leg Workouts for Runners: Top 8 Exercises for Strength and Speed

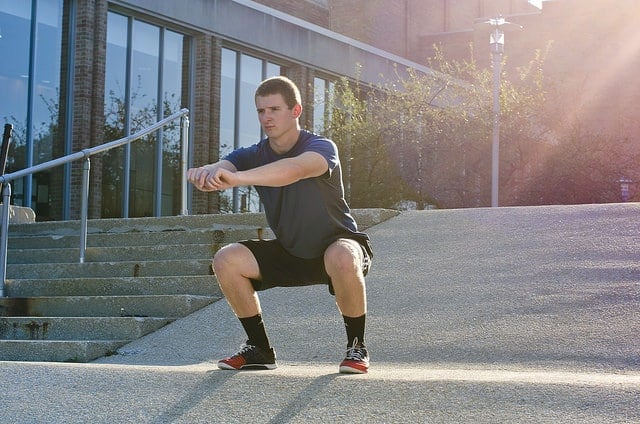
runner doing Legs Strength Exercises

Let me guess—you’re a runner who avoids the weight room like it’s a trap. I used to be the same.

I figured pounding out miles was enough. I called myself a “pure runner” and believed leg workouts were just fluff. That fantasy ended at mile 15 of a brutal Bali trail race. My knee buckled, and I had to limp to the sideline, humiliated.

My PT hit me with the truth: “Your legs aren’t strong enough.”

That hit harder than the trail did. But it was a turning point. Since then, I’ve built strength, stayed injury-free, and helped dozens of runners do the same.

This guide isn’t some generic leg day blueprint. It’s what worked for me and the athletes I coach. You’ll get real-world tips, stories from the trenches, and a workout plan that fits into your week without frying your legs. Let’s go.

Why Runners Need Leg Strength (Trust Me, You Do)

Let me dive into why you need strength work as a runner:

🔹 Injury Prevention

Your muscles are shock absorbers. If they’re weak, your joints take the hit. Research even shows strength training can slash your injury risk in half. Personally? I haven’t had a serious injury since I started lifting.

🔹 Running Economy = Free Speed

Stronger legs mean you burn less energy at the same pace. After a few weeks of squats and lunges, my “easy pace” actually felt easy. Like running with upgraded legs.

🔹 More Power on Hills and Finishes

You want that final kick? Or the legs to power up a climb? Strength is the answer. I remember gunning up a hill at mile 10 of a half marathon after months of deadlifts. I didn’t just survive. I attacked.

🔹 Form That Holds Up

Running is basically balancing on one leg over and over. Weak glutes and hamstrings? That’s when your running form breaks down. Single-leg work cleaned up my stride and made me feel stable, even on Bali’s uneven sidewalks.

The 30-Minute Leg Workout for Runners

This workout hits every key lower-body muscle you use when running. Glutes, quads, hamstrings, calves, and core stabilizers. It takes about 30 minutes, tops.

How it works:

  • 8 moves total
  • Alternate between different muscle groups
  • Mix of single-leg and two-leg exercises
  • 3 sets of 8–12 reps (adjust if you’re new)
  • Rest ~60 seconds between sets
  • Warm-up first! Think 5–10 mins of light cycling, jogging, or bodyweight squats

Progress your training by:

  • Adding weight (start small, increase weekly)
  • Bumping up reps or sets
  • Switching to tougher variations (e.g. jump squats, single-leg deadlifts)

Heavy lifting (around 80% of your one-rep max) has been shown to improve running economy, but work your way up slowly and stay sharp with form.

1. Lunges

Muscles Worked: Glutes, quads, calves — plus a solid hit to your hamstrings and core for balance.

Lunges are my bread-and-butter leg move for runners. If running is all about single-leg strength and forward drive, lunges hit that right on the nose. Think of it like a slow-motion running stride, but with fire. When I started adding them regularly, I noticed two big changes: I had way more power in my push-off, and my knees stopped doing that sketchy wobble mid-run.

How to Do Them Right:

Stand up tall, feet about hip-width. Start with just your bodyweight if you’re new. If you’re ready for more, grab a couple of dumbbells or sling a barbell across your back.

Step forward with your right foot — not a baby step, but not a leap either — and plant it strong. Bend your front knee to roughly 90 degrees and let your back knee drop toward the floor (don’t slam it; control is everything). Your front thigh should end up almost parallel to the ground, and your knee should stay in line with your ankle — not flying past your toes.

Now here’s the real work: push through your front heel like you’re pressing the floor away and bring yourself back to standing. Alternate legs if you’re doing walking lunges, or do one side at a time if you want to fry your legs a little more.

Reps: I usually go 10–12 reps per leg, per set. You can walk them across a field or stick to in-place lunges — whatever gets you fired up.

David’s Go-To Variations:

  • Walking lunges = great for range of motion
  • Reverse lunges = easier on the knees
  • Bulgarian split squats = pure leg fire. You prop your back foot on a bench and go deep on the front leg. It’s brutal — but it builds monster strength and reveals if one leg is slacking. I love to hate this one.

2. Calf Raises

Muscles Worked: Your calves — both the gastrocnemius (the big one) and the soleus (the deeper one). These are your power generators for push-off and ankle control.

Here’s the deal: runners talk quads and glutes all day, but your calves? They’re the unsung heroes. Every time you toe-off, your calves fire. Strong calves make your stride more efficient and can keep nasty stuff like Achilles pain and calf cramps away.

I learned the hard way. I used to cramp up deep into long runs. My fix? Regular calf raises. It changed everything.

How to Do Them:

Find a step or a sturdy ledge. Stand with the balls of your feet on it, heels hanging off. Hold something for balance if you need to.

Push through your toes and raise up high — think ballerina tall. Pause at the top, feel that hard contraction in your calves, then slowly lower until your heels dip just below the step. That slight drop gives your calves a juicy stretch. No bouncing. No momentum. Just honest work.

Reps: I usually hit 12–16 reps per set. Some days I’ll do 15 with both feet, then 10 single-leg on each side. That one-leg version really exposes any imbalances.

3. Squats

Muscles Worked: Quads, glutes, hamstrings, and core.

If I had to crown one strength move for total leg power, it’d be squats. Period. They build raw strength and help stabilize your knees, hips, and core. When I started squatting regularly, I stopped feeling sketchy going downhill. Before, I used to tip-toe down descents, worried my knees would buckle. That fear? Gone.

How to Do Them:

Feet shoulder-width. Toes turned out just a touch — whatever feels right for your hips. Drop it like you’re sitting in a chair behind you. Keep your chest proud, back straight, heels grounded. Don’t let your knees cave in or shoot forward past your toes.

Go down until your thighs are at least parallel to the ground. If you’ve got the mobility, deeper is great — more glute activation. Then drive through your heels and stand up strong.

Start with bodyweight. Goblet squats (holding a dumbbell at your chest) are also a solid entry point. More advanced? Load up a barbell for back squats.

Reps: 8–12 reps per set. Go heavier with fewer reps, lighter with more. Just never trade form for ego.

Coach’s Tip:

Form over depth. Always. Some runners obsess over going “ass to grass.” But if your form falls apart at the bottom, it’s not worth it. A solid partial squat with good control is better than a deep one that jacks up your lower back.

Also, your eyes should look straight ahead — not down. That tiny adjustment helps keep your spine aligned.

4 . Sumo Squats

Target Areas: Quads, glutes, and those underused inner thighs (adductors).

Sumo squats deserve their own spotlight. If you’re a runner struggling with knee wobble or hip instability, these can be a game-changer. The wide stance and feet turned out hit the inner thighs way more than your standard squat.

Why does that matter? Because your adductors help control side-to-side leg movement. If they’re weak, your knees might cave inward during a run, especially when fatigue sets in. I’ve seen this plenty in runners with IT band issues or that annoying “runner’s knee.”

Here’s how to do it:

  • Take a wide stance, feet pointed out at about 45 degrees.
  • Go bodyweight at first or hold a dumbbell/kettlebell between your legs. Barbell works too if you’re comfy with it.
  • Sit back and down, keeping knees aligned with toes (they should track outward, not collapse in).
  • Drop until thighs are parallel or you feel a good stretch in your inner thighs.
  • Push through your heels and squeeze your glutes to stand.

Shoot for 10–12 reps. Start light. Form over everything.

A common mistake? Knees collapsing inward. Fight that by driving them outward as you come up.

5. Leg Press

Target Areas: Quads, glutes, hamstrings, calves (a little).

The leg press machine catches a lot of hate from gym purists, but don’t dismiss it. Especially for runners new to strength training or anyone needing to load the legs safely. I leaned on leg press heavily when my squat form was garbage. It let me build strength and confidence without risking my back.

How to do it:

  • Sit down and set feet shoulder-width (or a little wider) on the platform.
  • Keep feet flat, hips and back pressed into the seat.
  • Start with knees bent around 90 degrees.
  • Press out until your legs are nearly straight (don’t lock out).
  • Lower back under control to that 90-ish degree bend.

Aim for 12 solid reps per set. Go heavier than your squats here — you’re supported, so you can push it. I do 3–4 sets of 10–12 when I’m in a heavy strength block.

Coach’s Tip: Foot placement changes what gets worked. High hits more glutes, low blasts quads. Keep knees aligned with toes. Never lock your knees at the top. Also, hands off your legs — use the grips, not your thighs, to stay stable.

6. Single-Leg Deadlifts

Target Areas: Hamstrings, glutes, lower back, core.

If I could only give a runner two exercises, the deadlift would be one of them. Why? Because running is basically a series of single-leg stances. And this move not only strengthens your backside, but also reveals any lopsidedness between legs. Trust me — you’ll know which leg is weaker.

How to do it:

  • Stand on one leg, knee slightly bent.
  • Hold dumbbells or just go bodyweight at first.
  • Hinge forward at the hips as your free leg extends back.
  • Keep your spine flat and hips square (no twisting).
  • Lower until your torso is parallel to the ground (or as far as your hamstring flexibility allows).
  • Drive through your heel to return to standing.

Do 8–10 reps per side. It’s gonna feel wobbly. That’s part of the magic.

Coach’s Tip: Hips love to cheat and open up. A trick? Point your back foot’s toes toward the ground. It helps square your hips. Also, keep your back flat like you’re balancing a cup of coffee on it.

I once had a runner whose left leg trembled like mad on these. He stuck with it. A few weeks in, the shakes were gone and his form looked clean. That carryover to his running? Massive.

And hey, there’s a reason physios love single-leg work. Running is a one-legged sport. Don’t ignore it.

7. Lunges with Rotation

Target Areas: Quads, glutes, calves, obliques, balance muscles.

Add some twist to your lunge and suddenly it hits different. Running isn’t just forward and back. Your torso rotates with each stride. This lunge variation taps into that natural twist and strengthens your ability to stay upright and stable under motion.

How to do it:

  • Grab a medicine ball or dumbbell.
  • Hold it in front of your chest, arms straight.
  • Step into a lunge with your right leg.
  • As you sink into it, rotate your torso toward that same side.
  • Keep arms extended as you rotate from the spine.
  • Come back to center and step back.
  • Repeat on the other side.

10–12 reps per side does the trick. Don’t rush it.

Coach’s Tip: Smooth control is key. Don’t fling the weight. If you’re wobbling like crazy, lighten up or use just your hands. Keep chest up and eyes forward.

Why do I love this one? Because it mimics real-life running mechanics in a smart way. I used to have slight crossover gait and some IT band flares. My physio threw this move into my program and it paid off. My stride smoothed out, and my hips felt more locked in. It’s a small tweak with big returns.

8. Cable Knee Drives

Target Muscles: Hip flexors (mostly the iliopsoas), glutes, and your core for stability.

Let me tell you—this one hits a part of your stride that most runners ignore: the knee drive. That explosive motion that powers you forward, especially when you’re sprinting or charging up hills? Yeah, this is how you build it.

Funny thing is, for as much running as we do, hip flexors often get tight or weak from all the sitting and limited motion in daily life. Tight hips, short stride, sluggish form. Fixing that can make a night-and-day difference.

Cable knee drives aren’t just another gym move—they actually mimic how your leg works when running hard. I love using the cable machine here because it gives constant resistance through the full range of motion, just like your stride does.

How to Do It:

Set up at a cable machine with a low pulley and ankle strap. If you’re at home, a resistance band works too. Hook the strap to your right ankle and stand facing the machine, about two feet away so the cable has tension. Start light—this isn’t about heavy loads.

From there, balance on your left leg and drive your right knee up toward your chest, like you’re doing a high-knee sprint. Go for that 90-degree angle at the hip (think thigh parallel to the floor). Focus on a strong upward drive, not a lazy lift. Control the return—don’t just let it flop down.

Do 10–12 reps on one leg, then switch sides. Go for 3 rounds each leg. You’ll feel it fire up your hip flexors and make your stabilizing leg (the one on the ground) work too.

Coach’s Tip: Stand tall. Don’t lean back or hunch over. Let the movement come from your hips—not from swinging your body like a kettlebell. If you’re yanking with momentum, lower the weight. Trust me, you don’t need much here. Activate your abs on each rep too—that’s what your core does during real running.

No cable machine? No problem. Loop a resistance band around your foot, anchor it behind you, and mimic the same movement. Or grab some ankle weights and try high-knee marches. Just make sure there’s resistance as you lift the knee—that’s the magic.

Weekly Plan: Strength + Running

Here’s a simple way to mix strength into your week:

  • Monday: Easy run or full rest. No lifting.
  • Tuesday: Leg workout #1 (30 min)—can pair with a light run.
  • Wednesday: Medium-distance run or cross-train.
  • Thursday: Speed session (intervals, tempo).
  • Friday: Leg workout #2—again, pair it with an easy run if needed.
  • Saturday: Long run. The timing works—legs had a full day since lifting.
  • Sunday: Off or recovery jog.

You don’t need to follow this exact setup—just keep the principle: don’t blast your legs the day before a big run.

If you’re running every day (shout out to my streak runners), tack these on after short easy days or bunch them with speed days if you’re going with the “hard day, hard day” plan.

Here’s your guide to strength training for runners.


Progression Plan

Stick with this for 8 weeks and level it up like this:

  • Weeks 1–4: Get familiar with the moves. Start light. Bump up from 2 sets to 3 if things feel good.
  • Weeks 5–8: Add weight where it makes sense. Or sneak in a fourth set. Or try a harder version of the move.
  • By Week 8: You’ll feel stronger. You’ll run stronger. You’ll see the difference.

Maybe you’re cruising up hills you used to crawl. Maybe your easy pace is quicker at the same heart rate. Strength work doesn’t lie—it shows up in your runs.


Pre-Race Tapering

Got a race coming up? Ease off about 10–14 days before. The goal is fresh legs, not DOMS two days out. Some runners stop lifting altogether two weeks before, others just cut back to bodyweight or light stuff.

Me? I taper the load and volume, keep a bit of movement, and let the legs breathe.


Maintenance Phase

Race season gets hectic. You don’t have to go beast mode in the gym year-round. During heavy race blocks, keep just one full-body session per week. That’s enough to maintain the strength you built.

Remember: it’s easier to maintain than to build.


Recovery: Don’t Skip It

Strength training adds load. Respect the recovery. Eat right (protein matters), hydrate, sleep like it’s your job. I always foam roll my quads, calves, and hamstrings after leg day.

DOMS? That soreness is your badge of honor—it means you’re doing something new and your body’s adapting. A light recovery run or swim can help too.

I once read a comment from a seasoned runner on Reddit that stuck with me:

“DOMS is real, but it’s proof you’re working.”

True that. It fades, and then you level up.


Strong Legs = Strong Runner

If you’re serious about running better—not just logging miles but running with purpose—then get to work on your legs.

This isn’t about looking good in shorts. It’s about injury-proofing, building power, and running smarter.

The weight room (or your living room floor) is your next training ground.

Lace up. Load up. Let’s build those bulletproof runner legs.

How to Handle Post-Run Fatigue After Your First Few Runs

That heavy, dragging feeling in your legs after your first run?

Yeah, it sucks. Like you’ve been hit by a truck and can barely move. 

During my first few runs I thought, “Is this really worth it?”

My legs were screaming, and I was wiped out the rest of the day.

But guess what—that’s exactly how it’s supposed to feel. Your body is yelling, “Hey, this is new!” and it’s working overtime to catch up.

I learned to listen to my body—sometimes slowing down, sometimes pushing through—and that’s what kept me coming back. Your body’s got the answers too. Learn to hear it, and you’ll come back stronger every single run.

Enough talking about me. In this article, I’m sharing with you some strategies to help hand post run fatigue like a pro.

Sounds like a good idea?

Let’s get to it.


Why Does Running Fatigue Hit So Hard?

First off, your body’s just not used to pounding pavement or hitting trails for long stretches yet.

But there are a few other reasons why that fatigue feels extra tough.

The most common one is doing too much too soon.

Believe me, I’ve made the mistake of overdoing it—jumping into long runs, sprints, and hills all at once.

But overdoing it too early? That’s a fast track to exhaustion—and injury.

What’s more?

You can’t run on empty. No matter how much willpower you have, poor nutrition will catch up with you.

Running burns through glycogen, the fuel your muscles rely on. If you’re not refueling, that fatigue hits hard—trust me, I’ve learned the hard way.


How to Recover After Your First Few Runs

So, you’re feeling wiped out after your first run. What’s next? Here’s how to bounce back like a pro:

Sleep Like a Pro

I can’t stress this enough: sleep is when your body does its repair work. If you’re not getting quality sleep, you’re fighting an uphill battle. Aim for 7-9 hours, and make it count.

No screens an hour before bed, and get into a solid sleep routine. Trust me, your muscles and mind will thank you the next day.


Hydrate

After a run, your body has been sweating buckets. You need to rehydrate, and I’m not talking about just a sip of water here and there. Drink enough to restore your fluids. If your run was on the longer or more intense side, consider adding electrolytes to help replace what you lost.

What to do: I aim for 16-24 oz of water within the first hour after my run. If I’ve done a long run, I’ll grab a sports drink to help with the electrolytes.


Stretch & Roll

I used to skip this early on, but trust me—it’s a game-changer for recovery. Now, I foam roll and stretch after every run. Focus on your calves, quads, hamstrings, and back.

Don’t skip this! Stretching helps with flexibility, and foam rolling can reduce soreness. It’s crucial for preventing tightness and keeping your muscles in check.


Rest 

Rest days are important, but don’t just crash on the couch for hours.

I get it, we all want to do that after a tough run.

But here’s the deal: light activities like walking, cycling, or swimming can actually help improve circulation and reduce muscle stiffness.

Don’t go hardcore. Keep it low-key, just enough to keep your body moving and aid recovery.


How to Know When You’re Ready to Push Again

Alright, you’re recovering.

But how do you know when it’s time to lace up your shoes and hit the pavement again?

Here’s what to look for:

  • No More Soreness. If you’re still feeling sore or stiff, take another day to rest. Listen to your body. Once that soreness fades, your muscles are ready for another run.
  • Energy Levels. Fatigue should feel like it’s gone. If you wake up feeling like you could take on the world (or at least a 3-mile run), you’re probably good to go.
  • No Pain. Remember—no sharp pain. If you’re feeling a mild ache, but no major issues, you can likely ease back into it.
    If it’s painful, take a step back.

When to Seek Help

If you’re still dealing with sharp pain or your fatigue isn’t improving despite rest, diet, and hydration, it might be time to see a professional.

Sometimes overuse injuries sneak up on you, and getting an assessment from a physiotherapist or doctor is the smart move.
It’s better to catch an issue early than push through and make it worse.


Conclusion

Fatigue is a given. You’re not going to feel like a running machine right out of the gate.

But every mile you put in, every recovery session, and every step you take towards learning your body’s limits—it all adds up.

Don’t let a little fatigue freak you out. It’s part of the game, and you’ll come out the other side stronger if you listen to your body.

It’s not about how fast you run today, but about how many days you can keep running in the future. 

Stay smart, stay healthy, and keep that momentum going.

I cannot thank you enough for dropping by.

David D.

What Should You Eat After a Long Run?

There’s nothing quite like finishing a long run.

You’re exhausted, maybe sore, but there’s that awesome sense of accomplishment that makes you walk with a grin plastered on your face.

But then, as soon as you catch your breath, the next big question pops up: What do I eat now?

I used to grab whatever snack was at hand, thinking that’d be enough.

But trust me, that’s a rookie mistake. Now that I’ve been around the block a few times, I can tell you—post-run nutrition is a total game-changer.

If you’re serious about recovery and getting your body ready for the next challenge, what you eat after your run matters.

Big time.

I can’t emphasize this enough, especially after a long run.

In this article, I’m going to break down what’s worked for me when it comes to post-run fueling, because how you refuel can literally make or break your recovery.

Let’s get to it.


Why Post-Run Nutrition is Crucial

Here’s the thing: we all define a “long run” differently, but for me, any run that’s over 5 miles—or anything over an hour of hard work—is what I consider a long run.

And during those runs? Your body’s burning glycogen, breaking down muscle fibers, and sweating like a faucet.

So, when you’re done?

Your body’s in desperate need of some refueling. It’s not optional—it’s necessary.

Here’s the breakdown:

  • Carbs: You’ve burned through your glycogen stores. Time to fill ‘em back up.
  • Protein: Those muscles are calling for some repair.
  • Electrolytes: You didn’t just sweat water—your body lost valuable minerals that need replacing.

So, now that we know why post-run nutrition is essential, let’s dive into how you can fuel up right.


The 3:1 Carb-to-Protein Ratio

Over the years, I’ve found one simple rule to follow when it comes to post-run fueling: the 3:1 Carb-to-Protein Ratio. It’s nothing fancy, but it’s gold for muscle repair and glycogen replenishment.

This is the magic ratio, folks. Trust me, if you want to recover properly, this is your best friend.

Let’s break it down:


Carbs: Refuel the Right Way

After a long run, your glycogen stores are probably running on empty. These bad boys weren’t built to last forever—they get depleted fast. So, you need to top them off. But don’t wait too long to eat—aim to refuel within 30 to 60 minutes after finishing your run.

I’m not sure about the science but I believe that the 30-60 minute window is key because that’s when your muscles are most primed for repair. If you wait too long, your body starts to shut down the recovery process, and you lose the benefits of that “golden window.”

Here are some of my go-to carbs:

  • Sweet potatoes: Loaded with nutrients and perfect for replenishing glycogen.
  • Brown rice: A solid, slow-releasing carb that’ll keep your energy steady.
  • Whole grain bread or pasta: Classic carbs, but they work.
  • Bananas: Easy, quick carbs—perfect if you’re in a rush.
  • Quinoa: Fancy? Sure. But also packed with carbs and protein.

Protein: Fix Those Muscles

You can’t just load up on carbs. You also need protein to repair those muscles and keep building strength.

I recommend aiming for about 20–25 grams of protein within that first hour after your run. This is key for muscle recovery.

Some of the best protein options:

  • Eggs: Scrambled, boiled, in an omelet—whatever. Packed with protein and easy to prepare.
  • Greek yogurt: Full of protein and probiotics, plus you can add some fruit for carbs.
  • Chicken, turkey, or tofu: Lean, high-quality protein sources.
  • Cottage cheese: Quick, easy, and full of muscle-building protein.

Don’t Skip Fats and Hydration

Now, while carbs and protein are the main players, don’t forget about healthy fats. These bad boys help with inflammation and overall recovery.

I’m talking about stuff like avocados or almonds—healthy fat options that keep you feeling good.

And please remember to drink plenty of water.  After a long run, you’re not done once you’ve eaten. You need to rehydrate, especially if you’re a heavy sweater.

Drink at least 16–24 ounces of water for every pound lost during your run.

If you sweat like I do, don’t be afraid to use a sports drink to replace the electrolytes you lost. Just make sure it’s not packed with sugar.

Post-Run Recovery Cheat Sheet: What to Eat & Why

Here’s a quick list of the top post-run foods and why they should be in your recovery plan:

  1. Chocolate Milk: Perfect 4:1 carb-to-protein ratio for muscle repair and glycogen replenishment
  2. Greek Yogurt: Packed with protein and probiotics for muscle rebuilding and gut health
  3. Bananas: High in potassium, they replenish electrolytes and provide quick carbs for energy restoration
  4. Eggs: Packed with leucine, a key amino acid for muscle repair
  5. Sweet Potatoes: Complex carbs that replenish glycogen and reduce inflammation
  6. Oatmeal: Slow-digesting carbs that refuel glycogen and provide fiber
  7. Peanut Butter: Healthy fats and protein for muscle recovery and hunger control
  8. Chicken Breast: Lean protein that aids in muscle repair
  9. Quinoa: A complete source of amino acids, helping repair muscle and keep energy up
  10. Tuna (or Salmon): Rich in omega-3 fatty acids to fight inflammation and aid muscle recovery
  11.  Whole Grain Bread: Sustained energy without blood sugar spikes
  12.  Lentils: Full of fiber and protein, a solid plant-based option for recovery
  13.  Avocados: Healthy fats for reducing inflammation and providing long-lasting energy
  14.  Protein Powders: Quick and easy protein for muscle repair when solid food isn’t appealing
  15.  Berries (Blueberries, Strawberries, etc
  16.  Antioxidants that reduce muscle soreness and oxidative stress
  17.  Almonds: Healthy fats and protein to aid muscle repair and keep energy levels steady
  18. Cottage Cheese: Rich in casein protein, a slow-digesting protein for overnight muscle repair
  19.  Hummus: A balanced mix of healthy fats, protein, and fiber for a recovery snack
  20. Rice Cakes with Avocado and Hard-Boiled Egg: Carbs, healthy fats, and protein for full recovery
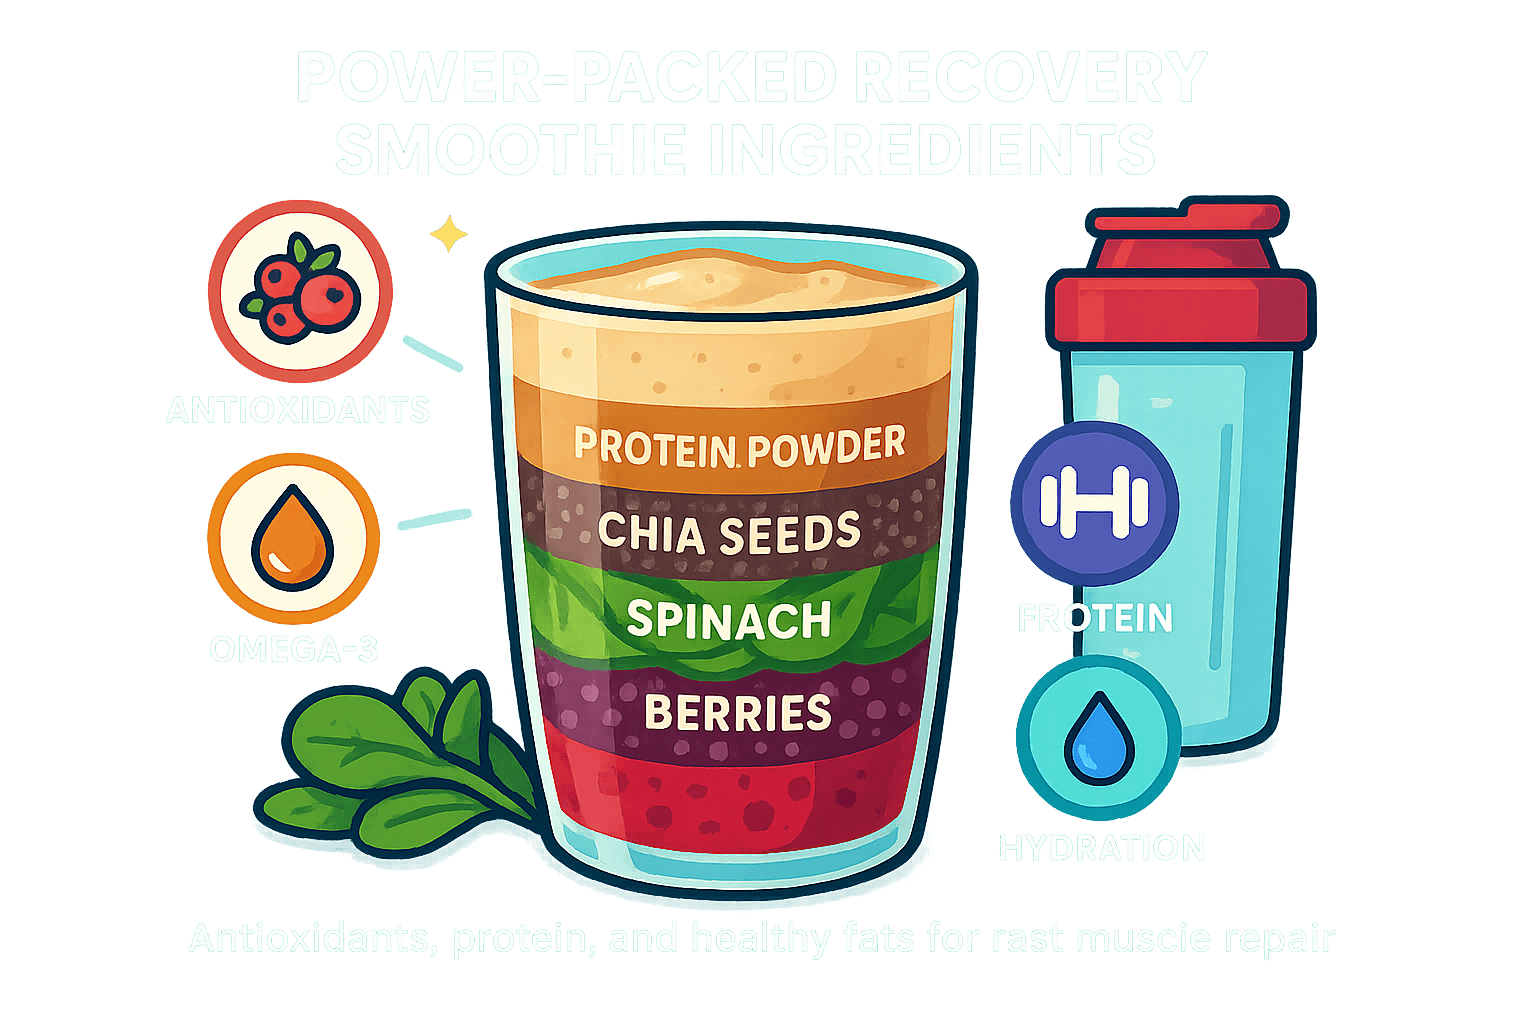
  21.  Smoothies with Protein Powder: Easy on the stomach and packed with protein, carbs, and healthy fats
  22. Tofu: Plant-based protein that aids in muscle recovery with anti-inflammatory properties
  23. Protein Bars: Convenient recovery snacks for when you’re on the go
  24. Whole Wheat Bagels: Complex carbs to restore glycogen and easy to pair with protein-rich spreads
  25. Mozzarella Cheese Sticks: Packed with protein and calcium for muscle and bone recovery
  26. Brown Rice: High in carbs to refuel glycogen stores, with added fiber
  27. Chickpea Pasta: A gluten-free, protein-rich carb for muscle repair
  28. Hard-Boiled Eggs with Carbs: Protein-packed with carbs like sweet potatoes or whole grain bread for a full recovery
  29. Spinach: High in vitamins and antioxidants to fight muscle soreness and reduce inflammation
  30.  Beets: Packed with nitrates to improve blood flow, endurance, and recovery
  31.  Chia Seeds: Omega-3 fatty acids, protein, and fiber to reduce inflammation and help with hydration
  32.  Almond Butter: Healthy fat and protein for muscle recovery and hunger control
  33.  Rice and Beans: A complete plant-based protein source with carbs to replenish glycogen
  34.  Whole Grain Crackers with Cheese: A simple, satisfying post-run snack with carbs and protein

Final Thoughts

There’s no magic formula here, but getting your nutrition right after a long run? 

That’s your ticket to smoother, faster recoveries and better performances down the road

You’ve earned it—now fuel like the runner you’re becoming

Every mile builds the runner you’re becoming

So, fuel up and get ready to crush the next one

How to Qualify for the Boston Marathon – Times, Strategy, and What You Need to Know

How Long Is A Marathon

Times, Strategy & What It Really Takes to BQ

Let’s get something straight—qualifying for Boston isn’t just a goal. It’s a statement. A finish line, sure—but also a challenge to your discipline, your grind, your grit.

Thousands of runners chase that BQ every year. Most don’t get it. Not because they’re not fit—but because Boston isn’t just a race… it’s a reward. And you’ve gotta earn it.

We’re talking about a race where even the slowest qualifying time still crushes the average marathon finish. The median marathon finish? Around 4:30 for men, just under 5 hours for women. Boston standards? Way ahead of that.

You’re not just toeing the line in Hopkinton—you’re lining up with the fastest 10% of runners on the planet. That’s why a BQ isn’t just a time—it’s a badge of honor.

I’ve said it before and I’ll say it again: Boston doesn’t take cash—it takes commitment.

Let’s break down how you get there.

What Makes Boston So Special (and So Hard to Get Into)

Boston isn’t just another race on your calendar. It’s the marathon.

Started in 1897. Oldest annual marathon in the world. One of the six World Marathon Majors. You can’t buy your way in. There’s no charity loophole or raffle luck here. Unless you’re a pro or doing it for a cause, you run your way in.

That exclusivity? That’s the magic. And it’s why qualifying means something.

Runners talk about getting a BQ like it’s winning an Olympic trial. Because in some ways, it is. Most races just take your money. Boston takes your best.

To BQ, you’ve got to hit a certified time that meets your age and gender bracket—and that just gets you in line to apply.

But here’s the kicker:
Even if you hit the standard, it might still not be enough.

In recent years, 35,000+ people have qualified—but only around 30,000 spots exist. That’s right: plenty of people who technically qualified didn’t get in. Why? Because Boston fills from the fastest down.

That’s why every second counts.

Boston Qualifying Standards: What You Need to Know

So how do you actually qualify?

Here’s what the Boston Athletic Association lays down:

1. Age & Gender Matter

Your qualifying time is based on your age on race day, not when you run your qualifier.

So if you’re 39 now but will be 40 on Boston race day? You get to use the 40–44 age group time.

There are three main categories:

  • Male
  • Female
  • Non-binary (recently added)

And yeah—you need to be at least 18 years old on race day.

2. Your Marathon Must Be Certified

No shortcuts here.

You’ve gotta run your time on a certified course—USATF, AIMS, or whatever your country’s governing body is. Think big city races, officially measured events—not your local fun run or a Strava DIY effort.

3. Timing Window: You Only Get So Long

To qualify for a specific Boston, your race has to happen within a set window—usually starting in September about 18 months before race day.

Example:

  • To run the 2025 Boston, your qualifying race needed to happen between Sept 2023 and Sept 2024.
  • To get into 2026, you’ll need to run your time after Sept 1, 2024.

Run too early? Doesn’t count.

4. It’s All About Chip Time

Boston uses your net time—the actual time from when you crossed the starting mat to the finish.

So no, it’s not gun time.

If your standard is 3:30:00, you better finish at or under 3:30:00—not 3:30:01. They don’t round up. Not even for half a second. Brutal, but fair.

Pro tip: Don’t aim for the cutoff—beat it. These days, just meeting the standard probably won’t get you in. Aim to be at least 1–2 minutes faster than the published time.

5. The Bar Keeps Moving

Boston qualifying times aren’t set in stone—they’re getting harder. Why? Too many fast runners.

  • In 2020, the BAA dropped every time by 5 minutes.
  • For the 2026 Boston Marathon, they’re doing it again—another 5-minute cut for most age groups (up to age 59).

That means if your previous standard was 3:30, now it’s 3:25. Welcome to the grind.

Real Talk from the Line

I’ve coached runners who chased their BQ for years. Some missed by seconds. Others finally cracked it by building smarter, not just going harder.

Every one of them will tell you: Boston isn’t just 26.2 miles—it’s a journey.

It’s about patience. Resilience. Showing up again and again.

And when that BAA confirmation email finally hits your inbox? Man, it hits different.

BQ Doesn’t Mean You’re In – The Boston Cut-Off Explained

So you nailed your Boston Qualifying time? First off—congrats. That’s no small feat. But here’s the truth that catches a lot of runners off guard:

Just because you hit your BQ doesn’t mean you’re guaranteed a bib.

Yeah, I know. That stings.

The Boston Athletic Association (BAA) only has so many spots—roughly 30,000 each year—and they give priority to the fastest runners. If more people apply than there are spots (and spoiler: they usually do), Boston sets a cut-off time below the qualifying standard. If your time doesn’t beat the standard by enough, you’re out.

Let’s break it down runner-to-runner:

What’s the Cut-Off, and Why Should You Care?

After registration closes, the BAA stacks everyone up by how far under their qualifying time they ran. This buffer is called your “BQ minus.” The deeper your cushion, the better your chances.

Think of it like this: your qualifying time gets you in line. How far under that time you ran determines how far ahead you are in that line.

So what’s the magic number? That changes every year depending on how many people apply and how fast they are. Some years you only need to beat your standard by a minute or two. Other years? You could miss out even with seven minutes under. Seriously.

Let’s take a lap through recent history.

Recent Boston Marathon Cut-Off Times & Denials

YearField SizeCut-Off (Under BQ)Runners Denied
2017~30,0002:09~2,950
2018~30,0003:23~5,000
201930,0004:527,248
202031,5001:393,161
202120,000*7:479,215
202230,0000:00 (all in)0
202330,0000:00 (all in)0
202430,0005:2911,039
2025~30,000TBD (~5+ mins est.)TBD (>10,000?)

*2021 had a reduced field due to COVID.

Real Stories, Real Frustration

I’ve talked to runners who’ve crushed a marathon, thrown their arms up at the finish line in celebration… only to get the “Sorry, not accepted” email months later.

Like one guy who ran 2:59:45 thinking he was golden for his 3:05 BQ. Turns out, the cut-off that year was 4:52. He needed a 2:59:32 to get in. Missed it by 13 seconds.

Another runner trained her butt off, nailed her BQ, then learned in 2021 that she missed by nearly eight minutes. Oof. That year was brutal.

So What’s “Safe” Now?

Honestly? These days, a 5+ minute cushion is the new standard if you want peace of mind.

The BAA has already tightened the qualifying times for 2026 to slow down the flood. Still, demand is nuts. In 2024, over 33,000 runners applied—11,000+ didn’t get in. For 2025? Over 36,000 threw their names in for roughly 22,000 qualifying spots.

Bottom line: just BQ-ing isn’t enough anymore. You’ve got to beat it. By a lot.

Coach’s Take: Train for the Cushion

If your BQ is 3:30, shoot for 3:25 or better. Got a 3:00 standard? Train for 2:55. Not just to get in — but to feel confident when registration day hits.

And remember: BAA registration happens in waves. First dibs go to those with 20+ minutes under, then 10+, then 5+, and so on. The deeper your cushion, the earlier you get to register. That’s huge.

That BQ Game: Hope, Hustle, and the Dreaded Cut-Off

So, here’s the real talk on the Boston Qualifier: hitting your BQ time doesn’t mean you’re in.

Yeah, that’s the kicker. One guy on a running forum nailed it when he said, “The BQ is 3:30, but the cut-off says you need to beat it by 3 minutes… so why don’t they just say the BQ is 3:27?” You feel that in your soul, right?

But the BAA sticks with the official standard and then trims the field using a yearly cut-off. From our side, that means you’ve got to do more than meet the mark—you’ve gotta crush it.

I remember one runner who spent 10 years chasing their BQ. Finally nailed it. Booked travel the next day. And then came the wait—weeks of nail-biting before finding out if the cut-off would let them in or slam the door.

When the acceptance finally hit their inbox? Straight-up tears. That’s what makes Boston so special. You don’t just register. You earn it. And then you sweat out the verdict.

When to Qualify, When to Apply: Boston’s Timeline, Simplified

Boston always falls on Patriots’ Day—third Monday in April. But don’t think April is when the magic starts. It’s a long game, and if you want in, you’ve gotta plan months—sometimes years—ahead.

Here’s the breakdown:

Step 1: Run a Qualifying Marathon

Your qualifying race needs to happen within a set window—usually from about 18 months to 7 months before race day.

If you want to toe the line in Boston 2025, you’ve got to qualify between September 1, 2023, and mid-September 2024.

Fall races are popular for a reason—they give you time to apply, recover, and build back up for Boston. Don’t leave it to the last minute unless you’re okay living dangerously (and possibly rehabbing instead of training).

Step 2: Registration Opens in September

The BAA opens registration in early-to-mid September. You get a five-day window to throw your hat in the ring.

It’s not first-come, first-served—everyone can apply during that window if they’ve got a qualifying time.

Step 3: Rolling Admissions = Faster Gets First

This is where it gets tense. The BAA rolls out registration in waves:

  • Day 1–2: 20+ minutes under standard
  • Then: 10+ under
  • Then: 5+ under
  • Finally: everyone else

So, if you just barely squeaked under your BQ, you’re in the final round. Fingers crossed the field doesn’t fill before your group’s turn.

Step 4: The Wait Begins

After registration closes, the BAA takes a couple weeks to confirm times and do the math.

By late September or early October, you’ll know if you’re in—or if you’re getting that dreaded “we regret to inform you” email.

That email stings. Been there. But it’s part of what makes the “You’re accepted!” message feel like winning a lottery.

What About Charity Spots?

About 20% of Boston entries go to charity runners or special cases (think 10-year streakers, invited elites, etc.).

Charity runners don’t need a qualifying time, but they do need to raise serious cash—usually thousands—for a BAA-approved cause. If time is out of reach this cycle, this is a legit alternate route.

Real Timing Example

Want to run Boston in April 2025?

  • Qualify between Sept 1, 2023 and Sept 2024
  • Apply in Sept 2024
  • Find out in Oct 2024
  • Train like mad for April 2025

If you qualify after the reg window closes—say, in October 2024—that time rolls over for 2026. No skipping ahead, no fast-tracking, even if you crush your BQ by 40 minutes.

BQ Planning Tip: Timing is Everything

Smart runners don’t leave it to chance. They map out their year like this:

  • Fall marathon for BQ attempt (more recovery time, less pressure)
  • Spring marathon as a backup if fall doesn’t go to plan
  • Rest, apply, then ramp up for Boston the following April

Whatever your plan, don’t gamble on last-minute qualifiers. And remember: qualifying by a huge margin won’t get you into Boston sooner, but it does help you beat the cut-off and land a better corral.

Bottom line? Run your BQ early, train smart, and be ready to apply when that September window opens. Then comes the real fun—training for Boston.

Want to Qualify for Boston? Start with More Miles

If you want to qualify for Boston, you’re not just chasing a number—you’re chasing consistent, aerobic strength. And that starts with mileage.

Real Data: What the Numbers Say

Strava dug into training logs from over 30,000 marathoners and found something crystal clear: the more miles you run, the better your odds.

  • Male BQers ran ~560 miles in the 12 weeks pre-race
  • Male non-BQers? Closer to 300 miles
  • Women? Same pattern: ~480 miles (BQ) vs ~280 miles (non-BQ)

That’s nearly double the distance. And those who qualified peaked around 55–60 miles per week, versus 40–45 for those who didn’t make it.

Why It Works

Every mile you run adds to your aerobic engine. You’re not just burning calories—you’re building endurance that carries you through mile 23 when your legs start lying to you.

That base lets you hold pace longer, recover faster, and stay in control. Mileage is the foundation. Speed and workouts matter too, but without a strong base, they won’t stick.

Real Runners, Real Results

One guy treated his first marathon like a bucket-list item—ran 30 miles a week, finished in 3:40. Not bad. But not Boston. A few years later, he built up to 50+ miles a week and added structure. Boom—3:12 at age 52. Boston-bound.

Another dude in his 20s went from a 4:48 debut to a 2:59 over six years. How? He increased weekly volume gradually, stayed consistent, and treated his training like a craft.

Word of Caution

Don’t jump from 20 to 50 miles overnight. That’s how runners end up on injury timeout. Stick to the 10% rule—slow, steady growth. It might take a year to build the volume you need. That’s okay. This is a long game.

Run often. Many BQers run 6–7 days a week. The average? Seven runs a week for qualifiers vs. five for non-qualifiers. The more days you run, the more you reinforce fitness—and the more natural running feels.

Easy Days Easy, Hard Days Hard (Stop Racing Every Run)

If you’re chasing a BQ and running every day like you’re trying to impress Strava, you’re doing it wrong.

One of the biggest screwups I see from runners trying to qualify for Boston is running too damn hard on their “easy” days. I get it. You want to feel fast. But if you’re hammering every run like it’s race day, you’re just digging yourself into a hole.

Here’s the truth: if you want to run fast, you’ve gotta run slow. Yeah, I know it sounds backwards—but it works.

You build endurance by stacking miles that don’t beat the hell out of your body. That’s where easy running comes in.

What the Data Says

Strava crunched the numbers. Turns out Boston qualifiers ran about 85% of their miles slower than marathon pace—only 15% of their runs were fast.

The folks who didn’t qualify? They ran 57% of their miles at or above goal pace. Basically, they ran too hard, too often, and probably never recovered right.

Same story with women: qualifiers ran just 23% of their miles fast. Non-qualifiers? A brutal 64%. That’s not training—that’s redlining your way to burnout.

Another study found that runners who kept their easy runs about 30% slower than goal pace hit their targets way more often than those who hovered too close to marathon pace every day.

So yeah, that guy trying to run 3:00 who insists on doing most runs at 7:00/mile? He’s probably breaking down while someone cruising at 9:00 pace is quietly building a monster aerobic base.

The 80/20 Rule (And Why It Works)

Aim for 80% easy, 20% hard. That’s the golden ratio.

Easy should feel conversational. I’m talking 90 seconds, sometimes 2 minutes per mile slower than marathon pace.

If your BQ goal is 8:00/mile, then your weekday runs might be 9:30–10:30/mile. And if that pace feels “too slow,” good—that’s the point. It’s supposed to feel easy.

Running slow lets you stack miles, build your heart, expand your capillary network—all that aerobic engine stuff—without frying your legs.

Then when it’s time for speed work or long runs? You’re actually fresh enough to hit the paces that matter.

Real Talk From the Trenches

A lot of Boston qualifiers say their biggest breakthrough wasn’t from some fancy workout—it was finally learning to slow the hell down on recovery days.

One guy I coached plateaued for two straight cycles running “medium” effort all the time. Once we made him run truly easy 4–5 days a week and only hammer his key sessions, boom—his speed jumped, his mileage went up, and he dropped minutes off his time.

You don’t build speed by sprinting your daily six-miler. You build it by stacking smart volume, then attacking your workouts with purpose.

Bottom line: Run more. Run slow. And save the racing for race day.

Speed Work: Sharpen the Sword

Now—just because we said “easy” doesn’t mean you skip the hard stuff. You still need the sharp end of the stick: goal pace workouts, tempo runs, VO₂ max intervals—the stuff that teaches your body how to run fast and hold it.

The key? Don’t overdo it. One or two hard sessions a week is plenty. More than that, and you’re flirting with burnout or injury.

A solid setup might look like this:

  • Mid-week speed workout: intervals, hill repeats, tempo efforts
  • Weekend long run: maybe steady at first, but later with goal pace segments or fast finishes

That combo—paired with lots of easy miles—builds the durability and speed you need without frying your system.

Train smart. Pace yourself. Nail your workouts. And leave something in the tank for the next one.

Want to BQ? Here’s the Work That Actually Moves the Needle

Let’s be straight: chasing a Boston Qualifier isn’t about luck. It’s about building speed endurance, dialing in your pace, and doing workouts that teach your body to suffer well and recover smarter.

1. Tempo Runs = Your BQ Workhorse

Tempo runs are where you learn to hold the line when your legs want out. We’re talking that “comfortably hard” zone—right at the edge where you can still think straight but have to work to stay there.

For most, that’s somewhere near 15K to half marathon pace. Or roughly the pace you could hold for an hour if someone told you the finish line had tacos and a PR waiting.

Start with 20-minute tempo efforts and build up. By the time you’re peaking, aim for 6–8 miles straight at tempo pace. These teach your body to buffer lactic acid and stay strong at fast marathon paces. Almost every BQ plan I’ve seen has tempos as the weekly bread and butter.

2. Goal Marathon Pace Runs: Get Real With Your Pace

You’ve gotta practice race pace—not just to train your legs, but to train your brain. You need to feel what 7:15/mile (or whatever your target is) feels like on tired legs.

Best way? Mix it into long runs. Try something like:

  • 10 miles easy + 8 miles at goal pace
  • 12 miles steady at marathon pace

This builds mental and physical efficiency. It’s not sexy, but it works.

3. Intervals: Build the Top Gear

Speed workouts raise the ceiling. When you boost your VO₂ max and leg turnover, marathon pace feels more doable.

Classic BQ workouts?

  • Yasso 800s – 6×800 meters, goal time matches your marathon hours/minutes
  • Mile repeats at 10K pace
  • Hill sprints – short and nasty, but they build leg strength like nothing else

Intervals train you to suffer. They’re brutal. They’re gold.

4. Long Runs With a Kick

Anyone can shuffle through a 20-miler. But finishing strong? That’s next level.

Try:

  • Fast finish long runs (last 5 at goal pace)
  • Progression long runs (each section faster than the last)
  • Back-to-back hard days (e.g., a tempo Saturday + long run Sunday)

You don’t need these every week. But drop them in strategically during peak weeks. They’re tough—but they teach you how to fight through mile 22 without folding.

⚠️ Heads up: these workouts are high stress. Don’t add them until you’ve built a mileage base. Overdo it, and you’ll be injured before you ever toe the line.

What the BQ Runners Actually Do

Here’s a fun stat: Over 80% of Boston qualifiers said tempo runs and intervals were critical to their plan.

But here’s the catch—they didn’t just run hard. They ran smart.

Some people pull off a BQ on 30–40 miles a week—but those runs were intentional and hard. Like a 26-year-old woman who ran her first marathon on hill-heavy workouts and 3–4 runs a week. Or a dude who ran a 2:58 on ~35 miles/week, just from knowing how to suffer well.

But let me be real: those folks are the exception. For most runners, you need both volume and speed. The combo is what gets you there without blowing up.

Eat to Train, Sleep to Recover

Your workouts don’t mean jack if your body isn’t ready to absorb them. I’ve seen runners train hard and stall for years—then finally hit their BQ once they fixed their nutrition and recovery.

Eat Like a Runner, Not a Rabbit

Marathon training isn’t the time for keto, fasting, or skipping dinner to “cut weight.” You need carbs, protein, and fat to fuel, rebuild, and stay healthy.

  • Load up on complex carbs (oats, rice, fruit, bread)
  • Get protein every meal (eggs, chicken, beans)
  • Don’t be afraid of healthy fats (avocados, nuts, olive oil)

And yeah—some runners need 3000+ calories/day during peak weeks. That’s not gluttony. That’s fuel.

Race-Day Fuel Starts in Training

If you’re not practicing fueling on long runs, you’re training to bonk.

Take in carbs during any run over 90 minutes. Gels, sports drinks, chews—doesn’t matter, just train your gut. Figure out what works and make it routine.

One guy I coached kept missing his BQ by a few minutes. Turns out he was under-fueling during races. We doubled his carb intake (from 30g/hour to over 60g) and boom—he didn’t hit the wall and finally qualified.

Food = performance. Don’t treat it like an afterthought.

Sleep: The Most Underrated Weapon

Want free recovery? Get more sleep.

Your body rebuilds and resets when you’re knocked out. That 6-hour-a-night hustle life might fly at the office, but in marathon training, it’ll wreck you. Aim for 7–9 hours if you want to feel good on your runs and bounce back between workouts.

Can You BQ in Your First Marathon?

So, you’re wondering: “Is it possible to qualify for Boston my first time out?”

Short answer? It’s rare—but yeah, it happens. It’s just not the norm, and you’ve gotta be real with yourself going in.

Most First-Timers Don’t BQ—And That’s Okay

Let’s be honest here: the marathon is a different animal. You can be a solid 10K or half-marathon runner and still get chewed up by the full 26.2.

It’s not just about running fast—it’s about pacing, fueling, staying mentally dialed in when your legs feel like bricks. Most runners need a few marathons to figure that out.

In fact, the stats back that up:

  • Sub-3 marathoners (aka BQ beasts) usually have 6 marathons under their belts.
  • Even 4-hour runners average around 4 marathons.
  • Experience builds wisdom—and grit.

But Yeah, Some First-Timers Crush It

That said, there are unicorns. Runners who show up, lace up, and drop a BQ on day one.

  • One 26-year-old woman trained for just 3–4 months at 30–40 miles per week and nailed a 3:34 in her first race—just under the 3:35 standard for her age group.
  • A med student (with barely enough time to train) clocked a 3:09 in his debut.
  • Another outlier trained 14 weeks at 30–40 miles per week and ran a jaw-dropping 2:58 his first go.

These stories are inspiring—but also outliers. Most of us mortals? We’ll be hobbling past mile 20 just hoping our toenails survive.

What’s a More Realistic Scenario?

Let’s say you’ve run a few half marathons. You’ve got some fitness and maybe a decent time or two.

Here’s the honest math:

  • A 1:25 half marathon (solid, fast) predicts around a 3:00 full. If that’s your wheelhouse and you’re 35 and male, you’re already flirting with BQ pace.
  • But if your half PR is 1:45, expecting a 3:10 marathon (the BQ standard for many men) on your first try is, let’s face it, a big leap.

Could it happen? Sure. Should you bet your whole season on it? Probably not.

Coach’s Advice: Don’t Chase It Blind

If it’s your first marathon, make BQ your stretch goal, not your only goal. Train your butt off, absolutely. Go all-in. But also set a backup target like “finish strong,” “stay steady,” or “break 4 hours.”

Use the race as a launchpad. Learn how it feels to hit the wall. Learn where your fueling plan holds up—and where it doesn’t.

Learn how your mind reacts when your legs are screaming but the finish line’s still miles away. That stuff? You don’t get it from training alone.

Timing Is Everything—And Sometimes Age Is On Your Side

Here’s a little silver lining: the older you get, the easier the BQ times get. Not dramatically, but enough to matter.

There are folks who never sniffed Boston in their 30s but finally got in at 50 because:

  • The standard eased up a bit
  • They kept training consistently
  • They got smarter about how to race

BQ doesn’t care how long it takes. Whether you hit it on try #1 or try #10, the result feels just as sweet.

What If You Miss the Boston Qualifier?

So, you trained your butt off for months. Race day came. You gave it everything… and still didn’t hit the Boston qualifying time.

First off—breathe. Yeah, it stings. I’ve been there. So have a lot of runners. But listen: missing a BQ doesn’t define you. It just means your story isn’t done yet.

Here’s what to do when Boston says “not this time.”

Step 1: Break It Down (Not Yourself)

Don’t spiral—analyze. Where did it fall apart?

  • Did you hit the wall in the last 10K? Super common. Could be a fueling issue or just not enough long-run endurance.
  • Did you go out too hot in mile 1? Pacing error. Rookie mistake. Happens to veterans, too.
  • Did the hills eat you alive? Might need more strength work or hill repeats.

The point? Pinpoint what held you back so you can fix it. Every race has a lesson if you’re willing to look for it.

Step 2: Try Again (If Timing Makes Sense)

If you’re still in the qualifying window, you’ve got options. Some runners miss in October and squeeze in another attempt at CIM in December. It’s fast, flat, and perfectly timed.

But don’t just sign up tomorrow without thinking it through. Your body needs to recover. Racing marathons back-to-back is brutal unless you’re built like a tank.

Rule of thumb: 6–8 weeks between hard marathons, minimum. More if you’re nursing fatigue or injury.

One guy I know missed his BQ by 3 minutes in November—signed up for a May marathon that same day. Smart move. Gave him time to train, recover, and come back better.

Step 3: Get Fast Before Going Long Again

If you missed by a big margin—like, “I wasn’t even close”—you might need to zoom out.

Take a break from the 26.2 grind. Focus on shorter stuff. Work on your 10K and half-marathon speed for the next 6–12 months. You’ll build speed, raise your lactate threshold, and come back stronger.

Real example: Coach Greg McMillan talked about a 48-year-old runner named Becky who couldn’t crack 3:50 for her BQ. They paused marathons and trained her up to a 48-minute 10K and a 1:47 half. Next marathon? She nailed 3:50. That break made all the difference.

Sometimes you gotta back off the gas to get there faster.

Step 4: Choose a Better Course (or Season)

Was the race too hot? Too hilly? Too crowded? Logistics a nightmare?

Next time, take control of the variables. Pick a race that suits you: fast, flat, cool temps, well-organized. Don’t just sign up for the local race because it’s close—sign up for the race that gives you your best shot.

Step 5: Shift Your Mindset

Missing a goal hurts. Missing by 10 seconds? That’s next-level pain. But don’t let it crush you.

Turn it into fuel. I’ve seen runners miss by a minute, then train like absolute monsters and come back to crush it.

One guy missed by 1:20, then toughed out a freezing cold winter marathon and got it. Another missed by 10 seconds and came back like a bat outta hell. Use the sting. Let it sharpen you.

Step 6: Recover Before You Reload

After the race, let your body heal. I’m talking:

  • Hydrate like it’s your job
  • Eat real food (yes, that pizza is earned)
  • Sleep like a teenager on summer break
  • Cross-train lightly or jog easy—don’t jump back into training too soon

Races beat you up more than you think. Respect the recovery. Then, once your head’s clear and legs feel good, plan your comeback.

Step 7: Get a Second Set of Eyes

If you’ve taken multiple shots and keep coming up short, bring in help. That could mean hiring a coach, joining a structured plan like Pfitzinger’s, or simply picking the brain of a more experienced runner.

Fresh eyes can spot what you missed—maybe it’s your training intensity, your pacing, your nutrition, or even your recovery habits.

There’s a whole community out there. Reddit, Strava groups, local running clubs—they’re filled with runners who’ve been exactly where you are. Tap into that knowledge.

Step 8: Don’t Burn Out

Don’t fall into the trap of marathon after marathon, year after year. That grind breaks people down.

If you’re feeling mentally cooked or physically drained, it’s okay to take a season off. Focus on fun runs. Hit some 5Ks. Rebuild the fire.

One guy I know? Took 26 years to get his BQ. Missed by 2, 4, then 6 minutes—but kept coming back. That’s the long game. That’s heart.

You’re Not Done

BQ’ing is supposed to be hard. That’s what makes it so sweet when you finally get there.

Missing it? That’s just part of the journey. And honestly—it’s the near-misses that make the success even better.

You didn’t fail. You’re just not finished.

Keep showing up. Keep tweaking the plan. Keep running.

Because the dream isn’t just Boston.
It’s earning your way to that starting line.

Final Thoughts from Coach Dack: Boston’s No Accident. You Earn It.

Let’s be real—qualifying for Boston is hard. Brutally hard. And that’s exactly what makes it worth chasing.

A BQ isn’t some lucky break. It’s not handed to you. You build it—one early-morning run, one smart workout, one tough decision at a time. You grind for it. You bleed for it. You fight through setbacks, bad races, long plateaus, and days where you wonder if you’re good enough.

But you keep going.

Because here’s the truth I drill into my athletes: you don’t qualify for Boston by luck—you get there on purpose.

Every mile you log when you’d rather stay in bed. Every stretch, every healthy meal, every skipped shortcut—that’s you laying another brick. And someday, you’ll look up and realize you’ve built the path to Hopkinton with your own damn hands.

BQ Isn’t Just a Time—It’s a Rite of Passage

When it finally happens—when you see that finish time tick down below your standard—it’s not just a number. It’s years of work finally clicking into place.

Runners have told me that the moment they hit their BQ felt bigger than running Boston itself. Because that’s the moment you earned your way in.

One of my runners called it a “rite of passage.” He was right. Boston isn’t just a race—it’s a milestone. It means you set a goal that most people would call crazy… and you made it real.

Still Chasing the BQ? Here’s Your Playbook

If you’re still grinding toward that qualifier, I see you. I’ve been you. And I can tell you—it’s possible. But you’ve got to be strategic:

  • Set stepping stones: Shave 5–10 minutes off your current PR. Get under 4:00. Then under 3:45. Break it down and build momentum.
  • Volunteer at Boston or run the course unofficially with friends. Soak in the energy. Let it fuel you.
  • Surround yourself with people who get it. This isn’t a casual goal. You need training partners who respect the hustle.
  • Keep the joy alive. If training starts killing your love for running, it’s time to reassess. BQ goals are big, but they shouldn’t burn you out.

Use Every Tool in the Toolbox

If you’re serious about that BQ, treat it like a mission. Use the data. Use the plans. Test yourself.

  • Pace calculators (like Greg McMillan’s or Jack Daniels’ charts) will show you what you need to hit at shorter distances to be in BQ shape.
  • Run a half marathon at goal pace—if you can do that and feel strong, you’re getting close.
  • Use a heart rate monitor to make sure your easy days are actually easy and your workouts are hitting the mark.
  • Grab a BQ-focused plan from a trusted coach—or better yet, get help tailoring one to you.

When You Line Up in Hopkinton…

Here’s what I want you to picture. You’re standing in Hopkinton, race bib on, nerves buzzing. And you know—you earned this.

Those 26.2 miles through New England? They’re not just a race. They’re your reward.

You’ll fly past Wellesley and hear the scream tunnel.
You’ll grind up the Newton hills and dig deep over Heartbreak.
And when you turn onto Boylston Street, you’ll run with the pride of someone who refused to quit.

Boston is tough. But so are you.

The only way to get there is to keep showing up. Keep dreaming big. Keep training smart. And when that finish line finally comes into view?

You’ll understand what I mean when I say:
“Running Boston is the dream. But earning Boston? That’s the real victory.”

Stay in the fight.

Train smart. Run hard. And never, ever give up on your BQ.
I’ll see you on Boylston.

— Coach Dack