Cross training workouts and exercises for runners. This is what you need to do off-road to improve your running performance and protect yourself against injry
Running, a timeless and accessible form of exercise, not only requires determination and stamina but also necessitates the right medical gear to ensure a safe and optimal experience. From head to toe, selecting essential medical equipment is pivotal in supporting overall health, preventing injuries and enhancing performance for runners of all levels.
Injury Prevention and Recovery: A Holistic Approach
First Aid Kits for On-the-Go Solutions
Every runner should carry a compact first aid kit to address minor injuries and unexpected challenges. First aid kits usually contain bandages, antiseptic wipes, blister treatment and pain relievers, just to name a few. There are other essential items, which you can learn more about from Sammedical. Their first aid, field treatment and medical supplies are well-known and of good quality. A well-equipped first aid kit ensures runners can manage minor issues promptly, thus preventing the issues from escalating into more significant problems.
Compression Garments for Circulation and Recovery
Compression garments, such as socks, sleeves and tights, have gained popularity for their role in enhancing circulation and expediting recovery. These garments apply consistent pressure to muscles, reducing muscle vibration and promoting efficient blood flow. For runners, this can translate to improved performance during runs and faster recovery post-exercise.
Foot Health: The Foundation of a Runner’s Journey
Proper footwear is the cornerstone of any runner’s arsenal, as it significantly influences performance and injury prevention. Running shoes should be selected based on individual biomechanics, foot arch and gait analysis. A well-fitted pair provides adequate support, cushioning and stability, mitigating the risk of common injuries such as shin splints, plantar fasciitis and stress fractures.
Orthopedic Insoles and Supports
Orthopedic insoles can be a game-changer for runners with specific foot conditions or biomechanical issues. These customized inserts provide additional support, align the foot correctly and alleviate pressure points. Runners with conditions like flat feet or overpronation often benefit from orthopedic solutions, enhancing comfort and reducing the risk of long-term injuries.
Cardiovascular Monitoring: Insights into Heart Health
Wearable Heart Rate Monitors
As cardiovascular health is paramount in running, wearable heart rate monitors offer real-time insights into heart rate zones, aiding in optimizing training intensity. These devices allow runners to tailor their workouts to specific heart rate targets, promoting cardiovascular fitness and preventing overexertion. The continuous monitoring capability empowers individuals to make informed decisions about their running regimen.
Fitness Trackers for Overall Health
Beyond heart rate monitoring, fitness trackers provide a comprehensive overview of a runner’s overall health. These devices often include features like step counting, sleep tracking and stress monitoring. By understanding patterns and trends in these metrics, runners can make lifestyle adjustments to support their well-being, both within and outside their running routines.
Hydration and Nutrition: Fueling the Running Engine
Staying properly hydrated is paramount in running, especially during longer distances. Hydration belts and handheld water bottles provide convenient solutions to ensure runners have access to fluids on the go. Proper hydration supports endurance, regulates body temperature and helps prevent dehydration-related complications.
In addition to that, energy gels and nutrition packs offer a quick and portable source of carbohydrates, electrolytes and essential nutrients. These supplements help replenish glycogen stores, delay fatigue and support optimal performance. Runners should experiment with different options during training to find the products that best suit their individual needs and preferences.
The Holistic Runner: Integrating Medical Gear for Optimal Performance
As already established, having medical gear for a runner is paramount, as it usually saves the day during emergencies and ensures optimal health. Some of the ways to integrate such a kit include:
Creating a Comprehensive Running Kit
A comprehensive running kit with the essential medical gear discussed above can significantly contribute to a runner’s overall experience. Tailoring the kit to individual needs, considering factors like fitness level, health conditions and running environment, ensures a holistic approach to health and performance.
Regular Assessment and Adaptation
As runners progress in their journey, regular medical gear assessment and adaptation become imperative. Factors such as changes in fitness levels, evolving health conditions or transitioning to different terrains may necessitate adjustments to the running kit. Staying attuned to the body’s signals and incorporating necessary modifications support ongoing health and longevity in the sport.
In a Nutshell: Running Safely, Running Strong
In the dynamic world of running, the impact of medical gear extends far beyond mere accessories—it becomes the linchpin for safe, effective and enjoyable experiences. From safeguarding foot health with the right shoes to monitoring cardiovascular fitness with wearable devices, each piece of gear plays a pivotal role in the runner’s holistic well-being.
As runners lace up their shoes and hit the pavement, the integration of essential medical gear becomes not just a precaution but a proactive choice for running safely and running strong.
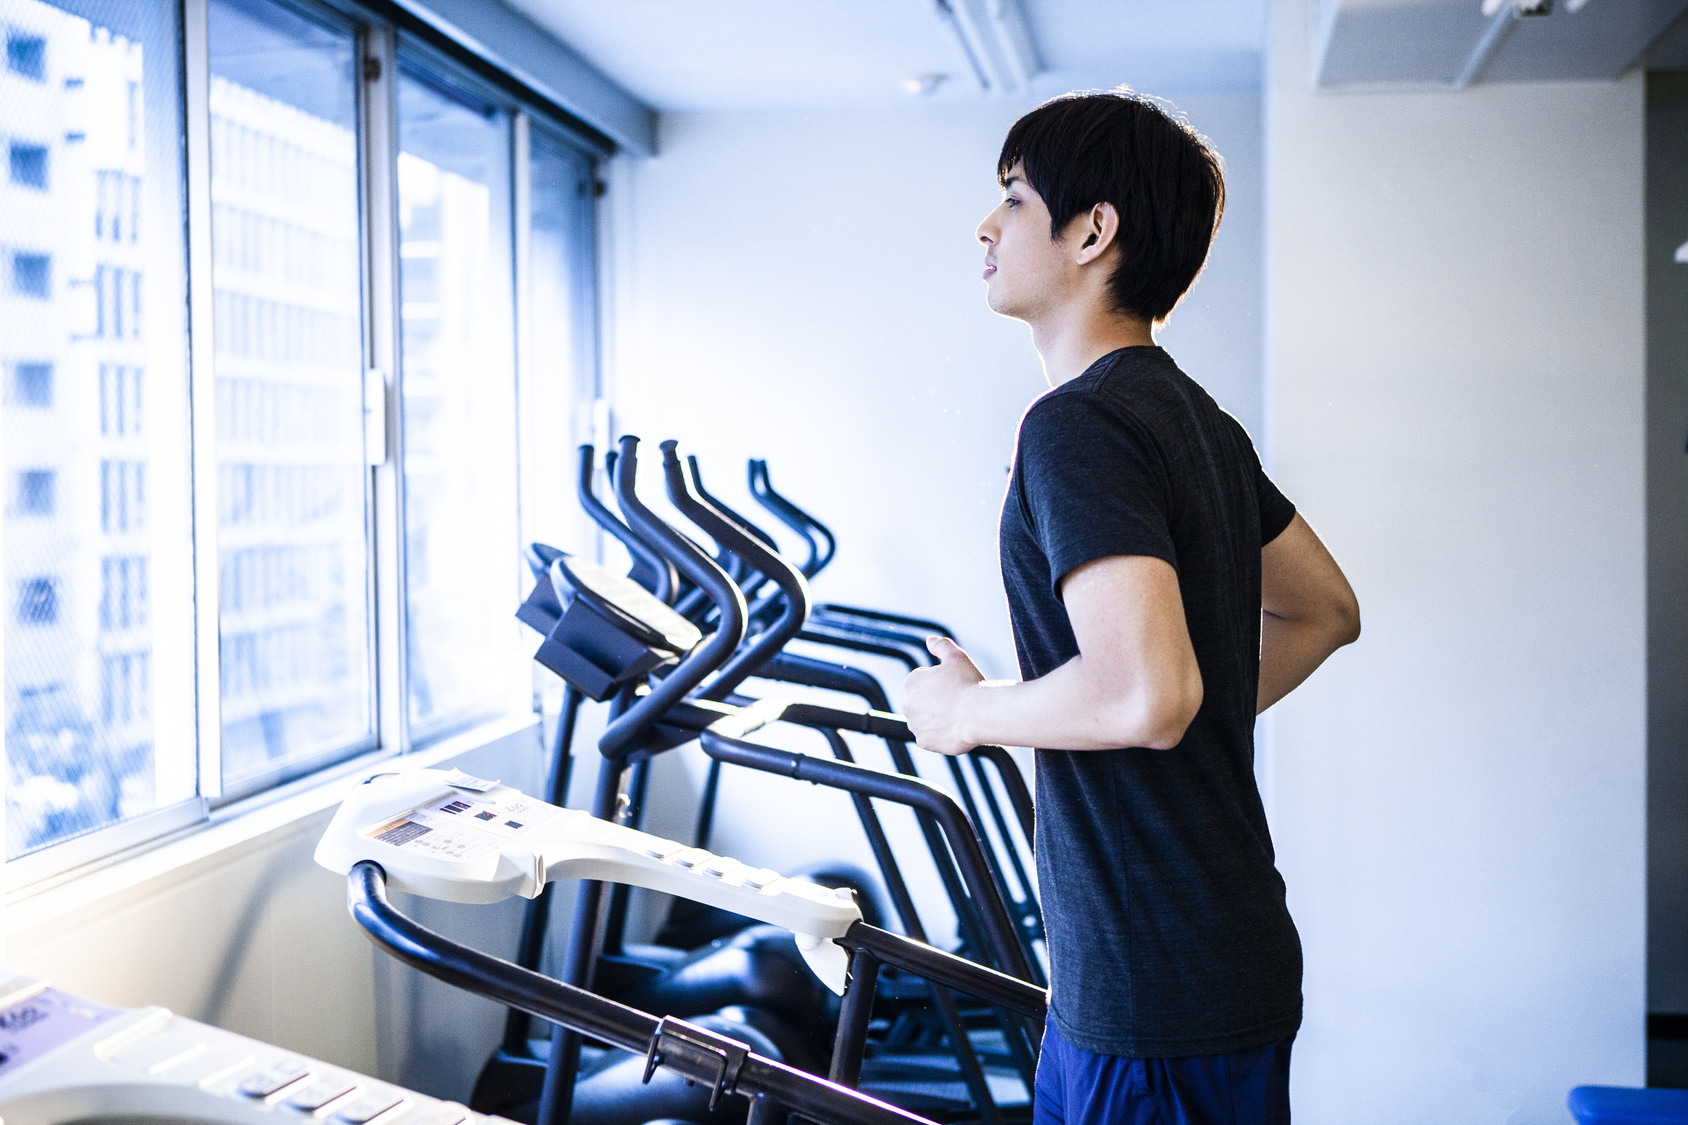
Treadmills have been around seemingly forever and are one of the most used cardio machines in every gym in the world. Many people prefer them either for a daily run or as a way to warm up before starting a weightlifting session. With that said, over the years, the technology used for treadmills has greatly improved, and now we can safely say that there are several different kinds, depending on what you need them for.
There are walking treadmills created for people with sedentary lifestyles so that they can get some daily exercise in; there are also foldable treadmills for running, which can be useful for busy professionals who want to be able to get a running session in the comfort of their homes and additionally, there are new and more modern treadmills for athletes – some with an air bubble around them, so that they can decrease the stress on the joints and muscles, some curved that provide new kinds of challenges and finally there are those, submerged in water – another tool for better active recovery.
Out of all of these options, the one that should pique your interest as an athlete is the curved treadmill. If you’re tired of running on the good old flat one that is available in every gym, you may want to consider switching to the curved one, as it provides a different set of challenges and forces your body to adapt to a new kind of physical activity.
In this article, we’re going to talk more about curved treadmills, the challenges they present, and how they compare to standard flat treadmills. So, if that sounds like something that’s up your alley, please continue reading.
What is a Curved Treadmill?
Similar to the standard treadmill, the curved one is also designed for indoor running, and its primary goal is to provide the user with an experience similar to what you would get on an outdoor curved path. Essentially, the idea behind it is to imitate running on a track but indoors.
Most curved treadmills are manual, which means they require the muscles of your legs to power the running belt, as there are no electricity or start buttons involved. Instead, when you step on the treadmill, you have to start pushing with the soles of your feet, making sure your foot strike lands forward in order to give the treadmill an incentive to start moving.
What Are the Main Differences Between the Flat and the Curved Treadmill?
We’re all pretty familiar with what the flat treadmill is, as that’s the cardio machine you will typically find in any commercial gym. Essentially, it’s a walking path with no curve, inclination, or tilt involved in any way. It imitates walking on a completely flat surface, where you face no ups or downs on your way, and so you’re able to maintain a similar pace for a prolonged period of time.
Flat treadmills are generally recommended for people who want to get some extra movement but work a sedentary job or for people that have suffered serious injuries and have muscle or joint limitations and can’t do intense workouts.
Furthermore, in the last few years, flat treadmills have become popular as walking pads for under the desk, as they require no extra movement and don’t hinder your work process. For many people who are now working from home, this has become their main source of activity throughout the day.
Another major difference between curved and flat treadmills is the source of power. Most, if not all, flat treadmills are powered either electrically or by a battery, so you have a head start on the movement. On the other hand, most curved treadmills are manual, which means that they solely rely on the power of your muscles to get started and to keep moving.
Some of the Benefits of Curved Treadmills
As you’ve probably guessed, there are some pretty incredible benefits to using a curbed treadmill over a flatter one. In recent years, the rising popularity of the manual, curved treadmill has led to some interesting concerns being voiced regarding the equipment’s features, the running technique it requires, and the contrasts between jogging on the road and on this type of treadmill. Let’s take a look at the discourse in the next paragraphs.
No Electricity Required
Unlike flat treadmills that require the use of electricity or a powered battery, most curved ones are manual and don’t require anything other than your muscles to get going. This makes them more environmentally friendly, and it can also lower your monthly expenses, especially if you plan on using the machine often.
Burns More Calories
According to manufacturers of curved treadmills, your calorie burn increases by around 30% when you use them compared to the standard ones. This feature makes them particularly useful for sprinting sessions and for HIIT exercise as a whole.
Increased Engagement of Lower Body Muscles
As we mentioned, unlike the flat treadmill that’s electrically powered, this one relies entirely on your own strength to start moving and to keep going. That’s why it uses more muscles when you’re running on it, and it specifically targets the hamstrings and the glutes.
Easy to Use
Curved treadmills are extremely easy to use – you just hop on them and start moving. There are no buttons that you have to press and no specific settings that you have to know about; they’re completely user-driven, so they follow your movement pattern. As soon as you step on one, lean forward and start jogging, running, or walking – it will follow your tempo and decrease/increase according to how you push. With that said, we recommend that you start by walking, and then once you hit your stride, you can begin with a light jog and finally move on to a full-on sprint.
Experts from Torokhtiy.com also add – ‘Although they initially have a steeper learning curve and are more physically demanding to work out on, they’re well worth diving into, especially for athletes with wide experience using treadmills.’
Which One is Better – The Curved or the Flat Treadmill?
Both of these machines have their specific use cases, and which one suits you better depends on the results you want to achieve and the kind of training sessions that you want to be able to do. For people who are older, who work sedentary jobs, or have suffered previous serious injuries, flat treadmills offer a terrific way to get some exercise in without putting a ton of stress on the muscles and joints. They’re also a fantastic option for stay-at-home moms or people working from home, as they enable them to get some activity while doing other types of work.
On the other hand, if you’re an active athlete or just someone who wants to perform better, curved treadmills challenge the muscles more; they’re also more similar to the real experience of running/sprinting and are a terrific way to get some sprinting/ high-intensity work done, while you’re indoors.
In Conclusion
We hope that by the end of this article, you’ve learned all that you wanted about the differences between curved and flat treadmills. As you can see, which one you choose to use or buy for your home gym depends entirely on your personal needs and the goals you have related to health and fitness. However, if there’s one thing that’s certain, both of these machines are a fantastic way to stay active and to get your regular cardio session in.
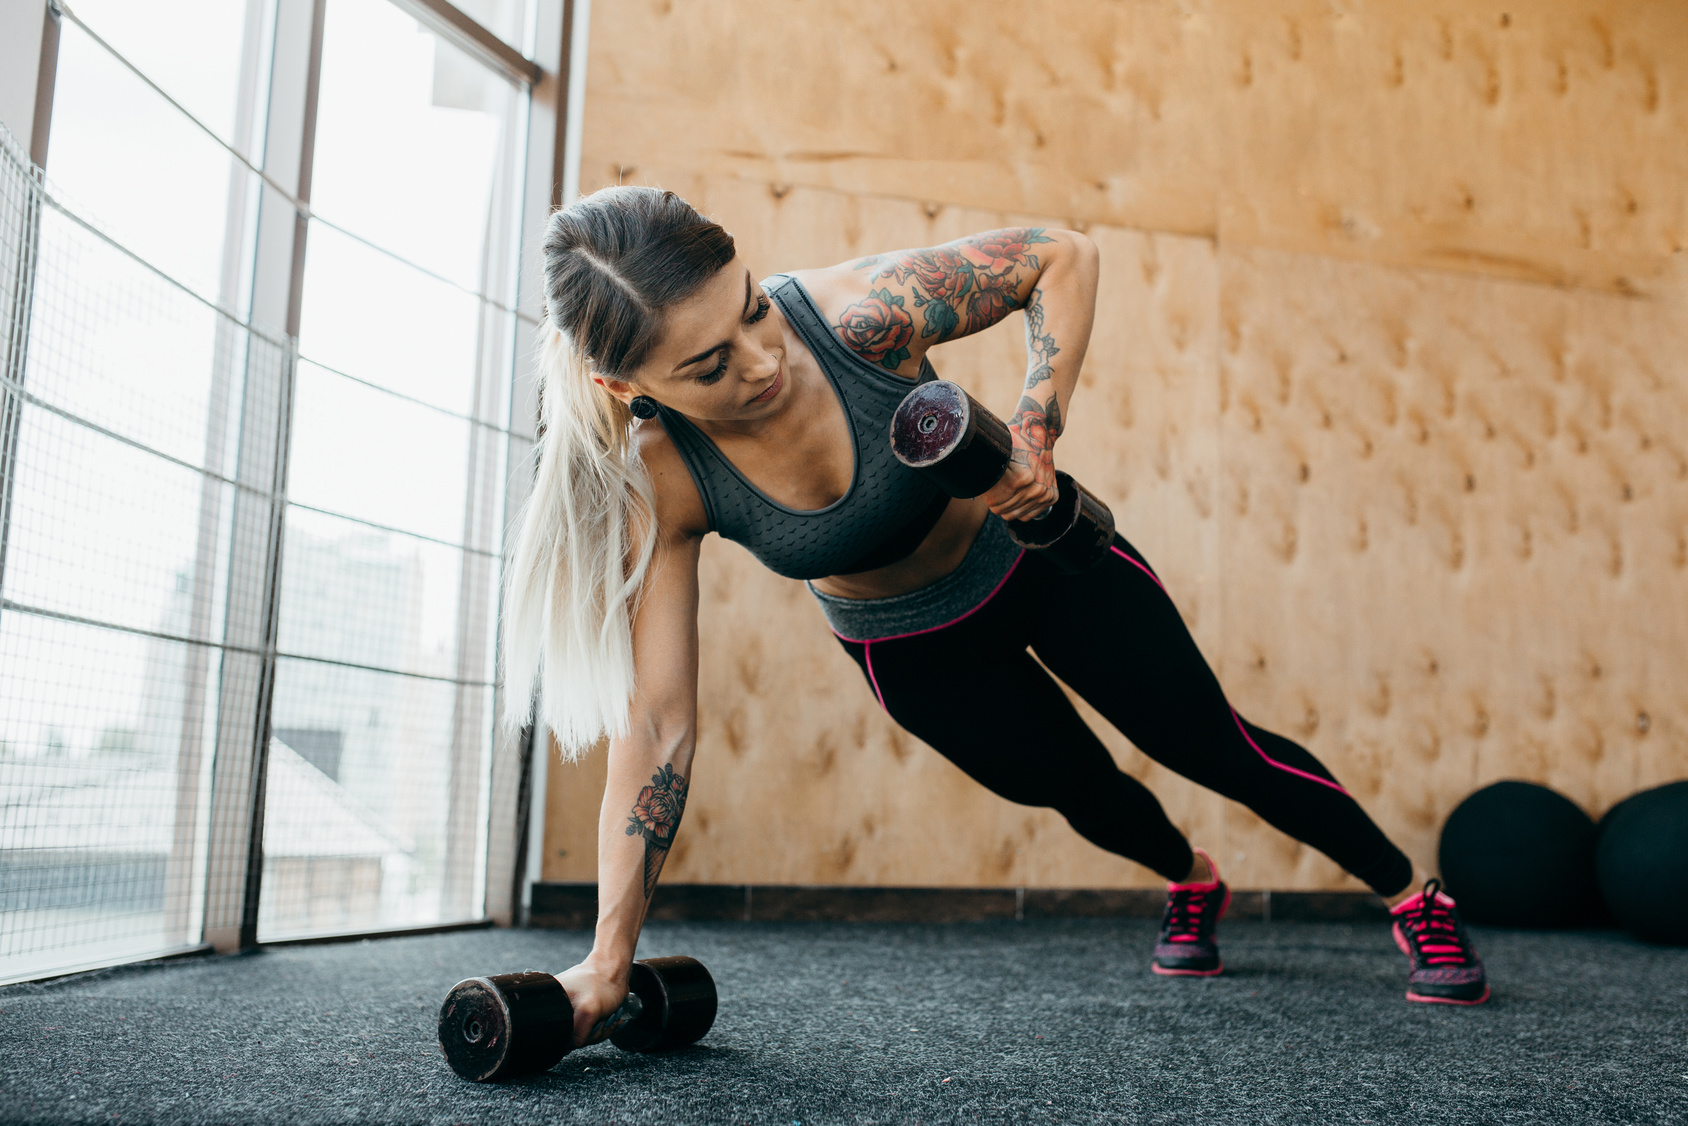
Let’s talk about push-ups! Now, I know when you think about boosting your running game, you might not immediately picture yourself doing push-ups.
I mean, running is all about the legs, right? But stay with me because by the time we’re done here, you might just be itching to add this fantastic exercise to your strength routine.
Get ready to discover the surprising benefits of push-ups for your running performance!
1. Posture and Form: As you mentioned, a strong upper body helps maintain good posture and form during your runs. It prevents slouching and keeps you upright, which is crucial for efficient running.
2. Injury Prevention: Upper body strength, including the chest, shoulders, and upper back, can help prevent injuries. A strong upper body provides stability, reducing the risk of overuse injuries and improving overall body mechanics.
3. Arm Drive: Strong arms can contribute to a more powerful arm drive, which can assist in propelling you forward while running. This can enhance your overall running speed and efficiency.
4. Core Activation: Push-ups engage your core muscles, helping to improve core stability. A strong core is essential for maintaining balance and transferring power from your upper body to your lower body during running.
5. Breathing: A strong upper body, including the chest and back muscles, can improve your lung capacity and breathing efficiency. This is particularly beneficial during intense or long runs.
6. Muscle Balance: Running predominantly works the lower body muscles. Strength training, including push-ups, ensures a more balanced musculature throughout your body, reducing the risk of muscle imbalances and injuries.
Why You Should Be Doing A Variety of Push-ups (and Exercises)
Adding variations to your push-up routine is key for many reasons.
Let me explain why.
Prevent Boredom: Doing the same exercise repeatedly can lead to workout monotony. Trying out different push-up variations keeps your routine interesting and challenging, making you more likely to stick with it in the long run.
Target Different Muscle Groups: Various push-up variations emphasize different muscle groups. For example, wide-arm push-ups target the chest and shoulders more, while diamond push-ups focus on the triceps.
Avoid Plateaus: When you continuously challenge your muscles with new movements, you prevent them from adapting to the same routine. Plateaus can hinder progress, but by introducing different push-up variations, you keep your muscles engaged and continually progressing.
Enhance Overall Strength: Different push-up variations can help strengthen not only the primary muscle groups but also stabilizing muscles and core muscles. This comprehensive strength development contributes to better overall fitness and can have a positive impact on your running performance.
Injury Prevention: Utilizing various push-up variations can reduce the risk of overuse injuries. By shifting the focus and load to different muscles, you avoid placing excessive stress on a single muscle group or joint.
1. The Standard Push-up
Starting Position:
Begin by positioning yourself on the ground in a prone (face-down) position.
Place your hands slightly wider than shoulder-width apart, with your palms flat on the floor. Your fingers should be pointing forward or slightly turned outward.
Extend your legs behind you, resting on the balls of your feet. Your body should form a straight line from head to heels.
Up and Down Motion:
Inhale as you slowly bend your elbows, lowering your chest toward the floor. Keep your body in a straight line and engage your core muscles.
Continue lowering your body until your chest is either touching or hovering just above the floor.
Elbow Position:
Maintain proper elbow alignment throughout the movement. Your elbows should not flare out to the sides or move behind your wrists.
Aim to keep your elbows positioned above your wrists, forming a 90-degree angle at the bottom of the push-up.
Avoid Slouching or Sagging:
Keep your hips in line with your torso to prevent sagging or raising your hips. Your body should remain straight like a plank.
Avoid any excessive arching or rounding of your lower back.
Head Position:
Keep your head in a neutral position, aligned with your spine. Avoid dropping your head or craning your neck forward.
Exhale and Push Away:
Exhale as you push through your palms and extend your arms, raising your body back up to the starting position.
Fully extend your arms without locking your elbows.
Repeat:
Perform the desired number of repetitions while maintaining proper form.
The modified version (for beginners)
If the standard push-up is too much for you, then you can always do the modified version, where you rest on your knees instead of your toes.
You can also perform this variation when you are really tired and can’t crank out a push-up with good form.
2. Walking Pushup
Proper Form:
Start by getting into a standard push-up position on the floor. Ensure your hands are placed slightly wider than shoulder-width apart, with your palms flat and fingers pointing forward.
Place your feet on a soft surface, preferably a towel or a sliding disc, to facilitate movement.
Keep your body in a straight line from head to heels, engaging your core muscles to maintain stability.
Execution:
Begin the exercise by walking with your hands while keeping your upper body steady and your back straight.
Take small steps with your hands, moving them forward, one at a time.
Continue walking with your hands across the room or the available space.
Once you’ve reached your desired distance or space limitations, start walking your hands back toward the starting position.
Maintain Proper Alignment:
Throughout the exercise, make sure to maintain proper alignment, keeping your hips in line with your torso.
Avoid letting your hips sag or pike upward. Your body should remain in a straight line.
Repetition:
10. Perform the walking push-up for the desired number of repetitions or distance. You can adjust the intensity by increasing the distance you walk with your hands.
3. Plyometric Pushups
Plyometric Pushups are a dynamic variation of the traditional push-ups that build explosive strength and coordination, making them ideal for improving speed and endurance. Here’s how to perform them with proper form:
Proper Form:
Start by assuming a standard push-up position on a well-padded carpet or exercise mat. Ensure your hands are positioned slightly wider than shoulder-width apart, with your palms flat and fingers pointing forward.
Maintain a straight line from your head to your heels, engaging your core muscles for stability.
Execution:
Begin the exercise by performing a regular push-up. Lower your chest toward the floor by bending your elbows, keeping them at a 90-degree angle or less.
4. Resistance Band Push-ups
Resistance Band Push-ups are a challenging variation that adds extra resistance to the standard push-up, making the exercise more demanding on your muscles.
This added resistance increases tension throughout the entire movement, even during the lowering phase, making it an effective strength-building exercise.
Here’s how to perform resistance band push-ups with proper form:
Proper Form:
Begin by grabbing a resistance band and placing it around your upper back, crossing it over your chest.
Hold the ends of the band in your hands and position them slightly wider than shoulder-width apart on the floor.
Assume a standard push-up position with your hands on the band and your body in a straight line from head to heels. Your palms should be flat on the floor, fingers pointing forward, and your feet hip-width apart.
Engage your core muscles to maintain a stable and aligned body position.
Execution:
Start performing the push-ups in a controlled and deliberate manner.
Lower your chest toward the floor by bending your elbows, keeping them at a 90-degree angle or less.
The resistance band will add tension throughout the exercise, making both the lifting and lowering phases more challenging.
Continue to lower yourself until your chest is close to or touching the floor.
Completion:
Push upward until your arms are fully extended, returning to the starting position.
Maintain proper form throughout the exercise, ensuring a straight line from head to heels.
Perform the desired number of repetitions, focusing on controlled movements and maintaining tension in the resistance band.
5. Diamond Push-ups
Diamond Push-ups are an effective variation of the standard push-up that primarily targets the triceps while also engaging the chest and shoulders. This variation involves placing your hands close together, forming a diamond shape with your thumbs and index fingers. Here’s how to perform diamond push-ups with proper form:
Proper Form:
Begin by getting into a standard push-up position with your hands placed close together, directly below the center of your chest.
Position your hands so that your thumbs and index fingers touch, forming a diamond or triangle shape with your hands.
Your fingers should point forward, and your palms should be flat on the floor.
Your body should be in a straight line from head to heels, with your feet hip-width apart. Engage your core muscles to maintain stability.
Execution:
Start performing the push-up by lowering your chest toward the diamond shape created by your hands.
Keep your elbows close to your body as you lower yourself down.
Lower your chest as close to the diamond shape as possible, ideally touching it or coming very close.
Completion:
Push upward by extending your arms until they are fully straight, returning to the starting position.
Maintain proper form throughout the exercise, ensuring a straight line from head to heels.
Continue to perform diamond push-ups for the desired number of repetitions.
6. Decline BOSU Ball Push-ups
Decline BOSU Ball Push-ups are an advanced variation of the standard push-up that adds an element of balance and stability training to the exercise.
This variation targets the chest, shoulders, and triceps while also engaging the core and stabilizer muscles. Here’s how to perform Decline BOSU Ball Push-ups with proper form:
Proper Form:
Set up a BOSU ball with the flat side down on the floor. Place a box or bench behind the BOSU ball.
Assume a standard push-up position by placing both hands on the flat, round side of the BOSU ball, slightly wider than shoulder-width apart.
Position your feet on the box or bench behind you, elevating your lower body. Your body should form a straight line from head to heels.
Engage your core muscles to maintain stability and balance.
Execution:
Begin the push-up by lowering your chest down toward the BOSU ball while maintaining a straight body position.
Lower your chest until it touches the BOSU ball or comes very close to it.
Completion:
Push upward by extending your arms, returning to the starting position with your arms fully straight.
Maintain proper form throughout the exercise, focusing on balance and stability.
Continue to perform Decline BOSU Ball Push-ups for the desired number of repetitions.
7. Dumbbell Push-ups with Row
Dumbbell Push-ups with Row are an effective compound exercise that combines a pushing motion with a pulling motion. This variation targets multiple muscle groups, including the chest, shoulders, triceps, and back muscles.
It’s a great exercise for building upper body strength and improving muscle balance.
Here’s how to perform Dumbbell Push-ups with Row with proper form:
Proper Form:
Place a pair of dumbbells on the floor, about shoulder-width apart.
Assume a standard push-up position with both hands gripping the dumbbells in a neutral grip (palms facing each other). Your body should be in a straight line from head to heels.
Position your feet shoulder-width apart to provide stability and balance.
Engage your core muscles to maintain a flat back and proper form.
Execution:
Begin the exercise by performing a push-up: Lower your chest toward the floor while keeping your elbows close to your body.
Lower your chest as close to the ground as possible without touching it.
Completion:
Push back up to the starting position by extending your arms fully.
After completing the push-up, transition into the rowing portion. While maintaining a flat back and engaged core, row the dumbbell in your right hand upward to the side of your chest.
Bend your elbow as you pull the dumbbell toward your body, keeping it close to your torso.
Pause for a second at the top of the row, squeezing your back muscles.
Slowly lower the dumbbell back down to the floor.
Repeat the push-up and row on the opposite side, this time using your left hand to row the dumbbell.
8. Outside Leg Kick Push-up
The Outside Leg Kick Push-up is a dynamic variation of the standard push-up that offers several benefits, including building strength and endurance in the shoulders and chest, improving flexibility in the lower body, and engaging the core muscles.
This exercise targets multiple muscle groups simultaneously.
Here’s how to perform the Outside Leg Kick Push-up with proper form:
Proper Form:
Begin by assuming a standard push-up position with your hands placed slightly wider than shoulder-width apart on the floor.
Ensure your body forms a straight line from head to heels. Engage your core muscles to maintain proper alignment throughout the exercise.
Execution:
Lower your chest toward the ground by bending your elbows. Continue the push-up until you are near the bottom of the movement.
Leg Kick:
At the bottom of the push-up, when your chest is close to the floor, initiate the leg kick. Extend your right leg out to the side as far as possible, aiming for approximately a 90-degree angle with your body.
Keep your right knee straight, and your toes pointed.
Hold the leg extended for a second to engage your hip flexors, hamstrings, and glutes.
Completion:
After pausing briefly with your right leg extended, retract your leg, bringing it back to the starting position.
Once your leg is back in the starting position, push back up to the top of the push-up position, extending your arms fully.
Switch sides and repeat the exercise, this time kicking your left leg out to the side at the bottom of the push-up.
9. Dive Bomber Push-ups
The Dive Bomber Push-up is an advanced variation of the standard push-up that engages multiple muscle groups and offers a great cardiovascular workout.
This exercise targets your chest, shoulders, back, triceps, and core while also enhancing flexibility and mobility in your hamstrings, back, and shoulders. Here’s how to perform the Dive Bomber Push-up with proper form:
Proper Form:
Begin in a position similar to the downward dog yoga pose. Place your hands on the ground slightly wider than shoulder-width apart.
Your feet should be spread wide, and your hips should be raised toward the ceiling. Your body should form an inverted “V” shape.
Execution:
To initiate the movement, bend your arms and lower your head toward the ground. At the same time, start to slide your head forward and between your hands.
Dive Forward:
4. Continue to glide your chest forward, bringing it between your hands. As you do this, arch your back and keep your hips low to the ground.
Your head should be facing forward and slightly upward as you move through this phase.
Aim to push your head upward until your arms are fully extended and your chest is pointing upward.
Hold this position for a moment, feeling the stretch in your back and shoulders.
Reversal:
To reverse the movement and return to the starting position, bend your arms and lower your chest back toward the ground.
Continue to slide your head backward and away from your hands.
Raise your hips toward the ceiling, returning to the inverted “V” position
10. The Three Medicine Balls Push-up
The Three Medicine Balls Push-up is an advanced push-up variation that challenges your strength, stability, balance, and core.
This exercise targets the shoulders, back, chest, and core muscles, making it an effective way to build upper body strength while improving stability and body awareness. Here’s how to perform the Three Medicine Balls Push-up with proper form:
Proper Form:
Begin by placing three medicine balls on the ground and positioning them around your body.
Place your palms on two of the medicine balls, keeping them slightly wider than shoulder-width apart.
Position your feet so that the balls support your back feet, creating a bridge-like position with your body.
Execution:
With your palms on the medicine balls and your feet supported by the third ball, engage your core and maintain a straight line from your head to your heels.
This is your starting position.
Push-up:
Lower your chest toward the ground while keeping your body in a straight line.
Aim to lower yourself until your chest is just above the floor.
Return:
8. Push through your palms to raise your body back up to the starting position.
Maintain balance and control throughout the movement.
Repeat:
10. Perform the desired number of push-ups while maintaining proper form.
11. Handstand Push-ups
Handstand Push-ups are an advanced bodyweight exercise that challenges your upper body strength, shoulder stability, and core.
This exercise is a staple in the CrossFit world and can greatly improve shoulder strength and mobility. Here’s how to perform Handstand Push-ups with proper form:
Proper Form:
Begin by facing a wall, standing about 8 to 12 inches away from it.
Place both of your hands on the ground at shoulder width, approximately shoulder distance apart.
Getting Into Position:
Bend at the waist and kick your legs up into a handstand position. Your body should be fully extended, with your arms straight, back flat, and core engaged.
Your feet should be resting against the wall for support while you’re in the handstand position.
Performing the Push-up:
Slowly lower your head toward the ground, aiming to bring it as close to the floor as possible. If you’re unable to touch your head to the floor, it’s perfectly fine to perform a partial range of motion push-up.
Pause briefly when your head is close to the floor.
Push back up with control, extending your elbows until your arms are fully straight. This completes one repetition.
Repeat:
Perform the desired number of Handstand Push-ups while maintaining proper form and control.
Tips:
Ensure your core is engaged and your body remains in a straight line throughout the movement.
Practice against a wall to ensure stability and safety.
If you’re new to Handstand Push-ups, consider performing them with a spotter or using a padded surface for your head until you build strength and confidence.
Start with a manageable number of repetitions and gradually increase the difficulty as you become more proficient.
Push up Variations to Try – The Conclusion
Hopefully, you loved the above 11 push-up variations. Now, make sure to take action and do them regularly. There is nothing to it but to do it.
In the meantime, thank you for reading my post.
Feel free to leave your comments and questions below.
Ready to transform your running experience and unlock new levels of performance? You’ve arrived at the starting line of a journey that could redefine your running game.
Picture this: You, gliding effortlessly through your favorite running route, feeling stronger, faster, and more resilient with every stride. The finish line is in sight, and it’s not just about the destination; it’s about the exhilarating journey you’re about to embark upon.
Welcome to the world of strength training – a game-changer for runners seeking to go the extra mile (literally) and shield themselves from the nagging specter of injuries. While logging quality miles on the road remains paramount, this isn’t your ordinary training regimen. It’s your secret weapon to becoming the best runner you can be.
Today, we’re diving deep into the realm where lifting weights and building strength collide with the art of running. You’ll discover how this dynamic duo can enhance your performance, prevent injuries, and pave the way to a stronger, more resilient you.
What’s the best part? Each one of my claims will be supported by relevant research, helping drive home the importance of strength training for runners.
Ready? Let’s get started.
What is Strength Training?
Let’s dive into the world of strength training, also known as weight lifting. It’s not just about hoisting weights; it’s a journey that involves pushing your limits against various forces like gravity, elastic bands, dumbbells, or weight machines.
But what’s happening under the hood, at the cellular level, is where the magic truly begins.
When you embrace strength training, you’re embarking on a path that can transform your body in remarkable ways.
Picture this: enhanced muscular strength and power, fortified tendons, denser bones, improved joint mobility, stability like never before, and a boost in endurance. Sounds like a superhero’s checklist, doesn’t it?
Now, you might wonder, why should I care about all of this? Well, here’s the exciting part: all these superhuman upgrades aren’t just for show. They play a pivotal role in safeguarding your body from injuries and supercharging your athletic performance.
But hey, don’t just take my word for it – let’s look at some of the benefits of strength training for runners that are backed by real science—not just anecdotes.
Improve Muscle Strength
If you’ve ever faced an overuse injury, chances are you’ve crossed paths with this culprit, and here’s why it’s such a big deal.
Running, as awesome as it is, can be a repetitive affair. When you’re clocking those miles, certain muscle groups get more love while others lag behind. Over time, this imbalance can set the stage for trouble – it’s like having a superhero with one super-strong arm and the other, well, not so super.
Here’s the kicker – when one muscle group gets used less, it can become weaker than its counterpart. Think of it as an uneven tug of war between muscles. This imbalance isn’t just a minor hiccup; it’s often the spark that ignites overuse injuries. And trust me, you don’t want those.
But here’s the twist in the tale. The muscle that’s working overtime, the stronger one, can actually rub salt in the wound. Its maximal contractions might irritate its weaker counterpart, all because it can’t play fair and counterbalance the force.
But here’s where the good news comes in. Enter strength training, the hero we’ve all been waiting for. With a well-crafted, balanced strength training plan, you can tip the scales in your favor. It’s like the ultimate muscle harmonizer.
While focusing on older adults, this study conducts a systematic review and meta-analysis to investigate the effects of resistance training on skeletal muscle strength. It suggests that resistance training can address muscle imbalances, a critical consideration for runners.
This study explores how resistance training influences endurance capacity and muscle strength in young athletes, not limited to runners. It provides insights into how strength training can complement endurance training in various sports.
This comprehensive review discusses the broader effects of strength training on physical function, including its influence on endurance, strength, recovery, and injury prevention. It emphasizes the multidimensional benefits of strength training for athletes.
This study examines the role of resistance training in the development of elite young athletes across different sports. It discusses how strength training contributes to athletic performance and injury prevention in a broader athletic context.
2. Improve Running Economy
Running economy isn’t just a fancy term; it’s the secret sauce that can take you further and faster than you ever thought possible.
Picture this: with each stride, your body is a finely-tuned machine, burning up oxygen to keep you going. Now, if you’re looking to outperform your personal best, here’s where running economy steps in. It’s all about using that precious oxygen more efficiently at different running paces. Why is this crucial? Because the better your running economy, the farther and faster you can run without hitting that dreaded wall.
But hey, I get it; you might be thinking, “Why should I believe this?” Fair enough! Let’s turn to the research, shall we?
Numerous studies have uncovered a fascinating truth: runners with better running economy are like energy-saving champions during their training and races. They can go the distance while using their energy with laser-like precision. And what’s the link between this and strength training, you ask?
Well, it turns out that strength training is your secret weapon to supercharge your running economy. Whether you’re lifting weights or diving into bodyweight exercises like box jumps and frog hops, you’re tapping into a wellspring of power that can catapult your running to new heights.
Here’s the science behind it: strength training boosts your body’s ability to harness elastic energy. Think of it as a slingshot for your muscles. When you push off the ground, that stored energy propels you forward with less muscle effort. Translation: you can cover more ground with less struggle.
This study examines the impact of strength training on the running economy of highly trained runners. It investigates whether incorporating strength training into their training regimen leads to more efficient use of energy during running, potentially resulting in improved performance.
This research focuses on recreational marathon runners and investigates the impact of strength training on running economy. It highlights how strength training can benefit runners of varying levels, not just elite athletes.
3. Improved Bone Density
Now, you might be wondering, why should I care about bone density? Well, here’s the scoop.
Research has spoken loud and clear: engaging in weight-bearing activities is the gold standard for boosting bone density. Think of your bones as the foundation of your running career. The stronger that foundation, the less likely you are to face the nemesis of many runners – stress fractures.
Now, you might ask, what’s one of the best weight-bearing activities out there? You guessed it – lifting weights. When you lift, you’re not just defying gravity; you’re taking on resistance head-on. It’s like a battle, where your muscles and bones are the heroes.
So, why is this so important? Stress fractures, those pesky and notorious injuries, are like a runner’s worst nightmare. They can pop up out of nowhere and put a pause on your running goals. But here’s the silver lining – by improving your bone density through weightlifting, you’re effectively fortifying your bones.
Picture this: your bones become stronger, tougher, and more resilient because they have to support the extra load you’re throwing at them. It’s like giving them a workout of their own. The result? You’re not just reducing the risk of stress fractures; you’re paving the way for a longer, injury-resistant running career.
This meta-analysis systematically reviews randomized controlled trials to assess the effects of weight-bearing exercises, such as weightlifting, on bone mineral density. It provides insights into how weight-bearing exercises can enhance bone density and reduce the risk of stress fractures.
4. Improve Core Strength
Let’s uncover a running secret that might surprise you: your core is the unsung hero, the very bedrock of your running prowess. It’s not just about those flashy leg muscles; your core plays a pivotal role in your every stride.
Don’t just take my word for it; there’s an army of research backing this up. Multiple studies have made it crystal clear that a strong core is the golden ticket to better running performance and a lower injury rate.
Now, here’s where the magic happens. When you dive into core-specific exercises as part of your strength training routine, you’re essentially laying the foundation for reliable core stability and strength. It’s like building a fortress of power deep within your body.
Now, what exactly makes up this core we’re talking about? It’s a powerhouse team that includes your abdominals, your glutes, the lower back, and those often-underestimated hips. Together, they form an unbeatable alliance.
Why does this matter for you as a runner? Well, here’s the deal: a robust core means that extra stress won’t end up in the wrong places, like your lower back or lower body, causing pain and injury.
This study conducts a systematic review and meta-analysis to explore how core training impacts distal limb strength. It provides insights into the relationship between core training and overall strength, which is essential for runners, especially in terms of injury prevention.
5. Improve Form & Posture
Are you familiar with the frustration of struggling to maintain proper form during those grueling long runs? If so, you’re not alone. It’s a challenge that many runners face, but there’s a solution that might surprise you – building stronger muscles.
You see when you’re out there logging those miles, it’s not just your lungs that bear the brunt of the effort. Your muscles, too, take a beating, and that can have a major impact on your form and posture.
But here’s the silver lining: by embracing total-body strength training, you’re not just working on your biceps or quads; you’re strengthening the entire ensemble. It’s like giving your body a suit of armor that can withstand the extra load and fatigue that often accompany long runs.
And here’s why this is such a game-changer: when your muscles are strong and well-conditioned, they become your allies in the battle against fatigue. They help you maintain that proper posture and technique, even when your body is screaming at you to stop.
Picture this: as you cruise through those long runs, your form remains impeccable, your posture stays on point, and you’re moving with an efficiency that’s nothing short of remarkable. This isn’t just a matter of aesthetics; it’s about making every stride count.
This paper provides a theoretical and empirical perspective on the incorporation of strength training in endurance athletes’ training programs. It discusses the potential benefits of strength training for improving endurance performance across various endurance sports.
This study investigates the effects of strength training on running performance, with a focus on female endurance athletes. It examines how strength training can positively influence various aspects of running performance, including form and posture.
Ever wondered how you stack up when it comes to your physical fitness? I’ve got you covered with not one, not two, but a dozen fitness assessments that’ll give you a real-deal snapshot of your fitness game
Let’s break it down: Fitness isn’t just about how many miles you can run or how much iron you can pump; it’s a finely tuned orchestra of various physical abilities.
We’re talking cardiovascular endurance, muscular endurance, muscular strength, flexibility (we all want to touch our toes, right?), and the nitty-gritty of body composition.
So, why these tests? Because they’re the ultimate litmus test for your fitness journey.
These assessments aren’t just about numbers; they’re your starting point. Whether you’re on a quest to conquer a marathon, reach peak athletic performance, or simply boost your overall fitness, these scores are your trusty compass.
Ready to lace up those sneakers and dive into this fitness adventure? Let’s get started!
Nonetheless, if you have never tested your speed, you can’t really know how fast you are.
Here is a test that can help.
200-Meter Sprint
If you’re ready to unleash your inner sprinter and want to measure your explosive power, the 200-meter sprint test is an excellent way to do it. Here’s how to go about it:
The Test Procedure
Warm-Up: Begin with a thorough 5-minute warm-up. This can include light jogging, dynamic stretches, and mobility exercises to prepare your muscles and joints for action.
Progressive Sprints: After the warm-up, start with a series of sprints, gradually increasing your speed with each round. This helps you transition into the all-out effort of the 200-meter sprint.
All-Out Sprint: When you feel sufficiently warmed up and ready, set a stopwatch or have a partner time you. Sprint 200 meters with maximum effort. This means giving it everything you’ve got from start to finish.
Scoring: How Fast Are You?
Your time in the 200-meter sprint can provide insight into your explosive speed and anaerobic power. Here’s how to interpret your performance:
More than 50 seconds: This indicates a relatively poor performance in terms of explosive speed.
40 to 50 seconds: Considered average, but there’s room for improvement.
25 to 40 seconds: A time in this range is good and shows a solid level of sprinting ability.
Less than 25 seconds: An excellent time, demonstrating outstanding explosive speed.
Beyond Speed: Endurance Matters
While the 200-meter sprint assesses your burst of speed, remember that being a well-rounded runner isn’t just about quick bursts. Endurance plays a significant role in your overall performance and stamina.
To excel as a runner, it’s crucial to incorporate endurance training into your regimen. This might include longer runs, interval training, and a focus on cardiovascular conditioning to complement your sprinting prowess.
Two-Mile Run
For those looking to gauge their endurance and aerobic capacity, the two-mile run test is a classic and reliable choice. Let’s break it down:
The Test Procedure
Warm-Up: Always begin with a thorough warm-up. This should include light jogging to raise your heart rate, dynamic stretches to loosen up your muscles, and mobility exercises to ensure your joints are ready for action.
The Run: Once properly warmed up, head to a track (a standard 400-meter track is ideal) or any measured course. Your goal is to run two miles (approximately eight laps on a standard track) as fast as you can.
Scoring: What’s Your Pace?
Your time for the two-mile run can provide valuable insight into your endurance and cardiovascular fitness. Here’s how to interpret your performance:
More than 20 minutes: This suggests that your endurance could use improvement and may be considered poor in terms of aerobic capacity.
15 to 20 minutes: An average time that shows a decent level of endurance, but there’s room for enhancement.
12 to 15 minutes: A time in this range is good and indicates a solid level of aerobic fitness.
Less than 12 minutes: An excellent time, demonstrating exceptional endurance and cardiovascular fitness.
Why Endurance Matters
While sprint tests like the 200-meter dash assess your explosive speed, the two-mile run focuses on a different aspect of your running capability – your ability to sustain effort over a longer distance.
Endurance is a key component for distance runners and crucial for achieving and maintaining a consistent pace during longer races.
Upper Body Strength
When it comes to running, we often focus on the legs but don’t overlook the importance of upper body strength. A strong upper body contributes to better posture, running form, and overall running economy. Here are two simple tests to assess your upper body strength:
3. Push-Ups Test: Building Upper Body Endurance
Test It: Begin with a proper warm-up that includes dynamic upper-body stretches. Then, get into a push-up position with your hands shoulder-width apart and your body in a straight line from head to heels. Lower your chest to the ground and push back up.
Perform as many push-ups as you can with proper form—keep your back straight and legs fully extended throughout the exercise.
Score It:
10 or less: This indicates that there’s room for improvement in your upper body endurance.
15 to 30: A decent score, showing an average level of upper body strength.
30 to 40: A good score, indicating solid upper body strength.
4. Pull-Up Test: Unleash Your Upper Body Power
Test It: For this test, you’ll need a pull-up bar. Grab the bar using an underhand grip, with your palms facing your body, and your arms fully extended. Hang from the bar, then pull your body up until your chin is above the top of the bar. Do as many pull-ups as possible with good form.
Score It:
Six or fewer: This suggests that you may want to work on your upper body strength.
6 to 12: An average score indicating a moderate level of upper body power.
12 to 20: A good score, reflecting strong upper body strength.
20 and more: An excellent score, showing exceptional upper body strength.
Bench Press
The bench press is a classic exercise that targets the muscles of your chest, shoulders, and triceps. It’s not just about building muscle; it’s also a measure of your upper body strength.
Let’s break down the bench press test:
The Test Procedure
Test It: To perform the bench press test, you’ll need access to a bench press machine and a barbell. Here’s how it works:
Begin by getting into the bench press machine. Keep your feet planted firmly on the ground and engage your core throughout the exercise.
Lower the barbell down until it reaches your mid-chest. Pause briefly at the bottom, then push the barbell back up to the starting position.
Perform this motion for one repetition.
Score It:
Calculate your score by dividing the maximum one-rep bench press weight you can lift by your body weight.
Scoring Guide
Less than 1.0: This score suggests that you may want to work on your upper body strength, specifically in the bench press exercise.
to 1.50 bodyweight: Falling into this range is a good sign and indicates solid upper body strength relative to your body weight.
5 or more: An excellent score! This indicates that you have exceptional upper body strength, lifting more than one and a half times your body weight in the bench press.
Core Strength
A strong core is your secret weapon for improved running performance and injury prevention. Your core muscles, including the upper and lower abs, obliques, and glutes, play a pivotal role in maintaining good running form. Let’s put your core power to the test with two effective exercises:
6. Crunches: Core Endurance Test
Test It: To perform crunches, follow these steps:
Lie on your back with your knees bent and feet flat on the floor, keeping your heels touching.
Place your hands behind your head with your elbows out. Engage your core muscles and lift your upper body off the ground, aiming to touch your elbows to your knees.
Do as many crunches as you can in one minute while maintaining good form.
Score It:
Interpret your score based on the number of crunches you complete in one minute.
15 or fewer: This score indicates that you may want to focus on improving your core endurance.
15 to 30: Falling into this range is considered average and signifies a moderate level of core endurance.
30 to 50: A score in this range is good, reflecting solid core endurance.
50 and more: An excellent score! It suggests that you have exceptional core endurance.
7. The Plank: Core Stability Challenge
The plank is a fantastic exercise for assessing your core stability. Here’s how to do it:
Assume a plank position with your forearms resting firmly on a mat, legs extended, and core activated.
Keep your body in a straight line from head to ankles.
Hold the plank as long as you can while maintaining good form.
Score It:
Your score is determined by the duration you can hold the plank with proper form.
Less than one minute: This score suggests that you may need to work on building core stability.
One to two minutes: An average score that indicates a decent level of core stability.
Two to three minutes: A good score, signifying strong core stability.
More than three minutes: An excellent score! It means you have exceptional core stability.
Why Core Strength Matters for Runners
Core strength is the foundation of a strong, stable running form. It helps you maintain proper posture, balance, and control throughout your runs, reducing the risk of injuries and improving overall performance.
Lower Body Strength and Endurance
Strong and balanced lower body muscles are essential for runners. They not only propel you forward but also help prevent overuse injuries. Let’s assess your lower body strength and endurance with a classic exercise – the bodyweight squat:
Assume a shoulder-width stance, with your feet about hip-width apart. Keep your back straight and your knees tracking behind your toes throughout the exercise.
Perform as many squats as you can in three minutes while maintaining good form.
Score It:
Determine your score based on the number of squats completed in three minutes.
Scoring Guide for Bodyweight Squats
Less than 50: This score suggests that you may need to work on your lower body endurance.
50 to 100: Falling into this range is considered average and indicates a moderate level of lower body endurance.
100 to 200: A score in this range is good, reflecting strong lower body endurance.
200 and more: An excellent score! It means you have exceptional lower body endurance.
Flexibility and Mobility: Unlock Your Running Potential
Runners often struggle with tight hamstrings and calves, which can lead to overuse injuries like Runner’s Knee and ITB syndrome. To assess your flexibility and mobility, let’s go through three tests:
9. Test 1: Hamstring Flexibility
Test It: Sit on the floor with one leg extended straight and the other leg bent so that the sole of your foot touches the inner thigh of the extended leg. Reach forward toward your toes while keeping your back straight.
Score It:
Interpret your score based on how close you can reach to your toes without straining.
Scoring Guide for Hamstring Flexibility
Not able to touch your toes: This may indicate limited hamstring flexibility.
Able to touch your toes with fingertips: A moderate level of hamstring flexibility.
Able to touch your toes with palms: Good hamstring flexibility.
Able to reach beyond your toes: Excellent hamstring flexibility.
10. Test 2: Calf Flexibility
Test It: Stand facing a wall with one foot forward and the other foot back. Bend the front knee while keeping the back heel on the ground. Your back leg should be straight, with the heel touching the floor.
Score It:
Your score depends on how close your heel can get to the wall without lifting off the ground.
Scoring Guide for Calf Flexibility
Heel can’t reach the wall: Limited calf flexibility.
Heel reaches the wall: Moderate calf flexibility.
Heel touches the wall or gets very close: Good calf flexibility.
Heel easily touches the wall: Excellent calf flexibility.
11. Test 3: Hip Mobility
Test It: Sit on the floor with your legs straight out in front of you. Try to reach forward toward your toes while keeping your knees straight.
Score It:
Your score is based on how close you can reach your toes without bending your knees.
Scoring Guide for Hip Mobility
Not able to touch your toes: Limited hip mobility.
Able to touch your toes with fingertips: Moderate hip mobility.
Able to touch your toes with palms: Good hip mobility.
Able to reach beyond your toes: Excellent hip mobility.7
12. Thomas Test
The goal: Assess hip flexibility, precisely in the iliopsoas and quadriceps muscles.
Thomas Test: Assessing Hip Flexibility
Test It: For the Thomas Test, you’ll need a partner:
Lie on your back at the edge of a bench or table.
Pull both knees toward your chest using your arms.
While keeping your lumbar spine flat on the bench, lower your right leg toward the bench, letting it hang freely.
Have your partner measure where your right leg hangs.
Repeat the test with your left leg.
Score It:
Interpret your score based on how your leg positions during the test:
Your leg touches the bench: Good hip flexibility.
The back of your leg is slightly off the surface: Average flexibility, indicating tight hip flexors.
Your upper thigh won’t get parallel with the bench: Poor flexibility.
13. Sit and Reach Test: Evaluating Hamstring and Lower Back Flexibility
Test It: Perform the sit and reach test as follows:
Sit on the floor with your legs extended straight ahead. Keep your knees locked and pressed to the floor.
Reach as far as you can toward or beyond your toes without rounding your back. Hold the position for at least three seconds and note how far down you can reach.
Score It:
You can easily reach and grab your toes: Good flexibility.
You can grab your ankles or shins: Average flexibility.
You can only grab your knees: Poor flexibility.
14. Depth Squat Test: Mobility and Stability Assessment
Test It: The depth squat test assesses the mobility, flexibility, and stability of your lower body:
Stand with your feet shoulder-width apart. Hold a pole or bar in both hands and straighten your arms overhead.
Drop into a deep squat while keeping your back flat and your knees tracking over your toes.
Score It:
Ankles and heels remain in contact with the floor without any struggle: Good mobility, flexibility, and stability.
You struggle to keep your back flat and knees tracking over your toes, but your heels remain on the ground: Average mobility and stability.
You can’t achieve a full squat without raising your heels off the ground: Poor mobility, flexibility, and stability.
Total Body Strength and Conditioning Fitness
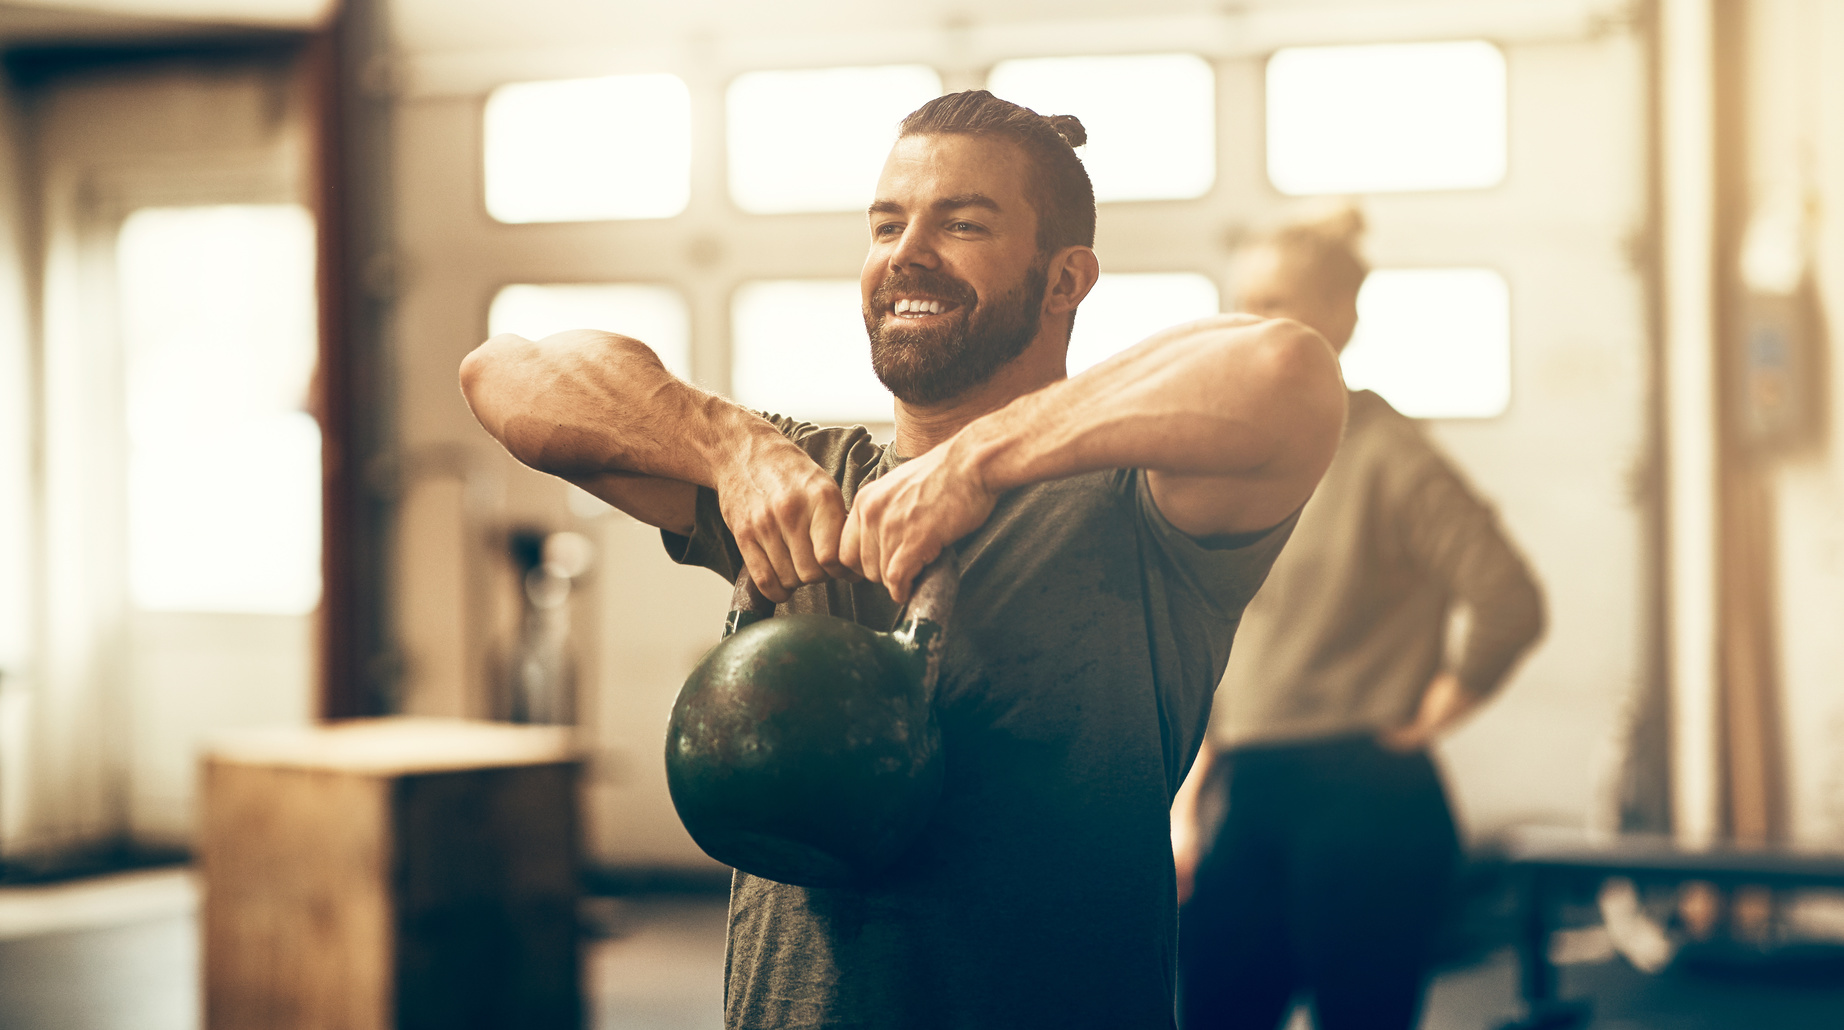
15. Total Body Strength and Conditioning: The CrossFit Challenge
If you’re ready to push your fitness limits and embrace a well-rounded approach to total body strength and conditioning, CrossFit might be the challenge you’re seeking. CrossFit’s philosophy revolves around non-specificity, aiming to excel in all facets of fitness. One of the quintessential CrossFit workouts is the Fran WOD (Workout of the Day):
The Fran WOD: A Test of Total Body Fitness
Test It: The Fran WOD consists of the following exercises:
21 thrusters (95 pounds for men, 65 pounds for women)
21 pull-ups
15 thrusters
15 pull-ups
9 thrusters
9 pull-ups
Perform these exercises as quickly as possible while maintaining proper form.
Score It:
Interpret your score based on the time it takes you to complete the workout:
12 minutes and more: This score suggests you may need to work on your overall fitness.
Eight to 12 minutes: Falling into this range is considered average and indicates a decent level of fitness.
Five to eight minutes: A good score, reflecting strong total body fitness.
Less than five minutes: An excellent score! It signifies exceptional total body fitness.
Body composition
16. The waist-to-hip ratio
Determining your body composition is crucial for understanding your overall health and fitness. One effective way to assess body composition is by measuring the waist-to-hip ratio. Here’s how to do it:
Measuring Your Waist-to-Hip Ratio
Test It: To measure your waist-to-hip ratio, follow these steps:
Get a measuring tape. Measure your waist at the narrowest point, usually just above the navel. Then measure your hips at the widest part of your buttocks.
Score It:
Calculate your waist-to-hip ratio by dividing your waist circumference by your hip circumference.
Interpreting the Results for Men
96 or higher: This ratio is considered poor and may indicate a higher risk of health issues related to body composition.
90 to 0.96: Falling within this range is considered ordinary, indicating an average waist-to-hip ratio.
83 to 0.89: A ratio in this range is considered good and suggests a healthier body composition.
82 or less: An excellent waist-to-hip ratio, indicating a favorable body composition.
Interpreting the Results for Women
86 or higher: This ratio is considered poor for women and may suggest a higher risk of health concerns related to body composition.
80 to 0.86: Falling within this range is considered ordinary, indicating an average waist-to-hip ratio for women.
73 to 0.79: A ratio in this range is considered good and reflects a healthier body composition.
72 or less: An excellent waist-to-hip ratio, indicating a favorable body composition for women.
Understanding the Importance of Waist-to-Hip Ratio
Your waist-to-hip ratio provides valuable insights into your body composition and overall health. Maintaining a lower ratio, whether you’re a man or a woman, is associated with reduced health risks related to body fat distribution, such as cardiovascular diseases and metabolic disorders.
Monitoring your waist-to-hip ratio can be a useful tool in achieving and maintaining a healthy body composition. It’s important to remember that body composition assessments like this one should be part of a comprehensive approach to health and fitness. Combining a balanced diet, regular exercise, and a holistic understanding of your body can help you achieve your fitness goals and maintain optimal health.
How Fit Are You Really? – The Conclusion
Here you have it!
The above fitness tests can shed light on how fit you are. So take them as soon as you can and keep track of your progress. That’s how you will improve.
In the meantime, thank you for reading my post.
Feel free to leave your comments and questions below
There’s nothing quite like a hearty breakfast to kickstart your day, especially when you’re gearing up for a long run or recovering from an intense training session.
These recipes are not only delicious but also packed with the nutrients you need to fuel your runs and recharge afterward.
And guess what? Some of these recipes are keto-friendly, making them an excellent choice if you’re already on a low-carb diet.
So, let’s dive into these mouthwatering breakfast ideas that will level up your running game while tantalizing your taste buds. Get ready for a breakfast experience like no other!”
Breakfast Recipe # 1: Keto Coffee
Are you a coffee enthusiast like me, someone who simply can’t face the day without that steaming cup of liquid motivation? Well, my fellow coffee lover, I’ve got something special for you!
Introducing… Keto Coffee is also known as the legendary butter coffee. Not only is it a delicious way to kickstart your morning, but it’s also a healthier alternative to your typical breakfast fare. This magical elixir will fuel you with boundless energy and keep those hunger pangs at bay until lunchtime.
Feeling exceptionally hungry in the morning? Consider this pro tip: add a teaspoon of rich, full-fat coconut oil or velvety coconut milk to your brew. Not only will it make your coffee even more delectable, but it will also give your ketone levels a little nudge in the right direction.
Ingredients
One cup of brewed coffee
One tbsp. extra virgin coconut oil
Two egg yolks
Two tbsp. heavy whipping cream
One tablespoon of unsalted grass-fed butter or ghee
Pinch of cinnamon
Pinch of vanilla or three drops of stevia.
Then follow through as shown in this YouTube tutorial
Breakfast Recipe # 2: Coffee Java Protein Shake
Picture this: a hectic morning, a packed to-do list, and no time for a leisurely breakfast. What’s your secret weapon? The Coffee Java Protein Shake!
This shake is like a double shot of energy, combining the power of caffeine and protein to kickstart your day like nothing else. It’s the go-to solution when you’re racing against the clock but still need to conquer your tasks.
But here’s the bonus: not only does it give you that coveted coffee fix, but it also serves up a hearty dose of protein that’ll keep those hunger pangs away until lunchtime. Talk about a win-win!
And the best part? It’s a breeze to make. Just throw all the ingredients into your trusty blender, let it work its magic until everything is gloriously smooth, and then, for that extra touch of indulgence, sprinkle some chocolate chips or cacao nibs on top.
Avocado, the superstar of this combo, deserves the spotlight. It’s not just a delicious addition but also incredibly nutritious. Packed with healthy monounsaturated fats and loaded with fiber, it’s the perfect way to fuel your body. And did I mention it’s a fantastic natural source of electrolytes? No need for supplements here!
Now, onto the eggs. These little wonders are a breakfast staple for good reason. They’re a protein-packed, nutrient-rich addition that keeps you going strong throughout the day.
To whip up this breakfast, all you need are two hard-boiled eggs, one creamy avocado, and a juicy tomato. It’s quick, easy, and versatile – perfect for any time of day.
Breakfast Recipe # 4: Eggs, Bacon, Avocado, and Tomato Salad
With over 30 grams of healthy fats and fewer than two net carbs in a medium-sized avocado, they’re a keto dieter’s dream come true. These creamy alligator fruits are loaded with prebiotic fiber, potassium, folate, Vitamin E, Vitamin C, zinc, and magnesium – just to scratch the surface.
As for me, I’m a die-hard avocado fan. I can’t go a day without enjoying one or two, either as a simple snack with a dash of salt or as a crucial part of a hearty meal like the one we’re about to dive into.
Clocking in at around 140 calories and packing a whopping 10 grams of protein, these muffins are the epitome of healthiness compared to your average coffee shop pastry or sugary snack. They give you all the muffin goodness without the sugar and junk.
The best part? They’re incredibly easy to make ahead of time and can stay fresh for up to a week. And if you’re following a keto diet, these muffins are a match made in heaven, boasting the ideal high-fat, moderate-protein, and low-carb macros.
Breakfast Recipe # 6: Skillet-Baked Eggs with Chili Oil, Spinach, and Yogurt
Each large egg is a nutritional powerhouse, boasting five grams of fats, six grams of protein, and less than one gram of carbs. This makes them a perfect fit for anyone following a ketogenic lifestyle.
Eggs are also known to be appetite-satisfying, keeping you feeling full and content.
This recipe is a quick and delightful way to whip up a delicious breakfast in no time.
On the keto diet, almond flour becomes your secret weapon in the kitchen. It’s a treasure trove of fats, protein, and fiber while keeping those pesky carbs at bay compared to regular flours. Not only that, it’s a nutritional powerhouse, boasting iron, niacin, magnesium, potassium, and calcium.
That’s why almond flour is a must-have for anyone following a ketogenic diet. I use it to create all sorts of keto-friendly treats, from bread and pancakes to cookies and cakes. Today, we’re diving into waffle territory, and these almond flour waffles are low-carb, paleo, protein-packed, gluten-free, and downright delicious.
Best of all, they’re a breeze to whip up. Just toss the ingredients into a blender, then cook them to golden perfection in your Belgian waffle maker.
Breakfast Recipe # 8: Creamed Coconut Milk with Nuts and Berries
This breakfast/dessert fusion is a heavenly blend of fresh fruits, creamy coconut flakes, and crunchy nuts, tantalizing your taste buds like nothing else. For that extra burst of flavor, crown it with ripe strawberries and a sprinkle of dark chocolate – and voilà, you’ve got yourself a decadent yet wholesome dessert to relish!”
The following Salmon Stuffed Avocado is a delightful treat you won’t want to miss. Salmon, known for its protein punch, omega-3 fatty acids, and essential vitamins, pairs perfectly with creamy avocado.
This recipe is a breeze to whip up. Just prepare a delicious salmon salad and generously stuff it into halved avocados. It’s the ideal choice for a quick lunch or a light dinner. Remember, using unsalted canned salmon is key, and for a sustainable twist, opt for wild-caught salmon whenever possible.”
Before my keto journey, I wouldn’t have imagined frying eggs in coconut oil, but I tried it, and it’s been a delightful surprise.
Coconut oil boasts a plethora of unique health benefits, including being a rich source of medium-chain triglycerides (MCTs), which offer various advantages, from supporting weight management to enhancing brain function.
This keto-friendly breakfast is a fantastic blend of high fats, high protein, low sodium, and low sugar. It’s so good that I’m thinking of adding it to my weekly breakfast schedule (yes, I have a breakfast schedule!
Ingredients
Whole eggs
Spinach
Coconut oil
Mixed vegetables (carrots, broccoli, cauliflower, green beans, etc.).
One of the things I adore about the keto diet is the freedom to enjoy plenty of eggs and fatty meats to my heart’s content. Eggs and bacon, in particular, are dietary staples for many keto enthusiasts.
So, I thought I’d share this recipe to jazz up your eggs and bacon, especially if you’re aiming to boost your fat intake while sticking to your macros. Just remember not to overcook the eggs (that’s the trickiest part) and opt for high-quality bacon to make this dish truly delicious!”
Cheese has a special place in my heart, and I’m sure many of you can relate. It’s not only delicious but also incredibly nutritious, especially for those following the ketogenic diet. Most cheese varieties are high in fat and low in carbs, making them a perfect energy source.
For instance, take my personal favorite, cheddar cheese. In just 100 grams, you get 33 grams of fat, 24 grams of protein, and less than 2 grams of net carbs! Talk about keto-friendly!
Now, let me share a recipe with you that takes the goodness of cheese to the next level. These muffins can be baked ahead of time, making them a perfect choice for busy schedules.
Plus, they’re a much healthier alternative to the high-carb junk breakfast sandwiches that many people consume daily.
listen up, folks, because this breakfast hack requires absolutely NOTHING – zero, nada, zilch! It’s as simple as it gets, and it won’t cost you a dime. What’s the secret, you ask? Well, it’s called skipping breakfast.
Yep, you read that right. Skipping breakfast is a form of intermittent fasting, a deliberate decision to skip a meal. It can have some incredible benefits, like regulating blood sugar levels and kickstarting your fat loss efforts. I’ve personally tried this method many times, and for the last week, I’ve been feeling just fine – but hey, I’m no stranger to intermittent fasting.
But don’t be afraid to toss aside the old adage that “breakfast is the most important meal of the day” or that “skipping breakfast slows down your metabolism.” Give intermittent fasting a shot, even if it’s just a couple of times a week.
Conclusion
There you have it.
The above breakfast recipes for runners are pretty awesome (except for the last one, maybe).
If you are going to have breakfast as a runner, at least make sure to have the right one.
Don’t eat junk food for breakfast.
Ain’t good.
Please feel free to leave your comments and questions in the section below.
Ever felt that bittersweet guilt after indulging in those delightful treats? Well, we’ve all been there. Cookies can sometimes be those sneaky calorie bombs with not much nutritional love to give.
Now, I’m not here to bring you down or lecture you on nutrition (you’re smart; you know the drill). But if you’re on the lookout for a snack-time game-changer, you’re in the right spot.
Today, I’m dishing out some of my go-to high-protein snacks, like mini beef sticks that’ll not only satisfy your cravings but will also give your body the fuel it deserves. Now, you might be thinking, “Why the protein hype?” Stick around, and let’s dive into that!
The Importance Of Protein
If you’re on a quest to give your body some love, protein is your trusty sidekick! Whether you’re flexing those muscles, aiming for that weight goal, or just stepping up your fitness game, protein is ready to back you up like the ultimate BFF.
Did you know? This mighty macronutrient isn’t just for gym buffs. It’s the magic behind those luscious locks, radiant skin, sturdy bones, and, of course, those muscles you’ve been working on. And here’s the kicker: Protein’s superpowers don’t stop there.
Ever devoured a sugary snack and felt that annoying energy slump an hour later? Yep, protein’s got your back there too! A study from the Journal of Nutrition shows that a protein-rich diet can enhance metabolism, keep those hunger pangs at bay, and prevent those post-sugar crash blues.
But how much protein is enough?
Well, it’s essential to sprinkle some protein magic throughout your day. That’s right—breakfast, lunch, dinner, and even those in-between snack attacks.
Hungry for some snack-spiration?
Get ready to treat your taste buds! I’m about to unveil eight scrumptious high-protein snack recipes that I swear by. And, spoiler alert: some might even have you rethinking those carb-loaded faves.
No matter where you are in your fitness journey, there’s a treat in here with your name on it. Ready to dive into this protein-packed treasure trove?
High Protein Snack 1 – Chocolate Almond Protein Bars
Ever dreamt of a snack that’s a perfect mix of crunchy yet moist? Introducing the Chocolate Almond Protein Bars! Honestly, if there was an Oscar for homemade protein bars, these babies would be swiping the award.
Guess the best part? There is no need for a long grocery list or culinary degree! These delectable bars are a piece of cake (pun intended) with just five easy-peasy ingredients.
Now, let’s talk about taste. They’re the perfect balance of chewy and sweet. And for those flavor adventurers out there? Sprinkle in a pinch of salt or a dash of cinnamon to dance up the taste buds. But hey, you’re the chef here – make it your own!
Traditional fudge? Yeah, it’s a sugar parade – filled with loads of sweeteners, condensed milk, butter, and those sneaky additives. But what if I told you there’s a healthier way to relish this treat?
Made with clean, whole ingredients, this dessert stands miles apart from those store-bought sugar traps. And guess what? It checks all the dietary boxes – no sugar, flour, butter, or oil! So, whether you’re vegan, gluten-free, keto, paleo, or just about anything, this treat’s got your back.
No more “I don’t have the time” excuses! This recipe is as simple as combining almond butter, oats, and a few other goodies. You’ll be done faster than you can say, “yum!” Just a quick tip: pop these bars in the fridge for a while before cutting. Makes things snippity-snap easy!
Ingredients
Almond butter
Oats—ground into flour
Cereal
Honey
Vanilla extract
Quick oats
Chocolate chips for melting—optional.
High Protein Snack 3 – Roasted Almonds
Want to know the secret weapon in my snack arsenal? It’s none other than the humble almond. Let’s crack open why they’re an absolute treat for both your taste buds and health.
Protein Powerhouse: Just an ounce of almonds provides a whopping six grams of protein.
Nutrient Nirvana: These crunchy delights are loaded with healthy fats, vitamins, and minerals. Seriously, they’re like mini nutrition bombs.
Long-lasting & Lovable: Almonds have a fantastic shelf life, are filling, and oh-so-portable. Perfect for those on-the-go moments!
How to Perfectly Roast Almonds
Spray your almonds lightly with oil.
Sprinkle just a dash of salt for that savory touch.
Pop them in the oven for 10-15 minutes. Remember: give them a gentle stir now and then to avoid any rogue burnt ones.
High Protein Snack 4 – Egg White Oatmeal
With the heart-healthy fiber from the oats combined with the lean protein from egg whites, you’re setting yourself up for a nutrient-packed start to the day.
The perfect balance of protein and fiber means you’ll feel full and satisfied, keeping those mid-morning snack cravings at bay.
Forget that image of gloopy oatmeal. Adding egg whites gives your oatmeal a light, fluffy makeover. It’s like giving your breakfast a cozy blanket to snuggle in.
Microwave Magicians: On a time crunch? No worries. This egg white oatmeal is microwave-friendly, making it perfect for those hustle-bustle mornings.
It tastes like you’re cheating on your diet, but guess what? You’re not! With less than 200 calories, this smoothie is as waistline-friendly as it gets.
If you’re on a low-carb journey, this is the treat for you. No more gazing longingly at those sugary drinks – you’ve got a better option now!
This isn’t just a pretty drink. It’s packed with protein, ensuring you’ll feel full and nourished for hours. So, it’s not just a sweet treat; it’s also a muscle treat!
High Protein Snack 6 – High Protein Cinnamon Cake Bars
With a whopping 20+ grams of protein per serving, this recipe tops the charts! Whether you’re post-workout or just need an afternoon pick-me-up, these bars have got your back.
These bars aren’t just good for you – they’re downright delicious. Imagine the rich, delightful taste of coffee cake packed into a bar you can take on-the-go. Sounds dreamy, right?
What’s more?
If you’re monitoring your carb intake, these bars are your best bet. Plus, say goodbye to those artificial nasties. Our bars are clean, using only wholesome ingredients.
Move over, milk! Chia seeds boast more calcium, making them a fantastic option for bone health.
Thought salmon was the king of omega-3s? Think again! These tiny seeds pack a punch with even more essential fatty acids.
With more antioxidants than those nutrient-rich blueberries, chia seeds are a fantastic choice for combating free radicals and aging.
…And that’s just scratching the surface!
My favorite way to consume chia seeds? In a scrumptiously simple Chia Pudding! Not only is it gluten-free and uber-easy to make, but it’s also an incredible protein source.
Here’s How to Whip It Up:
Blend your preferred protein powder, chia seeds, a ripe banana, and your choice of milk.
Let it sit and watch the magic happen as it turns into a creamy pudding!
Fancy a crunch? Add some granola.
For the morning rush, prepare it the night before and grab it as your on-the-go breakfast. It’s also a delightful, energy-boosting afternoon snack.
Garnish with frozen berries and crunchy almonds for a burst of flavor and added nutrition.
High Protein Snack 8 – Honey Nut Energy Bites
From protein and fiber to essential nutrients, these energy bites are little morsels of healthful goodness.
Whether you’re vegan, lactose intolerant, or gluten-sensitive, these bites have got you covered. Dairy-free, gluten-free, and entirely vegan, they’re a treat for all!
Need that burst of energy before hitting the gym? Looking for a midday snack to chase away the hunger blues? Or perhaps a guilt-free dessert after dinner? These bites fit the bill every time.
High Protein Snack 10 – High Protein Oatmeal Cookies
These cookies are like a dream for your taste buds. They capture all the wonderful flavors of classic oatmeal raisin cookies but come with a remarkable twist – extra protein power!
The following recipe leans on natural sweetness, courtesy of fruits, to bring you a cookie that’s super nutritious and low on the guilt factor.
Each bite packs a punch of protein, making these cookies perfect for those looking to fuel their bodies while enjoying a delightful treat.
High Protein Snack 11 – Grain-Free Protein Peanut Butter Cookies
Grain-Free Protein Peanut Butter Cookies are cookies are designed to fuel your body with the goodness of protein and fiber, giving you a satisfying snack without the sugar overload.
Made with creamy peanut butter, these cookies are a nutty delight that’ll have you reaching for more. Plus, they’re dairy-free and gluten-free, making them suitable for a variety of dietary preferences.
Short on time? No problem! You can whip up these delectable cookies in 15 minutes or less, from start to finish. It’s a hassle-free way to indulge in your cookie cravings.
Ingredients
Peanut butter
Maple syrup
Egg
Coconut flour
Baking soda
Salt
PS: Dried fruit and choco chips are the combo for these cookies!
High Protein Snack 12 – Flourless Almond Butter Chip Cookies
With just five simple ingredients and no more than 10 minutes of prep time, you’ll have warm, chewy cookies ready to devour. We’ve stripped away the flour and butter, leaving you with pure cookie magic!
These cookies are rich in flavor, thanks to the creamy goodness of almond butter. Say goodbye to traditional flours and hello to the nutty, satisfying taste of almonds.
Gluten-conscious? No worries! These cookies are completely flourless, making them a delightful choice for those with dietary restrictions or anyone who simply loves cookies!!
High Protein Snack 13 – Flourless Protein Brownies
These brownies are the perfect blend of indulgence and nutrition. Imagine biting into a fudgy, chocolatey square of heaven that’s actually good for you. That’s the magic of our Flourless Protein Brownies!
No matter what dietary path you’re on, these brownies are your perfect sweet companion. They’re gluten-free, protein-packed, and oh-so-satisfying. Keto, paleo, or just watching your carbs? You’re covered!
Peanut butter lovers, this one’s for you! That creamy, nutty goodness is more than just a tasty treat. It’s packed with approximately 7 grams of protein per tablespoon, making it a smart choice for those looking to up their protein intake.
Did you know that peanut butter has been shown to increase HDL (the “good”) cholesterol while reducing LDL (the “bad”) cholesterol and triglycerides? It’s not just delicious; it’s heart-smart too!
Pair that peanut butter with apple slices, and you’ve got yourself a snack that’s both satisfying and nutritious. Apples are a fantastic source of dietary fiber and antioxidants. They support gut health and help protect you from various diseases.
Creating this delectable snack is a breeze. Grab your favorite apple, slice it up however you like, and then crown those apple slices with a generous tablespoon of all-natural peanut butter. Opt for a brand that skips the artificial sugars and hydrogenated oils for a cleaner, healthier snack.
Ingredients
Apple
Peanut butter
Salt and cinnamon—optional
High Protein Snack 15 – Chocolate Peanut Butter Protein Bars
These bars are all about quality ingredients. Think creamy peanut butter, hearty oats, and more. The best part? They’re dairy-free, keto-friendly, vegan, and totally oil-free. That means they fit a variety of diets and preferences, making them a versatile snack choice.
Sure, you could head to the store and grab pre-packaged protein bars, but why bother when you can create your own? Homemade bars not only taste better, but they also allow you to control what goes into them. No hidden additives or mystery ingredients—just pure, wholesome goodness.
You won’t need to spend hours in the kitchen to enjoy these delights. The recipe is designed to be super efficient, so you can whip up a batch in no time. Perfect for those moments when you need a healthy snack on the go or want to satisfy your sweet tooth with something nutritious.
High Protein Snack 16 – No-Bake Quinoa Peanut Butter Crunch Cups
While most plant-based foods struggle to offer complete protein, quinoa swoops in as a superhero of the seed world! Just a quarter-cup of quinoa boasts an impressive six grams of protein.
But that’s not all; it’s also gluten-free and loaded with essential nutrients like Vitamin B, calcium, and magnesium.
These cups are incredibly versatile. Whether you’re rushing out the door in the morning or in need of an energy boost during the day, they’ve got you covered.
With the protein punch from quinoa and the delightful taste of peanut butter, you can enjoy a wholesome treat that’s as satisfying as it is nutritious.
Greek yogurt takes snacking to a whole new level with its impressive protein content. Depending on the brand, you can enjoy a generous 15 to 20 grams of protein in just one cup. That’s more protein than you’d find in regular yogurt!
What sets Greek yogurt apart? Its thick and creamy texture not only makes it incredibly satisfying but also keeps you feeling full for longer. No more mid-morning hunger pangs or afternoon slumps!
Greek yogurt boasts a naturally rich and creamy taste, so there’s no need to add extra sugar. If you’re watching your sugar intake, Greek yogurt is a fantastic choice.
Ingredients
Greek yogurt
Fruit of your choice (berries, peach, apple)_
Granola of your choice
Honey
High Protein Snack 18 – Peanut Butter Banana Muffin
If you’re a fan of the classic combo of bananas and peanut butter, prepare your taste buds for a delightful experience like no other.
First things first, these muffins are on a mission to bring you wholesome snacking joy. They proudly stand as grain-free champions, making them perfect for those who seek healthier alternatives.
Here’s the sweet deal: these muffins are naturally sweetened, so there’s no need for added sugar. You can indulge in their delightful sweetness without any guilt.
Say goodbye to unnecessary additives and processed flours. These muffins are all about pure, clean goodness. No junk ingredients are allowed in this muffin party!
Ingredients
Natural Peanut Butter
Eggs
Honey
Very ripe bananas
Vanilla
Baking soda
Toppings of your choice—dark chocolate chips, raisins, coconut, etc.
Cheese is like a treasure trove of essential nutrients. It’s not just about taste; it’s about what it brings to the table. In addition to being a protein powerhouse, cheese is loaded with calcium, selenium, phosphorus, and a host of other vital nutrients. It’s like nature’s multivitamin!
Ever heard of cheese helping with weight management? Believe it or not, studies have shown that calorie intake in overweight individuals decreased by approximately 10 percent after consuming cheese. So, if you’re on a dieting journey, cheese might just become your best buddy!
Now, here’s the scoop: not all cheeses are created equal when it comes to protein content. Parmesan cheese takes the crown with roughly 10 grams of protein per ounce. But don’t worry, there’s a variety of protein-rich cheeses to choose from, including cheddar, mozzarella, Brie, Gouda, Swiss, and blue cheese.
Are you thinking of starting a personal training business? It’s a smart move. Personal training is a booming industry, with the U.S. Bureau of Labor Statistics predicting a 14% job growth rate over the period from 2022 to 2032, which is much better than the average 3% rate for all occupations.
Still, to have a successful personal training business, you can’t just get certified, register a business, and hope for the best. To have the greatest chance of success, you need a solid business plan, good marketing, the right equipment and tools, and, of course, a love for fitness and continuous improvement.
In this blog post, we give you simple step-by-step instructions on how to start and run a successful personal training business so you can turn your passion into profit.
Find Your Niche
What is your fitness forte? Whether it’s strength training, yoga, martial arts, or weight loss, it’s a good idea to narrow down your focus. Being the jack of all trades is possible, but specializing can help make you stand out from the crowd and attract clients looking for your specific expertise.
Get Certified
While it’s not illegal to call yourself a personal trainer without certification, if you’re serious about your career, we highly recommend getting certified by one of the reputable programs like ACDM, NASM, or ACE. Certification will provide you with the knowledge and skills, plus build trust with potential clients.
Create a Business Plan
Every successful business stands on the shoulders of a good business plan. So, take your time to develop a solid, comprehensive business model and plan that outlines your vision, mission, goals, and strategies, including marketing strategies that will help you achieve those goals. A good business plan should also include things like cybersecurity services, target market analysis, your services and pricing, and financial projections.
Register Your Personal Training Business
Next, make it official by registering your business. Many trainers opt for a limited liability company (LLC), which helps with taxes, plus protects owners from personal responsibility for the business’s debts or liabilities.
Invest in Necessary Equipment
The equipment and gear you’ll need for your personal training business depends, of course, on your specialization. Whatever your niche is, though, make sure your equipment is first and foremost safe for your clients to use, and also of high quality. Some of the equipment most trainers use in their daily work include dumbbells, kettlebells, barbells, rowing machines, balance stability balls, skipping ropes, exercise mats, etc.
Use the Right Tools
We live in the most digital age yet, so take advantage of technology to make your business run more efficiently and successfully. For example, if you have a martial arts studio, consider using martial arts school management software to streamline scheduling, client management, and payments. Software solutions like these can save you a lot of time and make your business run smoother.
You can also take advantage of strategic initiative management tools to help plan and track your long-term business objectives, ensuring your operations stay organized and aligned with your growth goals. By using the right tools, you can focus more on growing your business and providing exceptional service to your clients.
Develop a Brand
To create a strong brand and effective marketing strategy, you have to know who your ideal client base is. For example, are you looking to work with people looking to lose weight? Maybe your ideal customer is an athlete? Whatever your target audience is, tailor your marketing strategy for them. But in any case, you would have to make use of both online and offline marketing tactics. From building a user-friendly website and making use of content writing to promote your gym on social media platforms to distributing flyers in high footfall areas and branding your gym vehicle (if you have one) using customised wraps and Private Plates, there is so much that can be done to add to your customer base.
One effective way to strengthen your brand identity is by using customized promotional items. By incorporating unique branded products, you can create a memorable impression on your clients and stand out in a competitive market. For instance, custom merch suppliers likevivipins specialize in high-quality, custom challenge coin and other promotional products that can help convey your brand message and make a lasting impact.
Keep Improving
Finally, embrace continuous improvement – track your progress, adapt your strategies, and always offer exceptional service. Feedback from your clients can provide invaluable insight into your operations, and things that you’re doing right as well as things could use improvement. The goal is to deliver excellent service to your clients consistently so you can stay competitive and keep growing your business.
Are you looking to increase energy levels and improve health with natural remedies and wonder what are kratom shots? Kratom shots have recently become the go-to option for many individuals seeking an herbal alternative to boost mental clarity, relieve stress, enhance moods, and even reduce pain sensations.
But why are these shots considered the best way to consume this unique Southeast Asian tree leaf extract? In this blog post, we will explore the most noteworthy benefits of consuming kratom in shot form, explore various types of products available on the market today, provide a step-by-step guide on how to make your own homemade Shot recipe at home – as well as some safety tips when taking it.
By the end of this article, you’ll have all the information needed to decide if incorporating these powerful tea leaves into your daily lifestyle is right for you!
7 Reasons Kratom Shots Are Considered The Best Way To Consume It
Convenience and portability
Kratom fans are always looking for the most convenient and portable way to enjoy their favorite herbal supplement. Fortunately, these shots have emerged as the clear winner in the convenience and portability department. These easy-to-carry shots come in convenient little bottles and can be consumed on the go, making them perfect for busy people who are always on the move.
Whether running errands or hitting the gym, these shots are the perfect way to ensure you don’t miss a dose of your favorite supplement. Plus, with various flavors available, you will surely find one that appeals to your taste buds. So why wait? Try a shot today and discover the ultimate convenience of Kratom consumption!
Many people rave about Kratom shots as the preferred method for consuming this popular herbal supplement. One reason is the lack of the typical bitter taste characteristic of Kratom consumption. Instead, these shots offer a more palatable and pleasant taste experience.
This is especially important for those hesitant to try it due to the taste alone. With these shots, users can reap the benefits of Kratom without enduring the unpleasant flavor. Whether you are new to it or a seasoned user, these shots are worth trying out!
Quick and easy to take
Kratom shots have become increasingly popular among enthusiasts as they offer a quick, easy-to-take alternative to traditional powder or capsules. With these shots, measuring exact doses or dealing with unpleasant tastes or textures is unnecessary. They can be conveniently consumed on-the-go or in social situations.
Thesshots also come in different flavors, giving users a variety. Moreover, these shots generally have a longer shelf life than the powder, ensuring that users have a consistent supply without frequent reordering. Because of these benefits, Kratom shots are considered by many to be the best way to consume it.
Precise dosage
Kratom shots have become increasingly popular as one of the most effective methods for consuming it. One of the main reasons this is the case is because these shots give users precise dosage control.
Unlike other consumption methods, these shots are designed to deliver a consistent and precise amount of kratom with each dose. This is important because it makes it easier for individuals to monitor their intake and ensure they consume a safe and appropriate amount of kratom.
Additionally, these shots are packaged and sold in small bottles that are convenient and easy to carry around, which makes them a great choice for individuals who are always on the go. Overall, kratom shots are an excellent option for anyone who wants to experience the benefits of this powerful plant in a safe and controlled manner.
Variety of flavors available
Kratom shots offer an array of tastes that enhance the drinking experience. Numerous flavors are available that provide users with a wide selection. Each flavor has its unique taste, making it possible for everyone to find their favorite flavor. One of the best things about these shots is the flexibility it offers when it comes to flavor choices.
You could be in the mood for a fruity, sour, or sweet taste, and these shots will provide you with all the options you need. Whether you prefer earthy and herbal flavors or fruitier tastes, Kratom has something for everyone. In addition, these shots are easy to consume and allow users to experience a unique and satisfying drinking experience.
Longer shelf life
Kratom has been widely used for centuries due to its numerous benefits like relaxation and energy boost. It is possible to consume it in different forms, with these shots being the most preferred option. This is because they have several advantages over other methods of its intake. One of the most significant benefits of these shots is their longer shelf life.
Unlike other forms of Kratom, the shots can last for months, making them a convenient choice for people who want to stock up on it. Additionally, these shots are easy to use since they are already bottled, saving users the time and hassle of measuring and mixing it. Overall, these shots are an efficient and effective way to get your daily dose while ensuring it stays fresh longer.
No preparation required
Kratom shots are favored by many because of their convenience. Unlike other methods of consuming it, no preparation is needed before taking a shot. These shots are usually sold in small bottles and can easily be carried around.
With these shots, you no longer have to worry about measuring out dosage quantities or grinding the leaves into powder. Just crack open a bottle and take a shot – it’s that simple. The convenience of these shots makes them perfect for those with a busy schedule.
Plus, they’re discreet, so you can take them on the go without drawing too much attention. Kratom shots are worth considering if you’re new to it or simply want an easy way to consume it.
Kratom shots are becoming increasingly popular amongst those looking to effectively consume the plant. Users have reported improved mood, increased energy levels, and enhanced focus. It is important to note that while these shots can be beneficial, it is essential to consult your physician before taking any new supplements or dietary changes. For those looking for a more efficient and concentrated method of its consumption than the traditionally consumed tea, give this shot a try today and see how it could benefit your lifestyle! While there’s no miracle cure-all or magical healing potion, incorporating the natural benefits into your routine could lead to tremendous improvements in physical performance and mental well-being.
Tired of the same old treadmill routine? It’s time to shake things up and discover the incredible benefits of strength training on a treadmill.
While treadmills are primarily designed for cardiovascular training, there are some strength exercises you can perform on them
Picture this: lunges, side shuffles, mountain climbers, and more, all right there on your trusty treadmill. No need for an expensive gym membership or fancy equipment; your treadmill can do it all.
And the best part? You’ll be tackling these exercises in a high-intensity circuit, pushing your limits, and taking your fitness game to new heights.
So, lace up those sneakers, and let’s embark on a journey that promises to challenge your body, invigorate your workouts, and leave you feeling stronger and more confident than ever. Get ready to discover the world of treadmill strength training like never before!
Benefits of Treadmill Strength Training
Strength training on a treadmill is more than just a trend; it’s in fact a powerful tool to add to your training routine.
Let’s dive into the incredible benefits that await you when you incorporate these exercises into your routine.
Improve Strength
Treadmill strength training can help you become a stronger, more enduring, and faster runner. These exercises target muscle groups often overlooked during traditional treadmill runs, giving you the power to conquer new personal bests. By challenging your body in unique ways, you’ll build the strength needed to outpace your previous limits. Here’s your guide on running after leg day.
Protect Against Injury
Running can take a toll on your body, but treadmill strength training can help you stay injury-free. By strengthening your core, shoulders, and other muscle groups, you’ll create a robust foundation that supports your running form.
Improve Calorie Burn
Who doesn’t want to maximize their fitness gains and torch those extra calories? Treadmill strength training does precisely that. These exercises elevate your heart rate, boost your metabolism, and engage multiple muscle groups simultaneously. The result? An efficient and effective workout that leaves you feeling accomplished and closer to your fitness goals.
Warm-Up and Safety Precautions
Before diving into these invigorating treadmill strength training exercises, it’s crucial to set the stage with a proper warm-up and ensure your safety throughout your workout. Let’s go over these essential steps.
Warm-Up
Never skip your warm-up; it’s your ticket to a successful workout. Start with a slow-paced walk or light jog on the treadmill for about five minutes. This gets your blood flowing and muscles loosened up and prepares your body for the challenges ahead.
You can try my dynamic warm up here.
Stay Safe
Safety always comes first. Whether you’re a seasoned fitness enthusiast or just beginning your fitness journey, these guidelines are essential:
Maintain a firm grip on the treadmill’s side rails if needed for balance.
Keep your attention on your movements; avoid distractions like phones or TVs.
Wear appropriate workout attire and supportive shoes.
Keep a water bottle nearby to stay hydrated.
Mastering Proper Form and Posture
Maintaining the right form and posture ensures you’re working the intended muscle groups and minimizes the risk of injury. Here are some pointers to keep in mind:
Engage your core muscles to stabilize your body.
Keep your back straight and chest up during exercises.
Maintain proper foot alignment to avoid strain on your knees and ankles.
Focus on controlled, deliberate movements for each exercise.
Incorporating Resistance or Speed Adjustments Over Time
To keep challenging your muscles and cardiovascular system, consider these options:
Treadmill Incline: Gradually increase the treadmill’s incline during your walking lunges or side shuffles. This added resistance will engage your muscles differently.
Speed Variations: Periodically introduce short bursts of higher speed during exercises like side shuffles or dynamic mountain climbers. These bursts can intensify your workout and boost calorie burn.
Weighted Vest: For those seeking extra challenge, a weighted vest can be added to increase resistance during walking lunges or side shuffles.
Mountain Climbers
Mountain climbers target your entire core and shoulders with this dynamic treadmill exercise. Here’s how to perform dynamic mountain climbers:
Muscles Targeted: The entire core and shoulders.
Setup: Start by setting your treadmill to dynamic mode. Assume a plank position with your hands firmly on the floor and your feet positioned in the middle of the treadmill.
Form: Maintain a straight line from head to heels. Keep your arms fully extended, engaging your core throughout.
Execution: Now, here’s the twist. Instead of static planking, you’re going to make the treadmill belt your mountainous terrain. Grip the moving belt with your toes while maintaining the plank position. As the treadmill belt moves, drive one knee toward your chest while extending the other leg backward, mimicking a mountain climber’s motion.
Duration: Continue this mountain climbing motion for one full minute. Feel the burn in your core and shoulders as you keep up the pace.
Transition: Once the minute is up, smoothly transition to the next exercise in your circuit. This dynamic movement will elevate your heart rate and engage your core muscles for a challenging workout. Keep up the great work!
Modification: Begin by setting the treadmill to a very low speed or even stopping it. Assume the plank position without any motion initially. Focus on holding the plank and gradually introduce the dynamic movement as you become comfortable.
Treadmill Walking Lunges
Let’s target those glutes, quads, and calves with Treadmill Walking Lunges. Here’s how to perform this effective exercise:
Muscle Targeted: Glutes, quads, and calves.
Setup: Begin by setting your treadmill to a moderate speed, approximately 1.5 to 2.0 mph. This speed will allow you to perform the walking lunges safely.
Balance: While performing the lunges, it’s important to maintain balance. You can hold onto the treadmill’s side rails lightly for support.
Form: Start with your right leg. Take an exaggerated step forward, ensuring your right knee bends to a 90-degree angle. As you lunge forward, your left knee should hover just above the treadmill belt.
Execution: Push through your right heel to rise up, bringing your left leg forward. Now, repeat the lunge with your left leg. Continue alternating between legs for one full minute.
Posture: Focus on maintaining proper form. Keep your body centered between your legs, your back flat, and your chest up throughout the exercise.
Duration: Perform Treadmill Walking Lunges for one full minute, feeling the burn in your glutes, quads, and calves.
Transition: After completing the lunges, smoothly transition to the next exercise in your circuit. This exercise is an excellent way to strengthen your lower body while using the treadmill in a creative way.
Modification: Start without any incline on the treadmill, and set the speed to a slow and comfortable pace. As you get more confident, you can gradually increase the treadmill’s incline and speed.
Muscle Targeted: Inner and outer thighs and calves.
Let’s get those inner and outer thighs working with Treadmill Side Shuffles. Follow these steps:
Starting Position: Begin by standing sideways on the treadmill. Ensure your back is straight and your knees are slightly bent. This position will help you maintain balance and stability during the exercise.
Safety Note: If you’re new to this exercise or need extra support, it’s a good idea to hold onto the railings of the treadmill.
Speed Setting: Adjust the treadmill speed to approximately 3.0 to 4.0 mph. This setting will provide enough momentum for effective side shuffles.
Execution: Start performing rapid and quick side shuffles. Focus on landing on the balls of your feet throughout the exercise. This will engage your inner and outer thigh muscles as well as your calves.
Duration: Continue the side shuffles for one minute, feeling the burn in your thighs and calves as you move laterally.
Switch Sides: After completing one minute on one side, it’s time to switch sides. Carefully step off the treadmill, reposition yourself on the other side, and repeat the exercise in the opposite direction.
Modification: Begin at a slow pace and a low incline to get accustomed to the movement. As your balance and coordination improve, you can increase the speed and incline to intensify the exercise.
Walking Plank
Muscles Targeted: The entire core and the shoulders.
Setting the Treadmill: Begin by setting the treadmill to a low speed, around 1 to 2 mph. This speed allows you to focus on your form and stability during the exercise.
Plank Position: Stand behind the treadmill and assume a plank position. Place your hands firmly on the sides of the treadmill base, with your palms facing down. Your legs should be stretched out behind you.
Core Engagement: Engage your core muscles. A strong core is crucial for maintaining stability during this exercise.
Walking Motion: Once you’re set in the plank position, carefully place your hands onto the moving treadmill belt. Start walking your hands forward while keeping your body in a plank position. Your shoulders and core will be working hard to support your weight.
Duration: Continue “walking” with your hands for one full minute. You’ll feel the challenge in your core and shoulders as you maintain this position.
Transition: After completing one minute of the Treadmill Walking plank, transition to the next exercise in your circuit.
Modification: Begin with the treadmill stopped and assume the plank position. Focus on maintaining a stable plank. Once you feel confident, start walking your hands on the stationary treadmill belt to mimic the motion.
Low Squat Side Shuffles
Muscles Targeted: The glutes, quads, hamstrings, glutes, and the core.
Starting Position: Begin just like the previous side shuffle exercise, standing sideways on the treadmill. Ensure your back is straight and your knees are slightly bent.
Quarter-Squat Position: This time, assume a quarter-squat position. Keep your back flat, core engaged, and chest up throughout the exercise. This lower squat position intensifies the workout, engaging your leg muscles and core more effectively.
Adjusting the Speed: Set the treadmill to a moderate speed, around 2.0 to 3.0 mph. This speed provides the right balance of intensity and control for this exercise.
Side Shuffling: While staying in the quarter-squat position, start performing quick side shuffles. Maintain a distance between your feet that’s at least hip-width apart throughout the exercise.
Duration: Continue side shuffling at this challenging pace for one full minute. You’ll feel the burn in your glutes, quads, hamstrings, and core as you power through this exercise.
Switch Sides: After completing one minute on one side, switch to the other side to ensure balanced muscle engagement.
Modification: Begin with the treadmill at a low speed and without an incline. Focus on your squat form and side shuffling motion. As you build strength and confidence, increase the speed and incline gradually.
Treadmill Bear Crawl
Muscles Targeted: The core, shoulders, and legs.
Speed Setting: Set the treadmill to a slow speed, typically ranging from 1.0 to 2.0 mph. Starting slow is essential for safety and control during this exercise.
Starting Position: Assume a pike position at the back of the treadmill. Your hands should be firmly placed on the treadmill base, and your feet should rest on the sides of the treadmill.
Weight Distribution: Most of your weight should be on your hands, with your fingers pointing forward. This position will engage your core and shoulders.
Start Bear Walking: Be extremely cautious as you begin. Gradually step your feet onto the moving belt of the treadmill and start walking your feet towards you. Imagine imitating the movement of a bear’s crawl.
Exercise Duration: Continue the bear crawl for one full minute. This exercise challenges your core stability and works your shoulders and legs simultaneously.
Rest Period: After completing one minute, carefully stop the bear crawl. Take a well-deserved rest for one to two minutes. Catch your breath and prepare for the next circuit.
Repeat: To maximize the benefits, repeat the entire circuit two to three times. Each round will further engage your core and help you build strength and stability.
Modification: Start with the treadmill stopped and assumed the pike position. Gradually introduce the crawling motion by stepping one foot at a time on the stationary treadmill belt. As you feel more comfortable, increase the speed slightly.