The Runner’s Dilemma: Can You Keep Jogging with an Abdominal Hernia?

running with hernia

You’re out for your routine jog, the sun’s warmth on your skin, and the rhythm of your steps setting the pace for a perfect day.

But then, a nagging thought creeps in – you have an abdominal hernia. Can you keep running, or should you hit pause until it’s fully healed?

Well, you’re in the right place because today, I’m going to unravel the mysteries of abdominal hernias and explore the ins and outs of running with this condition.

Whether you’re a seasoned runner or just lacing up your sneakers, this article is your go-to guide for making informed decisions about your running routine.

So, let’s lace up and hit the pavement – together!

What Is Abdominal Hernia?

So, what exactly is this “abdominal hernia” thing, and how might it affect your fitness and overall well-being?

Let me paint you a picture. Your body’s like a well-constructed fortress, with a protective wall called the abdominal wall. But sometimes, a sneaky internal organ, like your bladder or intestine, decides it’s time for an adventure. It pushes through a weakened section of that protective wall, resulting in a noticeable lump or bulge.

That’s your abdominal hernia saying, “Hello, world!”

Now, there are a few different types of these hernias.

First up, we’ve got the inguinal hernias, which often occur in the lower abdominal groin area. Then, there are the femoral hernias, which tend to strike the groin near the femoral canal.

But wait, there’s more! We’ve also got hiatal hernias, making their presence known in the upper abdomen, and umbilical hernias, afflicting the area around your belly button.

How To Treat Abdominal Hernias

When it comes to abdominal hernias, it’s crucial to know your options and understand why taking action matters.

Now, in many cases, persistent hernias will call for a little surgical intervention. Yep, we’re talking about a trip to the operating room. But don’t worry, it’s a well-practiced procedure, and your skilled medical team will have you covered.

Here’s the kicker: ignoring that pesky abdominal hernia is like playing with fire.

There’s a real danger of something called “strangulation,” and trust me, you don’t want any part of it. Strangulation is a situation where your intestines decide to throw a party, but the venue is way too small – so they get trapped. This hinders and in some cases, completely cuts off circulation to your precious tissue. It’s a life-threatening emergency, and you’d want to avoid it at all costs.

Now, how do you spot the red flags of a strangulated hernia? Keep an eye out for these telltale signs:

  • Fever – when your body temperature goes haywire.
  • Vomiting – not the kind from a rollercoaster ride.
  • Trapped gas – feeling like you’re carrying around an unwanted balloon.
  • Chronic pain – not the run-of-the-mill ache; but persistent discomfort.
  • Nausea – that queasy feeling that just won’t quit.
  • Constipation – when things in the bathroom aren’t quite as they should be.
  • Skin darkening – no, you’re not getting a tan; it’s a concerning sign.

Can you Run With an Abdominal Hernia?

Well, the answer isn’t as straightforward as we’d hope. It’s a bit like navigating a maze, and here’s why: whether you can keep running with a hernia depends on a few key factors.

First up, it all hinges on the severity of your hernia and how intense your training is. The milder your hernia, the better your chances of keeping up with your running routine. But if it’s throwing a full-on hernia tantrum, you might need to hit the pause button.

Here’s the silver lining, though: running at a low intensity is often recommended for hernia patients. Why, you ask? Well, running can actually help shed those extra pounds, which might just ease some of your hernia-related symptoms.

But (yes, there’s a but), remember that the intensity of your runs matters. If your hernia is causing you to wrestle with acid reflux symptoms, going hard or long on your runs might not be your best bet. It could potentially crank up the pain factor.

Additional Resource – Can You Run With An Abdominal Strain?

Intense Training And Hernia

Hernias don’t appreciate strenuous workouts.

Any activity that puts a squeeze on your abdominal region can send your hernia into a frenzy. While running might seem like it’s all about those legs, don’t be fooled – your core is in on the action, too!

Don’t just take my word for it; there’s solid research to back this up. A study published in PLOS One decided to peek under the hood and see what happens to our cores during running. They had 28 subjects undergo three months of Pilates training, which is all about strengthening that core.

What they found was quite telling – during running, our core muscles, especially those obliques (the side muscles), kick into high gear. And guess what? The more you rev up your running pace, the more your core muscles get involved.

Now, here comes the catch: running, especially when you’re cranking up the speed, could potentially worsen your hernia symptoms by ramping up those core muscle contractions. It’s like adding fuel to the fire!

But overall, if your hernia isn’t causing you agony or inflammation, running is generally considered low-risk.

Of course, it’s always a good idea to have a chat with your doctor before you lace up. However, if that hernia decides to go rogue and strangulate, which basically means it’s messing with your bowel’s blood supply – well, that’s a medical emergency.

Trust me; you’ll know when it’s happening. Vomiting, bowel issues, and an overall unpleasant time are all telltale signs that I’ve already mentioned. In that case, don’t hesitate – get yourself to a medical pro pronto!

How To Manage A Hernia While Running

Now, let’s talk about the comeback plan for all you hernia warriors who are eager to hit the pavement once again.

The golden rule here is gradual progress, and it all starts with channeling your inner beginner. Embrace the mindset of someone just starting their running journey – even if you’re an experienced runner.

Here’s a step-by-step roadmap to guide you back to the running track:

Before you even think about picking up the pace, start with a leisurely walk. Aim for a comfortable pace, around three to five miles per hour. The key here is to do it without experiencing any pain or discomfort. Listen to your body – it’ll tell you if you’re pushing too hard.

As you begin walking regularly without any issues, it’s time to add a little more distance to your outings. Slowly increase the mileage and endurance – don’t rush this process. The goal is to avoid any post-surgery complications and let your body adapt at its own pace.

Do Some Plyometric

Plyometrics are like the turbo boosters for your body, helping you get ready for the rigors of running. These explosive exercises can elevate your strength, agility, and overall fitness, which are essential for a smooth return to the miles.

Here’s a quick plyometric routine that you can incorporate into your comeback plan. Perform each exercise for 30 seconds, then give yourself a one-minute breather. Repeat the whole circuit three times for maximum benefits:

  • Hop in Place: Start with some simple hops while staying in one spot. It’s an excellent way to warm up your legs and get those muscles firing.
  • Hop Side to Side on Two Feet: Now, let’s amp it up a bit. Jump from side to side, landing softly on both feet. This exercise helps improve your lateral movement and stability.
  • Hop Forward/Backward on Two Feet: Take those hops forward and backward now. It’s all about building strength and coordination.
  • Single Leg Broad Jump: It’s time to work on that explosive power. Jump forward with one leg, landing on the same leg, then switch to the other. This exercise targets your balance and strength.
  • Squat Jumps: Get into a squat position and explode upwards into a jump. This one is fantastic for strengthening your legs and core.
  • Burpees: We saved the best for last – burpees! You’ll love to hate them. They combine a squat, push-up, and jump, offering a full-body workout. They’re like a crash course in plyometrics and endurance.

Walk Run

Now, let’s transition from walking to a beautiful walk/run combo – a strategy that’s perfect for easing back into running after a hernia.

Here’s how you can do it:

Start by continuing your regular walks, but this time, inject some running intervals into the mix. For instance, you can begin by walking for a few minutes to warm up, then transition into a gentle jog for a minute or two. Afterward, return to walking for recovery. Gradually increase the duration of your jogging intervals as your body becomes more comfortable.

Listen to Your Body:

Pay close attention to how your body responds. You should be able to complete these walk/run exercises without experiencing any pain or discomfort in your abdominal area.

Touch your abdomen gently – it shouldn’t feel tender or painful. If it does, it’s a sign to take it slower and consult with your healthcare provider.

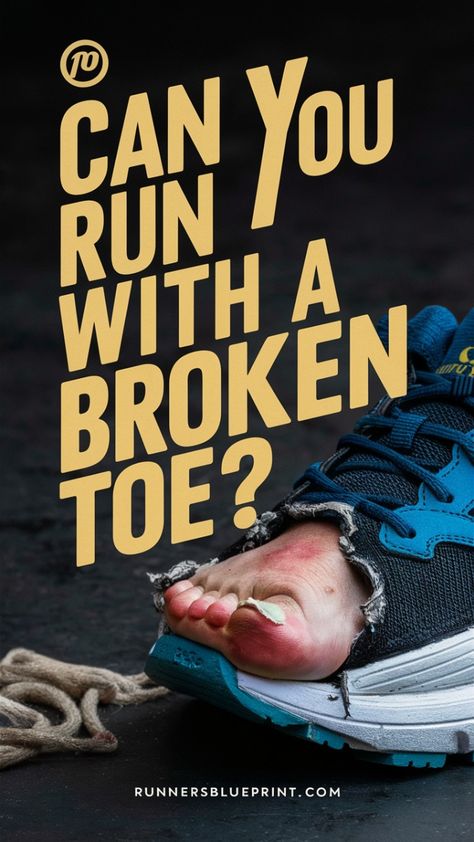
Can I Run with a Broken Toe?

Can You Run with a Broken Toe?

If you’re a regular runner, then you should be familiar with those occasional aches and pains that just come with the sport.

But when you break a toe, things can get tricky.

You might shrug this off a  at first, but I’ve learned the hard way that a broken toe can really mess up your training unless you handle it carefully.

Let’s dive into how you can manage running with a broken toe, including spotting symptoms and knowing when to hit pause on your runs.

What Is a Broken Toe?

A broken toe happens when one or more bones in your toe either crack or break outright. From what I’ve learned, toe fractures generally fall into two categories:

Traumatic Fractures:

These occur when there’s a sudden, direct impact to the toe, like stubbing your toe on furniture, dropping something heavy on it, or getting it caught while running.

Traumatic fractures can range from hairline cracks to complete breaks, and they’re usually accompanied by immediate pain and swelling. Sometimes, the bone can even break off completely, leading to a condition called an avulsion fracture.

Stress Fractures:

Stress fractures, a runner’s bane, stem from the repetitive pounding our feet take. They happen when tiny cracks develop in the bone due to the constant pounding from running, especially on hard surfaces.

These types of fractures often sneak up on you—what might start as a dull ache can become more painful with continued activity.

Stress fractures are usually the result of ramping up mileage too quickly or running too many high-impact workouts without proper rest.

The Main Symptoms of A Broken Toe

Figuring out if you’ve broken a toe isn’t always a walk in the park. In some cases, you might just feel mild discomfort, while the pain can be intense in others.

Here are some common symptoms that may indicate you’ve broken a toe:

  • Tenderness and Pain: One of the first signs of a broken toe is pain, especially when you put weight on the affected toe. This pain can be sharp or throbbing, and walking or standing can aggravate it. If the pain worsens when you wear shoes, that’s another red flag.
  • Swelling: Swelling is common in broken toes and can develop quickly. If the swelling is severe, you may notice puffiness around the toe or even in the entire foot.
  • Bruising and Discoloration: Bruising around the toe is often a sign of a traumatic fracture. Sometimes, black-and-blue marks spread around the toe and even under the toenail.
  • Stiffness: A broken toe can feel stiff and difficult to move, making it hard to bend or flex the toe.
  • Nail Injury: If a sudden impact caused the injury, your toenail may also be affected. You might experience bruising under the nail, or in more severe cases, the nail may lift or become damaged.
  • Deformity: The toe may look visibly crooked or out of alignment in severe fractures. If your toe points in a strange direction, it’s a strong indicator that the bone is broken.
  • Crepitation: You may feel a crackling or grating sensation (crepitation) when moving the broken toe.
  • Numbness or Tingling: If the injury affects nearby nerves, you may experience numbness or tingling in the affected toe or surrounding area.

Experiencing any of these signs, especially if your toe looks odd or the pain is severe? It’s time to see a doctor for an X-ray.

Can You Run with a Broken Toe?

So, Can You Actually Run with a Broken Toe? Well, that depends on which toe you’ve broken and just how bad the break is

After breaking my fourth toe during a football game, I tried to run a week later, thinking, “It’s just a toe, how bad could it be?” I was wrong. With every step, the pain shot up my foot, and I could feel myself compensating by changing my gait, which quickly led to discomfort in my ankle.

I had to face the fact that buddy taping the toe and taking a break from running was the only way it would heal properly.

Here’s a more detailed breakdown of whether or not you should lace up those running shoes:

  1. Middle Toes (2nd to 4th Toes): These toes play a less critical role in propulsion compared to the big toe, so running may still be an option if the pain is manageable. However, buddy taping (taping the injured toe to a neighboring toe for support) is crucial for stabilizing the break and reducing pain. But really, listen to your body—if running makes the pain worse or you start limping, it’s time to stop. Continuing to run with an altered gait can lead to other issues, like ankle, knee, or hip problems.
  2. Little Toe (5th Toe): Although it may seem less important, the little toe plays a significant role in maintaining balance and push-off during running. Running with a broken little toe can be challenging, and resting until it heals is often best. Running through the pain could lead to long-term complications or an extended recovery period.
  3. Big Toe (1st Toe): Running is likely out of the question if you’ve broken your big toe. The big toe provides the majority of your foot’s stability and propulsion; without it functioning properly, running can become painful and risky. You’ll struggle with balance and may even alter your gait, which could lead to further injuries. For a broken big toe, avoiding weight-bearing activities, including running, is best until it heals.

How Soon Can You Run Again After Busting Your Toe?

How long it takes to recover from a broken toe varies based on how badly you’ve broken it, but generally, here’s what to expect::

  • Minor Fractures: For a minor fracture, like a small stress fracture, you might be back on your feet in 3-4 weeks. However, you should only start running again when the pain has completely subsided, even during everyday activities like walking.
  • Severe Fractures: If the break is more severe—such as a traumatic fracture or a big toe break—you may need 6-8 weeks to fully recover. In some cases, your doctor may recommend a cast or even surgery if the bones need to be realigned.

Even while you recover, you can keep active with low-impact activities like swimming, biking, or lifting weights, as long as they don’t put weight on your foot

When I broke my toe during my football game, I tried to rush back to running too soon—a big mistake. I ended up prolonging my recovery by trying to “push through” the discomfort.

It took me about six weeks before I felt ready to lace up my running shoes again. The pain was gone by then, but I still took it easy for the first couple of runs. I did more walking and light jogging, listening carefully to how my body responded. It felt great to be back, but I knew rushing would only set me back

Time to Check in with Your Doctor

Think you might have broken your toe? Don’t wait around—seeing a doctor or podiatrist right away is crucial. A broken toe can bring about significant pain and limit your range of motion, making early treatment essential.

Broken toes can generally be categorized as either minor or severe, depending on the severity of the injury.

Signs of a minor fracture may include:

  • Swelling
  • Throbbing pain
  • Bruising of the skin and toenail
  • Inability to move the toe without pain

On the other hand, severe toe fractures can lead to the broken toe appearing visibly crooked or disfigured. In some instances, you might also experience an open bleeding wound at the injury site and numbness or tingling in the affected toe.

How to Treat a Broken Toe

If you’ve broken a toe, starting the healing process immediately is important.

Here’s what to do:

If you suspect a broken toe, Stop running and avoid putting any pressure on the injured toe. Rest is the most important part of healing a broken toe. Overdoing it can worsen the injury and prolong your recovery time.

Ice:

Icing my broken toe became part of my daily routine.

After work, I’d prop my foot up on the coffee table, wrap a bag of frozen peas in a towel, and let it sit on the swelling for 20 minutes.

It was uncomfortable at first, but the relief afterward was worth it. Over time, I noticed the swelling went down much faster, and the pain became more manageable.

Buddy Taping:

If the fracture isn’t too severe, you can buddy tape the broken toe to the one next to it for support.

I learned this trick after a friend suggested it. My middle toe was fractured, and the idea of strapping it to my healthy toe seemed odd at first, but it made a huge difference.

It stabilized my foot just enough so I could move around without wincing at every step. I could walk comfortably without risking further injury by keeping the toes taped together.

Here’s how to do it:

  1. Identify the injured toe and select the adjacent one for taping. Taping toes with similar shapes and sizes is advisable, but never tape two affected toes together.
  2. Gently bring the injured toe closer to the neighboring toe.
  3. Use gauze or medical tape to loosely wrap around both toes, securing them together.

To prevent blisters, you can place a cotton ball between the toes. For added support, a popsicle stick can be used as a splint.

It’s important to note that while toe taping is effective for managing broken toes, improper use can lead to reduced blood flow, limited joint motion, or even infection.

Remove the tape immediately if you experience any discomfort or pain after taping.

Pain Relief:

Over-the-counter pain relievers like ibuprofen can help with pain and swelling. However, avoid using painkillers to mask the pain while running—it’s best to rest until you’re fully healed.

Protective Footwear:

Depending on the severity of the break, your doctor may recommend wearing a walking boot, a cast, or a shoe with a rigid sole to protect the toe during healing.

I invested in a stiff-soled recovery shoe after breaking my toe, and it was a game-changer. It kept my foot stable and helped me avoid accidentally putting too much pressure on the toe when walking. It was the best decision because I felt I could still stay active without worrying about reinjuring it.

What’s more?

Try shoes with a low heel drop if they can accommodate your foot; this can help alleviate pressure on the broken toe during the healing process. Avoiding undue stress on the toe is essential to prevent worsening pain or improper healing.

Shoe Lacing for Pain Relief

Believe it or not, how you lace your shoes can make a difference in alleviating pain from a broken toe.

Here’s a technique to try for a wider toe box room:

Start by threading through the first bottom hole, then ladder up to the next hole. This creates space in the toe box, which can help remove the pressure off your injured toe. Diagonal lacing can also help, especially with black toenails or swelling.

Gradual Return to Running

Getting back to running after a broken toe takes patience, but a careful, gradual approach will help you rebuild strength and avoid re-injury. Here’s how to ease back into your routine.

Start with Walking

Begin with short walks as soon as you can walk without pain. Focus on flat, even surfaces, and keep distances short at first. If you feel any discomfort, stop and rest—it’s better to take things slow than to risk aggravating the injury.

Start Light Jogging

After a few days of pain-free walking, you can start adding in short jogs. Begin with a “walk-jog” approach: try jogging lightly for 5 minutes, followed by 5 minutes of walking. Pay close attention to how your toe feels during and after these sessions, and increase the jogging time only if you’re pain-free.

I’d recommend starting with a couple of jog-walk sessions per week, and avoid any high-intensity runs until your toe feels strong and stable. Gradual progress will keep you on the right track!

Use Supportive Footwear

Wearing the right shoes can make a big difference in your recovery. Choose footwear with a stiff sole and good support to minimize strain on your toe and provide added stability. A roomy toe box can also help by reducing pressure on the injured area.

The Bottom Line

While running with a broken toe is generally not recommended, it depends on the toe that’s injured and how severe the break is.

For middle toes, you might get away with buddy taping and gentle running, but rest is key for your big toe or little toe. Pushing through the pain can lead to longer recovery times or worse injuries.

Listen to your body, consult a healthcare professional, and prioritize healing. You’ll be back to running stronger than ever in no time.

Stay patient, keep your toes happy, and remember—there’s no shame in healing. You’ll thank yourself later!

The Only Treadmill Pace Chart You Need

Running on a treadmill is incredibly convenient and offers the perfect environment for precise training—you control every element, from speed to incline, without the unpredictability of outdoor elements.

Here’s something important to remember: running on a treadmill can feel easier than hitting the roads, primarily because there’s no wind resistance.

When you’re outdoors, the wind pushes against you, adding an extra layer of challenge that’s missing on the treadmill.

This is why a 20-minute run at 0% incline indoors might seem less taxing than the same run outside.

To make indoor runs more effective and mimic outdoor conditions, tweaking the incline is crucial, especially if you’re prepping for a race.

So, how do you ensure your treadmill training aligns with your outdoor performance?

Use a treadmill pace chart!

This tool is a game-changer for translating outdoor paces into the appropriate miles-per-hour indoor setting.

Let’s dive into how.

How to Make Treadmill Runs More Like Outdoor Runs

As a running coach, I often remind my athletes about adjusting their treadmill settings to simulate outdoor running. When you step on that treadmill, the lack of wind and natural terrain changes can throw off your pacing if you’re used to outdoor runs.

To help fix that, I recommend adding an incline—just a slight bump to 1% will do wonders. This mimics the effort to overcome wind resistance outdoors, making indoor sessions more productive and realistic.

Whether prepping for your first race or just trying to stay consistent with your fitness, making small adjustments to your treadmill settings can greatly impact how prepared you are when race day comes around. And trust me, that’s where a treadmill pace chart comes in handy!

What Is a Good Treadmill Pace?

This is hard to answer as it depends on your fitness level, training experience, and goals. For instance, if you’re a treadmill newbie, a good treadmill pace is as close to your real outdoor running pace. But that depends on your current fitness level and training goals.

Let me explain.

For Walking

A beginner’s optimal walking pace is around 3 to 4 mph (around 5 to 6 km/h). If you’re new to exercise, especially cardio training, walking is likely the perfect way to start. Walking has a low impact, burns calories, and helps you improve your endurance and build exercise habits.

Here is a list of top treadmills for walking – choose the best one!

For Jogging

Once (or if) walking feels too easy, try jogging. A proper jogging pace, in my opinion, is about five mph (around 8 km/h). Ideally, you should be able to train and talk without gasping for air for at least 20 to 30 minutes before you start challenging yourself more.

For Running

Once you can keep the conversational pace for 30 minutes., it’s time to challenge yourself. Running, as it relates to pace, is anything above five mph. You should move a little faster than when you jog but not push yourself too hard to the point where you’re panting for air on every step.

For Sprinting

After building a good cardio base, it’s time to take things to the next level.  That’s when you should start doing sprints on the treadmill. As a form of interval training, the typical sprint pace is anything above 12 miles (19 kmh). A pro runner can sprint at a speed of 15 mph. As a rule, you shouldn’t be able to sprint for more than one minute at a time.

How to Use a Treadmill Pace Chart

A treadmill pace chart converts the speed you see on the treadmill’s display (in miles per hour) into the pace of a mile you’d run outside (in minutes per mile).

This is key to making indoor runs as close to outdoor training. Whether you’re training for a 5K, half marathon, or a marathon, this chart can help you fine-tune your pace and achieve your race goals.

So, if you’re wondering how a 6.0 mph setting translates to outdoor running, the chart reveals that it’s akin to a 10-minute mile. This is super handy when trying to maintain a specific pace indoors that you’ve been rocking outdoors.

Here’s how to use it:

  1. Find Your Speed: Look up your treadmill speed (mph or km/h).
  2. Match to Pace: Find the corresponding pace (minutes per mile or kilometer).
  3. Adjust Incline: Use a 1-2% incline to better mimic outdoor conditions, especially if you’re training for hilly courses.

The Charts You Need

If you’re aiming for a specific race time, like 5K or a marathon, you should be able to locate that goal in the corresponding column on the right.

Once you’ve decided on a target pace, check the following posts to help you improve.

The rest is just details, as the saying goes. Here are a few:

Treadmill MPH settingPace per mileEquivalent paces by incline
0%1%2%3%4%5%6%7%8%9%10%
5.012:0012:3111:4411:0510:3210:039:389:168:568:388:228:07
5.211:3212:0211:1810:4210:119:449:208:598:408:238:087:54
5.411:0711:3510:5510:209:519:269:038:438:258:097:557:41
5.610:4311:1010:3210:009:339:098:488:298:127:567:427:29
5.810:2110:4710:129:429:168:538:338:157:587:447:307:18
6.010:0010:269:529:249:008:388:198:027:467:327:197:07
6.19:5010:159:439:168:528:318:127:557:407:267:147:02
6.29:4110:059:349:088:448:248:067:497:347:217:086:57
6.39:319:569:269:008:378:177:597:437:297:157:036:52
6.49:239:469:178:528:308:107:537:377:237:106:586:47
6.59:149:379:098:458:238:047:477:327:187:056:536:43
6.69:059:299:018:378:167:587:417:267:137:006:496:38
6.78:579:208:538:308:107:527:357:217:076:556:446:34
6.88:499:128:458:238:037:467:307:157:026:506:406:29
6.98:429:048:398:177:577:407:247:106:586:466:356:25
7.08:348:568:328:107:517:347:197:056:536:416:316:21
7.18:278:498:258:047:457:297:147:006:486:376:276:17
7.28:208:418:187:587:407:237:096:566:446:336:226:13
7.38:138:348:127:527:347:187:046:516:396:286:186:09
7.48:068:278:057:467:287:136:596:466:356:246:146:05
7.58:008:207:597:407:237:086:546:426:316:206:116:02
7.67:548:147:537:347:187:036:506:386:266:166:075:58
7.77:488:077:477:297:136:586:456:336:226:126:035:55
7.87:428:017:417:247:086:546:416:296:186:095:595:51
7.97:367:557:367:187:036:496:376:256:156:055:565:48
8.07:307:497:307:136:586:456:326:216:116:015:525:44
8.17:247:437:257:086:546:406:286:176:075:585:495:41
8.27:197:387:207:046:496:366:246:136:035:545:465:38
8.37:147:327:156:596:456:326:206:106:005:515:425:35
8.47:097:277:106:546:406:286:166:065:565:475:395:32
8.57:047:227:056:506:366:246:136:025:535:445:365:29
8.66:597:167:006:456:326:206:095:595:495:415:335:26
8.76:547:116:556:416:286:166:055:555:465:385:305:23
8.86:497:076:516:376:246:126:025:525:435:355:275:20
8.96:447:026:466:326:206:095:585:495:405:325:245:17
9.06:406:576:426:286:166:055:555:455:375:295:215:14
9.16:366:526:386:246:126:015:515:425:345:265:185:11
9.26:316:486:346:206:095:585:485:395:315:235:165:09
9.36:276:446:296:176:055:555:455:365:285:205:135:06
9.46:236:396:256:136:025:515:425:335:255:175:105:04
9.56:196:356:226:095:585:485:395:305:225:145:085:01
9.66:156:316:186:065:555:455:355:275:195:125:054:59
9.76:116:276:146:025:515:425:325:245:165:095:024:56
9.86:076:236:105:595:485:385:305:215:145:075:004:54
9.96:046:196:075:555:455:355:275:195:115:044:584:51
10.06:006:156:035:525:425:325:245:165:085:024:554:49
10.15:566:126:005:495:395:295:215:135:064:594:534:47
10.25:536:085:565:455:365:275:185:115:034:574:504:45
10.35:506:045:535:425:335:245:165:085:014:544:484:42
10.45:466:015:505:395:305:215:135:054:584:524:464:40
10.55:435:575:465:365:275:185:105:034:564:504:444:38
10.65:405:545:435:335:245:155:085:004:544:474:414:36
10.75:365:515:405:305:215:135:054:584:514:454:394:34
10.85:335:485:375:275:185:105:034:564:494:434:374:32
10.95:305:445:345:245:165:085:004:534:474:414:354:30
11.05:275:415:315:225:135:054:584:514:454:394:334:28
11.25:215:355:255:165:085:004:534:464:404:344:294:24
11.45:165:295:205:115:034:554:494:424:364:304:254:20
11.65:105:245:145:064:584:514:444:384:324:274:214:17
11.85:055:185:095:014:534:464:404:344:284:234:184:13
12.05:005:135:044:564:494:424:364:304:244:194:144:10

Treadmill Pace Chart Conversions

Min.
per Mile
Miles
per Hour
4:0015
4:0514.7
4:1014.4
4:1514.1
4:2013.8
4:2513.6
4:3013.3
4:3513.1
4:4012.9
4:4512.6
4:5012.4
4:5512.2
Min.
per Mile
Miles
per Hour
5:0012
5:0511.8
5:1011.6
5:1511.4
5:2011.3
5:2511.1
5:3010.9
5:3510.7
5:4010.6
5:4510.4
5:5010.3
5:5510.1


Min.
per Mile
Miles
per Hour
6:0010
6:059.9
6:109.7
6:159.6
6:209.5
6:259.4
6:309.2
6:359.1
6:409
6:458.9
6:508.8
6:558.7
Min.
per Mile
Miles
per Hour
7:008.6
7:058.5
7:108.4
7:158.3
7:208.2
7:258.1
7:308
7:357.9
7:407.8
7:457.7
7:507.7
7:557.6


Min.
per Mile
Miles
per Hour
8:007.5
8:057.4
8:107.3
8:157.3
8:207.2
8:257.1
8:307.1
8:357
8:406.9
8:456.9
8:506.8
8:556.7
Min.
per Mile
Miles
per Hour
9:006.7
9:056.6
9:106.5
9:156.5
9:206.4
9:256.4
9:306.3
9:356.3
9:406.2
9:456.2
9:506.1
9:556.1


Min.
per Mile
Miles
per Hour
10:006
10:056
10:105.9
10:155.9
10:205.8
10:255.8
10:305.7
10:355.7
10:405.6
10:455.6
10:505.5
10:555.5
Min.
per Mile
Miles
per Hour
11:005.5
11:055.4
11:105.4
11:155.3
11:205.3
11:255.3
11:305.2
11:355.2
11:405.1
11:455.1
11:505.1
11:555


Min.
per Mile
Miles
per Hour
12:005
12:055
12:104.9
12:154.9
12:204.9
12:254.8
12:304.8
12:354.8
12:404.7
12:454.7
12:504.7
12:554.6
Min.
per Mile
Miles
per Hour
13:004.6
13:054.6
13:104.6
13:154.5
13:204.5
13:254.5
13:304.4
13:354.4
13:404.4
13:454.4
13:504.3
13:554.3


Min.
per Mile
Miles
per Hour
14:004.3
14:054.3
14:104.2
14:154.2
14:204.2
14:254.2
14:304.1
14:354.1
14:404.1
14:454.1
14:504
14:554
Min.
per Mile
Miles
per Hour
15:004
15:054
15:104
15:153.9
15:203.9
15:253.9
15:303.9
15:353.9
15:403.8
15:453.8
15:503.8
15:553.8


Min.
per Mile
Miles
per Hour
16:003.8
16:053.7
16:103.7
16:153.7
16:203.7
16:253.7
16:303.6
16:353.6
16:403.6
16:453.6
16:503.6
16:553.5
Min.
per Mile
Miles
per Hour
17:003.5
17:053.5
17:103.5
17:153.5
17:203.5
17:253.4
17:303.4
17:353.4
17:403.4
17:453.4
17:503.4
17:553.3


Min.
per Mile
Miles
per Hour
18:003.3
18:053.3
18:103.3
18:153.3
18:203.3
18:253.3
18:303.2
18:353.2
18:403.2
18:453.2
18:503.2
18:553.2
Min.
per Mile
Miles
per Hour
19:003.2
19:053.1
19:103.1
19:153.1
19:203.1
19:253.1
19:303.1
19:353.1
19:403.1
19:453
19:503
19:553

5K Target Time: 12:30-17:15

5k
Time
400m600m800m1KM1200m1600mMile PaceSpeed
KMH
Speed
MPH
12:3001:00.001:30.002:00.002:30.003:00.004:00.004:01.424.014.9
12:4501:01.201:31.802:02.402:33.003:03.604:04.804:06.223.514.6
13:0001:02.401:33.602:04.802:36.003:07.204:09.604:11.123.114.3
13:1501:03.601:35.402:07.202:39.003:10.804:14.404:15.922.614.1
13:3001:04.801:37.202:09.602:42.003:14.404:19.204:20.722.213.8
13:4501:06.001:39.002:12.002:45.003:18.004:24.004:25.521.813.6
14:0001:07.201:40.802:14.402:48.003:21.604:28.804:30.421.413.3
14:1501:08.401:42.602:16.802:51.003:25.204:33.604:35.221.113.1
14:3001:09.601:44.402:19.202:54.003:28.804:38.404:40.020.712.9
14:4501:10.801:46.202:21.602:57.003:32.404:43.204:44.920.312.6
15:0001:12.001:48.002:24.003:00.003:36.004:48.004:49.720.012.4
15:1501:13.201:49.802:26.403:03.003:39.604:52.804:54.519.712.2
15:3001:14.401:51.602:28.803:06.003:43.204:57.604:59.319.412.0
15:4501:15.601:53.402:31.203:09.003:46.805:02.405:04.219.011.8
16:0001:16.801:55.202:33.603:12.003:50.405:07.205:09.018.811.7
16:1501:18.001:57.002:36.003:15.003:54.005:12.005:13.818.511.5
16:3001:19.201:58.802:38.403:18.003:57.605:16.805:18.618.211.3
16:4501:20.402:00.602:40.803:21.004:01.205:21.605:23.517.911.1
17:0001:21.602:02.402:43.203:24.004:04.805:26.405:28.317.611.0
17:1501:22.802:04.202:45.603:27.004:08.405:31.205:33.117.410.8

5k pace chart (12:30-17:15)

5K Target Time: 17:30-22:15

5KM
Time
400m600m800m1KM1200m1600mMile
Pace
Speed
KMH
Speed
MPH
17:3001:24.002:06.002:48.003:30.004:12.005:36.005:38.017.110.7
17:4501:25.202:07.802:50.403:33.004:15.605:40.805:42.816.910.5
18:0001:26.402:09.602:52.803:36.004:19.205:45.605:47.616.710.4
18:1501:27.602:11.402:55.203:39.004:22.805:50.405:52.416.410.2
18:3001:28.802:13.202:57.603:42.004:26.405:55.205:57.316.210.1
18:4501:30.002:15.003:00.003:45.004:30.006:00.006:02.116.09.9
19:0001:31.202:16.803:02.403:48.004:33.606:04.806:06.915.89.8
19:1501:32.402:18.603:04.803:51.004:37.206:09.606:11.815.69.7
19:3001:33.602:20.403:07.203:54.004:40.806:14.406:16.615.49.6
19:4501:34.802:22.203:09.603:57.004:44.406:19.206:21.415.29.4
20:0001:36.002:24.003:12.004:00.004:48.006:24.006:26.215.09.3
20:1501:37.202:25.803:14.404:03.004:51.606:28.806:31.114.89.2
20:3001:38.402:27.603:16.804:06.004:55.206:33.606:35.914.69.1
20:4501:39.602:29.403:19.204:09.004:58.806:38.406:40.714.59.0
21:0001:40.802:31.203:21.604:12.005:02.406:43.206:45.614.38.9
21:1501:42.002:33.003:24.004:15.005:06.006:48.006:50.414.18.8
21:3001:43.202:34.803:26.404:18.005:09.606:52.806:55.214.08.7
21:4501:44.402:36.603:28.804:21.005:13.206:57.607:00.013.88.6
22:0001:45.602:38.403:31.204:24.005:16.807:02.407:04.913.68.5
22:1501:46.802:40.203:33.604:27.005:20.407:07.207:09.713.58.4

5k Pace Chart (17:30-22:15)

5K Target Time: 22:30-27:15

5km
Time
400m600m800m1KM1200m1600mMile
Pace
Speed
KMH
Speed
MPH
22:3001:48.002:42.003:36.004:30.005:24.007:12.007:14.513.38.3
22:4501:49.202:43.803:38.404:33.005:27.607:16.807:19.313.28.2
23:0001:50.402:45.603:40.804:36.005:31.207:21.607:24.213.08.1
23:1501:51.602:47.403:43.204:39.005:34.807:26.407:29.012.98.0
23:3001:52.802:49.203:45.604:42.005:38.407:31.207:33.812.87.9
23:4501:54.002:51.003:48.004:45.005:42.007:36.007:38.712.67.8
24:0001:55.202:52.803:50.404:48.005:45.607:40.807:43.512.57.8
24:1501:56.402:54.603:52.804:51.005:49.207:45.607:48.312.47.7
24:3001:57.602:56.403:55.204:54.005:52.807:50.407:53.112.27.6
24:4501:58.802:58.203:57.604:57.005:56.407:55.207:58.012.17.5
25:0002:00.003:00.004:00.005:00.006:00.008:00.008:02.812.07.5
25:1502:01.203:01.804:02.405:03.006:03.608:04.808:07.611.97.4
25:3002:02.403:03.604:04.805:06.006:07.208:09.608:12.511.87.3
25:4502:03.603:05.404:07.205:09.006:10.808:14.408:17.311.77.2
26:0002:04.803:07.204:09.605:12.006:14.408:19.208:22.111.57.2
26:1502:06.003:09.004:12.005:15.006:18.008:24.008:26.911.47.1
26:3002:07.203:10.804:14.405:18.006:21.608:28.808:31.811.37.0
26:4502:08.403:12.604:16.805:21.006:25.208:33.608:36.611.27.0
27:0002:09.603:14.404:19.205:24.006:28.808:38.408:41.411.16.9
27:1502:10.803:16.204:21.605:27.006:32.408:43.208:46.311.06.8

5k Pace Chart (22:30-27:15)

5K Target Time: 27:30-32:15

5KM
Time
400m600m800m1KM1200m1600mMile
Pace
Speed
KMH
Speed
MPH
27:3002:12.003:18.004:24.005:30.006:36.008:48.008:51.110.96.8
27:4502:13.203:19.804:26.405:33.006:39.608:52.808:55.910.86.7
28:0002:14.403:21.604:28.805:36.006:43.208:57.609:00.710.76.7
28:1502:15.603:23.404:31.205:39.006:46.809:02.409:05.610.66.6
28:3002:16.803:25.204:33.605:42.006:50.409:07.209:10.410.56.5
28:4502:18.003:27.004:36.005:45.006:54.009:12.009:15.210.46.5
29:0002:19.203:28.804:38.405:48.006:57.609:16.809:20.110.36.4
29:1502:20.403:30.604:40.805:51.007:01.209:21.609:24.910.36.4
29:3002:21.603:32.404:43.205:54.007:04.809:26.409:29.710.26.3
29:4502:22.803:34.204:45.605:57.007:08.409:31.209:34.510.16.3
30:0002:24.003:36.004:48.006:00.007:12.009:36.009:39.410.06.2
30:1502:25.203:37.804:50.406:03.007:15.609:40.809:44.29.96.2
30:3002:26.403:39.604:52.806:06.007:19.209:45.609:49.09.86.1
30:4502:27.603:41.404:55.206:09.007:22.809:50.409:53.89.86.1
31:0002:28.803:43.204:57.606:12.007:26.409:55.209:58.79.76.0
31:1502:30.003:45.005:00.006:15.007:30.010:00.010:03.59.66.0
31:3002:31.203:46.805:02.406:18.007:33.610:04.810:08.39.55.9
31:4502:32.403:48.605:04.806:21.007:37.210:09.610:13.29.45.9
32:0002:33.603:50.405:07.206:24.007:40.810:14.410:18.09.45.8
32:1502:34.803:52.205:09.606:27.007:44.410:19.210:22.89.35.8

5k Pace Chart (27:30-32:15)

5K Target Time: 32:30-37:15

5KM
Time
400m600m800m1KM1200m1600mMile
Pace
Speed
KMH
Speed
MPH
32:3002:36.003:54.005:12.006:30.007:48.010:24.010:27.69.25.7
32:4502:37.203:55.805:14.406:33.007:51.610:28.810:32.59.25.7
33:0002:38.403:57.605:16.806:36.007:55.210:33.610:37.39.15.6
33:1502:39.603:59.405:19.206:39.007:58.810:38.410:42.19.05.6
33:3002:40.804:01.205:21.606:42.008:02.410:43.210:47.09.05.6
33:4502:42.004:03.005:24.006:45.008:06.010:48.010:51.88.95.5
34:0002:43.204:04.805:26.406:48.008:09.610:52.810:56.68.85.5
34:1502:44.404:06.605:28.806:51.008:13.210:57.611:01.48.85.4
34:3002:45.604:08.405:31.206:54.008:16.811:02.411:06.38.75.4
34:4502:46.804:10.205:33.606:57.008:20.411:07.211:11.18.65.4
35:0002:48.004:12.005:36.007:00.008:24.011:12.011:15.98.65.3
35:1502:49.204:13.805:38.407:03.008:27.611:16.811:20.88.55.3
35:3002:50.404:15.605:40.807:06.008:31.211:21.611:25.68.55.3
35:4502:51.604:17.405:43.207:09.008:34.811:26.411:30.48.45.2
36:0002:52.804:19.205:45.607:12.008:38.411:31.211:35.28.35.2
36:1502:54.004:21.005:48.007:15.008:42.011:36.011:40.18.35.1
36:3002:55.204:22.805:50.407:18.008:45.611:40.811:44.98.25.1
36:4502:56.404:24.605:52.807:21.008:49.211:45.611:49.78.25.1
37:0002:57.604:26.405:55.207:24.008:52.811:50.411:54.58.15.0
37:1502:58.804:28.205:57.607:27.008:56.411:55.211:59.48.15.0

Additional resources:

Here’s your guide to buying a second hand treadmill.

Here’s your guide to beginner running pace

Conclusion

There you have it! The above treadmill pace chart is ideal for anyone who wants to make the most out of treadmill training. The rest is just details.

Thank you for stopping by.
Keep training strong.

Running With Morton’s Neuroma

Running With Morton's Neuroma

*This is a guest post by my friend Ben Drew*

The feet are kind of the most important part of the body when it comes to running. That’s why pain in the foot is the last thing any runner wants to be dealing with.

The frustrating thing about foot pain is that it can be caused by a very wide variety of things. Narrowing down on the exact area of pain can help you to find out exactly what’s behind it.

If you’re plagued by pain in the ball of your foot between the 3rd and 4th toes, you may be running with Morton’s neuroma. This inflammatory foot condition is usually an overuse injury, and it requires some lifestyle and gear changes as well as the usual treatment.

Let’s explore the condition and how to deal with it so it doesn’t ruin your running.

What Is Morton’s Neuroma?

Morton’s neuroma is an inflammatory foot condition that leaves you with pain in the ball of your foot. It’s basically an overuse injury, as it often develops due to constant and consistent pressure or force on the forefoot.

It’s worth noting that this condition is not a true neuroma. Neuromas are tumors of the nerves, but Morton’s neuroma is simply a thickening of the tissue in the nerve.

The soft tissue around the nerves in the forefoot begins to thicken after a long period of consistent pressure or hard force. As they thicken, the metatarsal bones begin to rub against them, causing pain and more inflammation.

It can also begin to put pressure on ligaments surrounding the nerve, which is why it manifests as pain, numbness, or a tingling sensation in a very specific part of the forefoot.

Strangely, it tends to occur in only one foot.

How Does Someone Get It?

There are two things that put you at high risk of Morton’s neuroma. Number one is exercising or taking part in high-impact sports – for runners, both boxes are checked here.

Our feet take up to 4 times our body weight in force when we run! Imagine how that’s increased when you jump or play sports like basketball or racquetball.

The second thing that can lead to Morton’s neuroma is constant pressure on the toes from an ill-fitting shoe or a shoe with a tiny toe box. Women are at significantly higher risk of the condition developing if they wear high heels!

These two things place a lot more pressure on your forefoot than there should be. This is basically constant trauma to your bones and nerves, which results in plenty of inflammation.

Those who have existing foot conditions, such as bunions, flat or high arches, and hammertoes, may also be at higher risk of getting Morton’s neuroma.

In short, anything that causes you to change the way you walk can lead to this condition. Because you’ll be distributing pressure differently across the foot to what it’s used to, there’s a high chance of those nerves becoming strained and inflamed.

Additional Resource  – Should I run in miles or minutes?

What Are the Symptoms of Morton’s Neuroma?

The symptoms of Morton’s neuroma usually only show up a little while after the nerves become inflamed. Usually, the first time you’ll notice any sign that something isn’t right is after being on your feet for a long period of time.

The first symptom is usually an uncomfortable and definitely noticeable pain in the forefoot. This may be accompanied by a tingling or numb sensation in the ball of your foot.

You may also experience an uncomfortable feeling like there’s a pebble in your shoe right under the forefoot, which is a result of the inflammation of the nerve between the metatarsal bones.

The worse the inflammation gets, the more intense the symptoms will become. In mild to moderate cases, it begins after spending a lot of time on your feet.

When you run, the pain may start 10 to 20 minutes into your run, cutting it short. Every step can feel like an electrical shock going through your foot.

In severe cases, the pain may last for days or weeks at a time, effectively ruining any sort of training program you may have been following.

Additional resource – Running with osteoarthritis 

Is Morton’s Neuroma Common With Runners?

Morton’s neuroma isn’t specific to runners, but they may be at a higher risk of developing it. Because your feet take a lot of pressure when they’re pounding the pavement, that finicky nerve in the forefoot can take some strain.

Non-runners are also fairly prone to developing it if they play other high-impact sports or wear the wrong shoes.

But runners who also fall into other high-risk categories are the most susceptible to this painful foot condition.

If you run, you’re already at risk. But it’s more common in runners if they:

  • Wear running shoes that don’t fit properly
  • Wear running shoes with a small or tight toe box
  • Do high-impact cross-training
  • Spend time in high heels when they’re not running
  • Have existing foot conditions

Can You Continue Running With Morton’s Neuroma?

Well, you can keep running with Morton’s neuroma. But should you? Probably not.

When you run with Morton’s neuroma, you may feel sharp, electric pains in the area under your toes. Every time you step on the foot, you’ll most likely feel a stabbing sensation, possibly with tingling or burning. Nobody wants to run with that!

The pain in the ball of your foot is relieved by rest. It’s a good idea to stay off your feet while suffering from Morton’s neuroma, until it’s healed. You may have to reduce the volume of your training until it’s eased up and you’re no longer experiencing symptoms.

Keep in mind that rest should be used in conjunction with other treatments.

What Treatments Are There for Morton’s Neuroma?

Treating Morton’s neuroma effectively relies on fixing the things that are causing the condition in the first place.

If you’ve done all you can and you’re still struggling with debilitating pain, your doctor may be able to give you corticosteroid injections to reduce the inflammation, in turn lowering the pain.

Alternative therapies like acupuncture may show some results in improving pain. As a last resort, Morton’s neuroma surgery may be recommended.

But before we get that far, here are the steps you should be taking to reduce inflammation and relieve pain in the ball of your foot. Implementing these can make a huge difference to your pain!

Ice and Anti-Inflammatory Drugs

Ice can work wonders for forefoot pain.

Try to ice the painful area 3 to 4 times every day, for about 20 minutes at a time. Don’t place an ice pack directly on the skin, though. Wrap it in a cloth before placing it on the sore area.

If icing doesn’t alleviate the pain to a point where you can continue with your daily life as normal, you can take non-steroidal anti-inflammatory medications to ease the ache. They’re easy to get over the counter, just make sure to follow the instructions closely.

Change Your Shoes

Making the change to more supportive shoes can be a huge help.

The first thing you should be looking for in a pair of shoes is a spacious toe box. The easier it is for the toes to splay, the less chance there is of the nerve being pressured.

As well as toe space, there should be enough support for your arch. If you roll your feet inwards when you walk, you’ll need a stability shoe, but those with a neutral foot can wear a neutral shoe.

Making sure your foot is properly supported means that your body weight is evenly distributed. There’s less extra and unnecessary pressure on particular parts of the foot, so the nerves can be free of stress.

Choosing a shoe with a low heel-to-toe drop can also have a positive effect. The standard heel drops come in at 10 to 12mm, but investing in a show with a 4 or 5mm drop can drastically reduce pressure on the metatarsal bones.

It’s advisable to get new running shoes, work shoes, and everyday casual shoes for Morton’s neuroma. But that’s not always a practical or affordable thing to do, so we recommend buying one pair of new shoes and using met pads or insoles for the others.

Met Pads or Insole

Insoles can provide support for your feet that you aren’t getting from your shoes. It’s important to note that some shoes may not accommodate insoles. But generally, any shoe that has a removable insert in it can fit a custom insole.

They also add a touch more cushion underfoot, protecting your foot and absorbing shock. But the real benefit is that they realign the foot to reduce pressure on the sore spot.

If you don’t want a full insole, you can try a metatarsal pad first. These fit right behind the metatarsals, in the dip behind the fatty pad on the ball of your foot.

They do a similar thing to the insoles – provide support and reduce pressure on the neuroma by aligning the foot correctly.

Cut Back on Mileage

One of the easiest ways to fall right back into stabbing pain is to keep doing the same activities at the same level of intensity.

To lower the pain and speed up healing time, you should be resting your foot. This may mean taking a week or so off from running. Along with rest, you can stretch and massage the foot regularly throughout the day.

If you really can’t do without your weekly exercise, at the very least cut back on your mileage. You don’t want to be halfway through a run when you’re hit by crippling pain, so halve your mileage until the condition eases up.

When Should You See a Doctor?

There’s no need to see a doctor immediately when you notice the symptoms of Morton’s neuroma. Implementing the above home treatments can make a huge difference to your pain, and can actually allow the space for the condition to heal on its own.

But if you don’t feel any improvement after giving these treatments a try, it may be worth seeing your doctor to explore other options.

Don’t hesitate to visit your medical practitioner if you need to. Surgery is usually the last resort, and your doctor will be able to advise you on the best course of treatment for your particular case.

Maximize Your Event’s Reach: Top Marketing Hacks for Your Next 5K Race

running in the sun

Ready to make your 5K race or athletic event the talk of the town? You’re in the right place! I’m about to dive into a treasure trove of insider tips and tactics to help you market your event like a pro.

Whether it’s your first race or you’re a seasoned organizer, these strategies will give you a fresh perspective on reaching your audience effectively.

Let’s get started and turn your event into the must-attend experience of the season!

Social Media Ads

Can you believe that with just one click, you can potentially reach millions? It’s like having a megaphone that can broadcast your message across the globe.

You know where most people are hanging out online these days? Social media! Platforms like Facebook, Instagram, and Twitter have become our digital living rooms. Ever noticed how you (and, let’s be honest, almost everyone else) can’t resist checking your feed every so often? That’s right, we’re all a bit hooked.

If you’ve got a race or event coming up, this is the perfect playground for you. One of the most effective strategies to get your event noticed? Promoted posts! Think of it as shining a spotlight on your race details amidst the vast digital universe.

And here’s a cool tip for Facebook lovers: the platform allows you to zero in on your ideal participants. You can specify demographics like age, gender, location, or even interests. Fancy reaching out to 20-30-year-old marathon enthusiasts in New York? No problem!

All you need to do is set a budget, decide how long you want your campaign to run, upload your race details, and voila! Facebook will ensure your post finds its way to the screens of your target audience. Yes, there’s a fee involved, but think of it as an investment. After all, a house packed with enthusiastic runners on race day? Priceless.

Additional Resource – What’s A Good 5K Time For A Beginner.

Flyers

While we’re all swooning over digital ads and their potential, let’s not forget the charm of good old-fashioned face-to-face marketing. Yes, in the age of pixels and pop-ups, physical flyers still have some serious game!

Especially for athletic events, like your upcoming 5K run, flyers can be your best friend. Picture this: a vivid, punchy flyer that makes people stop, look, and think, “Hey, I want to be a part of this!”

Now, if you’re thinking, “I’m no Picasso, how do I design a head-turning flyer?”

Here are some steps and tips:

  • Design for Impact: Think vibrant colors, bold fonts, and captivating imagery. Remember, the goal is to stand out and grab attention.
  • Highlight the Essentials: Don’t forget to showcase the unique features of your race. A scenic route? Celebrity participants? Medals for everyone? Let people know!
  • Sweeten the Deal: Who doesn’t love a good discount? Add a promotional code or a special sign-up bonus to give people that extra nudge.
  • Promo Business Cards: Promotional business cards are a powerful tool to amplify your event’s reach and impact. These compact, visually appealing materials are easy to distribute and can effectively communicate essential details about your event, from date and location to highlights and special offers. With creative designs and strategic placement in high-traffic areas, promotional business cards by a reputable manufacturer like 4inlanyards can spark interest, engage potential attendees, and leave a lasting impression.

Stumped about design? No sweat! Platforms like VistaCreate are like a digital canvas, making it super easy to craft stellar flyers, even for those of us who can’t draw a straight line.

Once your masterpiece is ready, it’s time to get it out there! Potential runners are everywhere – at the local gym, running clubs, jogging tracks, or even browsing through the latest running gear at sports stores. Make sure they spot your flyer!

Fitness Clubs

If you’re on the hunt for potential race participants, where better to look than places buzzing with fitness enthusiasts? That’s right, local gyms and running clubs are like treasure troves brimming with people who might just be looking for the next race to conquer.

Consider this:

  • Instant Target Audience: People at these venues already have fitness on their minds. You’re not trying to convince someone to start running; you’re just showing them a fantastic opportunity to use their passion!
  • Personal Touch: Engaging with potential participants in person adds a layer of trust and genuine connection. They get to meet the face behind the race, ask questions, and feel a personal connection to the event.
  • Collaborative Opportunities: Rather than just leaving flyers or making announcements, why not integrate more deeply with the fitness club or running group? For instance, pitch the idea of a “Race Prep Group” where members train together for your event. It fosters community spirit and can be a fun way for members to prepare and participate as a team.
  • Fundraising Challenge: Amp up the excitement by introducing a friendly competition. Encourage the gym or club to form teams and see who can raise the most funds for a chosen cause. Not only does this promote your race, but it also contributes to a greater purpose.

Approach Influencers

In a world where social media often dictates trends, influencers can be your secret weapon to skyrocket awareness for your event! Here’s why: influencers are not just personalities; they’re a channel to access a committed, trusting audience – their followers.

Selecting the Right Influencer:

Identifying the right influencer is like selecting the right running shoes – essential and significantly impactful! Whether they’re a seasoned runner, a revered coach, dynamic fitness influencers, or even a sports reporter with a knack for captivating stories, they need to resonate with your event and audience.

Making It Engaging:

Going beyond mere promotions, imagine if a well-known local runner shared their training journey leading up to your event! Perhaps a revered running coach could share tips on preparing for race day? These authentic narratives could beautifully amplify your event’s appeal.

Invite a Special Guest:

Adding a sprinkle of star power never hurts! A sports celebrity can add that extra dash of excitement and allure. Hosting an Instagram Live session where they share a few words or engage with potential participants can create a massive buzz!

Key Steps to Influencer Collaboration:

Find influencers who align with your event ethos and have a following that matches your target demographic.

Ensure that your collaboration offers value to the influencer as well, be it through exposure, reciprocal promotion, or other creative means.

While Instagram may be the epicenter of influencer marketing, don’t forget about Twitter, LinkedIn, or other platforms where potential runners might spend their time.

Once the campaign is live, engage with the content, express gratitude, and perhaps even offer shoutouts to the influencer to foster a positive relationship for future collaborations.

Improve Your SEO

In today’s digital age, SEO (Search Engine Optimization) is like the stamina of a marathon runner: essential and game-changing. If you’ve been relying solely on other forms of advertising, imagine the boost you’ll get when your race website ranks at the top of Google’s search results!

People looking for races nearby? They’re heading to Google first. And you want to be right there, waving at them from the top results.

Let’s break down the SEO relay race for your event:

Keyword Mastery:

  • Discovery: Use tools like Google Keyword Planner or SEMrush to uncover popular search terms related to races in your area.
  • Organize: Group these keywords based on search intent and volume. This helps in structuring your content strategy.

Content is King:

  • Diverse Content: Don’t just focus on blog posts. Think race preparation tips, benefits of participating, personal stories, and even local landmarks or the race route’s scenic beauty.
  • Frequency Matters: Regularly update your website. Fresh content signals search engines about your site’s relevancy.

On-Page SEO Touchpoints:

  • Performance: Ensure your website loads quickly. Google loves speedy sites!
  • Mobile Optimization: A majority of users search on mobile. Make sure your website is mobile-friendly.
  • Internal Linking: Connect related pages within your site. It boosts the page’s SEO value and provides a better user experience.

Off-Page SEO Strategy:

  • Link-Building: Earn backlinks from credible websites. This vouches for your site’s credibility in the eyes of search engines.
  • Engage in Communities: Participate in online running forums and communities. Share your content and earn genuine traffic.

Patience and Persistence:

SEO isn’t an overnight success. It’s akin to long-distance running. You’ve got to put in consistent effort, refine strategies based on results, and keep pushing for that top spot.

The Conclusion

There you have it. By implementing the above strategies, you’ll definitely garner more attention and hopefully more sign-ups for your events. The rest is just details.

The Runner’s Guide To 5K Pace Charts

Whether you’re looking to break your personal record or trying to place in your age group, using 5K pace charts can assist in your efforts.

How come? Simple. The 5K pace tables can help you to instantly determine how fast you’re running in miles and kilometers and how that translates to race pace.

The rest is just details.

Would you like to learn more? Then keep on reading.

Let’s get started.

What’ is A 5K Pace Chart?

First things first, what’s a 5K pace chart, and why is it’s s important?

Also known as a time chart, a 5K pace chart consists of a table that breaks down the time at each mile split (and/or kilometer split) and provides a projected 5K finish time based on running pace.

Why is it important? Determining, as well as practicing, your goal 5K pace before the big day helps, but using a 5K pace chart will give you an extra edge by actually estimating your finish time as well. (Learn more about how long is a 5K in miles here)

For example, if your goal time is 25:00, your average pace will be about 5:00 per kilometer.

This means that you’ll need to complete your first kilometer in around five minutes, then you have to reach the second kilometer 10 minutes in, third in 15 minutes, fourth in 20 minutes, and you should complete the race in 25 minutes.

Check the splits in the table below for more examples.

Here’s more good news. 5K pace charts are easy to use. All you need is an awareness of your overall running pace.

By knowing your pace, you can easily structure your training accordingly to reach your goal. If you have a specific 5K target time for the event, find that target in the corresponding column on the right.

Additional resource:

The 5K Pace Chart You Need

As far as I can tell, the most reliable way to choose a goal is to use a 5K time chart to project an estimated finish time in line with a mile pace that’s closest to your normal training speed.

The 5K pace chart below divides each mile split for different speeds. You’ll definitely be able to find what works best for you with a range of paces from 4.30 to 15.00 minutes per mile, broken down in 30-second intervals.

You can also use your present 5K pace to choose the pace target for the intervals from the table below. The pace targets are expressed both in mins/mile and mins/km.

What’s a Good 5K pace?

Since we are on the subject of 5K pace, let me share some thoughts on what makes a good 5K speed.

A good 5K pace will depend on different elements such as your age, training experience, fitness level, race day conditions, etc.

All in all, a good 5K pace is a speed that challenges your body without breaking it down.

Let me explain more.

Toeing the 5K line for the first time? Try sticking to a pace that you can comfortably keep up throughout the 3.1 miles.

If you already have a few races under your belt, aim for a finish time slightly faster than your previous one(s).

As you get fitter and run more races, up the ante by aiming to run faster than before. In fact, the 5K race is the perfect opportunity to push yourself and strive for your best.

The rest, as the saying goes, is details.

Additional Resources:

What’s A Good 5K Time For A Beginner.

Here’s your guide to beginner running pace

The Runner’s Guide To 5K Pace Charts – Conclusion

There you have it. The 5K race chart shared here is enough to get you started on the right foot and set your feasible target. The rest is really up to you.

Please feel free to leave your comments and questions in the section below.

In the meantime, thank you for dropping by.

Keep training strong.

The Runners Guide To The Heel To Toe Drop

Heel To Toe Drop for runners

Ever wondered what the heel-to-toe drop is all about?

Then you have come to the right place.

Choosing running shoes is tricky. And it’s a personal affair.

Many factors influence your choice, from physiology, training goals, and personal preference. What works for your friend might not work for you.

That said, understanding running shoes is one step in the right direction when it comes to finding the right pair. And one of the most important things to understand about running shoes is what’s known as the heel-to-toe drop.

In this article, I’ll discuss what the heel-to-toe drop is all about and why it matters in running shoes. I’ll also explain how to determine the most suitable drop height for you.

Sounds great?

Let’s get started.

What is The Heel To Toe Drop?

First things first, what is the heel-to-toe drop?

Also known as the shoe offset, heel differential, or HTD for short, the heel-to-drop refers to the difference in height between the heel and the forefoot of an athletic shoe.

Let me explain.

The measurement is taken around the base of the heel and the middle point of the forefoot, and it’s usually provided in millimeters, going from 0 to over 14mm in running shoes.

A drop of zero would mean that heel and the ball of the forefoot would be more or less at the same height as the ground when seated in the shoe.

On the other hand, a running shoe with 15 mm of material under the heel and 5 mm of material under the forefoot would have a heel drop of 5 mm.

In this case, the heel sits ten millimeters higher than the forefoot when wearing the shoe.

Running shoes are also broken down by the level of heel drop they have. The four most common groups you’ll encounter include zero-drop, minimalist, moderate, and high drop shoes (more on this later).

The Purpose Behind Drop Height

The goal behind a shoe’s drop is to limit stress on certain parts of the body by intentionally keeping the foot in a specific position.

For example, the lower drop, the easier it’ll be to land on the forefoot or midfoot while running.

Let me explain more…

Low Vs. High Drops

The lower the drop, the more likely you’ll strike on the forefoot or midfoot.  That’s why some experts recommend runners with chronic knee problems to go for a lower drop shoe to avoid hyperextension and take some of the pressure off the knee.

However, although this takes some of the pressure off the knees, it may put more stress on the lower leg.

After all, the impact stresses have to go somewhere.

Conversely, a higher-drop shoe may work best for runners with lower leg issues, such as in the calves, Achilles, foot, or ankle—while transferring more impact to the knees and hips.

HTD Vs. Stack Height

Before I go any further, let me clearly state that stack height and heel drop are not the same thing.

Stack height refers to the cushioning inside of the shoe between the bottom of the foot and the ground. It measures the distance from your foot to the ground, typically based on the amount of material under the foot.

Stack height can range from minimal to maximal, and this measurement usually correlates with how much cushioning that a shoe has.

That’s why a shoe with less cushioning will have a lower stack height—and vice versa.

Additional resource – Can you run with a broken toe?

It’s Not A Golden Rule

Although heel-to-drop is important, it’s by no means the only metric to consider. It’s actually just one among many.

The shoe volume, structure, firmness, amount of cushioning, as well as your training goals and preferences all have a say. Even if a pair of shoes have raving reviews, it means nothing if they don’t fit your foot.

The Importance of HTT Drop

First things first, I’d like for the record to clearly state that there’s no conclusive scientific EVIDENCE that a shoe’s drop affects overall injury rates.

In fact, the evidence is, at best, anecdotal.

The only research I found is a 2016 study reported by the American Journal of Sports Medicine that tracked 553 recreational runners for six months. The participants were divided into three groups with different heel to toe drop from the least to the most, consisting of:

  • Group A – 10 millimeters drop
  • Group B – 6 millimeters drop
  • Group C – 0-millimeter drop.

All the runners monitored their training load as well as a sustained injury during the six-month period (that involved one or more days of missed runs).

In the end, the injury rate was quite the same regardless of which type of shoe they wore—roughly 25 percent of each group reported a running injury during the experiment.

The main conclusion of the experiment was that injury risk not only depended on the shoes used but also on training frequency.

Occasional runners (those running less than once a week for six months or more of the previous year) had a lower injury risk running in a shoe with 0mm or 6mm heel-to-drop than shoes with a 10mm drop.

For more frequent runners (those running at least once a week or more for more than six months of the previous year), this risk was reversed—as in, they reported fewer injuries when using the higher heel-to-drop shoes.

Heel To Toe Drop

My Opinion?

Scientific proof aside, I’d still recommend that you pay attention to your shoe’s drop, especially if you have a history of overuse injury.

The HTT drop is the reason why one pair of shoes might feel off, and another might be right for you. Different drop levels are better for different runners.

Range of Drop levels in Running Shoes

There’s a wide range of drop levels in running shoes, from the absolute minimalist shoe to the extremely cushioned ones.

Drop levels are typically broken down into the following:

Zero Drop Shoes – Roughly 0 millimeters

Most shoes within this category are often labeled as “barefoot” shoes as they embody the essence of the minimalist movement. In fact, these have gained a lot of steam after the book Born To  Run by Christopher McDougall was published a few years ago.

It is believed that these shoes mimic how your foot should sit on the ground, as naturally, it lies flat.

In zero drop shoes, the heel and forefoot are on the same plane. They’ve little to no cushion in the heel pad and a minimal later of material between the shoe and the ground.

I’m a big advocate for zero drop shoes, but I won’t recommend them for beginners. These shoes are for runners who have been around the running block for a while and have already developed proper running technique and habits.

If you’re a beginner runner, you’re better off running in shoes that offer plenty of support and cushioning to protect your legs from the impact of the sport.

Some of the most popular brands that make reliable drop running shoes include:

  • Topo
  • Altra
  • Merrel

Low Drop – to 1 to 4 millimeters.

Typically referred to as minimalist shoes, these have a lot in common to zero drop shoes but with a bit more structure—even though they feel very flat to most runners.

The heel sits roughly four millimeters over the toes, which provides a slight forward momentum.

The low drop shoes are for the runner who seeks more of the barefoot running experience but is not yet ready for zero-drop. These also encourage a forefoot or midfoot strike pattern.

Mid Drop  – Around 5 to 8 millimeters

This is the compromise zone.  Shoes within this category are not minimalist neither extremely cushioned.

Mid drop shoes work well for a wide variety of runners, making the typical range for most running shoes.

High Drop – 10 millimeters and above

High drop shoes are your typical stability shoes. In fact, any shoe with a drop higher than ten millimeters is a relatively firm and motion-controlled shoe.

If you have lower leg issues, such as Achilles tendonitis or tight calves, high drop shoes may help.

Shoes within this category send more impact to your knees and hips but are more merciful on the lower legs, including the foot, ankle, Achilles tendon, and calf.

Of course, I couldn’t find any reputable study to back this, but there’s a lot of anecdotal evidence, do so why not give it a try.

To Conclude – The Best Heel To Toe Drop

Since  HTT is a personal matter, there’s no such thing as a magical formula that works in general.

The best way to tell which HTT drop works the best for you is to pay attention to your body.

This is because various heel drops impact various body parts, as I have previously explained.

As a rule, the ideal shoe should feel like an extension of your feet the moment you wear them.

When it comes down to it, heel drop is not a deal maker or breaker.

It’s not the most important factor to consider when choosing running shoes.

Instead, let fit, comfort, and functionality be the main consideration. Find out more about how to choose your first running shoes in my beginners’ guide.

How Many Miles is 10000 Steps? The Full Guide to 10k Steps in Miles

Curious about how far 10,000 steps takes you?

Let me keep it simple.

It mostly comes down to your stride length, usually around 2.1 to 2.5 feet for most people.

So, with about 2,000 steps per mile, 10,000 steps usually ends up being close to five miles

Walking and running are two different stories when it comes to step count.

When you’re running, your strides are longer, so you end up with fewer steps per mile.

Let break down this even further.

Stride Length and Step Count

Here’s a general breakdown of how height affects the number of steps per mile:

HeightApproximate Steps per Mile
4’10”2,645
5’0″2,556
5’4″2,397
5’8″2,256
6’0″2,130
6’4″2,018

As you can already tell, taller individuals take fewer steps per mile, while shorter individuals take more. How far you go depends a lot on your personal stride length

HeightApproximate Steps per Mile
4’10”2,645
4’11”2,600
5’0″2,556
5’1″2,514
5’2″2,474
5’3″2,435
5’4″2,397
5’5″2,360
5’6″2,324
5’7″2,289
5’8″2,256
5’9″2,223
5’10”2,191
5’11”2,160
6’0″2,130
6’1″2,101
6’2″2,073
6’3″2,045
6’4″2,018
6’5″1,992


Here’s a handy table showing how steps translate into miles

1,000 steps = 0.47 miles
2,000 steps = 0.95 miles
3,000 steps = 1.42 miles
4,000 steps = 1.89 miles
5,000 steps = 2.37 miles
6,000 steps = 2.84 miles
7,000 steps = 3.31 miles
8,000 steps = 3.79 miles
9,000 steps = 4.26 miles
10,000 steps = 4.73 miles
11,000 steps = 5.21 miles
12,000 steps = 5.68 miles
13,000 steps = 6.16 miles
14,000 steps = 6.63 miles
15,000 steps = 7.10 miles
16,000 steps = 7.58 miles
17,000 steps = 8.05 miles
18,000 steps = 8.52 miles
19,000 steps = 9.00 miles
20,000 steps = 9.47 miles
25,000 steps = 11.84 miles
50,000 steps = 23.67 miles
75,000 steps = 35.51 miles
100,000 steps = 47.35 miles

How Long Does It Take?

This depends on how fast—as in the intensity of steps—you’re going.

Usually, you’ll take about 100 steps per minute at a moderate pace, and up to 130 steps if you’re moving briskly.

But all in all, expect to take around 1,000 steps in ten minutes. It’s faster than a casual stroll but not as rushed as if you were in a hurry because you need to use the bathroom.

At a pace of three miles per hour, it will take roughly one hour and forty minutes to take 10,000 steps.

Steps and Miles: Quick Reference

To make things easier, here’s a chart showing step counts and their corresponding distances in miles:

StepsMiles
1,0000.47
5,0002.37
10,0004.73
15,0007.10
20,0009.47
50,00023.67
100,00047.35

So, if you aim for 10,000 steps, expect to cover just under five miles. If that sounds like a lot, don’t worry! You’d be amazed at how quickly steps add up during your day.

Here’s your guide to step count in one mile running vs walking.

How Long Does It Take to Walk 10,000 Steps?

This depends on your walking speed. At a moderate pace, most people take about 100 steps per minute. So, if you’re walking for exercise, it’ll take you around 1,000 steps in 10 minutes. To reach 10,000 steps, you’re looking at roughly 100 minutes of walking.

I tell my clients that at a 3 mph pace, it usually takes about 1 hour and 40 minutes to hit 10,000 steps. If you pick up the pace to something more vigorous, you can knock that time down to around 80 minutes.

Is 10K Steps Per Day Worth it?

Of course, it is.

Walking is such a great form of exercise

It’s convenient, easy to do, keeps your heart healthy and can be almost done anywhere and anytime. It also helps you get in shape without increasing injury risk.

Plus, walking doesn’t require any special equipment or a gym membership.

Let me back my claims with some science:

  • Study reported that walking about 10,000 steps per day is optimal for reducing the risk of dementia by 50 percent.
  • Research in the JAMA Internal Medicine Journal found a link between the possibility of reduced risk of premature death for every 2,000 steps walked in a day.
  • This study found that walking often helps reduce knee and joint pain in people with arthritis.
  • Study found a direct link between walking and improved mental functions.

I can go on and but on the science is clear.

Many health experts recommend getting at least 150 to 300 minutes of moderate exercise each week, and hitting 10,000 steps daily helps you reach that goal. The CDC even considers walking at 3 mph a moderate activity, so if you’re clocking 10,000 steps, you’re in great shape.

How Many Calories Does Walking 10,000 Steps Burn?

This varies based on factors like body weight, pace, and the terrain you’re walking on. On average, most people burn about 100 calories per mile walked, so 10,000 steps (about five miles) will burn approximately 500 calories.

Remember, this number is highly individual—faster walking or rougher terrain will increase your burn, while slower, leisurely walks might burn less.

Keep Track of Your Steps

A pedometer or fitness tracker is the best way to monitor your daily step count. But, to get the most out of it, you’ll need to wear it consistently. Put it on first thing in the morning and wear it until bed. You’ll better understand how active you are daily by tracking your steps.

You’ll be surprised at how many steps you log without realizing it. I’ve had clients shocked when they see they’re only taking 3,000 steps a day—but once they start tracking and adjusting their habits, those numbers rise quickly.

How to Increase Your Step Count

The average person takes about 4,000 steps a day without thinking much about it—going to work, doing chores, or running errands. You only need about an hour of walking to hit 10,000 steps. If you’re short on time, there are easy ways to sneak in more steps:

  • Schedule walking meetings.
  • Walk while you’re on the phone.
  • Go for a post-dinner stroll.
  • Park farther away and take the stairs instead of the elevator.
  • Walk your dog or go for a nature hike on the weekends.
  • Incorporate short walks into your routine, such as walking during breaks at work or after meals.
  • Use your phone or a fitness tracker to set reminders to stand up and move every hour.
  • Participate in activities that involve movement, such as dancing, playing with pets, or walking with friends or family.
  • Whenever possible, walk to nearby destinations instead of driving.

You don’t have to hit 10,000 steps immediately—it’s all about building the habit and making walking a natural part of your daily routine. Once you start, you’ll find it becomes easier to meet and exceed your daily goal.

Frequently Asked Questions (FAQ)

I know that you have more than one pressing questions about the daily 10,000 steps habit. Let me share my answers to some of the most common concerns.

Is 10,000 steps the best goal?

While 10,000 steps is a widely recognized benchmark, it’s important to remember that it serves as a general goal rather than a one-size-fits-all standard. For beginners, starting with 5,000 steps can be a more achievable target. As you build your fitness and become more accustomed to regular walking or running, you can gradually increase your step count based on your lifestyle and health goals. Ultimately, the best goal is one that fits your personal circumstances and motivates you to stay active!

What if I can’t reach 10,000 steps every day?

It’s perfectly fine if you can’t hit 10,000 steps every day, especially as a beginner. The key is to focus on gradual improvement. Aim to increase your step count slowly over time, celebrating small milestones along the way. Consistency is more important than perfection!

How does walking compare to running in terms of health benefits?

Both walking and running offer significant health benefits, but they do so in different ways. Walking is generally easier on the joints and can be sustained for longer periods, making it ideal for beginners or those recovering from injuries. Running, on the other hand, burns more calories in a shorter time frame and can help build cardiovascular endurance faster. Ultimately, the best activity is one that you enjoy and can stick with!

Can I use a pedometer or fitness tracker to count my steps?

Absolutely! Using a pedometer or a fitness tracker can be a great way to monitor your step count and keep you motivated. Many smartphones also have built-in pedometers, making it easy to track your daily activity without any extra equipment. These devices often provide additional insights, such as calories burned and active time, which can help you understand your overall fitness level.

Conclusion

So, how many miles is 10,000 steps? Roughly 5 miles, depending on your stride length.

The real challenge is ensuring you hit that number consistently, but it’s entirely achievable with some small changes to your daily habits.

Whether walking for health, fitness, or just to get outside and move, aiming for 10,000 steps a day is a fantastic goal.

Got questions or want to share your step count journey? Drop a comment below—I’d love to hear how you’re working walking into your daily routine!