So you’re eyeing those featherlight, barely-there shoes that scream natural, efficient, Born to Run energy. Tempting, right?
You’re not alone. A lot of runners (me included) get sucked into the idea of running “naturally”—less shoe, better form, more connection to the ground. Sounds good in theory. But here’s the kicker:
If you go all-in without a plan, you’re one bad run away from a boot and crutches.
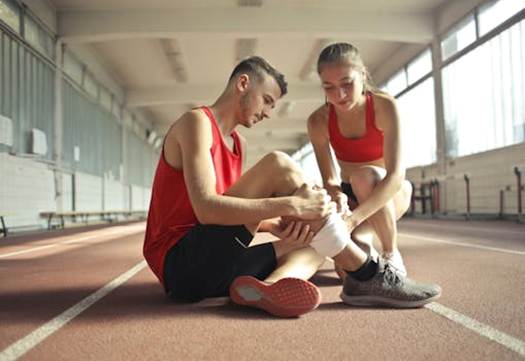
No exaggeration—one marathoner I know ran a single mile in brand-new zero-drop shoes and woke up the next day with a fractured heel. Game over for the season.
Moral of the story? Minimalist shoes aren’t bad—they’re just not plug-and-play. They’ll strengthen muscles you didn’t know existed. They’ll force you to run lighter. But they’ll also punish you if you don’t respect the transition.
This guide cuts through the marketing fluff and shows you what these shoes really are, who they’re for, and how to make the switch without wrecking your legs.
Let’s get into it.
🧐 What the Heck Are Minimalist Running Shoes?
Think of minimalist shoes as the barefoot runner’s compromise: enough protection to keep your soles from getting shredded, but none of the cushy overbuilt stuff traditional shoes have.
They’re not for “support.” They’re for freedom. But they come with responsibility.
Here’s what defines a minimalist shoe:
🔻 1. Low or Zero Heel-to-Toe Drop
- Most traditional running shoes stack your heel 10–12 mm higher than your toes.
- Minimalist shoes? Zero to 4 mm.
- This levels out your stride and encourages a midfoot or forefoot landing, which can reduce heel striking—if your form is ready for it.
⚠️ Caution: Switching from a high-drop shoe to zero-drop cold turkey? Your Achilles and calves will scream. Ease in, or pay the price.
🦶 2. Minimal Cushioning (Thin Soles)
- Expect little to no padding.
- You’ll feel the cracks in the sidewalk. That’s by design.
- The idea is to wake up your feet and lower legs—they’re supposed to absorb shock, not your shoe.
Translation: Your feet have to work harder. That’s a good thing… eventually.
💪 3. High Flexibility
- You should be able to roll the shoe up like a burrito.
- Why? Because your foot bends and twists as you run—your shoe should too.
- A flexible shoe lets you move naturally, stride to stride.
🧊 4. Wide Toe Box
- Minimalist shoes usually ditch the tapered, pointy forefoot.
- Instead, you get a foot-shaped toe box, so your toes can spread and splay like nature intended.
More toe splay = better balance + fewer blisters. But don’t assume all minimalist shoes are wide enough—fit still matters.
🪶 5. Super Lightweight
- Most minimalist shoes weigh under 8 oz (225g).
- In comparison, traditional trainers can push 12 oz (340g).
- That’s up to 100g per shoe saved, which can improve running economy by ~1%.
Lightweight shoes feel fast. Just don’t confuse “fast-feeling” with “safe for speed.”
⚖️ Quick Breakdown: Traditional vs. Minimalist Shoes
|
Shoe Type
|
Drop
|
Cushion
|
Flexibility
|
Toe Box
|
Weight
|
|
Traditional
|
10–12 mm
|
Plush, thick
|
Stiff
|
Narrow
|
10–12+ oz
|
|
Minimalist
|
0–4 mm
|
Thin, ground feel
|
Highly flexible
|
Wide, foot-shaped
|
< 8 oz
|
🧠 Where Did This All Come From?
Minimalist shoes exploded after Born to Run (thanks, McDougall) lit a fire under the barefoot running movement around 2010. The book made a compelling case: maybe modern shoes are overbuilt, and we’ve forgotten how to run like humans were meant to.
There’s some truth there—especially about over-striding, lazy foot mechanics, and letting shoes do too much of the work. Minimalist shoes strip away the crutches and force you to engage the engine.
But again—they’re a tool, not a magic fix. They expose weaknesses just as much as they build strength.
🥾 Iconic Examples?
- Vibram FiveFingers – Toe gloves. Max ground feel. Near-zero cushion. Not for the faint of foot.
- Merrell Vapor Glove, Xero Shoes, Vivobarefoot – Look more like sneakers, but follow the minimalist playbook.
Should You Run in Minimalist Shoes? Here’s the Real Talk
Minimalist running shoes aren’t magic. They’re not evil either. They’re a tool—just like any other piece of gear—and whether they help or hurt comes down to your body, your goals, and how smart you are about the switch.
I’ve seen runners transform their form and build bulletproof feet in minimalist kicks… and I’ve seen others wreck their calves and Achilles because they rushed the transition or ignored the warning signs.
So before you ditch the cushion and go full “Born to Run,” do yourself a favor: check yourself first.
Here’s how to know if you’re ready to go minimal—or if you should pump the brakes.
✅ Green Lights: You Might Be Ready If…
🦶 You’ve Got Strong Feet and Ankles
If you walk barefoot a lot, do balance drills, yoga, or strength work—great. That stuff lays the groundwork. Minimal shoes demand strength in the little stabilizer muscles most runners never think about.
If your feet are weak, the shoes will let you know real fast.
🤸♂️ You Can Balance on One Leg With Eyes Closed
Try this test:
Stand on one leg. Eyes closed. Hold it for 30 seconds.
No wobbling? Good. That’s solid proprioception, and it means your nervous system and muscles are already doing the kind of work minimalist shoes demand.
💥 You’re Not Injured
This one’s simple. If you’re hurt—or coming back from a nagging injury—now is NOT the time to overhaul your footwear. Wait until you’re in the clear.
🐢 You’re Patient as Hell
The people who thrive in minimal shoes take their time. They start with 5-minute jogs. They listen to their body. They respect the adaptation process. If you’re the “I’ll ease into it over a few months” type, you’ll do fine. If you’re the “YOLO, let’s run 10 miles in my new zero-drops” type… good luck with that.
🧠 You Actually Care About Form
Minimal shoes give instant feedback. Overstride? Heel-smash the ground? You’ll feel it. So if you’re the kind of runner who geeks out on mechanics and likes dialing in your form, you’ll probably appreciate what minimalist running teaches you.
🚩 Red Flags: Be Cautious (or Skip It) If…
⚠️ You’ve Got Tight Calves or Achilles
Here’s the big one. If you’ve spent years running in high-drop, cushy shoes, your Achilles tendon is used to a shorter range of motion. Going straight to zero-drop puts stress where your body isn’t ready for it.
This is how runners end up with Achilles tendinitis, calf pulls, or worse. If your lower leg feels like a tight rope? Stretch it out and ease in slowly—or wait.
🦶 History of Foot Injuries
Plantar fasciitis, stress fractures, collapsed arches—if you’ve battled these, minimal shoes might be risky. You’ll need a very slow transition and possibly help from a PT or coach. Not impossible, but definitely not casual.
👟 You Rely on Stability or Motion-Control Shoes
If your current shoes are doing all the work to control your stride, going minimalist is like ripping the training wheels off and going full send on a downhill. It might work… but it might also wreck your stride if your feet aren’t ready to take the load.
⚖️ You’re on the Heavier Side
More weight = more force per step. Studies (like the 2017 review) suggest runners over ~157 lbs face a higher risk of injury when switching to minimalist shoes. That doesn’t mean don’t do it—just take your time and maybe keep a little cushion in the rotation.
🛑 You Don’t Want to Do the Work
If you just want to slip on shoes and head out the door, minimalist shoes probably aren’t for you. Succeeding in them usually requires extra strength work for the feet, calves, and hips. If you’re not up for that, stick to what works and save yourself the rehab bill.
🦶 The Real Benefits of Minimalist Running Shoes (If You Ease In Smart)
Let’s get something straight — minimalist shoes aren’t just some hip trend or barefoot fantasy. When used the right way, they can seriously level up your running. We’re talking stronger feet, better form, and a more connected stride. But this only works if you transition smart, not cold-turkey from max cushion to zero drop.
So what’s the fuss really about? Let’s break down what minimalist running shoes can do for your body — and why some runners never go back once they’ve made the switch.
⚖️ 1. Encourages a More Natural Foot Strike (No More Heel Slamming)
Here’s the deal: big cushioned shoes let you get away with bad form — mostly by letting you slam into the ground heel-first without feeling it. But that heel-first landing puts the brakes on your momentum and sends shockwaves straight up your legs.
Minimalist shoes? They don’t play that game.
With no pillow under your heel, you’re forced to land closer to your midfoot or forefoot. If you don’t? It hurts. Simple as that.
Landing under your center of mass = better efficiency, less energy wasted, and less strain on your knees. In fact, a 2023 scientific review backed this up — barefoot-style running is linked to lower impact loading on the knees than traditional shoes.
Plenty of runners (myself included) have seen knee pain disappear after switching to midfoot striking in minimal shoes. It’s not magic — just better mechanics.
🧠 2. Boosts Proprioception & Balance (AKA: You Feel the Ground Again)
Proprioception is just a fancy word for “knowing where your body is in space.” And it matters a lot when you run.
Minimalist shoes strip away the thick rubber barrier between your foot and the ground — so you actually feel what you’re stepping on. Every crack in the sidewalk. Every pebble on the trail. At first it’s jarring. But over time? It sharpens your instincts.
Like riding a bike without training wheels, it forces you to balance better and run lighter. One trail runner told me switching to thin-soled shoes made him way more agile — he learned to trust his feet again. That awareness carries over into faster reaction times and fewer rolled ankles down the line.
🦵 3. Strengthens Feet, Calves & Lower Legs
This one’s huge. Cushioned shoes do the work your muscles should be doing. Minimalist shoes flip that on its head.
Your arches? They suddenly have to support themselves. Your calves and Achilles? They wake up and get back in the game. It’s like natural strength training — for muscles you didn’t even know were asleep.
A 2019 study in Medicine & Science in Sports & Exercise found that just walking in minimalist shoes for 8 weeks increased foot muscle strength as much as dedicated foot workouts. That’s wild.
But heads up: your first few weeks in minimalist shoes will hurt — especially in your calves. One runner described his first 7-miler in Vibrams like this: “My calves were torched. I was hobbling like I’d just finished a marathon.” That’s normal. Those burning muscles? They’re waking up.
With time, they get stronger — and that strength carries into every stride you take.
🪶 4. Lightweight = Faster, Smoother Running
Minimalist shoes are light — like really light. Most weigh less than your average racing flat. And that’s not just for show.
For every 100g (~3.5oz) you cut from your shoe, studies show you improve your running economy by about 1%. Doesn’t sound like much? It adds up. A few seconds per mile shaved off, and suddenly you’re chasing new PRs without doing anything different.
Light shoes also encourage a quicker cadence — more steps per minute — which naturally reduces overstriding and impact. That “floaty” feeling you get in minimal shoes? It’s real. You feel fast. Free. Efficient.
That’s not hype — that’s better biomechanics in motion.
✅ 5. Potential for Fewer Overuse Injuries (Done Right)
Let’s be honest: most runners battle injuries at some point. Knees, hips, IT bands — the usual suspects. A lot of that comes from how we land and how our bodies absorb stress.
Minimalist running shifts the stress:
- Away from the knees
- Onto the foot and calf muscles (where it belongs)
For heel-strikers with knee pain, switching to a forefoot or midfoot strike often brings relief. Without a big, soft heel to crash on, runners tend to shorten their stride, increase cadence, and land softer — all good things.
In one study with Army soldiers (not exactly known for babying their bodies), those using minimalist shoes performed better on fitness tests and had no higher injury rate than those in regular shoes — but they transitioned carefully.
So here’s the key takeaway: minimalist running might help prevent some injuries, but only if you give your body time to adapt. Go too fast, too soon? You’ll swap one injury for another.
⚠️ Minimalist Shoes: The Downsides (and How Not to Wreck Yourself)
Let’s be clear: minimalist shoes aren’t magic. They’re tools — powerful, risky tools. Used right, they can strengthen your stride and build resilience. Used wrong? They’ll chew you up and spit you out.
Here’s what you need to know about the downsides… and how to stay in one piece while reaping the benefits.
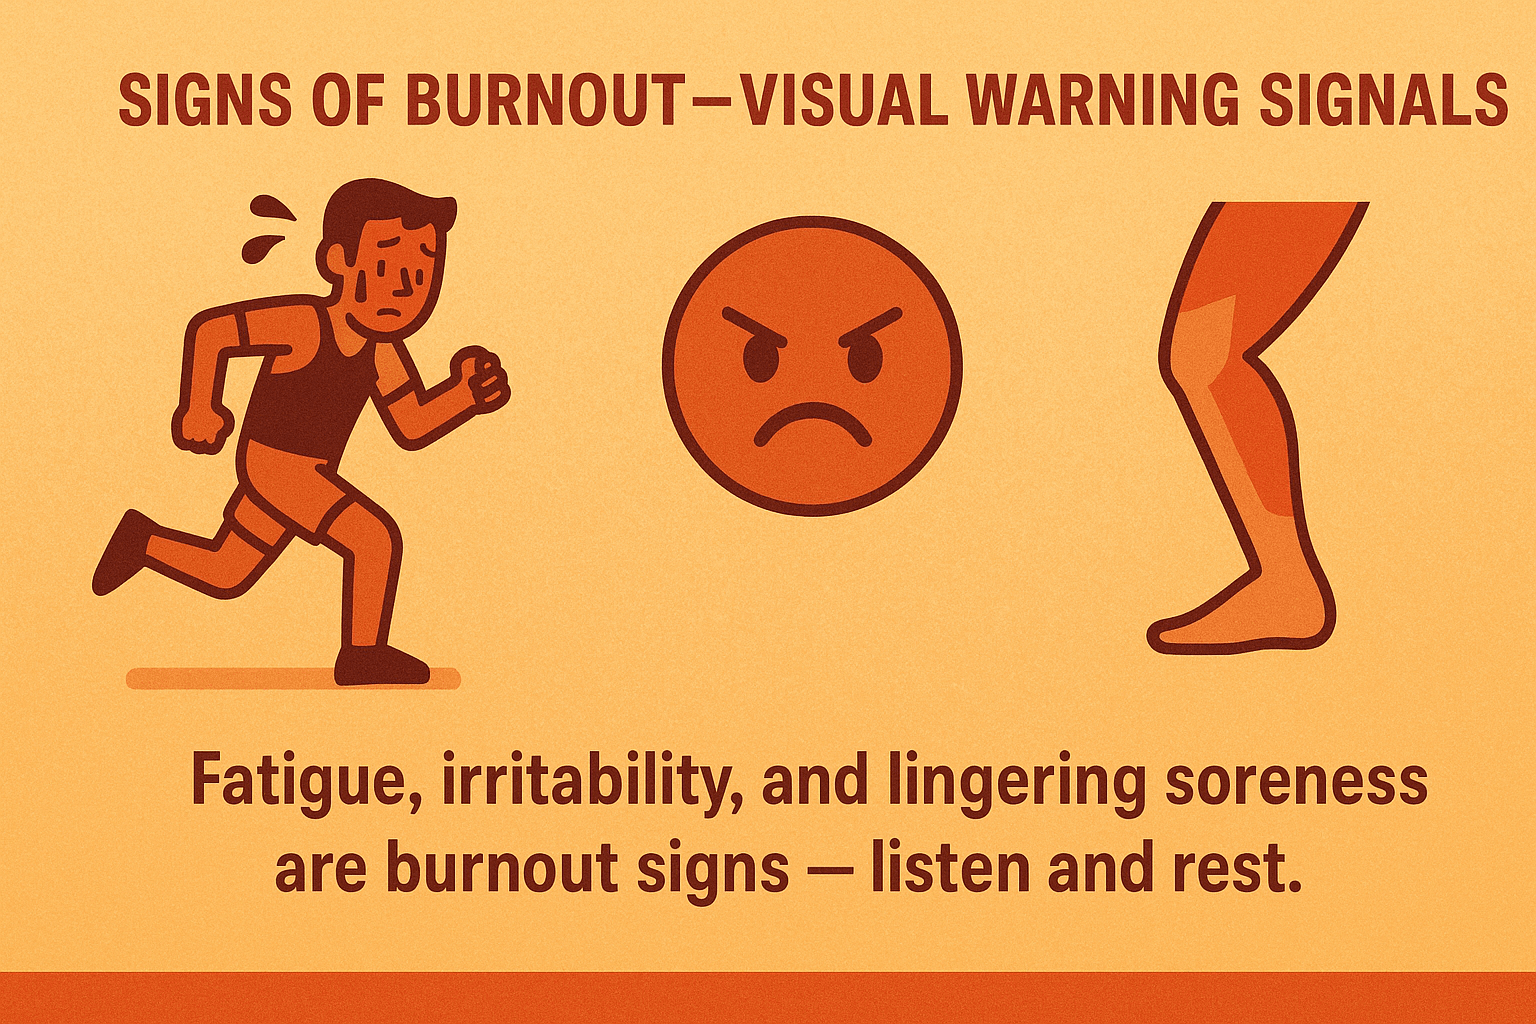
🔻 1. Going Too Far, Too Fast = Injury City
This is the rookie mistake. You grab a fresh pair of zero-drops, lace ‘em up, and try to run your usual 5-miler like nothing’s changed. Bad move.
Your body’s used to cushion. Yank that away too fast and you’re loading tendons, bones, and calves like never before.
Common injuries?
- Calf strains
- Achilles tendinitis
- Plantar fasciitis
- Metatarsal stress fractures
One runner broke his heel bone after one short run in Altras — true story. Why? No transition, no prep, just ego.
What to do instead:
- Cut your weekly mileage by 10–20% when transitioning.
- Start with short, easy runs.
- Mix in walking.
- Rotate with your old shoes for a few weeks (or longer).
Check your ego at the door. The “too much, too soon” trap is real, and it doesn’t care how fit you are.
🔻 2. Your Calves and Achilles Will Take the Hit
Minimalist running = more forefoot or midfoot striking. That means your calves and Achilles suddenly take on way more work. It’s like throwing a new lifter into a squat max without a warm-up.
Expect serious soreness early on — that’s normal. But overstretch your Achilles before it’s ready? Now you’re staring down months of pain.
One guy tried to “run on his toes” aggressively in his first half marathon in minimalist shoes. He ended up sidelined for 18 months with Achilles and plantar issues. Don’t be that guy.
How to protect your lower leg:
- Stretch your calves (both gastrocnemius and soleus) regularly
- Strengthen them, too — heel drops, toe walks, calf raises
- Ease into forefoot running gradually
- Watch for sharp pain in your Achilles — that’s a red flag, not a warm-up
Alternate shoes early on if needed. Give your calves time to recover. This isn’t a toughness test — it’s about smart adaptation.
🔻 3. At First, You’ll Feel Clumsy (and That’s Normal)
Here’s something most people don’t mention: your balance might suck at first. That squishy shoe you ditched? It was doing a lot of micro-stabilizing for you. Now your foot muscles have to do that work — and they’re rusty.
In a 2021 study, runners switching to barefoot-style running had less stability, even after 8 weeks. Your proprioception (body awareness) takes time to catch up.
To avoid face-planting on the trail:
- Stick to flat, safe surfaces in the beginning
- Avoid rocky terrain, uneven sidewalks, or aggressive downhills
- Add balance drills to your weekly routine (think: single-leg stands, wobble board, agility work)
Your feet are learning a new language. Be patient while they catch on.
🔻 4. Expect Sore Feet and Blisters in New Places
Don’t be surprised if your feet start barking.
- Soles hurting from direct impact
- Blisters from increased movement inside the shoe
- Arch or top-of-foot soreness from using muscles that used to coast along for the ride
Your skin will toughen up, and your feet will get stronger — but it takes time.
What helps:
- Use your minimalist shoes for walking first
- Build up to running with short, easy efforts
- Make sure the shoe fits with room for swelling
- Try thin socks that prevent hot spots, or go sockless once your feet are used to it
Your feet will adapt. Just don’t throw them into the deep end before they know how to swim.
🔻 5. They’re Not a Shortcut to Speed or Injury-Proofing
Here’s the biggest myth: “Minimalist shoes will make me faster and fix my form.” Nope.
In fact, you’ll probably be slower at first, because you’re shortening your stride, adjusting form, and dealing with soreness. And if you’ve got sloppy mechanics? These shoes won’t fix them — they’ll expose them.
A coach I know compared it to driving a sports car: “It’s fast and responsive — but it’ll punish every bad habit you have.”
If you want better performance, you’ve gotta earn it:
- Strengthen the right muscles
- Improve your form
- Be consistent
- Let the shoes enhance good habits — not fake them
Use minimalist shoes as a tool to build better mechanics over time. Not as a shortcut.
⚠️ Avoiding the Downsides of Minimalist Running (Don’t Be a Hero)
Switching to minimalist shoes? Cool. But don’t charge into it like you’ve got something to prove. That’s how runners get sidelined — not stronger.
The short version: ease in slow and listen to your body like your training depends on it — because it does.
🚨 Soreness = Normal
Sharp pain = Red flag.
If the top of your foot starts aching (classic sign of a brewing metatarsal stress reaction) or your Achilles gets wicked tight, back off. Don’t push through it just to “be tough” in your new zero-drops.
Too many runners feel like they have to prove their “minimalist purity.” That’s nonsense. You’re here to run better — not win a barefoot badge of honor.
🥾 Mix Your Shoes (Yes, Really)
Want to avoid injury? Alternate between your new minimalist shoes and your regular runners. That’s not cheating — that’s smart adaptation.
In fact, one study on soldiers found that folks who rotated between minimal and traditional shoes did better and had fewer injuries. Your feet need time to adapt to the new mechanics. Let ‘em.
Use minimalist shoes like a tool, not a religion:
- Use them for short, easy runs.
- Use them for drills or recovery jogs.
- Use your old shoes when your legs are beat.
Minimalist running isn’t an all-or-nothing lifestyle. It’s about intention. Be smart, not stubborn.
👟 How to Choose the Right Minimalist Running Shoe (Beginner’s Buying Guide)
Okay, so you’re ready to try minimalist shoes — but how do you pick a pair that won’t wreck your feet? Don’t just grab whatever looks cool on Instagram. You need function first.
Here’s your checklist:
✅ 1. Low Heel-to-Toe Drop
Look for shoes with 0 to 4 mm drop. Zero-drop is best for mimicking barefoot mechanics, but if you’re coming from thick heel-cushioned trainers, a 4 mm drop can help you transition smoother.
Coach’s Tip: Start with a 4–6 mm drop shoe. Once your calves and Achilles stop freaking out, move toward zero-drop.
✅ 2. Thin, Flexible Sole (Low Stack Height)
Minimalist shoes should be low to the ground — think 8–15 mm stack height total. You want to feel the ground, not float above it.
- More ground feel = better feedback.
- For rough trails, maybe go slightly thicker or look for a rock plate to avoid bruising.
Quick test: If you can’t bend the shoe in half or twist it like a rag, it’s not truly minimalist.
✅ 3. Wide Toe Box & Natural Fit
This one’s huge: your toes need room to spread.
- Look for an anatomical shape, not a pointy fashion sneaker.
- Brands known for roomy toe boxes: Altra, Xero, Vivobarefoot, Merrell Glove series.
The shoe should feel secure around the heel and midfoot — but never jam your toes. You should almost forget the shoe’s there. That’s the goal.
✅ 4. Lightweight
Minimalist shoes are usually in the 5–8 oz range per shoe. If it’s pushing 10 oz or more, it’s not minimal — it’s hiding cushioning or structure somewhere.
Don’t obsess over a 1 oz difference, but know that lighter = less interference with your natural stride.
✅ 5. Breathable, Barefoot-Ready Materials
Look for:
- Thin mesh, knit, or soft uppers.
- No big plastic heel cups or padded collars.
- Seamless interiors (so you can go sockless if you want).
Breathability is key if you’re doing longer runs or live somewhere warm. You want your foot to move and expand — not feel locked down like it’s in ski boots.
✅ 6. Road vs. Trail — Choose Based on Where You’ll Run
Minimalist shoes aren’t just for the road — but trail versions need extra protection.
Road use?
- Vibram FiveFingers, Merrell Vapor Glove, Xero HFS — all ultra-minimal.
Trail use?
- Look for lugs and a rock plate (like the Merrell Trail Glove or Xero Mesa Trail).
- Pure barefoot shoes on rocky trails = sore feet, fast.
Pick the tool that fits the job. A stripped-down road flat isn’t made for rooty, rocky mountain terrain. You’ll feel it — and not in a good way.
How Long Do Minimalist Shoes Last?
Good news: Minimalist shoes often outlast traditional running shoes.
Why?
- Traditional shoes rely on foam that compresses and dies.
- Minimalist shoes? No foam = nothing to break down.
- The weak link is usually the outsole rubber or upper fabric, not the midsole.
One guy logged 1,700 miles in a pair of Vibram FiveFingers before the sole gave out. Not everyone will hit that, but 600–800+ miles isn’t rare for well-made minimal shoes.
🔍 When to Retire Your Minimalist Shoes
Even without foam, they still wear out. Here’s how to tell:
1. Outsole Is Worn Flat
Check the bottom. If the grip is gone, or the rubber’s thinning through in key spots (like the forefoot), you’re losing protection and stability.
2. Upper Is Ripped or Loose
Tears around the toe box? Uppers peeling away from the sole? That glove-like fit starts slipping, and your foot moves too much = potential blisters or misalignment.
3. Ground Feel Changes
If you had an insole and now it feels numb, it might’ve compressed flat. Try removing it or replacing it. Minimal shoes are about feel—you should notice when that feedback disappears.
4. Your Body Starts Complaining
New soreness or aches in familiar shoes? Don’t ignore that.
Some experienced minimalist runners rotate 2–3 pairs and pay attention to which one leaves them feeling off. When one pair consistently makes you feel worse post-run? Time to say goodbye.
Pro Tip:
Don’t push dead shoes to save a few bucks. One veteran runner put it perfectly:
“Trying to squeeze 50 more miles out of your shoes isn’t worth the injury that sets you back 500.”
Replace when needed. Your feet (and mileage goals) will thank you.
👟 Minimalist Shoes: Care, Rotation, and When to Let Go
One tricky thing about minimalist shoes? They don’t always “feel” dead the same way cushioned shoes do.
With max-cushion shoes, it’s obvious — the foam flattens out and suddenly every sidewalk crack feels like a punch in the arch. But in minimalist shoes? You already feel the ground. That’s kind of the point. So when they wear out, it’s less about feel and more about mechanics.
You’ve gotta be more of a visual detective:
- Are the treads worn flat?
- Do they twist weirdly or feel sloppy around the midfoot?
- Has the shape stretched or collapsed?
Those are your clues.
👟 Rotate Your Shoes — It’s Not Just for Fancy Folks
If you can swing it, having two pairs of minimalist shoes on rotation is a smart move.
Here’s why:
- Each pair gets time to dry out (especially if you run sockless — hello, sweat)
- You can assign one pair for longer runs and one for short or easy runs
- When one pair dies, you’ve got a backup ready — no panic shopping the night before a race
Some runners also rotate a minimalist pair with a traditional shoe — and that’s perfectly fine. In fact, mixing it up might actually reduce injury risk by changing how the load hits your legs. One shoe doesn’t have to do it all.
🧼 Shoe TLC: Keep Them Dry, Cool, and Clean
Minimalist shoes don’t have much fancy tech, but they still need some love.
Here’s how to help them last:
- Let them air out after every run
- Pull out the insoles to dry separately if you can
- Hand wash if they stink — or machine wash if the manufacturer says it’s safe
- Never leave them in a hot car or on a radiator (heat ruins glue and warps the shape)
- Watch the laces — minimalist shoes often use thinner ones that can snap. Replace them before they fail mid-run
Bottom line: treat them like gear you rely on, not gym socks you forget in a corner.
⏳ How Long Do They Last?
Most minimalist shoes will give you at least 400–500 miles, if not more. They don’t have cushioning to flatten out — but they do break down structurally over time.
One runner (half-jokingly) admitted he ran 3,400 miles in his Vibram FiveFingers before realizing they were “dead.” Let’s just say… most of us shouldn’t take it that far.
If you’re logging mileage regularly, keep an eye (and even an ear) on your shoes. Subtle changes in how they land or flex are often early signs they’re cooked.
And hey, minimalist shoes usually run cheap(er), and their cost-per-mile is often excellent — that’s a nice perk.
🎯 Final Take: Minimalist Running Is a Lifestyle, Not a Hack
Making the switch to minimalist shoes? It’s not just about footwear — it’s about how you run, how you move, and how you pay attention to your body.
You’re not strapping on magic shoes. You’re signing up to retrain your form, build up weak links, and be patient. And that’s not a bad thing. A few months in, you might notice:
- Better running economy
- Stronger feet and calves
- Fewer weird aches from overstriding or heavy impact
You might also rediscover the fun of running — that stripped-down, carefree feeling of just moving through space. A lot of runners say minimalist running brings back a childlike sense of play. It reconnects you to the sport.
But let’s be clear:
👉 You don’t have to go full barefoot to be a real runner.
👉 You don’t need to toss your traditional shoes forever.
Coach Dack’s take? Use the right tool for the right job.
Minimalist shoes are great for:
- Short runs
- Easy days
- Form drills
- Strengthening your foundation
But for long hauls, tempo runs, or injury-prone phases? A little cushion might go a long way. And that’s cool too.
You Do You
Some runners try barefoot-style running, clean up their stride, get stronger… then jump back into traditional shoes with way better form — and thrive. Others go all-in, rocking marathons in sandals or toe shoes.
There’s no one path. Just be smart. Be honest with yourself. If minimalist shoes help you run better, awesome. If they don’t? No big deal.
Final Thoughts on Minimalist Running: Go Slow, Stay Smart, Run Strong
So you’ve made it this far — maybe you’ve already dipped your toes into minimalist shoes, or maybe you’re still thinking about it. Either way, here’s the real talk as you wrap up this journey (or kick it off):
💬 1. Be Patient — Seriously
You’re not gonna become a stronger, more efficient runner overnight. And yeah, some days you’ll feel clumsy or wonder why your calves are screaming after a short run. That’s part of the deal. Your body’s learning. Adapting. And sometimes, that learning curve is steep.
Progress in running is never linear — it’s more like two steps forward, one back, then three steps forward the week after. If something hurts, pull back. Let it heal. Then keep going. This is a long game, and smart runners play the long game.
🏋️♂️ 2. Stay Well-Rounded
Minimalist shoes alone won’t make you bulletproof. Keep strength training. Mix in some cross-training. Rotate your running surfaces. Try different shoes if you need to.
The best runners I know don’t rely on one silver bullet. They build a toolbox — and minimalist running is just one tool in that kit.
✌️ 3. Celebrate the Little Wins
You stood on one foot longer without wobbling? That’s a win. You felt less knee pain on today’s run? That’s a win. You discovered your pinky toe exists and can actually move? Huge win.
Every one of those moments means your body is waking up, recalibrating, and getting stronger.
🌍 4. Lean on the Community
There are tons of runners out there on this same path — from Reddit forums to local groups to longtime barefoot advocates. Some have been doing this for a decade-plus, and their stories are gold.
One guy I spoke to? Switched to minimalist shoes 14 years ago after chronic back pain. Still running strong. Still wouldn’t go back. These stories keep us going when the journey gets bumpy.
👣 5. Shoes Don’t Run. You Do.
This one’s big.
Minimalist shoes won’t fix bad form, weak feet, or poor habits. They’re not magic. They’re feedback tools. Teachers. Mirrors. You still have to do the work — consciously, consistently, and patiently.
So if things start clicking and you’re running smoother? Give yourself the credit. You earned it.
Your Next Move
Whether you stick with minimalist shoes for good, or just pick up a few lessons from the experience, here’s what you gain:
- A deeper connection to your body
- Smarter form
- Stronger feet
- Better awareness on every run
That’s a win no matter what shoes you end up in.
🗣 Now I’m Throwing It to You:
Have you tried minimalist or barefoot-style running? Thinking about it? Already made the switch?
Drop a comment or shoot me a message — I’d love to hear what you’re going through. What’s working? What’s hard? What surprised you?
We’re all out here learning, experimenting, and trying to keep our bodies strong for the long haul — and your story might help someone else take that first step.
For more on the pros and cons of minimalist running, check the following resources: