Macros For Runners – Your Guide To The Runners Diet

runner eating

Looking for a practical runners diet advice? Then my guide to macros for runners is what you need.

Here’s the truth. Eat the right things at the right times, and you’ll run better.

In fact, if you’re serious about reaching your full potential, you cannot ignore the importance of a proper runner’s diet.

Being a runner means more than just logging the miles.

Having your nutrition plan dialed in is equally important.

This is the case whether you’re running to lose weight, to run a race, or just to be in shape.

Would you like to learn how to design the perfect training nutrition plan when running?

Then you’ve come to the right place.

In today’s +6000-word post, I’ll delve deep into the basics of proper runners diet for beginners.

Yes, it’s pretty exhaustive guide, but I felt like I had to do it because the topic of nutrition for runners is that important.

More specifically, you’ll learn the following:

  • What is runners diet
  • The exact macros for runners
  • Carbohydrates for runners
  • Protein for runners
  • Fats for runners
  • How to design a running nutrition plan
  • Meal plan for beginner runners
  • and so much more.

By the end of this post, you’ll have all the pieces you need to start eating healthier.

Disclaimer: Before you go any further, I’d like for the record to clearly state that I’m not a certified nutritionist or dietitian.

While I went to great length to research the nutrition guidelines shared here, don’t hesitate to consult with a professional before you embark on a new diet.

What is Runner’s Diet?

Just as it is important to follow a well-rounded running, it is essential to fuel your body well.

But let’s make things clear before we proceed.

Runners’ diet is not about weight loss.

Eating healthy while running doesn’t mean counting calories or removing entire food groups from your daily eating menu.

Sure, healthy eating promotes positive weight changes and a healthier lifestyle, but the word diet has nothing to do with trying to remain unrealistically thin, instilling strict dietary limitations, or depriving yourself of the foods you love.

In fact, healthy eating involves eating in such a way that makes you feel great, increases your energy levels, regulates your mood, and improves your overall fitness and health levels.

Runners diet is all about consuming the right foods at the right times so your body can have all the energy and fuel needed to perform at its best.

The Main Macros For Runners

There’s a broad range of nutrients we need, but in general, the main ones, what’s known as macronutrients, can be broken down into three categories: Carbohydrates, proteins, and fats.

In essence, macronutrients, or macros for shorts, stand for a broad range of chemical compounds that our bodies need in large amounts for optimal functioning (unlike micronutrients, which are needed in small amounts).

The Exact Runners Macros Breakdown

As a general rule, a healthy diet should be (1) high in the complex carbohydrates, (2) moderate in lean protein, and (3) sufficient in healthy fats.

That translates to about 55 to 65 percent of daily calorie intake coming from carbohydrates, 20 to 25 percent from fats, and 15 to 20 percent from proteins.

Of course, these proportions aren’t written in stone.

They depend on many factors, including your fitness level, training intensity, body weight, physiology, and personal preferences.

Let’s dive a little deeper into the importance of each macro for runners.

The Runners Diet – Carbohydrates For Runners Explained

Also known as saccharides, carbohydrates, or carbs, for short, are your body’s preferred source of energy.

Carbohydrates include sugars, cellulose, starches, and a host of other compounds found in living organisms.

These occur naturally in plant-based foods, such as grain, such as grains.

But not all carbs are the same.

The fact is, most foods contain more than one, or a mix of carbs, proteins, and fats, in different amounts and ratios.

That’s one of the reasons designing nutrition plans is tricky.

The Main Building Blocks

Chemically, carbohydrates are organic molecular compounds made from three elements: carbon (C), hydrogen, and oxygen (H2O), with a ratio of hydrogen twice that of oxygen and carbon.

These molecular compounds are divided into two main categories:

  • The complex carbohydrates—the polysaccharides (mostly starches and fiber), and
  • The simple carbohydrates—the monosaccharides and disaccharides (mostly sugars).

Both types, as we are going to see, differ in their chemical structure and the impact they have on your body.

The Process

Think of carbohydrates as your body’s primary source of crude oil.

When you consume foods containing carbohydrate (except fiber), your body breaks it down and converts it into glycogen (a form of glucose), then stores in your muscles, liver, and bloodstream.

These stores act as fuel to make energy—just like high-octane unleaded gas.

When you start running, the glycogen stores are converted into energy that contracts the working muscles.

The longer and/or harder you run, the more glycogen you use up.

For most runners, glycogen stores are depleted after a 90- to 120-minute effort (think long runs).

What’s more, when you consume more carbs than you use up, the excess is turned into fat (stored energy for later use).

That’s why too much of it results in weight gain (and one of the reasons low carb-diet are so popular).

Simple Vs. Complex

I hate to sound like a broken record, but not all carbohydrates are created equal.

These “sugars” can be divided into two main forms: the simple and the complex.

This classification depends on the carbohydrates’ molecular structure, which has a drastic effect on how they are digested by your body.

The Simple Carbs

If you think that soda cans and chocolate bars would be in this category, you’re right.

Also known as the bad carbohydrates, simple carbs include all the monosaccharides—containing one sugar unit, and disaccharides—containing two sugar units.

Simple carbs are tasteful and ideal for a short-term energy boost as they require no further breakdown from enzymes and, thus, are quickly absorbed into the bloodstream.

That might sound like a good thing, but there is, as we are going to learn shortly, a huge downside to it.

Here’s the bad news.

Simple carbs are low in fiber and nutrients and offer little more than calories regarding overall nutrition.

For that reason, these carbs are usually referred to as empty calories.

Research has revealed that consuming these carbohydrates can lead to a host of health problems like type 2 diabetes, obesity, etc.

So, as a rule of thumb, avoid these carbs, except on occasional indulgences or cheat days.

The Main Sources of Simple Carbs

Simple carbs include:

  • Sugar
  • Syrup
  • Candy
  • Cake
  • Soda
  • Beer
  • Fruit juices
  • White bread
  • Pastries
  • White pasta
  • White rice

(Practically every food item you need to avoid if you’re serious about reaching your fitness and health potential).

macros for runners

The Complex Carbs

Complex carbs, also known as polysaccharides, are starches made up of long chains of simple sugar units bonded together in what’s known as saccharide chains.

Also, these carbs are made from longer molecules chains than their simple counterpart.

That’s why these carbs take longer to break down and get digested by your body.

High in The Right Nutrients

In general, complex carbs are unprocessed (or slightly processed) and still contain a variety of essential nutrients, and fiber found naturally in the food.

What’s more, complex carbs are low to moderate in calorie density.

This means that you can consume filling amounts and satisfy your hunger, but not worry about throwing your whole nutrition balance and calorie intake out of whack.

The Main Sources

High-quality examples of good carbohydrates include:

  • Whole grains
  • Broccoli
  • Lentils and rice
  • Sweet potatoes
  • Pasta
  • Bananas
  • And other fresh and dried fruits.

Macros For Runners  – Carbs Needs

According to the Institute of Medicine, the recommended dietary daily allowance for carbohydrates is about 130 grams per day.

This is the bare minimum required to fuel your brain, central nervous system, and red blood cells.

But as a runner, you’ll need, definitely, more than 130 grams per day.

In fact, your carbs needs in grams will vary according to many factors, including your training level, training intensity, fitness goals, and personal physiology and preferences.

Carb Needs & Bodyweight

As a rule of thumb, consume an amount of carbs based on your body weight.

According to experts, this is roughly 2 to 4 grams per pound of body weight.

As a general guideline, simply multiply your weight in pounds by 3.2 (or multiply your weight in kilogram by 7).

Once you have a rough estimate, break down that amount into the proper portions, then spread it out over the day.

This might translate to roughly 80 to 100 grams of carbs at three meals, a couple of healthy snacks, and some carbs while exercising—especially runs exceeding 90 minutes.

Additional Resource – Running while constipated.

Carbs Needs Based on Training Intensity

Or, if you are a serious runner,  determine your daily needs by assessing your training volume/intensity.

Use the guidelines below to guesstimate your general daily needs.

Just keep in mind that one gram of carbs contains four calories.

  • Low to moderate intensity training—45 to 60 minutes a day. 2 to 4 grams of carbohydrates per pound (or 4 to 8 grams per kilogram) of body weight.
  • Moderate to somewhat intense endurance exercise—60 to 120 minutes a day. 2.5 to 5 grams of carbohydrates per pound (or 5 to 10 grams per kilogram) of body weight.
  • High-intensity endurance exercise. Over three hours a day. 4 to 8 grams of carbohydrates per pound (or 8 to 16 grams per kilogram) of body weight.

These are suggestions taken from the 5th edition of the Manual for Professional.

Academy of Nutrition and Dietetics, Chicago, IL; 2012.

Example

If you weigh 180 pounds and engage in relatively intense endurance exercise, running, and cross-training for at least one to two hours every day, then you’d need something in the range of 450 to 900 grams of carbs each day.

The Simple Formula

Calculate calorie intake first, then break it down it into the right proportions (do the same thing with the other macros)

Here is the simple formula for determining your carb needs in grams:

Step 1.

Multiply the average number of calories you consume in a day by 0.55 to 0.65 (the lower and upper limit of carb consumption).

This helps you work out the average amount of calories from carbohydrates.

Step 2.

Divide the number of calories from carbs by 4 (carbohydrates contain four calories in each gram).

For example, for a 2,300-calorie diet,  Make sure that least 1300 to 1500 of your calories come from carb sources every day.

That translates to roughly 320 to 370 grams of carbohydrates.

Step 3.

Plan your meals and portion sizes around your daily carb needs.

Where To Find Them

Here is a list of some of the most common sources of carbohydrates, along with portion size and exact content.

  • One cup of sliced plantains = 48 grams
  • One medium baked potato = 37 grams
  • One cup of yum = 37 grams
  • One cup of parsnips = 26 grams
  • One medium sweet potato = 24 grams
  • One cup of butternut squash = 22 grams
  • One cup of acorn squash = 22 grams
  • ½ cup of cooked greens or orange veggies (spinach, broccoli, or carrot) = 20 grams
  • One cup of tomato sauce = 16 grams
  • One cup of beets = 16 grams
  • One slice of bread = 15 grams
  • One cup of canned/diced fruit = 15 grams
  • ½ cup of cooked pasta, rice, quinoa, or polenta = 15 grams
  • ½ cup of cooked porridge = 15 grams
  • ¼ cup muesli = 15 grams
  • One cup of canned/diced fruit = 15 grams
  • 1/2 cup of cooked or dried beans, peas, and lentils = 15 grams
  • One medium banana, orange, or apple = 12 to 15 grams
  • One medium artichoke = 14 grams
  • One cup of Brussel sprouts = 12 grams
  • One cup of sliced carrots = 12 grams
  • One cup of rutabagas = 12 grams
  • One cup of broccoli = 12 grams
  • One cup of mashed pumpkin = 12 grams
  • One cup of sliced jicama = 11 grams
  • One cup of collards = 11 grams
  • One cup of sliced jicama = 11 grams
  • One cup of red cabbage = 11 grams
  • One medium cucumber = 11 grams
  • One medium potato = 10 grams
  • One cup of eggplant = 9 grams
  • One cup of turnips = 8 grams
  • One cup of okra = 7 grams
  • One cup of asparagus = 7 grams
  • One cup of Swiss chard = 7 grams
  • One cup of spaghetti squash = 7 grams
  • One cup of mustard greens = 6 grams
  • One medium tomato = 5 grams
  • One cup of green bell pepper = 5 grams
  • One cup of cauliflower = 5 grams

The Runners Diet – Dietary Proteins For Runners

Protein is literally the building block of life.

As such, these compounds are needed to produce energy, maintain primary biological processes, and sustain life.

More specifically, proteins are primarily essential for building, repairing, and maintaining cells, tissues, and organs throughout your body, but also important for other vital bodily functions, including:

  • Metabolism,
  • Digestion,
  • The production of antibodies that fight infections,
  • Immune system integrity,
  • Hormonal messaging,

Dietary proteins can also serve as a source of fuel when your glycogen stores wear out.

This is especially the case during long and hard training sessions. This makes them one of the most importance macros for runners.

Then God Said: “Let There Be Protein.”

According to science, the human body is made up of about 100 trillion cells, with each cell housing about 10,000 types of different proteins.

Yes, that’s a huge number.

In fact, roughly 18 percent of your body weight comes from protein in the form of lean tissue.

Proteins also comprise 10 percent of your brain and 20 percent of your heart tissue.

Likewise, they are a fundamental component of bone, organs, glands, skin, hair, and bodily fluids—except urine and bile.

Additional resource – Vitamin D for runners

Essential Vs Non-essential Amino Acids

Protein itself is composed of 22 types of amino acids—all of which are crucial for normal functioning.

Only nine of them are what’s known as the essential amino acids— the compounds that our bodies need but does not manufacture.

Instead, you’ll have to get them from nutrition sources.

Here is a list of the nine amino acids we can get only from diet: isoleucine, histidine, methionine, lysine, threonine, valine, tryptophan, isoleucine, and phenylalanine.

The remaining 13 amino acids are produced by our bodies.

That’s why they’re referred to as non-essential.

Additional resource – What to eat after a night run

The Complete Vs. The Incomplete

As previously stated, proteins are not created equal.

Some are complete whereas others are incomplete.

The Complete

Complete proteins contain all nine of the essential amino acids.

For that reason, your body can readily use them for protein synthesis—the process of building and/or repairing of muscle tissue.

Primary sources of complete proteins include animal products.

In fact, most animal-based sources of proteins, such as poultry, meat, eggs, and fish, provide all the vital amino acids your body needs in significant quantity.

The Incomplete

Incomplete proteins are those that may contain significant quantities of amino acids, but not all the nine essential amino acids, or don’t deliver enough quantities to meet your body’s needs.

As a result, when you consume incomplete proteins, your body cannot fully use them during protein synthesis.

Most plant-based sources, such as vegetables, beans, grains, and nuts are often deficient in one or more of the essential amino acids.

The Solution

Just because incomplete proteins are, incomplete, doesn’t make them inferior, nor does it mean that you can’t get sufficient complete proteins from a plant-based diet.

All you need to do is combine different plant-based food to help provide your body with the proper balance (and amount) of essential amino acids.

Here Are a Few Tasty Examples.

  • Spinach salad with almonds
  • Grains and legumes based soups or stews
  • Hummus with whole-wheat bread
  • Yogurt with Walnut
  • Rice and peas
  • Brown rice and beans
  • Whole grain noodles with peanut sauce
  • Legume with nuts
  • Yogurt with almonds or sunflower seeds
  • Legumes with seeds
  • Beans and corn
  • Salad made with buts and beans
  • Green peas and brown rice
  • Legumes with grains

The Standard Recommendation

According to current guidelines, the average person should aim to consume about 0.6 to 0.8 grams of protein per pound of body weight.

So, for instance, if you weigh 160 pounds, you would want to consume about 100 to 130 grams of protein per day.

But you are no ordinary person, aren’t you?

You are a runner.

And for that reason, you need more protein than the average Joe and Jane.

The standard recommendations are likely not enough to offset the oxidation of proteins during exercise.

Note – Before you reach for protein shake, make sure you know how many calories the drink is packing.

Protein Needs In Runners

Here are some protein intake suggestions based on the training load to help guide you in the right direction:

Moderate Training

If you do light to moderation training, you’d need 0.7 to 0.9 grams of protein per pound of bodyweight.

Moderate to Intense Training

Once you rack up the miles or do any form of strength training, your protein needs increase.

In fact, prolonged and/or strenuous training may boost dietary proteins needs to as high as one gram of protein per pound of bodyweight (or 1.9 grams per kilogram of body weight) per day.

Half-Marathon and marathon runners might need to shoot for at least 1.2 grams of protein per lb. of bodyweight.

Additional Resource – Creatine For Runners

Example

Jane is a female runner weighing 150lb.

To consume enough protein to support her training, recovery, and overall health, Jane would be looking to ingest about 120 to 150 grams of the macronutrient every day.

Additional resource – Salt for runners

The 20 grams Post-Run Protein Rule

Consuming the right amount of protein isn’t the only significant factor you need to consider.

Timing is also of the essence if you’re serious about ensuring that you’re getting the most out of your protein intake.

Research shows that consuming protein within the recovery window can speed up glycogen synthesis.

During the recovery window, your muscles are primed to receive and use up nutrients to repair and replenish itself from the damage experienced while running.

In fact, according to research published in “Medicine and Science in Sports and Exercise,” consuming a meal or snack containing both protein and carbs post-workout can improve running performance and optimize muscle recovery.

The Complete List

If the above intake recommendation sounds like too much, then take a look at the below list and consider how much protein in common foods and dairy products.

Refer to this list whenever you’re sketching your diet plan to ensure that you’re getting enough sources of protein in your diet.

Animal-based Sources

  • 6 ounces of tuna = 40 grams
  • 6 ounces of fish, salmon or cod = 40 grams
  • 4 ounces of lean red meat = 35 grams
  • 4 ounces of skinless chicken = 35 grams
  • 4 ounces of lean pork = 35 grams
  • 3 ounces of roasted turkey = 26 grams
  • 3 ounces of steak = 26 grams
  • 4 ounces of trout = 27 grams
  • 4 ounces of fresh, Atlantic farmed, salmon = 25 grams
  • 3 ounces of lamb = 23 grams
  • 3 ounces of salmon = 22 grams
  • 3 ounces of pork = 22 grams
  • 3 ounces of shrimp = 20 grams
  • 3 ounces of lobster = 16 grams
  • 3 ounces of scallops = 14 grams
  • One ounce of broiled, beef, Sirloin steak = 8 grams
  • One ounce of baked, roast, beef = 8 grams
  • One ounce of, dark meat, chicken = 7 grams
  • One ounce of Salmon = 7 grams
  • One ounce of, white meat, chicken = 7 grams
  • One ounce of turkey breast = 7 grams
  • One large, 50g, egg = 6 to 7 grams
  • One ounce of Cod = 6.5
  • One ounce of tuna = 6.5 grams
  • One ounce of Scallops = 6 grams
  • One ounce of shrimp = 6 grams
  • One ounce of Flounder = 5 grams
  • One slice of roasted turkey breast = 5 grams
  • One ounce of smoked ham = 5 grams
  • One large, white only, egg = 3.5 grams
  • One medium slice of bacon = 2 grams

Plant-based Sources

  • ½ cup of raw tofu = 19 grams
  • One cup of lentils = 16 grams
  • ½ package of tofu = 14 grams
  • One cup of black beans = 12 grams
  • ½ cup of pinto beans = 11 grams
  • ½ cup of soybeans = 11 grams
  • ½ cup of lentils = 9 grams
  • ¼ cup of pumpkin seeds = 8 grams
  • ½ cup of black beans = 8 grams
  • ½ cup of chickpeas = 7 grams
  • ½ cup of black eyed peas = 7 grams
  • One ounce of peanuts = 7 grams
  • Once ounce of roasted almonds = 6.2 grams
  • One ounce of almonds = 6 grams
  • One ounce of flax seeds = 6 grams
  • One ounce of Chia seeds = 5 grams
  • One ounce of walnuts = 4 grams
  • One cup cooked rice = 4 grams
  • One ounce of roasted pistachios = 5 grams
  • One ounce of roasted cashews = 4 grams
  • ½ cup of quinoa = 4 grams

Dairy Food

  • One cup of cottage cheese = 28 grams
  • 6 ounces of Greek yogurt = 18 grams
  • 4 ounces of cottage cheese = 14 grams
  • One cup of regular, non-fat, yogurt = 11 grams
  • One cup of milk = 8 grams
  • Two tablespoons of peanut butter = 8 grams
  • One cup of skim milk = 8 grams
  • One ounce of mozzarella = 7 grams
  • One slice of cheddar cheese= 6 grams

The Runners Diet – Healthy Fats For Runners Explained

Dietary fats, along with carbohydrates and proteins, are one of the essential runners macros—something your body needs in large amounts to function optimally.

What is usually referred to as dietary fats in the fitness and diet circles is actually a class of substances called lipid.

These comprise all the lipids found in plant and animal tissue, which are consumed as food.

More specifically, dietary fats are made up of a large group of water-insoluble organic compounds that can be further divided into triglycerides, cholesterol, and phospholipids.

The most common type of fats (the solid form) or oils (the liquid form) are a mix of triglyceride (triacylglycerol) with slight amounts of other lipids.

I know I’m boring with all these scientific terms, but just bear with me.

Additional Resource – Here’s your guide to pre and post run nutrition

Saturated Vs. Unsaturated

Dietary fats can be broken down into two broad categories, based on their biochemical structure and their impact on the body: saturated and unsaturated.

  • Saturated fats contain high amounts of hydrogen, but no double bonds, and tend to be solid at room temperature, whereas
  • the unsaturated kind houses one or more double bond(s) between the carbon atoms (more on these distinctions in the upcoming sections).

The Many Roles Of Fats

Here are a few of the main functions of fat:

  • Transporting vitamins (mainly A, D, E, and K) throughout your body, offering better nutrient absorption.
  • Ensuring proper functioning at the cellular level, and keeping structural integrity.
  • Helping keep a stronger immunity system
  • Aiding in hormone productions—mainly estrogen and testosterone
  • Helping control inflammation and blood clotting
  • Helping keep your hair and skin healthy
  • A secondary source of energy as the largest reserve of stored fuel available for activity.
  • Assisting in the protection and the insulation of vital internal organs in the form of adipose fat, which your stored fat

The Good—the Unsaturated Fats

Good fats are what’s known as unsaturated fats.

These score high in disease-fighting and illness-preventing antioxidants, like vitamin E, etc.

In fact, research has shown that unsaturated fats help reduce bad cholesterol levels, which, in turn, cuts your risk of cardiovascular disease.

Here are some of the healthiest sources to include in your diet

  • Avocados
  • Olive oil
  • Nuts, including almonds, pecans, pine, peanuts, cashews, and pistachios.
  • Seeds, mainly sunflower and sesame.
  • Fatty fish
  • Natural peanut butter
  • Egg yolk

The Many Shades of Good Fats

Unsaturated fats can be further broken down into polyunsaturated fats and monounsaturated fats.

Additional resource – Can Running Help Cure Your Hangover?

Monosaturated Fats

Biochemically, monounsaturated fatty acids, also known as or MUFAs, contain a single, double bond in their fatty acid chain.

The more double bonds a fatty acid contains, the more fluid it is.

Research shows that consuming these fats improve cholesterol levels, which can reduce the risks of cardiovascular disease.

Not only that, numerous studies have revealed that monounsaturated fatty acids may have a positive impact on insulin levels blood sugar levels, which can be particularly beneficial if you have type II diabetes or other insulin-related issues.

Mono oils are usually liquid at room temperature, but start to harden at refrigerator temperature.

Common sources of monounsaturated fat include olive, canola, and olive oils, and avocados.

The Polyunsaturated Fats

Biochemically, polyunsaturated fats, or PUFAs for short, have more than one double bond in their fatty acid chain between its carbon atoms.

The most well-known polyunsaturated fatty acids today are the omega-3s and omega-6s.

These are essential nutrients that your body uses to produce vital chemicals needed for optimal functioning.

Evidence shows that these are particularly valuable to your heart, and might decreases the risk of coronary artery disease.

Research indicates that they reduce the level of harmful cholesterol (LDL) and boost the level of the healthy kind, or what’s known as HDL.

Research has also linked monosaturated fats to a reduced risk of cardiovascular disease and stroke.

Unlike the mono kind, polyunsaturated fatty acids tend to be liquid both at room temperature and in the refrigerator.

Common sources include corn, soybeans, sesame, safflower, many seeds and nuts, soybeans, and their oils.

Good portions of these oils can also be found in eggs from flax- or fish-fed chicken.

Additional resource – A list of ketogenic foods

The Bad—The Saturated Fats

So what are saturated fats?

What exactly they’re saturated with?

The third classification of fats are saturated with hydrogen.

More specifically, saturated fats are fatty acids in which all carbon atoms are bonded to hydrogen atoms.

Saturated fats, or what’s known as the bad kind—block your arteries and contributes little to your overall health and well-being levels.

Evidence shows that these fatty acids increase total blood cholesterol and LDL (low-density lipoprotein) cholesterol levels, increasing the risks of cardiovascular issues.

Saturated fats are often found in animal sources of foods, such as red meat, poultry, and full-fat dairy products.

According to the Dietary Guidelines for Americans, you should limit your saturated fat intake to no more than 7 percent of your total calorie intake.

This might translate to less than 20 grams a day for men, and 15 grams for women.

Or, better yet, replace saturated food sources with PUFAs and MUFAs.

The Ugly—The Trans Fats

Now that you have a basic understanding of the essential sources of fat, it is time to reveal the evil villain of the dietary fat world: trans fats.

Trans fats can occur naturally in some foods in tiny amounts, such as those from animals, including red meats and full-fat dairy products.

But, in general, these fatty acids are the only of the four types of fatty acids that are man-made.

Also known as hydrogenated fats, trans fats are a chemically produced form of fatty acids.

More specifically, trans fats are produced in a “food lab” when liquid vegetable oils are forced, with the help of nickel catalyst, through a hydrogenation process at high pressure, making the oils more solid—in a process known as hardening.

In other words, trans fats are created by processing vegetable oils, turning them from a liquid into a solid.

Common sources of trans-fat rich foods include:

  • Cookies
  • Commercially baked pastries
  • Pizza
  • Muffins
  • Doughnuts
  • Crackers
  • Packaged snack foods
  • Fried foods (mainly fried chicken, French fries, chicken nuggets, and breaded fish)
  • Stick margarine
  • Candy bars

Keep these fatty acids on the watch list.

Avoid any food or dairy products that have the words “hydrogenated vegetable oil,” “partially hydrogenated vegetable oil,” or “shortening,” in their ingredient list.

Also, food items labeled as “trans-fat free” usually contain less than half a gram per serving.

So, it’s quite misleading.

So, please do not be swayed.

Replace foods rich in saturated and trans fats, such as whole milk, butter, and baked foods with food rich in unsaturated fats (check the list above).

Additional resource – Best sources of electrolytes for runners

Healthy Fats Needs In Runners

Most experts recommend that as much as 15 to 25 percent of your calories should come from fats and less than 7 percent from saturated fat.

Just keep in mind that the average American average intake hovers around 35 percent, according to survey.

So, as a runner, if you consume 2800 calories per day, then less than 600 of these calories should be from dietary fats.

That translates to 65 to 75 grams of fat a day.

The List

Here is a long of fat-rich foods.

  • One cup of Brazil nuts = 93 grams
  • One cup of whipping, heavy cream = 88 grams
  • One cup of whole Filberts (hazelnuts) = 84 grams
  • One cup of dry and roasted cashews = 63 grams
  • One cup of pistachios = 60 grams
  • One cup of walnuts = 62 grams
  • One cup of silvered almonds = 53 grams
  • One cup of dry, roasted, whole, almonds = 47 grams
  • One cup of sliced almonds = 45 grams
  • One ounce of ghee = 28 grams
  • One cup of half & half cream = 27 grams
  • One cup of fresh coconut = 27 grams
  • One ounce of whole macadamia = 21 grams
  • One ounce of pecan = 20 grams
  • Two tablespoons of smooth peanut butter = 17 grams
  • Two tablespoons of creamy or smooth peanut butter = 16 grams
  • One ounce of dry roasted peanuts = 14 grams
  • One ounce of pine nuts = 14 grams
  • Two tablespoons of reduced fat, peanut butter = 12 grams
  • One tablespoon of lard = 12 grams
  • One tablespoon of regular butter = 11 grams
  • 2 tablespoon of Nutella = 11 grams
  • ½ cup of evaporated whole milk = 10 grams
  • One cup of whole goat milk = 10 grams
  • One ounce of white chocolate = 15 grams
  • One tablespoon of almond, hazelnut, walnut, and truffle oils = 13 grams
  • One tablespoon of soybean, olive, canola, safflower, corn and sesame oils = 13 grams
  • One ounce of pepperoni = 13 grams
  • Once ounce of dark; 70%, chocolate = 12 grams
  • Once ounce of Camembert = 12 grams
  • One ounce of Havarti = 11 grams
  • One ounce of extra black 82%, chocolate = 10.5 grams
  • One ounce of regular cream cheese = 10 grams
  • One ounce of Gorgonzola = 10 grams
  • One ounce of America, processed, cheese = 9 grams
  • One ounce of goat cheese = 9 grams
  • One ounce of regular cheddar = 9 grams
  • One cup of whole milk = 9 grams
  • One tablespoon of whipped butter = 8 grams
  • One cup of regular chocolate milk = 8 grams
  • One ounce of Danish cheese = 8 grams
  • One ounce of Gouda = 8 grams
  • One ounce of Edam cheese = 8 grams
  • One ounce of Parmesan cheese = 7.3 grams
  • One cup of regular yogurt = 7 grams
  • One ounce of shelled and cooked peanuts = 7 grams
  • One ounce of brie = 7 grams
  • One ounce of Feta cheese = 6 grams
  • One ounce of whole mike mozzarella = 6 grams
  • One ounce of fresh Mozzarella = 5 grams
  • One ounce of ground beef = 5 grams
  • One ounce of low-fat cheddar = 5 grams
  • ½ cup of cottage regular cottage cheese = 5 grams
  • One cup of low-fat chocolate milk = 5 grams
  • One cup of 2% fat milk = 5 grams
  • One cup of low-fat yogurt = 4 grams
  • One large egg = 4.5 grams
  • One small egg = 3.5 grams
  • Two tablespoons of reduced fat peanut butter = 2.5 grams
  • One cup of almond of, low-fat, almond milk = 2.5 grams
  • ½ cup of 2% low-fat cottage cheese = 2 grams

 How To Design A Running Nutrition Plan

Now that you know all you need to know about macros for runners, let’s see how can you put it into practice

 How To Design A Running Nutrition Plan

Determine your Calorie Maintenance Level

Every person has a set amount of calories that they need to consume each day in order to keep their current weight.

This is what’s referred to the Calorie Maintenance Level in the fitness circles, and is the number of calories your body will use up to support your metabolic rate and regular daily activities.

There are many ways and methods for guestimating calorie maintenance level.

Yes, guest the estimation.

One quick way to get an approximate estimate of what your daily calorie maintenance level is to multiply your current body weight in pounds by 14 and 18.

In essence, your daily calorie maintenance level will be typically somewhere in between these amounts.

For example, a 170lb runner would require a daily calorie maintenance level of roughly 2400 to 3000 calories per day.

But, if you are leading an active lifestyle, running, and/or doing other forms of exercise, your daily energy needs will go up.

This depends on the intensity, frequency, and duration of the workout session.

That’s why your daily body requirements will vary from one day to the next.

Here is the oversimplified formula for figuring out your weekly running energy expenditure:

Weekly Energy Expenditure = Weekly Mileage X Calorie Burn per Mile.

Just don’t get me wrong here.

This formula is not written in stone.

As I have previously mentioned, many factors affect calorie burn while running.

That said, the above formula can set you on the right path toward understanding your energy needs while running.

And that’s a good thing.

Here are some of the most common recommendations.

  • If your main fitness goal is to losing weight, then shoot for a daily calorie” deficit” of around 20 percent below your Calorie Maintenance Level.
  • If your main fitness goal is to increase strength or improve endurance level shoot for a daily calorie “surplus” of roughly 250 to 350 calories above your maintenance level.

For more, check this online calorie burn calculator from Runners World.

Additional resource – Best supplements for runners

Get Professional Help

In case you need more help, consider enlisting the help of a trained sports nutritionist or dietitian.

They can help you better estimate your energy needs, then devise a nutrition plan even design a weekly or monthly menu book to help you optimize your training and recovery times.

But this might be over the top—especially if you are just starting out and don’t need professional help.

Additional resource – Guide To BCAAs for Runners

Time Your Intake

Timing is the most important factor in a runner’s diet—right after the type foods you opt for.

As a rule of thumb, leave, at least, two to three hours between eating and running, depending on the content and size of the meal.

Discipline your intake takes a big part of this, so don’t underestimate the on-time schedule.

Before A Run

Aim for at least 30 to 40 grams of carbohydrates one to two hours before running.

Try a fruit, a bowl of cereal, an energy bar, whatever works the best for you.

Sure, choose the low sugar one!

If you run first thing in the morning, have a small, carb-rich breakfast 20 to 30 minutes before you head out the door.

Running on an empty stomach may, but not always, burn up all of your stored fuel, which can compromise your performance.

If you don’t have the time (or the stomach) for a full breakfast, then experiment with eating a small piece of fruit, a smoothie, or a hypertonic sports drink, before heading out.

The Right Foods

To get the most of your pre-run meal choices, focus on these four things:

  • Foods you’re familiar with, especially before a serious workout or race. It’s never nice to have a funny tummy during a workout.
  • Low-fat foods.
  • Low-fiber foods.
  • Carb-rich, and protein moderate foods.
  • Make sure the food is moderate in both protein and carbs.

Eating During A run

This is what you need to if you are planning to run for more than 90 minutes.

Consume 30 to 40 grams of carbohydrates for every 45- to 60-minute of exercise.

A gel pack is usually a good choice.

These deliver about 25 to 30 grams of easily digestible carbs.

For the full guide to eating on the run, check my post here.

Eat Post Run

Just don’t resume work, life, or whatever, on an empty growling stomach.

There is no guarantee that you’ll be reaching for a healthy and nutritious food when the hunger pangs strike.

The Tenets of Healthy Eating

Once you have figured your carb-to-protein-to-fat proportions, it’s time to pay attention to the food itself.

The three basic rules for a healthy runner’s diet are:

  • Balance,
  • Variety, and
  • Once you master these three aspects of your diet, you’ll be on your way to success.

Balance

Balance is the first step toward nice things in this world.

In order to stay healthy, you always have to tune in between good and bad, also for eating.

Balanced eating is not your typical trendy, yo-yo, or crash diet.

Instead, it’s the type of eating you should stick to for life.

Simply consume essentials and avoid overeating.

By following a balanced diet, you’ll ensure that you’re consuming all the essential nutrients that your body needs to function properly and optimally.

To find balance, get the bulk of your daily calories from these main food groups:

  • Fresh vegetables
  • Whole grains
  • Fresh fruits
  • Lean proteins
  • Legumes
  • Nuts

Keep in mind that one food group does not have all the answers.

It cannot provide you with all the nutrients you need.

Additional resource – Guide to runners stomach

Variety

Your diet could have all the characteristics above, but it might still lack variety, which is the second pillar of healthy, optimal eating.

If that’s your case, then you’re missing out, big time.

Before you start being creative, let’s get to know what variety I’m talking about.

Variety stands for opting for a wide range of foods from each main category every day to ensure a nutritious diet.

The more colors, the merrier.

Variety is the spice of life, and is definitely a significant goal and milestone when it comes to eating well.

In fact, most nutrition experts would agree that variety is one of the cornerstones of good quality, well-rounded diet.

a study published in the “Journal of Nutrition” revealed that, the more varied your food choices, the more likely you’re to get proper amounts of nutrients and fiber.

Also, be sure to opt for a variety of different foods from within the food categories themselves to keep your daily menu interesting and provide you with a wide range of macro-and micronutrients.

Additional resource – 30 Keto recipes  for low carb eating

Moderation

Moderation is all about regulating or controlling your daily food intake. It involves making sure not to eat too much or too little of any food or nutrient.

In other words, moderation is really about consuming the right amounts of foods at the right times while meeting your nutritional requirements and maintaining a healthy weight.

Not only that, but moderation also means not going overboard with treats, alcohol, fast food, or restaurant meals.

Of course, feel free to enjoy your treats, but do it once in a blue moon since most reward foods tend to be high in calories but low in nutrients and fiber.

Take more and don’t blame anyone if you gain significant weight, especially if you are into junk food.

Nutrition experts recommend getting at least:

Five servings of grains. Examples of one serving include one slice of bread, one small tortilla, ½ cup of whole-grain cereal or cooked oatmeal, one ounce of raw rice or pasta, one cup of ready-to-eat cereal flakes, and ½ cup of popped popcorn.

Six servings of vegetables (Fresh, frozen, canned, and dried). Examples of one serving include one cup of raw leafy greens, ½ cup of cooked peas or beans, and ½ cup of cut-up vegetables.

Five servings of fruits. Examples of one serving include one medium-sized fruit, ½ cup of cut-up fruit, or ¼ cup of dried fruit.

Runners Diet – The Conclusion

There you have it.

Today’s article is an in-depth dive into the main macros for runners  and how to design the perfect running nutrition plan.

But it barely scratches the surfaces of performance nutrition.

That’s why I highly urge you to continue your education and learn more about the subject.

Your diet, after all, is as important as your training.

There’s no way around that.

Please feel free to leave your comments and questions in the section below.

In the meantime, thank you for dropping by.

Keep running strong

David D.

The 24 Ketogenic Low-carb Recipes You Should Try

ketogenic food recipe

So, you have decided to give the ketogenic diet a try.

Well done.

Keep it up!

But unless you don’t mind eating eggs and bacon every day, you’ll need a few recipes to help you stick to the keto lifestyle.

Today I got you covered with following savory recipes as you need.

Relying primarily on healthy fats and low-carb vegetables, the following recipes are packed with flavor and nutrients, and range between 5 and 10 grams of carbs per serving.

They’re also loaded with plenty of healthy fats, nutrients, and flavors to keep you sated and fueled all through the day.

Note—The photos are copyrighted to the blog that originally posted the recipe.

To check the complete recipe on the original blog, simply click the recipe title under any photo.

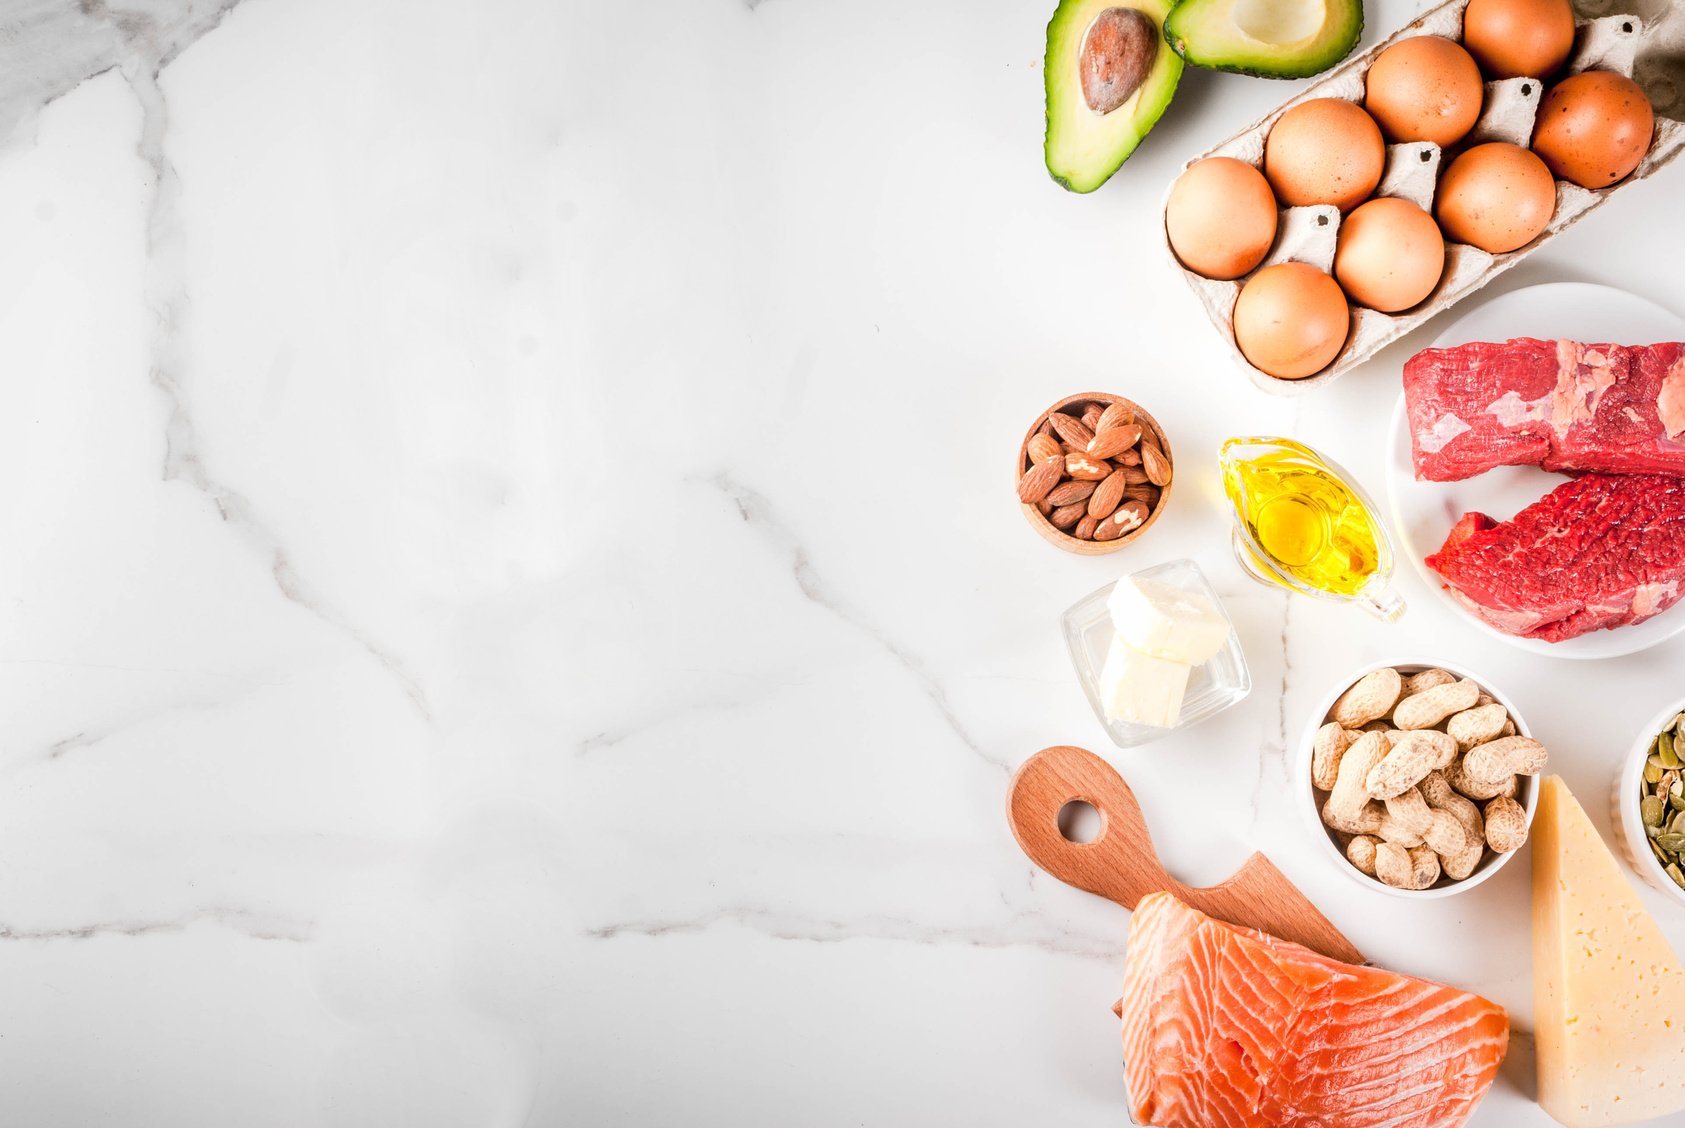
The Ketogenic Diet Explained

First things first, let’s give the ketogenic diet a close-up.

If you’re into healthy eating or losing weight, chances are you’re already familiar with the ketogenic, or keto diet.

This excellent eating plan has gathered so much steam these past few years, becoming one of the popular methods worldwide to improve eating habits.

Keto, or ketogenic, diet is a high-fat, moderate protein, strict low carb diet.

Typically, it preaches eating 70 to 80 percent fat, 10 to 20 percent protein, and under 10 percent carbohydrates.

This forces your body into ketosis, a metabolic state in which your body burns fat stores as a primary source of fuel rather than glucose (carbohydrates).

The keto diet can help you lose belly fat, improve brain function, increase performance, improve health, etc., research shows.

Here’s the full guide to ketosis sympotms.

Here’s a 7-day keto eating plan to try.

1- Low Carb Broccoli Cauliflower Salad With Bacon & Mayo

This keto broccoli salad is filling and very low in carbs.

It’s also loaded with flavor but only takes 10 minutes to throw together, resulting in a super colorful, simple, and great for any occasion.

The following salad tastes great, even after sitting in the fridge overnight.

For more taste, you can add a creamy, tangy dressing.

Ingredients

  • Fresh thyme
  • Olive oil
  • Garlic powder
  • Mayonnaise
  • Lemon juice
  • Sea salt and pepper

2- Zucchini Noodle Salad With Cheese & Tomatoes

If you don’t already have a spiralizer, then this recipe should be the reason to get one.

The following is my favorite healthy recipe using raw spiralized deli veggies, avocado, cucumber, and a low carb dressing of your choice.

This salad is the perfect low-carb, with pasta replacement.

If you already have cooked bacon or turkey on hand, no cooking needed.

Ingredients

You’ll need a spiralizer to make zucchini noodles.

I love this one from Amazon.

  • Zucchini
  • Cherry tomatoes
  • Shredded cheese
  • Mozzarella pearls
  • Fresh basil
  • Dressing
  • Extra virgin olive oil
  • Lemon juice
  • Red wine vinegar
  • Garlic powder
  • Sea salt and pepper.

3- Keto Eggplant Burgers

Craving burgers, but it’s too junkie, and you don’t want to derail from keto eating?

The following recipe is precisely what you need.

The following recipe uses eggplant slices as the buns since these hold together nicely once they’re cooked.

Keto eggplant burgers make a great snack or side dish.

For meat, use whatever ground option you prefer, but I strongly encourage you to prepare the dipping described below.

Ingredient

  • Japanese eggplant
  • Ground pork
  • Green onion
  • Black pepper
  • Ginger
  • The dipping sauce
  • Tamari sauce
  • Garlic cloves
  • Apple cider vinegar
  • Sesame oil
  • Salt and pepper

View Full Recipe

4- Keto Garlic Bread

If you love garlic bread but can’t have it because of the carbs, then you’ll appreciate this buttery, keto-approved version.

Keto garlic bread is low carb and gluten-free, which makes it a healthier option than most breads out there.

It’s actually the perfect breakfast food.

The bread is soft on the inside, crispy on the outside.

The cream cheese adds so much richness and creaminess to the bread that can’t be beaten.

The following recipe boasts only 1.5g net carbs per slice, making it perfect for eating any time of the day without ruining your keto diet.

Ingredients

  • Almond flour
  • Eggs
  • Shredded mozzarella cheese
  • Kosher salt
  • Baking sold
  • Topping
  • Melted butter
  • Kosher salt
  • Garlic powder
  • Dried oregano
  • Shredded mozzarella cheese

low carb recipe ingredients

5- Keto Salad Niçoise

The classic niçoise contains a lot of potatoes, green beans, and other non-keto ingredients.

This next take on this classic delight is loaded with nutrients and flavors.

It also addresses the extra carbs and adds in a dose of healthy fats.

Keto salad niçoise is a fantastic option for an easy-to-me yet satisfying lunch or dinner and is perfect for meal prepping.

For more flavor, serve on a bed of zucchini noodles.

Ingredients

  • Ground black pepper
  • Chopped garlic
  • Eggs
  • Celery root
  • Green beans
  • Olive oil
  • Tomatoes

Dressing

  • Dijon mustard
  • Worcestershire sauce
  • anchovies
  • Small capers
  • Mayonnaise
  • fresh parsley
  • olive oil
  • minced garlic clove
  • lemon juice

6- Grilled Eggplant Salad

The following eggplant-based salad is easy and delicious and will go well with any meat, especially grilled meat.

This is what makes the perfect side dish for any summer barbecue.

For more flavor and taste, add in some smoke almonds if possible.

Or maybe some Himalayan salt or chili powder.

Feel free to add up some spices to trigger your taste buds.

Ingredients

  • Eggplants
  • Olive oil
  • fresh mozzarella cheese
  • Garlic powder
  • Lemon juice
  • fresh mint
  • Anchovies
  • Tomatoes
  • smoked or roast almonds
  • Sea salt and pepper

7- Salad With Roasted Cauliflower

The Salad with Roasted Cauliflower is a great low-carb dish with its refreshing flavors and lemon dressing, but not too spicy—unless you want it to be.

This recipe is especially helpful if you’re a vegan on the keto diet.

In fact, recipes like this one prove that it’s possible to be a vegan on the ketogenic diet.

Further, since avocados, nuts, and olive oils are the main ingredients, the dish scores high on healthy fats—what’s the keto diet is all about anyway.

For a pleasant twist, top this dish with fresh thyme and a low carb crumb.

Ingredients

  • Large head cauliflower
  • Garlic cloves
  • Olive oil
  • Lemon
  • Avocado
  • Nuts
  • Garnish green onion
  • Salt and pepper

View Full Recipe

Precaution for people with an upset stomach, you might want to refrain from cauliflower and broccoli.

These build up more gas inside your tummy and make you bloated.

8- Zucchini Crust Grilled Cheese

The following recipe is bread free zucchini grilled cheese that is low carb and gluten-free.

The zucchini “bread” is made of shredded zucchini, Parmesan, mozzarella, and seasoning.

Plus, these grilled cheese sandwiches pack in fewer carbs and are healthier than traditional, junk, options.

Ingredients

  • Grated zucchini
  • Egg
  • Green onion
  • Grated parmesan
  • Shredded cheddar
  • Cornstarch
  • Salt and pepper
  • Vegetable oil—for cooking

View Full Recipe

Super yummy choice for cheese lovers.

My secret tips, add grilled or diced Halloumi cheese for extra taste.

Worth a try!

9- Keto Caesar Salad

Although I used to eat salads once in a blue moon, I don’t remember shying away from Caesar’s salads.

The traditional way of making them consists of chopped romaine lettuce with crispy croutons draped in cheesy parmesan dressing with lemon juice, olive oil, garlic, and anchovies.

The keto variation has a lot of parmesan cheese, crisp romaine lettuce, and chicken tossed in a delicious and out-of-this-world keto-approved homemade Caesar dressing.

It’s also simple to make.

Just remember to add extra cheese to your salad, and use low-carb croutons.

Ingredients

  • Romaine lettuce
  • Slices of chicken or bacon cooked and crumbled
  • Shredded parmesan cheese
  • Gluten-free garlic croutons (check the recipe here)
  • Sea salt & pepper
  • Tomato
  • Cucumber
  • Hard-boiled eggs
  • Chicken breast
  • Olive oil

Dressing

  • Mayonnaise
  • Lemon juice
  • Dijon mustard
  • Grated parmesan cheese
  • Fresh black pepper
  • Garlic clove
  • Mustard powder
  • Sea salt and pepper

Another secret tip from me.

Salted eggs! No need to add more salt since it will give you a different experience for a salty and creamy meal.

Pick one made of goose or duck eggs.

10- Creamy Meatballs

Here is another excellent recipe for a lip-smacking and healthy meal for the whole family.

Ketogenic meatballs are so juicy, incredibly delicious, and smothered with a creamy, rich queso sauce.

These can be served as a Ketogenic appetizer or as a meal over cauliflower rice, zucchini noodles, you choose.

Plus, you can prepare and sear them in roughly 30 minutes, then simply put everything into the slower cooker.

Ingredients

  • Ground beef
  • Yellow onion
  • Egg
  • Garlic powder
  • Black pepper
  • Cream cheese
  • Butter
  • Cream sauce
  • Cream cheese
  • Heavy whipping cream
  • Tamari soy sauce
  • Salt and pepper

View Full Recipe

I personally called this as lazy food.

Why?

Because it is suitable for filling my tummy during my lazy day.

Super creamy and mouthgasmic.

11- Spicy Shrimp And Avocado Salad

I love avocado and shrimp, and I know I’m the only one.

That’s why I wanted to share with you this awesome recipe.

Spicy Shrimp and avocado salad pack plenty of fresh ingredients to overwhelm your taste buds with every bite.

The recipe does not take long to make, and it’s very portable.

All you have to do is sear the shrimp in butter, then dice some veggies, mix up a dressing, and you’re done.

You can dip it into chilli powder before toss it into the pan if you are into spicy food.

Ingredients

  • Baby kale and baby spinach mix
  • Shrimp
  • Avocado
  • Cilantro
  • Olive oil
  • cucumber
  • Lime juice
  • Garlic
  • Cumin
  • Salt and pepper to taste

View Full Recipe

12- Low-carb Cheese Taco Shells

Mexican food is my favorite—especially tacos.

But thanks to its high carb intake, regular keto is a no-no on the keto diet.

That said, here is a recipe that can help you get all the best things about a taco minus the carbs.

Made from baked cheddar cheese then shaped into a taco, these low-carb shells are so easy to make (in a matter of minutes!), gluten-free, and very keto-friendly.

Not only that, but these are also delicious, crunchy, and taste almost as good as the real thing.

For fillings, go for whatever satisfies your senses.

My favorites include grated cheese, ground meat, diced onion, sour salsa, shredded lettuce, chopped peppers, etc.

Ingredients

  • Shredded Cheese
  • Ground cumin

View Full Recipe

13- Egg Salad Stuffed Avocados

Both eggs and avocados are excellent sources of healthy fats, which makes them a staple in ketogenic eating.

Eggs are also loaded with complete protein that keeps you full throughout the day.

For these reasons, this dish is a must for any serious keto’an.

The dish would also make a very delicious lunch that’s simple to make and quite satisfying.

Ingredients

  • Hard-boiled eggs
  • Celery
  • Lime juice
  • Avocado
  • Hot sauce
  • Cumin
  • Salt and pepper

View Full Recipe

14- Salmon and Avocado Nori Rolls

Sushi is a famous Japanese dish that’s available in almost every city around the globe.

But since traditional sushi is prepared with vinegar rice, it’s off the Keto menu.

That said, here is an easy method to make sushi without rice that happens to yield a delicious dish.

For this recipe, you’ll be using riced cauliflower as a substitute for regular rice.

What’s more?

The following low carb sushi recipe requires only five ingredients and 20 minutes.

Ingredients

  • Sliced smoked salmon
  • Cream cheese
  • Chopped pickled ginger
  • Nori sheets (grilled preferably)
  • Avocado

View Full Recipe

15- Keto Fish Sticks

I have always loved fish sticks, but once I adopted a healthier way of eating, I knew that I had to figure out a better way of eating them, and it took me a while to find the following recipe.

Keto fish sticks could be made as regular breaded fish or as fish nuggets—your choice.

These also take very little time to make.

Ingredients

  • Pork rinds
  • Eggs
  • Alaskan cod filet
  • Coconut flour
  • Grated parmesan
  • Garlic powder
  • Cooking spray
  • Salt and pepper

16- Low Carb Taco Salad

Well, you still can have your tacos without the carbs.

The following salad is made with some of the keto-friendliest foods out there, including ground turkey, avocado, olives, and lettuce.

It’s ideal for lunch, dinner, or as a side dish.

This recipe uses natural ingredients that are low in carbs, easy to make, absolutely mouthwatering.

Ingredients

  • Ground beef
  • Chili powder
  • Avocado
  • Shredded cheddar cheese
  • Tomatoes
  • ground cumin
  • Dried parsley
  • Romaine lettuce
  • Sour cream
  • Garlic powder
  • Green onions

The seasoning

  • Cumin
  • Chili powder
  • Paprika
  • Onion powder
  • Garlic powder
  • Black pepper
  • Oregano

17- Keto Cheese Roll-ups

This one might be, hands down, one of the simplest, fastest, easiest bites to make.

It requires ingredients you likely already have on hand.

Keto cheese roll-ups are also wonderful and delicious dipped in guacamole or low carb pizza sauce or Ragu sauce.

You can have this for breakfast or as s snack on the go.

You can practically fill them with anything you like—as long as it’s keto-friendly (and you know how long the list is).

Ingredients

  • Butter
  • Cheddar cheese, in a slice

18- Deviled Eggs

The typical deviled eggs are not keto-friendly as they’re often made of loads of commercial mayonnaise and other processed ingredients.

However, the keto version relies on avocados to deliver that creamy texture but minus the artificial additives.

You can store these eggs for up to 4 days in an airtight container later use.

Can’t beat them.

Ingredients

  • Eggs
  • Mayonnaise
  • Dijon mustard
  • Paprika
  • Fresh Dill
  • Salt and pepper

19- Keto Cheese Chips

If you’re looking for a crunch keto chip to snack on them, these three-ingredient fix will keep you satisfied.

These cheese chips are made with mozzarella and flavored with oregano and garlic—or any other keto flavor you like.

If you keen for something not so crispy, try Halloumi cheese for thicker taste.

The chips are delicious on their own or dipped in guacamole or marinara sauce.

Ingredients

  • Cheddar cheese
  • Paprika powder
  • Sea salt and pepper

20- Keto Greek Salad

Also, knowns Horiatiki, a Greek Salad, is the ideal example of healthy Mediterranean cuisine.

Broadly, it’s already keto-approved, as long as there no gluten or bread added to the recipe.

It’s a delicious low-carb dish for any time of the day or week.

The secret to making great Greek salads is simplicity, and using the freshest keto-friendly ingredients you can find.

Ingredients

  • Tomato
  • Green capsicum
  • Cucumber
  • Red onion
  • Green bell pepper
  • Fet cheese
  • Dried oregano
  • black Greek olives
  • Olive oil
  • salt and pepper

21- Cottage Cheese-filled Avocado

Thank God for the Aztecs.

Avocados are undoubtedly the greatest food in the world.

Mixing it with cottage cheese can deliver a great snack rich in nutrients without any of the carbs.

The following snack is packed with healthy fats and protein, keeping you feeling full to your next meal.

It should help you avoid mindless nibbling or unhealthy snacking that can lead to weight gain.

And it’s easy to make.

Slice an avocado in half lengthways, remove the pit from one-half, and fill the space with cottage cheese.

For extra spice, add in some cayenne pepper or regular pepper.

Ingredients

  • Avocado
  • Sliced cheese

22- Keto Egg Muffins

This is undoubtedly one of the best time-saving, keto-approved, breakfast options of all time.

Whether you’re minding your keto macros, or need something quick to grab on the go, keto egg muffins are perfect for meal prep or any occasion.

It’s a fantastic keto snack recipe packed with healthy ingredients and a lot of flavors.

They’re the perfect choice for anyone who loves the satisfying mix of bacon, cheese, eggs, and sweet potatoes.

These can be prepared ahead of time and kept well in the fridge for days for a quick bite on the go.

You can put it into steam if you want to last longer before it goes to the fridge.

Ingredients

  • Eggs
  • Scallions
  • Onion
  • Shredded cheese
  • Red peso
  • Salami
  • Sea salt and pepper

23- Keto Jalapeno Poppers

Keen on something spicy?

The mix of spicy jalapenos, bacon, and cheese makes these the best delicious fat bombs you can ever have.

This mouthwatering mix requires a bit of prep as there is a lot of steps, but it’s worth the effort.

Try not to devour them all in one sitting.

They’re a snack, after all.

Keep in mind; you can’t skip the main meal because you already had snacks. Big nope!

Ingredients

  • Shredded sharp cheddar
  • Cream cheese
  • Jalapenos
  • Bacon
  • Black pepper
  • Salt

24- Low Carb Tortilla Chips

Just because you’re on keto doesn’t mean that you can no longer eat chips—as long as these are keto-friendly.

The following low carb chips taste just as delicious as the real thing, but with the fraction of the carbs.

For these chips, you rely on almond flour and cheese to mimic the texture of a corn tortilla chip—you get the mouth-watering tastes without all the carbs.

Ingredients

  • Almond flour
  • Golden flaxseed meal
  • Shredded mozzarella
  • Sea salt and pepper.

How to Start Running: A Step-by-Step Guide for Beginners

woman starting a run

Are you ready to lace up your running shoes and embark on a thrilling journey towards becoming a runner?

Then you’ve come to the perfect place.

As someone who has been pounding the pavement for over a decade and has guided countless beginners to running success, I’m here to equip you with everything you need to know to kickstart your running adventure.

In this comprehensive guide, I’ll unveil the secrets to becoming a confident and injury-free runner. No more wondering how to start running or feeling overwhelmed by the process.

I’ll explain  how often you should run, the correct running technique to prevent injuries, and the ultimate beginner running plan that will take you from hesitant steps to victorious strides.

But wait, there’s more! Once you’ve conquered the basics, we’ll take your training to the next level, unlocking new levels of endurance, speed, and strength. You’ll learn the tips and tricks to elevate your running game and unleash your full potential.

By the time you reach the end of this post, you’ll be armed with the knowledge and tools to unleash your inner runner and reap the remarkable benefits that running has to offer.

Ready? Let’s get started!

How to Start Running? – The Exact System You Need

So you have decided  to start running.

First things first: Relax.

You won’t have to sacrifice an arm and a leg to the running gods to get started.

In fact, it’s not overwhelming, complicated, nor expensive.

The hardest part about taking up running for the first time is actually taking the first step.

If you do that, you’ve already gone farther than 82.5 percent of the population (a totally bogus statistic that I made just to make a point!), so give yourself a pat on the back.

If you ask me, it’s actually the easiest thing to do in the world—as long as you follow beginner running rules.

That’s where this section comes in handy.

Without further ado, here’s the exact step-by-step you need to become a runner.

Start Easy

Whether you’re a newbie lacing up your shoes for the very first time or a seasoned runner returning after a hiatus, there’s one golden rule you must engrave in your mind: start easy and build gradually. Trust me, I’ve witnessed too many beginners take on more than they can handle, only to find themselves sidelined by injuries or completely drained within weeks. We don’t want that for you.

Picture this: you’re famished, and a mouthwatering buffet lays before you. You can’t resist the temptation, so you pile your plate high with every delectable dish in sight. But soon enough, you realize that you’ve bitten off more than you can chew.

The same principle applies to running. If you go from zero to full-throttle, diving headfirst into high-intensity, high-volume, and high-impact training within a short period, you’re treading on dangerous ground.

Let me give it to you straight. You’re practically asking for trouble—burnouts and overuse injuries like Runners Knee and Stress Fractures—when you push too hard, too soon. Take a moment to let that sink in. It’s like trying to sprint before you’ve even learned to crawl.

During the first few months of your training (yes, I said months!), it’s essential to take it easy and embrace the beginner’s mindset. Start right where you are, not where you wish to be. It may not sound as glamorous as diving into intense workouts, but trust me, it’s the smartest approach you can take.

Additional resource – How to start running with your dog

Walk Before you Run

Not only does walking help you shed those extra pounds, but it also boosts your stamina, reduces stress, enhances your physical shape, and improves your overall health and well-being. It’s the foundation upon which you’ll build your running empire.

Now, let’s talk strategy. In these initial weeks, as you embark on your fitness journey, make it a habit to take 8 to 10 30-minute walks. This will gradually prepare your body for the transition into running. Think of it as priming the engine before you hit the gas pedal.

But what if you’re already in decent shape? Well, my friend, you’re ready to kick it up a notch. Gradually increase the duration of your walks to 60 minutes, three to four times a week. Allow your body to adapt to this new level of activity for at least three weeks before delving into the beginner running plan that awaits you.

How to Progress?

Now, it’s time to take your training to the next level and introduce a game-changing method that will revolutionize your running experience. Say hello to the walk/run method, a genius strategy crafted by the renowned running guru Jeff Galloway.

Here’s the secret sauce: the walk/run method combines the best of both worlds—low-intensity running intervals and strategic walking breaks. It’s like a beautifully choreographed dance between your feet and the ground, allowing you to manage fatigue, improve your fitness, and build stamina while safeguarding yourself from discomfort, injuries, and burnouts. It’s a method backed by science and championed by countless runners who have successfully embraced it.

Let’s break it down. As you transition from walking to incorporating running into your routine, take it step by step, quite literally. During the first week, aim for 20 to 30 minutes of walking per session. Feel the rhythm of your feet hitting the pavement as you gradually build up your strength.

As you move into the second week, it’s time to kick things up a notch. Increase your walking duration to 30 to 35 minutes per session. You’re pushing your boundaries, challenging your body to adapt and grow stronger.

But we’re not stopping there. Oh no, we’re just getting started. From here on out, I want you to add two to three precious minutes to your walks with each passing week. It may seem like a small increment, but it’s these incremental steps that will lead you to greatness. Keep adding those minutes until you’re comfortably walking for at least an hour. Feel the confidence surge through your veins as you conquer each milestone.

Once you’ve reached the point where you can power walk for an hour without breaking a sweat, it’s time to unleash the true runner within you. It’s time to embrace the run/walk method, alternating between easy jogs and well-deserved walking breaks. By incorporating short bursts of running into your regular walks, you’ll extend your endurance, push your limits, and remain injury-free.

How Much is Enough?

The exact run to walk ratio depends, mostly, on your current fitness level and training goals.

Now, here’s the golden rule: take breaks at the right times. Just like a well-timed pit stop during a thrilling race, these breaks will ensure you don’t push yourself to the brink of exhaustion. It’s all about strategic rest, my friend.

Let’s explore three walk-to-running ratios that you can experiment with. Remember, you have the freedom to choose the one that suits you best. No pressure, no judgment—just you and your personalized running journey.

If you’re just starting out on this exhilarating path, consider yourself a complete beginner. Start by running at an easy and slow pace for 10 to 20 seconds, and then reward yourself with a rejuvenating one to two minutes of walking. Feel the rhythm of this alternating dance between running and walking, allowing your body to adapt and grow stronger with each step.

As you progress and enter the intermediate stage, typically after two to three weeks of consistent running, it’s time to challenge yourself a little further. Embrace the runner within you by extending your running intervals. Push yourself to run for two to five minutes, and then savor the bliss of one to two minutes of walking. It’s a delicate balance, a symphony of effort and recovery, propelling you towards your running aspirations.

Now, if you’ve been on this running journey for over a month, congratulations! You’ve reached the realm of experience. It’s time to unleash your true potential. Challenge yourself to run for a solid ten minutes, immersing yourself in the sheer exhilaration of movement. Then, catch your breath with a short but well-deserved 30 seconds to one minute of walking.

Additional resource – Here’s your guide to running three miles a day.

Run For longer

As you progress on your running journey, the key is to gradually increase the time you spend running while reducing the number of recovery breaks you take. It’s a beautiful dance between pushing your limits and allowing your body to adapt and grow stronger. Picture it like a challenging puzzle where each piece fits into place with each passing day.

Now, let’s talk about reaching that magical milestone of running for a solid 25 to 30 minutes without feeling like you’re gasping for air. The timeline for reaching this goal varies depending on your current fitness level, but one thing is certain: consistency is the name of the game.

Stay committed and trust the process.

With each step, each breath, and each stride, you’ll inch closer to that moment of effortless running bliss.

Once you’ve conquered the 30-minute mark with ease, it’s time to level up your running game. It’s time to add a dash of variety to your training program. Think of it as spicing up a delicious dish with different flavors and textures. You can add distance to challenge your endurance, incorporate speed work to enhance your quickness, and conquer hills to strengthen those leg muscles. The possibilities are endless, and your running adventure is about to get even more exciting.

Now, let’s talk about exertion levels during your runs. It’s important to find that sweet spot where you’re pushing yourself enough without going into full-on sprint mode. Aim for a 6 to 7 out of 10 on the exertion scale during the running portion of your workout. Feel the burn, embrace the challenge, but also listen to your body’s cues.

And when it’s time to switch to a walking break, dial it down to a comfortable 2 to 3 on the exertion scale. It’s all about finding that delicate balance and honoring your body’s needs.

Want more structure?

Try my couch to 5K treadmill plan.

Follow a Beginner Running Plan

Having a plan is key to achieving any goal–let alone running.

You don’t pursue a career in marketing, for example, without a concrete plan of studying the right books and tutoring under the right teachers.

That’s why I highly recommend you follow a well rounded, well-thought training plan, just like the one shared below.

Doing so will not only help you build your training volume, but also keep you motivated beyond the initial motivation.

The simple beginner runner plan features three days of run-walk sessions.

You begin with a few short intervals of running–or slow-paced jogging–for 30 to 60 seconds, then build you on that while taking less and less for recovery.

By the end of the eight weeks, you should be able to run for thirty minutes straight–that’s roughly two to three miles–without much trouble.

Week One – Walk for five minutes, then jog for 30 to 6o seconds.

Repeat three to four times.

Week Two – walk for three minutes, then jog for one to two minutes.

Repeat the sequence for four to five times.

Week Three – Walk for three minutes, then jog for two to three minutes.

Repeat the cycle for five to six times.

Week Four – Walk for three minutes, then jog for three minutes.

Repeat the cycle six times.

Week Five – Walk for two minutes, then jog for three to four minutes.

Repeat the cycle four to five times.

Week Six – Walk for two minutes, then jog for five minutes.

Repeat the sequence three to four times.

Week Seven – Walk for two minutes, then jog for eight to ten minutes.

Repeat the cycle two to three times.

Week Eight – Warm up by brisk walking for 10 minutes, then slow jog for 20 to 30 minutes while keeping an easy and conversational pace.

Just keep in mind that this is a generic plan, so feel free to adjust it according to your own needs and preferences.

It’s not written in stone by any means.

Looking for a more extensive plan?

Try my couch to 5K training schedule.

And if you’re into challenges?

Give this 30-day running challenge a try.

You can also learn how to design your running plan here.

Note – Here’s how often should you run per week.

How Long Does it Take To Become A Runner?

If only I could conjure a magical stopwatch to provide you with a definitive answer. Alas, my friend, the path to becoming a runner is as diverse and intricate as the winding trails we traverse.

I must emphasize that each individual embarks on this journey with a unique set of circumstances and characteristics. Just as each snowflake boasts its own intricate design, your journey to becoming a runner is a personal tale, shaped by a multitude of factors.

Let’s explore some of these factors that weave together to create your running narrative:

First and foremost, we have your current shape. Are you starting from scratch, or do you possess a level of fitness from previous activities? Your starting point sets the stage for the adventure that lies ahead.

Consider your training history. Have you dabbled in running before, or are you a complete novice to the world of pounding pavement? Previous experiences, whether they involve running or other forms of physical activity, contribute to your body’s adaptation process.

Age is but another brushstroke on the canvas of your running journey. As the years grace us with their presence, our bodies may respond differently to the rigors of training. Fear not, for age is but a number, and determination knows no bounds.

Ah, the weight we carry, both physically and metaphorically. Your current body weight can influence the demands placed upon your joints, muscles, and cardiovascular system. Remember, every stride forward is a step towards a stronger and healthier you, regardless of the number on the scale.

Now, let us not overlook the intricate tapestry of our genetic makeup. Like a hidden treasure map, our genetic composition influences our body’s response to training stimuli. Embrace your unique genetic blueprint, for it holds the secrets to unlocking your potential.

Foot Calluses From Running – How To Stop A Running Callus

running shoe brands

Running and foot calluses go hand in hand.

In fact, if you log in serious miles every week and have zero calluses, consider yourself one of the lucky ones.

Here’s the truth.

Excessively large calluses aren’t just a problem of appearance, but can also cause discomfort during exercise, especially when running.

They’re also pretty common among athletes from all training backgrounds.

In today’s post, we’ll go through what causes this skin build-up while running, how to prevent calluses, and how to treat them.

Sounds great?

Let’s get started.

Foot Callus From Running – The Definition

Also known as a corn, a callus is hardened skin that occurs in friction-prone areas, such as the bottom of the foot, or over bony projections.

Often painless, calluses are your skin’s natural protective reaction of pressure sites.

The affected skin may start getting dry, flaky, and harder than the rest of your skin.

For most runners, this hardened mass of skin tends to build up in the heel, likely from the edge of the shoe rubbing repeatedly against the back of the foot.

What’s more?

If you run in improper shoes, you might develop a callus along the outside of your big toe.

Here’s the good news.

There are many things you can do to lower your risk of developing calluses during running.

Here are a few.

The Symptoms of A Running Callus

It’s easy to tell that you have a callus.

Usually, the skin of a plantar callus is yellowish or gray.

It may also feel flaky, tough, and dry.

The skin may be tender when direct pressure is applied to the region.

Not a Bad Thing

Getting a callus as a runner isn’t necessarily a bad thing.

There’s actually a benefit of having calluses when pounding the pavement.

This hardened skin buildup in areas prone to friction and rubbing against your shoes protect you from forming blisters.

In essence, calluses protect your feet against blisters and sores while running.

Although calluses your our body’s natural reaction for protecting the skin, like all good things in life, too much of a good thing can do you more harm than good.

How To Stop A Running Callus

How To Prevent A Running Callus

Here are a few simple measures to help you prevent and manage painful calluses.

Proper Running Shoes

Running in improper shoes can be a real problem for your feet, likely resulting in numbness, blisters, and calluses.

This is especially the case if your shoes are too narrow and tight in the forefoot, causing pinched-nerve pain and calluses.

If you’re prone to calluses, make sure your running shoes suit your feet and running style.

They should be wide enough across the front, so there little no friction or pinching.

Additional guide – How to prevent Foot pain from running

Good Socks

Proper running socks are also key.

Go for sports socks made from polyester-cotton blend.

Technical materials help reduce moisture better than regular cotton socks.

High-performance socks are often designed with extra cushion in callus prone areas.

What’s more?

You can also reduce friction when running by wearing thicker socks that have extra padding in high-friction areas.

Reduce Friction

As previously stated, friction lies at the heart of the problem.

Anything you can do to reduce it is surely welcomed.

Use a foot ointment that can help reduce friction while running, thus preventing calluses.

You can also prevent calluses by putting a barrier between where the shoe is rubbing and your skin.

Place the bandage inside of your running shoes where the shoes rub against your foot.

Additional resource  – Here’s your guide to pain on top of the foot when running.

Treating Foot Calluses For Runners

If your calluses are painful, you should take some measures to ease the pain.

Here’s how to treat running-induced calluses by yourself.

First, start by soaking your feet in soapy, warm water for 5 to 10 minutes. This helps soften the skin.

Next, get a pumice stone (available at your local drugstore), get it wet, then gently shave lightly the dead skin, AND the callus using circular or sideways motions for two to three minutes.

Stay safe.

Do not take too much skin off—or else, you’ll wound your foot.

And you don’t want that.

Repeat this process many times per week or as needed.

Apply moisturizing foot cream following the scrub sessions to keep the area soft.

The ingredients should include Ammonium, Salicylic Acid, Urea, or Ammonium Lactate.

When to See A Doctor

Although most cases of callus do not require medical attention, you need to have it looked at by your doctor or podiatrist.

The following scenario deserves attention from a healthcare professional.

The callus is red, dry, and cracking. This may indicate chronic athlete foot.

The callus is chronic and recurring. Your sports-oriented physician may help you figure out why your calluses keep returning.

If you notice that your callus is warm to the touch, red, or particularly painful, seek medical attention.

These red flags could signal an infection.

The callus is thick and painful. It should be treated by a sports-oriented physician.

The callus has clear fluid or pus discharge. This could indicate that the callus might be infected or ulcerated, thereby, requires medical attention.

If you have heart problems, diabetes, or circulatory problems, suffering from any of these conditions makes it more likely for you to develop an infection.

If you have any of these conditions, check your feet for damage regularly.

Additional Resource – Does running make you old

5 Treadmill Apps You Need To Try

5 Treadmill Apps

Training on the treadmill is a fantastic way to stay consistent with your training all year round.

But pounding the belt day in and day out can get boring—pretty fast.

Don’t lose hope.

With the right tools and mindset, you can make treadmill training something to look forward to.

One way to get the most out of your treadmill runs is to use one of the many running  apps available.

A lot of companies have started in recent years to develop apps that make treadmill training much more fun and challenging.

You can find apps that encourage you to reach your running goals.

You can even participate in group run classes from the comfort of your home, and so much more.

Want to try some of these running apps on your own?

Then you’re in the right place.

In today’s post, I’ve separated the wheat from the chaff and am sharing five apps that will take your indoor runs up a gear.

They’ll motivate you to hit the belt again and again

1. Zwift

Want to be taken into a virtual reality world?

Then Zwift is all you need.

Zwift lets you run in Watopia, complete with the road, trails, sand, jungle, volcanoes, and the countryside, plus routes in New York, London, among others.

You can choose from 5 virtual worlds and with over 80 routes.

However, there’s a downside.

This running app requires a bit more accessories to help provide you with accurate feedback on cadence and speed.

First, you’ll need to bring up the app on your phone, tablet, laptop, or tv.

You’ll also need a footpad to monitor your cadence and heart rate monitor.

Additional Source – Check this treadmill pace chart

2. Nike+ Run Club

This app has been around for a long time, and it keeps on getting better.

You can find within the Nike + Run Club app more than 50 guided runs—some of which are led by Nike superstars, such as Shalane Flanagan and Eliud Kipchoge.

You can also choose from six running routines, specifically tailored for the treadmill.

The sessions are roughly 15 to 20 minutes long and come with audio instructions—for everything from speed and incline settings to encouraging tips.

What’s more?

By setting your running surface, the app monitors your pace, time, distance, and calorie burn.

The instructions provide good suggestions on how fast or had you should go, so it’s a good idea to know your training and recovery paces beforehand.

What’s more?

You can also link the app with other Nike products, like the Fuel band, load up on Nike Fuel.

Additional resource – Strava for runners

runners training on a treadmill

3. Peloton Digital

Looking to live-stream your treadmill workouts?

This app is for you, especially if you love the energy of group classes.

You can find more than 170 Tread Studio live on-demand running classes that range from 15 to 60 minutes long.

These routines cover everything from recovery runs to interval workouts and hill reps.

You can also filter by class type, duration, difficulty, instructor, or music genre.

The app also has also other types of guided training, such as stretching yoga, walking, and boot camp, and other exercises that require no equipment at all.

Additional Resource  – When to replace a treadmill belt

4. Zombies! Run

Looking to turn your treadmill runs into a horror movie adventure with zombies?

Try Zombies.

Run! App.

The app comes with basic features you’d expect in a running app, but it’s also a multi-player game, taking place in a post-apocalyptic world infested with zombies.

Zombies! Run is straightforward.

You set it up, put on your earbuds, and start playing one of the 60 missions.

You begin by walking, or running, then as soon as you hear zombies approaching, you run for your life.

5. Ghost Race

Ghost Race may seem to have a lot in common with Zombies, Run! But the ghost here isn’t much of a supernatural entity but a virtual body you create before each workout to compete against.

This created entity is crafted based on your pace, distance, and time, though you can re-adjust to push yourself even harder.

The app also allows you to monitor your times on different surfaces and compare your performance from day-to-day.

It also keeps you updated on your growth against your ghost in real-time.

What’s more?

You can also save previously running times and then race against those during future training sessions.

When you fail to keep up your previous time, a “ghost” will manifest in front of you, moving at a faster pace.

Conclusion

There you have it.

Using running apps, like the ones mentioned above, is one of the best ways to make treadmill training more fun and less boring.

Now it’s up to you to download the apps and start training.

The rest is just details.

Please feel free to leave your comments and questions in the section below.

In the meantime, thank you for dropping by.

Keep training strong.

Top 4 Mobility Training Drills For Runners

foot pain from running

Looking for a powerful mobility training routine to help you improve performance and reduce injury risk?

You’re in the right place.

All runners know that stretching is part and parcel of a well-rounded training plan.

Regular stretching feels good, increases flexibility, releases tension, corrects muscle imbalance, and improves technique—all of which make running more enjoyable and efficient.

That said, mobility training is also important.

It’s actually one of the keys to training longevity as it helps reduce injury risk, keep the joints healthy, and ensure optimal performance.

Yet, so many runners miss out on its benefits, whether they don’t know much about mobility’s impact on performance or are simply unwilling to invest time doing mobility drills (I understand, we’re all busy, but that’s no excuse).

Here’s the truth: Improving your mobility doesn’t have to burn off long hours from your day.

In fact, as little as 10 to 15 minutes a day is enough to reap physical performance gains.

In today’s article, I’ll explain what mobility is all about and share a few mobility drills as well as how to incorporate mobility work into your workout routine.

Before we go into the many ways mobility training improves your athletic performance, let’s take a look at what mobility actually means.

Flexibility VS Mobility

Most runners know what flexibility is, but they often confuse it with mobility.

Understanding the difference is key as mobility training is much more than just stretching.

Let’s see which is which.

Flexibility stands for the ability of the soft tissues to stretch in a specific direction.

It’s the lengthening of muscles in a passive way.

For example, if you can reach your toes from a standing position without bending your knees, or scratch every part of your back unassisted, you’re pretty flexible.

Mobility, on the other hand, is about how freely you can move a joint through a range of controlled motions, before being limited with control.

It’s your ability to exert force throughout a greater range of motion.

For example, if you can press dumbells behind your neck, get into a deep squat with weights on your back, or do gymnastics, you have good mobility.

Now that you have an idea what mobility is all about, let’s look at how it can help improve your running performance.

The Benefits Of Mobility Training For Runners

Whether you just took up running to lose weight, are preparing for your 5th marathon, or just running for the joy of it, working on improving your mobility could give you a big performance boost!

Good mobility helps us pay more attention to our bodies and our range of motion, leading to improved running technique and fewer injuries.

Let’s see why…

Improved Speed

Poor mobility limits your ability to run at a faster pace.

The main goal of mobility training is to improve the position of the joint, which helps increase power output, resulting in efficient performance.

When you have a good range of motion, you can push move much more efficiently.

This translates to a faster pace and improved athletic performance.

Reduced Injury Risk

A lack of mobility makes you prone to pain and injury, especially as you ramp up your training.

For instance, research shows that limited hip mobility may lead to patellofemoral pain syndrome, iliotibial band syndrome, hip pain, and a host other issues.

Better Awareness & Technique

Mobility training can make you more aware of how your body moves and your range of motion, which results in better running form.

runner stretching

The Mobility Training Routine You Need

Here’s a 15-minute routine to improve the range of motion in all major joints and strengthen the surrounding stabilizing muscles.

You can perform these movements as part of your dynamic warm-up or your cool-down.

Perform it two to three times a week to take your running efficiency and power to the next level.

Squat to Stand

A great movement for mobilizing the inner thighs and hamstrings.

Proper form

Begin by standing, feet slightly farther than shoulder-width apart.

Next, while bending your knees much as needed, bend over and grab the bottom of your feet, pulling yourself into a deep squat position.

As you assume the bottom position, focus on pushing your knees out, forcing your chest up, and keeping the heels low as you lower your body toward the floor.

Hold for a moment, then push your hips upward until you feel the stretching in your hamstrings.

Try to keep a slight arch in the lower back, chest up and knees out the entire time.

Shoot for 8-10 reps.

Additional resourceShould you run after leg day?

Chest Stretch With Broomstick

This drill mobilizes the upper back.

It improves shoulder mobility and stretches the arm and chest muscles.

Proper Form

Stand tall, assuming an athletic position.

Then grab with your hands the end of the broomstick, using a pretty wide grip.

While keeping your core engaged and elbows straight, lift the broomstick up and over your head.

Next, while keeping arms straight, slowly rotate the broomstick up, overhead, and behind the hips (or as low as possible).

Widen your grip if you’re having issues getting the pipe overhead.

That’s one rep.

Couch Stretch

This move not only opens up your hips but also improves mobility and relieves tightness in the core, back, and groin.

Proper Form

Place your front foot on the floor, knee bent at 90 degrees angle.

Bend your right knee and place your shin along the back cushion of a chair or a couch with the toes pointed upward.

While keeping your right thigh in line with your body, place your left foot, aligning the knee over the ankle.

Engage your core, elongate your spine, and keep your hips square.

You should feel tension through the hips flexors and quads on that right leg.

Wall Ankle Mobilization

A great drill for improving ankle mobility.

Proper Form

Start by facing a wall, toes of your right foot against the wall.

While keeping the right heel planted, try to shift your knee toward the wall, having it go past the toes.

Next, straighten your front knee and slide your foot back a bit so that your toes are roughly an inch away from the wall then repeat.

Continue on moving back gradually until your kneecap is barely touching the wall.

Your knee should go straight forward and not inward, the heel remaining on the ground the entire time.

You should feel a stretch in the posterior lower leg.

It’s a good idea to back off if you feel pinching in the front.

Perform 8 to 10 reps on each side, preferably in minimal footwear,  to complete one set.

Looking for more exercises?

Here’s the speed drills routine you need to improve your running speed.

More Mobility Exercises For Runners And Athletes

Without further ado, here’s a series of exercises you can almost do anywhere to improve your hip mobility and strength. The following exercises will help loosen your hip flexors and strengthen the surrounding stabilizing muscles.

  1. Standing Hip Figure Eight

Begin by standing on your left leg, then bring your right knee up to a 90-degree angle and then move it through a figure “8” motion. Hold on to a chair or wall for balance.

2. The 90/90

Start by sitting on the ground, then bend your right leg in front of your body with your hip rotavated out.

Next, get your chin as close to your foot as possible by moving your upper body forward. Again, keep the motion fluidly and only hold at the bottom for a moment.

Repeat the movement 8 to 10 times, then switch sides. Make sure to keep your torso stacked over your hips the entire time.

You should feel tension throughout your body as you go through the movements.

Spend around 60 to 90 seconds on each side to complete one set.

Start by placing your right leg forward and your left back. Next, position your left leg beside you while keeping your hip rotavated inward and your ankle and shin on the floor. Next, bend your right knee so your leg forms a 90 degrees angle. Your ankle should be neutral, and your left knee in line with your hip.

3. Spiderman Stretch

Assume a push-up position, supporting your weight on your hands and toes. Make sure to engage your core, so your back is flat and not arched or rounded.

Next, bring your right leg to the outside of your hands, with the foot pointed forward and the entire foot planted on the floor. Next, let your right knee travel far ahead of your foot for more stretch by dropping your hips toward the ground. Just keep your heel planted on the ground the entire time.

Hold the position for 5 to 10 seconds, flexing slightly forward for a deeper stretch. Then bring your right leg back to the push-up position and change sides for anywhere from 6 to 8 reps for each leg.

4. Supine Hip Rotation

Start by lying flat on your back, arms extended to your sides with your palms on the floor.

Next, while bending your knees to a 90-degree angle, bring your legs into the air, then drop them to your right side. Again, make sure to keep the upper and middle back flat on the ground.

You should feel the stretch deep into your left hip. Hold for 15 to 20 seconds, then bring your legs back to the starting position and switch sides.

Repeat 4 to 6 times per side.

5. Frog Stretch

Start in a table position on your hands and knees, facing sideways on your mat. Make sure your knees are under your hips and your wrist under your shoulders.

Next, lower your upper body to your forearms while sliding your knees apart. If your knees are sensitive, you can fold your yoga mat or add planets to help take off some of the pressure.

Hold the stretch for one to two minutes. Then slowly return to starting position. You’re doing it right if you only feel the stretch or tightness in your inner thigh/adductor area.

6. The Yogi Squat

This is a hard one to pull off, so if you struggle to stay upright and/or on your feet, feel free to hold onto a chair or railing for balance.

Assume an athletic stance, with feet about shoulder-width apart and legs turned out from your hips. Next, while engaging your core and keeping your low back fat, lower yourself into a low squat position. Do your best to tock side to side without falling over.

Bend your knees and hips and slowly lower into a very low squat while keeping your chest up, knees in line with your toes, and heels planted on the floor the entire time.

For a deeper stretch, place your elbows within your knees, then press your palms together in front of your chest.

7. Reverse Plank/inverse tabletop

Start by lying on your back with hands placed by your rips and fingertips facing your feet.

Next, press your hips upward so that your hands and feet are the only part of your your body in contact with the ground. Make sure your body is straight from your head to your feet.

For a deeper stretch, lift your right knee off the floor and hold for 20-30 seconds.

Conclusion

There you have it! If you’re looking to improve your mobility as a runner, then today’s article will put you on the right path. The rest is just details.

Thank you for dropping by.

Keep running strong.

David D.

How to Use KT Tape For Shin Splints Pain

runner suffering from shin splints

Would you like to learn how to use KT tape for shin splints?

Tµhen you have come to the right place.

Shin splints are the inevitable side effect of logging the miles, especially for those who often run on hard surfaces.

This notorious overuse injury can also stop runners in their tracks, often taking weeks to fully heal.

Luckily, KT tape can give your muscles a little relief.

But knowing why, how, and where exactly to tape your shins can be a bit tricky.

Worry no more.

In today’s article, I’ll spill the beans on shin splints, its causes, red flags, and also show you how to use kinesiology taping to soothe this painful injury.

By the end of this post, not only will you know what the condition is all about, but also learn how to tape your shins at home for shin splints like a pro.

Are you excited?

Here we go.

The Definition – KT tape For Shin Splints

Shin splints are the all-catch-term often used to refer to pain on the side of the shin, and it’s one of the most agonizing pains a runner can suffer from

The condition occurs when you overstress the muscles in the front of the shin, causing inflammation in the muscle, bone, and surrounding tissue.

This can be blamed on running or performing other high impact exercises for extended periods of time without proper recovery.

Pain is commonly experienced along the tibia shone or the legs following running—or other forms of high impact exercise.

The condition is common in athletes participating in high impact activities, including runners, tennis players, military personnel, and dancers.

Surveys show that shin splints make up 13 percent of all running injuries.

So what can you do about it?

Besides rest, stretching, and strength training, KT can also help ease pain and significantly speed up the recovery process.

Let’s see why and how.

The Benefits Of KT Tape For Shin Splints

Also known as K tape, or physio tape, Kinesio tape is, quite literally, a thick, elastic, heat-activated sports tape that you apply to your muscles, acting a sort of second skin.

The KT offers sensory input into the affected region but still allows for full range of motion.

Using kinesis tape to deal with shin splints is an effective method for soothing or preventing symptoms of shin splints.

Don’t take my word for it.

Research out of the Journal of Sports Medicine and Physical Fitness that that assessed subjects with shin splints revealed that those using the tape for just a week reported less pain than those who used shoe insoles.

Here’s how it helps.

Speeds Up Recovery

When your shin is injured, your body sends lymphatic fluid to that affected area, causing it to swell and become inflamed.

This results in soreness and pain, which is never fun.

However, using KT, especially tapes with elastic properties, can limit soreness by lifting up the skin and promoting greater mobility of lymphatic fluid, speeding up healing in the process.

Relaxes the muscles

The tape facilitates muscular contractions of the tibialis anterior muscle, which can improve your muscle function and reduce the pressure on tissues to soothe the pain.

Multi-uses

You can use the tape to treat other lower extremities overuse injuries, such as plantar fasciitis, posterior tibialis tendinopathy, and Achilles tendinopathy.

It’s Cheap

Taping is a straightforward, cheap, and quick measure you can take to improve your shin splints condition and return to running as soon as possible.

Additional Resource – Here’s your guide to calf pain while running

KT tape For Shin Splints IS Not The Ultimate Answer

Just keep in mind that tape is the panacea fix to all of your shin issues.

In fact, you should be using it in addition to there treatment methods to completely heal the injury.

Additional resource – Common cause of lower leg pain while running

using KT tape for shin splints

How To Apply KT Tape For Shin Splints Pain

Now let’s get to the practical stuff.

Here’s the step by step guide on how to tape your shin splints for a quick recovery.

Word of caution. Before taping your shins, I’d recommend that you visit your doctor to ensure it’s safe for you to do.

Before applying the tape, understand the side effects of suing KT tape and assess the specific types of strips used.

Get The Tape

You can purchase either kinesiology tape or trainers tape at most pharmacies or sports stores, and even some larger retailers.

Just avoid using duct tape as you risk blistering and shearing of your skin.

Additional Resource – Here’s how to use KT Tape for runners knee.

Keep Clean

Wash your legs, cleaning any dirt, sweat, and oils off your skin with water and a mild cleanser.

Next, dry them thoroughly with a towel.

You might also need to trim or shave any hair on your legs.

This helps ensure that the tape adheres effectively to your skin.

Measure The Tape

Start measuring from the bony bump on the outside of the foot, then around the sole of your feet, to roughly halfway up your shin.

Make sure the tape is long enough to cover your lower leg or at least the affected area.

Keep in mind that the KT will be longer once stretched.

Next, cut an ‘I’ strip of KT that’s about three inches shorter than the length of your shin—or at least as long as the pained area.

Unroll it

Hold the tape at the center-top of your foot, roughly two inches beneath the top of your big toe, then unroll it until it reaches just below the outside of your knee.

Cut tape there.

Find The Muscle

Make sure to apply the tape on the top part of the anterior tibial muscle.

To find it, move your toes up toward your knee, actively flexing your ankle.

The anterior tibial muscle is located roughly two inches under the lateral aspects of your knee.

Apply It Right

Apply one piece on your shin, starting from the top of your foot.

While keeping your ankle flexed, apply the other end of KT to your big toe and top of your foot.

This should create a tape bridge over your shin.

Next, apply a small strip horizontally across your shin, roughly below the affected area.

Pull this strip firmly.

Then put another small horizontal strip of tape just above the affected area.

Additional Resource – A Tibial Posterior Tendonitis Guide in Runners

Peel Off

Peel off the residual paper and stretch the tape to stick just below the base of your big toe, foot still flexed.

Remove the edge of KT and stick without any tension.

Rub it

Rub the tape with the palm of your hand to heat it up and activate the adhesive.

This helps it better bond to your skin.

Wait

Wait for at least an hour after applying the tape to run, or it might come off. Also, don’t jump into the shower immediately after applying the tape, or it won’t adhere.

Leave it

You can leave the tape on for up to three to five days, and you can get it wet.

Just keep an eye for any signs of irritation around the KT, and remove it if your skin becomes red, a rash, itchiness, or any other adverse side effects.

Additional Resources:

Your guide to runners itch

How to prevent Foot pain in runners

How to prevent calf pulls while running

Conclusion

There you have it.

This is all you need to know about using KT tape for shin splints pain.

This simple tool can actually go a long way in soothing your shin pain, even preventing the injury in the future.

Just be willing to try it for yourself and see if it helps.

Please feel free to leave your comments and questions in the section below.

In the meantime, thank you for dropping by.

When To Run Through Pain & When To Stop?

When To Run Through Pain

Whether you just took up running or a serious athlete, log enough miles, and you’ll experience aches and pains in your muscles, joints, bones, and connective tissue.

In some cases, you might able to keep running through the discomfort, but often serious running pain means that you need to assess your running routine, even stop training altogether.

So how do you know when it’s okay to run through the pain, when to slow it down, and when to rest and go see a doctor?

If you’re looking for answers, then you’re in the right place.

In this post, I’ll briefly explain the different types of running pains, with suggestions on when it’s okay to keep training and when to stop.

Sounds great?

Let’s get started.

Word of caution. Let the record clearly state that I’m not encouraging anyone to keep running through injury.

If you have chronic pain, get it checked out by a professional.

I’m not a doctor nor play one on the internet.

Measure your Pain

Running pains are not created equal.

Instead, these come in many forms, whether it’s a sore muscle, achy joint, bone fracture, inflamed tendon, or throbbing headache.

They also vary from one runner to the next.

To help you decide how to best react to these running pains, consider grading them on a pain scale of 1 to 10.

Here’s how.

Mild Pain 1-3

You experience it at the beginning of a run, but it usually subsides as you start to warm up and continue running.

In general, it’s safe to run through mild pain.

If you have any problem areas, opt for the RICE protocol after your session.

Moderate Pain 4-6

This type of pain manifests as you start running, but stays at a tolerant intensity throughout the workout.

While you can still run through it, it’s better to listen to your body and adjust your training approach accordingly to prevent things from getting worse.

Severe pain – 7 to 10

This type of pain is so serious that you feel it before, during, and after your runs.

In fact, the agony increases as you log in more miles, forcing you to limp or change your gait.

Never run through this type of pain as it will do you more harm than good.

Instead, take as many days off from training as long as you have symptoms.

You should also consult your doctor, who will recommend the right treatment and prevention options to help you return to running pain-free.

Where is the pain?

Now let’s dive into some of the most commonly affected limbs while running.

Pinpointing the exact affected area can help you determine what’s going on and how best to proceed.

runner training through pain

Pain Region – The Head

If you’re experiencing a headache after running, it could be caused by bright sunlight (especially squinting), dehydration, or exhaustion (due to swelling blood vessels).

To avoid it, make sure (1) you’re drinking plenty of water before, during, and after your runs; (2) wear a hat with a brim and running sunglasses when running in the sun; and (3) change your running duration or time of the day.

But if you often get headaches after running, or suffer from any other unusual symptoms, such as a stiff neck, confusion, double vision, vomiting, or God forbid, fainting and loss of consciousness, then seek medical care.

Pain region – The Foot

Since the feet take the brunt of the repetitive pounding of the sport, it’s an injury-prone region in runners.

The foot is an incredibly complicated structure made up of a network of bones, tendons, ligaments, muscles, and fascia that work together in harmony and serve as the foundation to every running step you take—and there are plenty of things that can go awry with this key body part.

One dysfunctional cog and the whole machine can be slowed down to a screeching halt—or stop functioning altogether.

Let’s look at a few issues.

Reason 1 – Improper Running Shoes

If your feet feel tingly or numb, poor blood circulation could be the culprit.

Check if your shoes are too tight.

If it’s the case, loosen them up and give your toes enough wiggle room.

Apply the RICE protocol as soon as you get home.

Seek medical care if the numbness persists.

Reason 2 -Heel Pain

If you experience most of the pain in your heel, especially if it’s worse in the morning, you could be dealing with plantar fasciitis.

Every case is different.

You might push through mild plantar fasciitis, but in other cases, any extra miles can cause more damage to the ligament.

If your pain is severe, stop training for a few days, then start running again once you’re pain free.

Reason 3 – A Blister

Blisters are by no means a serious injury, thereby, running through them should be no problem, as long as you minimize the friction against your skin.

Apply gel, jelly-like blister bandages or put a tissue over the affected area

Pain Region – The Shins

The lower leg, including everything between the knee and ankle, is a prime spot for aches and pain thanks to running’s high impact nature.

Runners can suffer from a couple of different overuse injuries that strike this region.

Reason 1 – Shin Splints

If the pain is neither on the front or the back of the shins, you could have shin splints, which is a common overuse injury among beginner runners who try to do too much too soon.

Shin splints are the catch-all term used to describe pain below the knee either on the inside part of the leg (medial shin splints) or on the front outside part of the leg (anterior shin splints).

Shin splints can often be treated with rest and ice, but if symptoms don’t improve, consult your physician to make sure you have a stress fracture.

Reason 2 – Stress Fracture

If the pain starts off mildly and gradually gets worse the more miles in, it could be a stress fracture, which requires immediate medical attention.

Stress fractures consist of small cracks, or severe bruising, in a bone that causes discomfort and pain.

It often strikes runners in the shins and feet.

The condition happens when muscles become fatigued and can no longer absorb added shock.

Taking time off running is essential as continued strain on the bone can lead to more serious injury.

And you don’t want that.

Pain Region – The Ankle

Your ankle joint is one of the most important running joints—so it’s no surprise that it’s a common source of pain.

The joint forms the connection between your body and the ground, and there are several roots for running-induced ankle pain.

The following are the most common:

Reason 1 – Ankle Sprain

If you sprain your ankle during a run, stop running, especially if the joint is swollen or the pain is intense.

Running on a sprained ankle may damage the affected ligament, making you prone to further injury.

As a rule of thumb, get home straightway, and apply the RICE method.

Try to keep the affected joint mobile but don’t overstress it.

Reason 2 – Achilles Tendonitis

Experience soreness on the back of the ankle?

It could be Achilles tendonitis, which is an overuse injury of the Achilles’ tendon, the large tendon that attaches your calf muscles—the gastrocnemius and soleus— to the back of your heel bone.

Under repeated load, the tendon contracts and is forced too hard, resulting in inflammation or irritation.

If you have it, stop running and go home.

Next, rest, apply ice, compress, and keep the affected limb raised above heart level.

Pain Region – Knees

The knees are a problematic area for runners as there are different overuse injuries that involve knee pain.

In fact, out of all aches and pains that plague runner, knee pain from running is the most frustrating and debilitating.

Reason 1 – Runners Knee

If you feel pain under or around the kneecap, runners’ knee might be the culprit.

Also known as patellofemoral pain syndrome, the condition consists of damage to the cartilage under the kneecap, and it’s often caused by movements that load the knee joint on a flexed position.

Stop running for a few days, and RICE the affected knee.

You should also work on strengthening your quadriceps and stretching your hamstrings and hip muscles.

Reason 2 – Iliotibial Band Syndrome

If you feel pain around the knee on the outside of your leg, it could be the inflammation of the iliotibial band.

The IT band stretches along the outside edge of the upper leg, from hips to the knee.

Rest immediately the moment you notice IT band pain.

That means shorter distances or no running at all.

The condition can turn chronic if you don’t give yourself a break from running.

Reason 3 – Patellar tendon strain

Feel the pain just below the kneecap?

If so, it could be a patellar tendon strain, which is an inflammation of the tendon surrounding the kneecap (patella).

This tendon is a key part of leg structure, attaching the patella to the shinbone as well as helping keep the patella in line as the leg bends and straightens during the running gait.

Running through a tendon strain is asking for trouble.

If the pain doesn’t subside within a few days, have it looked at.

Pain region – The Hips

Prolonged sitting often causes tight hip flexors, which are usually made tighter the more miles you log in without following a consistent stretching routine.

That’s why hip pain from running is a common concern in the running world.

Reason 1 – Typical Soreness

When it’s just soreness.

In most cases, the pain subsides as you get fitter and gain more experience running.

You should also stretch and use a foam roller to improve mobility and release tension in that area, especially in the hip flexors.

Reason 2 – Bursitis

If you notice pain or swelling directly in the joint, then you could be dealing with hip bursitis.

If it’s the case, halt your running routine and opt for pain-free cross-training options and stretches you can do at home.

Pain region – The Lower back

Running’s high impact nature can take a toll on your back, causing soreness in the lower back, especially in runners taking up the sport for the first time.

Experience back pain during a run?

Try stopping and stretching for a few minutes.

If symptoms don’t improve, stop running altogether, and seek treatment.

Most cases of back pain are caused by a specific cause that you need to address before it gets better.

To prevent lower back pain in general, work on strengthening your core as well as trunk control and unilateral lower-body resistance training.

Pain region – The Chest

Stop running on the sport if the pain is spreading to your neck or shoulder and/or being accompanied by double vision, breathlessness, profuse sweating, and faintness.

In some cases, these are the symptoms of a heart attack.

Next, seek medical help immediately —or pray someone is nearby to help.

Conclusion

There you have it.

The above covers some of the most common pains runners experience during training as well as how to proceed in the presence of pain.

The key thing is to always listen to your body and readjust your training approach accordingly.

The rest is just details, as the saying goes.

Please feel free to leave your comments and questions in the section below.

In the meantime, thank you for dropping by.

David D.

Unlock Speed & Agility: How to Incorporate Strides into Your Running Routine

how to run faster

If you’re a beginner looking to delve into the world of running strides, you’ve come to the right place.

Running strides can be a valuable addition to your training routine.

They introduce your body to faster paces and speedwork, help you prepare for challenging sessions, and allow you to loosen up after easy workouts. In essence, by incorporating strides into your running routine, you’ll be taking significant steps toward achieving your running goals.

So, what exactly are running strides, and why are they important? In this post, we’ll answer these questions and guide you on how to integrate strides effectively into your weekly running regimen. Let’s dive in and get started.

What are Strides in Running?

Whether you’re a 10K beginner, cross country athlete, or training for the 9th marathon, strides are key for building coordination and speed—the kind you need to reach your full running potential.

Strides, also referred to as accelerations, are a valuable tool in a runner’s training regimen, regardless of their experience level. These short bursts of speed can help you build coordination, increase speed, and enhance your overall running performance.

Strides are brief, controlled bursts of speed during a run. They typically involve transitioning from a relaxed jog to nearly 95 percent of your maximum speed and then gradually decelerating to a stop. The goal is to run smoothly, focusing on good form and controlled effort.

Purpose of Strides:

Strides serve several purposes in a runner’s training routine:

  • Speed Development: Strides help improve your top-end speed, which can be beneficial for finishing races strongly or achieving personal records.
  • Running Mechanics: During strides, you can concentrate on your running form, ensuring that you maintain proper posture, arm movement, and foot placement.
  • Coordination: Strides enhance your neuromuscular coordination by requiring precise control over your running motion.
  • Anaerobic Capacity: These short, intense efforts engage your anaerobic energy system, improving your body’s ability to handle faster paces.

Why Do I Need To Do Running Strides?

Running strides, those brief and speedy bursts during your workout, offer a multitude of advantages that can significantly boost your running performance. Let’s dive into why you need to incorporate them into your training regimen:

  1. Speed Enhancement:

Strides provide a convenient way to introduce speed work into your training routine without dedicating an entire day to high-intensity workouts.

They help you acclimate your body to running at a faster pace, preparing you for hard training sessions or races.

  1. Improved Running Technique:

Strides are an effective tool for refining your running form and enhancing your running economy. By reinforcing proper running techniques, they make you more efficient.

They encourage a focus on aspects like posture, arm movement, and foot placement, promoting better running mechanics.

Strides can also increase your stride length, further improving your running mechanics and speed.

  1. Time-Efficient:

Perhaps one of the most appealing aspects of strides is their time efficiency. You can reap significant benefits in just a few minutes.

Strides can be seamlessly integrated into your training, whether it’s after an easy run as post-run drills or as part of a structured workout.

  1. Versatile Location:

Strides don’t require a specialized location. You can perform them virtually anywhere as long as you have enough space to accelerate and decelerate safely.

Whether it’s a track, a grassy field, or a quiet road, you can easily incorporate strides into your training terrain.

  1. Mental Focus:

Strides demand a high level of concentration and control, which can sharpen your mental focus and resilience.

Mastering the art of striding with precision can translate to improved race performances, as you’ll be better equipped to maintain your form during the toughest moments of a race.

Additional source – Here’s the full guide to average stride length.

picture of sunburn

How To Perform Running Strides

Here’s a comprehensive guide on how to execute them effectively:

  1. Choose Your Terrain:

Find a flat, straight surface that’s long enough to sustain a 30-second burst of speed. A typical range is about 250 to 300 feet, but adjust as needed based on your fitness level.

Ideal locations include tracks, long stretches in local parks, or quiet dead-end streets away from traffic.

  1. Start Gradually:

Begin the stride by running at an easy pace for approximately five seconds. Focus on maintaining a quick and short stride during this initial phase.

  1. Accelerate Smoothly:

Gradually increase your speed as you progress through the stride. Lengthen your stride and put in more effort.

By the time you reach the three-quarter mark of your chosen distance, you should be running at close to your maximum speed.

  1. Decelerate Gradually:

As you near the end of your chosen distance, start to slow down. Shorten your strides and ease into a gentle deceleration.

Avoid abrupt stops, as these can strain your muscles and disrupt your form.

  1. Transition to a Jog:

After completing the stride, transition smoothly into a slow jog. This phase helps in recovery and gradually brings your heart rate down.

  1. Post-Stride Walk:

Walk for one to two minutes after your stride to facilitate recovery and allow your heart rate to return to a comfortable level.

  1. Repeat as Desired:

You can incorporate multiple strides into your workout routine, with each one separated by a short recovery period.

The number of repetitions and the frequency of strides depend on your fitness goals and the specifics of your training plan..

Strides – The Running Technique

When it comes to running strides, having the right form is crucial to maximize their effectiveness and minimize the risk of injury. Here’s a breakdown of the key elements to focus on:

Posture Is Paramount:

Maintain an upright, tall posture throughout your stride. Keep your back flat and your core engaged.

Slightly lean forward from the ankles, creating a subtle forward tilt. This helps you harness the force of gravity for propulsion.

Embrace Relaxation:

Strides should feel effortless and fluid. Avoid tensing up any part of your body.

Unclench your jaw, let your cheeks dangle, and relax your facial muscles. Facial tension can sometimes translate into bodily tension.

Loosen Up:

Keep your body relaxed and free from tension. Ensure your arms, shoulders, and neck are loose.

Let your arms swing naturally at your sides. Avoid overextending or flailing them, as this can waste energy.

Short, Quick Strides:

Keep your strides short and quick to minimize overstriding.

Land Lightly:

Aim to land on your midfoot, closer to your toes, rather than striking with your heel. This promotes a more efficient stride.

A light, controlled landing reduces the risk of jarring impact on your joints and muscles.

Focus on Breath:

Pay attention to your breathing rhythm. Maintain a steady and controlled breath pattern.

Sync your breathing with your stride to ensure a smooth flow of oxygen to your muscles.

Additional resource – Bolt top running speed

When and How Many Running Strides For Beginners

Running strides can be integrated into your workout routine in various ways, each offering unique benefits:

  • Warm-up: Strides can be used as part of your warm-up routine. They help elevate your heart rate, increase blood flow to your running muscles, and mentally prepare you for the upcoming run, all of which contribute to improved performance.
  • Weekly Runs: Incorporate strides into your weekly runs, particularly during easy runs or as part of your speed workout. This allows you to practice speed and form in a controlled manner while breaking up the monotony of long, steady runs.

To maximize the benefits of strides, try adding them to your routine for a few weeks and assess how they impact your running. As a general guideline, aim to perform strides two times a week, with each session consisting of 4 to 8 strides, each lasting approximately 20 to 30 seconds.

Additional Resource – Here’s your guide to cross-country running

Do A Variety Of Strides

While we’ve covered the fundamentals of running strides, it’s essential to recognize that there’s more to this valuable training tool than meets the eye. F

or beginners and seasoned runners alike, delving into different types of strides can provide a more comprehensive understanding of how to incorporate them effectively into your training regimen.

Downhill Strides:

  • Purpose: Downhill strides involve running at a faster pace while descending a gentle slope. They are excellent for building speed, coordination, and leg turnover.
  • Benefits: Downhill strides challenge your body in a unique way by emphasizing eccentric muscle contractions, which can enhance strength and stability. They are particularly useful for downhill sections in races.
  • Technique: When doing downhill strides, focus on maintaining control and balance. Keep your strides short and quick to avoid overstriding, which can lead to injury.

Uphill Strides:

  • Purpose: Uphill strides involve running at an increased effort level while ascending a hill. They improve strength, power, and cardiovascular fitness.
  • Benefits: Uphill strides target your quadriceps, glutes, and calf muscles, helping to build strength and endurance for hillier courses. They also improve your aerobic capacity.
  • Technique: When tackling uphill strides, maintain an upright posture and focus on driving your knees and arms to generate power. Shorten your stride and take quicker steps.

Strides on a Track:

  • Purpose: Utilizing a standard 400-meter track can be an excellent way to measure your strides accurately and gauge your progress over time.
  • Benefits: Strides on a track allow you to fine-tune your pacing and get a better sense of your speed improvements. They are a fantastic addition to your speed workout routine.
  • Technique: Run one stride along the straight section of the track and recover by jogging or walking around the curve. Repeat this process for several laps.

Progressive Strides:

  • Purpose: Progressive strides involve gradually increasing your speed within each stride. They are effective for teaching your body to transition smoothly from easy to hard efforts.
  • Benefits: Progressive strides mimic race scenarios where you start at a comfortable pace and progressively increase your effort. They improve your ability to handle pace changes during a race.
  • Technique: Start each stride at a slower pace, and then pick up the speed as you go along. The last few seconds of the stride should be at close to maximum effort.

Strides with Form Focus:

  • Purpose: These strides emphasize running with impeccable form. They can be integrated into your regular runs to reinforce proper technique.
  • Benefits: Strides with form focus help engrain good running habits and make you more conscious of your technique during races and workouts.
  • Technique: Concentrate on specific aspects of your form during these strides, such as arm swing, posture, or foot placement.

Progressing Your Running Strides:

As a beginner, incorporating running strides into your training routine is an excellent way to improve your speed, running form, and overall performance.

Although strides have a lot to offer, it’s also key to follow a structured progression plan to ensure continued growth and prevent plateaus.

Here’s how you can progress your stride workouts effectively:

  1. Frequency:

Start with one stride workout per week: When you’re just beginning, one session of strides per week is sufficient. This allows your body to adapt gradually to the increased intensity.

Progress to two sessions per week: After a few weeks of consistent strides, consider adding a second session. Ideally, space these sessions a few days apart to allow for recovery.

  1. Intensity:

Begin with moderate intensity: Initially, focus on strides that are around 80-90% of your maximum speed. This moderate intensity helps your body adapt to the demands of faster running.

Increase intensity gradually: As you become more comfortable with strides, start incorporating faster bursts, reaching closer to 95-100% of your maximum speed. This higher intensity can further improve your speed and running economy.

  1. Duration:

Start with shorter strides: Initially, aim for 20-30 second strides. This duration allows you to focus on form and get used to the feeling of running at higher speeds.

Extend stride duration: Over time, consider gradually increasing the duration of your strides. You can work your way up to 40-60 second strides, but maintain a strong focus on maintaining proper form throughout.

  1. Recovery:

Shorten recovery periods: In the early stages, take longer recovery periods between strides to allow for adequate rest. A 1-2 minute recovery between strides is a good starting point.

Reduce recovery time: As you progress, work on reducing the recovery time between strides. Aim for 45 seconds to 1 minute of recovery between each stride.

  1. Total Volume:

Start with a lower volume: When you begin, limit the number of strides in each workout. Four to six strides per session can be a suitable starting point.

Gradually increase stride volume: As your fitness and comfort with strides improve, you can gradually increase the number of strides in a single session. Aim for 8-10 strides or more, depending on your goals.

  1. Incorporate Variety:

Experiment with different types of strides: As you become more experienced, consider incorporating variations like downhill strides, uphill strides, or diagonal strides. These variations challenge different aspects of your running performance.

Running Strides for Beginners – Conclusion

There you have it.

That’s all you need to know about running strides for beginners.  These are easy to implement and can help you achieve great progress toward your running goals.

The rest is just details.

Please feel free to leave your comments and questions in the section below.

In the meantime, thank you for dropping by.

Keep running strong.

Push Past Pain: Unleash Your Running Potential with Mental Tricks

tough runner training through pain

Running can be tough, and we’ve all had those moments where our left knee aches, our shoes feel too tight, and our throat is parched, but we still have miles to go. It’s a mental battle as much as a physical one.

Whether you’re dealing with boredom or physical discomfort, having some mental tricks up your sleeve can make all the difference during a run.

So, are you ready to conquer that monkey mind and push through the pain? I’ve got some mental tricks that can help you stay focused and motivated during your run.

Just a quick note: If you’re in serious pain or discomfort, it’s essential to prioritize your well-being. Stop running and seek help. These tricks are for those moments when you’re mildly tired or simply need a mental boost to stay on course.

Let’s dive in and make your runs more enjoyable and fulfilling.

Beginnings Are Hard

Let’s face it – the first mile is always a struggle. Your body and mind are still warming up to the idea of running. But here’s the truth: beginnings are hard. Stepping out of your comfort zone isn’t easy, and logging serious miles takes a special kind of determination.

But guess what? You’re a runner, and that’s something to be proud of! So, when that first mile feels like an uphill battle, remind yourself it’s just the warm-up. Push through those initial niggles, keep putting one foot in front of the other, and watch how things get easier as you go.

Trust me, it’s all part of the journey.

Break it Down

When faced with a long run, fixating on the total mileage ahead can be overwhelming. Instead, break your run into smaller, more manageable chunks. Focus on conquering one segment at a time rather than the entire distance.

For instance, if you’re tackling a daunting 12-mile run, don’t dwell on that big number. Instead, think of it as three 3-mile runs. As you begin each new segment, visualize it as the start of a fresh run filled with motivation and energy. This mental strategy can make your run feel less daunting and more achievable, one step at a time.

Work on Your Form

When you find yourself struggling during a run, redirect your attention from discomfort to running technique. By honing in on your mechanics, you can improve your efficiency and maintain better form, especially during long or challenging runs.

Here’s a mental checklist to guide you:

  • Run Tall: Maintain an upright posture.
  • Keep Your Back Flat: Avoid hunching or slouching.
  • Breathe Deeply: Pay attention to your breathing pattern and ensure it’s deep and rhythmic.
  • Quiet Steps: Strive to make minimal noise as you run.
  • Relaxed Shoulders: Keep your shoulders loose and relaxed, not tensed.
  • Imagine a String: Picture a string lifting your head up, encouraging proper head positioning.
  • Release Tension: Ensure your face and the rest of your body are tension-free.
  • Foot Placement: Aim to land with your feet under your body’s center of gravity.

Additionally, you can count your foot strikes to gauge your running cadence. A good target is 170 to 180 steps per minute. Monitoring and improving your running form can help you become a more efficient and comfortable runner.

Run Somewhere Else

If you’re feeling stuck in a running rut, it might be time for a change of scenery. Running the same route every day can become monotonous and drain your motivation. Here are some ways to break the cycle and refresh your mind:

  • Explore New Routes: Seek out different running paths, trails, or cross-country routes. Exploring new terrain can make your runs more exciting.
  • Nature Retreat: Find a location with natural beauty, such as running by a river, along the ocean, or through a scenic forest. Connecting with nature can be rejuvenating.
  • Urban Adventure: If you prefer city environments, try running in areas with bustling crowds. People-watching can be a great distraction and add some excitement to your run.
  • Travel Running: When you travel, use it as an opportunity to run in a new city or area. It’s an excellent way to explore and stay active while experiencing a change of scenery.

Run To Music

If you’re not already running with music, it’s time to tune in. Music can be a powerful tool to enhance your running experience in several ways:

  • Boost Motivation: Upbeat music can be a source of inspiration, helping you stay motivated and maintain a strong pace throughout your run.
  • Reduce Perceived Effort: Research has shown that runners who listen to music while exercising often report a lower perceived level of exertion. This means you may feel like you’re putting in less effort, even when you’re pushing your limits.
  • Extend Your Runs: Music can distract your mind from fatigue and discomfort, allowing you to run longer distances without feeling as tired.

To make the most of your music, create a playlist of your favorite tunes that energize you and keep you in the zone. Whether you’re into rock, pop, hip-hop, or any other genre, the right music can make your runs more enjoyable and productive.

Create Mantras

Looking for a mental edge during your runs? Consider incorporating mantras into your routine. These simple, positive affirmations can be a game-changer for your mindset and performance. Here’s how they work:

  • Stay Centered: Mantras act like your inner cheerleader, keeping you focused and motivated, especially during challenging parts of your run.
  • Distract from Negativity: They divert your thoughts away from negative self-talk, such as “I want to quit” or “I’m done,” which can slow you down and hinder your performance.

Here are some mantra ideas to get you started:

  • I’m strong.
  • I’m capable.
  • I’m fast.
  • Just do it.
  • I’m a good runner.
  • Keep going.
  • Run strong.
  • I got this.
  • I love this.

Choose a mantra that resonates with you, or create your own. Mentally repeat it during your run to help you stay focused, positive, and determined. You don’t need to share your mantras with anyone; they’re your secret weapon to keep you strong and motivated.