Boost Your Running Performance with Medicine Ball Training: A Complete Guide

Looking to turbocharge your cross-training efforts as a runner? Then, it’s time to add medicine balls into your running program.

Imagine having a versatile tool at your disposal—one that not only enhances your athletic performance but also enables you to cultivate explosive power while targeting your core muscles simultaneously. That’s where medicine balls come into play.

These weighted marvels are tailor-made for explosive movements, granting you the ability to toss, catch, and unleash your inner athlete. Whether you’re a beginner runner or a ultra athlete looking for the next edge, medicine ball exercises hold the key to a stronger, fitter version of yourself.

But here’s the most thrilling part: you don’t need an elaborate gym setup to get started. All that’s required is a medicine ball and a bit of space, setting you on a path that will challenge every muscle group in your body, get your heart racing, and leave you invigorated.

In this article, I’m sharing with you the full guide to medicine ball training for runners. More specifically, I’ll be explaining what med balls are all about, the benefits, and the must-do exercises to perform if you’re looking to improve your running performance.

Sounds like a good idea?

Let’s get started.

What is a Medicine Ball?

Did you know that medicine balls have been in use for thousands of years? Ancient Greek athletes wielded these weighty orbs for strength training, akin to the early Olympians preparing for their legendary competitions.

Fast forward to the present day, and the medicine ball has transformed into a versatile tool cherished by fitness enthusiasts and athletes alike. They come in various weights, sizes, and materials, each serving its distinct purpose.

You’ll encounter the classic leather varieties, bouncy rubber renditions, and even those equipped with handles, reflecting the diversity of the runners who employ them.

Selecting the right medicine ball parallels choosing the perfect pair of running shoes – it should align with your workout style.

If you’re new to this, opt for a lighter ball, perhaps in the range of 4 to 6 pounds. For seasoned athletes, going for a heavier ball, say 10 to 12 pounds, might be your preference.

And what about size? Size matters, too.

A larger ball proves ideal for exercises like overhead throws, while a smaller one shines in movements like Russian twists. Material also plays a role – rubber balls excel in bouncing exercises, while the softer leather or vinyl counterparts are suited for partner workouts.

Squat Variations exercise

The Benefits of Medicine Ball Training for Runners

Medicine ball exercises are a dynamic and effective way to enhance fitness, with various scientific studies supporting their benefits:

Enhanced Core Strength:

A study in the “Journal of Sports Science & Medicine” (Saeterbakken et al., 2014) confirms that medicine ball exercises effectively boost core muscle activation and strength. This makes them a valuable addition to core-strengthening routines.

A strong core serves as the powerhouse of your running form, the central command center where all your running power is coordinated. Core strength is your stabilizer, ensuring each stride is as efficient as possible.

Improved Muscular Power:

Research in the “Journal of Strength and Conditioning Research” (Smith et al., 2002) highlights the impact of medicine ball exercises on muscular power. These exercises, involving explosive movements with a weighted ball, have been shown to significantly increase power output in athletes.

Improved Stability

Medicine ball workouts are like a perpetual balancing act, constantly challenging your stability. For us runners, this is a game-changer because, let’s be honest, we’re not always on perfectly flat and predictable terrain. Whether it’s dodging potholes or navigating rugged trails, a stable core is our ticket to staying injury-free and maintaining smooth, uninterrupted runs.

Versatility:

Medicine balls are adaptable for a wide range of fitness levels. Studies, including one from the “Journal of Sports Science & Medicine” (Chin et al., 2012), have shown that medicine ball exercises can be modified for different skill and strength levels, making them accessible to a broad audience.

Efficient Workouts:

Finally, the efficiency of medicine ball workouts is well-established. A study in the “Journal of Sports Science & Medicine” (Otto III et al., 2012) compared the energy expenditure of medicine ball exercises with traditional resistance training, concluding that medicine ball workouts offer a time-efficient way to achieve similar energy expenditure and perceived exertion.

Instructions

To make the most out of medicine ball training, make sure to follow these guidelines:

Choose The Right Weight:

Go for a medicine ball that challenges you without compromising your form. A weight that allows you to complete 12 to 16 repetitions of each exercise with proper technique is ideal.

Maintain a Continuous Flow:

To keep your heart rate elevated and optimize the effectiveness of your workout, transition smoothly between exercises with minimal rest. This continuous movement helps build endurance and burn more calories.

Strategic Rest Period:

After completing a circuit of exercises, take a well-earned break of one to two minutes. Use this time to catch your breath, hydrate if needed, and mentally prepare for the next round of exercises.

Proper Form is Key: Focus on executing each exercise with the correct form and technique. Avoid rushing through movements, as this can lead to injury. Quality repetitions are more valuable than quantity.

Progress Gradually:

As you become more proficient, gradually increase the weight of your medicine ball to continue challenging yourself and making progress in your fitness journey.

Listen to Your Body:

Pay attention to how your body responds to the exercises. If you experience pain or discomfort beyond the usual burn of a workout, stop and assess your form or consider using a lighter weight.

By following these guidelines, you’ll maximize the benefits of your medicine ball exercises. This approach will help you build strength, improve cardiovascular fitness, and get the most out of your workout.

So, grab your medicine ball, and let’s begin!

Top 7 Medicine Ball Exercises For Runners

Without further ado, here are the med ball moves you need in your running life.

1. Medicine ball toss

  • Find a Partner: Choose someone who’s ready to move and have fun.
  • Face Each Other: Stand about an arm’s length apart, facing your partner.
  • Get Moving: Start shuffling your feet, like a little dance, to stay active.
  • Pass the Ball: Grab the medicine ball, toss it to your partner, and be ready to catch it when it comes back.
  • Keep It Going: Repeat this back-and-forth toss for 12 to 16 reps. It’s excellent for your upper body and enhances hand-eye coordination and reaction time.
  • Level Up: If it gets too easy, try a heavier medicine ball for an extra challenge

2. Diagonal Chop

  1. Stand Tall: Begin with your feet shoulder-width apart. Hold the medicine ball beside your ear with both hands, gripping it firmly.
  2. Ready to Chop: Imagine you’re holding an axe, keeping your back straight, and engaging your core for stability.
  3. Chop It Down: Lower the medicine ball diagonally across your body as if you’re chopping wood in that direction. Feel the twist in your core.
  4. Power Up: Explosively bring the ball back to the starting position, engaging your core and getting a full-body workout.
  5. Switch Sides: Repeat for the desired number of reps, then switch to the other side to work both sides of your core evenly.
  6. Keep It Controlled: Maintain control, especially when returning to the starting position, to engage your muscles effectively.

3. The Three Medicine Balls Push-up

  1. Start by placing three medicine balls on the ground around your body.
  2. To maintain balance, engage your core muscles and squeeze your inner thighs together.
  3. Position your hands on the two medicine balls, ensuring your palms are flat on them.
  4. Rest your toes on the third medicine ball, keeping your feet close together for balance.
  5. Lower your chest toward the ground while keeping a straight line from head to heels.
  6. Engage your chest, shoulders, and triceps as you push back up to the starting position.
  7. Focus on controlled movements throughout to challenge your stability.
  8. Complete the desired number of repetitions while maintaining balance and proper form. Increase the challenge over time by adding more reps or sets.

4. Suitcase Crunch

  1. Lie flat on your back on an exercise mat with your legs fully extended.
  2. Hold a medicine ball with both hands, arms extended overhead just slightly above the ground.
  3. Engage your core muscles by pulling your belly button toward your spine.
  4. Lift your torso off the ground while simultaneously bending your right knee toward your chest. Bring the medicine ball toward your right foot in a twisting motion.
  5. Reverse the motion to return to the starting position, lowering your torso back to the ground and extending your right leg fully.
  6. Repeat the same motion on the left side, bending your left knee toward your chest and twisting to reach your left foot.
  7. Each repetition involves performing the exercise on both sides.
  8. Aim for your desired number of repetitions while maintaining proper form and controlled breathing. Exhale as you crunch, and inhale as you return to the starting position.

5. Toe Touch

  1. Lie on your back on an exercise mat with your legs straight up in the air, feet together. Hold a medicine ball with both hands, arms extended toward the ceiling.
  2. Engage your core muscles.
  3. Lift your torso off the ground while simultaneously reaching the medicine ball toward your toes. Try to touch your toes with the ball.
  4. Keep your legs straight and feet together as you lift your torso and reach for your toes. Maintain core engagement.
  5. Hold the position briefly, focusing on squeezing your abdominal muscles.
  6. Slowly lower your torso and the medicine ball back to the starting position while keeping your legs straight and elevated.
  7. Exhale as you lift your torso reach for your toes, and inhale as you return to the starting position.

6. Russian Twists

  1. Sit on the ground with knees bent, heels on the floor, and back straight. Hold a medicine ball with both hands, arms extended in front, and feet hip-width apart.
  2. Engage your core muscles to stabilize your spine and protect your lower back.
  3. Slowly rotate your torso to the right as far as possible while holding the medicine ball. Keep your arms extended as you tap the ball on the floor beside your right hip.
  4. Pause briefly and squeeze your oblique muscles on the right side.
  5. Rotate your torso to the left side without stopping, moving the medicine ball to the other side. Tap the ball on the floor beside your left hip.
  6. This completes one repetition. Repeat the twisting motion from right to left and back to the right for the desired number of reps or time intervals.
  7. Exhale as you twist to each side, and inhale as you return to the center position.

7. Medicine ball V-up

  1. Lie on your back with your legs straight, and arms extended above your head, holding a medicine ball with your palms facing up.
  2. Engage your core muscles to stabilize your spine and protect your lower back.
  3. Lift your upper body and legs off the ground while bringing the medicine ball toward your feet, creating a “V” shape with your torso and legs.
  4. Hold this position for a count of three, focusing on contracting your abdominal muscles.
  5. Slowly lower your upper body and legs back down to the starting position while maintaining control over the medicine ball.
  6. Remember to exhale as you lift your torso and legs and inhale as you lower them. Aim for 15 to 20 repetitions per set, adjusting as needed based on your fitness level and goals.

Integrating Medicine Ball Workouts into Running Training

Here’s how you can seamlessly blend medicine ball training into your running schedule:

Blending Medicine Ball Workouts with Running:

  1. Frequency: Aim for 2-3 sessions of medicine ball exercises per week. This approach boosts your running routine without overwhelming your body.
  2. Timing Around Runs: Use a brief medicine ball session as a dynamic warm-up before running or as a strength-focused cooldown afterward. This is like fine-tuning your body before a run or easing it down post-run.
  3. On Non-Running Days: Alternatively, you can dedicate days when you’re not running to focus solely on medicine ball exercises. This method keeps your muscles active and enhances your overall fitness, similar to cross-training.

Duration and Intensity of Workouts:

  1. Length of Sessions: Opt for 15-20 minute sessions. Focus on the effectiveness of your workout rather than the duration, mirroring the importance of quality over quantity in running.
  2. Adjusting Intensity: Start with a lighter medicine ball and increase the weight as you grow stronger, akin to progressively increasing your running distance.
  3. Listen to Your Body: As with running, be attuned to your body’s response to the exercises. Adjust the intensity if necessary – your body’s feedback is crucial.

Sample Weekly Running and Medicine Ball Plan:

  • Monday: Easy run followed by a 15-minute medicine ball routine.
  • Tuesday: Rest or engage in light cross-training.
  • Wednesday: Interval running paired with a 20-minute medicine ball workout.
  • Thursday: Rest day or gentle yoga for recovery.
  • Friday: Long run to build endurance.
  • Saturday: Focus on core and strength with a dedicated medicine ball session.
  • Sunday: Rest or engage in active recovery activities.

Stay Active on the Go: 6 Simple Ways to Incorporate Fitness into Your Daily Life

Are you tired of hearing that exercise is good for you? I mean, we all know that, right? But here’s the thing: life gets busy. Between the 9-to-5 grind, endless to-do lists, and family commitments, finding time for exercise can feel like trying to find a needle in a haystack.

But guess what? You don’t need a perfect world to stay active and healthy. In fact, you don’t even need a gym membership or hours of free time. What you do need are some clever tricks up your sleeve to sneak in exercise whenever and wherever you can.

So, let’s ditch the excuses and discover 6 easy ways to inject some fitness into your daily routine. Whether you’re at home, on your way to work, or stuck in the office, these hacks will help you stay active without breaking a sweat (well, maybe just a little).

Let’s get started!

1. Turn Your Commute into a Workout

Transforming your daily commute into an exercise session is a creative way to stay active. Instead of the usual car ride, consider more active alternatives.

One option is a “run-commute.” Pack your essentials like keys, phone, ID, and some cash into a running backpack or a fanny pack, and jog to your destination. Running is not only great cardio but also an efficient mode of transportation.

If running isn’t your thing, cycling is another excellent alternative. It’s a low-impact activity that still provides a good workout and gets you where you need to go.

For those who find running or cycling impractical, walking is a simple yet effective option. If your workplace is too far to walk, you can still add extra steps to your day by getting off public transport earlier or parking your car farther from the office.

2. Sneak in a Lunch Break Workout

Are you ready to transform your lunch hour from ordinary to extraordinary? Picture this: it’s the middle of your workday, the clock strikes noon, and instead of the usual lunchtime lull, you’re gearing up to supercharge your body and mind!

Welcome to the world of lunchtime workouts, where every bite of your sandwich comes with a side of endorphins. Whether it’s embracing the fresh air with a brisk walk, channeling your inner Usain Bolt with a quick sprint, or sneaking in a power-packed 20 to 30-minute gym session, the possibilities are endless. And the best part? Research says that a midday workout is not just a fitness booster; it’s also your secret weapon for an afternoon productivity surge.

Mark your calendar – this is a date with your healthier self! Treat it like the main event of your day.

And why fly solo? Grab a work buddy and make it a dynamic duo sweat session. Not only is it more fun, but it also keeps you both on track.

Need some quick and effective workout ideas? How about a jump rope challenge with ten rounds of heart-pumping action? Or maybe a set of jumping jacks to get your blood flowing? For the brave-hearted, try dominating those air squats or shadow boxing your way to fitness fame. All you need is 5 to 15 minutes, and you’re set.

3. Take the Stairs

Are you ready to transform your daily routine into an undercover workout session? Next time you’re about to press that elevator button or step onto an escalator, pause and consider the mighty staircase. Yes, those stairs you’ve been ignoring could be your new fitness ally!

Stair climbing is not just a way to get from one floor to another; it’s a heart-pumping, calorie-burning powerhouse. For every minute you ascend those stairs, you could be burning up to 10 calories – if you weigh around 160 pounds. Now, compare that to the mere 1.5 calories you’d burn lazily riding the elevator.

I used to always take the elevator until one day, it was out of service, and I was forced to take the stairs. I was surprised by how challenging it was but also how accomplished I felt afterward. Since then, I’ve made it a habit to take the stairs whenever possible. On days I’m feeling extra energetic, I challenge myself to take two steps at a time. It’s a small change, but it’s made a noticeable difference in my fitness level

But let’s be realistic – if your destination is way up on the 39th floor, climbing all those stairs might seem like a mission to Mount Everest. No stress! Find a happy medium: take the elevator partway and then challenge yourself to conquer the remaining flights.

And for those feeling extra bold, why not amp up the challenge? Take two steps at a time, or add a brisk pace. This way, you’re not just climbing – you’re unleashing your inner fitness superhero, one step at a time.

4. Try this 15-minute Interval Routine

Ready to supercharge your fitness routine without eating up your entire day? Let me introduce you to the 15-minute Interval Routine – your new best friend for efficient and effective workouts.

Interval training is the ultimate time-saver, packing a punch in a short amount of time. Imagine getting a full-body workout in just 15 minutes – it’s possible, and I’m here to show you how.

Here’s your game plan:

  1. Warm-Up (5 minutes): Kick off with a light jog in place. Spice it up with dynamic stretches to wake up those muscles. This isn’t just a preamble; it’s essential for a killer workout.
  2. The Interval Magic (10 minutes): Now, brace yourself for 20-second bursts of high-intensity exercises followed by a 10-second rest. This cycle of exertion and recovery is where the magic happens.

Your High-Energy Workout Menu:

  • Military Push-Ups: Dive into these for strength and endurance.
  • Squat Jumps: Get those legs working with explosive energy.
  • Mountain Climbers: Ramp up your heart rate and engage that core.
  • Burpees: The all-in-one powerhouse move.
  • Weighted Sit-Ups: Add some extra oomph to your core workout.

All you need is a little space, your body weight, and a mat. This 15-minute blitz is designed to make you sweat and feel empowered.

5. Drop the Office Chair

Transform your office routine into a fitness opportunity with a simple switch: replace your regular desk chair with a stability ball! This change isn’t just about shaking things up in the office; it’s a stealthy way to strengthen your core, improve your posture, and subtly burn calories while you work.

Sitting on a stability ball engages your core and lower back muscles, turning your regular desk time into a low-key workout. And it’s not just about getting fit; it’s beneficial for your back health, too. According to a study in the Journal of the Canadian Chiropractic Association, people with lower back pain reported fewer symptoms after regularly using a stability ball.

The best part? It won’t even feel like exercise. You’re simply sitting, but now with the added bonus of improving your strength and posture. Plus, it’s a fun conversation starter with your colleagues!

After experiencing some back pain, I decided to swap my office chair for a stability ball. At first, it felt odd, but I quickly noticed a difference in my posture and core strength. Colleagues started asking about it, and before I knew it, stability balls became a trend in our office! It’s a small change that’s made a big difference in my daily routine

Feeling bold? Amp up your office fitness game with a stand-up desk. This addition allows you to seamlessly transition between sitting and standing, adding more movement and flexibility to your workday.

6. Go Isometric

Isometric training is your secret weapon for a stealthy, strength-boosting workout that fits perfectly into a busy schedule. This form of exercise involves flexing and holding your muscles without any dynamic movements, making it incredibly convenient and discreet.

The great thing about isometric exercises is their simplicity – no equipment needed, just your body weight and, optionally, a timer.

The real charm of isometric training lies in its incognito nature. You can effortlessly incorporate it into various parts of your day without drawing attention. Whether you’re catching up on your favorite TV show, engrossed in a book, or even replying to emails, you can be strengthening your muscles simultaneously. Talk about a multitasking marvel!

You have plenty of exercise choices, such as wall squats, planks, iso lunges, chair poses, and iso calf raises. This variety keeps your routine fresh and engaging.

Try starting with each pose for 20 to 30 seconds, then transition smoothly to the next exercise. With isometric training, you’re quietly yet effectively building strength and enhancing your fitness, and the best part? You won’t even disrupt your daily routine or those around you.

Busy Life, Fit Body: Finding Time for Exercise in a Hectic World

“Wow, I wish I could run like you, but who’s got the time, right?” Sound familiar?

Every time I rave about my latest run, someone tosses this comment my way, almost implying, “So, you’re saying you’ve got oodles of free time to just… run?”

Okay, maybe I’m reading between the lines a tad too much.

But here’s the deal: we all get it—exercise is crucial. Yet, amidst the chaos of work, family, and that ever-growing to-do list, lacing up those sneakers often takes a backseat.

But hang on a sec! If you’ve ever thought, “I wish I could make exercise a no-brainer in my daily routine,” you’re in for a treat.

In today’s article, I’ll be sharing with you my favorite ways to turn fitness from a “should do” into a “can’t wait to do.”

Sounds like a good idea?

Let’s dive in.

Find Your Why

Understanding your personal reasons for exercising can greatly enhance your motivation. Whether you have kids and want to set a healthy example for them or you’re just aiming to lead a more active life, finding your “why” is crucial. Regular physical activity is vital not only for fitness but also as a defense against various health issues like diabetes, heart disease, high blood pressure, and even cancer.

Your first task is to clearly define your reasons for wanting to stay active. Write them down and place them where you’ll see them every day – as your phone’s wallpaper, on your fridge, or even on your mirror. A daily reminder of your “why” can be a powerful motivator.

Set The Right Goals

Once you have your motivation in place, it’s time to set realistic goals. If you’re new to exercising, it’s important not to overdo it right from the start. Instead of aiming for extreme goals like running a marathon immediately, start with smaller, more achievable targets.

Begin with a manageable daily workout of about 20-30 minutes. This gradual approach helps you build your fitness level without the risk of burnout or injury. Remember, it’s about pacing yourself and celebrating each small victory along the way.

Block Time

To prioritize exercise effectively, treat your workout sessions as key events in your schedule, similar to important meetings or regular social activities. Consistently allocating specific times for exercise helps integrate it into your routine.

Here’s how to make exercise a priority:

  • Aim to exercise three to four times a week, choosing the time that works best for you – it could be a morning jog, a lunchtime session, or an evening routine.
  • Visualize the positive outcomes of this habit, like feeling fitter and stronger.
  • When planning your week, mark your workout times as important commitments. Treat them with the same respect as essential appointments, and be prepared to decline conflicting offers.

Do it Early

If fitting exercise into a busy schedule is challenging, try working out early in the morning.

Early morning workouts can be peaceful and invigorating, providing a sense of accomplishment before the day’s busyness begins.

Research indicates that people who exercise in the morning are often more consistent with their fitness routines.

Starting your day with exercise sets a positive tone, and you don’t have to be naturally inclined toward mornings to benefit from this strategy. It’s about taking control of your day from the outset.

Put Money On the Line

If you’re struggling to maintain motivation for working out, consider using a financial incentive. By tying your fitness goals to monetary rewards, you create an additional layer of motivation.

Here’s how it works:

  • Set a fitness goal and commit to depositing a certain amount of money each time you complete a workout. Essentially, you’re rewarding yourself financially for staying active.
  • Once you reach your fitness target, use the accumulated funds for a special treat or donate it to a cause you care about. This approach not only benefits your health but can also contribute positively to others.
  • Having a financial stake in your fitness journey can provide the extra push needed on days when motivation is low.

Conclusion

There you have it. The above tips are all you need to make exercise a habit in your daily life. You just need to show up and follow the simple instructions.

From Couch to Consistency: Easy Steps to Maintain Your Exercise Habit

Working out is key to feeling energized, managing stress, and maintaining good health. But let’s be honest, sometimes the comfort of the couch wins over the gym. It’s easy to find excuses to skip a workout, and they can be quite creative!

Sounds familiar? Then know you’re not alone. Many people struggle to find the motivation to exercise consistently.

This article is here to help you replace those excuses with a genuine enthusiasm for fitness.

Through my interactions with friends and readers, I’ve heard numerous stories about struggles to maintain a regular workout routine. The good news is that I’m going to share some simple strategies that have helped me and many others. These tips aren’t complicated, but they can be incredibly effective in helping you achieve your fitness goals.

Let’s get started!

Create A Ritual

Consistency is key when it comes to establishing an exercise routine. The goal is to make your workout as habitual and automatic as your daily morning rituals, like brushing your teeth or skincare routines.

The concept here is to turn exercise into a ritual, removing the internal debate of whether to exercise or not, especially early in the morning when motivation can be low.

For instance, imagine setting a goal to run three times a week in the morning.

To make this a ritual, you could create a routine around it: wake up, freshen up, make your favorite morning beverage (coffee or tea), get dressed in your running gear, and start your run. This structured approach can transform exercise from a task into a regular part of your day.

runner using workout journal

Do it Early

The adage “The early bird catches the worm” can apply to exercise routines as well. Research indicates that people who work out in the morning are often more consistent with their fitness regime.

One study from the University of North Texas suggests that exercising early in the day may lead to quicker improvements in fitness compared to exercising later. The reason? In the morning, your energy and willpower are at their peak, and there are fewer distractions and less chaos from the day’s activities.

Morning exercise sets a positive tone for the day, whether it’s running or hitting the gym.

To make this easier:

  1. Alarm Strategy: Place your alarm, possibly set to an energetic song, across the room. This forces you to get out of bed to turn it off, helping you wake up.
  2. Prepare the Night Before: Lay out your workout clothes and gear before going to bed. This simplifies your morning routine and reduces the effort needed to get started.

Schedule Your Sessions

The difference in consistency often boils down to one simple practice: scheduling. This approach turns exercise into a non-negotiable part of your routine, much like any other important appointment.

Life can be unpredictable, and without a set plan, gym time can easily be overlooked in favor of other activities like watching TV. The solution is to treat workouts as fixed appointments in your calendar, giving them the same priority as work meetings or family events.

This habit of scheduling workouts isn’t just a personal recommendation; it’s backed by research. A study in the British Journal of Health Psychology found that individuals who scheduled their exercise sessions (even just mentally) were more likely to follow through with them.

Be Accountable

Making your workout routine enjoyable is like committing to a coffee date with a friend – it’s an appointment you wouldn’t want to skip because you value that relationship. Similarly, valuing your relationship with your body and health is crucial.

By scheduling your exercise sessions and viewing them as commitments rather than optional choices, you create a sense of accountability. It might be tempting to hit snooze or watch another episode of your favorite show, but having your workout noted in your calendar serves as a gentle reminder of your commitment to fitness.

It’s important to remember that it’s not about finding time for exercise; it’s about making time for it. When you start to include your fitness goals in your daily schedule, alongside other important events like birthdays or meetings, they become an integral part of your day that you’re less likely to overlook. This approach helps in making exercise a regular and enjoyable part of your lifestyle.

Reward Yourself

Rewarding yourself is an effective way to stay motivated in your fitness journey. Associating positive rewards with exercise can make the whole process more enjoyable and something to look forward to.

This approach works because it taps into the brain’s reward system, particularly dopamine, a neurotransmitter associated with feelings of pleasure and satisfaction. When you reward yourself after exercising, you create a positive association in your mind, making exercise feel not just beneficial for your body but also immediately gratifying.

To get started, here are some ideas for post-exercise rewards:

  • Enjoy a healthy, fruity dessert.
  • Spend time reading the next chapter of an engaging book.
  • Browse your favorite websites or online shops.
  • Take a refreshing power nap.
  • Treat yourself to a nice meal at a favorite restaurant.
  • Watch an episode of a popular TV show.
  • Book a relaxing massage session.
  • Relax with a glass of your favorite wine.
  • Unwind in a soothing bubble bath.
  • Start a ‘sweat fund’ by putting aside a small amount of money for each completed workout.
  • Buy a new book or another small reward that you’ve been wanting.

Focus on the Habit First & the Results Later

In a world where quick results are often prioritized, it’s important to focus more on the process and the habit rather than just the end results. The tendency to seek immediate outcomes, like rapid weight loss or improved marathon times, can lead to frustration or burnout if these goals aren’t achieved as quickly as expected.

A more effective approach is to embrace the journey and focus on establishing consistent habits. For instance, instead of fixating solely on losing a certain amount of weight, concentrate on the actions that will get you there, like committing to regular jogging sessions.

Habits form the foundation of our goals. They are the daily actions and routines that propel us towards our objectives. By shifting the focus from the outcome (“I want to shed 20 pounds”) to the process (“I’m committed to jogging four times a week”), you cultivate resilience and a sense of accomplishment in your daily efforts.

Conclusion

The key to building an exercise habit is to make it as easy as possible to do your workout. Go for exercises that you like, keep your workouts comfortable and simple,  and focus on showing up every day—even if you do not see any progress.

How to Achieve a Sub-25 Minute 5K

Ready to conquer a 5K in under 25 minutes? Then you’ve come to the right place.

Aiming for a sub-25 minute 5K is a realistic objective, especially if you’ve already experienced a few races and are looking to step up your game. Achieving this time means you’ve developed a stronger cardiovascular system and improved your overall fitness.

I remember when I first set my sights on breaking the 25-minute barrier for a 5K. I was pretty average – my initial 5K times were around the 30-minute mark. But thanks to consistent, I saw gradual improvements. The journey wasn’t easy, but it was incredibly rewarding when I finally saw 24:50 on the clock at a 5K event not far from my house.

And today I’m here to help you achieve similar (or better) results.

In this blog post, I’ll cover essential tips and strategies to help you improve your 5K time. By focusing on these key areas, you can confidently approach your next race, ready to achieve a new personal best.

Let’s get started on your journey to a faster 5K.

Can Anyone Run A 25-Minute 5K?

Before we start, let’s set a clear goal: running a 5K in 25 minutes is a significant challenge, especially for beginners. This goal isn’t a starting point but rather an aspiration to work towards.

In fact, running a a sub-25-minute 5K is not common for everyone, especially after just a few months of training. According to a Runner’s World article, the average 5K time for men is around 28 minutes, and for women, it’s about 34 minutes. Aiming for a 25-minute finish is ambitious and places you in a more advanced running group.

Here’s the full guide to good 5K times. as well as average 5K times.

So, if you’re new to running or have recently started joining 5K races, striving for a 25-minute finish might seem daunting.

What should you do then?

Simple. Remember that running is a personal journey. It’s not about comparing yourself to elite athletes or the fastest runner in your neighborhood. It’s about setting personal goals and improving at your own pace.

During my early years as a runner, I used to compare myself with others at the park, track, or any other venue and this often made me fee discouraged. But, I managed somehow to shift my focus on personal progress, not just beating average times. This shift in perspective changed my approach and made my training sessions more fulfilling.

5K Distance & Average Finish Times

A 5K race, which is 3.1 miles long, is a popular distance for runners of all levels. It’s an ideal starting point for beginners entering the world of racing and a great opportunity for experienced runners to achieve a new personal best.

The average finish time for such a distance typically ranges from 30 to 40 minutes for most runners. However, these times can vary widely based on factors like age and gender.

Research indicates that men in their 20s and 30s often record faster times, likely due to peak muscle mass and endurance. Women in the same age group generally have slightly longer average times, but individual performance can vary greatly.

Teenage runners often complete the race in around 25 minutes, benefiting from youthful energy and stamina. Master runners, those in their 50s and older, often finish within 30 to 35 minutes, showing that age doesn’t necessarily limit running performance.

Where Should You Start?

Before setting your sights on a 25-minute 5K, it’s essential to assess your current fitness and running experience. I hate to sound like a broken record, but this goal is ambitious and more suited for those who have already developed a solid running foundation rather than complete beginners.

Here’s a quick guide to help you determine your starting point:

  1. Regular Runners: If you’ve been running consistently for several months, have completed a few 5Ks, and can run for 30 minutes without extreme exhaustion, you’re likely ready to train for a 25-minute 5K.
  2. 5K Newcomers: If you’re new to running or have been running inconsistently, focus first on completing a 5K comfortably. Look for beginner training plans that emphasize building endurance and confidence. Try my 30-minute 5K training plan, for example.
  3. Returning Runners: If you’ve had a break from running but have prior experience, spend a few weeks assessing your current level. Start with easy runs, evaluate how you feel, and then set realistic goals based on your findings.

The Pace Needed For A Sub-25 Minutes 5K

To achieve a 25-minute finish, you need to maintain an average pace of approximately eight minutes per mile or five minutes per kilometer. Hitting this pace consistently throughout the race will allow you to reach the finish line right at the 25-minute mark.

However, maintaining this pace over the entire 3.1 miles is challenging. Research on pacing and endurance reveals that while many runners can achieve an eight-minute mile pace for a single mile, sustaining this speed for the full 5K distance is more complex. It requires not only speed but also consistency and endurance.

I’ll never forget my first go at running an eight-minute mile pace. It felt incredibly challenging, and I struggled to keep it up for more than a few laps around a track. But, as I get fitter, this pace became more manageable.

Your Guide To Running A 5K In Under 25 Minutes

Here’s what you need to do in order to help you achieve your 25-min 5K goal.

Start With A Baseline

To gauge where you stand, start with a time trial. This initial step isn’t just about recording a time; it’s about understanding your current capabilities.

Here’s how to begin:

  1. Warm-Up Thoroughly: Begin with a 5-minute easy jog, and then incorporate dynamic exercises like inchworms, squats, and lunges. This routine is vital for increasing blood flow and preparing your muscles and joints for the effort ahead.
  2. Run a Timed Mile: Choose a track and run a mile (or four laps around a standard track) at your best effort. Pay attention to how you feel during this run, and make sure to record your time upon completion.
  3. Estimate Your 5K Time: To get a basic idea of your current 5K capability, multiply your one-mile time by 3.1. This calculation will give you an approximate 5K time based on your current fitness level.

But here’s the plot twist. While this approach is straightforward, it oversimplifies the complexity of a 5K race.

Here’s why this method isn’t always reliable:

  1. Fatigue Factor: There’s a significant difference between running one mile and running 3.1 miles. Fatigue becomes a more significant factor over longer distances, and it can affect your ability to maintain a consistent pace.
  2. Mental Stamina: A 5K run requires not just physical endurance but also mental stamina. The mental aspect of running a 5K differs from the shorter, more intense effort required for a one-mile run.
  3. Pacing and Strategy: Pacing is crucial in longer races like a 5K. Your strategy might involve starting strong, maintaining a steady pace in the middle, and sprinting toward the end, which is different from the approach for a one-mile run.

While a one-mile time trial is helpful and provides insight into your current speed and fitness, a longer trial, like a 2-mile or 3-mile run, might offer a more accurate picture of how you perform over longer distances, particularly when it comes to fatigue.

What’s more?

Consider using modern technology to your advantage. There are various running apps and online calculators that use advanced algorithms to predict race times more accurately. These tools take into account different factors and can provide a more detailed prediction.

Remember, though, that no method is entirely precise, and race day can always bring its own set of variables.

Do Interval Training

If you’re aiming to improve your 5K time, incorporating interval training into your routine is essential.

Interval training involves alternating between periods of high-intensity running and recovery. This method pushes your body to its limits with bursts of speed, followed by short recovery periods, making it a highly effective way to increase your running speed.

Why Include Interval Training?

Speed is a crucial component of a fast 5K. To run faster, you need to train at higher speeds. Interval training is proven to significantly improve VO2 max (the maximum amount of oxygen your body can use during exercise), enhance endurance, and build stamina. This translates into faster, more efficient runs, helping you maintain a strong pace throughout your race.

Here’s how to get started with interval training:

  1. Choose Your Location: A track is ideal for interval training because it allows you to accurately measure distance. However, any flat and straight path, like a road or park trail, will do as long as it’s safe and free from traffic.
  2. Thorough Warm-Up: Start with a 15-minute warm-up. Begin with a gentle 5-minute jog, followed by dynamic exercises to prepare your muscles.
  3. Execute the Intervals: After warming up, start your intervals. Run a 400-meter lap (one lap around a standard track) at your target 5K pace, followed by a one-minute jog for recovery. Initially, aim for five intervals per session. As you progress, increase the number of repetitions to continuously challenge yourself and improve your speed.

Do A Tempo Run

Tempo runs, also known as threshold training, are designed to be run at a challenging but manageable pace. They are faster than a jog but not as fast as a sprint, offering a balanced intensity level.

As a rule, aim to perform your tempo runs at roughly 80-85% of your maximum heart rate. The pace is quicker than a casual jog but slightly slower than your race pace. This intensity pushes your body’s lactate threshold, the point at which fatigue begins to set in.

Here’s how to execute a tempo run:

  1. Warm-Up: Begin with a 10-minute warm-up to get your heart rate up and muscles prepared. This warm-up is key to preventing injuries and ensuring your body is ready for the intensity of a tempo run.
  2. Main Run: Aim for a 15-20 minute run at a pace about 30 seconds slower per mile than your target 5K pace. For example, if your goal is an 8-minute mile in a 5K, run your tempo at an 8:30 mile pace.
  3. Consistency: Maintain a steady pace throughout the run. You should be breathing heavily but not so much that you can’t maintain the pace. Adjust your speed if necessary to stay within a “comfortably hard” effort.
  4. Cool Down: Finish your workout with a relaxed one-mile jog to help your body recover and reduce the risk of muscle soreness.

Do Your Long Runs

When training for a 5K, it’s common to focus heavily on speed. However, endurance is equally important. And the best way to improve your endurance is via a long run.

A long run is a weekly workout where you increase your distance significantly, typically ranging from four to eight miles. It’s not about running fast; it’s about building endurance and resilience. These runs should be more relaxed, about one to two minutes slower per mile than your 5K goal pace. This pace allows you to build endurance without overexerting yourself.

As a rule, keep your long runs leisurely, akin to a casual, scenic tour rather than a race. This slower pace helps build endurance while minimizing the risk of injury.

Want more challenge? Then start the first half of your long run at a steady, relaxed pace. Then, gradually increase your pace in the second half, aiming to finish the last mile at your target 5K pace. This approach helps improve your ability to maintain speed even when tired.

Your Plan

As you embark on your journey to a faster 5K, creating a structured training plan is crucial. I hate to state the obvious, but you can’t go far (or fast) without the right plan. Failing to plan is planning to fail, after all. A typical 5K training program lasts 8 to 12 weeks, and your specific plan should be based on your current fitness level and goals.

Here’s a sample weekly training schedule to guide you:

  • Monday: Interval Training – Perform six 400-meter intervals at your target 5K pace to boost speed and cardiovascular fitness.
  • Tuesday: Easy Run – Take a 20-minute easy-paced run. Use this as a recovery day, keeping your pace relaxed and enjoyable.
  • Wednesday: Cross-Training or Rest – Engage in alternative activities like cycling swimming, or take the day off for rest.
  • Thursday: Tempo Run – Start with a 10-warm-up jog, then complete a 20-minute tempo run, pushing slightly harder than your usual pace.
  • Friday: Rest or Light Cross-Training – Use this day for gentle cross-training activities or take another rest day.
  • Saturday: Long Run – Do a long, endurance-building run, ranging from five to eight miles, at a comfortable pace.
  • Sunday: Rest and Recovery – Allow your body to rest and rejuvenate, as recovery is a crucial part of training.

Pacing Your Training: Finding the Sweet Spot

As you start running more often, the shadow of overtraining may loom larger. That’s why you should pay attention to the frequency and intensity of your training to find the right balance. Jumping into an intense routine can be exciting at first, but it’s crucial to pace yourself to avoid overtraining, which can lead to injuries, fatigue, and decreased performance.

Signs of Overtraining:

  • Persistent soreness or pain
  • Excessive tiredness, even after rest
  • Declining performance or hitting a plateau
  • Sleep disturbances
  • Reduced appetite
  • Increased susceptibility to illnesses

Strategies to Avoid Overtraining:

  1. Listen to Your Body: Pay attention to signs of excessive soreness or fatigue. Rest days are vital for recovery and should be an integral part of your training plan.
  2. Start Gradually: If you’re new to this level of training, consider reducing the intensity or volume at the beginning. For example, if the plan suggests six intervals, start with three.
  3. Incorporate Cross-Training: Include activities like swimming, cycling, or yoga in your routine. These provide a good workout while reducing the repetitive impact of running.
  4. Consult Experts: Seek advice from a coach or join a running group for personalized guidance that matches your fitness level and goals.
  5. Focus on Nutrition and Hydration: Proper nutrition and hydration are essential for recovery and performance. Ensure you’re eating a balanced diet and staying hydrated, and don’t skip post-run stretches.

Want more challenge? Check this 20-min 5K program.

Treadmill Belt Replacement Made Easy: Your Complete DIY Guide

If you’re considering replacing your treadmill belt, you’re in the right place.

Treadmills are a fantastic tool for maintaining fitness throughout the year. They offer the convenience of logging miles without having to contend with outdoor weather conditions.

Running on a treadmill can also be gentler on your muscles, bones, and joints compared to outdoor surfaces, allowing you to run longer and harder with a reduced risk of overuse injuries. What’s not to love about that?

However, like any machine, treadmills need regular maintenance, and various parts will require replacement over time. The treadmill belt, in particular, bears the brunt of the impact when running. If it begins to wear down, the machine becomes less effective and can even pose a safety risk.

But there’s no need to worry. In this article, I’m going to guide you through a detailed, step-by-step process to replace your treadmill belt easily. Whether you’re a hands-on DIY enthusiast or new to treadmill maintenance, this guide is designed to simplify the process and ensure a smooth, hassle-free experience.

Ready to dive in?

Let’s begin.

couch to 5K on the treadmill

The Tools You Need

Before we dive in, let’s talk tools. To successfully replace your treadmill belt, you’ll need a few basic tools.

Here’s what you need to gather:

  • A screwdriver (Phillips or flat-head, depending on your treadmill model),
  • An Allen wrench or hex key (for adjusting the belt tension),
  • A socket wrench to tackle any bolts that stand in your way.
  • A marker to mark the points of alignment and ensure a seamless transition.
  • Piers
  • Cleaning supplies
  • A reliable friend to offer both strength and support during the lifting and installation.

Preparing the Treadmill

Before you start replacing your treadmill belt, it’s crucial to prepare the machine properly to ensure a smooth and safe process. Here are the steps to get your treadmill ready for a belt replacement:

  1. Unplug the Treadmill: Safety first. Make sure the treadmill is completely unplugged from the power source. This step is essential to avoid any risk of electrical shock.
  2. Clear the Surrounding Area: Ensure you have ample space to work around the treadmill. Move any nearby furniture or objects to create a comfortable workspace, allowing you easy access to all sides of the machine.
  3. Clean the Treadmill’s Exterior: Give your treadmill a good clean before you start. Wipe down the exterior with a damp cloth to remove any dust or debris. This helps prevent external dirt from entering the machine during the belt replacement.
  4. Remove the Motor Hood: The motor hood, usually at the front end of the treadmill, protects the motor and front roller. It’s typically secured with screws. Use a screwdriver to remove these screws, and keep them safe for reassembling later.
  5. Familiarize Yourself with the Belt and Deck: The running belt is the part you walk or run on, and the deck is the surface underneath it that supports the belt. Understanding these components is important for the replacement process.
  6. Access the Belt Area: Depending on your treadmill model, additional covers or parts might need to be removed for full access to the belt. Refer to your treadmill’s manual for specific instructions tailored to your model.
  7. Locate the Belt Adjustment Bolts: Usually found at the rear of the treadmill, these bolts are used for adjusting the belt’s tension and are crucial for both removing the old belt and installing the new one.
  8. Record Initial Belt Tension: If you can, measure the current tension of the belt with a tension gauge or take note of the adjustment bolts’ positions. This will be a useful reference for installing the new belt.
  9. Organize Your Tools: Arrange all the necessary tools beforehand. Having everything within reach will make the process more efficient and reduce interruptions.

Removing the Old Belt

Great, you’re all set to begin! Now it’s time to remove the old treadmill belt, but remember, this is a delicate process that requires careful attention to ensure everything goes smoothly and safely.

Here’s how to remove the old belt from your treadmill:

  1. Loosen the Rear Roller Bolts: Use an Allen wrench or hex key and go to the back of the treadmill. Turn the rear roller bolts counterclockwise, but not all the way. You’re aiming to reduce tension, not remove the bolts entirely.
  2. Ease Tension on the Belt: Once the rear roller bolts are loosened, the belt’s tension will decrease. You should be able to lift the belt slightly off the deck. If it’s still tight, gently twist the bolts a bit more, but avoid making them too loose. Keep the bolts in their slots to prevent the roller from coming out.
  3. Remove the Front Roller (If Needed): Some treadmill models require removing the front roller to take the belt off. This usually means unscrewing the roller’s mounting bolts with a screwdriver or socket wrench.
  4. Slide the Belt Off the Rollers: Carefully slide the belt off both the front and rear rollers. You might need to lift or tilt the rollers slightly to help remove the belt.
  5. Lift the Belt from the Deck: After freeing the belt from the rollers, gently lift it off the deck. Be cautious to avoid snagging or damaging the deck’s surface.
  6. Clean the Exposed Areas: With the belt removed, it’s a good opportunity to clean the deck and rollers. Clear away any dust, debris, or buildup to ensure smooth operation when the new belt is installed.
  7. Inspect Rollers and Deck: Before putting on the new belt, check the rollers and deck for any signs of wear or damage. Address any issues to ensure optimal performance of the new belt.
  8. Prepare for New Belt Installation: Ensure the area is tidy and the rollers are properly positioned for the installation of the new belt.

Here’s How To Put Together The New Belt 

Now that the old belt is off, it’s time to install the new one. This step is key to ensuring a smooth and safe running experience on your treadmill. Here’s how to properly position, align, and tension the new treadmill belt:

  1. Position the New Belt on the Deck: Lay the new belt flat on the treadmill’s deck. Ensure it’s correctly placed, with any belt seam or directional arrows (if present) facing the right way, following the manufacturer’s instructions.
  2. Align the Belt with the Rollers: Place the belt over the front roller, then over the rear roller. If you removed the front roller earlier, now’s the time to reinstall it with its mounting bolts.
  3. Center the Belt: The belt might not be perfectly centered initially. Adjust its position on the rollers so that it’s equidistant from both sides of the treadmill deck.
  4. Adjust Rear Roller Bolts for Tension: Retighten the belt by evenly tightening the rear roller bolts on both sides, turning them clockwise. The correct tension allows you to lift the belt about 2 to 3 inches off the deck at the treadmill’s midpoint.
  5. Check and Adjust Belt Centering: Run the treadmill at a low speed without walking on it and observe the belt’s movement. It should remain centered. If it drifts, stop the treadmill, turn it off, and adjust the tension on the drifting side by slightly tightening the corresponding bolt.
  6. Adjust the Deck (If Needed): In some cases, adjusting the deck might be necessary for smooth belt operation. This could involve leveling the deck or adjusting its position. Consult your treadmill’s manual for specific guidance.
  7. Final Tension and Alignment Check: After centering the belt, perform a final tension check. The belt should be tight enough to prevent slipping when you walk on it but not so tight that it strains the motor.

Essential Training Strategies for Runners With Lower Back Pain

Running is one of the best types of exercises for those that want to get their regular cardio in. Or maybe you’re a runner that has been training for races for a long time. However, there may be times when your body may not be what it used to be.

You may be dealing with lower back pain issues – which can really hamper your training or even your usual run. This guide will provide you with excellent strategies that you can use while you’re training. You shouldn’t let back pain slow you down, especially in times when the race is on and the pressure is on you.

Ready to get started? On your mark, get set, go.

Determine the origin of the back pain

To begin, it’s important to find out what could be causing this lower back pain. It may be due to muscle cramps or perhaps a herniated disc. In the case of the latter, it is important to consider herniated disc treatments that are effective.

You may not know until you are able to visit your doctor. From there, they will perform an examination to confirm the source of your back pain. In the meantime, let’s take a look at some of the other strategies.

Don’t forget to properly warm-up and stretch

This is perhaps one of the most crucial aspects of working out. Warming up and stretching will prevent injury while you are training. There are all kinds of warm-up activities that you can perform such as push-ups, sit-ups, and even lunges.


Stretching includes your entire body, even the legs. So take a few minutes to stretch each leg with a few variations such as straight-leg lateral swings, bent-knee forward swings, and even arm swings. Do not skip these whatever you do.

Do regular core strengthening exercises

Whether you know it or not, a strong core will provide you with excellent stress reduction on your lower back. When you’re not running but still training, you want to do core exercises such as plans, bird-dog exercises, and even crunches. Core stability will also help improve posture, which can make a huge difference while you’re running – be it short or longer distances.

Listen to your body

Obviously, this point cannot be stressed enough. You want to pay attention to your body throughout your entire training. If you’re dealing with lower back pain or persistent discomfort, it may be a good idea to modify your training accordingly.

You may want to include rest days in your schedule. Professional advice and assistance is also available if you’re dealing with persistence in pain. Do not under any circumstances ignore the warning signs.

Doing so will lead to aggravating the problem and may cause serious injury. At that point, you may not be able to train for a period of time as directed by your doctor. When you are running, be mindful of what your body is telling you and take mental notes of anything out of the ordinary you may be experiencing.

Final Thoughts

Lower back pain can slow you down. But you can be able to treat it accordingly so you can continue with your running training. We hope this guide has given you an idea of what you can do in order to make lower back pain less of a problem.

Be sure to make warm-ups and stretches a priority. If you include core exercises in your workouts, you should be in a better position to run with excellent posture while not dealing with any lower back pain. Make sure you treat it accordingly and ask your doctor if you have any additional concerns.

4 Ways Running Benefits Your Mental Health — and 7 Tips to Help if You’re Struggling With Low Mood

Calling all pavement pounders and treadmill trotters! Ever felt that runner’s high and wondered if it’s really a thing? Spoiler alert: it totally is. Running isn’t just a killer way to shape up, it’s your brain’s BFF too.

To prove it, let’s talk through the benefits it brings, and also discuss a few other things you can do to break yourself out of a mental health slump.

Jolt Your Gray Matter: 4 Mental Miracles of Running

There’s no point beating about the bush; running is a radical and impactful way to reframe your mental state. Here’s how it works:

  • Hello, Endorphins! – When you’re zipping through the streets or tackling a trail, your brain releases endorphins, those feel-good peptides that act like natural painkillers and mood elevators. It’s like flipping on the happy switch.
  • Stress-Be-Gone Sorcery – Hitting your stride can also mean shedding stress. As you clock up miles, it’s not just sweat you’re losing; cortisol levels take a dive too. Running has this knack for transforming tension into tranquility.
  • Sleep Like a Log 2.0 – Regular joggers often catch Zs with ease because physical exertion promotes better sleep patterns. Sleep’s super important for mental health – think of it as nightly maintenance for your noggin.
  • Boosted Brainpower Buffet – Believe it or not, running can sharpen the mind as well as the body. It boosts blood flow to your brain and encourages the growth of new gray matter cells. Hello productivity and improved memory!

Yet More Ways to Master Your Mood: Take Action Today

In addition to running to enhance your mental health, here are a few other tips to boost your mood when you’re in the doldrums:

Find a Local Therapist, e.g. in Salt Lake City

Ever felt like you’re running with ankle weights on your mood? It might be time to join forces with a pro who can help lighten that load. If you’re scouting for therapists in Salt Lake City or any hometown USA, it’s super key to find someone who clicks with you. Once you do, the only way is up.

Creative Outlet Express Lane

Art, music, writing – choose your weapon. Finding a creative outlet is like uncorking a bottle of fizzy good vibes. Let it out and let it flow; it’s mighty therapeutic.

Positive People Posse

Lean on pals who can plaster a smile on your face. Good company is the human equivalent of sunshine for plants – utterly essential.

Nature’s Chill Pill

Mother Earth knows best when it comes to soothing souls. Parks, forests, beaches – these aren’t just pretty places; they’re mood-leveling landscapes.

Mindful Me-Time Moments

Meditation or deep-breathing exercises are like hitting ‘refresh’ for your brain browser. Couple that with daily gratitude moments to keep things in perspective.

Digital Detox Dojo

Too much screen time can be a sneaky mood-zapper. Chuck your gadgets in the proverbial locker for a bit and watch life go HD.

Nosh on Nature’s Candy

Your diet’s not just about waistlines or your running performance, as it’s brain fuel too. Munching on wholesome grub can have your neurons throwing a party!

The Bottom Line

Alright, road warriors and footpath conquerors, here’s the wrap-up. Running isn’t just a test for the legs; it’s a triumph for the mind. Pair those miles with our straight-talk tips and you’ve got yourself a cocktail for better mental health.

So whether you’re sprinting through Salt Lake City or jogging in Jersey, know that every step is a step toward happier horizons. And if those clouds roll in, don’t forget: reaching out is as courageous as any marathon finish. Keep running towards the sun!

The Ultimate Guide to Preventing Plantar Fasciitis for Runners

Looking for practical guidelines to help you prevent plantar fasciitis for good? Then you’ve come to the right place.

Plantar fasciitis, a common overuse injury among runners, can significantly disrupt your running routine. This condition, characterized by inflammation of the tissue along the bottom of your foot, can be incredibly painful and frustratingly persistent, potentially sidelining you for weeks or even months.

Given that running is a high-impact activity, each step you take can stress your feet, making plantar fasciitis a frequent issue for runners. Therefore, prevention is absolutely crucial.

But there’s no need to worry. In this article, I’m going to share scientifically-backed guidelines to help you avoid this all-too-common injury. We’ll delve into effective prevention strategies, from selecting the right footwear to adding foot-specific exercises to your training regimen.

Interested in this offer?

Let’s dive in.

Understanding Plantar Fasciitis

So, what’s the deal with plantar fasciitis? Well, it’s like the grumpy neighbor of your foot – the inflammation of the plantar fascia, a fancy band of tissue doing a marathon along the bottom of your foot, connecting the heel to the toes.

Now, if you’re a runner, you might have already had a not-so-pleasant rendezvous with this condition. It’s that heel pain giving you the side-eye, thanks to all the stress and pounding your feet endure during those runs.

Here’s the kicker: Plantar fasciitis isn’t just a pain in the heel; it’s also a serious training buzzkill. The pain can be a real party pooper, especially when it hits you with its A-game in the morning or after a Netflix marathon on the couch.

Now, onto the good stuff. Ready? Let’s roll.

How To Prevent Plantar Fasciitis When Running

Treatment may take up to a months-long combination of rest, ice, rehab, and even medication. That’s why you’re better off not getting injured in the first place.

When it comes to dealing with plantar fasciitis, the adage “An ounce of prevention is worth a pound of cure” couldn’t be more true.

Keep on reading to learn more about protecting your plantar fascia and preventing any future pain.

Wear the Right Shoes

For runners, selecting the right footwear is not just a matter of comfort; it’s a critical decision for injury prevention, particularly when it comes to conditions like plantar fasciitis.

Go for running shoes that provide ample support for your entire foot. These shoes should have a thick sole to cushion your heel and prevent it from shifting excessively. It’s crucial to replace your running shoes every 400 to 500 miles because the structural integrity of the shoe diminishes over time.

Additionally, consider your choice of casual shoes. Avoid footwear with heels that can strain your arch during everyday activities, as this can contribute to plantar fasciitis. Choose comfortable, supportive shoes for daily wear to protect your feet.

Additional resource – Running shoes for plantar fasciitis

Stretch Your Plantar Fascia

Calf tightness can contribute to the development of plantar fasciitis. When both your Achilles and plantar fascia are tight, they can exert tension on the plantar fascia, leading to irritation and weakening of its attachment to the bone.

Research from the University of Rochester suggests that performing stretching exercises tailored to the plantar fascia can effectively alleviate pain and support long-term recovery.

Incorporate these stretches into your daily routine, particularly in the morning and after a run. A recommended regimen includes three to five sets of 20 to 30 seconds for each stretch.

Here are some of the stretches you should consider:

Towel Stretch

Sit with your legs extended. Place a towel around the ball of your foot and gently pull the towel towards you while keeping your knee straight.

Foot Writing

Although not artistic, writing the alphabet with your foot can be beneficial. It’s a simple exercise for your plantar fascia.

Calf Stretches

These stretches are practical for your calves. Include them to maintain muscle flexibility.

Heel Drops

Elevate your heels on a step, allowing them to hang and stretch. It’s a useful exercise for your foot’s well-being.

Additional resource – How to prevent calf pulls from running

Strength Train

Building strength through targeted exercises is like giving your feet a reliable bodyguard against injuries like plantar fasciitis. You want your foot squad to be strong and ready for action, right?

And don’t my word for it.

Studies from the American Journal of Sports Medicine highlight that incorporating strength training into your routine can significantly decrease the risk of injuries like plantar fasciitis.

Here are some exercises that will have your foot muscles flexing their strength muscles:

Calf Raises

Stand tall, rise up onto your tiptoes, and feel the burn in your calf muscles.

Toe Curls

Give your toes a workout by curling them inwards, working those muscles in the midfoot.

Doming

Elevate the arches of your feet by doming – it’s like a mini dance for your foot muscles.

Toe Spread & Squeeze

Spread those toes out and then squeeze them back together. It’s a toe party for foot stability.

https://www.youtube.com/watch?v=_izMb3PPamI

Roll Your Plantar Fascia

Rolling your foot over a cold water bottle is an excellent way to alleviate fascia pain and reduce the risk of injury. After a run, grab a frozen water bottle and roll it under your foot for 5 to 10 minutes, with a focus on your arch.

After a run, treat your feet to a cool and soothing session with a frozen water bottle. It’s like a mini ice bath for your feet, minus the icy plunge. Here’s how to roll with it and keep your fascia feeling fantastic:

Get a frozen water bottle and do the following:

  1. Rolling Time: Grab your frozen water bottle and roll it under your foot. Focus on the arch area – it’s like giving your foot a refreshing massage.
  2. Pressure Points: Apply some firm pressure to key areas—start with the middle, then shift to the inner and outer edges. Hold each spot for about 20 to 30 seconds.
  3. Keep it Moving: Don’t park your bottle in one spot for too long. Keep the roll going to hit all the important areas.

Check out the cool technique here

This chilly trick isn’t just about feeling the freeze. It’s a strategic move to manage inflammation, keep your foot flexible, and say goodbye to fascia pain.

Try Athletic Tape

If you’re dealing with plantar fasciitis, consider the benefits of using athletic tape. This technique, known as Kinesio taping, has proven effective in managing symptoms.

Here a are few reasons:

  • Enhances Blood Flow: Improves blood circulation to the foot.
  • Provides Support: Offers structural support to the foot.
  • Addresses Inflammation: Aids in reducing inflammation and swelling.
  • Gentle Compression: Applies gentle compression to the affected area.
  • Limits Movement: Restricts movements that may worsen symptoms.

Research validates its effectiveness. A review of eight studies indicates that taping can bring short-term relief to individuals with plantar fasciitis

Keep in mind that various types of Kinesio tape are available, so choose the one that suits your needs best.

The following Youtube tutorial should get you started on the right foot:

Use A Night Splint

Consider night splints as a practical aid in managing plantar fasciitis. These devices play a helpful role by stretching the calf and plantar fascia while you sleep.

Here’s how night splints work:

  • Stretching Effect: They create a gentle stretching effect on the calf and plantar fascia.
  • Prevent Tightening: By keeping the plantar fascia stretched, they prevent it from tightening or cramping.
  • Chronic Cases: Particularly useful for chronic cases of plantar fasciitis.
  • Pain Relief: Aid in stretching the plantar fascia, contributing to pain relief.
  • Maintain Foot Position: Help maintain the correct foot and ankle position during sleep.

If you frequently experience plantar fasciitis, incorporating night splints into your routine can be beneficial. They provide continuous stretching, addressing the condition even while you rest.

However, it’s crucial to consult with your doctor or podiatrist before choosing a night splint. They can offer guidance on the most suitable option based on your specific needs. Night splints can be a valuable addition to your plantar fasciitis management plan, contributing to relief and improved foot health.

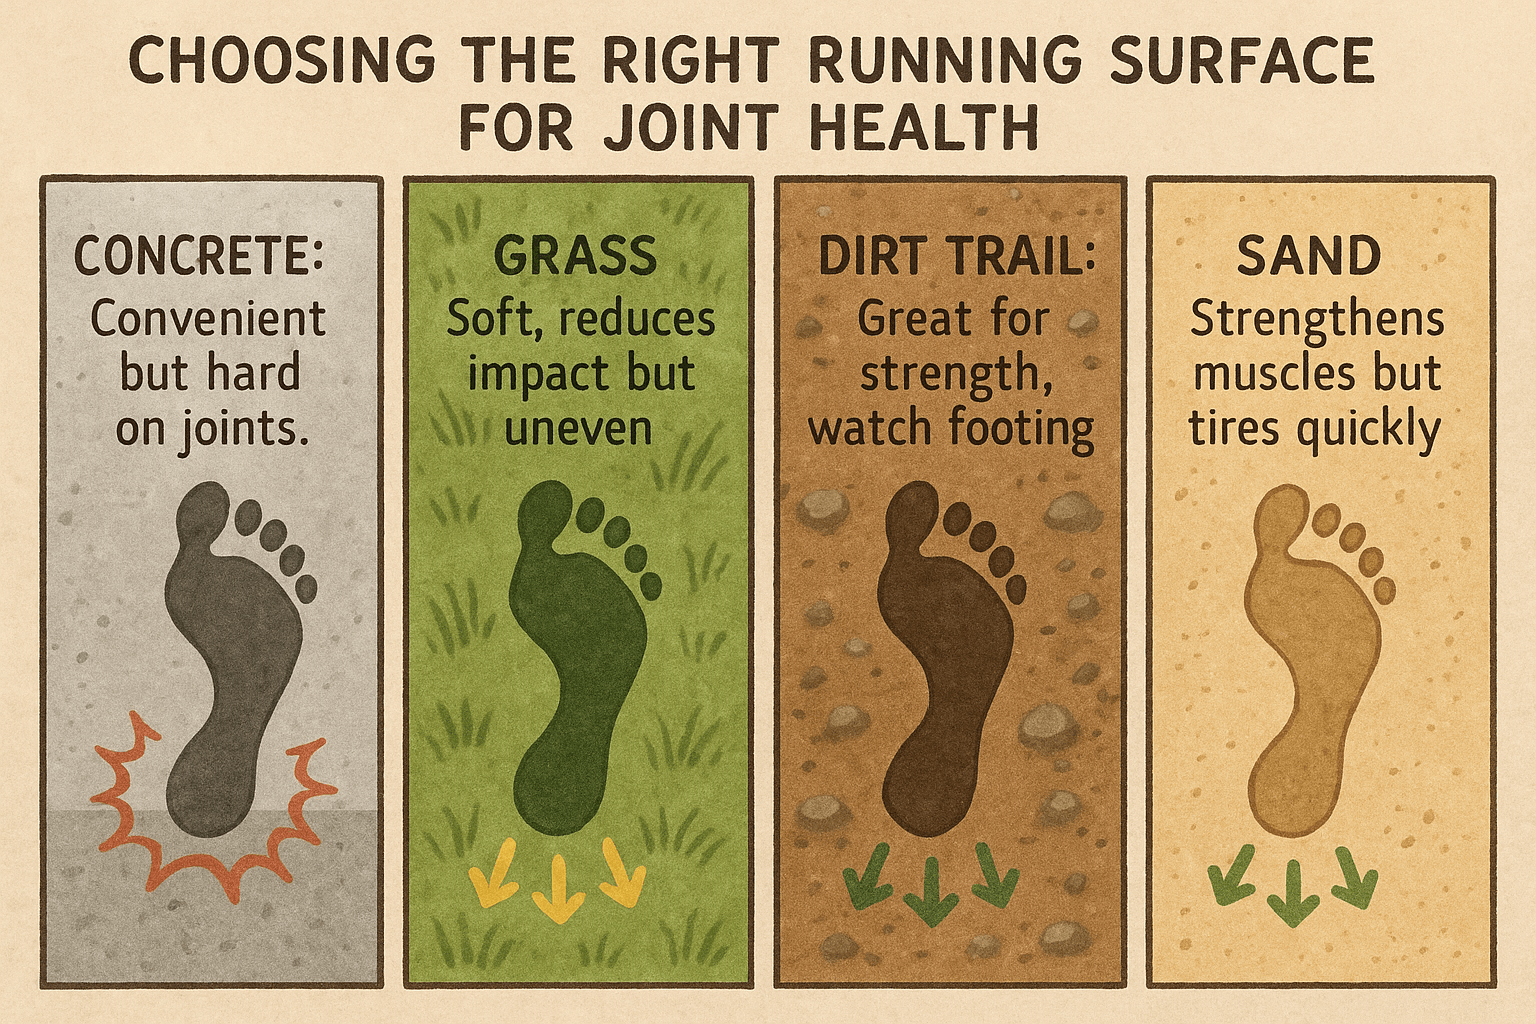
Run On Soft Surfaces

To safeguard yourself against injuries like plantar fasciitis, consider adjusting your running surface. The type of terrain you run on can significantly impact the stress your feet endure, influencing the health of your plantar fascia.

Here are three reasons why shoft surface matter:

  • Varying Stress Levels: Different surfaces exert different stress levels on your feet.
  • Impact Reduction: Softer surfaces reduce the impact on your feet, minimizing the strain on your plantar fascia.
  • Hard Surfaces Warning: Hard and uneven surfaces can increase stress, potentially leading to inflammation and plantar fascia stress.

Here’s how to choose wisely;

  • Opt for Soft Surfaces: Whenever possible, choose softer running surfaces to mitigate stress.
  • Even Terrain Advantages: Running on even terrain decreases the risk of landing incorrectly, reducing strain on tendons and ligaments.
  • Park Paths: Well-groomed paths in parks or other soft surfaces are preferable to concrete sidewalks or rough terrain.

What’s more?

You should also incoporate a variety of running surfaces into your training routine to balance stress on your feet.

Improve your Running Form

Ensuring proper running form is pivotal to minimizing the likelihood of plantar fasciitis. The way you run profoundly influences the stress on your feet, particularly the plantar fascia.

For example, excessive inward rolling of your foot upon landing can stress the plantar fascia, heightening the risk of injury. Plus, a severe heel strike can also increase stress on the plantar fascia.

Here’s how to improve your form. Start by paying close attention to your foot pronation during your running stride. Instead of a heavy heel strike, aim to land more evenly on the middle of your foot. Landing evenly distributes impact, easing stress on your heel and maintaining plantar tendon flexibility.

Maintain a Healthy Weight

Maintaining a healthy body weight and embracing sound nutrition are pivotal factors that contribute to overall foot health, playing a vital role in injury prevention—plantar fasciitis is no exception.

Let me explain. Excess body weight places substantial strain on your heels, the plantar fascia ligament, and the arch and ball of your foot. When running, your feet can handle up to two and a half times your body weight during shock absorption. Running at a faster pace intensifies this strain.

In simple terms, every ten pounds of body weight translates to a significant 25-pound impact on your feet.

That’s why losing excess weight significantly alleviates the load on your plantar fascia ligament and other supporting foot structures. It serves as a proactive measure, diminishing the likelihood of developing or worsening plantar fasciitis.

Know Your Limits

Listening to your body and respecting your limits is crucial in preventing overuse injuries like plantar fasciitis. . Pay close attention to your body’s signals, including signs of fatigue and soreness, and tailor your training regimen accordingly.

Striking a balance between pursuing your running goals and allowing your body sufficient time to adapt and recover is key. Avoid pushing beyond your limits to ensure a sustainable and injury-free running journey.

When your body signals fatigue or discomfort, heed the call. Recognizing these signs early on is crucial in preventing injuries.

Looking to increase your weekly mileage? Then do so gradually. Abrupt changes can subject your feet to excessive stress, paving the way for injuries like plantar fasciitis.

Mastering the Mile: Your Ultimate One-Mile Training Plan

If you’re on the hunt for an ideal one-mile training plan, you’ve landed in the perfect spot.

It might be stating the obvious, but in the realm of running, the mile is a legendary measure of both speed and endurance. Whether you’re a beginner looking to master this renowned distance or an experienced athlete aiming to trim your mile time, one thing is certain: a structured one-mile training plan is essential.

Despite seeming brief – yes, it’s just four laps around a standard track – the mile is a formidable test of speed, stamina, and mental toughness. Running a fast mile demands a special blend of sprinting ability, aerobic strength, and mental resilience. It’s neither too long nor too short, striking the perfect balance for challenging your capabilities.

In this article, I’ll unveil my top one-mile training plan, along with my most effective tips and strategies to enhance your mile time. I’ve got everything covered, so you’re in great hands.

Ready to dive in?

Let’s begin.

Note – I’ve got you covered with two mile training plans—one for beginners and the other for intermediate runners. Take a moment to pick the plan that aligns with your current fitness level and goals. No need to overcommit or set goals that don’t challenge you. Find that sweet spot that pushes you just enough without overwhelming you. Let’s set you on the right path

Start With A Baseline

Before you start training for that mile, you need to know where you’re at. It’s like figuring out your starting point on a map before you begin a journey. So, step one: find out your baseline mile time.

Think of this as your personal mile-time investigation. Why? Well, knowing where you’re starting from helps you see how much progress you make. To do this, head to a standard track—four laps equals one mile. But here’s the catch: tracks can be a bit different, so measure it out before you start running.

But before you hit the track for your mile time, warm up for 10 minutes. Get your muscles moving and your blood flowing. It’ll make a difference, promise. I recommend the Myrtle Routine for warm-up.

Now, it’s time for the main event. Run that mile at about a 9 out of 10 effort—push yourself but don’t go all out. When you finish, note your time. This is your current mile-running ability.

But this isn’t a one-time thing. To really see progress, do this test every 8 to 12 weeks. Make it a routine, adapt it to your goals, and watch how you improve.

To be sure about your baseline, do the mile time trial a couple of times on different days. It helps account for variations and ensures your baseline time is accurate.

With your baseline mile time, you’re ready for a personalized training journey. Whether you’re aiming for personal records or just want to get fitter, knowing where you start is the key to reaching your mile-running goals. And here’s your guide to average mile times.

The One-Mile Training Plans

Just because it’s just a “mile,” it doesn’t mean you shouldn’t follow a running program to Just because we’re talking about a mere “mile,” it doesn’t mean you should skip out on a running program to amp up your performance.

Depending on whether you’re a seasoned runner or just starting out, gearing up for the mile might seem like a walk in the park or a serious commitment. But no matter your current running goals, there’s always room for improvement when it comes to that iconic mile.

A one-mile training plan is a game-changer for any runner keen on adding more structure to their routine while working on shaving off those precious seconds from their mile time.

Here’s the good news: there’s a plethora of one-mile training plans floating around the internet. But before you randomly pick one, I strongly suggest giving it a once-over with a running coach or someone who’s got more running experience under their belt than you do.

Don’t have access to a running coach? No worries! Shoot me an email at [email protected], or at the very least, make sure the training plan you choose covers all the bases. An ideal plan for the mile should throw in short-distance sessions, long-distance sessions, cross-training workouts, and some well-deserved rest days—just like any solid training plan would.

Now, here’s the kicker: the key variable is the distance. Unlike a marathon’s lengthy 20 miles, you won’t need to clock in that far to see improvements in your mile time.

Your exact training plan will be as unique as you are, factoring in your fitness level, pace, running experience, and most importantly, your goal pace.

Oh, and one more thing—no need to stick to specific training days. But if you’re just starting out, consider steering clear of back-to-back running days. As you get fitter, you can gradually handle more training load over time.

On your non-running days, feel free to mix it up with some cross-training or simply kick back and let your body recover and adapt to the training grind.

The one-mile training plan below is a perfect starting point for beginners, those making a comeback, or runners keen on maintaining their base training fitness during the off-season.

Let’s dive in

The Intermediate Mile Training Plan

Week One: Building the Foundation

Welcome to the first week of your one-mile training plan! This week focuses on building the foundation for your mile time improvement journey. Here’s a detailed training schedule, including mileage and workouts:

Monday – Three miles easy

Purpose: Start the week with an easy-paced three-mile run. This run helps you ease into your training plan, allowing your body to adapt to the routine.

Workout Details: Maintain a comfortable pace that allows for conversation while running. This run is about building endurance.

Tuesday – Cross-train or rest

Purpose: Give your running muscles a break while staying active. Cross-training can include activities like swimming, cycling, or yoga.

Workout Details: Choose an activity you enjoy and perform it at a moderate intensity for 30-45 minutes. This helps prevent overuse injuries and provides variety in your training.

Wednesday – Speedwork: 10 X 200-meter. 30 seconds rest

Purpose: Introduce speedwork to improve your running efficiency and speed.

Workout Details: Head to a track or a flat, measured stretch of road. Run 200 meters (half of a lap) at a faster pace, close to your goal mile pace. Take a 30-second rest between each interval. Repeat this 10 times to build speed and stamina.

Thursday – Cross-train or rest

Purpose: Allow your body to recover and prepare for the upcoming workouts.

Workout Details: Engage in cross-training or take a complete rest day to promote recovery.

Friday – Three miles moderate

Purpose: Focus on maintaining a consistent pace for three miles, slightly faster than your easy pace.

Workout Details: Run at a pace that feels comfortably challenging but sustainable. This run helps improve your cardiovascular fitness.

Saturday – 45 to 60 minutes long run at an easy pace

Purpose: Build endurance and aerobic capacity with a longer run.

Workout Details: Run at an easy, conversational pace for 45 to 60 minutes. This extended run enhances your ability to cover longer distances.

Sunday – Cross-train or rest

Purpose: Provide your body with a recovery day to prevent overtraining.

Workout Details: Engage in cross-training or enjoy a restful day to recharge.

This first week sets the stage for your mile time improvement journey. You’ll gradually introduce speedwork, build endurance, and ensure proper recovery.

Remember to listen to your body, stay hydrated, and focus on maintaining good form during your runs.

As you progress through the weeks, you’ll see improvements in your mile time. Stay motivated and committed to your training plan!

Week Two: Building Speed and Endurance

Congratulations on completing your first week of training! In week two, we’ll continue to build your speed and endurance. Here’s your training schedule for the second week:

Monday – Four miles easy

Purpose: Start the week with an easy-paced four-mile run. This run helps you gradually increase your mileage while maintaining a comfortable pace.

Workout Details: Run at an easy, conversational pace. Focus on building your endurance.

Tuesday – Cross-train or rest

Purpose: Give your running muscles a break and engage in cross-training or rest to aid recovery.

Workout Details: Choose a cross-training activity you enjoy and perform it at a moderate intensity for 30-45 minutes.

Wednesday – Speedwork: 8 X 400-meter. One minute rest.

Purpose: Continue to work on your speed and stamina.

Workout Details: Head to a track or a flat, measured stretch of road. Run 400 meters (one lap) at a faster pace, close to your goal mile pace. Take a one-minute rest between each interval. Repeat this 8 times to improve your speed and pacing.

Thursday – Cross-train or rest

Purpose: Allow your body to recover and prepare for the upcoming workouts.

Workout Details: Engage in cross-training or take a complete rest day to promote recovery.

Friday – Four miles moderate

Purpose: Focus on maintaining a consistent pace for four miles, slightly faster than your easy pace.

Workout Details: Run at a pace that challenges you but remains sustainable. This run helps enhance your cardiovascular fitness and pacing skills.

Saturday – 60 minutes long run at an easy pace

Purpose: Continue building endurance with a longer run.

Workout Details: Run at an easy, conversational pace for 60 minutes. Enjoy the opportunity to cover more distance and strengthen your aerobic capacity.

Sunday – Cross-train or rest

Purpose: Provide your body with a recovery day to prevent overtraining.

Workout Details: Engage in cross-training or enjoy a restful day to rejuvenate.

Consistency is key in week two. Maintain a balanced approach to training, and ensure you’re properly hydrated and nourished. As you progress through this training plan, your mile time will improve, and you’ll become a stronger runner. Keep up the good work, and stay committed to your goals!

Week Three: Increasing Speed and Endurance

You’re making great strides in your training journey! Week three introduces some variations in workouts to continue improving your mile time and overall fitness. Here’s your training schedule for the third week:

Monday – Three miles easy

Purpose: Start the week with a comfortable three-mile run to aid recovery from the previous week.

Workout Details: Run at an easy, conversational pace. This run helps maintain your weekly mileage and prepares you for more challenging workouts.

Tuesday – Cross-train or rest

Purpose: Give your running muscles a break and engage in cross-training or rest.

Workout Details: Choose a cross-training activity you enjoy and perform it at a moderate intensity for 30-45 minutes.

Wednesday – Speedwork: 5 X 800-meter. One minute rest.

Purpose: Increase the distance of your speed intervals to enhance your endurance and speed.

Workout Details: Head to a track or a measured stretch of road. Run 800 meters (two laps) at a pace close to your goal mile pace. Take a one-minute rest between each interval. Repeat this 5 times to challenge your aerobic capacity and pacing skills.

Thursday– Cross train or rest

Purpose: Allow your body to recover and adapt to the increased training intensity.

Workout Details: Engage in cross-training or take a complete rest day to promote recovery.

Friday – Three miles easy

Purpose: Maintain a comfortable pace for three miles to continue building your mileage base.

Workout Details: Run at an easy, conversational pace. Focus on proper form and breathing.

Saturday – 80 minutes long run at an easy pace

Purpose: Extend your long run to enhance your endurance.

Workout Details: Run at an easy, conversational pace for 80 minutes. Enjoy the longer duration, which will contribute to your aerobic fitness.

Sunday – Cross-train or rest

Purpose: Provide your body with a recovery day to prevent overtraining.

Workout Details: Engage in cross-training or enjoy a restful day to rejuvenate.

Week three introduces more challenging speed intervals with longer distances. The gradual progression in both speed and endurance will contribute to your mile time improvement.

Remember to stay hydrated, fuel your body with proper nutrition, and prioritize rest to maximize the benefits of your training. You’re on the right path to achieving your mile time goals!

Week Four: Focusing on Speed and Mile Pace

Congratulations on reaching week four of your mile training journey! This week, we’ll continue to work on your speed and mile pace. Here’s your training schedule for the fourth week:

Monday – Four miles easy

Purpose: Start the week with a comfortable four-mile run to maintain your mileage base.

Workout Details: Run at an easy, conversational pace. Focus on maintaining good form and relaxed breathing.

Tuesday – Cross-train or rest

Purpose: Allow your muscles to recover and prevent overuse injuries.

Workout Details: Engage in cross-training activities you enjoy or take a complete rest day.

Wednesday – Speedwork: 10 X 400-meter at target pace. 30-second rest

Purpose: Enhance your speed and pacing skills with shorter, faster intervals.

Workout Details: Find a track or measured stretch of road. Run 400 meters (one lap) at your target mile pace. Take a 30-second rest between each interval. Perform this workout 10 times to challenge your anaerobic capacity and improve your mile pace.

Thursday – Cross-train or rest

Purpose: Provide your running muscles with a break and promote recovery.

Workout Details: Engage in cross-training activities or enjoy a rest day to aid recovery.

Friday – Three miles moderate

Purpose: Maintain your mileage while running at a slightly faster pace.

Workout Details: Run three miles at a moderate pace, which should be faster than your easy pace but not all-out effort. Focus on consistency and controlled breathing.

Saturday – 80 minutes long run

Purpose: Extend your long run to further boost endurance.

Workout Details: Run at an easy, conversational pace for 80 minutes. Enjoy the longer duration, which will contribute to your overall fitness.

Sunday – Rest

Purpose: Take a complete rest day to allow your body to recover and rejuvenate.

Workout Details: Rest, relax, and focus on recovery techniques like stretching or foam rolling.

Week four continues to challenge your speed and pacing abilities with shorter intervals at your target mile pace. Rest days are essential for recovery, so make sure to prioritize them.

Stay consistent with your training, maintain proper nutrition, and get adequate sleep to support your progress. Keep up the excellent work!

Week Five: Test Run or Race – The Moment of Truth

You’ve reached the final week of your one-mile training plan, and it’s time for the moment of truth – your test run or race. Here’s how to approach week five:

Monday – Rest or light cross-training

Purpose: Prepare your body for the upcoming test run or race without overexertion.

Workout Details: Engage in light cross-training activities or take a complete rest day to conserve your energy.

Tuesday – Short shakeout run

Purpose: Keep your legs active without exhausting yourself.

Workout Details: Go for a short, easy-paced run lasting around 15-20 minutes. Focus on maintaining good form and staying relaxed.

Wednesday – Rest or light cross-training

Purpose: Allow your body to recover and prepare mentally for the test run or race.

Workout Details: Similar to Monday, engage in light cross-training or take a complete rest day.

Thursday – Pre-race preparations

Purpose: Prepare both physically and mentally for the test run or race.

Workout Details: Focus on hydration, proper nutrition, and getting a good night’s sleep. Visualize your race, plan your pacing strategy, and pack everything you need for the event.

Friday – Rest or light cross-training

Purpose: Ensure your body is well-rested and ready for peak performance.

Workout Details: Engage in light cross-training or take another complete rest day.

Saturday – Test Run or Race Day

Purpose: To assess your progress and hopefully achieve a new personal best.

Workout Details: This is the day you’ve been working toward. Arrive at the race venue or your chosen test run location with ample time. Warm up properly with a jog and dynamic stretches.

Focus on your pacing strategy – start steady and gradually increase your effort as you progress. Stay mentally strong, stay hydrated, and give it your all. After the race, take time to cool down with a walk or light jog and stretch to aid recovery.

Sunday – Rest and reflection

Purpose: Allow your body to recover and reflect on your training journey.

Workout Details: Take a complete rest day to recover both physically and mentally. Reflect on your progress, what you’ve learned, and set new goals for your future running endeavors.

The Beginner Mile Training Plan

For a beginner runner who can run non-stop for 30 minutes and has been training for at least three months, a more conservative approach to increasing mileage is indeed wise. Here’s a revised one-mile training plan with reduced mileage:

Week One: Gentle Start

  • Monday – Two miles easy: Start with an easy-paced two-mile run to ease into the training.
  • Tuesday – Cross-train or rest: Opt for a moderate-intensity cross-training activity like cycling or yoga.
  • Wednesday – Speedwork: 5 X 200-meter with 45 seconds rest: Introduce short bursts of speedwork.
  • Thursday – Rest or light cross-training: Focus on recovery.
  • Friday – Two miles moderate: Run at a slightly challenging yet comfortable pace.
  • Saturday – 30 minutes long run at an easy pace: Build endurance with a longer but easy-paced run.
  • Sunday – Rest or gentle yoga: Aid recovery and improve flexibility.

Week Two: Building Confidence

  • Monday – Two and a half miles easy: Increase the distance slightly, maintaining an easy pace.
  • Tuesday – Cross-train or rest: Choose a light activity you enjoy.
  • Wednesday – Speedwork: 5 X 400-meter with one minute rest: Gradually increase your interval distance.
  • Thursday – Rest or light cross-training: Keep up with recovery.
  • Friday – Two and a half miles moderate: Aim for a consistent pace that’s a bit faster than your easy runs.
  • Saturday – 35 minutes long run at an easy pace: Gently extend your endurance.
  • Sunday – Rest or light stretching: Focus on recovery.

Week Three: Enhancing Endurance

  • Monday – Two miles easy: Maintain your endurance with an easy run.
  • Tuesday – Cross-train or rest: Engage in a different exercise to avoid monotony.
  • Wednesday – Speedwork: 3 X 800-meter with 90 seconds rest: Challenge yourself with longer intervals.
  • Thursday – Rest or light cross-training: Prioritize recovery.
  • Friday – Two miles moderate: Keep working on your pacing.
  • Saturday – 40 minutes long run at an easy pace: Gradually increase your long run duration.
  • Sunday – Rest or gentle stretching: Focus on flexibility and recovery.

Week Four: Steady Progress

  • Monday – Two and a half miles easy: Keep building your mileage base at an easy pace.
  • Tuesday – Cross-train or rest: Opt for an enjoyable cross-training activity.
  • Wednesday – Speedwork: 6 X 400-meter at target pace with 45 seconds rest: Work on your mile pace.
  • Thursday – Rest or light cross-training: Recovery is key.
  • Friday – Two and a half miles at a moderate pace: Test your ability to maintain a steady pace.
  • Saturday – 45 minutes long run: Enhance your endurance with a slightly longer run.
  • Sunday – Rest: Fully recover and prepare for the upcoming week.

Week Five: Test Run Preparation

  • Monday – Rest or light cross-training: Keep your body lightly active.
  • Tuesday – Short shakeout run: A 20-minute easy run for leg turnover.
  • Wednesday – Rest or light cross-training: Prepare your body and mind.
  • Thursday – Rest and race preparations: Focus on good nutrition and rest.
  • Friday – Rest or light cross-training: Stay relaxed and ready.
  • Saturday – Test Run or Race: Put your training into practice.
  • Sunday – Rest and reflection: Recover and reflect on your journey and future goals.