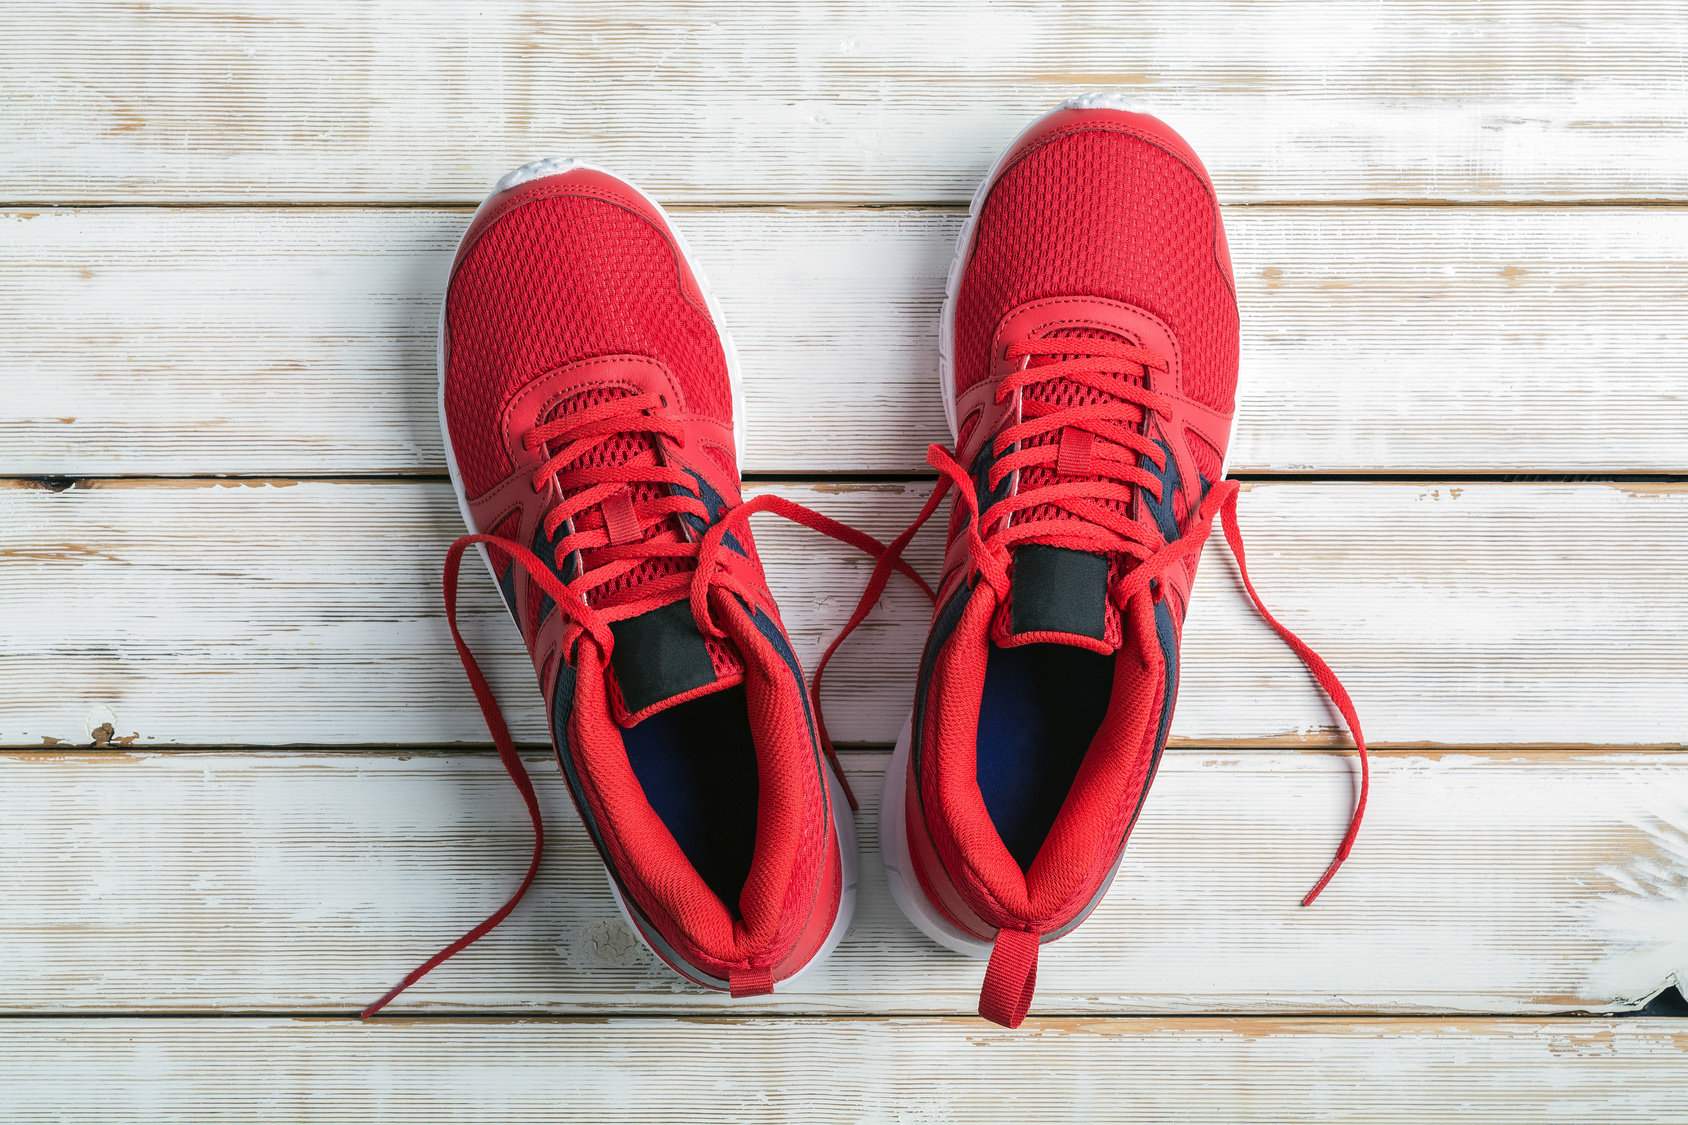
How To Dry Running Shoes The Fast & Safe Way

What To Do With Old Running Shoes - how to recycle running shoes

If you’re regularly looking for how to dry your wet running shoes as fast and as safe as possible, then worry no more.

Getting your running shoes wet—whether while training or after a thorough wash—is inevitable. All runners have been there and will be there at some point, sooner or later.

Regardless of the reason your shoes got wet, the next thing you need to do is dry and dry them fast, especially if you’re running in the near future (and only have one pair, have more, please).

Though letting the shoes air dry over time does work, it can take days.

Fortunately, there are a few tricks that speed up the drying process while also dodging any risk of mold, mildew smell, and damage to the shoe. That’s where the rest of the article comes in handy.

In this article, I’ll share with you my favorite tips for drying your running shoes in a fast, efficient, yet safe manner.

Sounds great?

Let’s lace up and dig in.

Why Should you Dry Your Running Shoes Properly?

Running in wet shoes not only feels terrible but can also introduce other risks. These may include chronic stench, blisters, fungal infection, and unexpected costs.

Not only that, you might end up compromising the structure that makes up your shoes, damaging them in the process.

This can be painful since a good pair of running shoes isn’t cheap, and nobody wants to shell out the $80 to $150 on a pair of sneakers every couple of months.

What’s more?

Your feet might have less equilibrium in a pair of wet shoes. This could irritate your joints and lead to injury.

Enough said.

Additional Resource – Here’s a list of the best running shoe brands.

How To Dry Your Running Shoes

Here are some of the best strategies to help you get your running shoes dry and ready for tomorrow.

Separate

This may sound like a bit of a hassle, but to make sure your running shoes dry fast and efficiently, it’s best to remove the laces.

You should also, if possible, remove the insoles of your shoes as well as stretch out the shoe’s tongue forward.

The whole shoe may dry faster if more air is circulating throughout it and reach the hidden parts with the removal of laces and the insoles.

Stains and mud on the shoe? Take a hand brush or a used toothbrush and get rid of them as much as possible. Deep clean if you need to.

Additional resource – Here’s the full guide to running shoe anatomy.

runners ankle pain

Get Old Newspaper

If your running shoes are completely soaked, getting them dry with nothing but air circulation can take ages. I know I’m kinda exaggerating, but if you ever had to cancel a run because of wet shoes, then you know the struggle. It sucks.

One reliable method is to put used up newspapers inside the shoes. The stuff is made from wood pulp and recycled material, which is super absorbent.

In fact, you’ll be surprised at how much water just a couple of balls of crumpled paper in each shoe will pull out.

The sheets are not only efficient at soaking up water but also stench smells.

Here’s how.

Crumble up a few sheets of crinkled-up newspaper or paper towel and stuff away.

I’d recommend using two full sheets: one in the heel area and the other in the toe-box area.

Last up, let the newspaper do its job for at least one to two hours.

Once your shoes are stuffed, make sure to place them in a well-ventilated area, preferably away from direct sunlight.

Every few hours, replace the newspaper until the shoes are relatively dry.

By then, it’s just a matter of air drying.

Just try it out. Got nothing to lose.

Be careful, though. Avoid using heavily inked sheets of the newspaper as they might bleed onto your shoes, especially if your shoes are white.

Fan It Out

Another hack to swiftly get your shoes back on the road is some fanning.

It’s simple, too.

Open the mouth of your running shoes as wide as possible.

Next, place the shoes and insoles directly in front of a high-speed fan. Remember to put the fan up somewhere stable, safe, and out of the way.

The fast, dry air coming from the fan will flow through and around the material of shoes and dry them in no time. The sooner you do this, the faster your shoes dry.

Only have a ceiling fan? Then get a chair and put your wet shoes on the elevated platform with the fan on max speed.

Additional Reading  – Your guide to the heel to toe drop.

Put Them In A Dry Place

The last step is key, so don’t let all of your hard work go to waste.

Sooner or later, your shoes will remain relatively moist, but the newspaper and fan method will stop working as there’s too little humidity to be fully absorbed.

Once you reach this stage, air drying is the ideal way to remove the remaining dampness.

Make sure to leave your shoes in a room or space that’s dry and warm where moisture and humidity are limited. You don’t want mold to linger inside your shoes.

Avoid using heating tools like a hair dryer as it can damage the fabric of the shoe, causing it to crack and wrap.

How To Not Dry Your Running Shoes

There are many things you should never do when trying to dry your running shoes.

These include:

Using A Dryer

Throwing your sneakers into the dryer achieves nothing but adds more wear and tear to them as well as likely damage your dryer (and shoes).

The high heat can break down the glue that holds your running shoes together. It can also compromise the upper and cause it to crack.  Not worth it.

The dryer may also irreversibly warp the shoes, which will impact their fit and performance.

Additional Resource – Here’s how to break in new running shoes.

No Hair Dryer

Using a hairdryer to soak up moisture away from your running shoes is both a waste of time and energy. It’s also dangerous.

Holing the drier for a long time can actually damage the glute and melt the rubber sections if you’re not careful.

What’s more?

The heat may amp up the odor factors as well as damage the adhesive and materials.

And since you’ll likely get impatient holding the hairdryer, you might leave the shoes unattended with the device stuck inside if. This not only creates a fire hazard not only for the shoes but your home as well.

Moreover, hairdryers aren’t designed for prolonged use, so short circuits risk is high.

No Direct Sun Exposure

Another common drying method to avoid is putting your running shoes outside under direct exposure to the sun.

The sun’s light may help speed up the drying process as well as remove unwanted odors but can also fade your shoes and cut their lifespan short.

The sun’s UV rays can damage the synthetic and rubber material used within your shoes. This, in turn, will result in a fast decline and corrosion of any glue and seams in your shoes.

No Bad Storage

Storage also matters.

Don’t leave your running shoes-wet or dry—in a locker, gym bag, the truck of your car, or some dark corner in the garage without proper ventilation.

This only makes them a breeding ground for bacteria and nasty smells.

The perfect place is somewhere with a mild temperature that has good air circulation and is dust-free. The wardrobe, as long as it has enough space, is one such place.

You can also store your shoes on mounted shelves on the wall or under your bed.

Coughing After Running – How Long Does Runners Cough Last & How To Prevent it

If you find yourself coughing either during or after running, then you have come to the right place.

Running-related coughing is a common annoyance that plagues many runners—recreational and elite alike.

Today’s post will explain the main causes of coughing after running while offering a few tips for treatment and prevention.

Sounds great?

Let’s get started.

How Is Common Coughing After Running?

Coughing after a run is a common condition among runners.

In fact, it’s so common that it’s been referred to by many names such as “track hack” and “pursuer’s cough.”

In some cases, the cough may set in shortly after a session, but at other times a few minutes into your run.

The cough may strike quite frequently, but in most cases, it’s not as stubborn to persist longer than an hour nor continuously.

Though the cause may vary from one runner to runner, there are a few reasons that are most common—most of which you’ll learn more about later on.

The best way to treat and prevent this condition is to identify what may be triggering it in the first place.

Let’s dive into it.

What Is Coughing?

First things first, let’s talk about coughing and the mechanism behind it.

Also known as tussis, a cough is a voluntary or involuntary act that clears the airways and throat of irritants, microbes, mucus, fluids, and other foreign particles. It’s basically a cleaning mechanism of your upper respiratory system.

When an irritating stimulates the nerves within your airways or throat, a message is sent to your brain. Then your brain commands the muscles in the chest and abdomen to push air of the lunges in order to get rid of the irritant.

For example, if you’re prone to seasonal allergies, your cough might be triggered by allergens such as dust or pollen.

In some cases, poor air quality (as we’re going to see later) might also compromise your airways and cause coughing.

The sporadic cough is normal. But there’s a number of conditions that might need medical attention.

How Long Does Runners Cough Last

Sorry I don’t have the answer for this as it depends on the cause of the cough. Some cases may only last for a few moments, whereas a severe case of running induced caugh can last up for the whole day. Keep on reading to learn more about the causes of runners caough.

Runners Cough – Why Am I Coughing After Running

Here are the most common reasons why you might be coughing during and/or after running.

Cause Number 1 – Exercise-Induced Bronchoconstriction

If your cough while running is chronic and not caused by a sickness or a medical condition, you might be dealing with exercise-induced bronchoconstriction.

Formerly known as exercise-induced asthma, exercise-induced Bronchoconstriction (EIB) refers to a temporary constriction of the airways in the lungs during strenuous exercise.

When it’s the case, your airways get briefly constricted, which can induce a cough that can last for a few minutes.

The condition causes wheezing, shortness of breath, coughing (of course), and other symptoms during and after running.

Having asthma—as well as other respiratory issues—will make you more prone to suffer from EIB.

Symptoms

In most cases, EIB may peak roughly 10 to 15 minutes into a workout and fades away within one hour or less. The symptoms may linger for an hour or longer if untreated.

The telling signs include

  • Wheezing
  • Coughing
  • Chest tightness
  • Shortness of breath
  • Fatigue during running
  • Mediocre performance

Left ignored, EIB may develop into a serious, sometimes life-threatening, condition, especially among people with already existing lung issues.

The condition may also force some people to stop exercising, which drastically lowers quality of life.

The Solution

Other than preventing it in the first place, most cases of EIB can be treated with albuterol, which is a quick-acting medication that can briefly open up the airways.

If you’ve been diagnosed with EIB or asthma, you’ll probably have at least one inhaler. These inhalers aren’t only used during an attack but also as a preventative measure to reduce the risk of an attack.

That’s why most doctors would recommend using this fast-acting emergency medicine 15 to 20 minutes before running to prevent airway spasms for the upcoming hours.

Prevention

Do the following to reduce your risks of EIB while running.

Warm Up

A warm-up is important before any run, but for those with EIB, it’s even more crucial. This allows your body to get used to physical activity and increased breathing rate, which prepares it for more strenuous exercise.

Perform at least 5 minutes of light jogging then followed by another 5 minutes of dynamic warm-up exercises, such as inchworms, leg swings, walking lunges, and air squats. For my full warm-up routine, check this guide.

Cause Number 2 – Seasonal Allergies

Seasonal allergies such as hay fever are another common cause of coughing after running.

According to the American Lung Association, pollen is the most common springtime allergy offender.

During this period of the year, you might find yourself coughing both during your workout as well as post-run.

You may come down with symptoms such as wheezing, sneezing, and coughing after outdoor running, especially if the pollen count is high.

This is blamed on mold spores and airborne pollen that get trapped in the airways and irritate them.

The Solution

If you want to avoid allergies relating to pollen through the springtime, take the following steps.

Check The Levels

Check the pollen count before heading out the door. If the count is too high, consider hopping on the treadmill or cross-training.

Not worth the risk if you’re already prone. Luckily there’s an app to help you predict the pollen count of the day.

Stay indoors as often as possible

You should be able to comfortably run outdoor without coming down with any allergic reactions when pollen count goes down.

Take Antihistamine

Craving an outdoor run but don’t want to hop on a treadmill? Consider taking an antihistamine to medicinally control your allergies.

Just keep in mind that just like any other medicine, antihistamines have side effects. The most well-known one is drowsiness, so be careful.

Runners Cough
Young man resting on the stairs after running

Additional resource – What’s the best temperature for running

Cause Number 3 – Postnasal Drip

If you find yourself coughing up phlegm and wheezing after running in the cold, it’s likely because you’re dealing with a case of post-nasal drip.

The glands within your throat and nose constantly produce mucus to moisten the nasal membranes, expel foreign matter, and fight off infection.

Most of the time, you swallow this mucus without even realizing it.

Usually, your body produces just enough of the mucus to keep things going smoothly, but in the presence of triggers, such as sinus infections, irritants in the air, the common cold, and of course, running in cold weather, your body may start to make too much of it.

When this takes place, the mucus starts accumulating in the back of your throat. That’s when you start feeling a steady trickily mucus from the back of your sinuses to your throat. This irritates your throat and eventually develops into a cough.

That’s why post-nasal drip may force you to clear your throat much more often, and you feel soreness in your throat, too.

Common symptoms of postnasal drip include:

  • Scratchy, sore throat
  • Bad breathe
  • Constant need to clear the throat or swallow
  • Nausea from excessive mucus getting in the stomach
  • Dry throat
  • Blood streak

The Solution

Take the following measures to keep post-nasal drips while running at bay.

Stay Inside

If you’re prone to post-nasal drip, stay inside as often as possible to stop the cough from getting worse.

Use OTC Medicine

If your post-run cough is triggered by postnasal drip, try using an over-the-counter (OTC) oral decongestant, guaifenesin, or antihistamine—all of which help thin the mucus.

This might be enough to thin mucus and soothe your nasal membranes.

Don’t know which one to take? Consult your doctor or pharmacist before trying any of these products. Better be safe than sorry.

Additional resource – Prevent Acid Reflux While running

Rinse

Before heading out the door for a run, rinse your nasal passages with a saline solution, whether in the form of a neti pot or a bulb squeeze syringe.

This should be enough to wash irritants or allergies out of your nasal passages, which helps your body get rid of that excess junk that’s triggering the secretion of mucus. You can also turn this into a habit by doing this every night before you sleep.

Additional resource – running with asthma?

Humidify

Another trick to unclog your respiratory tracts is to inhale vapors or steam.

You simply pour a few drops in hot water then inhale deeply. This helps moisten your nasal passages, helps thin secretions, removes mucus clogs, and relax the muscles.

Cause Number 4 – Running In Cold Weather

With or without allergy risk, bouts of running-related coughs are much more common during the cold season than in any other season.

When you run outdoor during the cold season, you’ll be breathing air that’s drier and colder than the air in your lungs. This air causes heat loss in the lungs, resulting in shortness of breath, wheezing, and a cough while exercising.

That’s not the whole story. Research out of the National Library of Medicine has also reported that the cold air can reduce the amount of water and heat in the lung, setting the stage for a scratchy, dry cough.

The Solution

To reduce your risks, do the following:

Cover your Face

If you’re running in cold weather, consider wearing a mask or a scarf around your face. This should help moisturize the air and filter out large particles. Choose the breatheable one.

Train Indoor

If you’re prone to coughing and it’s too cold outside, consider moving your workout indoors. A treadmill is your best friend here. Check my full guide here.

Cause Number 5 – Acid Reflux

Medically known as gastroesophageal reflux is a common condition that causes a burning sensation in the chest.

The condition occurs when acids in the stomach churn up in the throat when exercising. More specifically, it strikes when the lower esophageal sphincter, the band of muscle at the bottom of the esophagus—is too relaxed or weak.

This is why you might start coughing mucus a few minutes into a run to neutralize it.

The Solution

To keep heartburn when running at bay, take the following steps.

Get OTC

Head to your local pharmacy and ask for over-the-counter medication for heartburn.

If this doesn’t help soothe your symptoms,  consult your doctor for more options.

Avoid Trigger Foods

Acid reflux is typically caused by eating certain foods in the hours—or night—before a run.

Some of the most common offenders:

  • Citrus fruits
  • Coffee
  • Mind
  • Onions, shallot
  • Etc.

Instead, eat plenty of food that aid in the reduction of acid reflux. These include:

  • Vegetables
  • Lean Meats
  • Eggs
  • Sea Food
  • Oatmeal
  • Ginger, especially the tea.

Additional resource – GI distress in runners

Cause Number 6 – Vocal Cord Dysfunction

Last but not least, Vocal Cord Dysfunction (VCD) is a less-known cause of coughing during running.

The condition occurs when the muscles in the larynx—the voice box—tighten and stay shut when you inhale.

Unlike EIB, this condition may force you to start coughing while running, as exercise triggers VCD.

You may experience tightness in your throat as well as wheezing when inhaling and a cough.

Usually, if you’re dealing with asthma, you’ll typically hear the wheezing on the exhale.

Your voice may also change or become hoarse, and you have difficulty breathing.

Treating & Preventing

When it comes to running-related coughs, causes such as seasonal allergies, post-nasal drips, running in the cold can be easily managed on your own.

But if you’re coming down with severe VCD symptoms for an extended period of time, you should consult your doctor for a thorough medical check up.

According to my research, this condition isn’t treated with medication but rather with speech therapy.

During a VCD speech therapy session, you’ll be taught techniques and exercises which reduce the symptoms of VCD.

The vocal exercises are meant to soothe throat strain as well as finding the optimum volume and pitch for speaking. The exercises are practiced regularly so in case an attack strikes, and you can remain in control.

This not only will help you upspeak more clearly, but also decrease the irritants within your throat as well as breathlessness.

When To See A Doctor

Consult your doctor if you have symptoms of exercise-induced bronchoconstriction as well as Vocal Cord Dysfunction.

Plenty of conditions may trigger similar symptoms, which is why you need to get a thorough diagnosis.

You cannot treat what you don’t know. Right?

But if symptoms persist, you should consult your doctor.

Call a doctor right away if your caught is accompanied by:

  • Shortness of breath or wheezing that makes it hard to breathe
  • High fever
  • Heart palpitations
  • Coughing getting worse despite using OTC medication.
  • Halitosis
  • Swelling around jaw and mouth,
  • Rapid change of weight.

Runners Cough – The Conclusion

There you have it!

If you often cough either during or after a run, then today’s post should be enough to guide you on the right path toward soothing what’s ailing you. The rest is really up to you.

Please feel free to leave your comments and questions in the section below.

In the meantime thank you for dropping by.

David Dack.

Running Pain-Free: A Comprehensive Guide to Metatarsalgia In Runners

Running With Morton's Neuroma

Are you familiar with that annoying, often downright painful sensation in your feet, right beneath your toes, while running?

Well, if you’ve experienced it, you’re not alone. I’m talking about metatarsalgia, the not-so-welcome companion for many runners.

But wait, what’s causing this unwelcome guest to crash your running party? And, more importantly, how can you kick it to the curb or, even better, prevent it from showing up in the first place?

You see, in about 9 out of 10 cases, metatarsalgia is the culprit behind that pesky ball-of-foot pain – and it’s not exclusive to runners; it can bother just about anyone.

Now, here’s the kicker: when you’re dealing with metatarsalgia, running isn’t exactly your foot’s best friend.

The high-impact nature of running places a considerable amount of stress on those already grumpy feet, making your symptoms worse and slowing down the healing process.

But worry not because today, we’re here to dive headfirst into the world of metatarsalgia.

We’ll uncover its secrets, explore its main symptoms, and arm you with the knowledge to both treat and prevent it.

Sounds like a plan, right?

So, lace up those shoes, let’s dig in, and get you back to enjoying pain-free runs!

Anatomy 101 – Foot & Forefoot

Your feet are nothing short of a marvel of design. They were crafted by nature for an impressive range of activities – from walking and jumping to balancing, dancing, climbing, and, of course, running.

But here’s the kicker – your feet, while amazing, also bear the incredible load of your entire body. And when you kick into running gear, that weight amplifies even more.

Now, let’s dive deeper into the nitty-gritty of foot anatomy. A single foot houses a whopping 26 bones, which is nearly a quarter of all the bones in your entire body.

And that’s just the beginning! You’ll find 33 joints, 19 muscles, a whopping 107 ligaments, and enough tendons to make your head spin.

But the real star of the show? The forefoot. This area is like the VIP section of your feet, home to the metatarsal bones, the metatarsophalangeal joints (say that five times fast!), and all ten toes.

It’s where the action happens, and it’s densely packed with tiny yet mighty muscles, tendons, ligaments, bursa (those cushiony sacs that keep things smooth), fascia (the body’s natural tension tamer), blood vessels, and nerve fibers.

The Function of The Forefoot

Imagine your foot as a well-choreographed team, with each member having a unique job. The forefoot squad’s primary tasks are weight-bearing and propulsion.

Let me explain.

When you’re in the midst of your running stride, your forefoot is the first responder to the call of duty. It takes on the enormous responsibility of supporting your entire body’s weight during the toe-off phase, which is basically when you’re propelling yourself forward.

Talk about a heavy task!

Now, here’s where it gets interesting. Depending on factors like your running speed, biomechanics, the terrain you’re conquering, and your own body weight, your forefoot might be handling as much as three to five times your body weight with every single step. That’s a lot of load for those metatarsal bones to bear.

That’s why it should come as no surprise that runners often experience forefoot pain. The sheer workload and repetitive stress placed on this part of the foot can lead to discomfort, and in some cases, it can even put a pause on your running goals.

Additional resource – Running with osteoarthritis 

What Is Metatarsalgia?

Metatarsalgia is essentially a fancy term for an overuse injury that sets up camp under the heads of your metatarsal bones, which are the long bones that make up the front part of your foot. Think of it as the ball of your foot staging a protest.

The structures surrounding these metatarsal bones start getting all riled up, irritated and inflamed. It’s like a mini-revolution happening in your foot neighborhood.

Now, where’s the hot spot for this rebellion? Typically, it’s right under the ball of your foot, especially close to the base of your second toe. Why the second toe, you ask? Well, that’s where the action tends to kick off.

But here’s the kicker (pun intended): metatarsalgia isn’t the main culprit; it’s more like a messenger delivering some not-so-great news. It’s a symptom, not the root cause itself. The real question is, what’s behind this foot uprising?

Metatarsalgia is no respecter of professions. It doesn’t discriminate between runners, track and field athletes, or folks who love high-impact sports like football and basketball. If you’re putting your feet through the wringer, metatarsalgia might just pay you a visit.

Additional guide  – Running With Seasonal Allergies

The Main Causes OF Metatarsalgia in Runners

The key culprits behind metatarsalgia is the excessive impact endured during physical activities, particularly running. This relentless pounding can irritate and even break down the structures that make up the forefoot.

That’s not the whole story.

Let’s unravel a few variables that could make things worse.

  • Calf Tightness: Tight calf muscles can pull on the tendons and muscles in your feet, increasing the strain on the metatarsal area.
  • Inadequate Shoe Cushioning: Running shoes that lack proper cushioning in the forefoot can leave your feet vulnerable to metatarsal stress.
  • Overuse and Rapid Training Increases: Pushing your limits too quickly can prevent your muscles and tendons from adapting, potentially leading to metatarsalgia.
  • Foot Biomechanics: If your feet roll excessively inward (overpronation) or outward (underpronation) during running, it can exacerbate the
  • Foot Anatomy: Having excessively high arches or flat feet can alter the distribution of weight on your feet, potentially increasing the risk of metatarsalgia.
  • Prolonged Standing or Sitting: Occupations or activities that involve extended periods of standing or sitting can also contribute to metatarsal stress.
  • Foot Deformities: Conditions like hammertoe deformities and bunions can alter the alignment of your toes, impacting the metatarsal area.

Additional resource – Guide to big toe pain from running

Symptoms of Metatarsalgia While Running

Let’s take a closer look at the symptoms when metatarsalgia gate-crashes your run.

Metatarsalgia often starts as a low murmur of discomfort, like a distant thunderstorm on the horizon. It sneaks up on you gradually, making itself known over time.

As it settles in, metatarsalgia’s signature move is a symphony of pain. You might feel like there’s a tiny dagger stabbing, a smoldering burn, or a persistent ache right under your toes. Sometimes, it’s a sharp, shooting pain that takes you by surprise.

Imagine walking around with a pebble perpetually lodged in your shoe. That’s the sensation metatarsalgia can deliver. It’s as if something is constantly irritating the area under the heads of your metatarsal bones, those bony joints beneath the ball of your foot.

What’s more?

Metatarsalgia often picks on the second toe, though it can sometimes target the third or fourth toe as well. It’s like it has a preference for causing chaos in specific areas.

Moreover, if metatarsalgia isn’t satisfied with just pain, it might invite its friends, numbness, and tingling, to join the party. These sensations can creep into your toes, making things even more uncomfortable.

Additional resource – Chiropractor for runners

Does Running Make Metatarsalgia Worse?

When it comes to metatarsalgia, your beloved sport is not your feet’s best friend. In fact, running can be the catalyst for turning a minor foot discomfort into a full-blown metatarsalgia party.

Why’s That?

Picture this: every time your foot strikes the ground while running, your forefoot plays the role of shock absorber. It takes on the Herculean task of soaking up the impact and propelling you forward.

Now, that’s a noble job, but it’s also a lot of work!

And guess what? When you’re already dealing with metatarsalgia, this high-impact action can be like pouring gasoline on a fire. It exacerbates your symptoms, making your foot pain scream louder with every stride.

So, Does Running Make Metatarsalgia Worse?

In a word, yes. Running intensifies the stress on the structures within your forefoot, aggravating the inflammation and irritation that metatarsalgia brings along.

How To Treat Metatarsalgia In Runners

The best way to speed up recovery is to take action quickly and uncover the actual cause(s) that led to the irritation and pain.

Next, start treating it at the onset of pain.

Here’s what to do

The Rice Method

Your aim is to restore a normal range of motion while soothing pain, reducing swelling, and ensuring proper function.

Begin with the R.I.C.E method, in which you:

Rest the injured limb

Take time off any activities that cause pain. As the pain fades, you can gradually taper up while paying attention to your symptoms.

Ice the affected area

Typically, the sooner, the better—for 15 to 20 minutes, three times a day. Avoid placing the ice in direct contact with your skin. Instead, use a barrier between the ice and your skin.

Compress

Use a simple ACE wrap around the affected limb to help with the swelling and pain. Begin at the toes and work up the foot. Avoid wrapping too tightly.

Elevate the injured foot

Use a pillow to place the affected limb above the level of your chest to help limit swelling and speed up recovery.

What’s more?

For more relief, try stretching your calf muscles. As I previously stated, having tight calf muscles may place more pressure on the forefoot. I’d also recommend a foam roller for a deeper release.

Use A Pad

Metatarsal pads are small, triangular-shaped cushions that can work wonders for metatarsalgia, especially for pain relief. And the best part? They’re temporary, so you can give your feet the TLC they deserve without committing to a long-term solution.

These clever little pads are strategically placed behind the site of your injury – that’s where your metatarsal bones reside. By providing extra support and cushioning, metatarsal pads reduce the pressure on your metatarsal heads, those vulnerable areas that bear the brunt of your body weight.

When you’re dealing with metatarsalgia, it’s all about finding relief where it counts. These pads are your allies in the battle against foot pain, and they’re ready to go to work wherever you need them most.

Additional resource – Sore quads after running

Consult Your Doctor

When those metatarsalgia symptoms become too much to bear, it’s time to consult the experts. Here’s the lowdown on when to seek professional help.

Get the Diagnosis Right

Metatarsalgia isn’t a one-size-fits-all condition. It can have various underlying causes, and nailing down the specific issue is crucial for effective treatment. Your doctor may suggest diagnostic tools like ultrasounds, X-rays, or bone scans to uncover the root cause of your pain.

Injections: A Powerful Ally

When metatarsalgia pain is causing you agony, your doctor might offer a helping hand in the form of injections. These injections can help reduce inflammation, bringing you much-needed relief. While they won’t solve the underlying problem, they’re like a soothing balm for your symptoms.

Surgery: The Last Resort

In severe cases of metatarsalgia, surgery may be the ultimate solution. It can correct structural issues in your feet or remove damaged tissue that’s causing your pain. Rest assured, it’s not a decision taken lightly, and your doctor will discuss all options with you.

Return To Running With Metatarsalgia

Congratulations! You’ve battled metatarsalgia and emerged victorious. Now, it’s time to lace up those running shoes and hit the trail once again.

But wait – before you sprint off, here’s the lowdown on making a triumphant return to running after metatarsalgia.

Listen to Your Body

First and foremost, heed the golden rule of recovery: listen to your body. Your foot has been through a lot, and it deserves your TLC. Only venture back onto the running track once you’re completely healed and can run on the affected foot without a hint of pain.

Slow and Steady Wins the Race

When returning to running after metatarsalgia, opt for a gradual comeback. Don’t try to pick up where you left off before the injury.

Instead, start with shorter, easier runs and progressively increase your mileage and intensity. It’s like easing into a hot bath – dipping your toe in first and gradually submerging yourself.

Pay Close Attention

As you resume your running routine, keep a close eye on your foot. Monitor it for any signs of discomfort, pain, or unusual sensations. Your foot will give you cues on how it’s feeling. If something doesn’t seem right, don’t hesitate to take a step back and give it more time to heal.

How To Prevent Metatarsalgia In Runners

The best way to prevent metatarsalgia —as well as any other overuse injury—is to address the risk factors that are to blame for the condition (some of which I’ve already shared above).

Use Proper Shoes

When it comes to preventing metatarsalgia and other overuse injuries, your choice of footwear can make all the difference.

Let’s dive into the world of shoes and discover how you can step into comfort and avoid foot woes.

Toe Box Bliss

Your toes splayed out like a hand of playing cards, free to move and breathe within your shoes. That’s the kind of comfort you should aim for. When selecting running shoes, prioritize those with a spacious toe box. Your toes deserve room to wiggle and spread out comfortably.

Arch Allies

If you have flat feet, they might need a little extra cushiony love. Look for running shoes with ample midfoot cushioning to cradle your arches and absorb shock. It’s like treating your feet to a cozy pillow.

On the flip side, if you’re blessed with high arches, seek out shoes with shock-absorbing support tailored to your arch type. This support acts like a trusty sidekick, ensuring your feet are well-equipped for the journey ahead.

Casual Consideration

While your running shoes are essential, don’t overlook your casual footwear. Those stylish high heels or sleek, narrow-toed shoes may look fabulous, but they can wreak havoc on your feet.

Choose casual shoes with a design that accommodates your foot’s natural shape. It’s like giving your feet a break when they’re not pounding the pavement.

Try Tape or Orthotics

We get it; sometimes, your trusty running shoes just don’t provide the support your feet need. But fear not; there’s a solution that can come to your rescue: taping and orthotics.

Let’s unravel this secret weapon against metatarsalgia discomfort.

Tape It Up

Think of athletic tape as your foot’s personal cheerleader. It can offer targeted support where you need it most. If you’re experiencing metatarsalgia symptoms and need quick relief, taping can be a game-changer.

By skillfully applying tape, you can help alleviate pressure and discomfort in specific areas of your foot. Plus, taping is a flexible solution that allows you to fine-tune the level of support you require.

Orthotics

Orthotics are like the customized suits of the shoe world, designed to fit your feet perfectly. They come in various forms, including metatarsal pads and insoles, and can be a valuable addition to your footwear arsenal.

Metatarsal pads are small but mighty, offering targeted relief to the ball of your foot, where metatarsalgia pain often strikes. Slip them into your shoes, and you’ll feel like you’re walking on clouds.

Insoles, on the other hand, provide overall support and stability. They can help distribute pressure evenly across your foot, reducing the strain on sensitive areas.

The Perfect Pairing

Sometimes, orthotics and metatarsal pads come together like a dynamic duo. You can choose the combination that best suits your needs. It’s like having a personalized support team for your feet, ensuring they stay comfortable and pain-free.

Strengthen Your Feet

Let’s talk about boosting the strength of your feet – it’s not only a great way to ward off metatarsalgia but also to keep your feet in tip-top shape!

When you work on strengthening these muscles of your lower legs, you’re essentially giving your feet a superpower boost when it comes to carrying your body weight.

Plus, you’ll be handing them the tools to support your arch, reducing any strain that might come their way when you’re out for a run.

But here’s the kicker: If your foot and ankle muscles are feeling weak or out of whack, they can actually lay the groundwork for trouble in your feet, like putting extra stress on your plantar fascia – and nobody wants that.

But wait, there’s more! Strengthening the underside of your foot can also be your secret weapon against excessive flattening, which is a game-changer when it comes to protecting those precious metatarsals. So, let’s get those feet pumped up and ready for action.

Additional guide – Bunions in runners

Stretch Regularly

Your muscles are like the strings of a puppet show, and your midfoot is the stage. When those muscles are tight, they’re pulling the strings too hard, causing unnecessary stress on your midfoot. Ouch, right? But that’s not all – tight muscles can also be the puppet masters behind those not-so-friendly bunions.

Not a pretty sight, I assure you.

But fear not!

There’s a simple habit you can adopt to keep those muscles in check. It’s all about stretching regularly.

Whether you’re gearing up for a run or winding down after one, make sure to give those muscles a good stretch, especially if you’ve had a history of leg or ankle issues.

Now, let’s get to the juicy part – the key areas you should be targeting for a speedy recovery. We’re talking toes, ankles, Achilles tendons, and those trusty calf muscles.

Here’s the lineup of superstar exercises to keep those troublemakers at bay:

  • Calf-stretch
  • Achilles tendon – Stretch
  • Toe towel-scrunches
  • Ankle Extension
  • Ankle Flex

Additional resource – Causes of heel pain in runners

Running With Metatarsalgia – The Conclusion

There you have it! If you’re planning on running with metatarsalgia, then today’s post has you covered. The rest is just details.

Please feel free to leave your comments and questions in the section below.

Thank you for stopping by.

Why Does my Jaw Hurt When I Run – Jaw Pain When Running Explained

ear pain when running

Experiencing jaw pain when running? Then you have come to the right place.

Jaw pain while running isn’t your typical overuse injury, yet having it during a run or at any time, can be quite annoying.

There are many possible causes of jaw pain. In fact, it can be different reasons for different runners.

That’s why you should look into them because they can be quite dangerous (in super rare cases, of course).

In today’s post, I’ll discuss why does your jaw hurt when you run and share some tips and guidelines on what to do to soothe it.

Sounds great

Let’s get started.

Why Does my Jaw Hurt When I Run – Stop Jaw Pain While Running

Jaw pain is usually felt as pain around the ear, tenderness in the jaw, as well as inability to chew comfortably.

If suffering from this pain while running, any of the following causes could be the reason behind your condition.

Forward-Head Posture

If you’re routinely in a slouched position, either while running, working, or watching TV, then you’re, basically, holding your body in a less-than-ideal position.

Here’s the truth.

Your body functions best when all of the muscles, bones, and joints are properly aligned.

When your head is too much forward, your neck muscles may take in more load than usual. This extra stress travels up your neck and causes jaw pain.

That’s not the whole story.

This type of jaw pain can also contribute to headaches and migraines, which can hinder your performance and cause further trouble.

The Solution

If you catch yourself in a forward-head position—either while running, at work, or whenever—correct it on the spot.

I’d recommend that you also make a few lifestyle changes such as adjusting your computer screen as well ad spending less time looking down at your phone.

Here are a few hints to help you build and maintain proper running form.

  • Keep your shoulders loose and relaxed. Avoid hunching.
  • Gaze straight ahead—about 15 to 20 feet. Never look down at your feet unless you’re running on a technical terrain where you need to SEE where you put your feet.
  • Keep your chin tucked in a while keeping your neck and head in the same plane as your body.
  • Engage your core and keep your back neutral and straight.
  • Keep your arms loose, bent at a 90-degree angle, with a strong forward swing. Avoid side-to-side swinging.

Additional resource – Chiropractor for runners

Jaw Clenching

Grinding the teeth—or what’s known as bruxism—is another common habit that causes jaw pain.

Bruxism occurs when you subconsciously clench your teeth together. This can create stress in the jaw, especially in the muscles, ligaments, and tendons that support it.

Over time, bruxism can form painful trigger points in the jaw muscle, especially in the masseter and temporalis muscles.

This is actually the reason that although most runners breathe with an open mouth, having already developed these trigger points can be behind the jaw pain while running.

Additional Resource – A Tibial Posterior Tendonitis Guide in Runners

 Jaw Pain When Running
African american woman running in New York City at the morning

The Solution

Pay more attention to how you’re holding your jaw, especially when stressed. Then, build the habit of consciously relaxing your jaw every time you catch yourself clenching your teeth.

You should also do something about the stress.

Some steps include:

  • Deep breathing
  • Meditation
  • Stretching
  • Taking regular breaks

What’s more?

Consider getting a nightguard if you tend to grind your teeth while asleep.

Temporomandibular Joint (TMJ) Dysfunction

Feeling pain when yawning or chewing? You might be dealing with a TMJ problem.

Temporomandibular joint disorder, or TMJ, is a condition in which the joints of the jaw might be displaced, injured, or otherwise poorly functioning. TMJ is caused by nerve damage along the temporomandibular joint.

This can manifest as pain in the jaw as well as in the muscle surrounding it.  It can also contribute to headaches, migraines, and back pain.

Main symptoms include:

  • Pain or discomfort while chewing food
  • Tenderness in and around the ear
  • Difficulty opening and closing the mount
  • Facial pain.

What’s more?

Thanks to the repetitive high-impact nature of running, logging the miles can make the TMJ more swollen and painful.

Additional Resource – Here’s your guide to Anterior Tibial Tendonitis 

The Solution

Most people who have TMJ suffer from mild or temporary symptoms which may fade away within a few days or weeks.

That’s why you should consider taking the conservative approach first before procedures such as getting fitted for an appliance, shaving down teeth, or having surgery.

For starters, try some thermal therapy as research by the TMJA has reported that the use of hot or cold therapy helps reduce the symptoms.

In essence, cold therapy limits swelling and pain, whereas heat can improve blood and loosen the jaw muscle.

Apply this method for 15 to 20 minutes at a time. Just remember to use a light layer between your skin and the compress.

You can also try an over-the-counter analgesic. These anti-inflammatory drugs may help soothe the pain.

If your TMJ condition is caused by musculoskeletal issues, look for a physical therapist that specializes in jaw disorders.

Additional Resource – Here’s your guide to calf pain while running

Heart Problems

Last but not least, the reason behind your jaw pain might be more sinister than you imagine. In fact, jaw pain could indicate some type of cardiovascular problem.

This is why in case you’ve persistent jaw pain (despite taking some of the above measures), consult your doctor to rule out any underlying condition.

The most common issue is Angina, a condition in which your heart is in trouble as it’s not getting sufficient blood, and it causes chest pain.

Temporal arthritis, a condition in which swelling causes blood vessels to narrow, may also cause jaw pain.

Blocked arteries is another common condition.

What’s more?

In some cases, jaw pain might be a symptom of a heart attack.

The other well-known heart attack sign are, certainly, chest pain and left-sided arm pain.

The Solution

If you suspect you’re having cardiovascular problems—especially if it’s a heart attack—seek medical attention as soon as possible.

Don’t delay one second.

Why Does my Jaw Hurt When I Run  – The Conclusion

There you have it

If you’re looking to uncover the cause of your jaw pain during exercise, then today’s post will get you started on the right foot. The rest is really up to you.

Please feel free to leave your questions and suggestions in the section below.

In the meantime thank you for dropping by.

Should You Be Running After Leg Day?

One of the most common questions I get asked is, “Should I run after leg day?” And honestly, the answer isn’t a simple yes or no.

Although leg day may take a toll on your body, it’s possible to log in the miles the day after.

But if you can barely walk away from the gym following a leg workout, you might wonder if it’s a good idea to run after leg day.

As a runner and coach with my fair share of brutal leg days, I know how it feels when your legs are shot, but you still want to hit the pavement.

Let’s break it down and figure out when it’s a good idea and how to do it without regretting every step.

Why Leg Day is Essential for Runners

First off, leg day is non-negotiable if you want to be a stronger, faster runner. Sure, the more you run the better you get at it, but leg day? That’s the secret sauce for a powerful stride and injury prevention.

In case you don’t know what it is about, leg day is a whole workout session, as the name implies, dedicated to the muscles of your lower body. The main muscle groups include:

  • The glutes
  • The adductors
  • The hamstrings
  • The quadriceps
  • The calves

Here’s why leg day matters:

  • Builds Muscle: Compound exercises like squats, deadlifts, and lunges work your largest muscle groups. Strong legs mean more power, better endurance, and fewer injuries.
  • Strengthens Your Core: Every squat and deadlift you do engages your core. A strong core is a game-changer for maintaining good running form, especially on long runs.
  • Improves Athleticism: Strong legs lead to better balance, more stability, and a smoother, more efficient stride.

Skipping leg day? Big mistake. Even if you’re just running for fun, working on leg strength will make a difference in how you feel on those long runs.

Should You Run Right After Leg Day?

The real question is, can you run after leg day?

The answer isn’t a simple yes or no. Running immediately after an intense leg workout may not be the best idea, as your muscles are tired and your glycogen stores are depleted.

I often tried to power through a run right after a brutal squat day, and it felt like running with cement blocks strapped to my legs. I usually have to humble my self and keep my pace as slow as possible.

But why does this happen?

Let me explain more.

When you exercise, your body taps into its stored glycogen as fuel.

The harder you exercise, the more fuel you burn up.

That’s why this energy reserve can get depleted when you perform any type of physical exercise.

What’s more?

Classic lower body exercises, such as squats and deadlifts, target more muscles than just your legs, and that’s quite tiring, too.

The larger the muscle, the bigger the inflammation and micro tears, hence, the more soreness and pain.

That’s not the whole story.

Other factors may impact how strength training affects your miles’ quality (and quantity).

These include your:

  • Training intensity
  • Training volume
  • Training speed
  • Order of exercises and workouts
  • Recovery rate
  • Fitness level

For these reasons (and more), the run you do following a leg session the same day will be mediocre at best.

If you’re so sore that you can barely walk, take a day off from running.

However, if you’re just a little sore, a light recovery run can help loosen things up and get the blood flowing, promoting faster recovery.

When Running After Leg Day is a Bad Idea

Sometimes it’s better to skip the run after leg day. Here are a few:

  • Extreme soreness: If you’re struggling to walk, running will only worsen things. Pushing sore muscles can lead to injury or burnout.
  • You pushed to failure: If you went hard in the gym and left everything on the floor, your body needs time to recover. Running right after can do more harm than good.

Still insist on running? Then, at the very least, keep it light and easy.

How to Run After Leg Day (Without Regretting It)

If you’re determined to run after leg day, here’s how to do it smartly:

  1. Start with a Proper Warm-Up Running on sore legs is rough, but a good warm-up can make a huge difference. Do some dynamic stretches—leg swings, lunges, or even brisk walking- to get your muscles loose and increase blood flow.
  2. Keep It Short and Easy After leg day, this is not the time to go for a PR or attempt a long run. Stick to a recovery run—keep the pace easy and the distance short. The goal is to move your legs and boost circulation, not to crush a workout.
  3. Wear Compression Gear I used to think compression socks were just a gimmick, but after trying them out, I’m sold. They help with circulation and reduce muscle fatigue, especially after a tough leg workout. Give them a shot—you might be surprised how much they help.
  4. Fuel Up Properly Running after leg day means your body works overtime to recover. Ensure you’re fueling up with the right mix of carbs and protein. Skipping food can make you hit the wall halfway through your run, and trust me, running on empty doesn’t feel good.

When Should You Skip the Run?

There are days when running just isn’t in the cards. If your legs feel like jelly and even walking is painful, it’s probably a good day to rest.

Pushing through extreme soreness can lead to injuries like strains or sprains. And let’s be real, no run is worth getting sidelined for weeks.

Listen to your body, and take a day off if you need to.

Conclusion: To Run or Not to Run After Leg Day?

To run or not to run after leg day depends on how your legs feel. If the soreness is manageable, a light recovery run can speed up recovery by boosting circulation. But if you’re too sore to walk properly, it’s best to take a rest day or opt for cross-training.

Remember, the key to long-term success is consistency. Missing a run or two after an intense leg day won’t derail your progress, but pushing too hard might.

The Runner’s Dilemma: Can You Keep Jogging with an Abdominal Hernia?

running with hernia

You’re out for your routine jog, the sun’s warmth on your skin, and the rhythm of your steps setting the pace for a perfect day.

But then, a nagging thought creeps in – you have an abdominal hernia. Can you keep running, or should you hit pause until it’s fully healed?

Well, you’re in the right place because today, I’m going to unravel the mysteries of abdominal hernias and explore the ins and outs of running with this condition.

Whether you’re a seasoned runner or just lacing up your sneakers, this article is your go-to guide for making informed decisions about your running routine.

So, let’s lace up and hit the pavement – together!

What Is Abdominal Hernia?

So, what exactly is this “abdominal hernia” thing, and how might it affect your fitness and overall well-being?

Let me paint you a picture. Your body’s like a well-constructed fortress, with a protective wall called the abdominal wall. But sometimes, a sneaky internal organ, like your bladder or intestine, decides it’s time for an adventure. It pushes through a weakened section of that protective wall, resulting in a noticeable lump or bulge.

That’s your abdominal hernia saying, “Hello, world!”

Now, there are a few different types of these hernias.

First up, we’ve got the inguinal hernias, which often occur in the lower abdominal groin area. Then, there are the femoral hernias, which tend to strike the groin near the femoral canal.

But wait, there’s more! We’ve also got hiatal hernias, making their presence known in the upper abdomen, and umbilical hernias, afflicting the area around your belly button.

How To Treat Abdominal Hernias

When it comes to abdominal hernias, it’s crucial to know your options and understand why taking action matters.

Now, in many cases, persistent hernias will call for a little surgical intervention. Yep, we’re talking about a trip to the operating room. But don’t worry, it’s a well-practiced procedure, and your skilled medical team will have you covered.

Here’s the kicker: ignoring that pesky abdominal hernia is like playing with fire.

There’s a real danger of something called “strangulation,” and trust me, you don’t want any part of it. Strangulation is a situation where your intestines decide to throw a party, but the venue is way too small – so they get trapped. This hinders and in some cases, completely cuts off circulation to your precious tissue. It’s a life-threatening emergency, and you’d want to avoid it at all costs.

Now, how do you spot the red flags of a strangulated hernia? Keep an eye out for these telltale signs:

  • Fever – when your body temperature goes haywire.
  • Vomiting – not the kind from a rollercoaster ride.
  • Trapped gas – feeling like you’re carrying around an unwanted balloon.
  • Chronic pain – not the run-of-the-mill ache; but persistent discomfort.
  • Nausea – that queasy feeling that just won’t quit.
  • Constipation – when things in the bathroom aren’t quite as they should be.
  • Skin darkening – no, you’re not getting a tan; it’s a concerning sign.

Can you Run With an Abdominal Hernia?

Well, the answer isn’t as straightforward as we’d hope. It’s a bit like navigating a maze, and here’s why: whether you can keep running with a hernia depends on a few key factors.

First up, it all hinges on the severity of your hernia and how intense your training is. The milder your hernia, the better your chances of keeping up with your running routine. But if it’s throwing a full-on hernia tantrum, you might need to hit the pause button.

Here’s the silver lining, though: running at a low intensity is often recommended for hernia patients. Why, you ask? Well, running can actually help shed those extra pounds, which might just ease some of your hernia-related symptoms.

But (yes, there’s a but), remember that the intensity of your runs matters. If your hernia is causing you to wrestle with acid reflux symptoms, going hard or long on your runs might not be your best bet. It could potentially crank up the pain factor.

Additional Resource – Can You Run With An Abdominal Strain?

Intense Training And Hernia

Hernias don’t appreciate strenuous workouts.

Any activity that puts a squeeze on your abdominal region can send your hernia into a frenzy. While running might seem like it’s all about those legs, don’t be fooled – your core is in on the action, too!

Don’t just take my word for it; there’s solid research to back this up. A study published in PLOS One decided to peek under the hood and see what happens to our cores during running. They had 28 subjects undergo three months of Pilates training, which is all about strengthening that core.

What they found was quite telling – during running, our core muscles, especially those obliques (the side muscles), kick into high gear. And guess what? The more you rev up your running pace, the more your core muscles get involved.

Now, here comes the catch: running, especially when you’re cranking up the speed, could potentially worsen your hernia symptoms by ramping up those core muscle contractions. It’s like adding fuel to the fire!

But overall, if your hernia isn’t causing you agony or inflammation, running is generally considered low-risk.

Of course, it’s always a good idea to have a chat with your doctor before you lace up. However, if that hernia decides to go rogue and strangulate, which basically means it’s messing with your bowel’s blood supply – well, that’s a medical emergency.

Trust me; you’ll know when it’s happening. Vomiting, bowel issues, and an overall unpleasant time are all telltale signs that I’ve already mentioned. In that case, don’t hesitate – get yourself to a medical pro pronto!

How To Manage A Hernia While Running

Now, let’s talk about the comeback plan for all you hernia warriors who are eager to hit the pavement once again.

The golden rule here is gradual progress, and it all starts with channeling your inner beginner. Embrace the mindset of someone just starting their running journey – even if you’re an experienced runner.

Here’s a step-by-step roadmap to guide you back to the running track:

Before you even think about picking up the pace, start with a leisurely walk. Aim for a comfortable pace, around three to five miles per hour. The key here is to do it without experiencing any pain or discomfort. Listen to your body – it’ll tell you if you’re pushing too hard.

As you begin walking regularly without any issues, it’s time to add a little more distance to your outings. Slowly increase the mileage and endurance – don’t rush this process. The goal is to avoid any post-surgery complications and let your body adapt at its own pace.

Do Some Plyometric

Plyometrics are like the turbo boosters for your body, helping you get ready for the rigors of running. These explosive exercises can elevate your strength, agility, and overall fitness, which are essential for a smooth return to the miles.

Here’s a quick plyometric routine that you can incorporate into your comeback plan. Perform each exercise for 30 seconds, then give yourself a one-minute breather. Repeat the whole circuit three times for maximum benefits:

  • Hop in Place: Start with some simple hops while staying in one spot. It’s an excellent way to warm up your legs and get those muscles firing.
  • Hop Side to Side on Two Feet: Now, let’s amp it up a bit. Jump from side to side, landing softly on both feet. This exercise helps improve your lateral movement and stability.
  • Hop Forward/Backward on Two Feet: Take those hops forward and backward now. It’s all about building strength and coordination.
  • Single Leg Broad Jump: It’s time to work on that explosive power. Jump forward with one leg, landing on the same leg, then switch to the other. This exercise targets your balance and strength.
  • Squat Jumps: Get into a squat position and explode upwards into a jump. This one is fantastic for strengthening your legs and core.
  • Burpees: We saved the best for last – burpees! You’ll love to hate them. They combine a squat, push-up, and jump, offering a full-body workout. They’re like a crash course in plyometrics and endurance.

Walk Run

Now, let’s transition from walking to a beautiful walk/run combo – a strategy that’s perfect for easing back into running after a hernia.

Here’s how you can do it:

Start by continuing your regular walks, but this time, inject some running intervals into the mix. For instance, you can begin by walking for a few minutes to warm up, then transition into a gentle jog for a minute or two. Afterward, return to walking for recovery. Gradually increase the duration of your jogging intervals as your body becomes more comfortable.

Listen to Your Body:

Pay close attention to how your body responds. You should be able to complete these walk/run exercises without experiencing any pain or discomfort in your abdominal area.

Touch your abdomen gently – it shouldn’t feel tender or painful. If it does, it’s a sign to take it slower and consult with your healthcare provider.

Can I Run with a Broken Toe? Insights and Tips for Runners

Can You Run with a Broken Toe?

As a dedicated runner, you’re no stranger to the occasional aches and pains that accompany your passion for logging those miles. However, when it comes to a broken toe, things might not be as straightforward as you’d like.

Typically, a broken toe doesn’t require immediate emergency care, but it’s essential to err on the side of caution. Consulting with your doctor is a wise move to ensure you receive the right guidance for your specific situation.

In the meantime, you might be wondering whether it’s possible to continue running with a broken toe. To find the answers you’re seeking, keep reading.

Why The Toes Are Important

The toes play a crucial role in the mechanics of the foot, and each toe serves specific functions that contribute to your overall foot stability and mobility.

Here’s why the toes, particularly the big toe, are important:

  • Contact Point with the Ground: Your toes are the initial contact point with the ground when you walk or run. They provide support and help in maintaining balance during the gait cycle.
  • Propulsion: The toes, especially the big toe (hallux), contribute significantly to the forward propulsion during each step you take. They help push off the ground, aiding in the movement.
  • Shock Absorption: Your toes assist in absorbing shock with each step, reducing the impact on the rest of your foot and leg.
  • Stability: The big toe, in particular, plays a critical role in foot stability. It is responsible for a substantial portion of the overall stability of your foot, accounting for about 80 percent.

Breaking any of your toes, especially the big toe, can have significant consequences, especially if you’re into pain-free training.

Ignoring such an injury and continuing to run can exacerbate the problem and lead to further complications.

What Is A Broken Toe?

A broken toe, also known as a toe fracture, occurs when one or more of the bones in the toes are fractured due to an injury.

These injuries can happen in various ways, such as:

  • Traumatic Fractures: These occur as a result of a sudden injury or impact, like dropping a heavy object on the toe or forcefully stubbing it. Traumatic fractures can range from hairline cracks to more severe, full breaks, including avulsion fractures.
  • Stress Fractures: Stress fractures are a type of overuse injury common among runners. They develop gradually due to repetitive stress and strain on the bones, often from activities like running. In the case of runners, high mileage and rapidly increasing training loads can contribute to stress fractures.

Additional resource – Guide to big toe pain from running

The Main Symptoms of A Broken Toe

If you suspect you’ve broken one of your toes, it’s crucial to pay attention to specific symptoms. While some cases of broken toes may be less severe and require less medical intervention, others might need an X-ray to assess the extent of the injury and the best course of treatment.

Common symptoms of a broken toe include:

  • Tenderness and Intense Pain: You’ll likely experience significant pain, especially when putting weight on the affected toe, even without wearing shoes.
  • Swelling: Swelling in and around the injured area is common and can develop rapidly.
  • Stiffness: The affected toe may become stiff, making it challenging to move comfortably.
  • Nail Injury: In some cases, the trauma can result in nail injury, such as bruising or even bleeding under the nail.
  • Discoloration: Severe bruising beneath the skin may cause visible skin discoloration around the injured area.
  • Visual Deformity: The toe may appear visibly deformed or displaced due to the fracture.
  • Crepitation: You may feel or hear a grating or cracking sensation when you move the broken toe.
  • Numbness: Numbness or altered sensation in the affected area may occur, especially if there is nerve involvement.

As for whether to get an X-ray, it’s a decision to make in consultation with your doctor. An X-ray can provide a clearer picture of the fracture’s location, severity, and alignment, helping guide the appropriate treatment plan.

It’s especially important for fractures that may require realignment or surgical intervention. Always consult with a healthcare professional for an accurate diagnosis and appropriate care.

Can You Run with a Broken Toe?

Running with a broken toe is generally not advisable, and it’s essential to consider the type of toe you’ve broken and the extent of the injury.

Here’s a breakdown of considerations for running with a broken toe:

  • Middle Toes (2nd to 4th Toes): If you’ve broken one of these toes, you might be able to continue running with proper care. Buddy taping, which involves taping the broken toe to a neighboring one for support, can help reduce pain and provide some stability. However, you should listen to your body and stop running if the pain worsens or you experience discomfort. Running with an altered gait due to pain can lead to other issues, such as ankle or knee problems.
  • Little Toe (5th Toe): Running with a broken little toe can be challenging because this toe plays a significant role in the push-off phase of the running gait. It’s often better to rest and let it heal properly, especially if you want to avoid complicating the injury or causing further discomfort.
  • Big Toe (1st Toe): If you’ve broken your big toe, it’s advisable to avoid all weight-bearing activities, including running. The big toe is crucial for balance and propulsion during running, and attempting to run with this injury can be both painful and potentially harmful. You may also struggle to fit your foot into a running shoe due to swelling or deformity.

How Fast To Return To Running?

The answer is: depends.

Typically, a broken toe doesn’t require immediate emergency care, but it’s essential to err on the side of caution. Consulting with your doctor is a wise move to ensure you receive the right guidance for your specific situation

Consult Your Doctor

If you suspect your toe might be broken, it’s crucial to consult your doctor or podiatrist promptly. A broken toe can bring about significant pain and limit your range of motion, making early treatment essential.

Broken toes can generally be categorized as either minor or severe, depending on the severity of the injury.

Signs of a minor fracture may include:

  • Swelling
  • Throbbing pain
  • Bruising of the skin and toenail
  • Inability to move the toe without pain

On the other hand, severe toe fractures can lead to the broken toe appearing visibly crooked or disfigured. In some instances, you might also experience an open bleeding wound at the injury site, along with numbness or tingling in the affected toe.

Additional resource – When to ditch your running shoes

Say No To Drugs

It’s essential to avoid using drugs to mask the pain of a broken toe. Instead, listen to your body and stop any activity that causes discomfort. Attempting to power through the pain can worsen the injury and prolong the healing process.

Furthermore, pain can serve as a diagnostic tool for medical professionals to assess the severity of the injury. If the pain suddenly disappears, it may make it more challenging to diagnose the extent of the damage.

Using non-steroidal anti-inflammatory drugs (NSAIDs) while continuing to engage in physical activities like running can lead to various complications and potentially harm your liver.

The Healing Process

The good news is that healing a broken toe usually doesn’t require extensive intervention. Typically, your doctor will recommend taping the broken toe to aid in the healing process. In more severe cases, a cast or boot may be necessary to provide support and complete immobilization. Surgery is rarely needed for a broken toe.

Rest

If you suspect a broken toe, it’s crucial to prioritize rest and avoid placing any weight on the affected toe. Take a break from high-impact exercises for a few weeks and consider using a splint or cast to restrict movement in the toe bones.

Opt for shoes with a low heel drop if they can accommodate your foot; this can help alleviate pressure on the broken toe during the healing process. Avoiding undue stress on the toe is essential to prevent worsening pain or improper healing.

Apply Ice

To reduce swelling and discomfort, apply ice to the affected toe for 15 to 20 minutes at a time, repeating this process three to four times a day. Using an ice pack or wrapping the ice in a towel can protect your skin from direct contact with the cold.

Soothe The Pain

For severe pain, you can consider taking over-the-counter pain relievers such as aspirin or ibuprofen. These medications can help reduce swelling and bruising. However, it’s important to reiterate that attempting to run through the pain is not advisable.

Elevate

One of the best things you can do to speed up healing is to elevate your foot higher than your heart level. This helps reduce swelling as well as keep fluid from pooling or draining.

Tape The Broken Toe

To alleviate pain, you can employ buddy taping, which involves taping the affected toe to its neighboring toe.

Here’s how to do it:

  1. Identify the injured toe and select the adjacent one for taping. It’s advisable to tape toes with similar shapes and sizes, but never tape two affected toes together.
  2. Gently bring the injured toe closer to the neighboring toe.
  3. Use gauze or medical tape to loosely wrap around both toes, securing them together.

To prevent blisters, you can place a cotton ball between the toes. For added support, a popsicle stick can be used as a splint.

It’s important to note that while toe taping is effective for managing broken toes, improper use can lead to reduced blood flow, limited joint motion, or even infection. If you experience any discomfort or pain after taping, remove the tape immediately.

Protective Footwear

For toe fractures, it’s advisable to explore protective footwear options such as walker braces, boots, casts, and rigid-soled post-operative shoes. Toe separators can also be helpful in alleviating pain and aiding recovery.

How Soon Can You Run After Broken Toe?

When it comes to recovering from a broken toe, prioritizing rest is essential. You should aim for the pain to subside, especially when walking or running.

The healing timeline for a broken toe typically falls within the range of four to six weeks, depending on the severity of the fracture. In more severe cases involving complications like infection or the need for surgery, recovery can extend to two months or even longer.

During the recovery phase, it’s wise to engage in cross-training with low-impact activities that won’t strain your injured toe. Consider options such as cycling, swimming, strength training, and yoga.

Shoe Lacing For Pain Relief

How you lace your shoes can also play a role in managing your injury. Opting for shoes that provide ample room for your toes and reduce stress on the affected area is crucial.

One effective lacing technique involves threading through the first bottom hole and then laddering up to the next hole. This method lifts the toe box, creating space and accommodating the natural curvature of your foot. Diagonal lacing can also help prevent issues like black toenails while running.

Can you Run with a Broken Toe – The conclusion

There you have it! Breaking your toes doesn’t have to spell the end of running routine. With the right treatment, you should be back on your feet ASAP. The rest is just details.

Thank you for dropping by.
Keep training strong.

The Only Treadmill Pace Chart You Need

Running on a treadmill is incredibly convenient and offers the perfect environment for precise training—you control every element, from speed to incline, without the unpredictability of outdoor elements.

Here’s something important to remember: running on a treadmill can feel easier than hitting the roads, primarily because there’s no wind resistance.

When you’re outdoors, the wind pushes against you, adding an extra layer of challenge that’s missing on the treadmill.

This is why a 20-minute run at 0% incline indoors might seem less taxing than the same run outside.

To make indoor runs more effective and mimic outdoor conditions, tweaking the incline is crucial, especially if you’re prepping for a race.

So, how do you ensure your treadmill training aligns with your outdoor performance?

Use a treadmill pace chart!

This tool is a game-changer for translating outdoor paces into the appropriate miles-per-hour indoor setting.

Let’s dive into how.

How to Make Treadmill Runs More Like Outdoor Runs

As a running coach, I often remind my athletes about adjusting their treadmill settings to simulate outdoor running. When you step on that treadmill, the lack of wind and natural terrain changes can throw off your pacing if you’re used to outdoor runs.

To help fix that, I recommend adding an incline—just a slight bump to 1% will do wonders. This mimics the effort to overcome wind resistance outdoors, making indoor sessions more productive and realistic.

Whether prepping for your first race or just trying to stay consistent with your fitness, making small adjustments to your treadmill settings can greatly impact how prepared you are when race day comes around. And trust me, that’s where a treadmill pace chart comes in handy!

What Is a Good Treadmill Pace?

This is hard to answer as it depends on your fitness level, training experience, and goals. For instance, if you’re a treadmill newbie, a good treadmill pace is as close to your real outdoor running pace. But that depends on your current fitness level and training goals.

Let me explain.

For Walking

A beginner’s optimal walking pace is around 3 to 4 mph (around 5 to 6 km/h). If you’re new to exercise, especially cardio training, walking is likely the perfect way to start. Walking has a low impact, burns calories, and helps you improve your endurance and build exercise habits.

Here is a list of top treadmills for walking – choose the best one!

For Jogging

Once (or if) walking feels too easy, try jogging. A proper jogging pace, in my opinion, is about five mph (around 8 km/h). Ideally, you should be able to train and talk without gasping for air for at least 20 to 30 minutes before you start challenging yourself more.

For Running

Once you can keep the conversational pace for 30 minutes., it’s time to challenge yourself. Running, as it relates to pace, is anything above five mph. You should move a little faster than when you jog but not push yourself too hard to the point where you’re panting for air on every step.

For Sprinting

After building a good cardio base, it’s time to take things to the next level.  That’s when you should start doing sprints on the treadmill. As a form of interval training, the typical sprint pace is anything above 12 miles (19 kmh). A pro runner can sprint at a speed of 15 mph. As a rule, you shouldn’t be able to sprint for more than one minute at a time.

How to Use a Treadmill Pace Chart

A treadmill pace chart converts the speed you see on the treadmill’s display (in miles per hour) into the pace of a mile you’d run outside (in minutes per mile).

This is key to making indoor runs as close to outdoor training. Whether you’re training for a 5K, half marathon, or a marathon, this chart can help you fine-tune your pace and achieve your race goals.

So, if you’re wondering how a 6.0 mph setting translates to outdoor running, the chart reveals that it’s akin to a 10-minute mile. This is super handy when trying to maintain a specific pace indoors that you’ve been rocking outdoors.

Here’s how to use it:

  1. Find Your Speed: Look up your treadmill speed (mph or km/h).
  2. Match to Pace: Find the corresponding pace (minutes per mile or kilometer).
  3. Adjust Incline: Use a 1-2% incline to better mimic outdoor conditions, especially if you’re training for hilly courses.

The Charts You Need

If you’re aiming for a specific race time, like 5K or a marathon, you should be able to locate that goal in the corresponding column on the right.

Once you’ve decided on a target pace, check the following posts to help you improve.

The rest is just details, as the saying goes. Here are a few:

Treadmill MPH settingPace per mileEquivalent paces by incline
0%1%2%3%4%5%6%7%8%9%10%
5.012:0012:3111:4411:0510:3210:039:389:168:568:388:228:07
5.211:3212:0211:1810:4210:119:449:208:598:408:238:087:54
5.411:0711:3510:5510:209:519:269:038:438:258:097:557:41
5.610:4311:1010:3210:009:339:098:488:298:127:567:427:29
5.810:2110:4710:129:429:168:538:338:157:587:447:307:18
6.010:0010:269:529:249:008:388:198:027:467:327:197:07
6.19:5010:159:439:168:528:318:127:557:407:267:147:02
6.29:4110:059:349:088:448:248:067:497:347:217:086:57
6.39:319:569:269:008:378:177:597:437:297:157:036:52
6.49:239:469:178:528:308:107:537:377:237:106:586:47
6.59:149:379:098:458:238:047:477:327:187:056:536:43
6.69:059:299:018:378:167:587:417:267:137:006:496:38
6.78:579:208:538:308:107:527:357:217:076:556:446:34
6.88:499:128:458:238:037:467:307:157:026:506:406:29
6.98:429:048:398:177:577:407:247:106:586:466:356:25
7.08:348:568:328:107:517:347:197:056:536:416:316:21
7.18:278:498:258:047:457:297:147:006:486:376:276:17
7.28:208:418:187:587:407:237:096:566:446:336:226:13
7.38:138:348:127:527:347:187:046:516:396:286:186:09
7.48:068:278:057:467:287:136:596:466:356:246:146:05
7.58:008:207:597:407:237:086:546:426:316:206:116:02
7.67:548:147:537:347:187:036:506:386:266:166:075:58
7.77:488:077:477:297:136:586:456:336:226:126:035:55
7.87:428:017:417:247:086:546:416:296:186:095:595:51
7.97:367:557:367:187:036:496:376:256:156:055:565:48
8.07:307:497:307:136:586:456:326:216:116:015:525:44
8.17:247:437:257:086:546:406:286:176:075:585:495:41
8.27:197:387:207:046:496:366:246:136:035:545:465:38
8.37:147:327:156:596:456:326:206:106:005:515:425:35
8.47:097:277:106:546:406:286:166:065:565:475:395:32
8.57:047:227:056:506:366:246:136:025:535:445:365:29
8.66:597:167:006:456:326:206:095:595:495:415:335:26
8.76:547:116:556:416:286:166:055:555:465:385:305:23
8.86:497:076:516:376:246:126:025:525:435:355:275:20
8.96:447:026:466:326:206:095:585:495:405:325:245:17
9.06:406:576:426:286:166:055:555:455:375:295:215:14
9.16:366:526:386:246:126:015:515:425:345:265:185:11
9.26:316:486:346:206:095:585:485:395:315:235:165:09
9.36:276:446:296:176:055:555:455:365:285:205:135:06
9.46:236:396:256:136:025:515:425:335:255:175:105:04
9.56:196:356:226:095:585:485:395:305:225:145:085:01
9.66:156:316:186:065:555:455:355:275:195:125:054:59
9.76:116:276:146:025:515:425:325:245:165:095:024:56
9.86:076:236:105:595:485:385:305:215:145:075:004:54
9.96:046:196:075:555:455:355:275:195:115:044:584:51
10.06:006:156:035:525:425:325:245:165:085:024:554:49
10.15:566:126:005:495:395:295:215:135:064:594:534:47
10.25:536:085:565:455:365:275:185:115:034:574:504:45
10.35:506:045:535:425:335:245:165:085:014:544:484:42
10.45:466:015:505:395:305:215:135:054:584:524:464:40
10.55:435:575:465:365:275:185:105:034:564:504:444:38
10.65:405:545:435:335:245:155:085:004:544:474:414:36
10.75:365:515:405:305:215:135:054:584:514:454:394:34
10.85:335:485:375:275:185:105:034:564:494:434:374:32
10.95:305:445:345:245:165:085:004:534:474:414:354:30
11.05:275:415:315:225:135:054:584:514:454:394:334:28
11.25:215:355:255:165:085:004:534:464:404:344:294:24
11.45:165:295:205:115:034:554:494:424:364:304:254:20
11.65:105:245:145:064:584:514:444:384:324:274:214:17
11.85:055:185:095:014:534:464:404:344:284:234:184:13
12.05:005:135:044:564:494:424:364:304:244:194:144:10

Treadmill Pace Chart Conversions

Min.
per Mile
Miles
per Hour
4:0015
4:0514.7
4:1014.4
4:1514.1
4:2013.8
4:2513.6
4:3013.3
4:3513.1
4:4012.9
4:4512.6
4:5012.4
4:5512.2
Min.
per Mile
Miles
per Hour
5:0012
5:0511.8
5:1011.6
5:1511.4
5:2011.3
5:2511.1
5:3010.9
5:3510.7
5:4010.6
5:4510.4
5:5010.3
5:5510.1


Min.
per Mile
Miles
per Hour
6:0010
6:059.9
6:109.7
6:159.6
6:209.5
6:259.4
6:309.2
6:359.1
6:409
6:458.9
6:508.8
6:558.7
Min.
per Mile
Miles
per Hour
7:008.6
7:058.5
7:108.4
7:158.3
7:208.2
7:258.1
7:308
7:357.9
7:407.8
7:457.7
7:507.7
7:557.6


Min.
per Mile
Miles
per Hour
8:007.5
8:057.4
8:107.3
8:157.3
8:207.2
8:257.1
8:307.1
8:357
8:406.9
8:456.9
8:506.8
8:556.7
Min.
per Mile
Miles
per Hour
9:006.7
9:056.6
9:106.5
9:156.5
9:206.4
9:256.4
9:306.3
9:356.3
9:406.2
9:456.2
9:506.1
9:556.1


Min.
per Mile
Miles
per Hour
10:006
10:056
10:105.9
10:155.9
10:205.8
10:255.8
10:305.7
10:355.7
10:405.6
10:455.6
10:505.5
10:555.5
Min.
per Mile
Miles
per Hour
11:005.5
11:055.4
11:105.4
11:155.3
11:205.3
11:255.3
11:305.2
11:355.2
11:405.1
11:455.1
11:505.1
11:555


Min.
per Mile
Miles
per Hour
12:005
12:055
12:104.9
12:154.9
12:204.9
12:254.8
12:304.8
12:354.8
12:404.7
12:454.7
12:504.7
12:554.6
Min.
per Mile
Miles
per Hour
13:004.6
13:054.6
13:104.6
13:154.5
13:204.5
13:254.5
13:304.4
13:354.4
13:404.4
13:454.4
13:504.3
13:554.3


Min.
per Mile
Miles
per Hour
14:004.3
14:054.3
14:104.2
14:154.2
14:204.2
14:254.2
14:304.1
14:354.1
14:404.1
14:454.1
14:504
14:554
Min.
per Mile
Miles
per Hour
15:004
15:054
15:104
15:153.9
15:203.9
15:253.9
15:303.9
15:353.9
15:403.8
15:453.8
15:503.8
15:553.8


Min.
per Mile
Miles
per Hour
16:003.8
16:053.7
16:103.7
16:153.7
16:203.7
16:253.7
16:303.6
16:353.6
16:403.6
16:453.6
16:503.6
16:553.5
Min.
per Mile
Miles
per Hour
17:003.5
17:053.5
17:103.5
17:153.5
17:203.5
17:253.4
17:303.4
17:353.4
17:403.4
17:453.4
17:503.4
17:553.3


Min.
per Mile
Miles
per Hour
18:003.3
18:053.3
18:103.3
18:153.3
18:203.3
18:253.3
18:303.2
18:353.2
18:403.2
18:453.2
18:503.2
18:553.2
Min.
per Mile
Miles
per Hour
19:003.2
19:053.1
19:103.1
19:153.1
19:203.1
19:253.1
19:303.1
19:353.1
19:403.1
19:453
19:503
19:553

5K Target Time: 12:30-17:15

5k
Time
400m600m800m1KM1200m1600mMile PaceSpeed
KMH
Speed
MPH
12:3001:00.001:30.002:00.002:30.003:00.004:00.004:01.424.014.9
12:4501:01.201:31.802:02.402:33.003:03.604:04.804:06.223.514.6
13:0001:02.401:33.602:04.802:36.003:07.204:09.604:11.123.114.3
13:1501:03.601:35.402:07.202:39.003:10.804:14.404:15.922.614.1
13:3001:04.801:37.202:09.602:42.003:14.404:19.204:20.722.213.8
13:4501:06.001:39.002:12.002:45.003:18.004:24.004:25.521.813.6
14:0001:07.201:40.802:14.402:48.003:21.604:28.804:30.421.413.3
14:1501:08.401:42.602:16.802:51.003:25.204:33.604:35.221.113.1
14:3001:09.601:44.402:19.202:54.003:28.804:38.404:40.020.712.9
14:4501:10.801:46.202:21.602:57.003:32.404:43.204:44.920.312.6
15:0001:12.001:48.002:24.003:00.003:36.004:48.004:49.720.012.4
15:1501:13.201:49.802:26.403:03.003:39.604:52.804:54.519.712.2
15:3001:14.401:51.602:28.803:06.003:43.204:57.604:59.319.412.0
15:4501:15.601:53.402:31.203:09.003:46.805:02.405:04.219.011.8
16:0001:16.801:55.202:33.603:12.003:50.405:07.205:09.018.811.7
16:1501:18.001:57.002:36.003:15.003:54.005:12.005:13.818.511.5
16:3001:19.201:58.802:38.403:18.003:57.605:16.805:18.618.211.3
16:4501:20.402:00.602:40.803:21.004:01.205:21.605:23.517.911.1
17:0001:21.602:02.402:43.203:24.004:04.805:26.405:28.317.611.0
17:1501:22.802:04.202:45.603:27.004:08.405:31.205:33.117.410.8

5k pace chart (12:30-17:15)

5K Target Time: 17:30-22:15

5KM
Time
400m600m800m1KM1200m1600mMile
Pace
Speed
KMH
Speed
MPH
17:3001:24.002:06.002:48.003:30.004:12.005:36.005:38.017.110.7
17:4501:25.202:07.802:50.403:33.004:15.605:40.805:42.816.910.5
18:0001:26.402:09.602:52.803:36.004:19.205:45.605:47.616.710.4
18:1501:27.602:11.402:55.203:39.004:22.805:50.405:52.416.410.2
18:3001:28.802:13.202:57.603:42.004:26.405:55.205:57.316.210.1
18:4501:30.002:15.003:00.003:45.004:30.006:00.006:02.116.09.9
19:0001:31.202:16.803:02.403:48.004:33.606:04.806:06.915.89.8
19:1501:32.402:18.603:04.803:51.004:37.206:09.606:11.815.69.7
19:3001:33.602:20.403:07.203:54.004:40.806:14.406:16.615.49.6
19:4501:34.802:22.203:09.603:57.004:44.406:19.206:21.415.29.4
20:0001:36.002:24.003:12.004:00.004:48.006:24.006:26.215.09.3
20:1501:37.202:25.803:14.404:03.004:51.606:28.806:31.114.89.2
20:3001:38.402:27.603:16.804:06.004:55.206:33.606:35.914.69.1
20:4501:39.602:29.403:19.204:09.004:58.806:38.406:40.714.59.0
21:0001:40.802:31.203:21.604:12.005:02.406:43.206:45.614.38.9
21:1501:42.002:33.003:24.004:15.005:06.006:48.006:50.414.18.8
21:3001:43.202:34.803:26.404:18.005:09.606:52.806:55.214.08.7
21:4501:44.402:36.603:28.804:21.005:13.206:57.607:00.013.88.6
22:0001:45.602:38.403:31.204:24.005:16.807:02.407:04.913.68.5
22:1501:46.802:40.203:33.604:27.005:20.407:07.207:09.713.58.4

5k Pace Chart (17:30-22:15)

5K Target Time: 22:30-27:15

5km
Time
400m600m800m1KM1200m1600mMile
Pace
Speed
KMH
Speed
MPH
22:3001:48.002:42.003:36.004:30.005:24.007:12.007:14.513.38.3
22:4501:49.202:43.803:38.404:33.005:27.607:16.807:19.313.28.2
23:0001:50.402:45.603:40.804:36.005:31.207:21.607:24.213.08.1
23:1501:51.602:47.403:43.204:39.005:34.807:26.407:29.012.98.0
23:3001:52.802:49.203:45.604:42.005:38.407:31.207:33.812.87.9
23:4501:54.002:51.003:48.004:45.005:42.007:36.007:38.712.67.8
24:0001:55.202:52.803:50.404:48.005:45.607:40.807:43.512.57.8
24:1501:56.402:54.603:52.804:51.005:49.207:45.607:48.312.47.7
24:3001:57.602:56.403:55.204:54.005:52.807:50.407:53.112.27.6
24:4501:58.802:58.203:57.604:57.005:56.407:55.207:58.012.17.5
25:0002:00.003:00.004:00.005:00.006:00.008:00.008:02.812.07.5
25:1502:01.203:01.804:02.405:03.006:03.608:04.808:07.611.97.4
25:3002:02.403:03.604:04.805:06.006:07.208:09.608:12.511.87.3
25:4502:03.603:05.404:07.205:09.006:10.808:14.408:17.311.77.2
26:0002:04.803:07.204:09.605:12.006:14.408:19.208:22.111.57.2
26:1502:06.003:09.004:12.005:15.006:18.008:24.008:26.911.47.1
26:3002:07.203:10.804:14.405:18.006:21.608:28.808:31.811.37.0
26:4502:08.403:12.604:16.805:21.006:25.208:33.608:36.611.27.0
27:0002:09.603:14.404:19.205:24.006:28.808:38.408:41.411.16.9
27:1502:10.803:16.204:21.605:27.006:32.408:43.208:46.311.06.8

5k Pace Chart (22:30-27:15)

5K Target Time: 27:30-32:15

5KM
Time
400m600m800m1KM1200m1600mMile
Pace
Speed
KMH
Speed
MPH
27:3002:12.003:18.004:24.005:30.006:36.008:48.008:51.110.96.8
27:4502:13.203:19.804:26.405:33.006:39.608:52.808:55.910.86.7
28:0002:14.403:21.604:28.805:36.006:43.208:57.609:00.710.76.7
28:1502:15.603:23.404:31.205:39.006:46.809:02.409:05.610.66.6
28:3002:16.803:25.204:33.605:42.006:50.409:07.209:10.410.56.5
28:4502:18.003:27.004:36.005:45.006:54.009:12.009:15.210.46.5
29:0002:19.203:28.804:38.405:48.006:57.609:16.809:20.110.36.4
29:1502:20.403:30.604:40.805:51.007:01.209:21.609:24.910.36.4
29:3002:21.603:32.404:43.205:54.007:04.809:26.409:29.710.26.3
29:4502:22.803:34.204:45.605:57.007:08.409:31.209:34.510.16.3
30:0002:24.003:36.004:48.006:00.007:12.009:36.009:39.410.06.2
30:1502:25.203:37.804:50.406:03.007:15.609:40.809:44.29.96.2
30:3002:26.403:39.604:52.806:06.007:19.209:45.609:49.09.86.1
30:4502:27.603:41.404:55.206:09.007:22.809:50.409:53.89.86.1
31:0002:28.803:43.204:57.606:12.007:26.409:55.209:58.79.76.0
31:1502:30.003:45.005:00.006:15.007:30.010:00.010:03.59.66.0
31:3002:31.203:46.805:02.406:18.007:33.610:04.810:08.39.55.9
31:4502:32.403:48.605:04.806:21.007:37.210:09.610:13.29.45.9
32:0002:33.603:50.405:07.206:24.007:40.810:14.410:18.09.45.8
32:1502:34.803:52.205:09.606:27.007:44.410:19.210:22.89.35.8

5k Pace Chart (27:30-32:15)

5K Target Time: 32:30-37:15

5KM
Time
400m600m800m1KM1200m1600mMile
Pace
Speed
KMH
Speed
MPH
32:3002:36.003:54.005:12.006:30.007:48.010:24.010:27.69.25.7
32:4502:37.203:55.805:14.406:33.007:51.610:28.810:32.59.25.7
33:0002:38.403:57.605:16.806:36.007:55.210:33.610:37.39.15.6
33:1502:39.603:59.405:19.206:39.007:58.810:38.410:42.19.05.6
33:3002:40.804:01.205:21.606:42.008:02.410:43.210:47.09.05.6
33:4502:42.004:03.005:24.006:45.008:06.010:48.010:51.88.95.5
34:0002:43.204:04.805:26.406:48.008:09.610:52.810:56.68.85.5
34:1502:44.404:06.605:28.806:51.008:13.210:57.611:01.48.85.4
34:3002:45.604:08.405:31.206:54.008:16.811:02.411:06.38.75.4
34:4502:46.804:10.205:33.606:57.008:20.411:07.211:11.18.65.4
35:0002:48.004:12.005:36.007:00.008:24.011:12.011:15.98.65.3
35:1502:49.204:13.805:38.407:03.008:27.611:16.811:20.88.55.3
35:3002:50.404:15.605:40.807:06.008:31.211:21.611:25.68.55.3
35:4502:51.604:17.405:43.207:09.008:34.811:26.411:30.48.45.2
36:0002:52.804:19.205:45.607:12.008:38.411:31.211:35.28.35.2
36:1502:54.004:21.005:48.007:15.008:42.011:36.011:40.18.35.1
36:3002:55.204:22.805:50.407:18.008:45.611:40.811:44.98.25.1
36:4502:56.404:24.605:52.807:21.008:49.211:45.611:49.78.25.1
37:0002:57.604:26.405:55.207:24.008:52.811:50.411:54.58.15.0
37:1502:58.804:28.205:57.607:27.008:56.411:55.211:59.48.15.0

Additional resources:

Here’s your guide to buying a second hand treadmill.

Here’s your guide to beginner running pace

Conclusion

There you have it! The above treadmill pace chart is ideal for anyone who wants to make the most out of treadmill training. The rest is just details.

Thank you for stopping by.

Keep training strong.

The Runners Guide To The Heel To Toe Drop

Heel To Toe Drop for runners

Ever wondered what the heel-to-toe drop is all about?

Then you have come to the right place.

Choosing running shoes is tricky. And it’s a personal affair.

Many factors influence your choice, from physiology, training goals, and personal preference. What works for your friend might not work for you.

That said, understanding running shoes is one step in the right direction when it comes to finding the right pair. And one of the most important things to understand about running shoes is what’s known as the heel-to-toe drop.

In this article, I’ll discuss what the heel-to-toe drop is all about and why it matters in running shoes. I’ll also explain how to determine the most suitable drop height for you.

Sounds great?

Let’s get started.

What is The Heel To Toe Drop?

First things first, what is the heel-to-toe drop?

Also known as the shoe offset, heel differential, or HTD for short, the heel-to-drop refers to the difference in height between the heel and the forefoot of an athletic shoe.

Let me explain.

The measurement is taken around the base of the heel and the middle point of the forefoot, and it’s usually provided in millimeters, going from 0 to over 14mm in running shoes.

A drop of zero would mean that heel and the ball of the forefoot would be more or less at the same height as the ground when seated in the shoe.

On the other hand, a running shoe with 15 mm of material under the heel and 5 mm of material under the forefoot would have a heel drop of 5 mm.

In this case, the heel sits ten millimeters higher than the forefoot when wearing the shoe.

Running shoes are also broken down by the level of heel drop they have. The four most common groups you’ll encounter include zero-drop, minimalist, moderate, and high drop shoes (more on this later).

The Purpose Behind Drop Height

The goal behind a shoe’s drop is to limit stress on certain parts of the body by intentionally keeping the foot in a specific position.

For example, the lower drop, the easier it’ll be to land on the forefoot or midfoot while running.

Let me explain more…

Low Vs. High Drops

The lower the drop, the more likely you’ll strike on the forefoot or midfoot.  That’s why some experts recommend runners with chronic knee problems to go for a lower drop shoe to avoid hyperextension and take some of the pressure off the knee.

However, although this takes some of the pressure off the knees, it may put more stress on the lower leg.

After all, the impact stresses have to go somewhere.

Conversely, a higher-drop shoe may work best for runners with lower leg issues, such as in the calves, Achilles, foot, or ankle—while transferring more impact to the knees and hips.

HTD Vs. Stack Height

Before I go any further, let me clearly state that stack height and heel drop are not the same thing.

Stack height refers to the cushioning inside of the shoe between the bottom of the foot and the ground. It measures the distance from your foot to the ground, typically based on the amount of material under the foot.

Stack height can range from minimal to maximal, and this measurement usually correlates with how much cushioning that a shoe has.

That’s why a shoe with less cushioning will have a lower stack height—and vice versa.

Additional resource – Can you run with a broken toe?

It’s Not A Golden Rule

Although heel-to-drop is important, it’s by no means the only metric to consider. It’s actually just one among many.

The shoe volume, structure, firmness, amount of cushioning, as well as your training goals and preferences all have a say. Even if a pair of shoes have raving reviews, it means nothing if they don’t fit your foot.

The Importance of HTT Drop

First things first, I’d like for the record to clearly state that there’s no conclusive scientific EVIDENCE that a shoe’s drop affects overall injury rates.

In fact, the evidence is, at best, anecdotal.

The only research I found is a 2016 study reported by the American Journal of Sports Medicine that tracked 553 recreational runners for six months. The participants were divided into three groups with different heel to toe drop from the least to the most, consisting of:

  • Group A – 10 millimeters drop
  • Group B – 6 millimeters drop
  • Group C – 0-millimeter drop.

All the runners monitored their training load as well as a sustained injury during the six-month period (that involved one or more days of missed runs).

In the end, the injury rate was quite the same regardless of which type of shoe they wore—roughly 25 percent of each group reported a running injury during the experiment.

The main conclusion of the experiment was that injury risk not only depended on the shoes used but also on training frequency.

Occasional runners (those running less than once a week for six months or more of the previous year) had a lower injury risk running in a shoe with 0mm or 6mm heel-to-drop than shoes with a 10mm drop.

For more frequent runners (those running at least once a week or more for more than six months of the previous year), this risk was reversed—as in, they reported fewer injuries when using the higher heel-to-drop shoes.

Heel To Toe Drop

My Opinion?

Scientific proof aside, I’d still recommend that you pay attention to your shoe’s drop, especially if you have a history of overuse injury.

The HTT drop is the reason why one pair of shoes might feel off, and another might be right for you. Different drop levels are better for different runners.

Range of Drop levels in Running Shoes

There’s a wide range of drop levels in running shoes, from the absolute minimalist shoe to the extremely cushioned ones.

Drop levels are typically broken down into the following:

Zero Drop Shoes – Roughly 0 millimeters

Most shoes within this category are often labeled as “barefoot” shoes as they embody the essence of the minimalist movement. In fact, these have gained a lot of steam after the book Born To  Run by Christopher McDougall was published a few years ago.

It is believed that these shoes mimic how your foot should sit on the ground, as naturally, it lies flat.

In zero drop shoes, the heel and forefoot are on the same plane. They’ve little to no cushion in the heel pad and a minimal later of material between the shoe and the ground.

I’m a big advocate for zero drop shoes, but I won’t recommend them for beginners. These shoes are for runners who have been around the running block for a while and have already developed proper running technique and habits.

If you’re a beginner runner, you’re better off running in shoes that offer plenty of support and cushioning to protect your legs from the impact of the sport.

Some of the most popular brands that make reliable drop running shoes include:

  • Topo
  • Altra
  • Merrel

Low Drop – to 1 to 4 millimeters.

Typically referred to as minimalist shoes, these have a lot in common to zero drop shoes but with a bit more structure—even though they feel very flat to most runners.

The heel sits roughly four millimeters over the toes, which provides a slight forward momentum.

The low drop shoes are for the runner who seeks more of the barefoot running experience but is not yet ready for zero-drop. These also encourage a forefoot or midfoot strike pattern.

Mid Drop  – Around 5 to 8 millimeters

This is the compromise zone.  Shoes within this category are not minimalist neither extremely cushioned.

Mid drop shoes work well for a wide variety of runners, making the typical range for most running shoes.

High Drop – 10 millimeters and above

High drop shoes are your typical stability shoes. In fact, any shoe with a drop higher than ten millimeters is a relatively firm and motion-controlled shoe.

If you have lower leg issues, such as Achilles tendonitis or tight calves, high drop shoes may help.

Shoes within this category send more impact to your knees and hips but are more merciful on the lower legs, including the foot, ankle, Achilles tendon, and calf.

Of course, I couldn’t find any reputable study to back this, but there’s a lot of anecdotal evidence, do so why not give it a try.

To Conclude – The Best Heel To Toe Drop

Since  HTT is a personal matter, there’s no such thing as a magical formula that works in general.

The best way to tell which HTT drop works the best for you is to pay attention to your body.

This is because various heel drops impact various body parts, as I have previously explained.

As a rule, the ideal shoe should feel like an extension of your feet the moment you wear them.

When it comes down to it, heel drop is not a deal maker or breaker.

It’s not the most important factor to consider when choosing running shoes.

Instead, let fit, comfort, and functionality be the main consideration. Find out more about how to choose your first running shoes in my beginners’ guide.

How Many Miles is 10000 Steps? The Full Guide to 10k Steps in Miles

Ever wondered how many miles are in 10,000 steps? You’re not alone—this is a common question, especially for anyone using a fitness tracker.

The answer depends on several factors, most notably your stride length, which is between 2.1 and 2.5 feet on average.

That translates to roughly 2,000 steps per mile, so 10,000 steps would be around five miles.

Walking and running, however, are different beasts.

If you’re running, your stride length increases, meaning you take fewer steps per mile.

Let break down this even further.

Stride Length and Step Count

Here’s a general breakdown of how height affects the number of steps per mile:

HeightApproximate Steps per Mile
4’10”2,645
5’0″2,556
5’4″2,397
5’8″2,256
6’0″2,130
6’4″2,018

As you can see, taller individuals take fewer steps per mile, while shorter individuals take more. The actual distance covered will always depend on your stride length.

HeightApproximate Steps per Mile
4’10”2,645
4’11”2,600
5’0″2,556
5’1″2,514
5’2″2,474
5’3″2,435
5’4″2,397
5’5″2,360
5’6″2,324
5’7″2,289
5’8″2,256
5’9″2,223
5’10”2,191
5’11”2,160
6’0″2,130
6’1″2,101
6’2″2,073
6’3″2,045
6’4″2,018
6’5″1,992


Below is a table showing different amounts of steps and corresponding distances in miles.

1,000 steps = 0.47 miles
2,000 steps = 0.95 miles
3,000 steps = 1.42 miles
4,000 steps = 1.89 miles
5,000 steps = 2.37 miles
6,000 steps = 2.84 miles
7,000 steps = 3.31 miles
8,000 steps = 3.79 miles
9,000 steps = 4.26 miles
10,000 steps = 4.73 miles
11,000 steps = 5.21 miles
12,000 steps = 5.68 miles
13,000 steps = 6.16 miles
14,000 steps = 6.63 miles
15,000 steps = 7.10 miles
16,000 steps = 7.58 miles
17,000 steps = 8.05 miles
18,000 steps = 8.52 miles
19,000 steps = 9.00 miles
20,000 steps = 9.47 miles
25,000 steps = 11.84 miles
50,000 steps = 23.67 miles
75,000 steps = 35.51 miles
100,000 steps = 47.35 miles

How Many Miles is 10000 Steps – How Long It Takes

This depends on how fast—as in the intensity of steps—you’re going.

On average, you can take up to 100 steps per minute for mild intensity, take roughly 130 steps or more for vigorous activity. Step intensity matters.

But all in all, expect to take around 1,000 steps in ten minutes. This is likely faster than walking through the grocery store but slower than if you deliberately walked fast because you need to use the bathroom.

At a pace of three miles per hour, it will take roughly one hour and forty minutes to take 10,000 steps.

Steps and Miles: Quick Reference

To make things easier, here’s a chart showing step counts and their corresponding distances in miles:

StepsMiles
1,0000.47
5,0002.37
10,0004.73
15,0007.10
20,0009.47
50,00023.67
100,00047.35

So, if you aim for 10,000 steps, expect to cover just under five miles. If that sounds daunting, don’t worry—you’d be surprised how quickly those steps add up throughout the day.

How Long Does It Take to Walk 10,000 Steps?

This depends on your walking speed. At a moderate pace, most people take about 100 steps per minute. So, if you’re walking for exercise, it’ll take you around 1,000 steps in 10 minutes. To reach 10,000 steps, you’re looking at roughly 100 minutes of walking.

I usually tell my clients that if you’re walking at a pace of 3 miles per hour, you can expect to hit your 10,000 steps goal in about 1 hour and 40 minutes. If you pick up the pace to something more vigorous, you can knock that time down to around 80 minutes.

Is 10K Steps Per Day Worth it?

Of course, it is.

Walking is an awesome exercise.

It’s convenient, easy to do, keeps your heart healthy and can be almost done anywhere and anytime. It also helps you get in shape without increasing injury risk.

Plus, walking doesn’t require any special equipment or a gym membership.

Let me back my claims with some science:

  • Study reported that walking about 10,000 steps per day is optimal for reducing the risk of dementia by 50 percent.
  • Research in the JAMA Internal Medicine Journal found a link between the possibility of reduced risk of premature death for every 2,000 steps walked in a day.
  • This study found that walking often helps reduce knee and joint pain in people with arthritis.
  • Study found a direct link between walking and improved mental functions.

I can go on and but on the science is clear.

Many health experts recommend getting at least 150 to 300 minutes of moderate exercise each week, and hitting 10,000 steps daily helps you reach that goal. The CDC even considers walking at 3 mph a moderate activity, so if you’re clocking 10,000 steps, you’re in great shape.

How Many Calories Does Walking 10,000 Steps Burn?

This varies based on factors like body weight, pace, and the terrain you’re walking on. On average, a person burns about 100 calories per mile walked, so 10,000 steps (about five miles) will burn approximately 500 calories.

Remember, this number is highly individual—faster walking or rougher terrain will increase your burn, while slower, leisurely walks might burn less.

Keep Track of Your Steps

A pedometer or fitness tracker is the best way to monitor your daily step count. But, to get the most out of it, you’ll need to wear it consistently. Put it on first thing in the morning and wear it until bed. You’ll better understand how active you are daily by tracking your steps.

You’ll be surprised at how many steps you log without realizing it. I’ve had clients shocked when they see they’re only taking 3,000 steps a day—but once they start tracking and adjusting their habits, those numbers rise quickly.

How to Increase Your Step Count

The average person takes about 4,000 steps a day without thinking much about it—going to work, doing chores, or running errands. You only need about an hour of walking to hit 10,000 steps. If you’re short on time, there are easy ways to sneak in more steps:

  • Take a walking lunch break.
  • Schedule walking meetings.
  • Walk while you’re on the phone.
  • Go for a post-dinner stroll.
  • Park farther away and take the stairs instead of the elevator.
  • Walk your dog or go for a nature hike on the weekends.

You don’t have to hit 10,000 steps immediately—it’s all about building the habit and making walking a natural part of your daily routine. Once you start, you’ll find it becomes easier to meet and exceed your daily goal.

Conclusion

So, how many miles is 10,000 steps? Roughly 5 miles, depending on your stride length.

The real challenge is ensuring you hit that number consistently, but it’s entirely achievable with some small changes to your daily habits.

Whether walking for health, fitness, or just to get outside and move, aiming for 10,000 steps a day is a fantastic goal.

Got questions or want to share your step count journey? Drop a comment below—I’d love to hear how you’re working walking into your daily routine!