10 Tips for Getting a Sports Scholarship

Sports scholarships are one of the forms of financial help for students from low-income families. But actually, the majority of student-athletes dream of receiving this type of scholarship.

Athletes seek out athletic scholarships even if their families can pay for the education. They want them as rewards and status symbols. This status demonstrates to others that the school is interested in them as much as they are interested in studying at that institution.

Playing for a university team is the first step towards fame. Talented student-athletes often become stars of their teams. They achieve popularity they can only dream of at home. Many continue their careers in professional sports after graduating from university.

Some of them, having tasted fame and popularity within the university, decide to try their luck in Hollywood. George Clooney, Matthew McConaughey, Charlie Sheen, Ashton Kutcher, Emma Watson, and Dwayne Johnson. They all played for the schools; sports teams.

If you are interested in politics, remember that US President Ronald Reagan was the captain of the swimming team at Eureka College, Illinois. And George W. Bush was the captain of the baseball team at Yale.

How to Apply for a Sports Scholarship?

  1. Make a preliminary list of colleges/universities according to the criteria that are important to you:
  • availability of an academic program in the field that interests you;
  • availability of programs in your sport;
  • which association and division the teams of these educational institutions belong to;
  • type of academic environment;
  • number of students in the educational institution,
  • location;
  • tuition fees, etc.
  1. Prepare a motivational letter. For this task, you might want to contact a professional essay writer to create something exquisite. This letter must describe why you want this scholarship and why you are the best candidate for it.
  2. Create a resume that reflects all your accomplishments as an athlete.
  3. Write letters to the head coaches at each university on your list. State good reasons why you would like to attend that particular institution.
  4. Explain that you are interested in competing for the athletic teams of these colleges/universities. Inquire about financial aid opportunities, including athletic scholarships. Without too much shyness, describe your achievements in sports and studies. Add proof of your sports awards.
  5. Contact your current coaches for letters of recommendation. They should show how valuable and promising you are. And what value you can bring to college/university teams.
  6. Pass the standardized tests required for admission with good results. Remember that American collegiate athletic associations have certain academic requirements for students applying for athletic scholarships. In addition, the coaches pay attention not only to your sports achievements but also to your academic abilities and character (perseverance, leadership qualities, etc.).
  7. Apply to as many colleges/universities of your choice as possible. There are many amazing scholarships that you can get as an athlete. Choose wisely.
  8. Take note of alternative sources of financial support. It is important in case the scholarship turns out to be partial and covers only academic costs.
  9. To receive a sports scholarship, it is important to have outstanding academic and sports results. What’s even more important is to make the right impression on university coaches because they are the ones who have the final say in awarding this type of scholarship.

Competition for sports scholarships in the US is very high, so as an athlete, you need to show:

  • discipline,
  • motivation,
  • energy,
  • desire to win,
  • excellent knowledge of the history of the chosen sport,
  • knowledge of outstanding athletes and their achievements.

And keep in mind that you need to start preparing an application for a sports scholarship 18-24 months before the competition. So you need to take certain steps and start preparing for your application early in high school. You must be extremely punctual, regardless of busyness and time difference. You should respond quickly and in a timely manner to letters and requests from the university and the coach. This is probably the most important indicator of your discipline and motivation.

Famous Americans to Look up to

Universities invest huge amounts of money in their teams. And are proud of their success no less than scientific achievements. Many famous American athletes have started playing for a university team.

Tiger Woods, one of the highest-paid athletes of our time, received an athletic scholarship at Stanford. He played for the university’s golf team. Michael Jordan received a sports scholarship from the University of North Carolina. He studied socio-economic geography there. Shaquille O’Neal played for the Louisiana State University team. Tom Brady, one of the most famous players in American football, also known as Tom the Spectacular, played for the University of Michigan.

Other Important Things About Sports Scholarships

It is quite obvious that getting into a university sports team and getting a scholarship is quite difficult. But before you get scared, there are some things that you need to know about sports scholarships. Make sure that you know everything about the rewards that such a program can give you as well as all the hardships.

This is an ideal option for those who want to continue their careers as athletes. And at the same time, they get a higher education not necessarily related to sports.

Students who play for the university team can choose any major that is available at the university. For example, a basketball student can study:

  • management,
  • psychology,
  • chemistry,
  • programming, etc.,

And if desired, also pick up a second major.

The quality of professional training of students does not cause any doubts. High-class coaches will make a lot of effort so that you reach the peak of your athletic capabilities during four years of studying at the university.

They are even more interested in the success of their students than the students themselves. After all, the results of each individual athlete can become a guarantee of the future victories of the university team. In addition to personal training with a coach, a student-athlete receives extra bonuses. These are the services of massage therapists, doctors, nutritionists, and other specialists.

The already mentioned Tom Brady said in one of the interviews that part of his preparation was serious work with a psychologist. It helped Tom to get rid of stress and nervousness before the game. He had weekly sessions to build up his confidence and thus improve his game. Besides, student-athletes receive the most expensive health insurance. As well as better nutrition.

Many universities take into account the tight performance schedule of student-athletes. To support them, unis allocate tutors for individual classes. So, you have no reason to worry that a sports career at the university will prevent you from getting a high-quality education.

Playing for a varsity team, you will also travel a lot, not only within your state but also outside of it. At the same time, regular students can only travel during vacations.

Final Thoughts

Apart from a significant part of the cost of education, in exceptional cases, the scholarship can also cover the following:

  • accommodation,
  • food,
  • medical insurance,
  • educational materials,
  • other extra expenses, for example, buying a laptop and sports uniform.

The size of the scholarship depends on the following:

  • division the university competes in,
  • type of sport,
  • student’s sporting achievements.

Yet, in any case, a sports scholarship in the USA allows you to save a lot on your tuition bills.

How To Fix Sore Quads After Running

prevent running injuries

Do you often get sore quads from running? Then you have come to the right place.

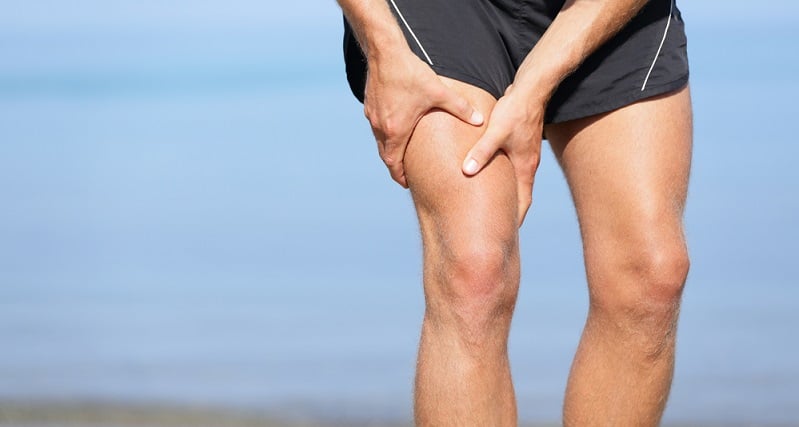
Quad soreness is a common problem among runners—beginners and elites alike. In most cases, the pain is just annoying, but sometimes it can even sideline the most committed for days, or weeks, at a time.

In this post, I’ll dive into the causes of quad soreness and then share a few measures and tips that you can try to fix sore quads and return to running strong and pain-free.

If your quads are sore more than often, taking a few measures can help you return to running strong and pain-free.

But first, let’s cover the basics.

What Are The Quad Muscles?

The quads, or quadriceps, refer to the four muscles located in the front upper thigh between the pelvis and knee.

The four muscles include:

  • The rectus femoris—which runs down the center of your thigh from the hip to the kneecap
  • Vastus lateralis—which is located on the outer side of the front of the thigh
  • Vastus medialis—which runs along the inner section of the front of the thigh
  • Vastus intermedius—which extends down the center of the thigh

Although the quads are made of these four different muscles, most people think of them as one simple muscle and system.

Your quad muscles work “hand in hand” with your hamstrings to extend and bend your legs and perform other vital functions. That’s why the quads are some of the most important running muscles and are vital for all types of athletic endeavors.

For this reason, the quads are some of the most important running muscles and a key driver in virtually all athletic sports. This, as you can already tell, also means they’re susceptible to overuse or injury, which might the reason you’re experiencing quad soreness after running at times.

The price we pay.

Causes Of Quad Soreness In runners & What To Do About it

Training mistakes are the main reason behind most running injuries—quad soreness is no exception.

Muscle soreness is your body’s way of telling you that you’ve been gone a little beyond its comfort zone.

This happens when you put a lot of stress on the cells that make up your quads that aren’t quite used to the intensity of the exercise, which happens when you try to run further or faster than you’re used to.

Fortunately, over time, your quads will be more robust. But the keyword is time, and when you’re trying to rush things out and skip stages, you start getting too hurt.

Why Do my Quads Hurt After Running?

In most cases, some quad soreness is no cause for alarm. For example, if you changed up your training load recently, your quadriceps might experience delayed onset soreness (DOMS).

This condition is believed to be mainly caused by discomfort linked with micro-tears in the muscles during training.

This is thought to be a residual effect of the build-up of lactic acid in the muscle from intense training.

But dealing with chronic quad pain likely means a more severe injury.

Additional resource – Labral tears in runners

Drastic Increase in Volume

As previously stated, the main culprit behind quad soreness is overuse.

So it should be no surprise to experience soreness when you try increasing your overall training load—either by logging more miles or doing more speedwork. Both impact the workload of your quads.

As you up to training, you also increase the load on your quads, making them sore afterward.

Beginner Runners

If you just took up running for the first time, don’t feel surprised if you feel sore quads after running.

How come?

It takes time for your muscles to adapt to the high-impact nature of running. Unfortunately, it doesn’t happen overnight.

So if your quads are especially painful than your other muscles, it doesn’t mean that there’s something wrong with your technique, stride, or body. It’s just a part of the process.

Improper Landing

Another thing that may strain your quads is landing too far out in front of your center of gravity. This is known as overstriding and is believed to cause a plethora of overuse running injuries such as runners’ knees and ITBS.

Too Much Downhill Running

Although downhill running may feel like a break—especially after the climb portion—most runners are taken back by how sore their quadriceps can get the next day.

The reason is simple. Your quadriceps take in much more impact and stress when traveling downhill than while running on flat surfaces. For example, the impact of running on a flat surface is around two to three times your body weight with each step.

However, on the downhill, the impact is drastically higher since the ground is moving away from you, as in you are falling further down. Due to the compacted stress, your quad develops micro-tears, leading to excessive soreness over time.

The Solution

The downhill section is part and parcel of any running routine, especially if you live in a hilly area. You just can’t avoid downhills altogether.

But if you’re limping around due to sore quads, it helps to avoid them for a few days to give your body a chance to bounce back.

Additional resource – your guide to running with metatarsalgia

Limited Hip Mobility

Another common cause of quad soreness in runners is limited hip mobility, which is a known side effect of a sedentary lifestyle.

When you spend a lot of time in a seated position, you’ll force your hip flexors to work overtime and tighten up.

The solution

There are many exercises that can help you undo all that sitting.

The following stretches can activate and loosen your tight hip flexors, especially before a run.

Some of the best ones include

The Standard Quad Stretch

Lying Quad Stretch

The Kneeling Quad Stretch

What’s more?

You should also consider foam rolling your hip flexors after stretching to soothe any tightness or firmness before you run.

Try the following foam rolling exercise

How to Prevent Quads Soreness After Running

Here are the steps you need to prevent sore quads from running.

Warm-up And Cool Down

Start all of your runs—and workouts with a proper warm-up.

Trying to run while still feeling some quad soreness? Then perform your usual warm-up, then do a few easy stretches if your muscles still feel tight.

By properly warming up, you’ll help prevent your muscles from getting overly tight, which leaves you prone to injury.

A good warm-up routine should include plenty of dynamic exercises with flexibility and activation drills to help transition your body into “running mode.” This is especially the case after prolonged sitting.

Once you feel warmed up, ease into your run. You might still experience soreness on your first few steps, but it should fade as you continue.

If your soreness is chronic or getting worse as you keep running, stop running altogether and perform some pain-free cross-training instead. Think yoga, strength training, swimming, cycling, etc.

Additional Resource – Your Guide to Groin Strains While Running

Change Your Cadence

Cadence refers to the number of times your feet hit the ground in one minute of running. Also known as stride rate, cadence helps indicate whether you’re landing under your center of gravity or reaching your legs too far forward in front of your body.

The slower your cadence—the fewer steps you take per minute—the more likely you’re overstriding, the higher the impact you place on your ankles, knees, and hips.

Most research indicates that the optimal cadence for runners is around 180 steps per minute.

Additional Resource – Here’s the full guide to running watches

Strengthen Your Quads

The best way to safeguard your quadriceps from getting sore in the future is to make them stronger.

When you do this, you increase the tissue’s capacity for training and stress bearing.

The stronger the muscles, the more training capacity and the less risk of experiencing pain and injury when you log in more miles.

Some of the best exercises that strengthen the quads include:

  • Squats
  • Split squats
  • Lunges
  • Leg presses

Stretch After You Run

Build a habit of regularly stretching your running muscles, especially after hard runs and workouts.

Although dynamic stretching is the way for pre-run stretching, you should always stretch statically following a run.

Focus on your hips, hamstrings, calves, and of course, your quads and anything that felt tight during the run.

Try some Ice Therapy

A useful measure to soothing muscle soreness, especially after hard training, is ice baths.

Even jumping in cold water for a few minutes can help speed up recovery.

Ice therapy may also force your blood vessels in the quads to tighten, which promotes the draining of lactic acid out of your muscles.

Taking an ice bath is simple. All you have to do is fill a bath with cold water, then slowly immerse yourself into the cold water. Next, add some ice. This should slowly ease your way into it, especially if you hate the cold.

Not a fan of ice baths? Then try applying some ice packs on sore areas. Just make sure not to overdo it. You shouldn’t be icing any body parts for more than 10 to 15 minutes.

Additional resource – Common running injuries

Try Massage

Another option that has been shown to reduce muscle soreness is massage.

Massaging the impacted muscle(s) boosts blood flow, which helps bring oxygen and nutrients to the area, speeding up recovery.

Massage also reduces tension and stress in the muscles by helping loosen them up, which removes stiffness.

If you cannot invest time or money in a professional massage, try doing some gentle self-massage by using a massage tool such as a stick or a foam roller.

Check the following YouTube Tutorial on how to do it:

Eat Well

Your food choices also impact how sore you feel following a run. After all, what you put in your body makes a big difference in both recovery and performance.

Aim to replenish your fuel tanks as fast as possible post-run.  Research has suggested that your muscles might be the most receptive to nutrients within the first few hours after exercise.

Opt for a good balanced, and nutritious meal after a run. Focus on carbs and protein. You should also add in some healthy fats as well.

Most experts recommend taking 3 grams of carbs to every 1 gram of protein.

As a general rule, shoot for a post-run food ratio of 1 gram of protein for every 3 grams of carbs. You can try a protein shake or smoothie of fruits and yogurt—your choice.

Great examples include

  • A protein shake
  • A bagel with peanut butter
  • Yogurt and banana

Don’t have the stomach for solid food following a run? Then try drinking chocolate milk. This should provide your body with enough carbs, protein, and other nutrients to kickstart the recovery process.

What’s more?

Drink plenty of water as it helps flush out toxin buildup that piles up throughout your muscles. Here’s the full guide to proper hydration.

Additional Resource – Here’s the full guide lower abdominal pain while running.

Take Plenty of Recovery

When it comes down to it, the best way to ward off quad soreness—and most other pains—is to give your body plenty of time to rest and bounce back.

Don’t jump into another hard run or workout the next day or soon, as this can only worsen your pain.

Instead, make sure to give your body time off to rest.

Downtime allows your body to soothe muscle soreness and pain so you can return to running to your fullest.

Additional Resource – Here’s the full guide to feeling bloated after running

Sore Quads After Running – Conclusion

Although it’s possible to keep quad soreness at bay by taking some of the above measures, if pain persists, you’re better to visit your doctor throughout the examination. This is because you might be injured or have a condition to blame for your pain.

What Does an Athletic Therapist Do?

knee brace for knee pain

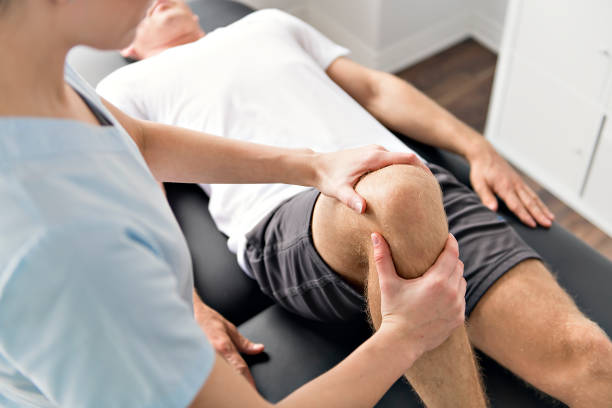
Athletic therapy is a medical sphere that focuses on musculoskeletal disorders. Healthcare specialists don’t only treat existing damages. They also prevent them and assess how muscle, bone, or joint disorders got affected by the trauma.

Athletic therapists work with people who do a lot of physical exercises. These are not sports professionals but also those who pursue physical activity.

People often think that athletic therapists are doctors who support professionals during competitions. You can usually find them near the courts, football fields, or on the ice. However, many industries require these specialists too.

For example, athletic therapists work in fitness and sports centers and insurance companies. Their presence is necessary during various university and college competitions. Besides, athletic therapists help people in clinics and hospitals.

This profession has become extremely crucial since people do more sports all over the world. Today, athletic therapist jobs are well-paid and highly appreciated. Specialists in this sphere are regularly in contact with innovations and have access to state-of-the-art biotechnologies. However, becoming a therapist requires many years of preparation. Getting a job in this profession is also a complicated task.

Tasks of an athletic therapist

A certified athletic therapist is a specialist with an emphasis on the musculoskeletal system and biomechanics. They know how to prevent injuries and use this knowledge while working on special shoes or other things for sports professionals. Besides, athletic therapists deal with rehabilitation and clinical care. They elaborate on various programs that help people recover sooner and get back to their previous lives. On top, athletic therapists also often get involved in emergency care.

They assist people who got massive and complicated injuries during sports competitions. As a result, patients’ health depends on the first aid and professionalism of the therapists a lot. If they provide high-qualified aid, the rehabilitation process will be much easier and more effective.

As we see, the list of tasks is quite long. However, we could cut it down to the following duties: firstly, athletic therapists do the injury assessment; secondly, they have to manage severe traumatic dysfunctions.

Recognizing and taking action to prevent complications is the next crucial step. Athletic therapists provide first aid too. Also, they are in charge of picking up the right healthcare delivery systems for the patients.

Ultimately, these professionals also apply various strategies and techniques to foster a safe recovery that ensures full-fledged life. Returning to daily routine and an opportunity to live a normal life without restrictions may be a challenging task. However, with the right treatment and professional care, the chances are increasing.

How are Athletic Therapists not?

Before figuring out how to become an athletic therapist, let us start with distinguishing who these professionals are not. For instance, they are not physiotherapists, personal or team trainers.

Although physiotherapists and athletic therapists have much in common, they focus on slightly different things. Apart from musculoskeletal disorders, specialists from the first category also deal with cardiovascular and neurological problems. As a result, their scope of work is larger.

Trainers and coaches have to know the basics of athletic therapy. Otherwise, they won’t be able to help the people they are working with in case of emergency. However, therapists know way more about the subtleties of human biomechanics and provide high-qualified support. Like trainers, athletic therapists also prescribe individual training programs for patients.

They also work on various manual therapies and therapeutic modalities to provide people with effective techniques that bring them back to normal life. However, the main difference between the missions of therapists and trainers is that the first category helps people get their previous abilities while the second category cares about improving their physical state.

As we see, there are several areas close to athletic therapy. They have much in common, yet can’t be interchangeable. If you think of starting a professional path in one of the spheres mentioned above, keep in mind opportunities for your career growth. For instance, if you feel you’re not satisfied with your job as a personal trainer, you can try to start studying as an athlete therapist and then pursue a career as a physiotherapist.

How to become an Athletic Therapist?

To become an athletic therapist, you need a certification. For example, in Canada, the Canadian Athletic Therapists Association (CATA) issues such documents. To get them, one should successfully complete a bachelor’s degree. Additionally, candidates should accomplish an Athletic Therapy program at a CATA-accredited school.

Keep in mind that even having finished the program, you don’t automatically become a certified specialist. Before studying the chosen educational program, potential students have to check various resources for education and assess employment opportunities.

Although there is nowadays no strictly regulating legislation in the sphere, athletic therapists need to have several certifications that confirm their level of professionalism and experience. In Canada, specialists have to get certified by the Canadian Athletic Therapists Association (CATA) and become a member of the Alberta Athletic Therapists Association (AATA).

Applying candidates should have a completed bachelor’s degree and possess a valid Standard First Aid and Basic Life Support (BLS). Alternatively, they can have a CATA-approved equivalent. Also, candidates must have a valid First Responders certificate or CATA-approved equivalent. Successful completion of the Athletic Therapy program at an educational school accredited by CATA is another must-have on the list. Ultimately, the candidate should accomplish the National Certification Examination within 2 years from the date when they graduated from the accredited institution.

As we see, the educational and career path of athletic therapists is quite long and demanding. However, you will have a well-paying and fulfilling career with many professional options and an opportunity to make the lives of people better.

Sports and other physical activities have become an indispensable part of our routine. Therefore, specialists who help us prevent injuries, assess their damage to our bodies, and help successfully overcome physical challenges will always be much needed.

Besides, this sphere is one of the most innovative and fast-developing. Thus, as a specialist, you have a high chance to combine medical knowledge with engineering and cutting-edge technologies.

Fitness Activities for Physical Education

Physical education is one of the most contradictory disciplines in high school and middle school because some people love it more than everything else, but some people just hate it.

There are a lot of jokes and quite sad stories about how physical education lessons were held in schools. Even once there was a show in which celebrities were asked to repeat some exercises, to talk about their experience in physical education, and they definitely had completely different memories.

If you are faced with the task of coming up with interesting, practical fitness activities for physical education that do not require special sports equipment, then this article will come in handy.

If you want your students to love this subject and this course, or at least relate to it without outright rejection, then you must first think about their interests and how they fit with the goals of your course.

Which Fitness Activities are Suitable for PE

Of course, there are an infinite number of activities that could be used in physical education classes, but it is important to focus on those that will last. Because this is not a club session, but a course, and you need to see the progress of your students from the beginning of the semester to the end of the semester.

There are obvious limitations when it comes to planning fitness activities suitable for PE, and we tried to consider them when writing this article. Obviously, we cannot know the conditions you work in, but hope this list will be useful anyway.

Various Fitness Challenges

Students love to compete, and almost all the sports we like to watch on TV are competitive sports. Of course, you can talk a lot about the fact that the main thing is victory over yourself and your own development, but it is very important how you move forward compared to other students.

You can arrange different fitness challenges, for example, the flexibility challenge or the abdominal muscle challenge or the walking challenge, both for the whole group and for individuals. If you are satisfied with the whole group, then you must set a goal, and the group must gain some amount of physical activity to achieve this goal, or, individually, which can be compared with each other.

Dancing Activities

Modern dances are very active, they are suitable for both girls and boys, non-binary students.

They appeal to students’ interests in music and to pastime. And in general, if you have the opportunity to invite someone who would conduct modern dance classes in physical education classes, then you will definitely attract the attention of your students and help them get in better physical shape. Check online and ask around more.

Net Sports

Net sports are an evergreen classic. They are played all over the world and differ only in what kind of sport is the most popular among students, it can be volleyball, badminton or any games over the net that you come up with as a coach.

How to Make PE Classes Work

Even when you come up with good, interesting, as you think, physical activities for your sports class, it may turn out that students are not so interested in it, they get bored during the lesson, and they do not have the results that you would like to see.

Perhaps some of these tips will be useful to you in order to make the physical education program more relevant to the interests of students and meeting fitness goals for their age.

Prefer Group Challenges to Individual Ones

There’s a lot of stress these days, students worry about the high competitiveness of the environment they’re in. And it won’t end in college or at work. Therefore, on the one hand, the spirit of competition is important and valuable in sports, but on the other hand, if we are talking about achieving fitness goals, then it may be more useful and ethical to set group goals, where each participant can score points and help the team move forward.

In this case, you need to come up with some kind of encouragement for the team as a whole and motivate the stronger students to help the weaker students.

Take Interest in Your Students

Everything is individual, our interests are individual. How our body reacts to different tasks, including exercise, is also individual. Of course, when you make a general program, you cannot take into account the strengths and weaknesses of every student who comes to your physical education class.

But on the other hand, during the semester or academic year, you can get to know your students better and help them individualize the program that is already there. It takes some time, but it’s worth it, because you will see your students’ personal fitness and health results grow much more than the average across the board.

Tell Them That Grades are not Everything

Of course, this doesn’t exactly apply to physical activity, but as a physical education teacher, you may care about the moral and physical condition of your students. Now students are under so much pressure, they are very much focused on academic assignments, academic processes, and this affects their health.

Hiring essay writers from a professional academic writing service, SmartWritingService, we got to know that students address them mostly not because they can’t write something complex, but because there are too many papers and assignments with too little time to deal with them. You can help them by building an exercise program that will help them cope with stress and anxiety and lower their cortisol levels.

You should talk to students about finding a healthy balance between mental and physical activity and putting more emphasis on the knowledge they receive than on the grades, of course, if these grades are sufficient to move forward along the educational path. 

We hope that these tips have helped you make your PE class more interesting and rewarding, as well as find an individual approach to the different students in your classes.

The Runners Guide To Running Safely With Prescription Glasses

Running With Prescription Glasses

Looking for some advice on how to run safely with prescription glasses?

Then you’ve come to the right place.

If you’re a runner with imperfect vision, you might be wondering whether you should be logging the miles with your glasses or not.

Here’s the truth. Strapping on your glass while running can be annoying, especially if they get fogged up or skip down your nose.

However, leaving them home may put you in real danger. You might struggle to read signs, see uneven ground or obstacles, or notice what’s happening around you.

The more visually impaired you’re, the higher the danger.

Your eyes are there, after all, to guide you forward—away from danger and to safety.

The Runners Guide To Running Safely With Prescription Glasses

Without further ado, here are a few tips on how to run safely and efficiently with prescription glasses.

Get The Perfect Fit

Sweating and fogging are common problems while logging miles.  This can impact visibility and cause the glasses to slip out of your nose. That’s why choosing the right fit is key.

As a rule, steer clear of loose-fitting eyewear that can bounce off your face.

Instead, go for lightweight and snug-fit glasses. You should also pay attention to the glass’s size and measurements.

Back-Up Glasses

If you’re a typical prescription glasses user, then chances are you have more than a few pairs stuffed in your nightstand drawer

If you need corrective lenses while pounding the pavement, test out your spare glasses before buying a new pair of prescription running eyewear.

At the very least, you’ll learn more about your preferences, what works and what doesn’t, and how to manage your lenses before you likely damage a more expensive pair.

Additional guide  – How to run with seasonal Allergies

Prevent Slippage

One of the most common problems runners encounter when running with sunglasses is the inevitable glasses slipping down the nose.

This little annoyance can turn into a real problem a few miles in, especially as you start to build a sweat. Left unchecked, it also causes you to either break or lose your glasses on the course.

So how do you prevent your glasses from slipping?

You got many options. Get an adjustable strap or use a silicone anti-slip ear grip hook.

What’s more?

You should also consider getting our frames properly fitted. Loose-fitting frames can slip down your nose during a run, which is annoying and can also risk falling off your glasses entirely.

Visit the nearest optometrist to get your frames to fit comfortably and snugly while running.

Additional Resource – Why Do I sweat too much while running?

Try Other Alternatives

Depending on how visually impaired you’re, there are a few alternatives that you may want to try other than prescription glasses.

For starters, you can try contact lenses.

This may not work for everyone, but if possible, using contact is a viable option if you need a corrective lens while running. You might be surprised at the advances in contact technology. Who knows!

What’s more?

Contact may offer sharper optics and an increased field of vision.

What’s more?

Using contact rather than prescription glasses will enable you to strap on about any sports eyewear on the market.

You’ll also have more options instead of being limited to frames that take prescription lenses.

Normal sunglasses have a wider field of vision, are lighter, are more comfortable, and have better airflow for less fogging.

Another option is surgery, and as technology advanced, you’ve more options than before, like table Contact Lenses or LASIK surgery

Try Prescription Running glasses

Over the past few years, prescription sports glasses have progressed significantly in technical features and performance.

Some of the best brands that make prescription sports eyewear for runners include Oakley, Rudy Project, and Roka. They’ve all designed modern and reliable frames with the latest technology that looks as well as they perform.

Additional resource – How to choose running gloves

Prevent Falling

Looking to prevent your glasses from falling? Then consider using one of the popular eyewear bands, or what’s known as an eyewear retainer.

You must simply attach the bands to your frames and wear them around your neck to prevent them from falling off. That’s all.

Good eyewear retains one that’s easy to attach, fits comfortably around your glasses and neck, and is made of durable and easy-to-clean materials. One example is Croakiest.

Additional resource – How to run in the city

Say no To Fog

Your glasses are in constant contact with your skin while running. This means fog, sweat, dust, and grit can build up on the lenses and hinge area.

To prevent this problem, cleaning your glasses before and after running is key. This not only keeps your eyewear clear but also prolongs the lifespan of the glasses and lenses and stays smudge-free for clearer vision. If fogging is a recurring issue, choosing eyewear designed to handle these conditions can make a big difference.

Options like oakley anti fog prescription safety glasses are built to reduce fog buildup while providing the clarity and protection needed for active use.

For that reason, if you already have glasses and are not looking to replace them, look for an anti-fogging spray to apply to your glasses.

.

Keep Your Glasses Secure

To stop your glasses from moving, or god forbid, falling while you run, slide some anti-slip ear hooks onto the arms or for a sports adjustable strap.

You can also use a beanie in winter or a bandana in summer to help keep your glasses in place.

Glasses-Free Running

Keen on running without glasses or contacts? Then, at the very least, know what you’re getting into. Doing this has many downsides. You don’t know what you’d be running into—until it’s too late.

To stay safe, take the following measures:

  • Choose a smooth course that you know very well. I’d recommend heading to a nearby track that you’re familiar with.
  • Are you running on asphalt? Then go for streets where there’s little traffic or no traffic at all. You can head to your local park, especially if it has paths you’re familiar with.
  • Partner up. You can also run with a friend who can help you around obstacles and potential hazards.
  • Train indoor. Hopping on the treadmill should be no problem, regardless of the time of the day or season.
  • Be visible. Avoid running early in the morning or late at night. You’re already visually impaired. Don’t make things worse by letting others not see you.

Additional Resource – Running and pollution

Running with prescription glasses – The Conclusion

There you have it. If running with prescription glasses is an issue for you, then today’s post should set you off on the right path. The rest is just details.

Please feel free to leave your comments and questions in the section below.

Keep running strong.

David D.

Running Shoes Vs. Cross Trainers – The Main Differences

Running Shoes Vs. Cross Trainers

Although running shoes and cross-trainers have a lot in common, the differences between the two means that you must choose the right type for activity.

So what are some of these differences, and how can you tell which one is?

Worry no more.

In this post, I’ll share the full guide on the key differences between running shoes vs. cross-training shoes so you can more easily choose the best for a given activity.

Training Vs. Running Shoes

Although running and cross-training (or non-running exercise) are two entirely different ways of training, many people still wear the same footwear for both activities.

This is a big mistake

Although running shoes and cross trainers can look the same to the untrained eye for injury prevention, comfort, and performance, it’s worth using the right shoe for the right activity. Otherwise, you’ll set yourself up for poor performance, pain, or even injury.

Let’s get into why.

What Are Cross-Training Shoes

Cross trainers are designed for a wider range of motion and multi-directional movements, including jumping, cutting, breaking, stopping, and changing direction quickly. This makes cross-trains suitable for a variety of workouts.

They also feature a flatter sole than standard road running shoes, which makes them more flexible.

What’s more?

Cross trainers also tend to be flatter with a lower heel-to-drop.

Cross-Training shoe Purpose

As the name implies, cross-training refers to a range of various workouts. By the same token, cross trainers are the all-catch term that refers to a wide range of shoes for different activities.

Think of cross-trains as your all-in gym shoe.

Cross trainers are designed to perform a variety of roles. You can use them for almost any non-running exercise, such as strength training, the elliptical machine, yoga, stretching, Zumba workout, or CrossFit.

This includes weight-bearing exercises such as squats and lunges, changes of direction, and multidirectional moves such as jumping.

Therefore, the main function of good cross trainers is to provide support and stability for the different exercises and movements you’d perform during cross-training.

In most models, cross-trainers feature a flatter and smoother outsole to increase ground contact for better stability. They also have a rounded edge to limit the risk of ankle rolling. This shoe also features a flexible midsole for multi-directional movement.

Can you run in your Cross Training shoes

While cross trainers may feel comfortable, I still won’t recommend them for running, especially on long-distance runs.

Running shoes

Although running has a lot to offer, the high-impact nature of the sport can take a toll on your muscles and joints. This, over time, can lead to pain and injury, especially if you’re not using the right footwear.

Running shoes are made for, wait for it, running. They’re designed for heel-to-toe movement and have a higher heel drop. This, in turn, gives them extra support and cushioning in the midfoot and heel.

What’s more?

Running shoes tend to be light for the best running experience. But, even if it’s just an ounce, over the miles, those extra ounces are fast to pile one to extra pounds. This will slow you down, and you don’t want that.

Running shoes feature extra arch support and cushioning than cross trainers, which can help reduce the risk for overuse injuries such as runners’ knee or stress fractures.

What’s more?

Running shoes tend to be lighter than cross-trainers. This is because a lighter design makes running easier, especially if you’re logging in many miles.

Here’s the full guide to running shoe types as well as a list of the best running shoe brands.

Do you Need Both Running Shoes and Cross Trainers?

Of course, you do, especially if you engage in activities other than running.

If you’re not into cross-training, then you should get started ASAP. I  cannot emphasize it enough.

You should also have different running shoes for different runs. Road shoes and trails shoe are designed for specific purposes, you know. Use the right one for the job.

Are you planning to do a lot of trail running? Then go for running shoes with deeper lugs and more durable uppers to help improve traction and protection while navigating technical terrains.

Additional Resource:

Conclusion

For these reasons—and some more—you shouldn’t be running in your cross-trainers.

They simply won’t offer enough support and cushioning, whether you’re pounding the pavement or running indoors on a treadmill. Be careful

Boost Your Running Game: 7 Essential TRX Exercises for Improved Performance

Whether you’ve recently started running or you’re preparing for your 14th marathon, TRX training is an excellent cross-training tool to enhance your overall strength, endurance, and athletic performance.

Don’t get me wrong. While running more quality miles is undoubtedly crucial for reaching your full potential, there’s a limit to how far and fast you can go before things become monotonous.

The truth is, that TRX training is one of the most effective ways to improve the strength and mobility necessary to become a faster and more agile runner. Regardless of your running and fitness objectives, the following TRX exercises will help you establish a solid foundation and bolster all aspects of your athletic performance.

When integrated into your training regimen, TRX training exercises can enhance your power, build strength, increase flexibility, boost endurance, and more.

In this article, I’ll outline the key benefits of TRX training and share some runner-friendly TRX exercises to help you achieve your next personal record.

Let’s kick it up a notch!

What IS TRX Training?

TRX, which stands for Total Resistance Exercise Training, is a highly effective fitness system designed by former Navy Seal Randy Hetrick. He developed this system to address the need for a versatile and portable training method that can maintain fitness levels even in limited space and time constraints.

The fundamental principle behind TRX is quite straightforward: it leverages body weight and gravity to enhance muscular strength and endurance. TRX workouts typically involve performing a variety of movements, including push, pull, squat, lunge, rotation, hinge, and plank exercises. What makes TRX so appealing is that it allows anyone to engage in a robust workout using just this single piece of equipment.

Here are some key benefits of TRX training:

  • Customizable Intensity: TRX workouts can be tailored to your fitness level. By adjusting your body’s position and angle, you can make exercises more or less challenging, making them suitable for both beginners and advanced athletes.
  • Versatility: TRX offers a wide range of exercises that engage multiple muscle groups simultaneously. This versatility enables you to target different areas of the body and achieve a full-body workout in a short period.
  • Portability: TRX suspension trainers are lightweight and portable, making them an ideal choice for individuals who travel frequently or have limited workout space at home. You can set up your TRX system almost anywhere with a secure anchor point.
  • Core Engagement: Many TRX exercises inherently engage the core muscles, helping improve core strength and stability.
  • Functional Fitness: TRX exercises often mimic natural body movements, promoting functional fitness that translates into improved everyday activities and sports performance.
  • Balance and Flexibility: TRX workouts challenge your balance and flexibility, promoting a well-rounded approach to fitness.
  • Time Efficiency: TRX workouts can be intense and efficient, making them suitable for individuals with busy schedules.
  • Injury Prevention: TRX exercises emphasize proper form and body alignment, reducing the risk of injury.

Additional Resource – Here’s a strength training plan for runners.

Works Your Entire Body

TRX training is known for its ability to engage and work the entire body effectively. The instability created by suspending yourself in the air using the TRX bands requires your muscles to work hard to maintain stability and control throughout each exercise.

As a result, nearly all major muscle groups are activated during TRX workouts, making it a comprehensive full-body training system.

Here are some key muscle groups that are targeted during TRX training:

  • Core Muscles: TRX exercises inherently engage the core muscles, including the abdominals, obliques, and lower back, to stabilize the body and maintain proper form.
  • Upper Body: TRX exercises like rows, push-ups, and tricep extensions target the chest, shoulders, back, and arms.
  • Lower Body: Squats, lunges, and hamstring curls work the quadriceps, hamstrings, glutes, and calves.
  • Back and Postural Muscles: Exercises like rows and Y-flyes help strengthen the upper back and improve posture.
  • Hip Muscles: Movements that involve hip abduction and adduction, such as leg lifts and hip presses, engage the hip muscles.
  • Balance and Stabilization Muscles: TRX challenges balance and stability, which recruits various smaller stabilizer muscles throughout the body.
  • Cardiovascular Endurance: Some TRX workouts can be quite intense, helping improve cardiovascular fitness as well.
  • Ease of Use: TRX is user-friendly and requires minimal setup. Once you find a safe anchor point, you can start your workout right away. The simplicity of TRX exercises makes it accessible to individuals of all fitness levels, from beginners to advanced athletes.
  • Low Impact: TRX exercises are low-impact, which means they are gentle on the joints and muscles. This makes TRX an ideal choice for individuals who want an effective workout without the added stress on their bodies, especially if they have joint issues or are recovering from injuries.
  • Space Efficiency: TRX workouts don’t require a lot of space. You can use TRX in a small room or even outdoors, making it suitable for home workouts or crowded gym environments.
  • Comprehensive Workouts: With TRX, you can perform strength training, flexibility exercises, core workouts, and even cardiovascular exercises. It offers a well-rounded fitness solution in a single piece of equipment.

The 7 Best TRX Exercises For Runners

Without further ado, here are the top TRX exercises for runners.

Enjoy!

TRX Exercise For Runners – 1. TRX Plank

The TRX plank is an effective core-strengthening exercise that engages multiple muscle groups. Here’s a step-by-step guide on how to perform the TRX plank:

Equipment Needed: TRX suspension trainer

Adjust the Straps: Begin by adjusting the TRX straps to mid-calf length. Ensure that the straps are evenly adjusted on both sides.

Set Up Position: Stand facing away from the anchor point of the TRX. Kneel down on the floor and position yourself on your forearms. Your elbows should be directly below your shoulders.

Secure Feet: Place your toes into the foot cradles of the TRX straps. Make sure the foot cradles align with the middle of your calves.

Maintain Proper Alignment: Keep your head in line with your shoulders, creating a straight line from your head to your shoulders, hips, and ankles. Your body should form a plank-like position.

Engage Core: Activate your core muscles by pulling your navel toward your spine. This will help stabilize your body during the exercise.

Lift Knees: Lift your knees off the floor, maintaining a straight line from your head to your ankles. Your hips should be in line with your head and shoulders. Keep your glutes tight and your shoulder blades slightly apart throughout the exercise.

Hold the Position: Maintain the plank position for the desired duration. Start with one minute and gradually increase the time as you build strength and endurance.

Lower Knees: To complete one set, slowly lower your knees back to the floor while maintaining control and stability.

TRX Exercise For Runners – 2. TRX Suspended Lunge

The TRX Suspended Lunge is a challenging lower-body exercise that targets the quadriceps, hamstrings, glutes, and calves while also engaging the core for stability. Here’s how to perform it:

Equipment Needed: TRX suspension trainer

Adjust the Straps: Start by adjusting the TRX straps to an appropriate length. Ensure that the straps are evenly adjusted on both sides.

Position the Foot Cradles: Line up the foot cradles of the TRX with the middle of your calves. This ensures proper alignment during the exercise.

Set Up: Stand facing away from an anchor point, such as a wall, with your feet hip-width apart. Place your left foot into both TRX foot cradles, securing it in place.

Lunge Position: Step your right foot forward to get into a single-leg lunge position. Your right knee should be bent at a 90-degree angle, and your right shin should be perpendicular to the floor. Keep your chest up and shoulders back.

Execute the Lunge: Slowly lower your body into the lunge position by bending your right knee and sending your left foot backward. Lower yourself until your rear knee is almost touching the floor or hovering just above it.

Push and Return: Push through the heel of your right foot to rise back up to the starting position. Keep your core engaged for balance and stability.

Complete Repetitions: Perform 8-10 repetitions on one leg (right leg forward) to complete one set.

Switch Legs: Rest for about 30 seconds, then switch to the other leg (left leg forward) and repeat the exercise for 8-10 repetitions.

Additional Sets: Complete two more sets, resting for 30 seconds between sets.

TRX Exercise For Runners – 3. TRX Squat Jump

The TRX Squat Jump is an explosive lower-body exercise that combines squats with a vertical jump, providing a full-body workout. Here’s how to perform it:

Equipment Needed: TRX suspension trainer

Adjust the Straps: Start by adjusting the TRX straps to an appropriate length. Set them to mid-calf length and ensure that they are evenly adjusted on both sides.

Stand Facing the Anchor Point: Stand facing the anchor point of the TRX with your feet shoulder-width apart. Hold the TRX handles with your palms facing inward.

Squat Position: Begin the exercise by squatting down towards the floor while keeping your chest up, back straight, and hips pushed back. Your knees should be in line with your toes, and your thighs should be parallel to the floor. This is the starting position.

Jump Explosively: From the squat position, explode upward by extending your hips, knees, and ankles simultaneously. Jump as high as you can while keeping your arms extended.

Control the Landing: As you reach the peak of your jump, begin to descend back to the ground. Bend your knees to control the landing and ensure a soft, controlled landing.

Complete Repetitions: Perform 6 to 8 squat jumps in a controlled manner to complete one set. Focus on quality jumps rather than speed.

Rest and Repeat: Rest for approximately 30 seconds between sets.

Additional Sets: Perform two more sets of 6 to 8 reps each, with a 30-second rest between sets.

TRX Exercise For Runners – 3. TRX Single Leg Squat

The TRX Single Leg Squat is an excellent exercise for building strength and stability in your lower body, particularly your quadriceps, hamstrings, glutes, and core. Here’s how to perform it:

Equipment Needed: TRX suspension trainer

Adjust the Straps: Start by adjusting the TRX straps to an appropriate length. Ensure that they are evenly adjusted on both sides.

Stand Facing the Anchor Point: Stand facing the anchor point of the TRX with your feet hip-width apart. Hold a TRX handle in each hand with your elbows under your shoulders.

Single Leg Position: Lift your right leg straight in front of you, with your toes pointed upward. Keep the leg elevated throughout the exercise.

Squat Down: Begin the exercise by squatting down while maintaining your balance on your left leg. Lower your hips and torso while keeping your chest up and core engaged.

Knee Alignment: Ensure that your left knee stays aligned over your left ankle and doesn’t go too far forward during the squat.

Focus on Heel: Most of your weight should be on your planted left leg. Focus on driving up through your left heel as you extend your hips and return to a standing position.

Repeat on Both Sides: After completing the desired number of repetitions on your left leg, switch to your right leg and perform the same number of reps.

Complete Repetitions: Aim to perform 6 to 8 reps on each leg to complete one set. Maintain control and balance throughout the movement.

Rest and Repeat: Rest for approximately 30 seconds between sets.

Additional Sets: Perform two more sets, focusing on maintaining proper form and balance.

TRX Exercise For Runners – 4. TRX Atomic Pushup

The TRX Atomic Pushup is a challenging full-body exercise that combines a push-up with a knee tuck. It targets multiple muscle groups, including the chest, shoulders, triceps, core, and hip flexors. Here’s how to perform it:

Equipment Needed: TRX suspension trainer

Adjust the Straps: Start by adjusting the TRX straps to an appropriate length and ensuring that they are evenly adjusted on both sides.

Plank Position: Begin in a plank position with your feet suspended in the TRX straps. Your hands should be directly under your shoulders, forming a straight line from your head to your heels. Engage your core, tighten your glutes, and maintain a stable shoulder position.

Push-Up: Lower your chest toward the floor by bending your arms and performing a push-up. Keep your elbows close to your sides and maintain a straight body position. Lower yourself as far as your strength allows.

Knee Tuck: After completing the push-up, shift your weight forward slightly, bringing your knees toward your chest. Engage your abdominal muscles to tuck your knees as close to your chest as possible.

Return to Plank: Extend your legs back to the starting plank position, ensuring that your hips are in line with your shoulders and your body forms a straight line. This completes one repetition.

Repeat: Perform 6 to 8 repetitions of the TRX Atomic Pushup in a controlled manner, maintaining proper form throughout.

Sets: Complete two more sets with a brief rest (approximately 30 seconds) between sets.

Additional resource – Clamshells for runners

TRX Exercise For Runners – 5. TRX Sprinters Start

The TRX Sprinter’s Start is a challenging exercise that targets the core, hip flexors, and lower body while also improving balance and coordination. Here’s how to perform it:

Equipment Needed: TRX suspension trainer

Adjust the Straps: Start by adjusting the TRX straps to an appropriate length and ensuring that they are evenly adjusted on both sides.

Initial Position: Begin in a standing plank position facing away from the anchor point. Hold the TRX handles with your arms fully extended, forming a straight line from your head to your heels. Your body should be at a 45-degree angle from the ground.

Sprinter Position: From the initial position, begin to walk your feet forward toward the anchor point while maintaining the 45-degree angle. Keep your body straight and engaged.

Step Back: Once your feet are closer to the anchor point, step your right foot back, positioning it behind you. Bend your left knee, bringing it toward your chest in a sprinter-like stance. Your right leg should be extended behind you.

Engage Core: Engage your core muscles to help stabilize your body in this sprinter position. Maintain a strong and balanced posture.

Return to Plank: To complete one repetition, return to the initial standing plank position by reversing the movements. Step your right foot forward, extending both legs and walk your feet back to the 45-degree angle plank.

Alternate Sides: After completing a set with your right leg back, switch to the left leg back for the next set. This ensures balanced training for both sides.

Repetitions: Perform 6 to 8 repetitions on each leg, alternating sides, for one set.

Sets: Complete two more sets with a brief rest (approximately 30 seconds) between sets.

TRX Exercise For Runners – 6. TRX Squat To Row

The TRX Squat to Row is a compound exercise that combines squats with a rowing motion, targeting multiple muscle groups, including the legs, back, and core. Here’s how to perform it:

Equipment Needed: TRX suspension trainer

Adjust the Straps: Begin by setting the TRX straps to mid-length. Ensure that they are evenly adjusted on both sides of the anchor point.

Initial Position: Stand facing the anchor point with your feet shoulder-width apart. Hold both TRX handles with an overhand grip (palms facing each other) and extend your arms fully in front of you.

Lean Back: Lean back to approximately a 45-degree angle while keeping your arms extended. Your body should form a straight line from your head to your heels. Adjust your stance by walking your feet in closer to the anchor point, creating tension in the straps.

Squat: From the leaned-back position, initiate the movement by bending your knees and hips to lower into a squat. Keep your weight on your heels, chest up, and core engaged.

Row: As you begin to rise from the squat, simultaneously bend your elbows and pull your chest toward your hands, performing a rowing motion. Focus on squeezing your shoulder blades together during the row.

Return to Squat: After completing the row, straighten your arms and return to the squat position.

Complete the Repetitions: Continue the squat-to-row movement for 30 seconds, performing as many repetitions as possible with proper form.

Rest: Rest for 20 seconds before transitioning to the next set.

Repeat Sets: Perform 8 to 10 repetitions (or as many as possible in 30 seconds) for one set. Complete two more sets with a 30 to 45-second rest between sets.

Additional resource – Single leg bridge technique

Can You Run ON The Keto Diet? How to Combine Keto & Running

keto running

Are you looking for ways to combine keto and running in a safe way?

Then you have come to the right place.

Carbs are the primary energy source on the run.  It’s, in fact, the reason so many runners load up on pasta and bread the night before a long run. Carbs are key.

But over the past few years, the keto diet—a nutrition plan known for its super carb restrictions—has gathered a lot of steam in the fitness world.

And as far as I can tell, a lot of runners from various backgrounds are also embracing this trend.

But can you really run on the keto diet? Is it possible?

In short, the answer is YES—as long as you do it the right way (and are willing to make some sacrifices along the way).

In this article, I’ll share a few practical guidelines on how to adopt the keto diet as a  runner.

What Is The Keto Diet

In essence, the keto diet is a high-fat, mild protein, and super low carbohydrate diet.  It’s similar to the Atkins diet and other low-carb diets, but to properly follow the diet, you’ll need to get into a state of ketosis.

The idea is that you eat a lot of fat and severely restrict your carb intake to exhaust your body’s carb stores and force it to tap into fat for energy.

Doing this forces your body into ketosis, a metabolic state where your body switches to burning fat for fuel since it doesn’t have enough carbs for energy.

During ketosis, your body starts to make ketones for fuel—derived from fat—instead of glycogen which mainly comes from carbs.

When you achieve complete ketosis adaptation, you’ll use fat as your primary fuel source.

There are many methods to check whether you’re in ketosis—some of which I’ve already gone into great detail about in this post.

Additional resource – Keto marathon training

The Meaning Of Keto Adaptation

Keto-adaptation, or what’s referred to as fat-adapting, refers to the metabolic jump from carbohydrates to fat as the main energy source.

According to current scientific literature, fat-adapting may take anywhere from 4 to 12 weeks, depending on variables such as your diet, physiology, metabolism, training habits, etc.

running on keto

Staying In Ketosis

To stay in ketosis, your carb intake should be limited to around 30 to 50 grams per day—depending on your activity level.

The more running you do, the more carbs gram you can get away with. Here’s a list of the off-limits foods on the keto diet.

  • Bread
  • Fruits
  • Starchy vegetables like beets and potatoes
  • Legumes
  • Beans
  • Lentils
  • Beer and alcohol
  • Many condiments and sauces high in sugar
  • Any other sugar-rich food item

You get it. If it has carbs in any form, you shouldn’t be eating when you’re trying to adhere to the ketogenic diet.

As you can already tell, switching to the keto diet will most likely mean a complete diet makeover—especially if you’re used to eating a lot of carbs.

Additional resource – Probiotics For Runners 

The Benefits of Keto And Running

Here are some of the acclaimed benefits of the keto diet.

Note – Please keep in mind that research on the keto diet’s effectiveness for runners is still inconclusive. Most of the evidence is anecdotal so take it with a grain of salt.

The Wall and Fat Store

If you’re familiar with endurance training, then you know that your body requires nonstop carbohydrates intake to keep going.

How come?

The human body can only store a limited volume of glycogen—roughly 500 grams in muscle and liver cells. That’s around 2000 calories of fuel.

As you can already tell, 2000 calories ain’t enough to sustain you through a whole marathon. That’s why marathon runners need energy on the go. They need the extra fuel to keep going.

However, the theory is if you’re completely keto-adapted, you might be able to tap into a more abundant energy fuel source, which is your body fat. In fact, body fat packs roughly 20 times more calories than glycogen, even in a lean runner.

In theory, if you’re truly keto-adapted—as in, you’re using fat as the primary source of energy—the wall, or what’s known as bonking, may disappear.

Since the keto diet forces your body to use fat as its main source of energy, there’s a chance that it can help you avoid hitting the wall during endurance running.

Additional Resource – Here’s how to create a running program

Improved Body Composition

Logging the miles on the keto diet can help you burn fat and achieve your body composition goals. I lost over 12 pounds and improved my body fat percent by over 4 points the first month I went on keto.

Science also backs up the power of keto for losing weight. This research, for instance, has revealed that the keto diet can positively impact one’s body composition when combined with moderate-intensity training.

Here are more research papers to check out:

In essence, the keto diet improves your body’s ability to burn fat, both at rest and during training. This, in turn, maximizes your fat loss effort while exercising in these zones.

For example, research out of the Journal of Endocrinology reported that the ketogenic diet boosted the production of the hepatic growth hormone, which can be key for youthfulness and strength.

Other benefits of the keto diet include:

  • Improved energy levels
  • Better sleep
  • Enhanced cognition and focus
  • Improved weight loss
  • Improved body composition
  • Improved heart health
  • Helping reduce seizures
  • Improve acne
  • Protect brain function
  • Improve PCOS symptoms
  • And so much more

Additional resource – Best supplements for runners

The Downsides of Keto While Running

As you can already tell, the keto diet is a controversial subject in running circles.

I hate to sound like a broken record, but runners love their carbs as they’re the main energy source on the run.

This makes the likelihood of suffering a few downsides—or a lot—more likely once you start restricting your intake of this valuable macronutrient.

Let’s check some of the cons of the keto diet for runners.

Additional resource – Keto recipes list 

The Keto Flu

During the early days of a keto diet, expect to experience a plethora of unwanted symptoms.

First, you’ll feel bad—like really bad. This is what’s known as the keto flu among keto fans. It’s, essentially, the result of sugar and carbohydrate withdrawal as well as a change in the gut bacteria and an immune system reaction.

Some of the side effects include

  • Brain fog
  • Irritability
  • Headache
  • Fatigue
  • Nausea
  • Trouble sleeping
  • Cramps
  • Sore muscles
  • Constipation
  • Dizziness
  • Smelly breath

Additional resource – Salt tablets for runners

Muscle loss

An unwanted side effect of keto-related weight changes is a loss of muscle mass.

This is especially the case if you’re limiting your protein intake and/or engaging in prolonged endurance exercise.

Sure, the keto diet is scientifically proven to help people lose weight—and a lot of it. But some of the weight might be muscle as well. Not good at all.

And since fat burns fewer calories than muscle mass, that will impact your metabolism.

That’s why most people who drop off the ketogenic diet tend to regain much of their pre-keto weight and often not in the same proportions. Instead of gaining back your muscle mass, you’re likely to pile on the fat.

Reduced Performance

One of the telling signs of the keto full is diminished performance. If performance matters, this should worry you since complete fat-adaptation takes a while.

So don’t expect to switch into the keto diet and start breaking your PRs left and right. It doesn’t happen that way in the real world.

The opposite is more likely to happen.

Carbs, after all, are your body’s favorite source of energy for running, and without them out, you simply won’t be able to run as long and/or as hard as you’re used to be.

What’s more?

The research on the effectiveness of the keto diet for improving running performance is still in the woods.

That’s why most runners who might benefit from keto-adaptation are those logging a lot of miles at low to moderate intensity—think marathon runners.

Once you log in enough miles, your body needs to start burning off those fat energy stores.

When you’re logging the miles at low intensity, your body will be able to sustain its energy needs from fat. But since glycogen is the primary fuel source during high-intensity exercise, you might be limiting your performance on some runs and workouts to follow a certain diet.

Additional Resource – Why is my running not improving

Fat Adaptation Takes time

Although getting into ketosis might only take a few days, becoming truly keto-adapted might take up to months.

Fat adaptation typically begins between 6 and 12 weeks after entering ketosis, depending on how strictly you follow the keto diet as well your physiology, metabolism, and training load.

For example, research shows that endurance athletes may become fat-adapted faster than the average individual.

For this reason, expect your first few weeks—or months—to suck.

Once you’re truly fat-adapted, you can go the distance. At least, that’s been my experience.

However, keep in mind that, for some reason or the other, some athletes might never be able to fully adapt to endurance exercise while on keto. I know life is unfair and all that, so be careful.

That’s why some of these athletes practice carbo cycling by switching in from a ketogenic diet or might go low-carb during higher training load weeks of training.

The Verdict

So should you really try the keto diet as a runner? Will it work for you?

In the end, it’s really up to you.

I believe that if the keto diet is done right, sooner or later, you’ll be able to tap into your fat stores for fuel.

Overall, the benefits of the keto diet far outweigh the downsides—this is especially the case if you’re willing to sacrifice performance for weeks over long-term health gains.

Note – I hate to sound like a broken record, but if you’ve been logging this mile for a while and then decide to go full keto, your performance will likely plummet—in fact, it might plummet hard. If you have an upcoming race in which you want to break your PR, deciding to try keto might compromise your training.

Additional resource – Best sources of electrolytes for runners

How To do it Safely

So are you really serious about giving the keto diet a try? Then keep on reading.

Keep in mind that keto transition is a big performance and mood damper. Don’t try doing anything strenuous during the first few days.

Keep it light. I’d recommend planning your first ketosis cycle during a time in which you don’t mind if your athletic performance suffers a bit.

How Long Should You Go Keto For?

Again it depends on your lifestyle and training goals.

At the very least, try to stay keto-adapted for months in a year.

Or you can embrace a full Keto lifestyle or remain in, or close to, ketosis all the time—Zach Bitter is one inspiring athlete to emulate.

This elite ultra runner is the 100-mile American record holder, and he’s one of the most known proponents of a high-fat, low-carb eating lifestyle in the fitness world.

So if you want to dip your toe into the keto world while training for a serious endurance event, read upon Zach. The guy is quite inspiring.

However, it’s not easy for most people, including myself, to commit to a lifetime lifestyle of low carb and high fats.

What’s more?

I also love carbohydrates –let’s admit, they do taste better. What’s more?

If you have a family—or any form of social interaction with other humans—sticking to a restrictive keto diet all the time can be quite tricky.

Here’s what I’d recommend you to do.

Day 1

Have a keto friend breakfast and lunch (get the recipes from here), then skip dinner as research shows that fasting for prolonged periods helps you get into ketosis faster.

Days 2 to 10

Start your day with bulletproof coffee—keto coffee with MCT oil—then do your workout—whether it’s running, weight lifting, spinning—but keep it low intensity.

Feel free to take plenty of breaks—take as many walking breaks during your long runs. Don’t try to force.

You should also drink plenty of water.

Through these days, keep your carb intake as long as possible. Remember that the average banana packs in around 25 to 30 grams of net carbs—or the daily recommend income for getting into ketosis.

So one banana is enough to ruin your keto efforts.

Day 11 and Over

It’s up to you.

By this point, you should be in ketosis. Now, fat-adaptation starts.

6 Straightforward Steps to Begin Your Personal Trainer Career

If people constantly ask you to help them get fit, you may want to consider becoming a personal trainer. While personal trainers aren’t new, the online space is booming with opportunities. It’s time to take your knowledge, talent, and expertise and help others achieve their goals.

There are tons of advantages to becoming a personal trainer, including that you work when you want. Imagine being able to set your own hours so you can have flexibility in your day. Sounds good, right? Now, the term personal trainer is broad. Finding your niche is the key to being successful. There are personal trainers who only work with bodybuilders, weight-loss groups, professional athletes, and the list goes on.

Once you figure out where your skills are best suited, you’ll be ready to move to the next step. Once you’re ready to commit, there are a few things you need to do to get started.

Steps to Becoming a Personal Trainer

  1. Get certified

It’s important to get certified because that demonstrates you have taken the time to not only invest in yourself and become recognized for your skills, but you care about training your clients the right way.

If you’re going to work in a gym, they usually require some type of certification for their trainers. Trainers must have a diploma or GED before they can get fully certified. Depending on the type of certification you seek, you may have to go through a specialized program. These programs are nationally known for personal training. In most cases, you should have first aid/CPR/AED training.

  • American Council on Exercise
    This class is about six months and has an exam voucher. You’ll have six months to take the exam. There are three programs to choose from to get you prepared.
  • International Sports Science Association (ISSA)
    There are three different accredited programs to choose from. Each one is 12 months.
  • National Academy of Sports Medicine
    You can pay for the exam or choose to purchase a study materials bundle. You must recertify every two years.
  • National Strength and Conditioning Association
    They have a membership that you can join. Once you register for the exam, you must take it within 120 days. The fees for the exam vary based on whether you are a member or not.
  1. Develop training strategies
    Once you become certified, developing training strategies that become your signature is key. Your proprietary methods that get results help you stand out in the marketplace. Working with a sports doctor can enhance your offerings, and listening to your existing clients can also assist. Doing this will help in offering your classes in-person and online. Developing an online portion of your class will help you with exposure in the marketplace.

If you’ve decided to offer an online portion of your program, you want to make sure your clients can reach you with questions. Developing an app is a good solution where they can look at the exercises, see how to do them the right way, ask questions in the app, and get the information they need in one place. A website is also a good idea that has a members-only section. This way, your clients will get consistent updates and will be able to contact you at a moment’s notice.

It’s important to figure out the delivery of your classes. Will they be live and available online at certain times? Will they be pre-recorded? Are you going to add meal plans to this? All of these are considerations for online and live classes. Finally, you must think about their progress. How will it be monitored? Do they need to wear a heart rate monitor? How will they weigh in?

  1. Register your business
    Once you are ready to put yourself out there as a professionally certified personal trainer, it’s time to make it legitimate. While you don’t need a business license to work as a personal trainer, it makes you look more professional and gives you credibility. You want your clients, gyms where you train, and any vendors you work with to trust your brand.

You may expand your offerings and have a desire to open your own gym. As an established business, you can quickly move on this and people will already know and trust your name.

  1. Get business insurance
    People get injured all the time when exercising. As a personal trainer, you want to protect yourself and your clients from any risk. It’s easy to think that everything will be okay, but there’s always that one client that may want to go a step further and file a lawsuit against you. Business insurance can help.

Personal trainer business insurance can protect you against allegations of negligence, copyright infringement, and more. If you opt for general liability insurance, this will cover any bodily injury, property damage, and more. Speaking with a business insurance agent will point you in the right direction to make sure you are fully covered every step of the way.

Make sure you review the quotes on the policy and get different ones to compare pricing and coverage. You should also take the time to speak to other personal trainers to find out what types of insurance they currently use. Depending on your niche, you may have more risk than others. It’s always important to consider this when moving forward.

  1. Keep learning
    One of the best things you can do for yourself is to stay up to date on the latest techniques and strategies on the market. Trends change and advances in the industry or from sports doctors should always be welcomed into your systems and processes. When you take the time to invest in yourself and make a concerted effort to make sure your clients are always getting the best, it will show in everything you do, including their results.If you’re using tech in any way, you should stay up on the latest tips and techniques. If there are videos on your website, they should be updated and refreshed. The graphics you use for social media should follow a pattern. How will you record and edit your videos? What software will you use, or will you have someone working with you?

Your learning doesn’t stop there. It’s a good idea to learn how to effectively use social media and watch your analytics to see when people engage most. Once you have really become established, considering merchandise and how to use a platform to sell that merchandise comes into the mix.

The best way to enhance your learning is to do it. No one can do what you do like you do it, so make sure you know and understand every element of your business.

  1. Creating marketing visual assets
    This directly ties into the learning portion of building a career as a personal trainer. Although you may have a website and use social media, you need other types of branding to stand out from the competition. You should have a logo that’s distinctive and memorable to use on all your business touchpoints.

Your business cards and other items should also be standardized to match your logo for consistency. When developing your logo, you should consider some existing personal trainer logo ideas to imagine what you could develop.

Your graphics should also be crisp, clear, and authentic. Your clients should be able to relate to every part of your brand.

Marketing visual assets are crucial in the development of a lasting brand. Make sure you create assets that capture and engage your current and prospective audiences every time they interact with your brand.

Marathon Pace Chart – How To Determine Marathon Race Pace

Marathon Pace Chart

Curious about how to find the right marathon pace? Then using a marathon pace chart is one step in the right direction.

Here’s the truth.

Running a marathon is an incredible feat, regardless of how prepared you may be. The distance of 26.2 miles is so long that estimating your finish times is often trickier than expected.

What’s more?

Keeping a consistent marathon pace is harder than anything you might experience during training.

Fortunately, by using a pace chart, just like the one provided below, you’ll be able to break down each mile—and kilometer-spilt during the race—this can be incredibly helpful for beginner and veteran runners alike.

So how do you navigate all of this when planning for a marathon? How do you choose a time goal? What pace should I try to keep? And so much more.

Keep on reading to check out the pace chart.

What Should My Marathon Target Time Be?

This is an important question for newbie and advanced runners alike and tricky to answer.

Figuring out your ideal marathon pace depends on a host of factors. The two most important ones are your current running ability—as in what pace you sustain and for how long—and your goal marathon time.

Additional resource – How to nail your sub 4 hour marathon pace. And here’s the full guide to how long is a marathon.

Want more challenge? Check this 50K training plan.

Estimating your Marathon Finish Time

There are many ways to estimate your finish marathon time. One way is to take your recent half marathon times, doubling it then adding eight to ten minutes.

But all in all, I’d recommend being conservative with your goal. If this is your first marathon, your main goal should be to make it to the finish line instead of worrying about a specific target time.

During the first 13 miles, stick to a pace you’re comfortable with, then speed it up the second half of the race and see what time you can do. Just remember to stay patient and to keep everything under control.

Have been running for a while, but is this your first event? Choose a marathon pace based on your current running pace.

Additional Resource – Your Guide to fun runs

The Most Common Marathon Mistake

A common mistake made by beginner marathoners is starting out too fast. The truth is, logging the first few miles at a faster pace than you’re capable of keeping throughout the race can do more harm than good.

The best way to avoid this mistake is to understand, train, then follow your marathon pace strategy per mile—or kilometer—without letting anything else interfere with your plan.

Additional Resource – Guide to running pace charts

What Your Marathon Pace Depends ON?

Many variables play a role when it comes to the marathon goal pace.

The main ones include your;

  • Your running experience
  • Your running history
  • Your weekly mileage
  • Your genetics
  • Your age
  • Bodyweight
  • Nutrition plan
  • The course rouse
  • Race conditions, especially the weather temperature

Additional resource – Guide to pacing strategies for different races

How to Find What Your Marathon Pace Should Be

There are many ways to help you determine your next marathon pace.

What Should your Pace Be For A Marathon?

The most common formula runners use to estimate their marathon time is to take a recent half-marathon time, double, and then add around 15 to 20 minutes.

You can also base it on your best performance in the mile. Or what’s known as the Magic Mile in the running world.  You can also take your recent race (5K, 10K, or half marathon), then compare it to the following chart to find what your estimated marathon time might be.

CHART HERE

Already run a marathon? Aim to take off roughly five to ten percent from your finishing times as your new marathon time target.

Just keep in mind that these methods only predict how fast you could POTENTIALLY run a marathon, so take with a grain of salt. Different elements can drastically impact your marathon time, such as temperature, course, recovery rate—so nothing is for sure.

Additional Resource – Here’s your guide to beginner running pace

The Marathon Pace Chart You Need

The charts offer practical guides as you dive into marathon training and prepare for the big day. They show you the average pace needed to run to achieve your marathon finishing time.

Best Mile Performance to Marathon Finishing Time Goal Prediction Chart:

Additional resources: